Inhaltsverzeichnis
Werbung
Verfügbare Sprachen
Verfügbare Sprachen
Quicklinks
Werbung
Kapitel
Inhaltsverzeichnis

Verwandte Anleitungen für tepro WAYA 5524

Inhaltszusammenfassung für tepro WAYA 5524
- Seite 1 k Bedienungsanleitung PAVILLON „WAYA“ t Instruction Manual GAZEBO “WAYA” Version 2016/ Art.-Nr. 5524,5525,5526,5527,5528,5529 P160150_TEPRO_5524,5525,5526,5527,5528,5529_Waya_Pav_DE_GB_20161003.indd 1 18/11/16 11:46 AM...
-
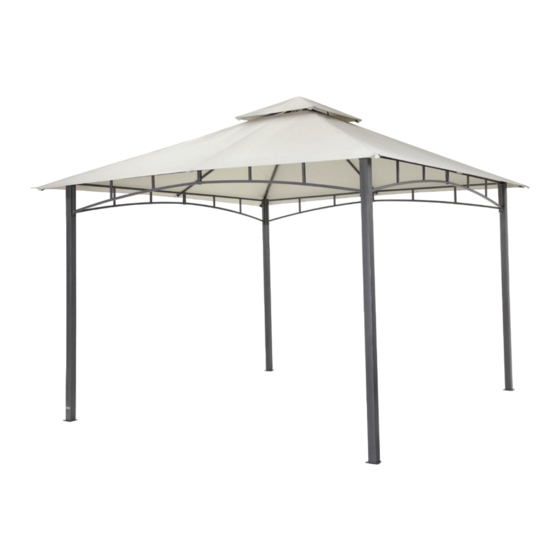
Seite 2: Abmessungen
Abmessungen Pavillon 334 cm 299 cm Gestell 17x9,5x0,6mm 20x14x0,6mm 23x17x0,6mm 20x14x0,6mm 60x60x0,9mm P160150_TEPRO_5524,5525,5526,5527,5528,5529_Waya_Pav_DE_GB_20161003.indd 2 18/11/16 11:46 AM... -
Seite 3: Inhaltsverzeichnis
Inhalt Bevor Sie das Produkt benutzen ..................4 Lieferumfang ....................... 4 - 5 Bestimmungsgemäßer Gebrauch ................... 5 Zu Ihrer Sicherheit ......................5 - 7 Signalsymbole ....................... 5 Sicherheitshinweise ....................5 - 7 Montage ........................7 - 10 Vorbereitung ........................7 Benötigtes Werkzeug und Hilfsmittel ................7 Aufbau ........................8 - 10 Wartung und Pflege ...................... -
Seite 4: Bevor Sie Das Produkt Benutzen
Bevor Sie das Produkt Nr. Abbildung Menge benutzen Dachtextilspanner Prüfen Sie nach dem Auspacken sowie vor jedem Gebrauch, ob der Artikel Schä- den aufweist. Stange, kurz Sollte dies der Fall sein, benutzen Sie den Artikel nicht, sondern benachrichtigen Sie bitte Ihren Händler. Die Bedienungsanleitung basiert auf den Dachkreuz in der Europäischen Union gültigen Nor-... -
Seite 5: Bestimmungsgemäßer Gebrauch
Verwenden Sie den Artikel nur, für seinen Nr. Abbildung Menge vorgesehenen Verwendungszweck und wie in dieser Bedienungsanleitung be- schrieben. Jede andere Verwendung gilt als nicht bestimmungsgemäß und kann zu Sachschäden oder sogar zu Perso- Spannseil nenschäden führen. Der Hersteller übernimmt keine Haftung für Schäden, die durch nicht bestimmungs- Hering gemäßen Gebrauch entstanden sind. - Seite 6 – Halten Sie Kinder von dem Artikel fern, – Sollten Sie mehrere Pavillons aufbau- da sie versuchen könnten, sich daran en, beachten Sie bitte, dass zwischen hochzuziehen oder hinaufzuklettern. den einzelnen Pavillons ein Mindestab- stand von 3 m vorhanden ist. –...
-
Seite 7: Montage
– Nehmen Sie die Seitenteile ab, um den 2. Zur Montage sind mindestens Winddruck zu mindern. 3 Personen notwendig. Die Montage des Pavillons durch nur eine Person – Vorsicht Sturm / Gewitter! Nehmen ist nicht möglich. Sie das Dach sowie die Seiten- teile ab, wenn starker Wind oder 3. -
Seite 8: Aufbau
Aufbau Step 1 Verbinden Sie zwei Rahmenteile (1) mit Schraube (10), Unterlegscheibe (11) und Hut- mutter (21). Benutzen Sie dafür das untere der Löcher. Wiederholen Sie diesen Step bis sie vier Rahmenteilgruppen (1+1) haben. (Ziehen Sie die Schrauben erst komplett fest, wenn alle Teile zusammengebaut sind) Step 2 Befestigen Sie die Rahmenteilgruppen (1+1) mit Schrauben (9) und Unterlegscheiben (11) oben an den Standbeinen (2). - Seite 9 Step 4 Stecken Sie die Dachstützen (3+4) und (3+5) sowie die kurzen Stangen (6) in das Dach- kreuz (7). Platzieren Sie die Dachkonstruktion auf dem Gestell. Befestigen Sie die Dachstützen (3+4) und (3+5) mit Schrauben (8), Unterlegscheiben (11) und Muttern (12) oben an den Standbeinen. Step 5 Stellen Sie sich in den Pavillon und stecken Sie die Enden der kurzen Stangen (6) in das rechte Loch, in der Mitte jeder Rahmenteilgruppe (1+1).
- Seite 10 Step 6 Platzieren Sie das große Dachtextil (15) so über der Dachkonstruktion, dass die Nähte auf den Ecken des Pavillons liegen. Spannen Sie das kleine Dachtextil (14) an der Spitze des Pavillons über die Dachstüt- zen (3). Spannen und befestigen Sie das große Dachtextil. Die Dachtextilspanner (5) sind in der Länge einstellbar und können so das Dachtextil lockern oder stramm ziehen.
-
Seite 11: Wartung Und Pflege
Wartung und Pflege Lagerung Reinigen: Um die Bildung von Stockflecken und Schimmel zu vermeiden, stellen Sie vor • Wischen Sie das Textilmaterial mit einem der Lagerung sicher, dass der Pavillon- feuchten Tuch und einem milden han- stoff komplett getrocknet ist. delsüblichen Reinigungsmittel sauber. -
Seite 12: Garantie
Garantie Inverkehrbringer tepro Garten GmbH Sie haben einen qualitativ hochwertigen Pavillon gekauft. TEPRO GARTEN GmbH Carl-Zeiss-Straße 8/4 garantiert für ihre Pavillons im Rahmen D-63322 Rödermark ihrer Garantiebedingungen, bei normaler, Email: info@tepro-gmbh.de oder freizeitmäßiger und nicht gewerblicher backoffice@tepro-gmbh.de Nutzung für 24 (vierundzwanzig) Monate Web: www.tepro-gmbh.de... -
Seite 13: Passendes Zubehör (Nicht Im Lieferumfang Enthalten)
Passendes Zubehör (nicht im Lieferumfang enthalten) Erhältlich im stationären- und Online-Handel. Seitenteilset für Waya tepro Artikelnummer – Set bestehend aus: 1 Seitenteil geschlossen, 5512 - Farbe: dunkelblau 1 Seitenteil mit 2 Fenstern – Textilmaterial: 5513 - Farbe: burgund 100% Polyester, 180 g/m², 300x300D... - Seite 14 Dimensions Gazebo 334 cm 299 cm Frame 17x9.5x0.6mm 20x14x0.6mm 23x17x0.6mm 20x14x0.6mm 60x60x0.9mm P160150_TEPRO_5524,5525,5526,5527,5528,5529_Waya_Pav_DE_GB_20161003.indd 14 18/11/16 11:46 AM...
- Seite 15 Contents Before using the product..................... 16 Scope of delivery.......................16-17 Intended use......................... 17 For your safety......................17-18 Signal symbols........................17 Safety instructions......................17-18 Assembly........................19-22 Preparation......................... 19 Tools and accessories required..................19 Setup..........................20-22 Care and maintenance....................23 Storage.......................... 23 Disposal........................23 Technical details......................23 Warranty ........................
-
Seite 16: Before Using The Product
Before using the product No. Figure Qty. After unpacking and before every use, check whether the item shows any signs Roof textile tensioner of damage. Should this be the case, do not use the item, but notify your retailer. Short pole The operating manual is based on the norms and regulations that are applicable in the European Union. -
Seite 17: Intended Use
Only use the item for its intended purpose No. Figure Qty. and as described in this instruction manu- al. All other uses are considered improper and can lead to material damage or even to personal injuries. The manufacturer accepts no liability for Tension rope damages caused by improper use. - Seite 18 – Any modifications to the product repre- Attention Risk of burning and sent a large safety risk and are forbid- accidents! den. Do not undertake any unauthor- Caution – Risk of collapse! ised interventions yourself. Contact The roof of the gazebo must our service department or a local ex- not be subjected to additional pert in the event of damage, repairs, or...
-
Seite 19: Assembly
Tools and accessories required – Caution – Rain! Should pools of wa- ter form, the collected water should Wrench (16) be regularly tipped out. The roof can Hexagon key (20) (included in the scope of be carefully raised using a broom in supply). -
Seite 20: Setup
Setup Step 1 Connect two frame parts (1) using screw (10), washer (11) and cap nut (21). Use bottom holes for this purpose. Repeat this step until you have four frame part groups (1+1). (Only tighten the screws completely when all the parts are assembled) Step 2 Fasten the frame part groups (1+1) with screws (9) and washers (11) at the top of he support legs (2). - Seite 21 Step 4 Insert the roof supports (3+4) and (3+5), as well as the short poles (6) into the roof cross piece (7). Put the roof structure onto the frame. Fasten the roof supports (3+4) and (3+5) using screws (8), washers (11) and nuts (12) at the top of he support legs.
- Seite 22 Step 6 Position the large roof textile piece (15) over the roof structure so that the seams lie on the corners of the gazebo. Stretch the small roof textile piece (14) at the gazebo top over the roof supports (3). Tension and fasten the large roof textile piece.
-
Seite 23: Care And Maintenance
Care and maintenance Storage Cleaning: To prevent the formation of mould and mould stains, ensure that the gazebo ma- • Wipe the textile material clean using a terial is completely dry prior to storage. damp cloth and a mild, commercially available detergent. -
Seite 24: Warranty
Warranty Distributor tepro Garten GmbH You have purchased a high quality gazebo. TEPRO GARTEN GmbH Carl-Zeiss-Straße 8/4 provides a warranty for its products within D-63322 Rödermark the framework of its warranty conditions Email: info@tepro-gmbh.de oder under normal, recreational and non- backoffice@tepro-gmbh.de... -
Seite 25: Matching Accessories (Not Included In The Delivery Scope)
(not included in the delivery scope) Available over-the-counter and online. Side part set for Waya – Set consists of: 1 closed side part, 1 side part with tepro item number 2 windows 5512 - colour: dark blue – Textile material: Polyester 100%, 180 g/m²,... - Seite 26 P160150_TEPRO_5524,5525,5526,5527,5528,5529_Waya_Pav_DE_GB_20161003.indd 26 18/11/16 11:46 AM...