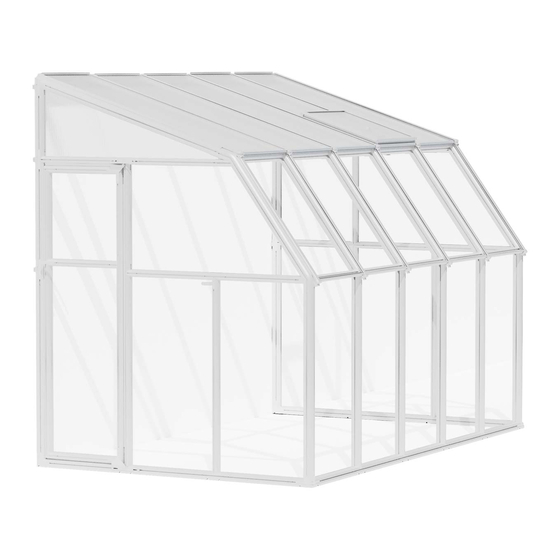
Palram SUNROOM 6 Bedienungsanleitung
Inhaltsverzeichnis

Verwandte Anleitungen für Palram SUNROOM 6


Inhaltszusammenfassung für Palram SUNROOM 6
- Seite 1 SUNROO PALRAM 7 mm 10 mm...
- Seite 2 Extending the Greenhouse - Sun Room 6' 6'x12' Back 4' Back 4' Middle Middle Front Front Index Front Middle Back 4...
- Seite 3 Greenland Latvia Romaina Uzbekistan Swaziland customer.service@palram.com Lithuania Estonia PalramApplicationsUK PalramApplications 01302-380775 +972-4-848-6816 Ireland Norway UnitedKingdom customer.serviceUK@palram.com customer.service@palram.com Italy Palram DIY France +33-169-791-94 04-848-6816 Spain Belgium Israel Portugal customer.serviceFR@palram.com info.il@palram.co.il Netherlands PalramApplications Palram DIY France 0169-791-094 +972-4-848-6816 Sweden France customer.service@palram.com customer.serviceFR@palram.com...
- Seite 4 @ alpaco@alpacodomica.com post@nshnordic.com www.alpacodomica.com Q• Infolinia: 801-011-929 Horisont Neuvonta: 09-6866720 Ntrade Tuki /Varaosat: 050-3715350 22-349-93-36 Finland Poland @ www.horisontenterprises.fi kontakt@ogrodosfera.pl tuki@horisontenterprises.fi Palram South Africa 011-397-7771 Viscom 0599-37-057 Croatia South Africa Slovenia receptionza@palram.com info@ms-viscom.com Greenhouse - Maze Palram Australia 03-9544-6-999 03-9219-4444 Australia info@mazedistribution.com.au...
- Seite 5 FOUNDATION Site Preparation! Baustellenvorbereitung! * Seebelow I recommended option * Sieheunten I empfohlene Optionen • Base or foundation must be flattened, leveled • Der Boden Oder das Fundament müssen A Solid Base (Concrete / Concrete Wall / Massiver Untergrund (Beton / Betonwand der Montage des Produkt planiert, nivelliert und and prepped prior to installing the product! Pressure Treated Wood / Wood Deck) (drawing)
- Seite 6 Klargjøring! hnxn :lbnb nx}mn nmv5N .-INI * * Se under I Anbefalte alternativer m-nmn IN moan nN nvvLn • • Sokkelen eller underlaget må bearbeides, PT / nvvn / jevnes ut og klargjøres før produktet monteres! !nxmn mpnn (mvnv) A Solid fundament (betong / betongvegg / •...
- Seite 7 Come preparare il sito: Forberelse af opsætningstedet! * Si prega di far riferimento alle I seguenti opzioni • La piattaforma o le fondamenta devono essere * Se 1 anbefalede muligheder herunder consigliate: • Din base eller grundlag skal være fladt, jævnt og appiattite, livellate e preparate prima di installare il A Base solida (calcestruzzo / muro di cemento/...
- Seite 8 Épitési terület elökészitése! Priprava terena! * Alåbb megtalål I åltalunkjavasolt opci6t * Spodaj sioglejte I priporoéeni moinosti • Pred postavitvijo izdelek je treba osnovno • Az alapnak simånak és vizszintesnek kell lennie, s A Szilård alap (beton / beton fal / nyomåskezelt povrSinoali podlago zravnati! elö...
- Seite 9 A TBepaan OCHOBa ( 6eTOH/ 6eTOHHaa CTeHa/ Piiprava mista! * Viz niie 1 doporueené moinosti noarOTOBKa nnou4aAKL.1! 06pa60TaHHaR noa aaBneH"erv' apeæcm•a / • OCHOBaHVt MJIL,I ct)YHaatvteHT AOTI>KHbl 6blTb • Båzenebo zåkladna musi byt zplogtélå, vyrovnanå A Pevny podklad (beton / betonovå zed/ aepeBAHHan nany6a) (qemex) c06paHbl,BblPOBHeHbl n nonHOCTbK) noar0T0BneHbl...
- Seite 10 FOUNDATION ROOM O Soli Solid base Trdna osnova pxtn D'oa TBepuaR OCHOBa {5eTOH 16eTOHHa* creHa / {Concrete / Concrete Wall / Pressure YY / nown / nun) (beton / betonvæg / (Beton / Betonska stena / Pregan 06pa60TaHHaRnoAAaBneHneM Treated Wood / Wood Deck) trykbehandlet træ...
-
Seite 11: Cleaning Instructions
Tools & Equipment IMPORTANT GTI - Special tool to connect pins through lined up holes. Pin Tool fixs and locks profiles in place. Pleaseread these instructions carefully before you start to assemble this product . Pleasecarry out the steps in the order set out in these instructions. Keepthese instructions in a safe place for future reference. During Assembly •... -
Seite 12: Instructions De Nettoyage
Outils et équipement IMPORTANT GTI - Outil spécial pour raccorder Ies broches aux trous alignés. Veuillez lire attentivement ces instructions avant de débuter le montage du produit. Fixeet verrouille les profiles en place. Veuillez suivre les étapes dans l'ordre indiqué dans ces instructions. Conservez ces instructions en lieu sür pour référence ultérieure. - Seite 13 Werkzeug & Ausrüstung WICHTIG Bitte lesen Siedie vorliegenden Anweisungen sorgfältig durch, bevor Sie mit dem Zusammenbau dieses GTI - Spezialwerkzeug zu Befestigung von Stiften in Lochreihen. Schuppens beginnen. Bitte führen Siedie Schritte in derin der vorliegenden Anleitung aufgeführten Stiftwerkzeug zurn Anbringen und zur Montage von Profilen. Reihenfolge aus.Bewahren Siedie Anleitung für eine spätereBezugnahme an einem sicheren Ort aut Während der Montage Pflege- und Sicherheitshinweise...
-
Seite 14: Instrucciones De Limpieza
Herramientas y equipo IMPORTANTE GTI: una herramienta especial para conectar Ias clavijas en Ios agujeros conectados. Lerogamos lea con atenciön Iassiguientes instrucciones antes de empezar a montar este producto La herramienta para clavijas sujeta y engancha Ioscontornoes en su sitio Siga Ios distintos pasos en eI mismo orden de Iasinstrucciones. - Seite 15 Narzedzia i sprzet Waine GTI - Specjalne narzedzie do Iqczenia kolkåw przez uszeregowane otwory. Przedprzystqpieniem do montaiu produktu prosimy o uwaine zapoznanie sie z instrukcjQ Narzedzie Pin naprawia i blokuje profile na miejscu. oraz o przeprowadzanie poszczegölnych etapåw montaiu w kolejnogci okreqonej w niniejszej instrukcji.
- Seite 16 819L L 19L LSNd / OZ9L LSNd/6L9L OE9L LNd/6ESL ESNd / 8Z9L LSNd elpp!W well...
- Seite 17 Contents Back Middle Item Front 7616/ PN128 7544/ PN127 7612 7611 7613 7614 7608 7610 7609 7552...
- Seite 18 Contents Back Middle Item Front PIN I 8713...
- Seite 19 Contents Back Middle Item Front E102...
- Seite 20 Contents Back Middle Item Front 7216 7215 7217 7273 7224 4016 7279 7281 4043 4008 7441 *only for clear Sun Room / Sun Lounge...
- Seite 21 Contents Item Front Back Middle 7536 7534 7535 7533...
- Seite 22 Contents Item Front Back Middle 8797 8798 8801 8799 8800 7441...
- Seite 23 Place door hinge in accordance with the side you wish to install the door at, to the right or the left side of the Sun Room / Sun Lounge. Arrange all 2D connectors with the stamped word OUT facing the outside of the product.
- Seite 24 Arrange all 2D connectors with the stamped word OUT facing the outside of the product. Item Qty• Item Qty. pin 1 Door Tür Porte Puerta pin 1 pin 1 pin 1 pinl pin I pin 1 Door Tür Porte Puerta...
- Seite 25 Arrange all 2D connectors with the stamped word OUT facing the outside of the product. Item Item Qty• Qty• *.jåi pin 1 Door Tür Porte P erta pin 1 pin I pin I pinl pinl pinl pin 1 pin I...
- Seite 26 Arrange all 2D connectors with the stamped word OUT facing the outside of the product. Item Qty. 0' = 5xB2 pin 1 Door Tür Porte Puerta pin I pinl pinl pin I pinl pinl...
- Seite 27 • •Make sure the base is square and leveled by measuring the diagonals and level b using a spirit level. • Make sure you anchor the base to the ground with suitable screws / screws + plugs / spikes (not supplied) in accordance with your chosed foundation. •...
- Seite 28 Ll.l!d...
- Seite 29 Qty. Item pinl pinl pinl pinl...
- Seite 30 Item Qty. 7539 / pin 1 pin I 7539/ PNI pinl pin 1 pinl...
- Seite 31 Wall's assembly must be done gradually, #1 insert the panel, #2 insert the profile and #3 insert the pin, in accordance with the drawings in step 8. Item Qty. 7539/ pin 1 pin 1 pin 1 7539 / PNI pinl pinl pin 1...
- Seite 32 Wall's assembly must be done gradually, #1 insert the panel, #2 insert the profile and #3 insert the pin, in accordance with the drawings in step 8. Item Qty• 7539/ pinl pin 1 pinl...
- Seite 33 Item Qty. Pin 1 Din 7...
- Seite 34 Item Qty. 7620/ PN51 7619/ PN51 pinl 7619/PN51 7620/PN51 7620/ PN51 7620/PN51 pin I 7620/ PN51 pinl...
- Seite 35 Qty. Item pin 1 7628/ PN53 7628/ PN53 7628/ PN53 pinl pin I...
- Seite 36 Item Qty• pin 1...
- Seite 37 Item Qty• 7608 7608 7608 7608 7608 7608 7608 7608 7608...
- Seite 38 Item Qty. pin 1 pin 1 pin 1 pinl pinl pinl...
- Seite 39 Qty. Qty. Item Item pinl 7609 7609 pin I pinl 7609 pinl...
- Seite 40 Arrange all 2D connectors with the stamped word OUT facing the outside of the product. Item Qty• Item Qty. 7224 7217 pin 1 7217 7224 7224...
- Seite 41 Item Qty. 7678 7678 Pin 7 Pin 7...
- Seite 42 Item Qty. pinl pin 1 pin I pin I pin I pinl pinl pin 1 pinl pin I...
- Seite 43 Qty• Qty. Item Item pin 1 7609 7609 7609...
- Seite 44 Arrange all 2D connectors with the stamped word OUT facing the outside of the product. Item Qty• pinl...
- Seite 45 Item Qty. 7617 pin 1 7617 pinl pin 1...
- Seite 46 Item Qty• pinl pini...
- Seite 47 Qty. Item pin 1 = 4xB2 0' = 5xB2...
- Seite 48 Item Qty• 7610 pin 1 7610...
- Seite 49 Make sure that the top frame is leveled with the wall. Fix it using one of the twooption illustrate with suitable screws / screws +plugs ( not s upplied) according to your wall surface Item Qty.
- Seite 50 Item Qty. 761 1 7611 7611 7611...
- Seite 51 Item Qty. 7613 7613 7613...
- Seite 52 Item Qty• Item Qty.
- Seite 53 Item Qty. 4008 4008...
- Seite 54 Qty• Item 7536 7 mm 7533 7534 M4x8mm 7536 7534 7533 7536 7534...
- Seite 55 Item Qty• 7535 7 mm M4x8 mm 7535 7535...
- Seite 56 Qty. Item 7630 7630...
- Seite 57 Windows Location Fenster Standort Fenétre Emplacement Ventana Ubicaciön...
- Seite 58 Qty• Item PN57 Window PN57 PN57 PN57...
- Seite 59 PN57 PN57 PN57 PN57...
- Seite 60 Item 7552 7552 7552 7552...
- Seite 61 Qty. Item 7612 7614 4043 7612 7612 7614...
- Seite 62 Item Qty. 4043 4043...
- Seite 63 Item Qty. PN55 7552 4043 'PN55 7552 7552 4043...
- Seite 64 Item Qty• Qty. Item PN55 7552 4043 7552 7552 4043 4043...
- Seite 65 & 03/7/ s...
- Seite 66 Insert the rubber strip from the outside of the product. Cut the remaining edges. Item Qty•...
- Seite 67 Item Qty• EIOO 7224 7215/7216 pin 1 pinl pin I pin I pinl EIOO EIOO 7215 7216 7224 7224...
- Seite 68 Item Qty• 7544/ PN127 7544/ PN127 8713 pin 1 8713 8713 EIOO EIOO pin I pinl pin I pinl 7544/ 7544/ PN127...
- Seite 69 Item Item Qty• Qty• E102 7224 EIOO 7215/ 7216 pinl 7215 7215 pin I 7215 7216 7224 7224 pin I 7224 7224...
- Seite 70 Qty• Item 7616/ PN128 pinl 7616/ PN128 7616/ PN128 pinl...
- Seite 71 Insert the rubber strip from the outside of the product. Cut the remaining edges. Item Qty• PN 128 PNI 28 PN127 PN127...
- Seite 72 Qty. Item...
- Seite 73 Item Qty. 4016 7279 4016 7279 7279...
- Seite 74 Item Qty. 7273 7281 7273 7273 7281 7281...
- Seite 75 Item 8797 8798 8801 8798 8797...
- Seite 76 Item Qty. 8799 8800 8800 8799 8799...
- Seite 77 If the window doesn't close properly, please release the screws,adjust the profile and re-tighten the screws. Item Qty. 7441 7441...
- Seite 78 Position ist und nicht entfernt Oder verschoben Oder in irgendeinerWeise verandert wurde, und/oder den Produkt an The claimant must allow Palram to inspect the product involved and the installation site itself while the product is still in its original...
- Seite 79 Palram Applications (1995) Ltd (Compagnie no 512106824) dont le siége social est adressé au Parc Industriel Teradion, M.P.Misgav 2017400, Israél ("Palram") garantit que le Produit n'a aucun défaut de matériel ou de manufacture pour une période de 5 ans ä dater de la date Période depuis...
- Seite 80 "N '-npnn nnpn pn "n nr rnnr1N am todavia en su posiciön original y no seha retirado ni movido o alterado de ningün modo y/o devolver el Producto a Palram para eval uarlo. .e-npnn '-pn nxnnn hpn IN 'nnn NbIN nmb) Palram se reserva el derecho a investigar la causa de cualquierfa Ilo de forma independiente.
- Seite 81 Ersättning Hvis et krav i henhold til denne garantien er korrekt an meldtog godkjent av Palram, kan kjøperen ved Palramsvalg enten (a) kjøpe et Nür reklamationen har anmålts enligt villkoren i garantin och godkånts av Palram har kÖparen (kåranden) rutt att få nya delar eller en ny erstatningsprodukt eller deler / s;eller (b) motta tilbakebetaling av originalproduktets eller delens kjøpskurs, alt i samsvar med følgende...
- Seite 82 Kantajan (reklamaation tehnyt' tulee sallia valrnistajan / valmistajan edustajan ta rkistaa vioittunut tuote sen alkuperäisessä position og ikke er blevet ternet eller flyttet eller ændret på nogen måde, og/eller lade produktet sende tilbage til Palram for afprøvning. Sijainnissa siinå kun nossa kuin se on vaurion sattumisen jälkeen. Tuotetta ei saa muunnella , korjata , siirtåå taikka låhettåå...
- Seite 83 Israél ("Palram") garandeert dat het product Vrij is van materiaal-en fabricagefouten voor een periode van 5 jaar vanaf de oorspronkelijke Israele{"Palram"; garantisce Che il Prodotto sari privo da difetti di materiale o di lavorazione in un periodo di 5 anni dalla data originale datum van aankoop door de definities en voorwaarden van deze garantie.
- Seite 84 Nöuded ja teated Ka2da reklamacia musi byeoznémené pisomne spoloenosti Palram do 30 dni po zisten[ vady na vyrobku. K oznåmeniu musi byt pri102eny Iga garantiinöue tuleb Palramile kirjalikult teatada 30 päeva jooksul pärast defektse toote avastamist, lisades originaalse müüg ikviitungi ja original dokladu 0 zaküpeni a tato zéruka.
- Seite 85 A Palram Applications (1995) Ltd {cégjegyzékszåm: 5 12106824),amelynek székhelye a Teradion Industrial Park. MP Misgav 20174, Izrael Palram Applications 1995) Ltd (Numer firmy: 512106824) ktÖrej zarejestrowane biuro znajduje sie w Teradion Industrial Park, M.PMisgav 20174, (atoväbbiakban: "Palram"), garantålja, hogy a termék az eredeti våsårläsi dåtumtOl szåmitva 5 évig mentes mindennemü anyag vagy a gyärtäsi hibätöl, Izrael...
- Seite 86 H ETcupEia Palram EpappovÉq (1995) Ltd (ap19pöc;ETa1pEia: 5 12106824), n é6pa onoiaq ßpi0Kz-ta1 oxo Teradion Industrial park, MP Misgav Izrael („Palram";, zarueuje, Ze Produkt nebude mit iédné vady materiélu nebo remeslného zpracoväni po dobu 5 let od data püvodniho nékupu. 20174, lopari)•, m") EYYUdTal...
- Seite 87 CUMPÅRÅTORUL ESTESING URULRESPONSABIL PENTRU A STABILIDACA MANIPULAREA DEPOZITAREA, MONTAJUL,INSTALAREA SAIJ UTILIZAREA P RODUSULUI SUNT SIGURE S l POTRIVITE PENTRU O RICE LOC. P ENTRU ORICE APLICATIE IN ORICE SITUATIE. PALRAM ESTE RESPONSA31LA PENTRU NICIO DAUNA SAU RANIREsurERlTÅ DE CUMPARÅTOR, DE ORICEALTA PERSOANA SAUBUN CE REZULTÅ...