Herunterladen Diese Seite drucken
Palram HYBRID 6x12 Bedienungsanleitung
Vorschau ausblenden Andere Handbücher für HYBRID 6x12:

Werbung

Verfügbare Sprachen
  • DE

Verfügbare Sprachen

  • DEUTSCH, seite 147
HARMONY
HYBRID
MYTHOS
6'x12'
TM
TM
TM
www.palramapplications.com
Harmony 6x12
Mythos 6x12
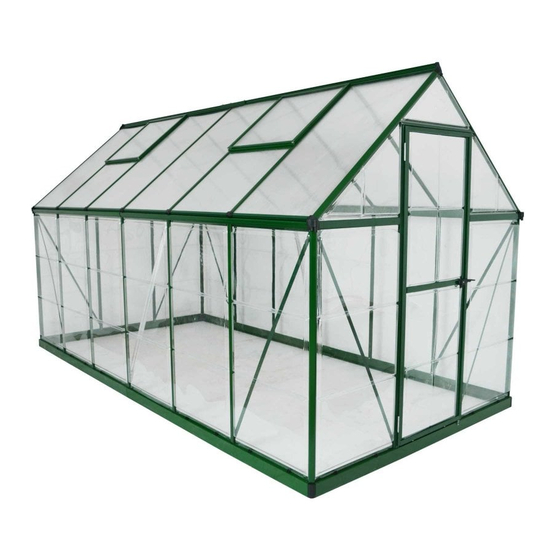
Hybrid 6x12
Mythos 6x12
Hybrid 6x12
Harmony 6x12
Mythos 6x12
HARMONY 6'x12'
HYBRID 6'x12'
MYTHOS 6'x12'
10 mm
x2
13/32"

Werbung

loading

Inhaltszusammenfassung für Palram HYBRID 6x12

  • Seite 1 HARMONY HYBRID MYTHOS 6’x12’ www.palramapplications.com Harmony 6x12 Mythos 6x12 Hybrid 6x12 Mythos 6x12 Hybrid 6x12 Harmony 6x12 Mythos 6x12 HARMONY 6’x12’ HYBRID 6’x12’ MYTHOS 6’x12’ 10 mm 13/32”...
  • Seite 2 Unguary Palram Applications +972-4-848-6816 Greece Japan Mexico Turkey Ukraine Greenland Latvia Romaina Uzbekistan Swaziland customer.service@palram.com Estonia Lithuania Palram Applications UK 01302-380775 Palram Applications +972-4-848-6816 Ireland Norway United Kingdom customer.serviceUK@palram.com customer.service@palram.com Italy Palram DIY France +33-169-791-94 ‫פלרם אפליקציות‬ 04-848-6816 Spain Belgium...
  • Seite 3 Neuvonta: 09-6866720 Infolinia: 801-011-929 Horisont Ntrade Tuki / Varaosat: 050-3715350 22-349-93-36 Finland Poland www.horisontenterprises.fi kontakt@ogrodosfera.pl tuki@horisontenterprises.fi Palram South Africa 011-397-7771 0599-37-057 Viscom Croatia South Africa Slovenia receptionza@palram.com info@ms-viscom.com Greenhouse - Maze 03-9544-6-999 Palram Australia 03-9219-4444 Australia info@mazedistribution.com.au...
  • Seite 124 Palram Applications (1995) Ltd (Firmennummer:512106824) mit Sitz in Teradion Industrial Park, M.P Misgav 20174, Israel („Palram“) garantiert, Israel (“Palram”) warrants that the product will be free from defects in material or workmanship for a period of 5 years from the original dass das Produkt für einen Zeitraum von 5 Jahren ab dem Kaufdatum frei von Mängeln in Material und Verarbeitung wird, und den Definitionen,...
  • Seite 125 Produit de remplacement ou partie Remboursement Israël (“Palram”) garantit que le Produit n’a aucun défaut de matériel ou de manufacture pour une période de 5 ans à dater de la date d’acquisition, conformément aux définitions et conditions incluses dans cette garantie.
  • Seite 126 .‫3.1 אחריות זו בטלה אם רכיבים וחלקים קונסטרוקטיביים כלשהם שנעשה בהם שימוש אינם תואמים את ההמלצות הכתובות של פלרם‬ todavía en su posición original y no se ha retirado ni movido o alterado de ningún modo y/o devolver el Producto a Palram para evaluarlo.
  • Seite 127 Tillverkaren (Palram) förbehåller sig rätten att självständigt undersöka orsaken till felet. Kompensasjon Hvis et krav i henhold til denne garantien er korrekt anmeldt og godkjent av Palram, kan kjøperen ved Palrams valg enten (a) kjøpe et Ersättning erstatningsprodukt eller deler / s; eller (b) motta tilbakebetaling av originalproduktets eller delens kjøpskurs, alt i samsvar med følgende När reklamationen har anmälts enligt villkoren i garantin och godkänts av Palram har köparen (käranden) rätt att få...
  • Seite 128 Sijainnissa siinä kunnossa kuin se on vaurion sattumisen jälkeen. Tuotetta ei saa muunnella , korjata , siirtää taikka lähettää position og ikke er blevet fjernet eller flyttet eller ændret på nogen måde, og/eller lade produktet sende tilbage til Palram for afprøvning.
  • Seite 129 Israël (“Palram”) garandeert dat het product vrij is van materiaal-en fabricagefouten voor een periode van 5 jaar vanaf de oorspronkelijke Israele (“Palram”) garantisce che il Prodotto sarà privo da difetti di materiale o di lavorazione in un periodo di 5 anni dalla data originale datum van aankoop door de definities en voorwaarden van deze garantie.
  • Seite 130 Nõuded ja teated Každá reklamácia musí byť oznámené písomne spoločnosti Palram do 30 dní po zistení vady na výrobku. K oznámeniu musí byť priložený Iga garantiinõue tuleb Palramile kirjalikult teatada 30 päeva jooksul pärast defektse toote avastamist, lisades originaalse müügikviitungi ja originál dokladu o zakúpení...
  • Seite 131 Produkt lub jakakolwiek jego część jest niedostępna lub nieaktualna. alapját a hibás alkatrész eredeti ára képzi. A Palram fenntartja azon jogát, hogy ha a termék vagy annak bármely alkatrésze nem érhető Niniejsza gwarancja nie pokrywa żadnych kosztów usunięcia lub montażu Produktu, podatków lub transportu, bądź jakichkolwiek innych el, vagy nem gyártják már, úgy azt más termékkel vagy alkatrésszel helyettesítse.
  • Seite 132 Podjetje Palram Applications (1995) Ltd (matična številka: 512106824), katerega sedež je na naslovu Teradion Industrial Park, M.P Misgav 20174, Toto podléhá definicím, podmínkám a ujednáním obsaženým v této záruce. Izrael (»podjetje Palram«), jamči, da bo izdelek brez napak v materialu ali pri proizvodnji še 5 let od originalnega datuma nakupa skladno z Podmínky opredelitvami pojmov in pogoji, ki jih vsebuje ta garancija.
  • Seite 133 ο αγοραστής θα πληρώσει το 60% της αρχικής τιμής αγοράς cu calendarul de mai sus, va porni de la procentul valoric al piesei defecte în prețul original al Produsului. Palram își rezervă dreptul de a Τέλος του 4ου έτους ως το τέλος του 5ου έτους...
  • Seite 134 Wind Resistance kg/m 2 www.palramapplications.com km/hr 15.4 lbs/ft 2 ml/hr Harmony 6x12 Mythos 6x12 Hybrid 6x12 Light Transmission Light Transmission Light Transmission Roof - 90% Roof - 82% Roof - 82% Panels - 90% Panels - 82% Panels - 90%...
  • Seite 135 Iceland Lithuania Romaina Ukraine Palram Applications UK Palram DE GmbH 01302-380775 +49-0180-522-8778 Austria Ireland Germany United Kingdom Luxembourg United Kingdom | customer.serviceUK@palram.com Germany | customer.serviceDE@palram.com Palram Applications Palram 00330169-791-94 04-848-6816 Belgium (1995) Ltd Israel Portugal Spain France | customer.serviceFR@palram.com info.il@palram.co.il...
  • Seite 136 Foot Print 905-5646007 Alpaco 357-224-971-13 Canada Cyprus alpaco@alpacodomica.com Canada | Sales@Footprintproducts.com www.alpacodomica.com Neuvonta: 09-6866720 Infolinia: 801-011-929 Horisont Ntrade Tuki / Varaosat: 050-3715350 22-349-93-36 Finland Poland www.horisontenterprises.fi kontakt@ogrodosfera.pl tuki@horisontenterprises.fi Greenhouse - Maze Palram Australia 1300-449-107 +61-3-9219-4444 Australia Australia info@mazedistribution.com.au salesvic@palram.com...
  • Seite 137 FOUNDATION Site Preparation! Baustellenvorbereitung! See below 2 recommended options Siehe unten zwei empfohlene Optionen • • Base or foundation must be flattened, leveled Der Boden oder das Fundament müssen vor A Solid Base (Concrete / Concrete Wall / Massiver Untergrund (Beton / Betonwand / and prepped prior to installing the product! der Montage des Produkt planiert, nivelliert und Pressure Treated Wood / Wood Deck) (drawing)
  • Seite 138 Klargjøring! !‫הכנת האתר‬ :‫ראה שתי אפשרויות מומלצות להלן‬ • Se under 2 Anbefalte alternativer • Sokkelen eller underlaget må bearbeides, ‫יש ליישר ולשטח את הבסיס או היסודות לפני התקנת‬ ‫בסיס מוצק (בטון / משטח בטון / עץ מטופל / דק‬ jevnes ut og klargjøres før produktet monteres! !‫המוצר‬...
  • Seite 139 Come preparare il sito: Forberelse af opsætningstedet! Si prega di far riferimento alle 2 seguenti opzioni • La piattaforma o le fondamenta devono essere • Se to anbefalede muligheder herunder consigliate: Din base eller grundlag skal være fladt, jævnt og appiattite, livellate e preparate prima di installare il Base solida (calcestruzzo / muro di cemento/ forberedt, før produktet installeres.
  • Seite 140 Priprava terena! Építési terület előkészítése! • • Alább megtalál 2 általunk javasolt opciót Spodaj si oglejte 2 priporočeni možnosti Pred postavitvijo izdelek je treba osnovno Az alapnak simának és vízszintesnek kell lennie, s Szilárd alap (beton / beton fal / nyomáskezelt površino ali podlago zravnati! elő...
  • Seite 141 Твердая основа (Бетон / бетонная стена / Подготовка площадки! Příprava místa! Viz níže 2 doporučené možnosti Oбработанная под давлением древесина / • • Основание или фундамент должны быть Báze nebo základna musí být zploštělá, vyrovnaná Pevný podklad (beton / betonová zeď / деревянная...
  • Seite 142 FOUNDATION NATURE 6 Solid Base ‫בסיס מוצק‬ Solid base Trdna osnova Твердая основа (Бетон / бетонная стена / (Concrete / Concrete Wall / Pressure ‫(בטון / משטח בטון / עץ מטופל‬ (beton / betonvæg / (Beton / Betonska stena / Prešan Oбработанная...
  • Seite 143 IMPORTANT Please read these instructions carefully before you start to assemble this product . Please carry out the steps in the order set out in these instructions. Keep these instructions in a safe place for future reference. Safety Advice Before Assembly •...
  • Seite 144 During Assembly Screws 411 and nuts 412 & 466 are used thruoghout the assembly process. • Make sure the base is square by measuring the diagonals and level by using a spirit level. • Screws 411 are to be assembled from the outside and nuts 412 & 466 from the inside of •...
  • Seite 145 IMPORTANT Veuillez lire attentivement ces instructions avant de débuter le montage du produit. Veuillez suivre les étapes dans l’ordre indiqué dans ces instructions. Conservez ces instructions en lieu sûr pour référence ultérieure. Consignes de sécurité Avant l’Assemblée • Pour des raisons de sécurité, nous recommandons vivement que le produit soit assemblé par au •...
  • Seite 146 Pendant l’assemblage Les vis 411 et écrous 412 & 466 servent tout au long de la procédure. • Assurez-vous que la base soit bien carrée en mesurant les diagonales et le nivelage à l’aide d’un • Les vis 411 se placent à l’extérieur et les écrous 412 & 466 à l’intérieur de la serre. niveau à...
  • Seite 147 WICHTIG Bitte lesen Sie die vorliegenden Anweisungen sorgfältig durch, bevor Sie mit dem Zusammenbau dieses Schuppens beginnen. Bitte führen Sie die Schritte in derin der vorliegenden Anleitung aufgeführten Reihenfolge aus. Bewahren Sie die Anleitung für eine spätere Bezugnahme an einem sicheren Ort auf.
  • Seite 148 Während der Montage • Schrauben 411 and Muttern 412 & 466 werden während des gesamten Aufbauvorgangs • Vergewissern Sie sich, dass die Basis sowohl quadratisch als auch waagrecht ist, benutzt. indem Sie die Diagonalen messen und die Basis mit einer Wasserwaage prüfen. •...
  • Seite 149 IMPORTANTE Le rogamos lea con atención las siguientes instrucciones antes de empezar a montar este producto. Siga los distintos pasos en el mismo orden de las instrucciones. Guarde las instrucciones en un lugar seguro para poder consultarlas en el futuro. Consejos de cuidado y seguridad Antes de empezar: •...
  • Seite 150 Durante la instalación Los tornillos 411 y las tuercas 412 & 466 son usados durante todo el proceso de montaje. • • Asegúrese de que la base es cuadrada, midiendo las diagonales y el nivel mediante el uso de Los tornillos 411 deben ser montados desde el exterior y las tuercas 412 & 466 desde el interior del invernadero.
  • Seite 151 ‫חשוב‬ .‫נא לקרוא בקפידה את הוראות ההרכבה לפני תחילת הרכבת המוצר‬ .‫נא לבצע את שלבי ההרכבה בסדר המוצג בהוראות אלה‬ .‫נא לשמור את הוראות ההרכבה במקום בטוח לשימוש עתידי‬ :‫לפני ההרכבה‬ :‫הנחיות טיפול ובטיחות‬ .‫• בחר בתשומת לב את מיקום ההרכבה לפני תחילת ההרכבה‬ .‫•...
  • Seite 152 :‫במהלך ההרכבה‬ .‫• ודא שהבסיס מרובע על ידי מדידת האלכסון ומפולס היטב לאחר בדיקת פלס‬ .‫• ברגים 114 ואומים 214 ו 664 משמשים במהלך כל תהליך ההרכבה‬ .‫• ברגים 114 יורכבו מבחוץ ואומים 214 ו 664 יורכבו מחלקה הפנימי של החממה‬ .‫•...
  • Seite 153 VIKTIGT Var vänlig läs instruktionerna noggrant innan du börjar montera produkten. Vänligen utför instruktionerna enligt de steg som angivits i dessa instruktioner. Spara dessa instruktioner på ett säkert ställe för framtida referens. Aktsamhets - och säkerhetsråd Rengöringsinstruktioner • Vid rengöring av produkt, använd ett milt rengöringsmedel och skölj med kallt rent vatten. •...
  • Seite 154 Under montering Skruv 411 och mutter 412 & 466 används genom hela monteringsprocessen. • Se till att grunden är jämnt fyrkantig genom att mäta diagonaler, och använd vattenpass till • Skruv 411 ska monteras från utsidan och mutter 412 & 466 från växthusets insida. att försäkra en plan nivå.
  • Seite 155 VIKTIG Les instruksjonene nøye før du begynner på monteringen av dette produktet. Følg stegene som forklart i instruksjonen. Oppbevar denne instruksjonen på et trygt sted, for fremtidig referanse. Sikkerhetsråd Før montering • Av sikkerhetsgrunner anbefaler vi sterkt at produktet monteres av minst to personer. •...
  • Seite 156 Under forsamlingen • Kontroller at basen er firkantet ved å måle diagonalene og at den er rett ved å bruke et vater. Skrue 411 og mutter 412 & 466 brukes på mange steder under monteringen. • Du kan bruke silikonspray for å hjelpe med at panelene sklir inn i profilene. •...
  • Seite 157 TÄRKEÄÄ Lue ensin huolellisesti nämä ohjeet ennen tuote asentamista .. Suorita vaiheet järjestyksellisesti esitettyjen ohjeiden mukaan. Säitytä nämä ohjeet turvassa vastaisuuden varalta Turvallisuus ohje Ennen kokoamista • Turvallisuussyistä suosittelemme, että katoksen asennukseen osallistuu vähintään kaksi henkilöä. • Valitse paikka huolellisesti ennen kokoamista. •...
  • Seite 158 During Assembly • Varmista, että pohja on neliö mittaamalla ristimitat ja tasaamalla se vesivaa’an avulla. Ruuvit 411 ja mutterit 412 & 466 ovat yleisesti käytössä koko kasvihuoneen osalta. • Voit käyttää silikonisprayta apuna paneelien liu’uttamisessa profiileihin. • Ruuvit 411 asennetaan ulko sisäänpäin ja mutterit 412 & 466 kiristetään sisäpuolelta •...
  • Seite 159 VIGTIGT Læs venligst vejledningen omhyggeligt, inden du begynder at montere dette produkt. Udfør venligst trinene i den rækkefølge de er angivet i vejledningen. Opbevar denne vejledning et sikkert sted for fremtidig reference. Sikkerhedsadvarsel Før montering • Vælg stedet omhyggeligt inden du påbegynder samlingen. •...
  • Seite 160 Under monteringen Skruerne 411 og møtrikkerne 412 & 466 bruges under hele samlingen. • Sørg for at basen er firkantet ved at måle diagonalerne og niveauet ved hjælp af et “åndniveau. • Skruer 411 skal skrues i udefra og møtrikkerne sættes på indenfor i drivhuset. •...
  • Seite 161 NL / BE BELANGRIJK! Alstublieft lees deze handleiding voor u begint met het assembleren van het product. Alstublieft volg de stappen in de volgorde zoals vermeld staat in deze instructie. Bewaar deze instructies op een goede plek. Veiligheid en voorzorgsmaatregelen Schoonmaak instructies •...
  • Seite 162 NL / BE Tijdens de Assemblage • Zorg ervoor dat de basis vierkant is door de diagonalen en het niveau te meten met een * Maak het product schoon na assemblage. • Schroeven 411 en bouten 412 & 466 worden door het gehele montageprocess gebruik. waterpas.
  • Seite 163 IMPORTANTE Si prega di leggere attentamente le istruzioni prima di iniziare a montare questo prodotto. Si prega di andare passo passo nell›ordine indicato in queste istruzioni. Conservare le istruzioni in un luogo sicuro per un futuro riferimento. Consigli sicurezza Istruzioni per la pulizia •...
  • Seite 164 Durante il Montaggio • Le viti 411 ed i dadi 412 & 466 sono usati in tutto il processo di montaggio. • Assicurarsi che la base sia quadrata misurando le diagonali e il livello usando una livella a • Le viti 411 devono essere inserite dall’esterno ed i dadi 412 & 466 dall’interno della serra. bolla d’aria.
  • Seite 165 DÔLEŽITÉ Pred začiatkom montáže skleníka si, prosím, dôkladne prečítajte tieto pokyny. Pokyny si ponechajte na bezpečnom mieste pre prípad potreby ich použitia v budúcnosti. Bezpečnostné rady Pred Montážou • Z dôvodu bezpečnosti výrazne odporúčame, aby výrobok montovali aspoň dvaja ľudia •...
  • Seite 166 Počas montáže • Uistite sa, že základňa je štvorcová nameraním uhlopriečok a úrovne pomocou vodováhy. • Skrutky 411 a matice 412 & 466 sa používajú počas celého procesu montáže. • Môžte použiť silikónový lubrikačný sprej pri zasúvaní panelov do profilov. •...
  • Seite 167 POMEMBNO Pazljivo preberite ta navodila, preden začnete sestavljati ta izdelek. Izvedite korake v zaporedju, kot je navedeno v teh navodilih. Ta navodila shranite na varnem mestu za kasnejšo uporabo. Varnostni nasvet Pred sestavljanjem • Zaradi varnostnih razlogov močno priporočamo, da izdelek sestavljata najmanj dve osebi. •...
  • Seite 168 Med sestavljanjem • Prepričajte se, da je osnova kvadratna, tako da izmerite diagonale in preverite ravnost z uporabo vodne tehtnice. Vijaki 411 in matice 412 & 466 se uporabljajo med celotnim postopkom sestavljanja. • Za pomoč pri vstavljanju plošč v profil lahko uporabite silikonsko mazalno razpršilo. •...
  • Seite 169 OLULINE Palun tutvuge käesolevate juhistega põhjalikult enne seda, kui alustate selle toote kokkupanemist. Palun teostage nimetatud sammud käesolevates juhistes mainitud järjekorras. Palun hoidke käesolevad juhised turvalises kohas alles, et tulevikus neid kasutada. Ohutusnõuanded Enne kokkupanekut • Ohutuskaalutlustel soovitame toodet kokku panna vähemalt kahel inimesel. •...
  • Seite 170 Kokkupaneku ajal • Veenduge, et alus on ruudukujuline, mõõtes ära diagonaalid ja veendudes, et pind on • Kruvisid 411 ja mutreid 412 & 466 kasutatakse läbivalt kogu kokkupanemisprotsessi ajal. tasapindne - selleks kasutage vesiloodi. • Kruvid 411 tuleb monteerida kasvuhoone väljastpoolt ja mutrid 412 & 466 seestpoolt. •...
  • Seite 171 FONTOS A termék összeállítása előtt kérjük, olvassa át alaposan ezeket az utasításokat. A lépéseket az útmutatónak megfelelő sorrendben végezze el. Tartsa meg ezt az útmutatót egy biztonságos helyen, hogy később is használhassa. Kezelési és biztonsági tanácsok Összeszerelés előtt • Biztonsági okokból javasoljuk, hogy a terméket legalább két ember szerelje össze. •...
  • Seite 172 A szerelés során • Az átmérők lemérésével biztosítsa, hogy az alap négyszögletes legyen, valamint ellenőrizze a Az összeszerelés során a csavarokra 411 és a csavaranyákra 412 & 466 lesz szükség. vízszintességet vízmértékkel. • A csavarokat 411 a melegház külsejéről, a csavaranyákat 412 & 466 pedig a belsejéből kell •...
  • Seite 173 Ważne Przed przystąpieniem do montażu produktu prosimy o uważne zapoznanie się z instrukcją oraz o przeprowadzanie poszczególnych etapów montażu w kolejności określonej w niniejszej instrukcji. Zachowaj tę instrukcję w bezpiecznym miejscu do przyszłego użytku. Porada bezpieczeństwa Instrukcje czyszczenia • Ze względów bezpieczeństwa zalecamy wykonanie montażu produktu przez co najmniej dwie •...
  • Seite 174 Podczas Montażu • Upewnij się, że podstawa jest kwadratowa poprzez pomiar przekątnych oraz, że jest równa, * Dokręć wszystkie śruby po zakończeniu montażu. • Śruby 411 i nakrętki 412 & 466 używane są w trakcie trwania całego procesu montażu. używając poziomicy. •...
  • Seite 175 ВАЖНАЯ ИНФОРМАЦИЯ ! Пожалуйста, внимательно прочитайте эту инструкцию, прежде чем приступать к сборке этого продукта. Выполняйте шаги в рекомендуемом порядке, указанном в этой инструкции. Храните эту инструкцию в надежном месте для дальнейшего использования. Советы по безопасности Перед сборкой • Перед началом сборки тщательно выберите место. •...
  • Seite 176 Примечания по сборке • Винты 411 и гайки 412 и 466 используются во время всего процесса сборки. • Убедитесь, что основание квадратное, измерив диагонали и уровень, используя спиртовой уровень. • Винты 411 должны быть в сборке с наружной стороны парника, а гайки располагаться во...
  • Seite 177 SVARĪGI Lūdzu, pirms šī produkta uzstādīšanas, rūpīgi izlasiet šos norādījumus. Lūdzu, veiciet darbības šajos norādījumos norādītajā kārtībā. Noglabājiet šos norādījumus drošā vietā, lai varētu tos izmantot arī vēlāk. Drošības Padoms Pirms montāžas • Drošības apsvērumu dēļ mēs iesakām, lai šī produkta montāžā piedalītos vismaz divi cilvēki. •...
  • Seite 178 Montāžas laikā • Vijaki 411 in matice 466 in 466 se uporabljajo skozi celoten postopek sestave. • Pārliecinieties, ka ir kvadrātveida pamats, izmērot diagonāles un līmeni, izmantojot līmeņrādi. pievelciet skrūvi. • Vijake 411 je treba postaviti na zunanjo stran, matice 412 in 466 pa na notranjo stran •...
  • Seite 179 DŮLEŽITÉ Než zahájíte montáž tohoto produktu, přečtěte si prosím pozorně tento návod. Všechny kroky prosím proveďte v pořadí uvedeném v tomto návodu. Tento návod si uschovejte na bezpečném místě pro budoucí potřebu. Rady pro péči a bezpečnost Před montáží • FZ bezpečnostních důvodů Vám důrazně doporučujeme, aby produkt montovaly alespoň dvě osoby. •...
  • Seite 180 Poznámky během montáže • Ujistěte se, že základna je čtvercová měřením úhlopříček a úrovně pomocí vodováhy. Šrouby 411 a matice 412 & 466 se používají během celého procesu montáže. • Můžete použít silikonový lubrikační sprej, aby vám panely sklouzly lépe do profilů. •...
  • Seite 181 Content s Item Qty. Item Qty. 7598 70” / 179 cm 67”/170 cm 67”/170 cm 65” / 165 cm 70” / 179 cm 65” / 165 cm 70” / 179 cm 64” / 163 cm 70”/178 cm 8470 62”/157 cm 51”...
  • Seite 182 Conte nt s Item Qty. 7010 46” / 117 cm 23.3”x22.6” / 59.4x57.5 cm 8549 22.3” / 56 cm 20.5”x31.7” / 52.3x80.6 cm 7011 22” / 56 cm 22” / 55 cm 23.3”x46” / 59.4x117cm 25” / 63 cm 23” / 58 cm 24”/ 61.5 cm 18.5”...
  • Seite 183 Content s Item Qty. Item Qty. Item Qty. Item Qty. Item Qty. 4008 8447 7083 (+1) (+1) 4043 7084 (+5) 7602 7085 8797 7442 (+2) (+1) 7086 8798 (+1) (+12) 8801 7088 4037 M4 x 50mm 344L 8799 (+1) 8710 8800 344R (+11)
  • Seite 184 7010 7010 7011 Mythos 6x12 Harmony 6x12 7011 581x10 Hybrid 6x12 7011x17...
  • Seite 185 143.7 143.7 cm / ” cm / ” cm / ” cm / ”...
  • Seite 186 8447 7598 7602 7442 7602 7598 8447 7598 7442 7442 7602 7602 7442 7442...
  • Seite 187 7598 7442 7598 7598...
  • Seite 188 Make sure the base is square by measuring the diagonals and level by using a spirit level. P328 P328...
  • Seite 191 Part 994, 995 are in the back of the greenhouse. Attaching them determines the front side of the greenhouse 10 mm 13/32” Door Tür Porte Puerta...
  • Seite 194 The oval hole in the crossbars 256 should always be made up near to the base of the greenhouse. 10 mm 13/32”...
  • Seite 195 Determines door direction. Part 987 is the side that the door hinges will be located. The door can be installed either as a left or right hand door. These instructions show a right hand door assembly.
  • Seite 197 The oval hole in the crossbars 256 should always be made up near to the base of the greenhouse. 8549 8549 8549 8549 8549...
  • Seite 198 Please Note! Each of the 3 greenhouses come with its compatible panels kit as shown in the content list and in the relevant assembly steps. 7011 Mythos 6x8 Harmony 6x8 7011 7011 Hybrid 6x8 7011 7011 7011 7011...
  • Seite 199 10 mm 13/32”...
  • Seite 201 The oval hole in the crossbars 256 should always be made up near to the base of the greenhouse. 10 mm 13/32”...
  • Seite 202 Please Note! Each of the 3 greenhouses come with its compatible panels kit as shown in the content list and in the relevant assembly steps. 7011 Mythos 6x8 Harmony 6x8 7011 7011 Hybrid 6x8 7011 7011...
  • Seite 203 7011...
  • Seite 208 Please Note! Each of the 3 greenhouses come with its compatible panels kit as shown in the content list and in the relevant assembly steps. 7011 7011 7011 Mythos 6x8 Harmony 6x8 7011 Hybrid 6x8 7011...
  • Seite 209 7011...
  • Seite 213 4008 4008...
  • Seite 217 Please Note! Each of the 3 greenhouses come with its compatible panels kit as shown in the content list and in the relevant assembly steps.
  • Seite 218 Please Note! Each of the 3 greenhouses come with its compatible panels kit as shown in the content list and in the relevant assembly steps.
  • Seite 220 Please Note! Each of the 3 greenhouses come with its compatible panels kit as shown in the content list and in the relevant assembly steps.
  • Seite 228 Window Location Fenster Standort Fenêtre Emplacement Decide on the window’s location before assembly. Window can be installed in one of the Ventana Ubicación indicated options.
  • Seite 229 8710 8710 8710 8710 8710...
  • Seite 231 Please Note! Each of the 3 greenhouses come with its compatible panels kit as shown in the content list and in the relevant assembly steps. 7010 7010...
  • Seite 232 Please Note! Each of the 3 greenhouses come with its compatible panels kit as shown in the content list and in the relevant assembly steps. 7010 7010...
  • Seite 235 Please Note! Each of the 3 greenhouses come with its compatible panels kit as shown in the content list and in the relevant assembly steps. 7011 7011 7011...
  • Seite 236 Please Note! Each of the 3 greenhouses come with its compatible panels kit as shown in the content list and in the relevant assembly steps. 7011 7011 7011 7011...
  • Seite 237 Please Note! Each of the 3 greenhouses come with its compatible panels kit as shown in the content list and in the relevant assembly steps. 7011 7011...
  • Seite 238 4043 4043 4043...
  • Seite 239 Please Note! Each of the 3 greenhouses come with its compatible panels kit as shown in the content list and in the relevant assembly steps. 7010 3017 3017 3017 3017 7010 7010 3017...
  • Seite 240 4008 4008 4008 7010 4008 4008 4008 4008...
  • Seite 241 7010 P328 7009 7009 7009 P328...
  • Seite 242 8797 8798 8801 8798 8797 8797 8797 8801 8798...
  • Seite 243 8799 8800 8799 8800 8800 8799...
  • Seite 244 If the window doesn’t close properly, please release the screws, adjust the pro le and re-tighten the screws.
  • Seite 246 Please Note! Each of the 3 greenhouses come with its compatible panels kit as shown in the content list and in the relevant assembly steps...
  • Seite 247 Door assembly should be done according to this decision. 4008 4008 4008...
  • Seite 248 Door assembly should be done according to this decision. 8710 3016 8710 8710 3016 3016...
  • Seite 249 Door assembly should be done according to this decision. 4008 4037 4037 4008 4037 4008 4008...
  • Seite 250 Door assembly should be done according to this decision. 7086 7085 7084 7086 7085 7083 7088 M4 x 50mm 7088 7084 7085 7083...
  • Seite 251 Door assembly should be done according to this decision.
  • Seite 252 7442 344R 344L 7442 344L 344R 344L...
  • Seite 253 8470 8550 8470 8550 8470...
  • Seite 257 Palram Applications (1995) Ltd (Firmennummer:512106824) mit Sitz in Teradion Industrial Park, M.P Misgav 20174, Israel („Palram“) garantiert, Israel (“Palram”) warrants that the product will be free from defects in material or workmanship for a period of 5 years from the original dass das Produkt für einen Zeitraum von 5 Jahren ab dem Kaufdatum frei von Mängeln in Material und Verarbeitung wird, und den Definitionen,...
  • Seite 258 Le demandeur doit permettre à Palram d’inspecter le produit impliqué et le site d’installation lorsque le produit est dans son emplacement d’origine et n’a pas été enlevé ou déplacé ni modifié de quelque façon et/ou envoyer le produit à Palram pour vérification (les taxes et frais de ports n’étant pas à...
  • Seite 259 ‫4.1 כתב אחריות זה חל רק על הקונה המקורי של המוצר. הוא אינו עובר אל קונים או משתמשים אחרים במוצר‬ todavía en su posición original y no se ha retirado ni movido o alterado de ningún modo y/o devolver el Producto a Palram para evaluarlo.
  • Seite 260 Kompensasjon Tillverkaren (Palram) förbehåller sig rätten att självständigt undersöka orsaken till felet. Hvis et krav i henhold til denne garantien er korrekt anmeldt og godkjent av Palram, kan kjøperen ved Palrams valg enten (a) kjøpe et Ersättning erstatningsprodukt eller deler / s; eller (b) motta tilbakebetaling av originalproduktets eller delens kjøpskurs, alt i samsvar med følgende När reklamationen har anmälts enligt villkoren i garantin och godkänts av Palram har köparen (käranden) rätt att få...
  • Seite 261 ændret på nogen måde, og/eller lade produktet sende tilbage til Palram for afprøvning. Kantajan (reklamaation tehnyt) tulee sallia valmistajan / valmistajan edustajan tarkistaa vioittunut tuote sen alkuperäisessä...
  • Seite 262 Israël (“Palram”) garandeert dat het product vrij is van materiaal-en fabricagefouten voor een periode van 5 jaar vanaf de oorspronkelijke Israele (“Palram”) garantisce che il Prodotto sarà privo da difetti di materiale o di lavorazione in un periodo di 5 anni dalla data originale datum van aankoop door de definities en voorwaarden van deze garantie.
  • Seite 263 Nõuded ja teated Každá reklamácia musí byť oznámené písomne spoločnosti Palram do 30 dní po zistení vady na výrobku. K oznámeniu musí byť priložený Iga garantiinõue tuleb Palramile kirjalikult teatada 30 päeva jooksul pärast defektse toote avastamist, lisades originaalse müügikviitungi ja originál dokladu o zakúpení...
  • Seite 264 A kétségek elkerülése végett a hibás alkatrész/-ek kompenzációjára vonatkozó meghatározás, a fenti ütemezés szerint történik, melynek alapját a hibás alkatrész eredeti ára képzi. A Palram fenntartja azon jogát, hogy ha a termék vagy annak bármely alkatrésze nem érhető W celu uniknięcia jakichkolwiek wątpliwości, kalkulacja postanowienia w związku z odszkodowaniem za wadliwe części, zgodnie z el, vagy nem gyártják már, úgy azt más termékkel vagy alkatrésszel helyettesítse.
  • Seite 265 Podjetje Palram Applications (1995) Ltd (matična številka: 512106824), katerega sedež je na naslovu Teradion Industrial Park, M.P Misgav 20174, Toto podléhá definicím, podmínkám a ujednáním obsaženým v této záruce. Izrael (»podjetje Palram«), jamči, da bo izdelek brez napak v materialu ali pri proizvodnji še 5 let od originalnega datuma nakupa skladno z Podmínky opredelitvami pojmov in pogoji, ki jih vsebuje ta garancija.
  • Seite 266 Η εταιρεία Palram Εφαρμογές (1995) Ltd (αριθμός Εταιρεία: 512106824), η έδρα της οποίας βρίσκεται στο Teradion Industrial Park, MP Misgav 512106824 )(「 Palram 」)は、本保証書に含まれる定義、および条項を条件として、本製品に材料または製造上の欠陥がないことを最初 20174, Ισραήλ (“Palram”) εγγυάται ότι το προϊόν δεν θα είναι ελαττωματικά υλικά ή την εργασία για μια περίοδο 5 ετών από την αρχική の購入日から 5 年間保証します。...

Diese Anleitung auch für:

Harmony 6x12Mythos 6x12