Joyetech eVic Primo SE Kurzanleitung
Verfügbare Sprachen
Verfügbare Sprachen
Quicklinks
Notice
for
Use:
Thank you for choosing
Joyetech
Please read this manual carefully before use to ensure that your usage is correct
If you require any additional
information
Or have any questions
Joyetech
agent, Or visit Our website
at wwwjoyetech
Product
Introduction:
Having a large 0.96 inch OLED display and a new
easy-to-go
interface, the eVic primo SE is a Compact
starter mod available in multiple attractive colors. It
makes no sacrifice to power Or functions
compared to its
predecessors.
The evic primo SE reaches a formidable
BOW power along with a sequence
of unique features
including 2A quick charge, clock, custom logo and
preheat
Spring loaded 510 connector was precisely
designed which has a wide coverage for tanks with
various pins ranged from 4.0 to 5.5mm. It' s simplicity
and modesty will surely satisfy you on a daily basis.
Battery
Lid
3. Charging
& Upgrading
The evic Primo SE adopts new balanced charging
current up to 2.0A. You can also take out the cell and charge it in a stand alone charger. The USB port is placed on the down
end. Download the atest firmware at www.joyetech com/mvr software/ and connect it with a micro USB cable to upgrade
General
settings:
Switch
the mode
press the fire button 3 times to enter into the mode options Then press "-F" /
switch between Power/Bypass/Starb'CIock/TEMP(Ni,
Press
the fire button
to confirm
Note: The TEMP-SS316
mode is especially designed for stainless steel 316 type coil only
Parameter
settings
Under Temp/TCR mode, you' re able to adjust the temperature by pressing "+" /
press the fire button 4 times and press "
" button thus you can adjust the wattage
' button you can lock/unlock the resistance by pressing
press
the fire button 4 times then press
Continue to press"
" button then you can choose to display current, puff counts and puff time by pressing "+" button
Under VW mode, you' re able to adjust the wattage by pressing "+" /
press the fire button 4 times then you can choose to display current, puff counts and puff time by pressing "+" button
I.Temp/TCR
mode only supports
a maximum
of 1.5 ohm. The device will automatically
resistance is larger than 1.5 ohm
2.When Kanthal wire is applied under TemplTCR
mode, the device will also automatically
3
Real-time-clock
The evic Primo SE comes with real-time-clock
function. And it is displayed in two
ways: digital clock and analog clock
Press the fire button 3 times and switch the modes by pressing "+" button
Se ect the clock mode. Press the fire button 4 times and you can choose to display
digital clock or analog clock
Under digital clock, press the fire button 4 times and then press"
select time and date. When it is flashing, press "+"
able to adjust by pressing
/ "+"
button
Set screen
protection
When the device
is on, simultaneously
hold the fire button
protection duration. Press the fire button to confirm. The screen will display analog clock in standby
General
functions:
Stealth
function
When the device is on, simultaneously
hold the fire button and " —" button to turn on/off the
stealth function. When it is under stealth, you can still vape with the display off
Key lock function
When the device is on, simultaneously
press"
" and "+"
Lock function
5
press the fire button and "+"
button simultaneously
into the timeout duration setting. Click "
' butto
to set the duration.
Once the duration
is set (like 5 seconds),
when you hold the fire button and vape over the pre-set time, it'
Over 5S protect and shut down automatically.
Press the fire button 5 times to restart
Indication
and protection
Over 10 Second
Protection:
When the fire button is pressed for over 10 seconds, the output will shut off
and the screen wil display Over IOS protection.
Atomizer
Short-circuit
Protection:
When atomizer short-circuit
occurs, the screen will display Atomizer Short
No Atomizer
Alert: When you press the fire button and the screen displays No Atomizer
That mainly because there'
s no atomizer
attached on the battery or it is not tightly secured
Weak Battery
Alert: When the device is working with the atomizer where battery voltage is
under 2.9V, the screen will display Weak Battery
Meanwhile,
accordingly.
Low
Power
Alert:
When the battery voltage is under 3.3V, the screen will show Battery Low
If you continue to press the fire button, it will show Battery
7
Precautions:
1. Don' t use the device in stormy weather or dust condition.
2. Connect the USB port and charger properly. Unplug the charger when the charging
3. Don' t put the device in your pocket or handbag directly; don' t mix it with coins, jewe ry or other hard objects
4. The charger and battery may heat when charging, keep away from flammable
Warning:
1. Keep out of reach of children
2. This device is not recommended
for use by people under 18 or non-smokers.
3. This device is not suitable for use by pregnant or breast-feeding
4. This device is not suitable for use by people who' re allergic or sensitive to nicotine or those who can'
products for health reasons
5. This device is not suitable for use by people who has cardiovascular
6. This device is not suitable for use by people who diseases like cardiac dysfunction,
Attention:
1 Only have your device
repaired
by Joyetech.
Do not attempt to repair the unit by yourself
lnJury may occur.
2. Do not leave the device in high temperatures
or damp conditions,
operation temperature is within OC to 450 while charging and -IOC to 60 C while in use
3. Do not attempt to combine the device with parts of other brands of e-cigarettes.
and your warranty will be void if any damage caused by this way
9
about the product Or its use, please consult your local
com
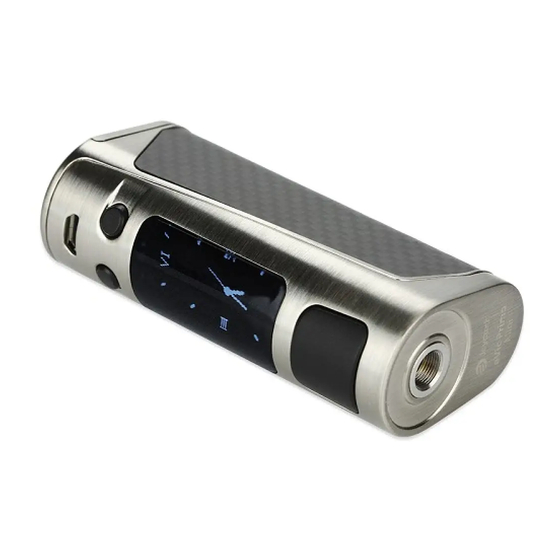
510 spring
Loaded
Connector
Fire
Button
OLED Display
Regulatory Buttons
usa
port
system which supports quick charge capability
with max charging
POWER
"
"
buttons
to
Ti, SS316)/TCR(M1,
M2, M3) modes
80.0
400
"
" buttons directly
" buttons directly
switch to VW mode when the
switch to VW mode.
. 14:07
2017-03-2g
P
80 .Ow
" button to
O.SOQ
button first and then you' re
and "-F " button.
Press "
button
to set
Stealth
buttons to tum on/off the button
to enter into the menu system.
Click "+"
button 3 times to enter
Press
the fire button
to confirm
Found.
output power will be reduced
Atom
'zer
Found
ow lock, then stop working
is completed
gas, liquid or other materials
women.
disease or respiratory disease.
high blood pressure or diabetes.
as damage or personal
as this may damage the device. The appropriate
Joyetech
will not take responsibility
parameter:
Output range: 1-80W
output modes: power/Bypassnemp(Ni,
Resistance
range: 0 05-1 50hm for Temp/TCR
Temperature
control: 100-3150C/ 200-6000F
Depth Of 510 pins applicable:
Battery: high-rate 18650 cell (continues discharge current *25A)
Max charging
current: 2 OA
Max Output current: 30A
How
to use:
1. Power
on/off:
put the device up side down. press and push the battery cover to Open the lid. put one 18650 battery inside and push
the cover back. press the fire button 5 times in quick succession
Note: 1 Please a ways use high rate 18650 cells with continuous discharge
2 Please pay attention to the positive and negative signs when installing the cells
3 Do NOT use cells with torn casings for safety reasons
2. Vaping
Hold the fire button and inhale through the mouthpiece.
mode and adjust the wattage to a proper range according
New coil, same coil
When replacing
the atomizer,
atomizer "base resistance"
is required. It should be used at room temperature
When the atomizer is detached, long press the fire button to initiate a reset. After fifing a new coil and reinstall the atomizer,
"New Coil, Same Coil" message will appear on display
POWER
Should you see the message accidentally
warm after use
press "
button so that the "base resistance" will remain the same. Always do
COIL
RMP
0009.
remember to choose proper mode and settings to fit the coil
80.0
set
TCR value
With the TCR (Temperature
4.00
v
control coils (Ni, Ti, SS) on your own
When the device is Off, press the fire button and "-F " button simultaneously
into the TCR setting menu:
1 press "+"
button to switch between TCR MI, M2 and M3;
"+"
button
2 press "
" button once first, then set the value with the "
/ " + " buttons;
3 Long press the fire button or eave it for a few seconds to confirm
TCR value range for normal
Note: 1 The above TCR value is 105multiplied of its actual value.
2. Value range is among 1-1000
When Key Lock is on, regulatory
under key lock
Screen
Min
Min
Switch
the display
Min
When the device is off, simultaneously
10
Min
Redo it to switch the display back.
IS
in
20
Min
Custom
logo
30
M in
Press the fire button and "+" button simultaneously
button and you'
II enter into the Logo Mode. Simply choose onloff by pressing "+" button. Press the
fire button to confirm. use the VT software for evic Primo SE to upload your logos (It should be single color
the screen
bmp. picture with 64840 pixel).
Preheat
function
Simply long press the fire button and "+" regulate button simultaneously
interface
Then press "-F" button 2 times to enter into Preheat Setting Menu
Press"
button first then press the fire button to switch between preheat power and duration
press "+"
or "— ' buttons to regulate
When the preheat function is on, the color of the wattage •con will tum reverse which was easy to check the preheat status.
Adjustable
timeout
duration
Due to different
vaping habits, you'
Please recharge the battery to reactivate. As soon as charging has commenced
I display
Atomizer
Low
Alert:
When
(Or < 0.050hm under TC/TCR mode), the screen wil display Atomizer
Temperature
protection:
Under TC/TCR mode, when the actual coi temperature
the set temperature,
the Screen will show protect
Device TOOHot Alert: When the temperature Ofdevice is higher than 70 C, output will shut
Off automatically
and display Device Too Hot.
Battery
using:
Over
10 s
Protectm
1 Please use correct charging equipment
2
Please choose good batteries from reputable
3
Please put the batteries on a hard surface when charging
POWER
4
Please
turn
off the device
COIL
AMP
c.on
07..g
5
Please use dry cloth to clean the battery and its terminals when needed
6
Don' t use batteries with torn casings
7
Don' t leave the charging
8
Don' t expose the battery to extreme heat, cold or direct sunlight.
2.SEv
9
Keep away from water or any liquids.
Weak
Bat
te ry
Warranty
terms:
Please refer to your Joyetech
Our warranty is not valid for products
Joyetech
agrees
to provide
1. This warranty
provides repair free of charge for defective
from date of purchase by the end user.
2. This warranty
may be void as a result of any of the following conditions:
* Customer does not provide warranty
* Merchandise
failure or damage is caused due to improper use or unauthorized
t use nicotine
* Merchandise
failure or damage as a result of excessive force such as dropping
* Merchandise
failure or damage as a result of usage outside of recommended
in usage manual).
* Merchandise failure or damage caused by improper use of water or other liquid (see usage manual for operating instructions).
* Merchandise
failure or damage due to usage with non-Joyetech
3. This warranty
does not cover personal
mouthpiece,
cartridge, atomizer
4. This warranty
does not cover any non-Joyetech
brand products during the warranty
Joyetech
reserves
the right of final decision
Joyetech
may interpret
and revise
Ti,
, M2, M3)
mode
for power/Start/Bypass
mode
4 0-5_5mm
to turn the device on or Off
current (CDC) 2 25A
Release the fire button and exhale. Please choose the correct
to your atomizer
before use
whose
resistance
is larger than the previous
press "+"
button to confirm that a new coil has been fitted
for any other reason —especially
when reinsta ling the same coil that is still
Coefficient
of Resistance)
function, you can customize
for about 5 seconds to enter
Material
Nickel
NiFe
temperature
control
coils:
Titanium
ss (303, 304, 316, 317)
buttons will not work to prevent accidental
adjustments.
press
and "+" buttons to turn the display upside down
to enter into the setting menu. Continue to press
to enter into the regulation
Long press the fire button to confirm
re allowed
to set the timeout duration from 5 to 15 seconds
low-voltage protection wi
resistance
Of the coil is lower
than O. Iohm
under
VW mode
Low
by reputable suppliers
companies
when
it is not in use.
batteries unattended
product warranty
card. We are not responsible
purchased from third party vendors
repair under
warranty
pursuant
to the following
Joyetech
brand merchandise.
card and original receipt of purchase.
components
(charger,
items or consumable
goods and attachments,
head, lanyard, and leather sheath
brand products.
This warranty
period of 90 days after date of purchase as indicated on proof of purchase
in all warranty
cases.
the content
of this warranty
terms.
2
one to some degree,
resetting
of the
TCR
Set
0120
your temperature
M2
0120
M3
0120
TCR Value Range
600-700
300-400
300-400
80-200
4
Stil , you can vape while it is
LOGO
Off
P reheat
Pwr
20_0xp.'
T ime
oas
as you prefer. Long
6
be unlocked
reaches to
Atom
[zer
Device
Low
Too
Hot
8
for any damage caused
by user error.
terms and conditions:
Warranty
period is 90 days
repair.
operating
conditions
(see precautions
battery, and power cable).
including
but not limited to:
is only valid for eligible Joyetech
10

Verwandte Anleitungen für Joyetech eVic Primo SE


Inhaltszusammenfassung für Joyetech eVic Primo SE
- Seite 1 II enter into the Logo Mode. Simply choose onloff by pressing "+" button. Press the Set screen protection fire button to confirm. use the VT software for evic Primo SE to upload your logos (It should be single color P reheat When the device...
- Seite 2 N'essayez pas de réparer l'appareil vous-méme car des dommages ou 4. Cette garantie ne couvre pas les produits de marque non-Joyetech. Cette garantie n'est valable que pour les produits de marque Joyetech admissibles pendant Ia periode de garantie de 90 jours apres Ia date d'achat, comme indiqué sur Ia preuve d achat...
- Seite 3 Beachten! Setzen Sie den Akku keiner extremen Hitze, Kälte Oder direkter Sonneneinstrahlung aus I _ Lassen Sie das Gerät nur direkt von Joyetech reparieren_ Versuchen Sie bitte nicht das Gerät selbständig zu Von Wasser Oder anderen Flüssigkeiten fernhalten reparieren urn weitere Schäden und/oder Personenschäden zu vermeiden 2 Das Gerät sollte bei einer Temperatur...
- Seite 4 1 Sölo tiene su dispositivo reparado por Joyetech_ NO intente reparar el aparato usted mismo ya que podria provocar daöos o de la marca Joyetech durante el periodo de garantia de 90 dias después de la fecha de compra como se indica en eI comprobante...
- Seite 5 4. Questa garanzia non copre i prodotti che non siano di marca Joyetech. La garanzia é valida solo ed esclusivamente per i prodotti di marca Joyetech nel periodo di 90 giomi dalla data di acquisto come indicato sullo scontrino di acquisto Joyetech...
- Seite 6 HecKonbK0 ceKYHA gT06bl BblKn»ognTb peXMM Stealth, npoaenaüTe npoueaypy eL_uepag stealth Lock evic Primo SE 1,1MeeT BCTpoeHHy»o MhKpocxeMy gacoB peanbHoro BpeMeHV1. TeKyuaee BpeM9 MO)KeTOT06paxaTbCA Kak Ha UM@POBOM uvl@ep6naTe, TaK M Ha «aHanor0BOM», COcypenKaMM. 6noKupoeKa KHonoK ynpaeneHun: OCHOBHYO KHonKy TPHXAbl, 3aTeM nepeKn»ogaiTe pe)KMMb1 KHonK051 Bb16epme pew,1M gacoB.
- Seite 7 (4%) Device Over IOS protection (10 Atom izer Device AtomizerShort (7 +74+f—Fh8) N0AtomizerFound RK+Y-%C) Over 10 s etuis protection Weak Battery Japanese _ldPdr1ese Joyetech Joyetech Joyetech Joyetech 90 E CT, • Joyetech Bd11EE-fi& Joyetech Joyetech Joyetech Joyetech Joyetech Japanese Japanese...
- Seite 8 4 Niniejsza gwarancja nie obejmuje produktöw marek innych ni2 Joyetech Niniejsza gwarancja dotyczy wyiqcznie uprawnionych gdy2 moze dojSé do uszkodzenia lub obra2eh ciaia produktöw marki Joyetech w okresie gwarancyjnym obejmujacym 90 dni od daty zakupu zgodnie z data na dowodzie zakupu 2 Nie nale2y pozostawiaé...
- Seite 9 4. Opladeren og batteriet kan blive varme når de op ader Hold dem væk fra brændbare materialer Joyetech reparerer under garanti i henhold til følgende betingelser: I Denne garanti giver dig ret til gratis reparation for defekte Joyetech produkter_ Garantiperioden er 90 dage fra den Advarsel: dato, slutbrugeren købte produktet...
- Seite 10 • Het niet functioneren of schade aan het product als gevolg van het gebruik ervan in combinatie met onderdelen niet van Joyetech 5. Mensen die last hebben van hart- en vaatziekten of een resp'ratoire aandoening wordt afgeraden dit apparaat te gebruken.
- Seite 11 Greek I H AEIT0upvia Temp/TCR uÖV0 To evic Primo SE U10dETEi Éva vÉo oü0Tnpa EtiooppöTTnons cpöpTlongTOOTTOiO U TT00Tnpi<El TOVöuvaTörr1TaTaxtias PöpTlong PE H OUOKEUri da yupi0El auTöuaTa OEÅElToupviaVW öTav n avTioraor1 Eival utyaÅüTEpn aTTö1 pÉY10T0 PEüpa pÉxPl2,0A. The USB port is placed on the down end.H Oüpa micro USB ßpi0KETal KOTLO p EPlå.
- Seite 12 AmpyetechB eVic Primo SE User Manual Manufacturer: Joyetech (Shenzhen) Electronics Co. Ltd. Manufactured by Joyetech Address: IF, 9th Blvd, Changxing High Tech Industry Zone, Made in China Shajing Town, Baoan District, ShenZhen, China. Email: service@joyetech.com (after sale) info@joyetech.com (wholesale) Web: wv.w_joyetech com...