Herunterladen Inhalt Inhalt Diese Seite drucken
Inhaltsverzeichnis

Werbung

Verfügbare Sprachen
  • DE

Verfügbare Sprachen

  • DEUTSCH, seite 53
Contact SAMSUNG WORLD-WIDE
If you have any questions or comments relating to Samsung products,
please contact the SAMSUNG customer care centre.
Comment contacter Samsung dans le monde
Si vous avez des suggestions ou des questions concernant les produits Samsung,
veuillez contacter le Service Consommateurs Samsung.
Kontakt zu Samsung
Falls Sie Fragen oder Anregungen zu Samsung-Produkten haben,
wenden Sie sich bitte an den Samsung-Kundendienst.
Contact Samsung wereldwijd
Wanneer u suggesties of vragen heeft met betrekking tot Samsung producten,
gelieve contact op te nemen met de consumenten dienst van Samsung.
Contacte con SAMSUNG WORLD-WIDE
Si tiene alguna pregunta o comentario referente a nuestros productos,
por favor contacte con nuestro Servicio de Atención al Cliente
Contacte SAMSUNG GLOBAL
Se tem algumas dúvidas ou comentários sobre os produtos Samsung,
contacte por favor a nossa linha de apoio a clientes Samsung.
Contatta SAMSUNG WORLD-WIDE
Se avete commenti o domande sui prodotti Samsung, contattate il Servizio Clienti
Samsung.
Country
Customer Care Center
BELGIUM
02 201 2418
CZECH REPUBLIC
844 000 844
DENMARK
38 322 887
FINLAND
09 693 79 554
FRANCE
08 25 08 65 65 (€ 0,15/min)
GERMANY
01805 - 121213 (€ 0,12/min)
HUNGARY
06 40 985 985
ITALIA
199 153 153
LUXEMBURG
02 261 03 710
NETHERLANDS
0900 20 200 88 (€ 0.10/min)
NORWAY
231 627 22
POLAND
0 801 801 881
PORTUGAL
80 8 200 128
SLOVAKIA
0850 123 989
SPAIN
902 10 11 30
SWEDEN
08 585 367 87
U.K
0870 242 0303
UKRAINE
8-800-502-0000
Web Site
www.samsung.com/be
www.samsung.com/cz
www.samsung.com/dk
www.samsung.com/fi
www.samsung.com/fr
www.samsung.de
www.samsung.com/hu
www.samsung.com/it
www.samsung.lu
www.samsung.com/nl
www.samsung.com/no
www.samsung.com/pl
www.samsung.com/pt
www.samsung.com/sk
www.samsung.com/es
www.samsung.com/se
www.samsung.com/uk
www.samsung.com/ur
BN68-01074B-00
Owner's Instructions
Before operating the unit,
please read this manual thoroughly,
and retain it for future reference.
ON-SCREEN MENUS
PC DISPLAY
TELETEXT
Register your product at www.samsung.com/global/register
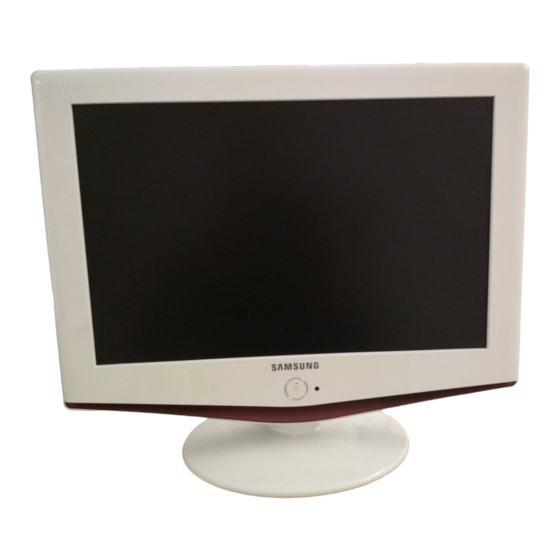
LCD TV
LE19R7

Werbung

Inhaltsverzeichnis
loading

Inhaltszusammenfassung für Samsung LE19R7

  • Seite 1 If you have any questions or comments relating to Samsung products, please contact the SAMSUNG customer care centre. Comment contacter Samsung dans le monde Si vous avez des suggestions ou des questions concernant les produits Samsung, veuillez contacter le Service Consommateurs Samsung. Kontakt zu Samsung Falls Sie Fragen oder Anregungen zu Samsung-Produkten haben, wenden Sie sich bitte an den Samsung-Kundendienst.
  • Seite 2 La visualizzazione prolungata di immagini fisse da videogiochi e PC può causare la visualizzazione di immagini residue parziali. Per evitare questo problema, ridurre la 'luminosità' e il 'contrasto' mentre si visualizzano immagini fisse. © 2006 Samsung Electronics Co., Ltd. All rights reserved.
  • Seite 3: Inhaltsverzeichnis

    Contents CONNECTING AND PREPARING YOUR TV SETTING THE TIME List of Parts .............. 2 Setting and Displaying the Current Time....15 Viewing the Control Panel ........3 Setting the Sleep Timer ........16 Viewing the Connection Panel........4 Switching the Television Viewing the Remote Control ........5 On and Off Automatically........17 Installing Batteries in the Remote Control ....
  • Seite 4 List of Features Please make sure the following items are included with your LCD TV. If any items are missing, contact your dealer. Remote Control Power Cord Wall Mount kit Owner’s Instructions & Batteries (AAA x 2) Registration Card Decoration Cover Cleaning Cloth English-2...
  • Seite 5: Viewing The Control Panel

    Viewing the Control Panel SOURCE Toggles between all the available input sources Press to change channels. In the on-screen menu, use (TV, Ext., AV, S-Video, PC, DVI). buttons as you use the buttons In the on-screen menu, use this button as you use the on the remote control.
  • Seite 6: Viewing The Connection Panel

    Viewing the Connection Panel The product colour and shape may vary depending on the model. Power Input Whenever you connect an external device to your TV, make sure that power on the unit is turned off. When connecting an external device, match the colour of the connection terminal to the cable. Connecting DVI - Connect the DVI connector to the DVD connector.
  • Seite 7: Viewing The Remote Control

    Connecting Set-Top Box, VCR or DVD - Connect the VCR or DVD SCART cable (optional) to the SCART connector of the VCR or DVD. - If you wish to connect both the Set-Top Box and VCR (or DVD), you should connect the Set-Top Box to the VCR (or DVD) and connect the VCR (or DVD) to your set.
  • Seite 8: Installing Batteries In The Remote Control

    Installing Batteries in the Remote Control Lift the cover at the back of the remote control upward as shown in the figure. Install two AAA size batteries. Make sure to match the “+” and “–” ends of the batteries with the diagram inside the compartment. Replace the cover.
  • Seite 9: Storing Channels Automatically

    Select the appropriate country by pressing the button. Press the ENTER button to confirm your choice. The “Auto Store” menu is displayed with the “Start” selected. Press the ENTER button. The channel search will start and end automatically. After all the available channels are stored, the “Clock Set” menu appears. ENTER Press the button at any time to interrupt the memorization process.
  • Seite 10: Storing Channels Manually

    Storing Channels Manually You can store up to 100 channels, including those received via cable networks. When storing channels manually, you can choose: Whether or not to store each of the channels found. The programme number of each stored channel which you wish to identify.
  • Seite 11: Editing The Channels

    Editing the Channels You can exclude the channels you chose from the channels you scanned. When you scan through the stored channels, those you have chosen to skip are not displayed. All channels that you do not specifically choose to skip are displayed during scanning.
  • Seite 12: Assigning Channels Names

    Assigning Channels Names Channel names will be assigned automatically when channel information is broadcast. These names can be changed, allowing you to assign new names. Press the MENU button to display the menu. Press the button to select “Channel”, then press the ENTER button. 2.
  • Seite 13: Changing The Picture Standard

    Changing the Picture Standard You can select the type of picture which best corresponds to your viewing requirements. Press the MENU button to display the menu. Press the button to select “Picture”, then press the ENTER button. 2. Press the ENTER button to select “Mode”. 3.
  • Seite 14: Changing The Colour Tone

    Changing the Colour Tone You can select the most comfortable colour tone to your eyes. Press the MENU button to display the menu. Press the button to select “Picture”, then press the ENTER button. Press the button to select “Colour Tone”, then press the ENTER button.
  • Seite 15: Adjusting The Colour Control

    Adjusting the Colour Control Adjust the individual R, G, B Colour Controls. Press the MENU button to display the menu. Press the button to select “Picture”, then press the ENTER button. Press the button to select “Colour Control ”, then press the ENTER button.
  • Seite 16: Changing The Sound Standard

    Changing the Sound Standard You can select the type of the special sound effect to be used when watching a given broadcast. Press the MENU button to display the menu. Press the button to select “Sound”, then press the ENTER button. Press the ENTER button to select “Mode”.
  • Seite 17: Adjusting The Volume Automatically

    Adjusting the Volume Automatically Each broadcasting station has its own signal conditions, and so it is not easy for you to adjust the volume every time the channel is changed. This feature let you automatically adjust the volume of the desired channel by lowering the sound output when the modulation signal is high or by raising the sound output when the modulation signal is low.
  • Seite 18: Setting The Sleep Timer

    Setting the Sleep Timer You can select a time period of between 30 and 180 minutes after which the television automatically switches to standby mode. Press the MENU button to display the menu. Press the button to select “Setup”, then press the ENTER button. Press the button to select “Time”, then press the ENTER button.
  • Seite 19: Switching The Television On And Off Automatically

    Switching the Television On and Off Automatically You can set the On/Off timers so that the set will: Switch on automatically and tune to the channel of your choice at the time you select. Switch off automatically at the time you select. Press the MENU button to display the menu.
  • Seite 20: Setting The Blue Screen Mode

    Setting the Blue Screen Mode If no signal is being received or the signal is very weak, a blue screen automatically replaces the noisy picture background. If you wish to continue viewing the poor picture, you must set the "Blue Screen" mode to "Off".
  • Seite 21: Editing The Input Source Names

    Editing the Input Source Names Name the device connected to the input jacks to make your input source selection easier. Press the MENU button to display the menu. Press the ENTER button, to select “Input”. Press the button to select “Edit Name”, then press the ENTER button.
  • Seite 22: Displaying The Teletext Information

    Displaying the Teletext Information You can display teletext information at any time, but signal reception must be good. Otherwise: Information may be missing. Some pages may not be displayed. To activate the teletext mode and display the contents page: 1. Using the P ) or P ) button, select the channel providing the teletext service.
  • Seite 23: Using Fastext To Select A Teletext Page

    Using Fastext to Select a Teletext Page The various topics included in the teletext pages are colour-coded, and can be selected by pressing the coloured buttons on the remote control. 1. Display the teletext contents page by pressing the TTX/MIX ( ) button.
  • Seite 24: Setting Up Your Pc Software (Based On Windows Xp)

    Windows and your particular video card. Even if your actual screens look different, the same, basic set-up information will apply in almost all cases. (If not, contact your computer manufacturer or Samsung Dealer.) First, click on “Control Panel” on the Windows start menu.
  • Seite 25: Setting The Pc

    Setting the PC Image Lock: The purpose of picture quality adjustment is to remove or reduce picture noise. If the noise is not removed by Fine-tuning alone, then adjust the frequency as best as possible (coarse) and Fine-tune again. After the noise has been reduced, re-adjust the picture so that it is aligned on the center of screen.
  • Seite 26: How To Adjust The Stand

    Wall mount items (sold separately) allow you to mount the TV on the wall. For the detailed information on installing the Wall Mount, see the instruction in the Wall Mount items. Contact a technician for installing the wall bracket. Samsung Electronics is not responsible for any damage to the product or injury to yourself or others if you elect to install the TV on your own.
  • Seite 27: Troubleshooting: Before Contacting Service Personnel

    The TFT LCD panel uses a panel consisting of sub pixels (3,888,000) which require sophisticated technology to produce. However, there may be few bright or dark pixels on the screen. These pixels will have no impact on the performance of the product. Technical and Environmental Specifications Model Name LE19R7 Screen Size (Diagonal) 19 inches Power Supply...
  • Seite 28 Table des matières CONNEXION ET PREPARATION DE VOTRE TELEVISEUR REGLAGE DE L'HEURE Liste de pièces............2 Réglage et affichage de l'heure......15 Présentation du panneau de commande ....3 Réglage de la minuterie de mise en veille ..16 Présentation du panneau de branchement ....4 Marche et arrêt automatique du téléviseur ..17 Présentation de la télécommande ......
  • Seite 29: Liste De Pièces

    Liste de pièces Veuillez vous assurer que les composants suivants sont bien inclus avec votre téléviseur LCD. Le cas échéant, contactez votre revendeur. Cordon d'alimentation Kit de fixation murale Télécommande et Instructions d'utilisation batteries (AAA x 2) Caches décoratifs Carte de garantie / Chiffon de nettoyage Guide de sécurité...
  • Seite 30: Présentation Du Panneau De Commande

    Présentation du panneau de commande SOURCE Bascule entre toutes les sources d'entrée disponibles. Pour changer de canal. Dans le menu à l'écran, utilisez (TV, Ext., AV, S-Video, PC, DVI). Dans le menu à l'écran, les boutons de la même manière que les utilisez ce bouton de la même manière que le boutons de la télécommande.
  • Seite 31: Présentation Du Panneau De Branchement

    Présentation du panneau de branchement La couleur et la forme du produit peuvent varier en fonction du modèle. Entrée del’alimentation Lorsque vous raccordez un appareil externe au téléviseur, assurez-vous que l'appareil est arrêté. Lorsque vous connectez un périphérique externe, faites correspondre les couleurs du terminal de connexion et du câble. Branchement DVI - Branchez la prise DVI à...
  • Seite 32: Présentation De La Télécommande

    Branchement d'un boîtier décodeur, d'un magnétoscope ou d'un lecteur DVD - Connectez le câble SCART (en option) du magnétoscope ou du lecteur DVD au connecteur SCART de ces appareils. - Si vous souhaitez brancher en même temps le boîtier décodeur et le magnétoscope (ou lecteur DVD), branchez ces appareils ensemble puis connectez le magnétoscope (ou le lecteur DVD) à...
  • Seite 33: Installation Des Piles Dans La Télécommande

    Installation des piles dans la télécommande Soulevez le panneau à l’arrière de la télécommande, comme illustré. Placez deux piles AAA. Assurez-vous de faire correspon dre les pôles “+” et “-” des piles avec le schéma situé à l'intérieur du compartiment. Replacez le couvercle.
  • Seite 34: Mémorisation Automatique Des Chaînes

    Sélectionnez la pays appropriée à l'aide de la touche Appuyez sur le bouton ENTER pour confirmer votre choix. Le menu “Mémorisation Auto” s'affiche. La commande “Démarrer” est sélectionnée. Appuyez sur le bouton ENTER. La recherche des chaînes débute et s'arrête automatiquement. Lorsque toutes les chaînes disponibles ont été...
  • Seite 35: Mémorisation Manuelle Des Chaînes

    Mémorisation manuelle des chaînes Vous pouvez mémoriser jusqu’à 100 chaînes, y compris celles reçus via les réseaux câblés. Lors de la mémorisation manuelle des chaînes, vous pouvez choisir : De mémoriser ou non chaque chaîne trouvée. Le numéro du programme qui vous servira à identifierchaque chaîne mémorisée.
  • Seite 36: Édition Des Chaînes

    Édition des chaînes Vous pouvez exclure des chaînes que vous avez choisies parmi celles que vous avez balayées. Lorsque vous balayez les chaînes mémorisées, celles que vous avez choisies d'éviter ne s’affichent pas. Toutes les chaînes que vous ne choisissez pas spécifiquement d'éviter s’affichent lors du balayage. Utilisez les boutons numériques pour sélectionner directement la chaîne à...
  • Seite 37: Attribution De Noms Aux Canaux

    Attribution de noms aux canaux Les noms de chaînes sont attribués automatiquement lorsque les informations des chaînes sont émises. Ces noms peuvent être changés, vous autorisant à attribuer de nouveaux noms. Appuyez sur le bouton MENU pour afficher le menu. Appuyez sur le bouton pour sélectionner “Canal”, puis sur la touche ENTER.
  • Seite 38: Changement Du Mode Image

    Changement du mode image Vous pouvez sélectionner le type d'image qui correspond le mieux à vos exigences d'affichage. Appuyez sur le bouton MENU pour afficher le menu. Appuyez sur le bouton pour sélectionner “Image”, puis sur la touche ENTER. 2. Appuyez sur le bouton ENTER pour sélectionner “Mode”. 3.
  • Seite 39: Changement De La Nuance Couleur

    Changement de la nuance couleur Vous pouvez sélectionner la nuance de couleur qui vous convient le mieux. Appuyez sur le bouton MENU pour afficher le menu. Appuyez sur le bouton pour sélectionner “Image”, puis sur la touche ENTER. 2. Appuyez sur le bouton pour sélectionner “Nuance Coul.”, puis sur la touche ENTER.
  • Seite 40: Réglage Du Contrôle De La Couleur

    Réglage du contrôle de la couleur Réglez les différents contrôles de couleurs R, V, B. Appuyez sur le bouton MENU pour afficher le menu. Appuyez sur le bouton pour sélectionner “Image”, puis appuyez sur le bouton ENTER. Appuyez sur le bouton pour sélectionner “Contrôle Couleur”, puis appuyez sur le bouton ENTER.
  • Seite 41: Changement De La Norme Son

    Changement de la norme Son Vous pouvez sélectionner le type d’effet sonore souhaité lorsque vous regardez un programme donné. Appuyez sur le bouton MENU pour afficher le menu. Appuyez sur le bouton pour sélectionner “Son”, puis sur la touche ENTER. Appuyez de nouveau sur le bouton ENTER pour sélectionner “Mode”.
  • Seite 42: Réglage Automatique Du Volume

    Réglage automatique du volume Chaque station de radiodiffusion possède ses propres conditions d'émission de signal. Il vous faut alors régler le volume à chaque fois que vous changez de chaîne. Cette fonction vous permet de régler automatiquement le volume de la chaîne en diminuant le volume de sortie du son si la modulation du signal est trop forte ou en augmentant le volume de sortie du son si le signal est trop faible.
  • Seite 43: Réglage De La Minuterie De Mise En Veille

    Réglage de la minuterie de mise en veille Vous pouvez sélectionner une durée comprise entre 30 et 180 minutes à l'issue de laquelle le téléviseur passera automatiquement en mode veille. Appuyez sur le bouton MENU pour afficher le menu. Appuyez sur le bouton pour sélectionner “Configuration”, puis sur la touche ENTER.
  • Seite 44: Marche Et Arrêt Automatique Du Téléviseur

    Marche et arrêt automatique du téléviseur Vous pouvez activer ou désactiver la minuterie afin que : Le téléviseur s’allume automatiquement et se positionne sur la chaîne de votre choix au moment que vous avez choisi. Le téléviseur s'éteigne automatiquement au moment que vous avezchoisi.
  • Seite 45: Réglage Du Mode D'écran Bleu

    Réglage du mode d’écran bleu Si aucun signal n'est reçu ou si le signal est très faible, un écran bleu remplace automatiquement l'arrière-plan de l'image parasité. Pour continuer malgré tout à afficher l'image de mauvaise qualité, vous devez “Arrêt” l'option “Ecran Bleu”. Appuyez sur le bouton MENU pour afficher le menu.
  • Seite 46: Modification Du Nom D'une Source D'entrée

    Modification du nom d'une source d'entrée Donnez un nom aux appareils connectés aux prises d'entrée, de manière à faciliter la sélection des sources d'entrée. Appuyez sur le bouton MENU pour afficher le menu. Appuyez sur le bouton ENTER pour sélectionner “Entrée”. Appuyez sur le bouton pour sélectionner “Modif.
  • Seite 47: Affichage Des Informations Télétexte

    Affichage des informations Télétexte Vous pouvez afficher des informations télétexte à tout moment, mais la réception du signal doit être bonne. Dans le cas contraire : Des informations peuvent manquer. Des pages peuvent ne pas être affichées. Pour activer le mode télétexte et afficher les informations télétexte : 1.
  • Seite 48: Utilisation Du Système Fastext Pour Sélectionner Une Page Télétexte

    Utilisation du système Fastext pour sélectionner une page télétexte Les différents sujets inclus dans les pages du Télétexte disposent d’un code de couleur et peuvent être sélectionnés à l’aide des boutons colorés de la télécommande. 1. Affichez les informations du Télétexte en appuyant sur le bouton TTX/MIX ( 2.
  • Seite 49: Paramétrage Du Logiciel Pc (Basé Sur Windows Xp)

    Même si vos écrans sont différents, des informations de configuration de base identiques seront applicables dans pratiquement tous les cas. (Si ce n'est pas le cas, contactez le fabricant de votre ordinateur ou un revendeur Samsung.) Cliquez sur “Panneau de configuration” dans le menu Démarrer de Windows.
  • Seite 50: Sélection Du Pc

    Sélection du PC Verrouillage Image: Le but du réglage de la qualité de l’image est d’éliminer ou de réduire le bruit parasite de l’image (défauts). Si le bruit parasite n'est pas éliminé en effectuant uniquement une syntonisation fine, réglez la fréquence du mieux que vous pouvez (approximative) puis effectuez à...
  • Seite 51: Réglage Du Socle

    Faites appel à un technicien pour obtenir de l'assistance lors de l'installation du support mural. Samsung Electronics n'est pas responsable de tout dommage au produit ou toute blessure sur vous-même ou une autre personne si vous choisissez d'installer le téléviseur vous-même.
  • Seite 52: Résolution Des Problèmes Avant De Contacter Le Personnel Qualifié Pour Le Dépannage

    Le panneau LCD TFT est doté de sous-pixels (3.888.000) exigeant le déploiement d’une technologie sophistiquée. Il se peut cependant que quelques pixels clairs ou foncés apparaissent sur l’écran. Ces pixels n’auront aucune incidence sur les performances du produit. Spécifications techniques et environnementales Modèle LE19R7 Taille de l’écran (diagonale) 19 pouces Alimentation AC 220-240 V, 50 Hz Consommation PC Résolution...
  • Seite 53 Inhalt ANSCHLIESSEN UND VORBEREITEN DES FERNSEHGERÄTS EINSTELLEN DER ZEIT Lieferumfang ............2 Uhrzeit einstellen und anzeigen ......15 Bedienfeld ..............3 Stellen der Einschlafschaltuhr ......16 Anschlussfeld............4 Fernseher automatisch ein- und ausschalten ..17 Fernbedienung............5 Batterien in die Fernbedienung montieren ....6 Ein-und Ausschalten ..........
  • Seite 54: Lieferumfang

    Lieferumfang Überprüfen Sie die Verpackung Ihres LCD-Fernsehgeräts auf Vollständigkeit. Sollten Teile fehlen, wenden Sie sich bitte an Ihren Händler. Fernbedienung und 2 Netzkabel Wandhalterung Bedienungsanleitung Batterien (Typ AAA) Garantiekarte/ Abdeckplatten Reinigungstuch Sicherheitshinweise/ Registrierungskarte Deutsch-2...
  • Seite 55: Bedienfeld

    Bedienfeld SOURCE Schaltet zwischen allen verfügbaren Signalquellen um Kanäle wechseln. Im Bildschirmmenü können Sie die Tasten (TV - Ext. - AV - S-Video - PC - DVI). wie die Tasten auf der Fernbedienung Im Bildschirmmenü können Sie diese Taste wie die Taste verwenden.
  • Seite 56: Anschlussfeld

    Anschlussfeld Die Produktfarbe und -form kann je nach Modell unterschiedlich sein. Netzkabelbuchse Wenn Sie ein externes Gerät an das Fernsehgerät anschließen möchten, muss das Gerät unbedingt ausgeschaltet sein. Achten Sie beim Anschließen von Kabeln an die Ausgänge des Geräts darauf, das die Kabel den entsprechenden farbcodierten Anschlüssen zugeordnet werden.
  • Seite 57: Fernbedienung

    Set-Top-Box, Videorecorder oder DVD-Gerät anschließen - Schließen Sie das SCART-Kabel (optional) des Videorecorders oder DVD-Geräts an den SCART-Anschluss des Videorecorders oder DVD-Geräts an. - Wenn Sie sowohl Set-Top-Box als auch Videorecorder (oder DVD-Gerät) anschließen möchten, verbinden Sie die Set-Top-Box mit dem Videorecorder (oder DVD-Gerät) und den Videorecorder (oder das DVD-Gerät) mit dem Fernsehgerät. Externe A/V-Geräte anschließen - Schließen Sie ein Cinch- oder ein S-Video-Kabel (optional) an ein geeignetes externes A/V-Gerät an (z.
  • Seite 58: Batterien In Die Fernbedienung Montieren

    Batterien in die Fernbedienung montieren Heben Sie die Abdeckung auf der Rückseite der Fernbedienung an, wie in der Abbildung dargestellt. Legen Sie zwei AAA-Batterien ein. Achten Sie darauf, dass die Pole der Batterien wie im Batteriefach angezeigt ausgerichtet sind. Schieben Sie die Abdeckung wieder auf die Fernbedienung. Wenn die Fernbedienung für einen längeren Zeitraum nicht verwendet wird, nehmen Sie die Batterien heraus, und lagern Sie sie an einem kühlen, trockenen Ort.
  • Seite 59: Kanäle Automatisch Speichern

    Wählen Sie die entsprechende Land aus, indem Sie die Taste oder drücken. Bestätigen Sie Ihre Auswahl mit der Taste ENTER. Das Menü “Autom. speichern” wird mit der aktivierten Option “Start” angezeigt. Drücken Sie die Taste ENTER . Die Kanalsuche wird automatisch gestartet und beendet.Wenn Sie alle verfügbaren Sender gespeichert haben, wird das Menü...
  • Seite 60: Kanäle Manuell Speichern

    Kanäle manuell speichern Sie können bis zu 100 Kanäle, einschließlich Kabelkanälen, speichern. Bei der manuellen Kanalspeicherung haben Sie folgende Optionen: Gefundene Kanäle speichern oder nicht. Die Programmnummer des jeweiligen gespeicherten Kanals bestimmen. Drücken Sie die Taste MENU, um das Menü anzuzeigen. Drücken Sie die Taste oder , um “Kanal”...
  • Seite 61: Kanäle Bearbeiten

    Kanäle bearbeiten Sie haben die Möglichkeit, bei der Kanalsuche gefundene Kanäle zu überspringen. Wenn Sie dann die gespeicherten Kanäle durch- laufen, werden die entsprechenden Kanäle nicht angezeigt. Alle Kanäle, die nicht ausdrücklich übersprungen werden sollen, werden angezeigt. Verwenden Sie die Nummerntasten, um den hinzuzufügenden oder zu löschenden Sender direkt auszuwählen.
  • Seite 62: Kanalnamen Zuweisen

    Kanalnamen zuweisen Kanalnamen werden automatisch zugewiesen, sofern Kanalinformormationen ausgestrahlt werden. Diese Namen können geändert werden, so dass Sie neue Namen vergeben können. Drücken Sie die Taste MENU, um das Menü anzuzeigen. Drücken Sie die Taste oder , um “Kanal” auszuwählen, und drücken Sie dann die Taste ENTER.
  • Seite 63: Bildstandard Ändern

    Bildstandard ändern Sie können den Bildstandard auswählen, der für Ihre Sehgewohnheiten am besten geeignet ist. Drücken Sie die Taste MENU, um das Menü anzuzeigen. Drücken Sie die Taste oder , um “Bild” auszuwählen, und drücken Sie dann die Taste ENTER. 2.
  • Seite 64: Farbwert Ändern

    Farbwert ändern Sie können den für Ihre Augen angenehmsten Farbton auswählen. Drücken Sie die Taste MENU, um das Menü anzuzeigen. Drücken Sie die Taste oder , um “Bild” auszuwählen, und drücken Sie dann die Taste ENTER. 2. Drücken Sie die Taste oder , um “Farbtemp.”...
  • Seite 65: Farbeinstellungen Ändern

    Farbeinstellungen ändern Sie können die Einstellungen für die Farben R, G und B ändern. Drücken Sie die Taste MENU, um das Menü anzuzeigen. Drücken Sie die Taste oder , um “Bild” auszuwählen, und drücken Sie dann die Taste ENTER. Drücken Sie die Taste oder , um “Farbanpassung”...
  • Seite 66: Tonwiedergabestandard Ändern

    Tonwiedergabestandard ändern Sie können spezielle Toneffekte auswählen, die wiedergegeben werden, wenn Sie eine bestimmte Sendung sehen. Drücken Sie die Taste MENU, um das Menü anzuzeigen. Drücken Sie die Taste oder , um “Ton” auszuwählen, und drücken Sie dann die Taste ENTER. Drücken Sie die Taste ENTER, um “Modus”...
  • Seite 67: Lautstärke Automatisch Einstellen

    Lautstärke automatisch einstellen Jeder Fernsehsender verfügt über seine eigenen Signalbedingungen, so dass es für Sie mitunter recht mühsam sein kann, beim Umschalten des Programms jedes Mal die Lautstärke nachzuregeln. Mit dieser Funktion können Sie die Lautstärke des gewünschten Programms automatisch einstellen lassen, indem bei einem hohen Modulationssignal die Lautstärke verringert und bei einem niedrigen Modulationssignal die Lautstärke erhöht wird.
  • Seite 68: Stellen Der Einschlafschaltuhr

    Stellen der Einschlafschaltuhr Sie können ein Intervall zwischen 30 und 180 Minuten auswählen, nach dessen Ablauf der Fernseher automatisch in den Standby-Modus geschaltet wird. Drücken Sie die Taste MENU, um das Menü anzuzeigen. Drücken Sie die Taste oder , um “Einstellungen” auszuwählen, und drücken Sie dann die Taste ENTER.
  • Seite 69: Fernseher Automatisch Ein- Und Ausschalten

    Fernseher automatisch ein- und ausschalten Sie können die Zeitschaltuhren des Fernsehgeräts stellen, so dass Folgendes geschieht : Automatisches Einschalten des Fernsehgeräts und Einstellen des aus gewählten Senders. Automatisches Ausschalten zum ausgewählten Zeitpunkt. Drücken Sie die Taste MENU, um das Menü anzuzeigen. Drücken Sie die Taste oder , um “Einstellungen”...
  • Seite 70: Anzeigen Eines Blauen Bildschirms

    Anzeigen eines blauen Bildschirms Wenn kein Signal empfangen wird oder das Signal sehr schwach ist, wird der rauschende Bildhintergrund automatisch durch ein blaues Bild ersetzt. Wenn Sie das schlechte Bild weiterhin anzeigen möchten, legen Sie den Modus “Blaues Bild” auf “Aus” fest. Drücken Sie die Taste MENU, um das Menü...
  • Seite 71: Signalquellennamen Bearbeiten

    Signalquellennamen bearbeiten Vergeben Sie für die an die Eingangsbuchsen angeschlossenen Geräte Namen, um die Auswahl der Signalquelle zu vereinfachen. Drücken Sie die Taste MENU, um das Menü anzuzeigen. Drücken Sie die Taste ENTER, um “Eingang” auszuwählen. Drücken Sie die Taste oder , um “Name bearb.”...
  • Seite 72: Anzeigen Von Videotextinformationen

    Anzeigen von Videotextinformationen Sie können jederzeit Videotextinformationen anzeigen, allerdings muss der Signalempfang hierzu gut sein. Anderenfalls: Informationen fehlen. Einige Seiten nicht angezeigt werden können. So aktivieren Sie den Videotext und zeigen die Inhaltsseite an: 1. Drücken Sie die Taste P ) oder P ), um den gewünschten Sender auszuwählen, der den Videotextdienst bietet.
  • Seite 73: Auswählen Einer Videotextseite Mit Fastext

    Auswählen einer Videotextseite mit Fastext Die verschiedenen Themen auf den Videotextseiten sind farbig gekennzeichnet und lassen sich mit den Farbtasten auf der Fernbedienung anwählen. 1. Drücken Sie die Taste TTX/MIX ( ), um die Videotext-Startseite anzuzeigen.. 2. Drücken Sie die farbige Taste, die dem Thema entspricht, das Sie anzeigen möchten.
  • Seite 74: Konfigurieren Des Pcs

    Videokarte. Selbst wenn das angezeigte Fenster abweicht, gelten in den meisten Fällen die gleichen Grundinformationen für die Einstellung. (Wenden Sie sich andernfalls an den Computerhersteller oder Samsung-Händler.) Klicken Sie im Startmenü von Windows auf “Control Pane”. Wenn das Fenster Systemsteuerung angezeigt wird, doppelklicken Sie auf “Appearance and Themes”.
  • Seite 75: Pc Auswählen

    PC auswählen Bildjustierung: Mithilfe der Anpassung der Bildqualität sollen Bildstörungen beseitigt oder verringert werden. Sollte sich das Bildrauschen durch die Feinabstimmung allein nicht beheben lassen, stellen Sie zunächst die Frequenz möglichst genau ein (Grob), und führen Sie dann erneut eine Feinabstimmung durch. Nachdem die Störungen reduziert worden sind, richten Sie das Bild erneut aus, so dass es auf dem Bildschirm zentriert ist.
  • Seite 76: Standfuß Einstellen

    Montieren der Wandhalterung finden Sie in den Anweisungen, die im Lieferumfang der Wandhalterung enthalten sind. Lassen Sie sich beim Anbringen der Wandmontagehalterung von einem Techniker helfen. Samsung Electronics haftet nicht für Schäden an Gerät oder Personen, wenn die Montage vom Kunden selbst durchgeführt wird.
  • Seite 77: Fehlerbehebung: Vor Der Kontaktaufnahme Mit Dem Kundendienst

    Verfahren hergestellt werden können. Es können zwar einige helle oder dunkle Pixel auf dem Bildschirm erscheinen, sie beein- trächtigen die Leistung des Produktes jedoch nicht. Technische Daten und Umgebungsbedingungen Modell LE19R7 Bildgröße (Diagonal) 19 Zoll Stromversorgung AC 220-240 V, 50 Hz Leistungsaufnahme Auflösung (PC)
  • Seite 78 Inhoud UWTV/MONITOR AANSLUITEN EN GEBRUIKSKLAAR MAKEN TIJD INSTELLEN Lijst met onderdelen ..........2 De huidige tijd instellen en weergeven ....15 Overzicht van het bedieningspaneel ......3 Standby-klok instellen ..........16 Overzicht van het aansluitpaneel ......4 De televisie automatisch aan uitschakelen ..17 Overzicht van de afstandsbediening ......
  • Seite 79: Lijst Met Onderdelen

    Lijst met onderdelen Controleer of de volgende onderdelen bij uw LCD-TV geleverd zijn. Neem contact op met uw verkoper als er onderdelen ontbreken. Afstandsbediening en 2 Netsnoer Muurbevestiging Gebruikershandleiding batterijen (AAA) Garantiekaart / Decoratiekapjes Schoonmaakdoek Veiligheidsinstructies / Registratiekaarten Nederlands-2...
  • Seite 80: Overzicht Van Het Bedieningspaneel

    Overzicht van het bedieningspaneel SOURCE Schakelen tussen alle beschikbare ingangsbronnen Druk op de afstandsbediening om van kanaal te (TV, Ext., AV, S-Video, PC, DVI). veranderen. Gebruik de knoppen in het Gebruik deze knop in het schermmenu zoals u de knop schermmenu zoals u de knoppen gebruikt op de ENTER gebruikt op de afstandsbediening.
  • Seite 81: Overzicht Van Het Aansluitpaneel

    Overzicht van het aansluitpaneel De kleur en vormgeving van het product kunnen afhankelijk van het model variëren. Netvoeding Wanneer u een extern apparaat aansluit op de tv moet het toestel zijn uitgeschakeld. Zorg bij het aansluiten van een externe aansluiting dat de kleuren van de aansluiting en de kabel overeenkomen. DVI aansluiten - Sluit de DVI-stekker aan op de DVD-stekker.
  • Seite 82: Overzicht Van De Afstandsbediening

    Een Set-Top Box, videorecorder of dvd-speler aansluiten - Sluit de VCR- of DVD- SCART-kabel (optioneel) aan op de SCART-aansluiting van de videorecorder of dvd-speler. - Als u zowel de Set-Top Box en de videorecorder (of dvd-speler) tegelijk wenst aan te sluiten, sluit u eerst de Set-Top Box op de videorecorder (of dvd-speler) aan en vervolgens de videorecorder (of dvd) op uw tv/monitor.
  • Seite 83: Batterijen In De Afstandsbediening Plaatsen

    Batterijen in de afstandsbediening plaatsen Open het klepje achterop de afstandsbediening met een opwaartse beweging zoals te zien in de afbeelding. Plaats twee AAA batterijen. Zorg ervoor dat de “+” en “-” uiteinden van de batterijen overeenkomen met de afbeelding in het vakje.
  • Seite 84: Kanalen Automatisch Opslaan

    Kies de juiste land door op de toets te drukken. Druk op ENTER om uw keuze te bevestigen. Het menu “Automatisch opslaan” wordt weergegeven door “Start” te kiezen. Druk op ENTER Het zoeken naar een kanaal start en stopt automatisch. Nadat alle beschikbare kanalen zijn opgeslagen, wordt het menu “Klok instellen”...
  • Seite 85: Kanalen Handmatig Opslaan

    Kanalen handmatig opslaan U kunt maximaal 100 tv-kanalen opslaan, waaronder kanalen die via kabelnetwerken worden ontvangen. Bij het handmatig opslaan van kanalen kunt u het volgende kiezen: Of u een gevonden kanaal al dan niet opslaat. Welke programmanummers u aan de opgeslagen kanalen toewijst. Druk op de toets MENU voor weergave van het menu.
  • Seite 86: Kanalen Wijzigen

    Kanalen wijzigen U kunt kanalen naar keuze uit de scanbewerking weglaten. Wanneer u door de opgeslagen kanalen scant, worden die kanalen overgeslagen en niet weergegeven. Alle kanalen die u niet wilt overslaan, worden tijdens het scannen weergegeven. Met de numerieke toetsen kunt u het kanaal selecteren dat u wilt toevoegen of verwijderen.
  • Seite 87: Kanaalnamen Vastleggen

    Kanaalnamen vastleggen Kanalen krijgen automatisch een naam toegewezen wanneer kanaalinformatie wordt uitgezonden. U kunt deze naam wijzigen en nieuwe Naam toewijzen. Druk op de toets MENU voor weergave van het menu. Druk op de toets om “Kanaal” te selecteren en druk vervolgens op ENTER.
  • Seite 88: De Beeldstandaard Aanpassen

    De beeldstandaard aanpassen U kunt het beeld selecteren dat het best overeenkomt met uw wensen. Druk op de toets MENU voor weergave van het menu. Druk op de toets om “Beeld” te selecteren en druk vervolgens op ENTER. 2. Druk nogmaals op de toets ENTER om “Modus” te selecteren. 3.
  • Seite 89: De Kleurtint Wijzigen

    De kleurtint wijzigen U kunt de kleurtoon selecteren die u het prettigst vindt voor uw ogen. Druk op de toets MENU voor weergave van het menu. Druk op de toets om “Beeld” te selecteren en druk vervolgens op ENTER. 2. Druk op de toets om “Kleur tint”...
  • Seite 90: De Kleurinstelling Aanpassen

    De kleurinstelling aanpassen De individuele kleurinstellingen voor R, G, B aanpassen. Druk op de toets MENU om het menu weer te geven. Druk op om “Beeld” te selecteren en druk vervolgens op ENTER. Druk op om “Kleur” te selecteren en druk vervolgens op ENTER.
  • Seite 91: De Geluidsstandaard Wijzigen

    De geluidsstandaard wijzigen U kunt het geluidseffect selecteren dat het best overeenkomt met de beelden die u bekijkt. Druk op de toets MENU voor weergave van het menu. Druk op de toets om “Geluid” te selecteren en druk vervolgens op ENTER. Druk nogmaals op de toets ENTER om “Modus”...
  • Seite 92: Het Volume Automatisch Aanpassen

    Het volume automatisch aanpassens Elk zendstation heeft haar eigen signaalcondities waardoor het voor u niet handig is het volume in te moeten stellen zodra een kanaal is gewijzigd. Met deze functie kunt u automatisch het volume van het gewenste kanaal instellen door de geluidsuitvoer te verlagen wanneer het modulatiesignaal hoog is of door de geluidsoutput te verhogen wanneer het modulatiesignaal laag is.
  • Seite 93: Standby-Klok Instellen

    Standby-klok instellen U kunt een tijdsduur tussen 30 en 180 minuten instellen waarna de TV automatisch uitschakelt. Druk op de toets MENU voor weergave van het menu. Druk op de toets om “Instellingen” te selecteren en druk vervolgens op ENTER. Druk op de toets om “Tijd”...
  • Seite 94: De Televisie Automatisch Aan Uitschakelen

    De televisie automatisch aan uitschakelen U kunt de aan/uit-timers zo instellen dat de TV: Automatisch wordt ingeschakeld en ingesteld op het door u gekozen kanaal en tijdstip. Automatisch wordt uitgeschakeld op het door u gekozen tijdstip. Druk op de toets MENU voor weergave van het menu. Druk op de toets om “Instellingen”...
  • Seite 95: Blauwe Schermmodus Instellen

    Blauwe schermmodus instellen Als er geen signaal wordt ontvangen of het signaal is heel zwak, ver- vangt een blauw scherm automatisch de onrustige achtergrond van het beeld. Als u het slechtere beeld wilt blijven zien, dient u de modus “Blauw scherm” op “Uit” te zetten. Druk op de toets MENU voor weergave van het menu.
  • Seite 96: De Namen Van De Ingangsbron Bewerken

    De namen van de ingangsbron bewerken Geef het apparaat aangesloten op de ingangen een naam om de selec- tie van ingangsbron makkelijker te maken. Druk op de toets MENU voor weergave van het menu. Druk op de toets ENTER om “Invoer” te selecteren. Druk op de toets om “Naam wijzigen”...
  • Seite 97: Teletekstinformatie Weergeven

    Teletekstinformatie weergeven U kunt de teletekstinformatie altijd weergeven, mits de signaalont- vangst goed is. Anders: Kan informatie ontbreken.Kan informatie ontbreken. Worden sommige pagina's mogelijk niet weergegeven. De teletekstmodus activeren en de inhoudspagina weergeven: 1. Selecteer met de toets P ) of P ) het kanaal waarop teletekst kan worden ontvangen.
  • Seite 98: Fastext Gebruiken Om Een Teletekstpagina Te Selecteren

    Fastext gebruiken om een teletekstpagina te selecteren De verschillende onderwerpen op de teletekstpagina’s hebben een kleurcodering, en kunnen geselecteerd worden door de gekleurde knoppen van de afstandsbediening in te drukken. Druk op de toets TTX/MIX ( ) om de teletekstinhoudspagina weer te geven.
  • Seite 99: Uw Software Installeren (Gebaseerd Op Windows Xp)

    Ook als uw weergaven anders zijn, kloppen de instellingsgegevens in grote lijnen in bijna alle gevallen. Als dit niet het geval is, kunt u contact opnemen met uw computerfabrikant of uw Samsung-dealer. Klik op “Configuratiescherm” in het menu Start van Windows.
  • Seite 100: De Pc Selecteren

    De PC selecteren Beeld vergrendelen: U past de beeldkwaliteit aan om beeldruis te verwijderen of te verminderen. Als de ruis niet verdwijnt door het kanaal nauwkeurig (fine) in te stellen, stel dan de frequentie zo goed mogelijk in (coarse)en voer opnieuw een nauwkeurige instelling uit. Stel het beeld opnieuw in het midden van het scherm in nadat de ruis is.
  • Seite 101: De Voet Aanpassen

    Neem contact op met een technicus alvorens de wandsteunen te bevestigen. Samsung Electronics is niet verantwoordelijk voor schade aan het product of voor verwondingen die u zelf of anderen oplopen wan- neer u besluit de TV zelfstandig te installeren.
  • Seite 102: Problemen Oplossen: Voordat U Contact Opneemt Met De Technische Dienst

    Er kunnen echter enkele heldere of donkere pixels in het scherm voorkomen. Deze pixels hebben geen invloed op de goede werking van het product. Technische specificaties en milieu Type LE19R7 Schermgrootte (diagonaal) 19 inch Stroomtoevoer AC 220-240 V, 50 Hz...
  • Seite 103 Indice CONEXIÓN Y CONFIGURACIÓN DEL TELEVISOR AJUSTE DE LA HORA Lista de componentes ..........2 Configuración y visualización de hora actual ..15 Visualización del Panel de control......3 Ajuste del temporizador de desconexión ....16 Visualización del Panel de conexión ......4 Encendido y apagado de la televisión Visualización del mando a distancia ......
  • Seite 104: Lista De Componentes

    Lista de componentes Asegúrese de que los siguientes elementos se incluyan con el televisor de pantalla LCD. Si falta alguno, póngase en contacto con su distribuidor. Cable de alimentación Kit de montaje mural Mando a distancia + pilas Manual de instrucciones (2x AAA) Tarjeta de garantía/ Tapetas decorativas...
  • Seite 105: Visualización Del Panel De Control

    Visualización del Panel de control SOURCE Cambia entre todas las fuentes de entrada disponibles Púlselos para cambiar de canal. En el menú de la pantalla, (TV, Ext., AV, S-Video, PC, DVI). En el menú de la use estos botones del mismo modo que los pantalla, use este botón del mismo modo que el botón botones del mando a distancia.
  • Seite 106: Visualización Del Panel De Conexión

    Visualización del Panel de conexión El color y la forma del producto pueden variar según el modelo. Entrada de alimentación Cada vez que conecte un dispositivo externo al televisor, compruebe que la unidad esté desconectada de la alimentación. Cuando conecte un terminal externo, debe hacer coincidir los colores del terminal de conexión y del cable. Conexión del DVI - Conecte el conector DVI al conector DVD.
  • Seite 107: Visualización Del Mando A Distancia

    Conexión de un receptor de televisión digital, vídeo o DVD - Conecte el cable SCART del vídeo o DVD (opcional) al euroconector del vídeo o DVD. - Si desea conectar tanto el decodificador como el vídeo (o DVD), deberá conectar el decodificador al vídeo (o DVD) y conectar el vídeo (o DVD) al aparato.
  • Seite 108: Instalación De Las Pilas En El Mando A Distancia

    Instalación de las pilas en el mando a distancia Levante la tapa de la parte posterior del mando a distancia, como se muestra en la ilustración. Coloque dos pilas de tamaño AAA. Compruebe que los extremos “+” y “-” de las pilas concuerdan con el diagrama del interior del compartimiento.
  • Seite 109: Memorización Automática De Canales

    Seleccione el país apropiado pulsando los botones Pulse el botón ENTER para confirmar la elección. Se visualiza el menú “Guardado automático” con la opción “Empezar” seleccionada. Pulse el botón ENTER. La búsqueda de canales comenzará y terminará automáticamente. Después de memorizar todos los canales, se muestra “Ajustar hora” ENTER Pulse el botón en cualquier momento para interrumpir el proceso de memorización.
  • Seite 110: Memorización Manual De Canales

    Memorización manual de canales Se pueden memorizar hasta 100 canales, que incluyen los que se reciben a través de redes por cable. Cuando memorice los canales manualmente, podrá elegir: Si se memoriza o no cada canal que se encuentre El número de programa con el que desea identificar cada canal memorizado Pulse el botón MENU para ver el menú.
  • Seite 111: Edición De Canales

    Edición de canales Puede elegir los canales que se excluirán en la operación de exploración de canales. Cuando se explore por los canales memorizados, los que se hayan seleccionado para que se omitan no se mostrarán. Todos los canales que no se haya especificado que se omitan se mostrarán durante la exploración.
  • Seite 112: Asignación De Nombres De Canales

    Asignación de nombres de canales Los nombres de los canales se asignarán automáticamente si se emite la información del canal. Estos nombres se pueden cambiar y puede asignar nombres nuevos. Pulse el botón MENU para ver el menú. Pulse los botones para seleccionar “Canal”...
  • Seite 113: Cambio Del Formato De La Imagen

    Cambio del formato de la imagen Se puede seleccionar el tipo de imagen que mejor se corresponda a los requisitos de visualización. Pulse el botón MENU para ver el menú. Pulse los botones para seleccionar “Imagen” y pulse el botón ENTER. 2.
  • Seite 114: Cambio Del Tono Del Color

    Cambio del tono del color Puede seleccionar el tono de color que le resulte más cómodo para su vista. Pulse el botón MENU para ver el menú. Pulse los botones para seleccionar “Imagen” y pulse el botón ENTER. 2. Pulse los botones para seleccionar “Tono color”...
  • Seite 115: Ajuste Del Control Del Color

    Ajuste del control del color Ajuste los controles del color R, G, B. Pulse el botón MENU para ver el menú. Pulse los botones para seleccionar “Imagen” y, a continuación, pulse el botón ENTER. Pulse los botones para seleccionar “Control de color” y, a continuación, pulse el botón ENTER.
  • Seite 116: Cambio Del Estándar De Sonido

    Cambio del estándar de sonido Puede seleccionar un tipo de efecto de sonido especial que se usará cuando se visualice una emisión concreta. Pulse el botón MENU para ver el menú. Pulse los botones para seleccionar “Sonido” y pulse el botón ENTER.
  • Seite 117: Ajuste Del Volumen Automáticamente

    Ajuste del volumen automáticamente Cada emisora tiene sus propias condiciones de señal, así que no resulta cómodo ajustar el volumen cada vez que se cambia de canal. Esta característica permite ajustar automáticamente el volumen del canal deseado, bajando el volumen del sonido cuando la señal de modulación es intensa, o elevando el volumen del sonido cuando la señal de modulación es débil.
  • Seite 118: Ajuste Del Temporizador De Desconexión

    Ajuste del temporizador de desconexión Puede seleccionar un período de tiempo entre 30 y 180 mins para que, cuando transcurran, el televisor pase automáticamente al modo de espera. Pulse el botón MENU para ver el menú. Pulse los botones para seleccionar “Configuración” y pulse el botón ENTER.
  • Seite 119: Encendido Y Apagado De La Televisión Automáticamente

    Encendido y apagado de la televisión automáticamente Puede ajustar los temporizadores de Des./Act. para que el Televisor: Se encienda automáticamente y sintonice el canal de su elección en el momento que seleccione. Se apague automáticamente a la hora que seleccione. Pulse el botón MENU para ver el menú.
  • Seite 120: Ajuste Del Modo Pantalla Azul

    Ajuste del modo Pantalla Azul Si no se recibe ninguna señal o la señal es muy débil, una pantalla azul sustituirá automáticamente el fondo ruidoso de la imagen. Si desea continuar visualizando la imagen deficiente, ajuste el modo “Pantalla Azul” en “Des.”. Pulse el botón MENU para ver el menú.
  • Seite 121: Edición De Los Nombres De Fuentes De Entrada

    Edición de los nombres de fuentes de entrada Dé un nombre al dispositivo conectado en las tomas de entrada; de esta manera será más fácil seleccionar el dispositivo de entra- Pulse el botón MENU para ver el menú. Pulse el botón ENTER para seleccionar “Entrada”. Pulse los botones para seleccionar “Editar nombre”...
  • Seite 122: Visualización De Informaciones Del Teletexto

    Visualización de informaciones del teletexto Puede visualizar la información del teletexto en cualquier momen- to, pero la recepción de la se al debe ser buena. Si no es así: Se puede perder información Algunas páginas no se visualizarán Para activar el modo de teletexto y visualizar la página de ndice: 1.
  • Seite 123: Uso De Fastext Para Seleccionar Una Página Del Teletexto

    Uso de Fastext para seleccionar una página del teletexto Las distintos temas que aparecen en las páginas del teletexto tienen varios colores, y se pueden seleccionar utilizando los botón coloreados del mando a distancia. Pulse el botón TTX/MIX ( ) para visualizar la página de índice del teletexto.
  • Seite 124: Configuración Del Software Del Pc (Basado En Windows Xp)

    (En caso contrario, póngase en contacto con el fabricante del ordenador o con el distribuidor de Samsung.) Primero, haga clic en “Control Panel” dentro del menú Inicio de Windows.
  • Seite 125: Selección Del Pc

    Selección del PC Bloqueo de Imagen: El propósito del ajuste de imagen calidad es remitir o reducir el ruido de la imagen. Si no se eliminan mediante la sintonización Fina, ajuste la frecuencia lo mejor que pueda (grueso) y vuelva a realizar la sintonización fina. Después de reducir el ruido, vuelva a ajustar la imagen para que quede alineada en el centro de la pantalla.
  • Seite 126: Cómo Ajustar El Soporte

    Para la instalación del soporte mural, póngase en contacto con un técnico. Samsung Electronics no se hace responsable de los daños causados al producto o a los usuarios si éstos han efectuado personalmente la instalación del televisor.
  • Seite 127: Solución De Problemas: Antes De Ponerse En Contacto Con El Servicio Técnicoa

    No obstante, pueden existir algunos píxeles brillantes u oscuros en la pantalla que, en cualquier caso, no afectarán al funcionamiento del producto. Especificaciones técnicas y medioambientales Nombre del modelo LE19R7 Tamaño de pantalla (diagonal) 19 pulg. Fuente de alimentación 220-240 V CA 50 Hz Consumo de energía...
  • Seite 128 Índice LIGAÇÃO E PREPARAÇÃO DO TELEVISOR ACERTO DA HORA Lista de acessórios ..........2 Acertar e ver a hora actual ........15 Apresentar o painel de controlo ......3 Programar o temporizador........16 Apresentar o painel de ligação ........ 4 Ligar e desligar o televisor automaticamente ..17 Apresentar o telecomando ........
  • Seite 129: Lista De Acessórios

    Lista de acessórios Verifique se recebeu os seguintes acessórios com o televisor LCD. Se faltar algum dos acessórios, contacte o revendedor. Cabo de alimentação Telecomando e Kit de montagem na Instruções para o proprietário pilhas (AAA x 2) parede Tampas decorativas Cartão de garantia/ Pano de limpeza Manual de se gurança/...
  • Seite 130: Apresentar O Painel De Controlo

    Apresentar o painel de controlo SOURCE Alterna entre todas as fontes de entrada disponíveis Move o selector para a esquerda ou para a direita nos ecrãs. (TV, Ext., AV, S-Vídeo, PC, DVI). No menu no ecrã, utilize os botões tal como usa os No menu no ecrã, utilize este botão tal como usa o botão botões do telecomando.
  • Seite 131: Apresentar O Painel De Ligação

    Apresentar o painel de ligação A forma e a cor do produto podem variar consoante o modelo. Potência de entrada Sempre que ligar um dispositivo externo ao televisor, verifique se a unidade está desligada. Quando ligar um terminal exterior, faça a correspondências de cores entre o terminal e o respectivo cabo. Ligar o DVI - Ligue o conector de DVI ao conector de DVD.
  • Seite 132: Apresentar O Telecomando

    Ligar Set-Top Box, videogravador ou DVD - Ligue o videogravador ou o cabo DVD SCART (opcional) ao conector SCART do videogravador ou do DVD. - Para ligar a ‘Set-Top Box’ e o videogravador (ou DVD), deve ligar a ‘Set-Top Box’ ao videogravador (ou DVD) e depois ligar o videogravador (ou DVD) ao televisor.
  • Seite 133: Colocar As Pilhas No Telecomando

    Colocar as pilhas no telecomando Levante a tampa na parte de trás do telecomando como se mostra na figura. Coloque duas pilhas de tamanho AAA. As polaridades “+” e “-” das pilhas têm que coincidir com o diagrama no interior do compartimento para pilhas.
  • Seite 134: Memorizar Canais Automaticamente

    Seleccione o País apropriado carregando no botão Carregue no botão ENTER para confirmar a escolha. O menu “Memor. auto.” é apresentado quando se selecciona “Iniciar”. Prima o botão ENTER. A busca de canais começa e termina automaticamente. Depois de todos os canais disponíveis estarem guardados, aparece o menu "Acertar relógio".
  • Seite 135: Memorizar Canais Manualmente

    Memorizar canais manualmente Pode memorizar até 100 canais, incluindo os canais recebidos através de televisão por cabo. Quando memoriza canais manualmente, pode escolher: Se pretende ou não memorizar os canais encontrados. O número de programa de cada canal memorizado que pretende identificar.
  • Seite 136: Editar Canais

    Editar Canais Pode excluir os canais que quiser dos canais que pesquisou. Durante a leitura dos canais memorizados,aqueles que optou por saltar não são mostrados. Todos os canais que não optou por saltar são mostrados durante a leitura. Utilize as teclas numéricas para seleccionar directamente o canal que será...
  • Seite 137: Atribuir Nomes A Canais

    Atribuir nomes a canais Os nomes dos canais serão atribuídos automaticamente quando a informação do canal é transmitida. Estes nomes podem ser alterados o que lhe permite atribuir nomes novos. Carregue no botão MENU para ver o menu. Carregue no botão para seleccionar “Canal”...
  • Seite 138: Alterar A Imagem Padrão

    Alterar a imagem padrão Pode seleccionar o tipo de imagem que melhor corresponda aos requisitos de visualização. Carregue no botão MENU para ver o menu. Carregue no botão para seleccionar “Imagem” e depois carregue no botão ENTER. 2. Prima o botão ENTER para seleccionar “Modo”. 3.
  • Seite 139: Alterar A Tonalidade

    Alterar a tonalidade Pode seleccionar o tom de cor mais confortável para si. Carregue no botão MENU para ver o menu. Carregue no botão para seleccionar “Imagem” e depois carregue no botão ENTER. Carregue no botão para seleccionar “Tonalidade” e depois carregue no botão ENTER.
  • Seite 140: Ajustar O Controlo Das Cores

    Ajustar o controlo das cores Ajuste os controlos individuais das cores R, G, B. Prima o botão MENU para ver o menu. Prima o botão para seleccionar "Imagem" e depois prima o botão ENTER. Prima o botão para seleccionar "Controlo de cor" e depois prima o botão ENTER.
  • Seite 141: Alterar O Som Padrão

    Alterar o som padrão Pode seleccionar o tipo de efeito sonoro especial a utilizar quan- do vê uma determinada transmissão. Carregue no botão MENU para ver o menu. Carregue no botão para seleccionar “Som” e depois carregue no botão ENTER. Prima o botão ENTER para seleccionar “Modo”.
  • Seite 142: Ajustar Automaticamente O Volume

    Ajustar Automaticamente o Volume Cada estação de difusão tem as suas próprias condições de sinal, não sendo por isso fácil ao utilizador ajustar o volume sempre que mudar de canal. Esta funcionalidade permite-lhe ajustar automaticamente o volume do canal pretendido ao baixar a saída de som quando o sinal de modulação é...
  • Seite 143: Programar O Temporizador

    Programar o temporizador Pode seleccionar um intervalo de tempo entre 30 e 180 mins, após o qual o televisor muda automaticamente para o modo de espera. Carregue no botão MENU para ver o menu. Carregue no botão para seleccionar “Configurar” e depois carregue no botão ENTER.
  • Seite 144: Ligar E Desligar O Televisor Automaticamente

    Ligar e desligar o televisor automaticamente Pode programar os temporizadores Desligar/Ligar para que o televisor: Se ligue automaticamente e sintonize o canal escolhido à hora marcada. Se desligue automaticamente à hora marcada. Carregue no botão MENU para ver o menu. Carregue no botão para seleccionar “Configurar”...
  • Seite 145: Programar O Modo De Ecrã Azul

    Programar o modo de Ecrã azul Se não estiver a receber nenhum sinal ou se o sinal for muito fraco, um ecrã azul substitui automaticamente o ruído de fundo no ecrã. Para continuar a ver a imagem em más condições, defina o modo “Ecrã...
  • Seite 146: Editar Os Nomes Das Fontes De Entrada

    Editar os nomes das fontes de entrada Identifique o dispositivo ligado às tomadas de entrada para que a selecção de fontes de entrada se torne mais fácil. Carregue no botão MENU para ver o menu. Carregue no botão ENTER, para seleccionar "Entrada”. Carregue no botão para seleccionar “Editar nome”...
  • Seite 147: Exibição Das Informações De Teletexto

    Exibição das informações de teletexto Pode ver a informação de teletexto em qualquer altura, mas o sinal de recepção tem de ser boa. Caso contrário: Podem faltar informações. Podem não aparecer algumas páginas. Para activar o modo de teletexto e ver a página dos conteúdos: 1.
  • Seite 148: Utilizar Fastext Para Seleccionar Uma Página De Teletexto

    Utilizar Fastext para seleccionar uma página de teletexto Os vários tópicos incluídos nas páginas de teletexto são codificados por cores e podem ser seleccionados premindo os botões coloridos no controlo remoto. 1. Faça aparecer a página de conteúdos do teletexto carregando no botão TTX/MIX ( 2.
  • Seite 149: Configurar O Software Do Pc (Baseado No Windows Xp)

    Em quase todos os casos, mesmo que os ecrãs reais tenham um aspecto diferente, aplica-se a mesma informação de configuração básica. (Caso contrário, contacte o fabricante do computador ou o dis- tribuidor da Samsung.) Primeiro, clique em “Control Panel” no menu Iniciar do Windows.
  • Seite 150: Seleccionar O Pc

    Seleccionar o PC Bloq. imagem: O objectivo da regulação da qualidade da imagem é reduzir o ruído da imagem. Se não conseguir retirar o ruído fazendo apenas a sintonização fina, regule a frequência o melhor possível e volte a fazer a sintonização fina. Depois de ter reduzido o ruído, volte a regular a imagem de forma a ficar alinhada no centro do ecrã.
  • Seite 151: Como Ajustar A Base

    A instalação do suporte para montagem na parede tem de ser feita por um técnico. Se a instalação for feita pelo cliente, a Samsung Electronics não se responsabiliza por quaisquer danos no produto nem por ferimentos sofridos pelo cliente ou por outras pessoas.
  • Seite 152: Resolução De Problemas: Antes De Contactar Os Serviços De Assistência

    No entanto, o ecrã poderá apresentar alguns pixéis brilhantes ou escuros. Estes pixéis não terão qualquer interferência no desempenho do produto. Características técnicas e ambientais Nome do modelo LE19R7 Tamanho do ecrã (Diagonal) 19 polegadas Fonte de alimentação AC 220-240 V, 50 Hz Consumo de energia PC Resolução...
  • Seite 153 Sommario COLLEGAMENTO E PREPARAZIONE DEL TELEVISORE IMPOSTAZIONE DELL'ORA Elenco dei componenti ..........2 Configurazione e visualizzazione Vista del pannello di controllo ........3 dell'ora attuale ............15 Vista del pannello dei collegamenti ......4 Impostazione del timer ........16 Illustrazione del telecomando ........5 Spegnimento e accensione automatica Inserimento delle batterie nel telecomando....
  • Seite 154: Elenco Dei Componenti

    Elenco dei componenti Controllare che nella confezione del TV LCD siano contenuti i seguenti componenti. Se qualsiasi componente risulta mancante, contattare il rivenditore. Telecomando e Cavo di alimentazione Manuale dell’utente Kit di montaggio a parete batterie (2 tipo AAA) Scheda di garanzia/ Coperture decorative Panno per la pulizia Guida alla sicurezza/...
  • Seite 155: Vista Del Pannello Di Controllo

    Vista del pannello di controllo SOURCE Passa tra tutte le sorgenti di ingresso disponibili Premere per cambiare canale. Nel menu a video, utilizzare i (TV, Ext., AV, S-Video, PC, DVI). tasti così come si usano i tasti Nel menu a video, utilizzare questo tasto così come si usa il telecomando.
  • Seite 156: Vista Del Pannello Dei Collegamenti

    Vista del pannello dei collegamenti La forma e il colore del prodotto possono variare in base al modello. Ingresso alimentazione Quando si collega un dispositivo esterno al televisore, assicurarsi che l’alimentazione dell’unità sia scollegata. Quando si collega un terminale esterno, far corrispondere il colore del terminale di collegamento a quello del cavo. Collegamento di un DVI - Collegare il connettore DVI al connettore DVD.
  • Seite 157: Illustrazione Del Telecomando

    Collegamento di un Set-Top Box, un videoregistratore o un DVD - Collegare il cavo SCART del VCR o DVD (opzionale) al connettore SCART del VCR o DVD. - Se si desidera collegare sia il Set-Top Box che il videoregistratore (o il DVD), collegare il Set-Top Box al videoregistratore (o al DVD) e il videoregistratore (o il DVD) al monitor TV.
  • Seite 158: Inserimento Delle Batterie Nel Telecomando

    Inserimento delle batterie nel telecomando Sollevare il coperchio sul retro del telecomando come mostrato in figura. Installare due batterie AAA. Controllare che le estremità “+” e “-” delle batterie corrispondano allo schema all'interno dello scomparto. Rimettere il coperchio. Se si prevede di non usare il telecomando per un lungo periodo di tempo, togliere le batterie e conservarle in un luogo fresco e asciutto.
  • Seite 159: Memorizzazione Automatica Dei Canale

    Selezionare la Nazione premendo il tasto Premere il tasto ENTER per confermare la scelta. Viene visualizzato il menu “Memorizzazione auto” con “Avvio” selezionato. Premere il tasto ENTER. La ricerca dei canali inizia e termina in modo automatico. Dopo aver memorizzato tutti i canali disponibili, viene visualizzato il menu “Imp orolog”.
  • Seite 160: Memorizzazione Manuale Dei Canale

    Memorizzazione manuale dei canale E’ possibile memorizzare un massimo di 100 canale, compresi quelli ricevuti via cavo. Durante la memorizzazione manuale dei canale si può scegliere: Se memorizzare ogni canale trovato. Il numero di programma con il quale si intende identificare ogni canale memorizzato.
  • Seite 161: Modifica Dei Canale

    Modifica dei canale È possibile escludere alcuni canale dall'operazione di scansione. Durante la scansione dei canali memorizzati, quelli esclusi non verranno visualizzati. Tutti i canale non specificamente esclusi dalla scansione verranno al contrario visualizzati. Utilizzare i tasti numerici per selezionare direttamente il canale da aggiungere o cancellare.
  • Seite 162: Assegnazione Dei Nomi Ai Canali

    Assegnazione dei nomi ai canali I nomi dei canali vengono assegnati automaticamente al ricevimento del segnale di broadcasting del canale. Tali nomi possono essere modificati in seguito, consentendone una personalizzazione. Premere il tasto MENU per visualizzare il menu. Premere il pulsante per selezionare “Canale”...
  • Seite 163: Impostazione Dell'immagine

    Modifica dello standard di immagine È possibile selezionare il tipo di 'immagine che si adatta meglio alle proprie esigenze di visualizzazione. Premere il tasto MENU per visualizzare il menu. Premere il pulsante per selezionare “Immagine” e premere ENTER. Premere il tasto ENTER per selezionare l’opzione "Modalità". 3.
  • Seite 164: Modifica Della Tonalità Di Colore

    Modifica della tonalità di colore E’ possibile selezionare il tono colore ottimale per la propria vista. Premere il tasto MENU per visualizzare il menu. Premere il pulsante per selezionare “Immagine” e premere ENTER. 2. Premere il pulsante per selezionare “Toni colore” e premere ENTER.
  • Seite 165: Regolazione Di Controllo Colore

    Regolazione di Controllo colore Regolare i colori R, G, B (rosso, verde e blu). Premere il tasto MENU per visualizzare il menu. Premere il tasto per selezionare "Immagine", quindi premere il tasto ENTER. Premere il tasto per selezionare "Controllo Colore", quindi premere il tasto ENTER.
  • Seite 166: Modifica Dello Standard Audio

    Modifica dello standard audio È possibile selezionare il tipo di effetto audio speciale da utilizzare durante la visione di una determinata trasmissione. Premere il tasto MENU per visualizzare il menu. Premere il pulsante per selezionare “Suono” e premere ENTER. Premere il tasto ENTER per selezionare l’opzione "Modalità". Premere il tasto per selezionare l'effetto audio desiderato.
  • Seite 167: Regolazione Automatica Del Volume

    Regolazione automatica del volume Ogni stazione delle emittenti ha le proprie condizioni del segnale, e non è semplice per l'utente regolare il volume ogni volta che si cam- bia canale. Questa funzione consente di regolare automaticamente il volume del canale desiderato abbassando il volume emesso quando la modulazione del segnale è...
  • Seite 168: Impostazione Del Timer

    Impostazione del timer È possibile impostare un periodo di tempo compreso tra 30 e 180 minuti, scaduto il quale il monitor TV si spegne automaticamente. Premere il tasto MENU per visualizzare il menu. Premere il pulsante per selezionare “Impostazione” e premere ENTER. Premere il pulsante per selezionare “Ora”...
  • Seite 169: Spegnimento E Accensione Automatica Della Televisione

    Spegnimento e accensione automatica della televisione È possibile impostare i timer di accensione/spegnimento automatico in modo che il monitor TV: Si accenda automaticamente e si sintonizzi sul canale desiderato all'ora selezionata. Si spenga automaticamente all'ora selezionata. Premere il tasto MENU per visualizzare il menu. Premere il pulsante per selezionare “Impostazione”...
  • Seite 170: Impostazione Della Modalità Pagina Blu

    Impostazione della modalità Pagina blu Se il segnale non viene ricevuto o è molto debole, una schermata blu sostituisce automaticamente lo sfondo dell'immagine disturbata. Se si desidera continuare a visualizzare l'immagine di qualità scadente, è necessario impostare la modalità “Pagina blu” su “Off”. Premere il tasto MENU per visualizzare il menu.
  • Seite 171: Modifica Dei Nomi Delle Sorgenti Di Ingresso

    Modifica dei nomi delle sorgenti di ingresso Assegnare un nome al dispositivo collegato ai jack di ingresso per semplificare la selezione della sorgente di ingresso. Premere il tasto MENU per visualizzare il menu. Premere il tasto ENTER per selezionare “Inserisci”. Premere il pulsante per selezionare “Modifica Nome”...
  • Seite 172: Visualizzazione Delle Informazioni Del Televideo

    Visualizzazione delle informazioni del Televideo È possibile visualizzare le informazioni del teletext in qualsiasi momento, tuttavia, la ricezione del segnale deve essere buona. In caso contrario: Le informazioni potrebbero mancare. Alcune pagine potrebbero non essere visualizzate. Per attivare la modalità teletext e visualizzare la pagina del sommario: 1.
  • Seite 173: Utilizzo Della Modalità Fastext Per Selezionare Una Pagina Teletext

    Utilizzo della modalità Fastext per selezionare una pagina Teletext I vari argomenti inclusi nelle pagine del Televideo sono codificati in base a diversi colori e possono essere selezionati premendo i pulsanti colorati sul telecomando. 1. Visualizzare la pagina del sommario del Televideo premendo il tasto TTX/MIX ( 2.
  • Seite 174: Configurazione Del Software Per Pc (Basato Su Windows Xp)

    Nel caso le schermate risultassero differenti, le stesse informazioni di base per la configurazione sono applicabili praticamente in ogni caso. (In caso contrario, contattare la casa costruttrice del proprio computer oppure un rivenditore Samsung). Fare clic su “Control Panel” nel menu di Start di Windows.
  • Seite 175: Selezione Del Pc

    Selezione del PC Blocco immagine: Lo scopo della regolazione della qualità dell'immagine è di rimuovere o ridurre i disturbi. Se il disturbo non viene eliminato mediante la semplice sintonizzazione fine, è necessario regolare al meglio la frequenza (sintonizzazione grossa) ed eseguire nuovamente la sintonizzazione fine.
  • Seite 176: Regolazione Del Supporto

    Contattare un tecnico per richiedere assistenza quando si monta la staffa a parete. Samsung Electronics non può essere ritenuta responsabile per qualsiasi danno al prodotto, lesioni personali o altri problemi causati da una installazione autonoma del televisore da parte dell’utente.
  • Seite 177: Risoluzione Dei Problemi: Prima Di Contattare L'assistenza

    Alcuni pixel potrebbero apparire più brillanti o neri sullo schermo, ma questo non avrà alcun impatto sulle prestazioni del prodotto. Specifiche tecniche e ambientali Nome del modello LE19R7 Dimensione schermo (Diagonale) 19 poll. Alimentazione AC 220-240 V, 50 Hz...
  • Seite 178: Diagrammi A Blocchi

    Diagrammi a blocchi Italiano-26...
  • Seite 179 Correct Disposal of This Product (Waste Electrical & Electronic Equipment) (Applicable in the European Union and other European countries with separate collection systems) This marking shown on the product or its literature, indicates that it should not be disposed with other household wastes at the end of its working life.

Diese Anleitung auch für:

Le19r71w

Inhaltsverzeichnis