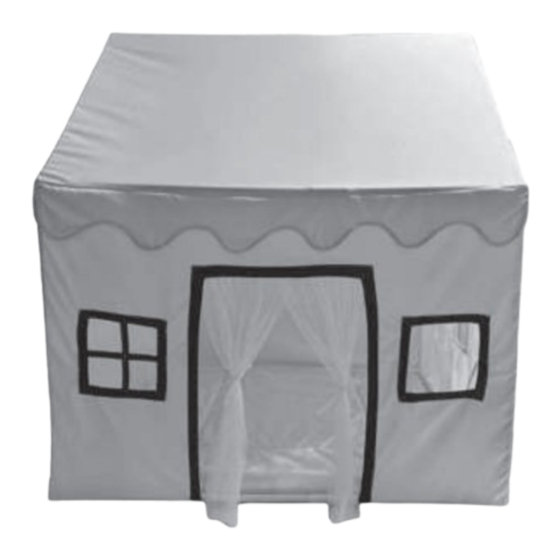
Costway TP10259 Bedienungsanleitung
Kinder spielhauszelt
Verfügbare Sprachen
Verfügbare Sprachen
Quicklinks
USA office: Fontana
AUS office: Truganina
DEU office: FDS GmbH, Neuer Höltigbaum 36, 22143 Hamburg, Deutschland
GBR office: FDS Corporation Limited,Unit 4, Blackacre Road, Great Blakenham,Ipswich, Ip6 0FL,United Kingdom
If you're having difficulty, our friendly
customer team is always here to help.
POL office: Gdańsk
ITA office: Milano
FRA office: Saint Vigor d'Ymonville
USA:cs.us@costway.com
POL:sklep@costway.com
AUS:cs.au@costway.com
DEU:cs.de@costway.com
GBR:cs.uk@costway.com
FRA:cs.fr@costway.com
I T A :cs.i t @costway.com
ESP:cs.es@costway.com
Kids Playhouse Tent
Kinder Spielhauszelt
Tente de Jeu pour Enfants
Tienda de Juegos para Niños
Tenda da Gioco per Bambini
Namiot do zabawy dla dzieci
Kinder speelhuisje Tent
TP10259
THIS INSTRUCTION BOOKLET CONTAINS IMPORTANT SAFETY INFORMATION.
PLEASE READ AND KEEP FOR FUTURE REFERENCE.

Verwandte Anleitungen für Costway TP10259


Inhaltszusammenfassung für Costway TP10259
- Seite 1 THIS INSTRUCTION BOOKLET CONTAINS IMPORTANT SAFETY INFORMATION. USA:cs.us@costway.com POL:sklep@costway.com If you're having difficulty, our friendly AUS:cs.au@costway.com DEU:cs.de@costway.com PLEASE READ AND KEEP FOR FUTURE REFERENCE. customer team is always here to help. GBR:cs.uk@costway.com FRA:cs.fr@costway.com I T A :cs.i t @costway.com ESP:cs.es@costway.com...
- Seite 2 Accessories Length 45 cm Length 55 cm Before You Start Length 70 cm Length 40 cm Please read all instructions carefully and keep it for future reference. General Security Warning Caution: Children should use this product under the parental supervision. Right-angle pipe sleeve Big triangle pipe sleeve Danger: Keep all small parts and packaging materials for this product away from babies...
- Seite 3 Connecting pipe sleeve Long pipe 40 cm Long pipe 40 cm Connecting pipe sleeve Long pipe 45 cm Long pipe 70 cm Use a connecting pipe sleeve to connect a 45 cm pipe with a 70 cm pipe as shown in the picture, forming 5 longer pipes in total. Right-angle pipe sleeve Insert 4 pieces of 40 cm x 2 pipes into the right-angle pipe sleeve as...
- Seite 4 Right-angle Right-angle pipe sleeve pipe sleeve Right-angle Right-angle pipe sleeve pipe sleeve Big triangle pipe sleeve Insert the 70 cm pipe into the big triangle pipe sleeve according to the Insert the pipe connected in step 2 into the right-angle pipe sleeve arrow direction, and then connect the 2 pieces of 70 cm pipes with the according to the arrow direction as shown in the figure, the house right-angle pipe sleeves as shown in the figure.
- Seite 5 Bevor Sie beginnen Bitte sorgfältig lesen und zum späteren Nachschlagen aufbewahren. Allgemeine Sicherheitswarnung Vorsicht: Kinder sollten diesen Artikel unter elterlicher Aufsicht benutzen. Gefahr: Halten Sie alle Kleinteile und Verpackungsmaterialien, die verschluckt werden können, von Babys und Kindern fern. Gefahr: Unsachgemäße Montage kann zu Kippgefahr führen. Achtung: ERSTICKUNGSGEFAHR -Kleine Teile.
- Seite 6 Zubehör Muffe für Verbindungsrohr Langes Rohr 40 cm Langes Rohr 40 cm Länge 45 cm Länge 55 cm Muffe für Verbindungsrohr Langes Rohr 45 cm Langes Rohr 70 cm Verwenden Sie eine Verbindungsrohrmuffe, um ein 45 cm langes Länge 70 cm Länge 40 cm Rohr mit einem 70 cm langen Rohr zu verbinden, wie in der Abbildung gezeigt, so dass insgesamt 5 längere Rohre entstehen.
- Seite 7 Rechtwinklige Rohrmuffe Rechtwinklige Rohrmuffe Rechtwinklige Rohrmuffe Stecken Sie 4 Stücke von 40 cm x 2 Rohren in die rechtwinklige Rohrmuffe, wie in der Abbildung gezeigt. Große dreieckige Rohrmuffe Stecken Sie das 70-cm-Rohr entsprechend der Pfeilrichtung in die Rechtwinklige große dreieckige Rohrmuffe und verbinden Sie dann die beiden Rohrmuffe 70-cm-Rohrstücke mit den rechtwinkligen Rohrmuffen, wie in der Setzen Sie die große dreieckige Rohrmuffe in die 4 aufrechten Rohre...
- Seite 8 Rechtwinklige Rohrmuffe Rechtwinklige Rohrmuffe Stecken Sie das in Schritt 2 angeschlossene Rohr in die rechtwinklige Nachdem der Hausrahmen zusammengebaut ist, setzen Sie die Rohrmuffe entsprechend der Pfeilrichtung, wie in der Abbildung Hausabdeckung auf, installieren Sie zuerst die untere Abdeckung und gezeigt, und der Hausrahmen ist fertig.
- Seite 9 Accessoires Longueur 45 cm Longueur 55 cm Avant de Commencer Longueur 70 cm Longueur 40 cm Veuillez lire attentivement toutes les instructions et les conserver pour la référence ultérieure. Avertissement de Sécurité Générale Attention : Les enfants doivent utiliser ce produit sous la surveillance de leurs parents. Manchon à...
- Seite 10 Manchon de raccordement Tuyau longue de 40 cm Tuyau longue de 40 cm Manchon de raccordement Tuyau longue de 45 cm Tuyau longue de 70 cm Utilisez un manchon de raccordement pour connecter un tuyau de 45 cm à un tuyau de 70 cm comme indiqué sur l'image, formant ainsi 5 tuyaux plus longs au total.
- Seite 11 Manchon de tuyau à Manchon de tuyau à angle droit angle droit Manchon de tuyau à Manchon de tuyau à angle droit angle droit Manchon de tuyau en forme de grand triangle Insérez le tuyau de 70 cm dans le manchon du grand triangle en Insérez le tuyau connecté...
- Seite 12 Antes de Empezar Lea atentamente todas las instrucciones y consérvelas para futuras consultas. Advertencia de Seguridad General Atención: Los niños deben utilizar este producto bajo la supervisión de sus padres. Peligro: Mantenga todas las piezas pequeñas y los materiales de empaque de este producto fuera del alcance de los bebés y los niños, ya que de lo contrario pueden suponer un peligro de asfixia.
- Seite 13 Accesorios Manguito de conexión Tubo largo de 40 cm Tubo largo de 40 cm Longitud de 45 cm Longitud de 55 cm Manguito de conexión Tubo largo de 45 cm Tubo largo de 70 cm Utilice un manguito de conexión para conectar un tubo de 45 cm con Longitud de 70 cm Longitud de 40 cm un tubo de 70 cm como se muestra en la imagen, formando 5 tubos...
- Seite 14 Manguito de tubo en ángulo recto Manguito de tubo en ángulo recto Manguito de tubo en ángulo recto Inserte 4 trozos de tubo de 40 cm x 2 en el manguito de tubo en ángulo recto como se muestra en la figura. Manguito de tubo triangular grande Inserte el tubo de 70 cm en el manguito de tubo triangular grande...
- Seite 15 Manguito de tubo en ángulo recto Manguito de tubo en ángulo recto Inserte el tubo conectado en el paso 2 en el manguito de tubo en Después de ensamblar el armazón de la caseta, coloque la cubierta ángulo recto de acuerdo con la dirección de la flecha, como se de tela de la caseta, instale primero la cubierta de tela inferior y luego muestra en la figura.
- Seite 16 Accessori Lunghezza 45 cm Lunghezza 55 cm Prima di Iniziare Lunghezza 70 cm Lunghezza 40 cm Si prega di leggere attentamente tutte le istruzioni e conservarle per riferimento futuro. Avvertenza di sicurezza generale Attenzione: I bambini devono usare questo prodotto sotto la supervisione dei genitori. Manicotto per tubi ad angolo Manicotto per tubi a triangolo Pericolo: Tenere tutte le piccole parti e i materiali di imballaggio di questo prodotto lontano...
- Seite 17 Manicotto per tubo di collegamento Tubo lungo 40 cm Tubo lungo 40 cm Manicotto per tubo di collegamento Tubo lungo 45 cm Tubo lungo 70 cm Utilizzare un manicotto di collegamento per collegare un tubo da 45 cm con un tubo da 70 cm, come mostrato nell'immagine, formando in totale 5 tubi più...
- Seite 18 Manicotto per tubi ad angolo Manicotto per tubi ad retto Manicotto per angolo retto Manicotto per tubi ad tubi ad angolo angolo retto retto Manicotto per tubi a triangolo grande Inserire il tubo da 70 cm nel manicotto a triangolo grande seguendo la Inserire il tubo collegato al passo 2 nel manicotto ad angolo retto direzione della freccia, quindi collegare i 2 pezzi di tubo da 70 cm con seguendo la direzione della freccia come mostrato in figura, il telaio...
- Seite 19 Zanim Zaczniesz Przeczytaj uważnie wszystkie instrukcje i zachowaj je na przyszłość. Ogólne ostrzeżenia dotyczące bezpieczeństwa Uwaga: Dzieci moga używać tego produktu jedynie pod nadzorem dorosłych. Niebezpieczeństwo: Trzymaj wszystkie małe części i materiały opakowaniowe dla tego produktu z dala od niemowląt i dzieci, w przeciwnym razie mogą stwarzać ryzyko zadławienia. Niebezpieczeństwo: Brak mocowania może spowodować...
- Seite 20 Akcesoria Łącznik prosty Długa rurka 40cm Długa rurka 40cm Długość 45 cm Długość 55 cm Łącznik prosty Długa rurka 45 cm Długa rurka 70 cm Użyj łącznika prostego, aby połączyć rurkę 45 cm z rurką 70 cm, jak Długość 70 cm Długość...
- Seite 21 Łącznik kątowy Łącznik kątowy Łącznik kątowy Umieść 4 rurki 40 cm x2 w łącznikach kątowych, jak pokazano na rysunku. Łącznik 3-kierunkowy Włóż rurkę 70 cm do łącznika 3-kierunkowego zgodnie z kierunkiem Łącznik kątowy strzałki. Następnie połącz 2 rurki 70 cm z łącznikami kątowymi, jak pokazano na rysunku.
- Seite 22 Łącznik kątowy Łącznik kątowy Włóż rurkę zmontowaną w kroku 2 do łącznika kątowego zgodnie z Po zmontowaniu ramy namiotu załóż tkaninę na ramę. Najpierw kierunkiem strzałki, jak pokazano na rysunku. Rama namiotu jest zamontuj dolną część tkaniny, a następnie główną część namiotu. gotowa.
- Seite 23 Accessoires Lengte 45 cm Lengte 55 cm Voordat U Begint Lengte 70 cm Lengte 40 cm Lees alstublieft alle instructies zorgvuldig door en bewaar deze voor toekomstig gebruik. Algemene Veiligheidswaarschuwing Let op: Kinderen dienen dit product onder ouderlijk toezicht te gebruiken. Haakse buismof Grote driehoek pijpmof Gevaar: Houd alle kleine onderdelen en verpakkingsmaterialen van dit product buiten...
- Seite 24 Verbindingspijpmof Lange pijp 40 cm Lange pijp 40 cm Verbindingspijpmof Lange pijp 45 cm Lange pijp 70 cm Gebruik een verbindingspijpmof om een pijp van 45 cm te verbinden met een pijp van 70 cm zoals op de afbeelding, zodat je in totaal 5 langere pijpen krijgt.
- Seite 25 Haakse buismof Haakse buismof Haakse buismof Haakse buismof Grote driehoekige pijpmof Steek de 70 cm pijp in de grote driehoekige pijpmof volgens de Steek de in stap 2 aangesloten buis in de haakse buismof volgens de richting van de pijl en verbind dan de 2 stukken 70 cm pijp met de richting van de pijl op de afbeelding, het huisframe is voltooid.
- Seite 26 How to Use Connect the USB connector of the string light to a 5V power supply (not included) to turn on the light. Note: The string light can be hung or wrapped around the tent for decoration. Do not use the string light if it is damaged. Wie zu verwenden Verbinden Sie den USB-Anschluss der Lichterkette mit einem 5-V-Netzteil (nicht im Lieferumfang enthalten), um das Licht einzuschalten.
- Seite 27 Jak Zmontować Girlandę How to Assemble the Bunting Najpierw nawlecz nitkę na igłę i zawiąż supełek, a następnie nawlekaj First thread the needle and tie a knot and string them up one by one in elementy jeden po drugim w odpowiedniej kolejności. order.
- Seite 28 Return / Damage Claim Instructions Instructions De Retour / Réclamation De Dommages NE PAS jeter la boîte/l'emballage d'origine. DO NOT discard the box / original packaging. Dans le cas où un retour est requis, l'article doit être retourné dans sa boîte In case a return is required, the item must be returned in original box.
- Seite 29 Istruzioni Per La Restituzione / Reclamo Per Danni Instructies voor Retournering/Schadeclaim NON scartare la scatola / confezione originale. GOOI DE doos/het originele verpakkingsmateriaal NIET weg. Nel caso in cui sia richiesto un reso, l'articolo deve essere restituito nella scatola In het geval van een retournering moet het artikel in de originele doos originale.