Inhaltsverzeichnis
Werbung
Verfügbare Sprachen
Verfügbare Sprachen
Quicklinks
Technische und gestalterische Änderungen im Zuge stetiger Produktverbesserungen vorbe-
halten.
Sous réserve de modifi cations techniques et structurelles dans le cadre de l'amélioration
constante des produits.
Su riserva di eventuali modifi che tecniche e strutturali derivate dal costante miglioramento
dei prodotti.
5. 2014
7
6 1 3 1 6 4 3 8 0 7 2 2
7
6 1 3 1 6 4 3 8 0 7 1 5
CH-Import & Distribution exklusiv durch:
Jumbo-Markt AG, 8305 Dietlikon
BEDIENUNGSANLEITUNG |
MODE D'EMPLOI | ISTRUZIONE D'USO
500 W Glas-Heizkörper | Radiateur en Verre 500 W |
Termosifone in vetro 500W
7
6 1 3 1 6 4 3 8 0 7 0 8
caldĕo 2014.04.05 | 2014.04.06 | 2014.04.07
Werbung
Inhaltsverzeichnis

Verwandte Anleitungen für Ayce CG500 WER011

Inhaltszusammenfassung für Ayce CG500 WER011
- Seite 1 Technische und gestalterische Änderungen im Zuge stetiger Produktverbesserungen vorbe- halten. Sous réserve de modifi cations techniques et structurelles dans le cadre de l‘amélioration constante des produits. BEDIENUNGSANLEITUNG | Su riserva di eventuali modifi che tecniche e strutturali derivate dal costante miglioramento MODE D‘EMPLOI | ISTRUZIONE D‘USO dei prodotti.
-
Seite 2: Erläuterung Der Symbole
02 | 03 WICHTIGE SICHERHEITSANWEISUNGEN ERLÄUTERUNG DER SYMBOLE Lesen Sie vor Benutzung des Gerätes unbedingt den entsprechenden Absatz in der vorliegenden Anleitung. 1. Lesen Sie bitte alle Anweisungen aufmerksam durch, bevor Sie das Gerät benutzen. 2. Kontrollieren Sie vor der Benutzung, ob die Netzspannung mit der Sie das Gerät betreiben möchten, mit der auf Entspricht den Europäischen Normen. - Seite 3 04 | 05 8. Um das Gerät abzuschalten, stellen Sie den Schalter in Kenntnis mangelt, benutzt werden, wenn sie beaufsichtigt die Position “OFF” und ziehen Sie dann den Netzstecker oder in die sichere Benutzung des Gerätes unterwiesen heraus. Ziehen Sie niemals am Kabel, da Sie dadurch das werden und die damit verstandenen Gefahren verstehen.
-
Seite 4: Liste Der Hauptteile (Abb.1.1)
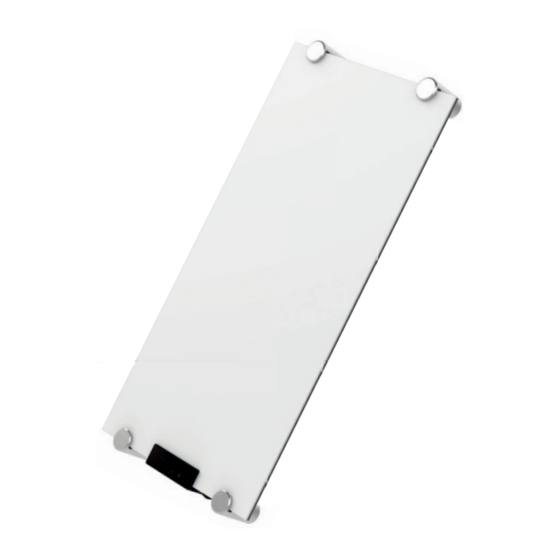
22. Das Heizgerät ist so zu installieren, dass Schalter und Regler nicht durch Personen, die sich im Nassbereich (z.B. in der Dusche) befi nden, berührt werden können. Abb. 1.1 TECHNISCHE DATEN LISTE DES ZUBEHÖRS (ABB.1.2) Modell CG500 WER011 Verlängerungs- Nennspannung 230 V ~ bolzen (4 Teile) Nennleistung 50 Hz Verlängerungs-... -
Seite 5: Für Wandmontage
08 | 09 FÜR WANDMONTAGE ANBRINGEN DES GERÄTES (ABB. 3, ABB. 4, ABB. 5) Auffinden eines geeigneten Ortes (Abb. 2) Markieren und bohren Sie die Löcher (4-Ø 10 X 60 mm) (Abb. 3 bis 5). Das Gerät muss so montiert werden, dass der Luftstrom nicht behindert wird. - Seite 6 10 | 11 Schrauben Sie die Verlängerungsmutter 2 von Bolzen 1 ab und stecken Sie Mutter 2 mithilfe eines Hammers in die Löcher (Abb. 6-7). Abb. 10 Abb. 11 Abb. 6 Abb. 7 Positionieren Sie auf der Rückseite Schrauben Sie die vier dekorativen der Platte das Edelstahlrohr C Abdeckungen F von der Heizung ab (4 Teile) auf Stütze B.
-
Seite 7: Betrieb
12 | 13 BETRIEB Die gleichen Funktionen können per Fernbedienung aktiviert werden (Abb. 15). Beschreibung des Bedienfeldes (Abb. 14): Abb. 15 • Achten Sie darauf, dass die Batterie (1 X CR2025 3 V) korrekt in die Abb. 14 Fernbedienung eingelegt ist. •... -
Seite 8: Überhitzungsschutz
14 | 15 ÜBERHITZUNGSSCHUTZ Eine Sicherheitseinrichtung unterbricht den Betrieb des Radiators bei Überhitzung. Für die Wiederherstellung des Gerätebetriebes den Netzstecker ziehen und das Gerät völlig abkühlen lassen. Die Störungsursache beseitigen und den Netzstecker wieder anschliessen. Falls das Heizgerät weitere Störungen oder mangelnde Sicherheitsvorrichtungen aufweist, bleibt das Heizgerät weiter ausgeschaltet. -
Seite 9: Description Des Symboles
16 | 17 CONSIGNES GENERALES DE SECURITE DESCRIPTION DES SYMBOLES Avant toute utilisation, reportez-vous au paragraphe correspondant, dans le présent manuel d’utilisation. 1. Lisez attentivement ce manuel avant d’utiliser l’appareil. 2. Vérifi ez que la tension du secteur correspond à celle de l’appareil. - Seite 10 18 | 19 9. Le radiateur ne doit jamais être placé sous une prise de Les enfants ne doivent pas jouer avec l’appareil. courant. Le nettoyage et l'entretien par l'usager ne doivent pas être effectués par des enfants sans surveillance. 10.
-
Seite 11: Caracteristiques Techniques
être touchés par une personne dans la baignoire ou la douche. CARACTERISTIQUES TECHNIQUES Modèle CG500 WER011 Fig. 1.1 Tension nominale 230 V ~ Fréquence nominale 50 Hz LISTE DES ACCESSOIRES (FIG. 1.2) - Seite 12 22 | 23 POUR FIXATION MURALE INSTALLER ET FIXER L’APPAREIL (FIG. 3, 4 ET 5) Trouver l’emplacement approprié (fig. 2). Marquer et percer les trous (4 - Ø 10 x 60 mm) (fig. 3 à 5). L'appareil doit être installé de façon à ce que la ventilation ne soit pas obstruée.
- Seite 13 24 | 25 Dévissez les écrous/chevilles à expansion (2) des vis (1), puis insérez les écrous/chevilles à expansion (2) dans les trous avec un marteau (fi g. 6 et 7). Fig. 10 Fig. 11 Fig. 6 Fig. 7 Au dos du panneau, placez les Dévissez les 4 caches décoratifs (F) tubes en inox (C) (4 pièces) sur les de l’appareil (fi g. 9).
- Seite 14 26 | 27 UTILISATION Les mêmes fonctions sont disponibles sur la télécommande (fi g. 15). Présentation du panneau de contrôle (fi g. 14): Fig. 15 • Insérez correctement la pile (1 x CR2025 3V) dans la télécommande. Fig. 14 • La portée effi cace de la télécommande est de 3 m environ. Interrupteur marche/arrêt PILE Bouton de démarrage «...
-
Seite 15: Maintenance
28 | 29 DISPOSITIF DE SECURITE ANTI-SURCHAUFFE Votre radiateur est équipé d’un dispositif de sécurité qui éteint le radiateur en cas de surchauffe. Pour la remise en fonction de l’appareil, retirer la prise et laissez refroidir complètement le radiateur. Eliminer la cause de la panne et rebranchez la prise. -
Seite 16: Descrizione Dei Simboli
30 | 31 IMPORTANTI ISTRUZIONI DI SICUREZZA DESCRIZIONE DEI SIMBOLI Prima dell’uso, consultare la corrispondente sezione del presente manuale. 1. Leggere attentamente le istruzioni prima dell’uso. 2. Accertarsi che la tensione sia identica a quella indicata sulla targhetta dell’apparecchio. Conforme alle direttive europee applicabili a questo prodotto. 3. - Seite 17 32 | 33 12. Per evitare il surriscaldamento, non coprire l’apparecchio. 13. Al fine di prevenire possibili incendi, evitare di bloccare le 18. I bambini di età inferiore a 3 anni non devono avvicinarsi al prese o scappamenti d’aria in qualsiasi modo. prodotto se non costantemente supervisionati.
-
Seite 18: Caratteristiche Tecniche
è nella vasca o nella doccia. Vetro Telecomando Interruttore principale CARATTERISTICHE TECNICHE Pannello di controllo Modello CG500 WER011 Tensione nominale 230 V ~ Frequenza nominale 50 Hz Tensione nominale 500 W d’ingresso Classe di protezione Grado di protezione IPX4 Fig. -
Seite 19: Montaggio A Parete
36 | 37 MONTAGGIO A PARETE INSTALLAZIONE E FISSAGGIO DELL’APPARECCHIO (FIG. 6, FIG. 7, FIG. 8) Ubicazione appropriata (fig. 2). Segnare e praticare i fori con un trapano (4 - Ø 10 x 60 mm) (fig. 3-5). Installare il dispositivo in modo da non ostruire il flusso d’aria. L’apparecchio deve essere installato in modo che gli interruttori e gli altri comandi non possano essere toccati da chi è... - Seite 20 38 | 39 Svitare il dato a espansione (2) dalla vite (1) e inserire il dado (2) all’interno dei fori con un martello (fi g. 6-7). Fig. 10 Fig. 11 Fig. 6 Fig. 7 Sul retro del pannello, mettere Svitare le 4 coperture decorative F il tubo in acciaio inox C (4 pz) sul dall’unità...
-
Seite 21: Funzionamento
40 | 41 FUNZIONAMENTO È possibile fare le stesse operazioni tramite telecomando (fi g. 15). Panoramica del pannello di controllo (fi g.14): Fig. 15 • Accertarsi che la batteria (1 X CR2025 3 V) sia installata correttamente Fig. 14 all’interno del telecomando. •... -
Seite 22: Manutenzione E Conservazione
42 | 43 DISPOSITIVO DI SICUREZZA CONTRO IL SURRISCALDAMENTO L’apparecchio è fornito di un dispositivo di sicurezza che spegnerà il termoventilatore in caso di surriscaldamento dell’apparecchio. Se il dispositivo di sicurezza è in funzione, spegnere il termoventilatore, staccare la spina e lasciare raffreddare completamente l’apparecchio;... -
Seite 23: Description Of The Symbols
44 | 45 GENERAL SAFETY WARNING DESCRIPTION OF THE SYMBOLS Before any use, refer to the corresponding section in this user manual. 1. Read all instructions carefully before using. 2. Make sure the voltage is the same as that indicated on the rating plate of the appliance. -
Seite 24: Technical Specifications
TECHNICAL SPECIFICATIONS ning use of the appliance in a safe way and understand the Model CG500 WER011 hazards involved. Children shall not play with the appli- Rated voltage 230 V ~ ance. - Seite 25 48 | 49 LIST OF MAIN PARTS (FIG.1.1) ASSEMBLY Support Founding a suitable location (fi g 2). Glass Remote controller The device must be installed so that airfl ow is not obstructed. Main power switch Control panel The heater is to be installed so that switches and other controls can- not be touched by a person in the bath or shower.
- Seite 26 50 | 51 INSTALLING AND FIXING THE DEVICE (FIG 3, FIG 4, FIG 5) Screw off the expansion nut 2 from bolt 1 and hammer nut 2 into the holes (fi g. 6-7). Marking and drill the holes (4-Ø 10 X 60 mm) (fi g. 3-5). 4- ( Ø...
-
Seite 27: Operation
52 | 53 OPERATION Introduction to Control Panel (fi g. 14): Fig. 10 Fig. 11 Fig. 14 Main Power Switch “ ” Start-up Button “ ” Power Up Button “ ” Power Down Button Infrared Receiver Power Indicator Start-up and Power Selection: 1. - Seite 28 54 | 55 OVERHEAT SAFETY DEVICE The same function is available with remote control (fi g. 15). Your heater is fi tted with a safety device to switch off the heater in the event of overheating. If the safety device is in operation, please turn the heater off , unplug the appliance and let it completely cool, inspect for blockage of air inlet or outlet, attempting to restart the heater then after.