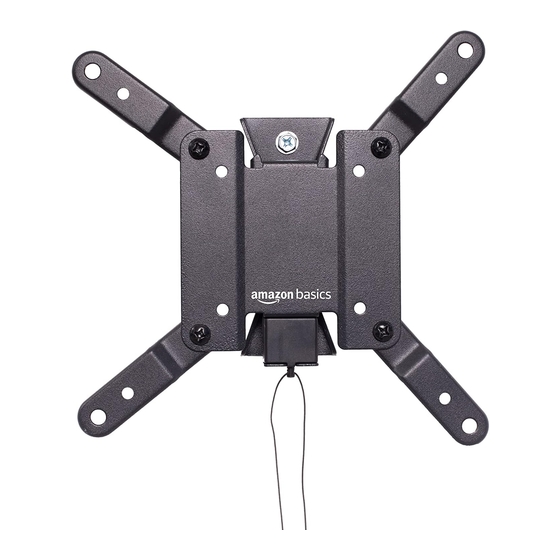
AmazonBasics B09JWS2NVJ Bedienungsanleitung
Neigbare tv-wandhalterung für 12 zoll- bis 40-zoll-tvs
Inhaltsverzeichnis
Quicklinks
Tilt
TV Wall
Mount
Support Murat Inclinable pour Téléviseurs de 12 Pouces
40 Pouces
Neigbare TV-Wandhalterung
Supporto a Parete per TV Inclinabile
40 Pollici
Soporte de Montaje en la Pared Inclinable para Televisores de
12 Pulgadas a 40 Putgadas
Kantelbare TV-Muurbeugel
TV
B09JWS2NVJ
Pagina
for
12-lnch
to 40-lnch
für 12-ZOII- bis 40-ZoII-TVs
voor 12 Inch tot 40 Inch TV's
12
40
. Page
5
. Page
8
. Seite
12
16
TVs
per a TV da 12 Pollici a
TV
Pågina
Pagina
20
25
29
37
Inhaltsverzeichnis

Verwandte Anleitungen für AmazonBasics B09JWS2NVJ


Inhaltszusammenfassung für AmazonBasics B09JWS2NVJ
- Seite 1 TV da 12 Pollici a 40 Pollici Soporte de Montaje en la Pared Inclinable para Televisores de 12 Pulgadas a 40 Putgadas Kantelbare TV-Muurbeugel voor 12 Inch tot 40 Inch TV's B09JWS2NVJ Pågina . Page . Page Pagina . Seite...
- Seite 2 Scan the QR Code and scroll through the images to find an assembly or how-to video. Scannez le code QR et faites défiler les images pour trouver une vidéo de montage ou un guide pratique. Scannen Sie den QR-Code und blättern Sie durch die Bilder, um ein Montage- OderAnleitungsvideo zu finden.
- Seite 3 Tools Needed • Outils Nécessaires • Erforderliche Werkzeuge • Strumenti necessar • Herramientas Necesarias • Benodigd gereedschap • Voltage detector • Détecteur de tension • Spannungsdetektor • Rilevatore di tensione • Detector de tensi6n • Spanningsdetector • Stud finder • Détecteur de montants •...
- Seite 4 Delivery Content • Contenu du Colis • Lieferumfang • Contenuto della • Contenido paquete • Levering • WM (x 1) AP (x 4) TS (x 2) M6 x 50 M4 x 22 M6x10 x 24 M8 x 20 M8 x 30 M4/M6/M8 M6/M8...
-
Seite 5: Important Safety Instructions
1. Important Safety Instructions Read these instructions carefully and retain them for future use. If this product is passed to a third party, then these instructions must be included. When using the product, basic safety precautions should always be followed to reduce the risk of injury including the following: A CAUTION Risk of injury and/or property damage! - Seite 6 2. Installation For additional illustrated mounting / assembly / installation steps, refer to the end of the written instructions. This product should be installed by 2 adults. If in doubt, consult a professional. Refer to the instruction manual provided with the TV you are going to install on this product.
-
Seite 7: Before Assembly
3. Before Assembly DANGER Risk of suffocation! D Keep any packaging materials away from children and pets — these materials are a potential source of danger, e.g. suffocation. Remove all the packing materials. Remove and review all components before starting assembly. Check the product for transport damages. -
Seite 8: Consignes De Sécurité Importantes
1. Consignes de Sécurité Importantes Veuillez lire attentivernent les présentes instructions et les conserver afin de pouvoir vous y référer ultérieurement. En cas de cession de ce produit un tiers, Ie présent manuel d'utilisation doit également lui étre remis. Lors de I'utilisation du produit, voUs devez toujours prendre des mesures de sécurité... - Seite 9 Soutenez toujours le téléviseur des deux mains lorsque vous effectuez des réglages. Assurez-vous de serrer convenablement les fixations et tous les autres raccordements, mais ne les serrez pas excessivement. N'utilisez jamais d'outil électrique pour serrer des fixations. Le cordon du support doit rester hors de portée des enfants et des animaux de compagnie.
-
Seite 10: Avant Le Montage
Si le produit doit étre fixé ä une structure autre que celles indiquées dans le présent manuel, seul un artisan/installateur professionnel agréé doit effectuer cette installation. La surface de montage doit supporter, au minimum, 4 fois le poids cumulé du support et de la TV. II incombe å l'installateur de s•assurerde la compatibilité... - Seite 11 5. Caractéristiques Taille d'écran de 12 å 40 pouces (de 30,5 å 101,6 cm) Charge max. 40 livres (18,2 kg) Profil de montage x 2,9 pouces (75 x 75 mm) 3,9 x 3,9 pouces (100 x 100 mm) x 3,9 pouces (200 x 100 mm) pouces (200 x 200 mm) Angle d'inclinaison 120 (de -30 å...
-
Seite 12: Wichtige Sicherheitshinweise
1. Wichtige Sicherheitshinweise Lesen Sie diese Bedienungsanleitung sorgfältig und bewahren Sie Sie zum späteren Gebrauch auf. Fügen Sie diese Bedienungsanleitung bei, wenn Sie dieses Produkt an Dritte weitergeben. Wenn Sie das Produkt nutzen, sollten Sie immer grundlegende Sicherheitsvorkehrungen treffen, um das Risiko von Verletzungen zu reduzieren, wozu auch Folgendes gehört: A VORSICHT Risiko von Verletzungen und/oder Sachschäden! - Seite 13 Stützen Sie den Fernseher immer mit Ihren Händen, wenn Sie Anpassungen vornehmen. Achten Sie darauf, Befestigungselemente und andere Verbindungen gut aber nicht zu fest anzuziehen. Verwenden Sie kein Elektrowerkzeug, um die Befestigungselemente anzuziehen. Die Schnur der Halterung muss sich außerhalb der Reichweite von Kindern und Haustieren befinden.
-
Seite 14: Vor Der Montage
Modifizieren Sie die Struktur dieses Produkts in keiner Weise. Falls das Produkt an einer anderen Struktur befestigt werden muss, als in dieser Bedienungsanleitung angegebenen, sollte diese Installation ausschließlich von einem zugelassenen Fachmann/lnstallateur vorgenommen werden. Die Montageoberfläche muss mindestens das 4-fache Gesamtgewicht der Montagehalterung und des Fernsehgeräts tragen können. - Seite 15 5. Technische Daten Bildschirmgröße 12 zoll-40 Zoll Max. Belastung 40 Pfund (18,2 kg) Montageschablonen Zoll (75 x 75 mm) Zoll (100 x 100 mm) x 3,9 Zoll (200 x 100 mm) Zoll (200 x 200 mm) Neigebereich 120 (-30 bis 90 nach oben/unten) Profil Zoll (38,2 mm) Nettogewicht...
-
Seite 16: Istruzioni Importanti Per La Sicurezza
1. Istruzioni Importanti per la Sicurezza Leggere attentamente le istruzioni e conservarle per un utilizzo futuro. In caso di cessione del prodotto a terzi, avere cura di consegnare queste istruzioni. Quando si utilizza il prodotto, necessario rispettare sempre le avvertenze generali di sicurezza per ridurre il pericolo di lesioni, incluse le seguenti: ATTENZIONE Pericolo... - Seite 17 La corda della staffa deve rimanere fuori dalla portata dei bambini e degli animali domestici. Non tagliare, ma nasconderla dopo ['installazione. 2. Installazione Per ulteriori passaggi illustrati relativi a montaggio/assemblaggio/ installazione, fare riferimento alla fine delle istruzione scritte. Questo prodotto deve essere installato da 2 persone adulte. In caso di dubbi, rivolgersi ad un professionista.
-
Seite 18: Prima Del Montaggio
Non incassare mai all'interno di mobili! Ciö pub comportare instabilitä, provocando lesioni personali e/o danni materiali. A VVISO IIprodotto realizzato peradattarsi a diversitelevisori d i dimensioni differenti. Non tutti gli elementi di fissaggio forniti sono necessari per l'installazione del prodotto. 3. - Seite 19 5. Specifiche Dimensione schermo 12-40 pollici (30,5-101 ,6 cm) Carico max. 40 libbre (18,2 kg) Schema di montaggio x 2,9 pollici (75 x 75 mm) pollici (100 x 100 mm) x 3,9 pollici (200 x 100 mm) pollici (200 x 200 mm) Inclinazione 120 (da -30 a 90 in alto/basso) Profilo...
-
Seite 20: Instrucciones Importantes De Seguridad
1. Instrucciones Importantes de Seguridad Lea estas instrucciones atentamente y guérdelas para futuras consultas. Si transfiere el producto a una tercera persona, debe incluir también este manual de instrucciones. A1usar este producto, siempre deben seguirse Ias precauciones de seguridad bésicas para reducir el riesgo de lesiones, incluidas las siguientes precauciones: A PRECAUCIÖN iRiesgo de lesiones y/o danos materiales! D No supere el peso måximo indicado. - Seite 21 La cuerda del soporte debe estar fuera del alcance de los nifios y las mascotas. No corte la cuerda después de la instalaci6n; ocültela. 2. Instalaciön Para pasos adicionales ilustrados sobre el montaje/configuraciön/ instalaci6n, consulte al final de las instrucciones por escrito. Este producto debe ser montado por adultos 2.
-
Seite 22: Antes Del Montaje
iNo instalar encima de muebles! Esto puede provocar inestabilidad y causar lesiones personales y/o daöos a la propiedad. AVISO EIproductosehadiseöado parasercompatible convariosTV de distintos tamaios. No todos tos pasadores entregados son necesarios para instalar el producto. 3. Antes del Montaje •... - Seite 23 5. Especificaciones Tamaio de Ia pantalla 12-40 pulgadas Carga méxima 40 libras (18,2 kg) Patron de montaje pulgadas x pulgadas (75 x 75 mm) 3,9 pulgadas x pulgadas (100 x 100 mm) 7,9 x 3,9 pulgadas (200 x 100 mm) x 7,9 pulgadas (200 x 200 mm) ÅnguIodeinclinaci6n 120 (de -30 a 90 arriba/abajo)
- Seite 24 Avances tecnolégicos y la disponibilidad del producto pueden hacer que reciba un producto de reemplazo con caracteristicas equiparables y precio distinto al comprado originalmente. En todos los casos, el producto de reemplazo comparable seré determinado por nosotros y a nuestra discreciön. Esta garantia limitada solo aplica para productos comprados en amazon.com.
-
Seite 25: Belangrijke Veiligheidsinstructies
1. Belangrijke veiligheidsinstructies Lees deze gebruiksaanwijzing aandachtig door en bewaar ze voor later gebruik. Doe bij overdracht van dit product aan derden deze gebruiksaanwijzing erbij. Bij gebruik van dit product moeten de volgende standaard veiligheidsmaatregelen worden genomen om het risico op letsel te beperken: A OPGELET Risico op Ietsel en/of schade aan eigendommen! D Overschrijd het opgegeven maximale gewicht niet. - Seite 26 Houd het touwtje van de beugel buiten het bereik van kinderen en huisdieren. Snijd het touwtje niet door, maar verberg ze na de installatie. 2. Installatie Voor aanvullende geillustreerde montage-/installatiestappen gaat u naar het einde van de geschreven instructies. Dit product moet door 2 volwassenen in elkaar worden gezet. Raadpleeg in geval van twijfel een vakman.
- Seite 27 Als het product wordt bevestigd aan een structuur die niet in deze gebruikershandleiding wordt vermeld, moet deze installatie worden uitgevoerd door een erkende professionele aannemer/installateur. montageoppervlak moet minstens vier keer het totale gewicht van de montagebeugel en de tv kunnen dragen. Het is de verantwoordelijkheid van de installateur om de geschiktheid van de ondersteunende structuur te controleren.
-
Seite 28: Specificaties
5. Specificaties Grootte beeldscherm 12 inch - 40 inch (30,5 - 101,6 cm) Max. belasting 40 pond (18,2 kg) Montagepatroon 2,9 inch x inch (75 x 75 mm) 3,9 inch x 3,9 inch (IOOx 100 mm) 7,9 inch x inch (200 x 100 mm) inch x inch (200 x 200 mm) 120 (-30 tot 90 omhoog/omlaag) - Seite 29 *ju--+f--...
- Seite 30 < tdä VESA (18.2 kg) 75-0) < 40 (18.2 kg)
- Seite 32 +2-6 4A_J...
- Seite 33 0.63 (16 mm) (1() mm) F No.2 (51 mm x 102 mm) 2 d 75- (51 mm x 102 mm) : 1.5 5- x 3.5 Y 5- (38 mm x 89 mm) — ASTM...
- Seite 35 3.87*frZZii'j'z...
- Seite 36 5.1±ü —f (30.5 101.6 cm) (18.2 kg) x 2.9 (75 x 75 mm) x 3.9 (100 x 100 mm) X 3.9 (200 x 100 mm) x 7.9 (200 x 200 mm) 120 (-30 ±/F) (38.2 mm) 1.56 (0.71 kg) x 8.8 x I .47 (22.3 x 22.3 x 3.73 cm) prræu:T153-0064...
- Seite 37 Wall Type• Typede Mur • Wandtyp • Tipo di parete • Tipo de pared • Soort muur • Drywall with woodenstudsor woodenwall: Drywallshould have maximum 0.63" (16 mm) thickness, wood stud size at least 1.5x 3.50"(38x 89mm).Start drywallinstallationfrom 0. Concrete/masonry w all: Concrete wall shouldhaveat least8" (203mm) thickness,sizeof eachconcreteblock is at least 7.99 x 7.99x 15.98"...
- Seite 38 Trockenbauwand mit Holzständern Oder Holzwand: Trockenbauwände sollten maximal 0,63 Zoll (16 mm) dick sein. DieDicke der Holzständersollte mindestens1,5 x 3,50 Zoll (38 x 89 mm) betragen. BeginnenSiedie Installation an einer Trockenbauwand ab Wandaus Beton/Mauerwerk: Die Betonwandsollte mindestens8 Zoll (203 mm) dick sein und die Größeder einzelnenBetonblöckesollte mindestens 7 ,99x 7,99x 15,98Zoll (203x 203x 406 mm)betragen.
- Seite 39 comominimo. EmpieceIa instalaci6nen cementoa;D. SiIa parednocumpleconIasespecificaciones anteriores, p arainstalareI producto contacte con un profesional. Gipsplaat met houten balken of houten wand: Gipsplaten moeteneen maximaledikte van 0,63 inch (16 mm) hebben,houten dragers moetenminstens 1,5x 3,50inch(38x 89mm)grootzijn. Begin de installatie op eengipsplaat vanaf Betonnen/gemetseldemuur: Eenbetonnenmuur moet minstens 8 inch (203 mm) dik zijn.
- Seite 40 Drywall Installation • Installation sur cloisonssiches • Installation an einer Trockenbauwand • Installazionesucartongesso • Instalaci6nen paneles deyeso • Installatie op gipsplaat • 4" (102 mm) 2" (51 mm) max. 0.63" (16 mm) Locate the wood stud with stud finder: Use a stud finder to locate the stud.
- Seite 41 Individuazione del montante in legno con il rilevatore di montanti: usareun rilevatore di montanti per individuare il montante. Contrassegnare il montante per trovarne il punto centrale. II montante deveesserein grado di sostenere4 volte il pesocombinato del prodotto e del televisore. Localiceel montante de madera con un detector de vigas: Utilice un detector devigas para localizar el montante.
- Seite 42 Placedrilling template: Selectthe desiredinstallation height and tape the drilling template (IT) onthe wall aligning it with the markings of the studs.Check that theTVCenter L ine(2)onthetemplate is at eye levelto the location whereyou would besitting. Placeaspirit levelonthe Check Level l ine (1)of the drilling template(IT)to ensure that it is in a straight line.
- Seite 43 PosizionareIa sagomadi foratura: selezionareI'altezzadi installazione desideratae fissarecon nastroadesivoIa sagomadi foratura (IT) sulla parete allineandola ai segni dei montanti. Verificare chela linea centrale del televisore (2) sulla sagomasia all'altezza degli occhifacendoriferimento alla posizionein cui stareteseduti. Posizionare una livella a bolla d'aria sulla linea di controllo del livello (I) della sagomadi foratura (IT) per assicurarsi c he sia in linea retta.
- Seite 44 Ø 5/ 2"(4 mm) 2.5" (64 mm) Drill holes:Drill 2.5"(64mm)deepholesthroughthe 2 locations (A and B) asmarkedon the template (IT) using a 5/32" (4 mm) drill bit. Remove the drilling template(IT)afterdrilling. Pergage destrous : Percez destrousde2,5pouces (64mm)de profondeur dansles2 emplacements (Aet B)indiqués surle gabarit(IT) l'aided'un foret de5/32 pouce (4 mm).Retirez le gabaritde perqag (IT)aprésIe pergage.
- Seite 45 Taladrar los agujeros: Taladreagujerosde 2,5 pulgadas(64 mm) deprofundidad a travésdeIos2 puntos(Ay B)tal comoestånmarcados en Ia plantilla (IT) utilizando para ello una brocade 5/32 pulgada (4 mm). Retire la plantilla deperforaci6n (IT) despuésdetaladrar. Gatenboren:Boordiepegatenvan2,5inch(64mm)in de 2 locaties (A en B)zoalsaangegevenop desjabloon (IT) met behulp van eenboor van 5/32 inch (4 mm).
- Seite 46 Remove mountingplate: Pullthestring of the mountingplate (MP) downwards and remove the wall bracket (WM). Retrait de la plaque de montage : Tirezle cordonde la plaque de montage(MP)vers le baset retirez le support mural (WM). Montageplatte entfernen: Z iehen SiedieSchnur d er Montageplatte(MP)nachuntenundentfernenSiedie Wandhalterung (WM).
- Seite 47 Prepare for mounting:Tightenthe sidescrews of the wall bracket (WM). Préparation au montage: Serrez Iesvis Iatérales du support mural (WM). Montagevorbereiten: ZiehenSie die seitlichen Schraubender Wandhalterung (WM) an. Prepararsi p eril montaggio:Serrare Ieviti lateralidellastaffa murale (WM). Preparar el montaje:Aprietelostornilloslateralesdelsoportede pared (WM). Montagevoorbereiden: Draai de zijschroevenvan de muurbeugel (WM) vast.
- Seite 48 TS(x 2) Attach wall bracket: Hold the wall bracket with the arrow pointing upwards.Half-waytightens the wall bracketinto eachof the holes usingthe screws(TS).Usinga spirit level, checkthat the wall bracketisalignedhorizontallythen fully tightenthe screws. A fter this step, proceedto Fixation du support mural : TenezIesupport mural avecIa fléche dirigée versle haut.
- Seite 49 Fissare Ia staffa murale: Tenere Ia staffa murale con Ia freccia rivolta verso I'alto. Avvitare a metå Ia staffa murale in ciascuno dei fori utilizzando le viti (TS).Utilizzando unalivella, verificare chela staffa muralesia allineata orizzontalmente, quindi serrarecompletamentele viti. Dopo questopassaggio,procedereal passaggio •n. Instalar el soporte de pared: Sujete el soporte de paredcon la flecha hacia arriba.
- Seite 50 ConcreteInstallation • Montage sur Béton • Installation an einer Betonwand • Installazione su muro in cemento • Instalaci6nen hormig6n• Installatie in beton • Selectinstallation position: Selectsuitable mounting position. Do not drill into any pipes or power lines beneaththe surfaceduring mountingholespreparation. U sevoltage/metal d etectorbeforedrilling any holesto eliminate anysuch potential risks.The concretewall must becapable of supporting 4 timesthe combined weightof the product and the TV.
- Seite 51 DieBetonwand muss in derLagesein,das4-Fache desGesamtgewichts ausProdukt und TV-Gerätzu tragen. SelezioneIa posizione di installazione: selezionareuna posizionedi montaggio idonea. Non forare tubi o linee elettriche sotto Ia superficie durantela preparazione d eifori di montaggio. U tilizzare un rilevatore di tensione/metalli prima di praticare i fori per eliminare i potenziali rischi correlati.
- Seite 52 IT(x1) Placedrilling template:Select t he desired installationheight andtapethedrilling template(IT)onthe wall. Check that theTVCenter Line(2)onthetemplateisat eyelevelto the locationwhereyouwould besitting. Place a spirit levelonthe Check Levelline(I) of the drilling template (IT) to ensurethat it is in a straight line. Positionnement dugabaritdeperpge: Sélectionnez lahauteur d'installationsouhaitée et collezle gabaritdeperqage (IT)aumuravec durubanadhésif.
- Seite 53 Posizionare la dima di foratura: selezionare l'altezza di installazione desiderata e fissare con nastro adesivo Ia dima di foratura (IT) sulla parete.Verificareche Ia linea centrale del televisore (2) sulla dima sia all'altezza degli occhifacendo riferimento alla posizione in cui starete seduti. Posizionare una livella sulla linea di controllo livello (I) della dimadi foratura(IT)perassicurarsi chesiain linearetta.
- Seite 54 ø5/1 "(8mm) 3" 6 mm) Drill holes:Drill 3" (76mm)deepholesthroughthe 2 locations (A and B) asmarkedon the template (IT) using a 5/16" (8 mm) drill bit. Remove the drilling template(IT)afterdrilling. Theninsertthewall plugs(U8)intothe drilledholes. Perqage destrous : Percez destrousde3 pouces ( 76mm)de profondeur dansIes2 emplacements (Aet B)indiqués surIe gabarit(IT) å...
- Seite 55 Praticare i fori: praticare dei fori profondi 3 pollici (76 mm) attraverso le 2 posizioni ( Ae B)comesegnato sulladima(IT)usando una punta da trapano da 5/16 di pollice (8 mm). RimuovereIa dima di foratura(IT)dopolaforatura.Quindi,inserirei tasselli(U8)neifori praticati. Taladrar Ios agujeros: Taladreagujerosde 3 pulgadas(76 mm) deprofundidad a travésdelos2 puntos(Ay B)tal comoesténmarcados en Ia plantilla (IT) utilizando para ello una brocade 5/16 pulgada (8 mm).Retirela plantilla deperforaci6n (IT)después d etaladrar.A...
- Seite 56 Repeat9, Attach wall bracket: Holdthe wall bracketwith the arrow pointing upwards.Half-waytightens the wall bracket into eachof the holes using thescrews (TS).Usingaspirit level,check that the wall bracketisaligned horizontallythen fully tightenthe screws. Répétez9, Fixationdusupportmural: Tenez Ie supportmuralavec Ia fléchedirigée versle haut.Vissez moitié le support mural danschacundestrous å ['aide des vis(TS).
- Seite 57 Ripetere i passaggiS, Fissare la staffa murale: Tenere la staffa murale con la freccia rivolta verso I'alto. Awitare a metå Ia staffa murale in ciascuno dei fori utilizzando viti (TS).Utilizzandouna livella,verificarechela staffa muralesia allineata orizzontalmente,quindi serrarecompletamentele viti. Repitaw, Instalarel soportedepared:Sujeteel soportedeparedconlaflecha hacia arriba.
- Seite 58 Identify mounting pattern • Identifiez le profil de montage • Ermitteln der Montageschablonen• Individuazione dello schemadi montaggio • Identifique el patr6nde monta•e• Montagepatroon identificeren• 7.9" (200 mm)
- Seite 59 Attachthe mountarms(AP) to the mountingplateasrequired usingthescrews (D). Fixez lespattesdemontage(AP) å laplaquedemontage selonles besoinså ['aide desvis (D). Befestigen Siedie Montagearme ( AP) nachBedarfmit den Schrauben(D)an der Montageplatte. Fissare i bracci d i montaggio (AP) alla piastradi montaggiocome indicato utilizzando le viti (D). Coloque Iosbrazos demontaje(AP)a Ia placademontajesegün sea necesario utilizando los tornillos (D).
- Seite 60 Fastenersguide Guide desfixations • Anleitung zu Befestigungselementen• Guida agli elementi di fissaggio • GuiadeIostornillos • Gidsvoor bevestigingen • 1. Screw diameter • Diamitre de vis • Schraubendurchmesser • Diametro delle viti • Dimetro del tornillo • Schroef diameter • 2. Screwlength • Longueurde vis • Schraubenlänge• Lunghezzadelle viti •...
- Seite 61 Spacersguide • Guide desentretoises • Hinweis zu Distanzscheiben • Guida ai distanziatori • Guia de espaciadores• Gidsvoor afstandshouders• —fid To accommodatevarious TV models,the product comeswith spacers with different diametersandthicknesses. T akeinto accountthat the innerdiameterof the spacer s houldmatchthe fastenerused. T he spacertype is determined byTV'senclosuretype andits mounting holes.
- Seite 62 Um verschiedene TV-Modellezu unterstützen,liegen dem Produkt Distanzscheiben mit unterschiedlichen Durchmessern und Dicken bei. Beachten Sie,dass der Innendurchmesser der Distanzscheibe mit dem genutzten Befestigungselementübereinstimmensollte. Der TypderDistanzscheibe WirddurchdenGehäusetyp d esFernsehers und dessenBefestigungslöcher b estimmt. (I) FlacheTV-Geräteohnestörende Elemente:benötigen keine Abstandshalter (2) TV-Gerätemit eingelassenen Befestigungslöchern,(3)TV-Geräte mit nachaußen ragendenKabelbuchsen, ( 4)TV-Gerätemit gewölbter Rückseite:benötigenAbstandshalter,um genügendFreiraumfür die Montageplatte zu schaffen.
- Seite 63 0m voorverschillende televisiemodellen g eschikt t e zijn,wordt het product geleverdmet afstandshoudersvan eenverschillende diameteren dikte. Houd ermeerekening dat de binnendiameter van de afstandshouderdient overeente stemmenmet degebruikte bevestiging.Het soort afstandshouderwordt bepaalddoor het soort televisiebehuizingen montagegaten. (I) Plattetelevisies zonderobstakels: h ebbengeenafstandshouders nodig (2)televisies met ingezette montagegaten, (3)televisies met naar buiten uitstekendekabelaansluitingen,(4)televisiesmet eengebogen achterkant: h ebben afstandshouders nodigomvoorvoldoende ruimte...
- Seite 64 R(x4) S(x4) Choose the screws (mount armswith flat TV):Testthe depth anddiameterof TV'smountingholesusingscrews A,Jand M(sizes M4, M6 and M8). Do not force any of the screwsin. If there is resistance, s top immediately andtry a screw with a smallerdiameter. F indthe suitable screws (A/J/M)and pairit with the corresponding w ashers (R/S).Doa testfit of all 4 holesbeforefully fastening the mountingplateto the TV.
- Seite 65 Schraubenauswählen (Montagearme mit flachem Fernsehgerät):TestenSiedie Tiefe und den Durchmesser d er BefestigungslöcherdesFernsehgeräts mit denSchraubenA, J und M (Größen M4, M6 und M8). Drehen Sie keine der Schrauben mit Gewalt ein.HörenSiesofortauf,wennSieWiderstand spüren, u ndversuchen Sie es mit einer Schraube mit kleinerem Durchmesser.
- Seite 66 De schroevenkiezen (montage-armen met platte tv): Testde diepte endiameter van de montagegatenvan detv met schroevenA, J en M (M4, M6en M8).Oefen geendruk uit om deschroevenvast te draaien.Alser weerstandwordt gevoeld,stop onmiddellijk enneemeen schroef m eteenkleinerediameter. Z oekdegeschikte schroeven (A/J/M) encombineer z emetdebijbehorende sluitringen(R/S). V oereentest uit van alle vier gatenvoordat u de montageplaat volledig aan detv bevestigt.Gadoor naar (73"/...
- Seite 67 B(x4) K(x4) Install spacers (curvedTV):Thegoalof thisstepisto levelthe backof the curvedTVintoa flat surface. T estthe depthanddiameter of TV'smounting holesusing screwsB,K and N (sizesM4,M6 and M8). Donot forceanyof the screws in. If thereis resistance, stopimmediately andtry a screwwith a smaller diameter. Thentestthe suitablescrews with the corresponding w ashers (R/S)and spacers(Q)to find the suitable combination.
- Seite 68 Installation desentretoises (téléviseur incurvé) : Lebut de cette étapeest d'aplanir l'arriére du téléviseurincurvépour obtenirunesurface plane.VérifiezIa profondeuret Iediametredestrousde fixation du téléviseurå ['aidedesvis B,Ket N (tailles M4,M6et M8).Neforcezaucune desvis.Encasderésistance, arrétez immédiatement et essayez u nevisde plus petit diamétre.TestezensuiteIesvisadaptéesavecIesrondelles(R/S) et les entretoises(Q)correspondantes pour trouver Iacombinaison qui convient.Faitesun essai d 'ajustement des4trous avant defixer complétement Ia plaquedemontage autéléviseur.
- Seite 69 Instalar separadores(TV curvo): El objetivo de este pasoes nivelar Ia parte posterior del televisor curvoen una superficieplana. PruebeIa profundidad y eIdiåmetro de Iosorificios de montaje utilizando los tornillos B, Ky N (tamaäosM4, M6y M8). Nofuerce ninguno de los tornillos. Si nota resistencia,pareinmediatamente y pruébelo con untornillo de diåmetro inferior.
- Seite 70 R(x4) Install spacers(flat TV): Testthe depth anddiameter of TV's mounting holesusing screwsA and J (sizesM4 and M6). Do not force any of the screwsin. If there is resistance,stop immediately andtry a screw with asmaller diameter.Findthe suitable screws(A/J) and pair it with the corresponding w ashers (R/S).Doatest fit of all 4 holesbeforefully fastening the mounting plate to the TV.
- Seite 71 einenProbeeinbau mit den4 Löcherndurch,bevorSiedie Halterungen vollständig am Fernsehgerät befestigen.GehenSieweiter zuto. Installare i distanziatori (televisore a schermopiatto): ven careIa profonditä e il diametro dei fori di montaggio del televisore utilizzando le viti A eJ (dimensioniM4e M6). Non forzare I'inserimento di nessuna delleviti. Seoppongono resistenza, fermarsi immediatamente e provarecon unavite di diametro piü...
- Seite 72 B(x4) Q(x4) R(x4) Install spacers (curvedTV):Thegoalof this stepisto levelthe back of the curved TV into aflat surface.Testthe depth anddiameter of TV'smountingholesusingscrews B andK(sizes M4andM6).Donot forceanyof the screws in. If thereis resistance, stopimmediately and try ascrewwith a smaller diameter.Thentest the suitable screwswith the corresponding w ashers (R/S)andspacers ( Q)to findthe suitable combination.
- Seite 73 Abstandshalter montieren (gewölbtes Femsehgerät):Ziel diesesSchritts ist, die Rückseitedesgewölbten Fernsehgeräts so auszugleichen, d asseine ebeneFlächeentsteht.TestenSiedie Tiefe und den Durchmesser d er Befestigungslöcherdes Fernsehgeräts mit den SchraubenB und K (GrößenM4 und M6). DrehenSie keineder Schrauben mit Gewaltein. HörenSiesofort auf, wenn SieWiderstandspüren, und versuchen Sie es mit einer Schraube mit kleinerem Durchmesser. TestenSiedann die passenden Schraubenmit den entsprechenden Unterlegscheiben(R/S)und Abstandshaltern(Q), um eine geeignete Kombination...
- Seite 74 Afstandshoudersinstalleren (gebogentv): Het doel van deze stap is om deachterkant van de gebogentv waterpaste zetten met een vlakke ondergrond.Testde diepte en diameter van de montagegaten van detv met schroevenB en K(M4 en M6).Oefengeendruk uit om deschroeven v astte draaien. A lserweerstand wordt gevoeld, s top onmiddellijk en neemeenschroefmet eenkleinere diameter.
- Seite 75 MounttheTVto the mountingbracket:With 1 adult oneither sideof the TV,lift theTVto hookthe mountingplateontothe wall bracket (WM). Pullthe stringdownwards t o lockthe mountingplatethen release the string. Fixationdutéléviseurausupportdemontage: Avec1 adultede chaquecöté du téléviseur,soulevezle téléviseur pour accrocherla plaque de montageau support de montage(WM). Tirez le cordonvers le baspour verrouiller la plaque de montage,puis relächez Ie cordon.
- Seite 76 Fernsehgerätan der Montagehalterung befestigen: Heben Siedas Fernsehgerät m it I Erwachsenen anjeder Seitean,um die Montageplatte aufderWandhalterung (WM)einzuhängen. ZiehenSiedie Schnurnachunten, umdie Montageplatte zu verriegeln. Lassen Sie dann die Schnur IOS. Montareil televisoresulla staffa di montaggio:conI persona adulta suentrambi i lati del televisore,sollevareil televisoreper agganciare la piastradi montaggioallastaffamurale(WM).
- Seite 77 Adjust the tilt: Askanother adult to hold the TVsteady,then loosenthe top tilt screwof the wall bracket (WM).Oncethe other adult adjustthe tilt, fully tightenthe tilt screw. The string of the bracket must be out of reachof children and pets.Do not cut, but hideawayafter installation. Régtagede l'inclinaison : Demandezå...
- Seite 78 Neigungeinstellen:BittenSieeinenweiterenErwachsenen, dasFernsehgerätruhig zu halten, und lösenSie danndie Obere Neigeschraube der Wandhalterung (WM).ZiehenSie die Neigeschraube voll an, sobald der andereErwachsene die Neigungeingestellt hat. Die Schnurder Halterung musssichaußerhalbder Reichweitevon Kindern und Haustieren befinden. Nicht abschneiden, sondern nach der Installationverbergen. Regolare I'inclinazione:Chiedere a un'altrapersona adulta di tenere fermo il televisore,quindi allentare la vite di inclinazione superioredella staffa murale (WM).Quando l'altra personaadulta ha regolato I'inclinazione,serrarecompletamente Ia vite di inclinazione.
- Seite 79 TV & (WM)
- Seite 80 MADE IN CHINA FABRIQUÉ ENCHINE HERGESTELLT IN CHINA PRODOTTO IN CINA HECHO EN CHINA GEMAAKT IN CHINA ceü:n V03-12/22...