Herunterladen Inhalt Inhalt Diese Seite drucken
Multiplex wingstabi Betriebsanleitung

Multiplex wingstabi Betriebsanleitung

Für alle rc-flächenmodelle
Vorschau ausblenden Andere Handbücher für wingstabi:

Werbung

Verfügbare Sprachen

Verfügbare Sprachen

Betriebsanleitung
Instruction Manual
Mode d'emploi
Seite
2-20
Page
21-39
Page
40-59

Werbung

Inhaltsverzeichnis
loading

Inhaltszusammenfassung für Multiplex wingstabi

  • Seite 1 Betriebsanleitung Seite 2-20 Instruction Manual Page 21-39 Mode d’emploi Page 40-59...
  • Seite 2: Inhaltsverzeichnis

    Regelmäßig Reichweitentests durchführen. Beachten Sie bitte auch die zubewahren und beim Verkauf des Produktes an Dritte weiterzugeben. Vor In- erweiterte Anleitung, die Sie mit der WINGSTABI Software auf Ihrem Computer betriebnahme Anleitung lesen. Nur für den vorgesehenen Einsatzbereich ver- installiert bekommen.
  • Seite 3: Gewährleistung/Haftungsausschluss

    · Veränderungen/Reparaturen, die nicht von MULTIPLEX oder einer mittelbar beteiligten Warenmenge der Firma MULTIPLEX Modellsport GmbH & MULTIPLEX-Servicestelle ausgeführt wurden Co.KG. Dies gilt nicht, soweit die MULTIPLEX Modellsport GmbH & Co.KG nach · Versehentliche oder absichtliche Beschädigungen zwingenden gesetzlichen Vorschriften wegen Vorsatzes oder grober Fahrlässig- ·...
  • Seite 4: Produkt- Und Funktionsbeschreibung

    Zeit das perfekte Gefühl über sein Modell zu haben, ist der Traum jedes Pi- Graupner, Futaba, M-LINK, Jeti, HiTEC, Weatronic und weitere. Es unterstützt loten. Das WINGSTABI macht das möglich und lässt weder bei Einsteigern noch folgende Signalarten: PPM, Futaba S.BUS*, MULTIPLEX SRXL, Graupner SUMD bei Profis Wünsche in Sachen Handhabung, Einstellung und Funktion offen.
  • Seite 5: Lieferumfang

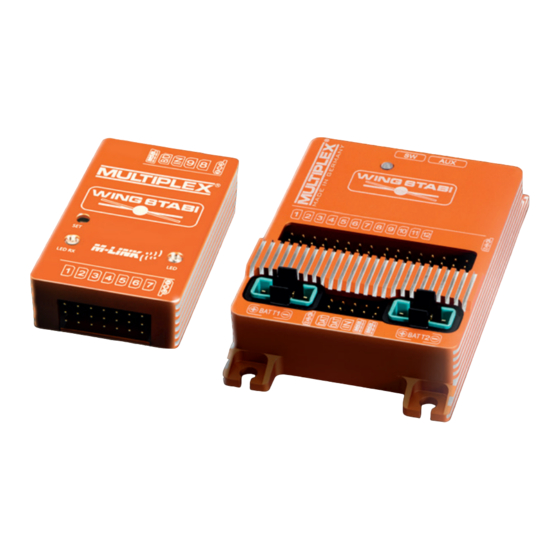
    3. Lieferumfang WINGSTABI-7-Channel WINGSTABI-RX-7-DR M-LINK WINGSTABI-9-Channel WINGSTABI-RX-9-DR M-LINK · WINGSTABI-7 · WINGSTABI-RX-7-DR M-LINK · WINGSTABI-9 · WINGSTABI-RX-9-DR M-LINK · Anleitung mit integriertem Empfänger · Anleitung mit integriertem Empfänger · Patchkabel 320 mm · 7-Kanal · Patchkabel 320 mm · 9-Kanal ·...
  • Seite 6: Technische Daten

    4. Technische Daten WINGSTABI 7/9 WINGSTABI RX-7/9-DR M-LINK Steuerkanäle 7 bzw. 9 Empfangssystem M-Link 2,4 GHz Servo-Kanalzahl Gewicht ohne integrierten 27 g Empfänger Antennenlänge 2 x 16 cm Gewicht mit integriertem 35 g Empfänger LED Codes WingStabi: Abmessungen ca. 54 x 34 x 15 mm ·...
  • Seite 7 WINGSTABI 12/16 WINGSTABI RX-12/16-DR M-LINK Steuerkanäle 12 bzw. 16 Empfangssystem M-Link 2,4 GHz Servo-Kanalzahl 12/16 Gewicht ohne integrierten 92 g Empfänger Antennenlänge 2 x 37 cm Gewicht mit integriertem 100 g Empfänger LED Codes WingStabi: Abmessungen (L x B x H) ca.
  • Seite 8: Anschlussbelegung

    5. Anschlussbelegung Querruder 1 Querruder 1 Höhenruder V-Leitwerk 1 Seitenruder V-Leitwerk 2 Gasausgang Gasausgang Querruder 2 Querruder 2 Klappe 1 Klappe 1 Klappe 2 Klappe 2 Querruder 1 Querruder 2 Seitenruder (optional) Gasausgang...
  • Seite 9 MSB (Telemetriedaten-BUS) seriell Schnittstellen (USB/Bluetooth) HiTEC SL S-BUS MULTIPLEX SRXL Graupner SUMD Graupner SUMO Jeti UDI JR XBUS Mode B Spektrum PPM...
  • Seite 10 5. Anschlussbelegung Schalter Erweiterungen HiTEC SL S-BUS MULTIPLEX SRXL Servoausgänge Graupner SUMD Graupner SUMO Jeti UDI JR XBUS Mode B Batterie 2 Spektrum PPM Batterie 1 MSB (Telemetriedaten-BUS) seriell Schnittstellen (USB/Bluetooth)
  • Seite 11: Konfiguration

    Besitzen Sie ein WINGSTABI RX-7-DR, WINGSTABI RX-9-DR, WINGSTABI RX- Artikelnummer # 8 5149 wird automatisch mit installiert. 12-DR pro oder WINGSTABI RX-16-DR pro (mit integriertem Empfänger), ist der 3. Software nach der Installation starten. IN Steckplatz ohne Funktion. Es kann kein zweiter Empfänger für den Multiplex 4.
  • Seite 12: Startbildschirm

    Flugzustand 4 (Werte sind per Drag&Drop auf andere Flugzustände übertragbar) Werkzeuge Firmware-Update Übertragung der Einstellung zum WINGSTABI (Symbol blinkt rot, wenn Übertragung wegen Änderungen der Einstellungen erfolgen muss) Auswahl zwischen Basis- und erweiterten Einstellungen Menü (WINGSTABI neu starten, WINGSTABI auf Werkseinstellung zurücksetzen, WINGSTABI-Einstellungen importieren,...
  • Seite 13: Servoeinstellungen

    9. Servoeinstellungen Erweiterte Servozuordnung Bei allen Servoeinstellungen ist zu beachten, dass diese im WINGSTABI und Bei Modellen, die mehr Servos verwenden, als auf Seite 8 dieser Anleitung in nicht am Sender erfolgen. Dabei muss die Trimmung am Sender auf Neutral den Standard-Anschlussschemen gezeigt, ordnen Sie diese in dem Servofens- bzw.
  • Seite 14: Flugphasen

    Wie aktiviert man die 4. Flugphase, die in der Standardkonfiguration nicht aktiviert wird? Flugphase aus (Flugphase 1) Das WINGSTABI ist aus und leitet die Steuerbefehle direkt vom Sender an die Wechseln Sie in der Software auf das Empfängereinstellfenster „4. Flugphase Servos weiter.
  • Seite 15: Empfindlichkeitseinstellung

    · Trimmung am Sender nutzen, bis das Modell neutral fliegt · Modell landen Das WINGSTABI ist nun für den ersten Flug mit unterstützender Regelung bereit. · Nach der ersten Landung müssen die getroffenen Trimmwerte per schnellem Es empfiehlt sich, immer in der Flugphase 1 oder 2 zu starten. Gerade bei den Umschalten des Flugphasenschalters an das WINGSTABI übergeben und so...
  • Seite 16: Übersichtsbildschirm

    Dem Einsteiger wird empfohlen, diese Voreinstellungen zumindest für die ersten Flüge beizubehalten. Schaltfläche importieren: Hier haben Sie die Möglichkeit, die zuvor über den MULTIPLEX Launcher expor- tierte Einstellungsdatei auf Ihr WINGSTABI zu importieren. Nach dem Klicken auf die Schaltfläche „Importieren“ öffnet sich automatisch ein Fenster. In diesem wählen Sie den Speicherort Ihrer WINGSTABI-Dateien und klicken auf „OK“.
  • Seite 17: Telemetrie

    Übertragungsqualität (LQI) zugeordnet und sollte deshalb nicht anderweitig vergeben werden. Multiplex Sensor Bus (MSB) Das Multiplex Sensor Bus (MSB) System ist eine Entwicklung aus dem Hause Multiplex. Es erlaubt den Anschluss von hintereinander oder parallel geschalte- ten Sensoren, welche den MSB unterstützen.
  • Seite 18: Optimierung

    Hat man ein Modell mit den Basis-Einstellungen des Assistenten oder der Mo- dellvorlage erfolgreich eingeflogen, kann man – wenn nötig – in den „Erweiter- ten Einstellungen“ an die Optimierung gehen. Dazu bietet das WINGSTABI alle seine Voreinstellungen in allen Flugphasen übersichtlich an. Im ersten Schritt kann man per rechtem Mausklick in der Kopfzeile für jede Phase Standardwerte...
  • Seite 19: Binding

    16. Binding Ablauf der Binding-Prozedur Bei einem WINGSTABI mit integriertem Empfänger muss dieser auf den Sender eingelernt werden. Dieser Vorgang wird als „Binding“ bezeichnet. Schritt 1: Zum Binding müssen Sender und Empfänger in den Binding-Mode Die Impulsausgabe an den Servoausgängen bleibt während des Bin- gebracht werden: ding-Vorgangs ausgeschaltet.
  • Seite 20 16. Binding Schritt 2: Nachdem Sender und Empfänger gebunden sind, gehen beide au- Die Funktionen der SET-Taste tomatisch in den Normalbetrieb über: Die LED am Empfänger blinkt langsam Wird die SET-Taste auf der Oberseite des Empfängers beim Einschalten ge- drückt, startet der Binding-Vorgang. Im Empfangsbetrieb können über die Die Binding-Prozedur dauert in der Regel nur wenige Sekunden.
  • Seite 21: Safety Information

    Please also note the extended manual that you get on when selling the product to third parties. Please read carefully before initial installed with the WINGSTABI software on your computer. use. For intended use only. 1.1. CE declaration of conformity...
  • Seite 22: Guarantee And Limitation Of Liability

    MULTIPLEX Service Centre This does not apply if MULTIPLEX Modellsport GmbH & Co.KG is obliged to · Accidental or deliberate damage accept unlimited liability in accordance with mandatory law for deliberate or ·...
  • Seite 23: Product And Function Description

    · Variation factor can be set separately for each axis The WINGSTABI is straightforward and swift to program using a PC or an APP · 7, 9 channels, or 12, 16 channels Pro versions with integrated battery backer with any smartphone or tablet.
  • Seite 24: Contents

    3. Contents  WINGSTABI-7-Channel WINGSTABI-RX-7-DR M-LINK WINGSTABI-9-Channel WINGSTABI-RX-9-DR M-LINK · WINGSTABI-7 · WINGSTABI-RX-7-DR M-LINK · WINGSTABI-9 · WINGSTABI-RX-9-DR M-LINK · Instructions with integral receiver · Instructions with integral receiver · 320 mm patch-leads · 7-channel · 320 mm patch-leads · 9-channel ·...
  • Seite 25: Specification

    - No configuration available Power supply 4 - 6 NiXX cells, 2S LiPo/Lilo - No RC signal - Stick moves when the WingStabi is switched on Operating temperature range –20°C to +55°C - Model moves when switched on - Critical error, hardware failure...
  • Seite 26 - No configuration available - No RC signal Power supply 5 NiXX cells, 2S LiPo/Lilo/LiFe - Stick moves when the WingStabi is switched on - Model moves when switched on - Critical error, hardware failure Operating temperature range –20°C to +55°C...
  • Seite 27: Terminal Assignment

    5. Terminal assignment Aileron 1 Aileron 1  Elevator V-tail 1 Rudder V-tail 2 Throttle output Throttle output Aileron 2 Aileron 2 Flap 1 Flap 1 Flap 2 Flap 2 Aileron 1 Aileron 2 Rudder (optional) Throttle output...
  • Seite 28 5. Terminal assignment MSB (telemetry data bus) serial  Interface (USB/bluetooth) HiTEC SL S-BUS MULTIPLEX SRXL Graupner SUMD Graupner SUMO Jeti UDI JR XBUS Mode B Spektrum PPM...
  • Seite 29 Switcher Extensions  HiTEC SL S-BUS MULTIPLEX SRXL Servo outputs Graupner SUMD Graupner SUMO Jeti UDI JR XBUS Mode B Battery 2 Spektrum PPM Battery 1 MSB (telemetry data bus) serial Interface (USB/bluetooth)
  • Seite 30: Configuration

    RX-12-DR pro or WINGSTABI RX-16-DR pro (with integrated receiver) the IN # 8 5149 will be installed automatically as well. slot has no function. You could not connect a second receiver for the multiplex 3. Launch the software after completing the installation.
  • Seite 31: Start Screen

    Flightmode 4 (values can be applied to other flight modes by drag&drop) Tools Firmware update Applying the settings to the WINGSTABI (Symbol flashes red if the settings must be re-applied because they have changed) Selection between basic and advanced settings...
  • Seite 32: Servo Settings

    Advanced servo mapping  It must be ensured that all servo settings are made on the WINGSTABI and not For models which use more servos than those shown on page 21 of these in- the transmitter. The trim on the transmitter must remain neutral or zero. Mixers structions in the standard wiring diagrams, map them in the servo window.
  • Seite 33: Flight Phases

    For elaborate acrobatics. This mode can only be used to a limited extent during landing and take-off, as it demands a certain level of experience in flying the WINGSTABI. Stalls are often detected too late by the pilot here. The advantage is that the model remains absolutely consistent even with heavy winds. What makes the WINGSTABI special here is that control over the rudder is specially optimised, thus ensuring a realistic airborne appearance.
  • Seite 34: Gain (Sensitivity)

    · After the first landing, the affected trim settings must be transferred to and thus programmed in the WINGSTABI by quickly toggling the flight The WINGSTABI is now ready for the first flight with assisted stabilisation. It is phase switch advisable to always take off in flight phases 1 or 2.
  • Seite 35: Overview Screen

    Import function This enables you to import settings files to your WINGSTABI which have previ- ously been exported using the MULTIPLEX Launcher. When you click the “Im- port” button, a window opens automatically. Browse for the file path of your WINGSTABI files and click “OK”.
  • Seite 36: Telemetry

    Avoid double assignments at all costs. Address 1 is assigned by default to trans- mission quality (LQI) and should therefore not be assigned differently. Multiplex Sensor Bus (MSB) The Multiplex Sensor Bus (MSB) system is a development from Multiplex. It allows to connect the sensors supporting the MSB in cascades or parallel.
  • Seite 37: Optimisation

    – if required – then perform optimizations in “Advanced settings”. To help you with this, the WINGSTABI clearly displays all default settings in all flight phases. Start by right clicking the page header for each phase in order to select the standard settings for purely damping mode, for an optimised damping mode, for fully stabilised mode or even aerobatics mode.
  • Seite 38: Binding

    16. Binding Binding procedure If you are using a WINGSTABI with an integral receiver, this must be programmed  to the transmitter. This procedure is referred to as “Binding”. Step 1: In order to bind, the transmitter and receiver must be brought into...
  • Seite 39 Step 2: After the transmitter and the receiver are connected, both switch to Functions of the SET button  normal operation and the LED on the receiver flashes slowly. If the SET button on top of the receiver is pressed when being turned on, the binding procedure begins.
  • Seite 40: Consignes De Sécurité

    à votre WINGSTABI est le ‘manuel de démarrage rapide’. Il doit être lu avant la mise en service. Il doit être utilisé exclusivement pour La ‘notice complète’...
  • Seite 41: Garantie Et Exclusion De Responsabilité

    · Utilisation non conforme à l’usage prévu Dans la mesure où la loi le permet, l’obligation de la société MULTIPLEX Mo- · Entretien incorrect, retardé, annulé ou effectué par un organisme non agréé...
  • Seite 42: Description Du Produit Et De Ses Fonctions

    RC. Avoir à tout moment la sensation d'une parfaite maîtrise de Graupner, Futaba, M-LINK, Jeti, HiTEC, Weatronic et autres. son modèle réduit est le rêve de tout pilote. C'est possible avec le WINGSTABI Il est compatible avec les types de signaux suivants: PPM, Futaba S.BUS*, qui satisfait les souhaits des débutants comme des confirmés en matière de...
  • Seite 43: Contenu De La Livraison

    3. Contenu de la livraison WINGSTABI-7-Channel WINGSTABI-RX-7-DR M-LINK WINGSTABI-9-Channel WINGSTABI-RX-9-DR M-LINK  · WINGSTABI-7 · WINGSTABI-RX-7-DR M-LINK · WINGSTABI-9 · WINGSTABI-RX-9-DR M-LINK · Instruction avec récepteur intégré · Instruction avec récepteur intégré · Câble patch 320 mm · 7 voie ·...
  • Seite 44: Caractéristiques Techniques

    Alimentation électrique 4 à 6 cellules NiXX, 2S LiPo/Lilo - Pas de signal RC - Manche déplacé lors de la mise en marche du WINGSTABI Gamme de températures de –20°C à +55°C - Modèle réduit déplacée lors de la mise en marche fonctionnement autorisée...
  • Seite 45 Alimentation électrique 5 cellules NiXX, 2S LiPo/LiIo/LiFe - Pas de signal RC - Manche déplacé lors de la mise en marche du WINGSTABI Gamme de températures de –20°C bis + 55°C - Modèle réduit déplacée lors de la mise en marche fonctionnement autorisée...
  • Seite 46: Affectation Des Connexions

    5. Affectation des connexions Aileron 1 Aileron 1  Gouverne de profondeur Empennage V 1 Gouvernail de direction Empennage V 2 Sortie des gaz Sortie des gaz Aileron 2 Aileron 2 Clapet 1 Clapet 1 Clapet 2 Clapet 2 Aileron 1 Aileron 2 Gouvernail de direction (optionnel) Sortie des gaz...
  • Seite 47 MSB (BUS de données de télémétrie) série  Interfaces (USB/Bluetooth) HiTEC SL S-BUS MULTIPLEX SRXL Graupner SUMD Graupner SUMO Jeti UDI JR XBUS Mode B Spektrum PPM...
  • Seite 48 5. Affectation des connexions Interrupteur Additif  HiTEC SL S-BUS MULTIPLEX SRXL Sorties servo Graupner SUMD Graupner SUMO Jeti UDI JR XBUS Mode B Batterie 2 Spektrum PPM Batterie 1 MSB (BUS de données de télémétrie) série Interfaces (USB/Bluetooth)
  • Seite 49: Configuration

    Pour les WINGSTABI sans récepteur M-Link intégrée, branchez votre propre 1. Télécharger le MULTIPLEX Launcher à partir du bouton DOWNLOAD de la récepteur à l´aide du cordon fourni (Cordon patch) sur la prise IN du WINGSTABI. page d'accueil du site MULTIPLEX et l'installer sur le PC.
  • Seite 50: Écran De Démarrage

    Assiette 4 (Les valeurs sont transposables par Drag&Drop à d’autres assiettes) Outils Mise à jour du micrologiciel Transmission du réglage au WINGSTABI (Le symbole clignote en rouge, lorsque la transmission doit avoir lieu à la suite des modifications des réglages) Choix entre les réglages de base et les réglages étendus...
  • Seite 51: Réglage Des Servos

    Affectation élargie des servos  On veillera à ce que tous les réglages de servos s'effectuent sur le WINGSTABI Si un modèle réduit utilise plus de servos que ne le montre le schéma de raccor- et non sur l'émetteur. Pour cela, la compensation sur l'émetteur doit être sur le dement standard en page 36 de ce manuel, ceux-ci doivent être attribués à...
  • Seite 52: Phases De Vol

    Avantage : même par vent fort, le modèle réduit conserve une stabilité direc- tionnelle parfaite. La particularité du WINGSTABI réside ici dans le fait que le gouvernail de direc- tion est réglé de manière optimale, ce qui permet un comportement en vol très naturel du modèle réduit.
  • Seite 53: Réglage De La Sensibilité

    Déplacer rapidement le commutateur de phase de vol 4 à 5 fois d'avant en arrière. Ainsi, les valeurs de compensation sur l'émetteur Procédure à suivre pour un premier vol avec le WINGSTABI nouvellement installé : sont programmées sur le WINGSTABI comme nouvelle position neutre.
  • Seite 54: Écran D'aperçu Général

    Importation des boutons de commande : Vous avez ici la possibilité d'importer sur votre WINGSTABI les données de réglage exportées précédemment par l'intermédiaire du MULTIPLEX Launcher. Cliquer sur le bouton "Importer", une fenêtre s'ouvre automatiquement. Dans cette fenêtre, choisissez le lieu de mémorisation de vos données WINGSTABI et cliquez sur OK.
  • Seite 55: Télémétrie

    1 est attribuée de manière standard à la qualité de transmission (LQI) et ne doit donc pas être attribuée autrement. Multiplex Sensor Bus (MSB) Le système Multiplex Sensor Bus (MSB) est un développement de Multiplex. Il permet de brancher des capteurs compatibles MSB connectés en série ou en parallèle.
  • Seite 56: Optimisations

    - si on le souhaite - dans le chapitre "Ré- glages étendus" pour optimiser les performances du modèle réduit. Pour cela, le WINGSTABI propose de manière claire tous les préréglages dans toutes les phases de vol. Dans un premier temps, on peut, avec un clic droit dans l'en-tête, sélectionner pour chaque phase des valeurs standards pour un simple mode...
  • Seite 57: Liaison

    16. Liaison Si le WINGSTABI a un récepteur intégré, ce dernier doit être programmé sur Déroulement de la procédure de liaison  l'émetteur. Cette procédure est appelée liaison ("Binding"). Étape 1 : Pour réaliser la liaison, émetteur et récepteur doivent être en mode Les sorties servo n'émettent pas d'impulsions durant la procédure de...
  • Seite 58 16. Liaison Étape 2 : Une fois que l'émetteur et le récepteur sont reliés, ils passent tous les deux Fonctions de la touche SET  automatiquement en fonctionnement normal : La LED du récepteur clignote lentement. La procédure de liaison commence lorsque l'on appuie sur la touche SET située sur la partie supérieure du récepteur.
  • Seite 59: Zubehör

    # 8 5194 # 4 5188 Klebepad für WINGSTABI 7/9 Klebepad für WINGSTABI 7/9 Bluetooth-Modul Adhesive pad for WINGSTABI 7/9 · Tapis adhésifs pour WINGSTABI 7/9 Bluetooth module · Module Bluetooth Optionales Zubehör · Optional accessories · Accessoires optionnels Accessoires optionnels...
  • Seite 60 V1.2.7 # 9855352 MULTIPLEX Modellsport GmbH & Co.KG · Westliche Gewerbestr. 1 · 75015 Bretten · Germany www.multiplex-rc.de...

Inhaltsverzeichnis