Herunterladen Inhalt Inhalt Diese Seite drucken
Inhaltsverzeichnis

Werbung

Verfügbare Sprachen
  • DE

Verfügbare Sprachen

  • DEUTSCH, seite 3
BRAUN PHOTO TECHNIK GmbH
Klingenhofstraße 72
90411 Nürnberg / Germany
www.braun-phototechnik.de
DF1360 / 08.14
DigiFrame 1360
Gebrauchsanweisung
Handleiding
Instruction Manual
Manual de operação
Mode d'emploi
Bruksanvisning
Manuale di Istruzioni
Instrucciones de manejo

Werbung

Inhaltsverzeichnis
loading

Inhaltszusammenfassung für Braun DigiFrame 1360

  • Seite 1 DigiFrame 1360 BRAUN PHOTO TECHNIK GmbH Gebrauchsanweisung Handleiding Klingenhofstraße 72 Instruction Manual Manual de operação 90411 Nürnberg / Germany Mode d'emploi Bruksanvisning www.braun-phototechnik.de Manuale di Istruzioni Instrucciones de manejo DF1360 / 08.14...
  • Seite 2 Deutsch ......1 Hinweis! Dieses Symbol auf dem Produkt oder in der Gebrauchsanleitung bedeutet, dass das Elektrogerät nicht im Hausmüll entsorgt wer- Dieser DigiFrame ist in unterschiedlichen Ver- den darf, sondern EU-weit an speziellen Sammelstellen abgege- sionen erhältlich. Die genauen Funktionen des ben werden muss.
  • Seite 3: Inhaltsverzeichnis

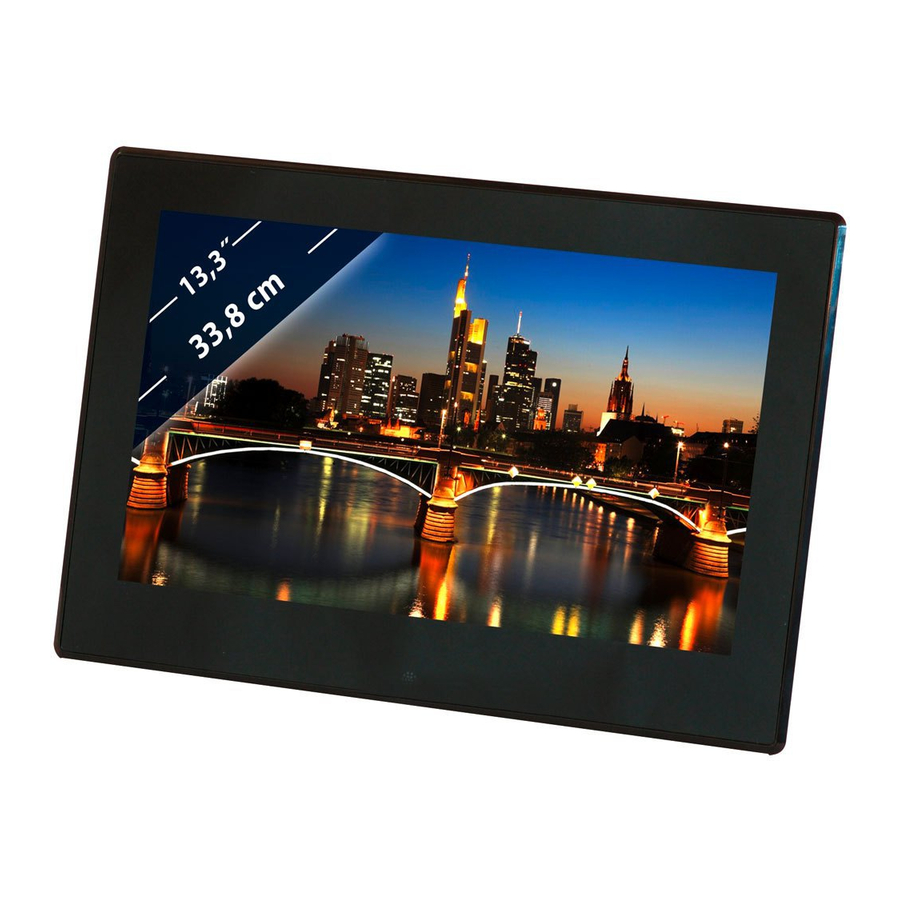
    D E U T S C H Wichtige Hinweise: Einleitung: Vielen Dank, dass Sie sich für diesen digitalen Bil- derrahmen entschieden haben. Er ermöglicht die Vorsichtsmassnahmen und Pflege schnelle Anzeige von Fotos, die Sie mit eine Digital- • Nur für Verwendung im Innenbereich kamera oder dem Handy aufgenommen haben oder •...
  • Seite 4: Aufstellungsanleitung

    D E U T S C H Funktionen: 1. Unterstützte Bildformate: JPEG 8. Unterstützt laufende Untertitel während der 2. Unterstützte Audioformate: MP3 Foto-, Musik- und Filmwiedergabe 3. Unterstützte Videoformate: MPEG1, MPEG2, 9. Unterstützt Zeitleiste während der Foto-, Musik- MPEG4, H.264, RM, RMVB, MOV, MJPEG, DivX und Filmwiedergabe 4.
  • Seite 5: 2B. Fernbedienung

    D E U T S C H 2b. Fernbedienung 1. Stumm: Lautsprecher stummschalten 2. Source: Eingangsquelle wählen (HDMI- IN/DMP) 3. Ein/Aus: Ein- und ausschalten 4. Foto: Fotos anzeigen 5. Musik: Musik abspielen 6. Film: Filme abspielen Wiedergabe/Pause: Wiedergabe im Stopp- oder Pausemodus starten, mit erneutem Tastendruck unterbrechen (Pause) 8.
  • Seite 6: Erste Schritte

    D E U T S C H 3. Erste Schritte USB-Speichermedium und Speicherkarte Das Gerät unterstützt SD/MMC/MS und USB 2.0. 3.1 Schließen Sie das mitgelieferte Netzteil an einer Drücken Sie Enter zur Auswahl der Signalquelle. 110-240 V AC Steckdose und am Netzteilein- gang des Bilderrahmens an.
  • Seite 7: Musikmodus

    D E U T S C H wählen Sie das Speichermedium (Karte, USB Bildwiedergabe Während der Bildanzeige drücken Sie Toolbar zur Stick), mit ENTER zeigen Sie die auf diesem Medium Anzeige der Informationsleiste und Einstellung. gespeicherten Titel an. Musikwiedergabe Während der Musikwiedergabe drücken Sie Toolbar zur Anzeige der Musik-Informationsleiste.
  • Seite 8: Scrollfunktion Für Untertitel

    D E U T S C H anzuzeigen. Drücken Sie EXIT auf der Fernbedie- Hinweis: nung, um die Videodateiliste des Speichermediums Folgen Sie den nachstehenden Schritten zur Ein- anzuzeigen. Mit markieren und wählen stellung der laufenden Untertitel: Sie das anzuzeigende Video, mit ENTER wird es ab- a) Erstellen Sie eine TXT-Datei.
  • Seite 9: Einstellungen

    D E U T S C H 11. Einstellungen 11.2 Zeiteinstellung 11.1 Einstellungsmenü Markieren Sie im Hauptmenü Zeit, drücken Sie Enter und verwenden Sie zur Auswahl des Zeit- Markieren Sie im Hauptmenü Gemeinsam, drücken ein-stellungsmenüs. Drücken Sie zur Aus- Sie Enter zur Anzeige und dann zur Auswahl wahl des Menüpunkts und dann zur Bestäti-...
  • Seite 10: Wiedergabeeinstellungen

    D E U T S C H 11.3 Bildeinstellung 11.4 Wiedergabeeinstellungen Markieren Sie im Hauptmenü System, drücken Sie Zum Einfügen eines Werbefilms während der Wie- Enter und verwenden Sie zur Auswahl des Bild- dergabe drücken Sie die Pfeiltaste , um das einstellungsmenüs.
  • Seite 11: Technische Spezifikationen

    D E U T S C H 13. Anleitung zur Problembehebung 12. Technische Spezifikationen Falls Sie Probleme mit Ihrem Gerät haben, beach- • Netzadapter: Eingang AC 100-240V 50/60Hz ten Sie die folgenden Hinweise. Für weitere Hilfe, Ausgang DC: 12V/2A kontaktieren Sie den technischen Support. •...
  • Seite 12 D E U T S C H...
  • Seite 13 E N G L I S H Cautions: Introduction: Thank you for purchasing this Digital Photo Frame. It is designed to allow quick and easy viewing of Precautions and maintenance photos taken with your digital camera, mobile pho- • For indoor use only ne, or from a memory card.
  • Seite 14: Stand Installation

    E N G L I S H Features: 1. Supported picture formats: JPEG, BMP, PNG 8. Supports scrolling subtitles when playing photo, 2. Supported audio formats: MP3 music, movie files 3. Supported video formats: MPEG1, MPEG2, 9. Supports time bar when playing photo, music, MPEG4, H.264, RM, RMVB, MOV, MJPEG, DivX movie files 4.
  • Seite 15: 2B. Remote Control

    E N G L I S H 2b. Remote Control 1. Mute: Mute speaker output 2. Source: Press it to select input source (HDMI-IN/DMP) 3. Power: Switch On/Off 4. Photo: Press to show photos 5. Music: Press to play music 6.
  • Seite 16: Getting Started

    E N G L I S H 3. Getting Started USB and Memory Card The unit supports SD/MMC/MS and USB 2.0. Press 3.1 Plug one end of the included AC adapter into a Enter to select the source device. standard 110-240V AC electrical outlet and the other end into DC in of the photo frame.
  • Seite 17: Music Mode

    E N G L I S H Picture Playback Music Playback When playing the single picture, press Toolbar to During music playback, press Toolbar to enter the enter information bar and set up the item. music information bar, select with and press Enter to operate.
  • Seite 18: Scrolling Subtitle Function

    E N G L I S H Video Playback 9. HDMI-IN Function When playing a single video, press Toolbar to enter Connect the HDMI-out device to HDMI-IN interface info bar to set up. of the photo frame. Press Source and select input source “HDMI”.
  • Seite 19: Time Setup

    E N G L I S H 11.1.7 Scroll Subtitle: Black, White, Red, Blue, 11.3 Picture Setup Green, Off. 11.1.8 Copy: Supports copy function between Highlight System in the main menu, press Enter and memory card and USB disk. to select and access the picture setup 11.1.9 Restore Factory Default: Press Enter and menu.
  • Seite 20: Specifications

    E N G L I S H 11.4 Play Setup 13. Troubleshooting Guide If you are having problems with your player, please To insert a commercial during playback, press the consult this guide. If you need further assistance, arrow buttons to set up the interval time (e.g. please contact Technical Support.
  • Seite 21 F R A N Ç A I S Remarques importantes : Introduction: Merci d'avoir acheté ce cadre photo numérique. Il est conçu pour regarder rapidement et facilement Précautions d'emploi et entretien les photos prises avec votre appareil photographi- • Pour une utilisation en intérieur exclusivement que, votre téléphone portable ou encore présentes •...
  • Seite 22: Installation Du Support

    F R A N Ç A I S Caractéristiques : 1. Formats d'images pris en charge : JPEG 8. Défilement des sous-titres lors de la reproduc- 2. Formats audio pris en charge : MP3 tion de photo, de fichiers musicaux ou de film 3.
  • Seite 23: 2B. Télécommande

    F R A N Ç A I S 2b. Télécommande 1) Muet: Pour couper le son du haut-parleur 2) Source: Pour sélectionner la source d’entrée (HDMI-IN/DMP) 3) Alimentation: Pour mettre en marche/arrêt 4) Photo: Pour visualiser les photos 5) Musique: Pour reproduire la musique 6) Film: Pour visualiser les films Lecture/Pause : Appuyez sur cette touche pour lire ou mettre en pause, et repren-...
  • Seite 24: Avant De Démarrer

    F R A N Ç A I S 3. Avant de démarrer Carte mémoire et stockage USB L'appareil prend en charge les cartes SD/MMC/MS 3.1 Branchez l'adaptateur secteur à une prise élec- et les dispositifs de stockage USB 2.0. Appuyez sur trique 110-240 V CA et l'autre extrémité...
  • Seite 25: Mode Musique

    F R A N Ç A I S Appuyer sur la touche EXIT de la télécommande Visualisation des images Lors de l'affichage d'une seule image, appuyez sur pour afficher le menu du dispositif de stockage. « Toolbar » pour accéder à la barre d'information et Appuyez sur pour mettre en surbrillance et sé- régler les options.
  • Seite 26: Fonction De Défilement Des Sous-Titres

    F R A N Ç A I S Remarque : Suivez la procédure suivante pour régler le défile- ment des sous-titres : Lecture d'un fichier vidéo Lors de la lecture d'un fichier vidéo, appuyez sur a) Créez un fichier TXT. Toolbar pour accéder à...
  • Seite 27: Insérer Un Commercial

    F R A N Ç A I S 11.2 Réglage de l'heure 10. Insérer un commercial Pour inserer un « commercial » pendant la lecture regardez 11.4 réglage de lecture. Mettez en surbrillance Horaire dans le menu principal, appuyez sur Enter et sur pour sélectionner et accéder au menu de réglage de l'heure.
  • Seite 28: Réglage De L'image

    F R A N Ç A I S 11.3 Réglage de l'image 11.4 Réglage de lecture Mettez en surbrillance System dans le menu princi- Pour insérer un « commercial » pendant la lecture, pal, appuyez sur Enter et sur pour sélectionner appuyez sur les touches fléchées gauche/droite et accéder au menu de réglage de l'image.
  • Seite 29: Spécifications Techniques

    F R A N Ç A I S 13. Détection des pannes 12. Spécifications techniques 1850 Si vous rencontrez des problèmes avec votre • Adaptateur secteur : Entrée AC 100-240V appareil, veuillez lire les remarques suivantes. Pour 50/60Hz / Sortie DC : 12V/2A toute aide supplémentaire, contactez le support •...
  • Seite 30 F R A N Ç A I S...
  • Seite 31 I T A L I A N O Avvertenze importanti Introduzione: Grazie per aver acquistato questa cornice digitale. Questo prodotto è stato progettato per consentire Misure di sicurezza e cura la visione rapida e facile delle fotografie scattate • Adatto all’uso solo all’interno con una fotocamera digitale o un telefono cellulare •...
  • Seite 32: Istruzioni Di Montaggio

    I T A L I A N O Caratteristiche: 1. Formati di immagine supportati: JPEG, 8. Supporto per sottotitoli scorrevoli durante la 2. Formati audio supportati: MP3 riproduzione di file di fotografie, musica e video 3. Formati video supportati: MPEG1, MPEG2, 9.
  • Seite 33: 2B. Telecomando

    I T A L I A N O 2b. Telecomando 1. Disattiva audio: Disattiva l'audio dell'alto- parlante 2. Premere Source per selezionare la sorgente del segnale in ingresso (HDMI-IN/DMP) 3. ACCENDI: Interruttore 4. Foto: Premere per vedere le foto 5. Musica: Premere per riprodurre la musica 6.
  • Seite 34: Modalità Foto

    I T A L I A N O 3. Operazioni preliminari – primi passi USB e scheda di memoria Il dispositivo supporta SD/MMC/ MS e USB 2.0. Pre- 3.1 Collegare un'estremità dell'alimentatore CA in mere Enter per selezionare il dispositivo sorgente. dotazione a una presa elettrica standard da 110-240 V CA e l'altra estremità...
  • Seite 35: Modalità Musica

    I T A L I A N O Premere il pulsante EXIT sul telecomando per visua- Riproduzione delle immagini Durante la riproduzione di una singola immagine, lizzare il menu del dispositivo di memoria. premere Toolbar per accedere alla barra delle infor- Premere per evidenziare e selezionare il disposi- mazioni e impostare l'elemento.
  • Seite 36: Scrollfunktion Für Untertitel

    I T A L I A N O premere il pulsante EXIT sul telecomando per visuali- 8 Funzione di scorrimento dei sottotitoli zzare l'elenco dei file video del dispositivo di memo- Il dispositivo supporta la funzione dei scorrimento ria. Premere per evidenziare e selezionare la dei sottotitoli durante la riproduzione di file di video da riprodurre e premere ENTER per riprodurre la...
  • Seite 37: Menu Di Configurazione

    I T A L I A N O 11. Configurazione 11.2 Configurazione dell'ora Selezionare Orario nel menu principale, poi premere 11.1 Menu di configurazione Enter e con i tasti selezionare e accedere al menu Evidenziare Commune nel menu principale, poi pre- di configurazione dell'ora.
  • Seite 38: Regolazione Dell'immagine

    I T A L I A N O 11.3 Configurazione delle immagini 11.4 Configurazione riproduzione Selezionare system nel menu principale, poi preme- Per inserire una pubblicità durante la riproduzione, re Enter e con i tasti selezionare e accedere al premere i tasti freccia per configurare l'inter- menu di configurazione delle immagini.
  • Seite 39: Impostazioni

    I T A L I A N O 13. Guida alla risoluzione di problemi 12. Specifiche tecniche Se dovessero presentarsi dei problemi, attenersi • Adattatore di rete: alle seguenti avvertenze. Per un ulteriore aiuto Ingresso AC 100-240V 50/60Hz pregasi contattare l’assistenza tecnica. Uscita DC: 12V/2A •...
  • Seite 40 I T A L I A N O...
  • Seite 41 E S P A Ñ O L Nota importante: Introducción: Gracias por comprar este marco de fotos digital. Está diseñado para ver fácil y rápidamente las fotos Medidas de precaución y cuidados hechas con su cámara digital, teléfono móvil, o •...
  • Seite 42: Instrucciones De Instalación

    E S P A Ñ O L Características: 1. Formatos de imagen soportados: JPEG, 8. Soporta subtítulos en desplazamiento durante 2. Formatos de audio soportados: MP3 la reproducción de fotos, música o películas 3. Formatos de vídeo soportados: MPEG1, MPEG2, 9.
  • Seite 43: 2B. Control Remoto

    E S P A Ñ O L 2b. Mando a distancia 1. Silencio: Desactiva la salida del altavoz 2. Pulsar Source para seleccionar la fuente de entrada (HDMI-IN/DMP) 3. ENCENDIDO: Encender/Apagar 4. Foto: Pulsar para ver fotos 5. Música: Pulsar para reproducir música 6.
  • Seite 44: Modo Foto

    E S P A Ñ O L 3. Primeros pasos USB y tarjeta de memoria La unidad soporta tarjetas SD/ MMC/MS y USB 2.0. 3.1 Enchufe el extremo del adaptador eléctrico en Pulse Enter para seleccionar el dispositivo fuente. una toma de corriente estándar de 110-240V CA, y el otro extremo en el conector eléctrico del marco de fotos.
  • Seite 45: Modo Música

    E S P A Ñ O L resaltar y seleccionar el dispositivo de memoria Reproducción de imágenes Cuando reproduzca una sola imagen, pulse Toolbar (trajeta, USB) y pulse ENTER para mostrar la musica para entrar en la barra de información para confi- almacenada en este dispositivo.
  • Seite 46: Función De Subtítulos Desplazables

    E S P A Ñ O L la tarjeta SD. Pulse el botón EXIT en el mando a Nota: distancia para mostrar la lista de archivos de video Siga estos pasos para configurar un subtítulo en del dispositivo de memoria. Use para resal- desplazamiento: tar y seleccionar el video que desee ver y pulse ENTER...
  • Seite 47: Menú De Configuración

    E S P A Ñ O L 11. Configuración 11.2 Configurar la hora 11.1 Menú de Configuración Resalte la opción Tiempo en el menú principal, pulse Enter y use para seleccionar y acceder al menú Resalte la opción Coumun en el menú principal, pulse de configuración de la hora.
  • Seite 48: Configuración De Imagen

    E S P A Ñ O L 11.3 Configuración de Imagen 11.4 Configuración de la reproducción Resalte la opción System en el menú principal, pul- Para introducir una cuña publicitaria durante la se Enter y use para seleccionar y acceder al reproducción, use los botones de dirección menú...
  • Seite 49: Especificaciones Técnicas

    E S P A Ñ O L 13. Solución de problemas 12. Especificaciones técnicas En caso de tener problemas con su dispositivo, • Adaptador de red: Entrada AC 100-240V tenga en cuenta las siguientes indicaciones. 50/60Hz Salida DC: 12V/2A Para más información contacte con el servicio de •...
  • Seite 50 E S P A Ñ O L...
  • Seite 51 N E D E R L A N D S Belangrijke informatie: Inleiding: Hartelijk bedankt voor het aanschaffen van deze Digitale Fotolijst. Dit product is ontworpen om snel Voozorgsmaatregelen en onderhoud en eenvoudig foto’s weer te geven vanuit een • Alleen voor gebruik binnenshuis geheugenkaart of foto’s genomen met uw digitale •...
  • Seite 52: Stroomaansluiting

    N E D E R L A N D S Eigenschappen: 1. Ondersteunde fotoformaten: JPEG, BMP, PNG 8. Ondersteunt rollende ondertiteling tijdens weer- 2. Ondersteunde audioformaten: MP3 gave van foto’s, muziek en videobestanden 3. Ondersteunde videoformaten: MPEG1, MPEG2, 9. Ondersteunt een tijdsbalk tijdens weergave van MPEG4, H.264, RM, RMVB, MOV, MJPEG, DivX foto’s, muziek en videobestanden 4.
  • Seite 53: 2B. Afstandsbediening

    N E D E R L A N D S 2b. Afstandsbediening 1. Demp: Luidsprekeruitgang dempen 2. Source Indrukken om de ingangsbron te selecteren (HDMI-IN/DMP) 2. AAN/UIT: In/Uitschakelen 3. Foto: Indrukken om foto’s weer te geven 4. Muziek – Indrukken om muziek af te spelen 5.
  • Seite 54: Eerste Stappen

    N E D E R L A N D S 3. Aan de Slag USB en Geheugenkaart Dit apparaat ondersteunt SD/MMC/MS en USB 2.0. 3.1 Steek het ene uiteinde van de meegeleverde AC- Druk op Enter om het bronapparaat te selecteren. adapter in een standaard 110-240V AC stop- contact en het andere uiteinde in de DC IN van de fotolijst.
  • Seite 55: Muziekmodus

    N E D E R L A N D S Druk op de toets EXIT op de afstandsbediening om Fotoweergave Wanneer er een enkele foto wordt weergegeven, het geheugeneenheidmenu te openen. Druk op kunt u op Toolbar drukken om de informatiebalk te om de geheugeneenheid te markeren en druk op openen en het onderwerp in te stellen.
  • Seite 56: Rollende Ondertitelingfunctie

    N E D E R L A N D S weer te geven die zijn opgeslagen op de USB-drive tijdens het afspelen van foto’s, muziek en video’s. of SD-kaart. Druk op de toets EXIT op de afstandsbediening om Opmerking: de videolijst van de geheugeneenheid te openen. Druk Volg de onderstaande stappen om de rollende om de weer te geven video te markeren ondertiteling in te stellen:...
  • Seite 57: Beeldinstelling

    N E D E R L A N D S 11.2.1 Klok: Druk op , gebruik vervolgens om Datum, Maand, Jaar, Uur, Minuut, Sec in te stellen en druk ter bevestiging op 11.2.2 Automatisch In/Uitschakelen Druk op Enter en gebruik vervolgens om "Once, Every Day, Off"...
  • Seite 58: Technische Specificaties

    N E D E R L A N D S 11.3.1 Beeldmodus: • USB: USB-host a) Druk op om "Standard, Mild, User, Dynamic" • Displayparameters: te selecteren. Displayformaat: 33,8 cm, 13,3 inch TFT b) U kunt het volgende instellen als u "User" selecteert: Resolutie: 1366x768 pixels Contrast: Gebruik om een waarde van 00...
  • Seite 59 P O R T U G U É S Observações importantes: Introdução: Agradecemos a sua compra desta Moldura Digital. A moldura está concebida para permitir uma visua- Cuidados e manutenção lização rápida e fácil de fotografias tiradas com a • Apenas para utilização no interior sua câmara digital, o seu telemóvel ou a partir de •...
  • Seite 60: Instruções De Montagem

    P O R T U G U É S 8. Suporta a deslocação de legendas quando está Características: 1. Formatos de imagem suportados: JPEG a reproduzir ficheiros de fotografias, música ou 2. Formatos áudio suportados: MP3 filmes 3. Formatos vídeo suportados: MPEG1, MPEG2, 9.
  • Seite 61: 2B. Comando

    P O R T U G U É S 2b. Controlo Remoto 1. Sem som: Corta o som à saída do altifalante Source: Premir no mesmo para seleccionar a fonte de entrada (HDMI-IN/DMP) 3. ALIMENTAÇÃO: Ligar/Desligar 4. Fotografia: Premir para mostrar fotografias 5.
  • Seite 62: Primeiros Passos

    P O R T U G U É S 3. Iniciar – Primeiros passos USB e Cartão de Memória O aparelho suporta SD/MMC/MS e USB 2.0. Premir 3.1 Ligar um dos terminais do adaptador AC incluí- Enter para seleccionar o dispositivo fonte. do numa tomada eléctrica normal 110-240V AC e o outro terminal na entrada DC da moldura.
  • Seite 63: Modo Música

    P O R T U G U É S e seleccionar o dispositivo de memória (cartão, Reprodução de Imagem Quando está a reproduzir unicamente uma imagem, USB) e premir ENTER para exibir as musica memo- premir a Toolbar para entrar na barra de informação rizadas neste dispositivo.
  • Seite 64: Função De Deslocamento Das Legendas

    P O R T U G U É S trolo remoto para exibir a lista do ficheiro de Nota: videos do dispositivo de memória. Premir Deve seguir estes passos para configurar o deslo- para realçar e seleccionar a video a ser camento de legendas: reproducir e premir ENTER para reproducir a video.
  • Seite 65: Menu De Configuração

    P O R T U G U É S 11. Configurar 11.2 Configurar o Tempo 11.1 Menu de configuração Seleccionar Horario no menu principal, premir Enter e usar para seleccionar e aceder ao menu de Seleccionar Comun no menu principal, premir Enter configuração do Tempo.
  • Seite 66: Modo Imagem

    P O R T U G U É S 11.3 Configurar a Imagem 11.4 Configurar a reprodução Seleccionar System no menu principal, premir Enter Para inserir um anúncio publicitário durante a s Bild- e utilizar para seleccionar e aceder ao menu de reprodução, premir os botões com a seta para l des...
  • Seite 67: Definições

    P O R T U G U É S 12. Especificações técnicas 13. Instruções para a resolução de • Transformador: Entrada CA 100-240V 50/60Hz problemas Saída CC 12V/2A No caso de ter problemas com o seu aparelho, • Formato de imagem: JPEG tenha em atenção as seguintes observações.
  • Seite 68 P O R T U G U É S...
  • Seite 69 S V E R I G E VIKTIGA ANVISNINGAR: Inledning: Tack för att du köpt denna digitala fotoram. Den är utformad för att ge en snabb och enkel visning av Försiktighetsåtgärder och skötsel bilder som tagits med din digitalkamera, mobiltele- •...
  • Seite 70: Handledning För Placering Av Fotoramen

    S V E R I G E Funktioner: 1. Bildformat som stöds: JPEG 8. Stöder rullande texter när du spelar upp foto-, 2. Ljudformat som stöds: MP3 musik-, filmfiler 3. Videoformat som stöds: MPEG1, MPEG2, 9. Stöder tidsfält när du spelar upp foto-, musik-, MPEG4, H.264, RM, RMVB, MOV, MJPEG, DivX filmfiler 4.
  • Seite 71: 2B. Fjärrkontroll

    S V E R I G E 2b. Fjärrkontroll 1. Ljud av: Högtalarutgång för ljud av 2. Source: Tryck på den för att välja ingångskälla (HDMI-IN/DMP) 3. STRÖMBRYTARE: På/av-knapp 4. Foto: Tryck för att visa foton 5. Musik: Tryck för att spela upp musik 6.
  • Seite 72: De Första Stegen

    S V E R I G E 3.Erste Schritte USB och minneskort Enheten har stöd för SD/MMC/MS och USB 2.0. 3.1 Anslut ena änden av den medföljande nätadap- Tryck på Enter för att välja källenhet. tern i ett vanligt 110-240V AC vägguttag och den andra änden i DC in på...
  • Seite 73: Musikläge

    S V E R I G E Trycker du på EXIT-knappen på fjärrkontrollen för Bilduppspelning När du spelar upp den enskilda bilden, tryck på att visa minnesenhetens meny. Tryck på för att Toolbar för att komma till informationsfältet och markera och välja minnesenhet och tryck på ENTER ställa in objektet.
  • Seite 74: Bläddring Av Undertext-Funktion

    S V E R I G E Trycker du på EXIT-knappen på fjärrkontrollen för Obs: att visa minnesenhetens lista med videofiler. Tryck Följ dessa steg för att ställa in rullande undertext: på för att markera och välja det video som a) Skapa en TXT-fil.
  • Seite 75 S V E R I G E 11.2.1 Klocka: Tryck på , använd sedan för att ställa in datum, månad, år, timme, minut, sekund och tryck på Enter för att be- kräfta. 11.2.2 Automatisk ström på/av Tryck på , använd sedan för att välja "Once, Every day, Off"...
  • Seite 76: Techniska Specifikationer

    S V E R I G E 11.3.1 Bildläge: 12. Tekniska specifikationer a) Tryck på för att välja "Standard, Mild, User, • Nätadapter: Ingång AC 100-240V 50/60Hz Dynamic". Utgång DC: 12V/2A b) Om du väljer "User", kan du ställa in följande: •...
  • Seite 79 (opt.)

Inhaltsverzeichnis