
Verwandte Anleitungen für Clou CL/07.56.002.65


Inhaltszusammenfassung für Clou CL/07.56.002.65
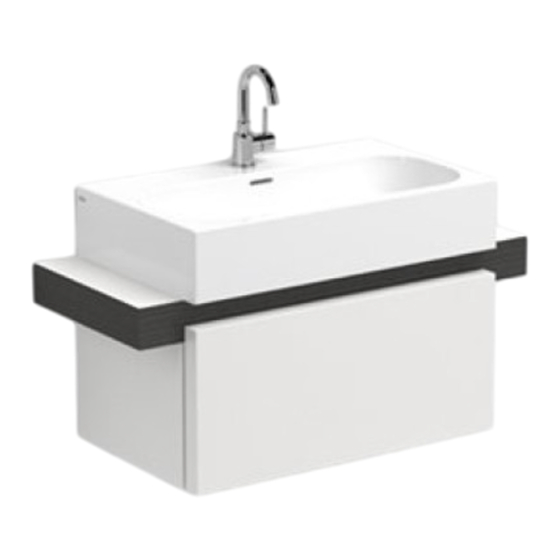
- Seite 1 90 cm b a t h f i n d i n g s CL/07.56.002.65, CL/07.56.002.66 Montage instructies Installation Instructions Notice de montage Montageanweisungen...
- Seite 2 All menti- oned dimensions in this manual should be verified before executing the action. - Clou b.v. can not be held responsible for the results of improper use, improper transportation or any damage caused during interim storage.
- Seite 3 à toute action. - Clou BV ne peut être tenu responsable pour usage non approprié des articles, trans- port inadéquat ou dommage causés à votre entrepôt en attente de livraison.
- Seite 4 Gegenstände auf das Produkt passend ist. Gebruiksvoorschriften: zie ook de onderhoudsvoorschriften op www.clou.nl max. User’s instructions: See also the maintenance guides at www.clou.nl 15 kg Instructions d’utilisation: Voyer aussi les instructions d’entretien sur www.clou.nl Gebrauchsanweisungen: Sehen Sie auch die Wartungsanweisungen am www.clou.nl...
- Seite 6 1800...
- Seite 7 1900...
- Seite 8 Duidt met potlood en waterpas de middellijn van de wastafel aan. Duidt de gewenste positie ook aan op de planchet. Mark with pencil and level the centreline of the washbasin. Also indicate the desired posi- tion on the shelf. X mm Marquer avec un crayon et avec un niveau la ligne de centre du lavabo.
- Seite 9 Maak de uitsnede met behulp van een decoupeerzaag. Make the cut-out with a jig- saw. Faire la découpe avec une scie sauteuse. Machen Sie den Ausschnitt mit einer Stichsäge. Duidt met potlood en waterpas de gewenste hoogte Y van de wastafel aan.
- Seite 10 Selecteer uit de hier getoonde opstellingen degene die het best aansluit bij uw opstelling. Duidt met potlood en waterpas de posities van de beugels aan. Y-line Select from the configurations shown here, the one that best suits your setup. Indicate with pencil and level the positions of the supports.
- Seite 11 Y-line Duidt met potlood voor elke beugel de plaatsen aan waar u gaten moet boren. Het is aan- geraden de gegeven afmetin- gen na te meten. Mark with pencil for every sup- port the spots to drill holes. It is recommended to verify the given dimensions.
- Seite 12 Boor de gaten voor de beugels (ø 10 mm). Drill the holes for the supports (ø 10 mm). Percer les trous pour les sup- ports (ø 10 mm). Bohren Sie die Löcher für die Unterstutzungen (ø 10 mm). ø 10 mm Boor ook de gaten voor de wastafel, ladekast, spiegel en kolomkast.
- Seite 13 Steek de pluggen in de gaten en bevestig de beugels met de schroeven. Insert the dowels in the holes and mount the supports with the screws. Enfoncer les chevilles dans les trous et fixer les supports avec les vis. Bringen Sie die Dübel in die Löchern und befestigen Sie die Unterstutzungen mit den Schrauben.
- Seite 14 Maak desgewenst kraangaten in de wastafel open volgens de bijgevoegde handleiding. If desired open tap holes in the washbasin according to its installation instructions. Si nécessaire, percer les trous de robinets en fonction des instructions d’installation. Auf Wunsch offen Hahnlöcher in das Waschtisch nach ihrer Montageanweisungen.
- Seite 15 Plaats de wastafel op de stok- schroeven en bevestig met de kraagringen en moeren. Place the washbasin on the dowel screws and fix with the collar washers and nuts. Placer le lavabo sur les goujons et fixer avec les rondelles à col- lerette et les écrous.
- Seite 16 Haal de lade uit de ladekast door ze naar voor en omhoog te trekken. Remove the drawer by pulling it forward and upward. Enlever le tiroir de la commode en le tirant et en le relevant. Nehmen Sie die Schublade aus der Kommode, indem Sie diese heraus und dann nach oben ziehen.
- Seite 17 Stel de positie van de ladekast bij. Met bout A regelt men de hoogte van de ladekast, met bout B de afstand tot de muur. Adjust the position of the dresser. With bolt A you regu- late the heigth of the dresser, with bolt B you adjust the distance to the wall.
- Seite 18 Bevestig de sifon (niet inbegre- pen) aan de afvoer en aan de afvoerleiding. Attach the trap (not included) to the drain and to the waste pipe. Fixer le siphon (non inclus) à la bonde et à la décharge d’eau. Befestigen Sie den Siphon (nicht im Lieferumfang ent- halten) am Ablauf und an der Abflussleitung.
- Seite 19 Plaats de lade terug in de ladekast. Place the drawer back in the dresser. Remettre le tiroir dans la com- mode. Setzen Sie die Schublade wie- der in der Kommode ein. Ontvet de achterzijde van de spiegel met een speciaal ont- vettingsmiddel, zoals reini- gingsalcool.
- Seite 20 Verwijder de beschermfolie van de tape op de bevesti- gingsframes en druk de frames stevig op de spiegel op de aangeduide plekken. Remove the protective foil from the tape on the mounting- frames and press the frames firmly on the indicated places on the mirror.
- Seite 21 Hang de spiegel met de frames op aan de ophanghaken. Place the mirror with the frames on the mounting brac- kets. Placer le miroir avec les mon- tants sur les supports. Setzen Sie den Spiegel mit den Framen auf die Halterungen. Kit alle naden tussen plan- chet, wastafel en muur af met sanitair kit.
- Seite 22 Afmetingen uitsnede t.b.v. Match Me wastafel 70 cm. Dimensions of the cut-out for Match Me washbasin 70 cm. Dimensions de la découpe pour Match Me lavabo 70 cm. Abmessungen der Aussparung für Match Me Waschtisch 70 cm.
- Seite 24 Office Clou bv Thermiekstraat 1 NL-6361 HB Nuth T +31 (0)45 524 56 56 F +31 (0)45 524 60 00 Warehouse Thermiekstraat 1 NL-6361 HB Nuth info@clou.nl www.clou.nl...