Herunterladen Diese Seite drucken

Werbung

Verfügbare Sprachen
  • DE

Verfügbare Sprachen

  • DEUTSCH, seite 44
User guide
Manuel de l'utilisateur
Guía del usuario
Manuale dell'Utente
Guia do usuário
Bedienungsanleitung
Gebruikershandleiding
ユーザー ガイド
COLLECT THEM ALL!
WWW.MYARCADEGAMING.COM

Werbung

loading

Inhaltszusammenfassung für My Arcade GAMESTATION PR

  • Seite 1 User guide Manuel de l’utilisateur Guía del usuario Manuale dell’Utente Guia do usuário Bedienungsanleitung Gebruikershandleiding ユーザー ガイド COLLECT THEM ALL! WWW.MYARCADEGAMING.COM...
  • Seite 3 ENGLISH ___________ Includes Console, two 2.4 GHz wireless joysticks with paddle controls, HDMI® cable, power cable and user guide Materials needed (not included): 8 AA batteries and mini-screwdriver, or USB-C® cable Please read and follow this user guide thoroughly before use. 1.
  • Seite 4 9 10 1. A button 7. START button 8. On/o switch 2. B button 9. Power port (5V IN) 3. C button 4. Paddle 10. LED sync indicator 11. MENU / RGB button 5. HOME button 6. SELECT button Photo Sensitivity Warning This game contains flashing lights or patterns which may trigger epileptic seizures among a small percentage of people, even those with no prior history of epilepsy or seizures.
  • Seite 5 5. Insert the USB-A end of the cable into a powered source. 6. Press the power button located on the top of the console. NOTE: The RGB lights around the power and home buttons will illuminate when the console is powered on. This may take up to 3 seconds after the power button is pressed.
  • Seite 6 NOTE: TV TYPE and GAME DIFFICULTY are only supported on Atari® 2600 games. NOTE: PADDLE SENSITIVITY is not supported on all paddle games. Save options The Atari® Gamestation Pro allows for game saves onto a microSD™ card. The microSD™ card slot allows up to 128 GB capacity. 1.
  • Seite 7 same time). • Do not mix di erent brands of batteries. • We do not recommend using batteries labeled “Heavy Duty”, “General Use”, “Zinc Chloride” or “Zinc Carbon” . • Do not leave batteries in the controller for long periods of non-use. •...
  • Seite 8 120 days from the date of your original purchase. If a defect covered by this warranty occurs to a product purchased in the U.S., MY ARCADE®, at its option, will repair or replace the product purchased at no charge or refund the original purchase price. If a...
  • Seite 9 For service on any defective product under the 120-day warranty policy, please contact Consumer Support to obtain a Return Authorization Number. MY ARCADE® reserves the right to require the return of the defective product and proof of purchase. NOTE: MY ARCADE® will not process any defective claims without a Return Authorization Number.
  • Seite 10 FRANÇAIS __ Avertissement sur l'épilepsie. (Article Annexe I) Annexe I A lire avant toute utilisation d'un jeu vidéo par vous-même ou votre enfant. Certaines personnes sont susceptibles de faire des crises d'épilepsie ou d'avoir des pertes de conscience à la vue de certains types de lumières clignotantes ou d'éléments fréquents dans notre environnement quotidien.
  • Seite 11 Avertissement concernant les risques d'épilepsie et des précautions à prendre lors de l'utilisation d'un jeu vidéo. (Article Annexe II) Annexe II Certaines personnes sont susceptibles de faire des crises d'épilepsie ou d'avoir des pertes de conscience à la vue de certains types de lumières clignotantes ou d'éléments fréquents dans notre environnement quotidien.
  • Seite 12 Comprend Console, deux joysticks sans fil 2,4 GHz avec commandes à palettes, câble HDMI®, câble d'alimentation et manuel d'utilisation Matériel nécessaire (non inclus) : 8 piles AA et petit tournevis ou câble de chargement USB-C® Veuillez lire attentivement le présent manuel avant toute utilisation.
  • Seite 13 9 10 1. Bouton A 7. Bouton START 8. Commutateur on / o 2. Bouton B 9. Port d'alimentation 3. Bouton C 4. Palette 10. Témoin de synchronisation à LED 11. Bouton MENU / RGB 5. Bouton HOME 6. Bouton SELECT Avertissement sur la photosensibilité...
  • Seite 14 fourni dans le port d'alimentation (5V IN) situé à l'arrière de la console. 5. Branchez l'extrémité USB-A du câble sur une source d'alimentation. 6. Appuyez sur le bouton d'alimentation situé sur le haut de la console. REMARQUE : Les lumières RVB autour des boutons d'alimentation et d'accueil s'allument lorsque la console est mise sous tension.
  • Seite 15 modifier les lumières RVB sur la console et les manettes. Commandes de jeu Appuyez rapidement sur le bouton MENU situé à l'arrière de la manette pour accéder aux GAME CONTROLS. REMARQUE : les options TV TYPE et GAME DIFFICULTY ne sont prises en charge que pour les jeux Atari®...
  • Seite 16 soient internes ou sur la carte microSD. Information sur la pile La fuite d’acide sulfurique peut causer des blessures et endommager le produit. En cas de fuite, lavez soigneusement la peau et les vêtements touchés. Éloignez l’acide sulfurique des yeux et de la bouche. Les piles qui fuient peuvent faire des bruits secs.
  • Seite 17 informations importantes. • Le jouet ne doit être utilisé qu'avec un transformateur pour jouets ou une alimentation électrique pour jouets. • Les batteries rechargeables doivent être chargées sous la surveillance d'un adulte. • Le produit ne doit être connecté qu'à des équipements portant l'un des symboles suivants.
  • Seite 18 MY ARCADE® se réserve le droit d’exiger le retour du produit défectueux et d’une preuve d’achat. REMARQUE : MY ARCADE® ne traitera pas les réclamations liées aux défectuosités sans numéro d’autorisation de retour.
  • Seite 19 Pour plus d'informations sur l'émulateur, visitez le site : www.MyArcadeGaming.com Sauvez un arbre, enregistrez-vous en ligne MY ARCADE® fait un choix écologique en demandant à ce que tous les produits soient enregistrés en ligne. Cela évite l’impression des cartes d’enregistrement papier. Tous les renseignements dont vous avez besoin pour enregistrer votre achat récent d’un produit MY ARCADE®...
  • Seite 20 ESPAÑOL __________ Incluye Consola, dos joysticks inalámbricos de 2,4 GHz con controles de paleta, cable HDMI®, cable de alimentación y guía del usuario Materiales necesarios (no incluidos): 8 pilas AA y un mini destornillador o cable de carga USB-C® Lea y siga minuciosamente esta guía del usuario antes de usar. 1.
  • Seite 21 9 10 7. Botón START 1. Botón A 8. Interruptor on/o (Encendido/apagado) 2. Botón B 9. Puerto de alimentación (5V IN) 3. Botón C 4. Paleta Indicador LED de sincronización 5. Botón HOME (Inicio) Botón MENU / RGB 6. Botón SELECT (Seleccionar) Advertencia de fotosensibilidad Este juego contiene luces parpadeantes o patrones que podrían provocar convulsiones epilépticas en un pequeño porcentaje de personas, incluso...
  • Seite 22 posterior de la consola. 5. Inserte el extremo USB-A del cable en una fuente alimentada. 6. Presione el botón de encendido ubicado en la parte superior de la consola. NOTA: Las luces RGB alrededor de los botones de encendido e inicio se iluminarán cuando la consola esté...
  • Seite 23 luces RGB de la consola y los joysticks. Controles del juego Presione rápidamente el botón MENU / RGB ubicado en la parte posterior del joystick para acceder a GAME CONTROLS. NOTA: TV TYPE y GAME DIFFICULTY solo son compatibles con los juegos de Atari®...
  • Seite 24 Información de las pilas La fuga de ácido de las pilas puede causar lesiones corporales, así como daños a este producto. Si se produce una fuga de las pilas, lave minuciosamente la piel y la ropa afectadas. Mantenga el ácido de las pilas alejado de los ojos y la boca.
  • Seite 25 Información de la garantía Todos los productos MY ARCADE® vienen con una garantía limitada y han sido sometidos a una serie exhaustiva de pruebas para garantizar el más alto nivel de confiabilidad y compatibilidad. Es poco probable que experimente problemas, pero si un defecto se hace evidente durante el uso de este producto, MY ARCADE®...
  • Seite 26 120 días desde la fecha de la compra original. Si ocurre un defecto cubierto por esta garantía a un producto comprado en los EE. UU., MY ARCADE®, a su criterio, reparará o reemplazará el producto comprado sin costo o reembolsará según el precio original de compra.
  • Seite 27 MY ARCADE® está disponible en: www.MyArcadeGaming.com/product-registration Declaración de Conformidad Se puede encontrar una copia de la Declaración de conformidad de UE para este producto en este vínculo: www.MyArcadeGaming.com/pages/doc...
  • Seite 28 ITALIANO _ Include Console, due joystick wireless da 2,4 GHz con paddle di comando, cavo HDMI®, cavo di alimentazione e manuale dell'Utente Accessori richiesti per l'uso del dispositivo (non compresi nella dotazione): 8 batterie AA en un cacciavite di piccole dimensioni o un cavo di ricarica USB-C®...
  • Seite 29 9 10 1. Pulsante A 7. Pulsante START 8. Commutatore di 2. Pulsante B accensione/spegnimento 3. Pulsante C 4. Paddle 9. Porta di alimentazione 10. Spia a LED di sincronizzazione 5. Pulsante HOME 11. Pulsante MENU / RGB 6. Pulsante SELECT Aavvertenza sulla fotosensibilità...
  • Seite 30 appropriato. Se ad esempio si collega la console all'ingresso HDMI® 1 del televisore, anche il televisore deve essere impostato sull'ingresso HDMI® 1. Insira cuidadosamente a extremidade USB-C® do cabo incluído na porta de alimentação (5V IN) localizada na parte traseira do console. Inserire l'estremità...
  • Seite 31 Pulsante MENU / RGB • Quando si preme rapidamente il pulsante MENU / RGB (nel corso di una partita), diventano disponibili le opzioni GAME CONTROLS o l'opzione SAVE MENU. • Tenendo premuto il pulsante MENU / RGB, è possibile modificare le luci RGB della console e dei joystick.
  • Seite 32 Ripristino delle impostazioni predefinite L'opzione FACTORY RESET è disponibile nella sezione ABOUT del menu SETTINGS. L'utilizzo dell'opzione FACTORY RESET determina la cancellazione di tutti gli stati salvati, sia all'interno del gioco sia nella scheda microSD™. Informazioni sulle batterie La fuoriuscita di acido da una delle batterie può causare lesioni personali e danneggiare questo prodotto.
  • Seite 33 • Con questo dispositivo, è consigliabile utilizzare un adattatore CD 5V 2A. • Utilizzare esclusivamente un adattatore rispondente ai requisiti del dispositivo. • L’adattatore non è un giocattolo. • Gli adattatori utilizzati con il dispositivo devono essere regolarmente ispezionati per controllare che non presentino segni di danneggiamento sul cavo, la spina, l’involucro o altre parti.
  • Seite 34 Informazioni sulla garanzia Tutti i prodotti MY ARCADE® vengono forniti con una garanzia limitata e sono stati sottoposti a un’intensiva serie di collaudi che ne ha assicurato il più alto livello di aidabilità e compatibilità. Benché il verificarsi di un problema debba essere ritenuto un evento altamente improbabile, non è...
  • Seite 35 MY ARCADE® si riserva il diritto di richiedere la restituzione del prodotto difettoso e la prova di acquisto. NOTA: Senza il codice di autorizzazione alla restituzione, MY ARCADE® non prenderà in considerazione alcun reclamo per prodotto difettoso. Linea diretta dell’Assistenza clienti...
  • Seite 36 PORTUGUÊS ____ Inclui Console, dois joysticks sem fio de 2,4 GHz com controles paddle, cabo HDMI®, cabo de alimentação e guia do usuário Materiais necessários (não incluídos): 8 pilhas AA e minichave de fenda ou cabo de carregamento USB-C® Leia este guia do usuário e o siga integralmente antes de usar. 1.
  • Seite 37 9 10 7. Botão START 1. Botão A 8. Interruptor On/O 2. Botão B 9. Porta de alimentação 3. Botão C 10. LED indicador de sincronização 4. Paddle 11. Botão MENU / RGB 5. Botão HOME 6. Botão SELECT Aviso de fotossensibilidade Este jogo contém luzes ou padrões piscantes que podem causar surtos epilépticos em uma pequena porcentagem de pessoas, mesmo naquelas sem histórico de epilepsia ou convulsões.
  • Seite 38 Pressione o botão liga/desliga localizado na parte superior do console. NOTA: As luzes RGB ao redor dos botões liga/desliga e Home acenderão quando o console for ligado. Isso pode levar até 3 segundos após o botão liga/desliga ser pressionado. Como configurar os joysticks Remova a tampa das pilhas localizada na parte inferior de cada joystick.
  • Seite 39 joystick para acessar o GAME CONTROLS. NOTA: TV TYPE e GAME DIFFICULTY são compatíveis apenas com jogos do Atari® 2600. NOTA: PADDLE SENSITIVITY não é compatível com todos os jogos de paddle. Opções de salvamento O Atari Gamestation Pro permite que jogos sejam salvos em um cartão microSD™.
  • Seite 40 • Somente um adulto deve instalar e substituir as pilhas. • Não misture baterias alcalinas, convencionais (carbono-zinco) ou recarregáveis. • Não misture pilhas usadas e novas (substitua todas as pilhas ao mesmo tempo). • Não misture pilhas de marcas diferentes. •...
  • Seite 41 Informações sobre garantia Todos os produtos MY ARCADE® têm garantia limitada e foram submetidos a uma série rigorosa de testes para garantir o nível máximo de confiabilidade e compatibilidade. É improvável que você encontre algum problema, mas, caso um defeito se torne aparente durante a utilização do produto, a MY ARCADE®...
  • Seite 42 MY ARCADE®. Para produtos MY ARCADE® adquiridos fora dos EUA, pergunte na loja onde foram adquiridos para obter mais informações. Esta garantia não cobre desgaste normal, uso abusivo ou mau uso, modificação, adulteração ou qualquer outra causa que não esteja...
  • Seite 43 Declaração de Conformidade Uma cópia da Declaração de conformidade da UE deste produto pode ser encontrada neste link: www.MyArcadeGaming.com/pages/doc...
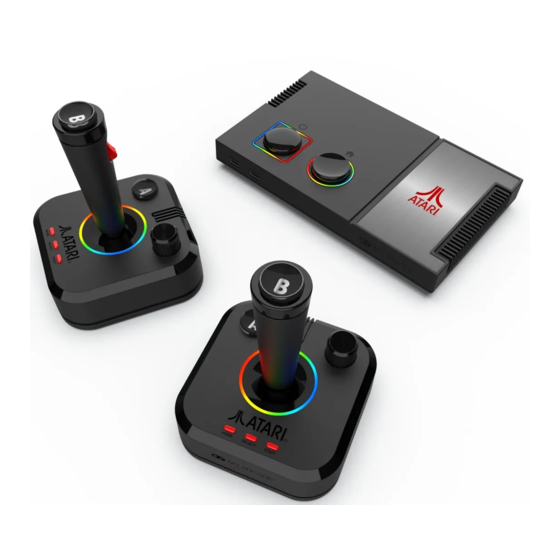
  • Seite 44 DEUTSCHE____ Im Lieferumfang enthalten Konsole, zwei kabellose 2,4-GHz-Joysticks mit Paddle-Steuerung, HDMI®-Kabel, Stromkabel und Benutzerhandbuch Benötigte Teile (nicht im Lieferumfang enthalten): 8 AA-Batterien und ein Mini-Schraubenzieher oder USB-C®-Ladekabel Bitte lesen Sie vor dem Gebrauch das Benutzerhandbuch und folgen Sie den darin enthaltenen Anweisungen. 1.
  • Seite 45 9 10 7. START-Taste 1. A-Taste 8. On/O -Schalter 2. B-Taste 9. Stromanschluss 3. C-Taste 10. LED sync indicator 4. Paddle 11. MENÜ / RGB-Taste 5. HOME-Taste 6. SELECT-Taste Warnung vor lichtempfindlichkeit Dieses Spiel enthält blinkende Lichter oder Muster, die bei einem kleinen Prozentsatz von Menschen epileptische Anfälle auslösen können, auch bei Menschen ohne Vorgeschichte von Epilepsie oder Anfällen.
  • Seite 46 den gleichen HDMI® 1-Anschluss als Quelle für Ihr Fernsehgerät festlegen. 4. Stecken Sie das USB-C®-Ende des mitgelieferten Netzkabels vorsichtig in den Stromanschluss (5V IN) auf der Rückseite der Konsole. 5. Schließen Sie das USB-A-Ende des Kabels an eine Stromquelle an. 6.
  • Seite 47 Optionen GAME CONTROLS oder SAVE MENU aufrufen (während Sie im Spiel sind). • Wenn Sie die MENÜ / RGB-Taste gedrückt halten, können Sie die RGB-Beleuchtung der Konsole und der Joysticks ändern. Game controls Drücken Sie kurz die MENÜ-Taste auf der Rückseite des Joysticks, um auf GAME CONTROLS zuzugreifen.
  • Seite 48 Zurücksetzen auf Werkseinstellungen FACTORY RESET finden Sie im Abschnitt ABOUT unter SETTINGS. FACTORY RESET löscht alle Spielstatus sowohl intern als auch auf der microSD™-Karte. Hinweise zu den Batterien Das Auslaufen von Batteriesäure kann zu körperlichen Verletzungen und Schäden am Produkt führen. Reinigen Sie in einem solchen Fall den betro enen Bereich der Haut und Ihre Kleidung gründlich.
  • Seite 49 • Der Adapter selbst ist kein Spielzeug. • Adapter, die mit diesem Gerät verwendet werden, müssen regelmäßig auf Schäden am Kabel, Anschluss, Gehäuse und an anderen Teilen untersucht werden. • Bitte bewahren Sie das Benutzerhandbuch für wichtige Informationen auf. • Das Spielzeug darf nur mit einem Wandler für elektrisches Spielzeug oder einem Netzteil für Spielzeug verwendet werden.
  • Seite 50 Produkt kostenlos reparieren oder den ursprünglichen Kaufpreis ersetzen. Wenn Sie einen Ersatz benötigen, Ihr Produkt jedoch nicht länger erhältlich ist, behält sich MY ARCADE® vor, nach eigenem Ermessen ein vergleichbares Produkt als Ersatz zur Verfügung zu stellen. Für MY ARCADE®-Produkte, die außerhalb der USA gekauft wurden, wenden Sie sich bei Fragen an das Geschäft, in...
  • Seite 51 Informationen zum Emulator finden Sie unter: www.MyArcadeGaming.com Registrieren Sie sich online und retten Sie einen Baum MY ARCADE® hat sich aus Umweltschutzgründen dafür entschieden, alle Produkte online registrieren zu lassen. Auf Papier gedruckte Registrierungskarten werden dadurch nicht länger benötigt. Alle Informationen, die Sie für die Registrierung Ihres neu erworbenen...
  • Seite 52 NEDERLANDS _______ Bevat Console, twee 2,4 GHz draadloze joysticks met paddles, HDMI®-kabel, voedingskabel en gebruikershandleiding Benodigde materialen (niet inbegrepen): 8 AA batterijen en mini schroevendraaier of USB-C®-kabel Lees en volg deze gebruikershandleiding zorgvuldig voor gebruik. 1. Aan/Uit-knop 4. Stroomaansluiting 2. Home-knop 5.
  • Seite 53 9 10 7. START-knop 1. A-knop 8. Aan/uit-schakelaar 2. B-knop 9. Stroomaansluiting 3. C-knop 10. Synchronisatie-indicator 4. Paddle 11. MENU / RGB-knop 5. HOME-knop 6. SELECT-knop Waarschuwing bij lichtgevoeligheid Dit spel bevat knipperende lichten of patronen die epileptische aanvallen kunnen veroorzaken bij een klein percentage mensen. Dit kan ook voorkomen bij mensen die geen voorgeschiedenis hebben van epileptische aanvallen.
  • Seite 54 voorzichtig in de voedingspoort (5V IN) aan de achterkant van de console. 5. Steek het USB-A-uiteinde van de kabel in een voedingsbron. 6. Druk op de aan/uit-knop aan de bovenzijde van de console. LET OP: De RGB-lampjes rond de aan/uit- en home-knoppen gaan branden wanneer de console wordt ingeschakeld.
  • Seite 55 Game controls Druk kort op de MENU-knop aan de achterkant van de joystick om GAME CONTROLS te openen. LET OP: TV TYPE en GAME DIFFICULTY worden alleen ondersteund in Atari® 2600-games. LET OP: PADDLE SENSITIVITY wordt niet door alle paddle-games ondersteund. Opslagopties De Atari®...
  • Seite 56 kleding grondig wassen. Houd accuzuur uit de buurt van ogen en mond. Lekkende batterijen kunnen een knappende geluiden maken. • Batterijen mogen alleen door een volwassene worden geïnstalleerd en vervangen. • Gebruik geen alkaline, standaard (koolstof-zink) of oplaadbare batterijen door elkaar. •...
  • Seite 57 Het is onwaarschijnlijk dat u enig probleem zult ondervinden, maar als een defect tijdens het gebruik van dit product zou blijken, garandeert MY ARCADE® de oorspronkelijke koper van de consument dat dit product gedurende 120 dagen vrij zal zijn van defecten in materiaal en...
  • Seite 58 Als er zich een defect voordoet dat onder deze garantie valt aan een product dat in de VS is gekocht, MY ARCADE®, naar eigen goeddunken, het gekochte product kosteloos repareren of vervangen of de oorspronkelijke aankoopprijs terugbetalen. Als een vervanging noodzakelijk is en uw product niet langer beschikbaar is, kan een vergelijkbaar product naar eigen goeddunken van MY ARCADE®...
  • Seite 59 Conformiteitsverklaring Een kopie van de EU-conformiteitsverklaring voor dit product vindt u onder de volgende link: www.MyArcadeGaming.com/pages/doc...
  • Seite 60 付属品 コンソール, 、 パドルコントロール付き2.4GHzワイヤレスジョイスティック 2本、 HDMI®ケーブル、 電源ケーブル、 ユーザーガイド 必要なアイテム (別売り) : 単三電池8本、 ミニドライバーまたはUSB-C® ご使用の前に、 このユーザーガイドをよくお読みになり、 指示に従ってく ださい。 1. 電源ボタン 4. 電源ポート 2. ホームボタン 5. HDMI OUT 3. USB-C® ポート 6. microSD™ カードスロッ ト...
  • Seite 61 9 10 7. START ボタン 1. A ボタン 8. On/o スイッチ 2. B ボタン 3. C ボタン 9. Power port (5V IN) 10. LED 同期インジケーター 4. Paddle 11. MENU / RGB ボタン 5. HOME ボタン 6. SELECT ボタン 光過敏性発作についての警告 このゲームには、 てんかんや発作の病歴がない方でも、 まれに光過敏性 発作を誘発する可能性のある光やパターンの点滅が含まれています。...
  • Seite 62 6. コンソールの上部にある電源ボタンを押します。 注 : 電源ボタンとホームボタン周辺のRGBライトは、 コンソールの電源が 入ったら点灯します。 点灯には、 電源ボタンを押してから、 最大5秒ほどか かる場合があります。 ジョイスティックのセッ トアップ方法 1. それぞれのジョイスティ ックの底部にある電池カバーを取り外します。 2. 各ジョイスティックに単3電池を4本ずつ挿入し、 電池カバーを元に戻 します。 3. 各ジョイスティックのオン/オフスイッチを ( ) から ( ) へ動かします。 4. 電源を入れると、 ジョイスティック背面のLED同期インジケーターが点 滅します。 ジョイスティ ックがコンソールと同期すると、 LED同期インジ ケーターが点灯します。 注 : 電池を使いたくない場合は、 USB-C®ケーブル (別売) のUSB-C®端子 をジョイスティックの背面にある電源ポート...
  • Seite 63 注 : TYPEとGAME DIFFICULTYは、 Atari® 2600ゲームにのみ対応して います。 注 : PADDLE SENSITIVITYは、 すべてのパドルゲームに対応しているわ けではありません。 オプションの保存 Atari Gamestation Proでは、 microSD™カードにゲームを保存できます。 microSD™カードスロッ トの最大容量は128 GBです。 microSD™カードをFAT32ファイルシステムにフォーマッ トします。 microSD™カードにフォルダを作成し、 Statesというラベルを付けます。 コンソールの側面にあるmicroSD™カードスロッ トにmicroSD™カード を挿入します。 注 : microSD™カードは、 ピンを上に向けてコンソールに挿入してください 。 ジョイスティックの背面にあるMENUボタンをすばやく押すと、 SAVE MENUにアクセスします。 このメニューから、 セーブ状態の保存、 ロード、 削除ができます。 注...
  • Seite 64 すべての電池を交換 してください)。 • 異なるブランドの電池を混ぜて使用しないでください。 • 「高出力」 、 「 高容量」 、 「 塩化亜鉛」 または 「亜鉛炭素」 と 表記された電池 の使用は推奨されません。 • 長期間使用しないときは、 製品に電池を入れたままにしないでくださ い。 • 使用していないときは、 電池を取り出し、 涼しく乾燥した場所に保管し てください。 • 消耗した電池は本機から取り外してください。 • 電池を逆方向に入れないでください。 プラス (+) とマイナス (-) 端子 が 正しい方向を向いていることを確認し、 マイナス側から挿入してくださ い。 • 破損、 変形、 または液漏れした電池は使用しないでください。 •...
  • Seite 65 性が確認されています。 問題が生じる可能性は低いものの、 本製品の使 用中に不具合が明らかになった場合、 MY ARCADE® は製品を購入され たお客様本人に対し、 本製品の購入日から 120 日間は材料および製造 上の欠陥がないことを保証します。 米国またはカナダで購入された製品に本保証の対象となる不具合が発 生した場合、 購入された製品を無償にて修理または交換を行うか購入金 額を返金させていただきます。 交換が必要な製品が入荷できない場合は 、 MY ARCADE® の独自の裁量により、 同等品でこれに代えさせていただく 場合もあります。 米国およびカナダ以外で購入された MY ARCADE® 製品 につきましては、 購入店舗に詳細をお問い合わせください。 通常の摩耗および裂け、 不正または誤った使用、 修正、 改造または材料 および製造に関連しないその他の原因については、 本保証は一切適用 されません。 産業または専門的、 商業目的で使用される製品については 、 本保証は一切適用されません。...
  • Seite 66 サービスに関する情報 120 日間の保証規定に基づく瑕疵製品の修理については、 お客様サポー トにお問い合わせください。 返品認証番号を発行いたします。 MY ARCADE® は、 瑕疵製品の返却および購入証明書を要求する 権利を 有します。 注: MY ARCADE® では、 返品認証番号がない場合、 瑕疵製品の補償の手 続きを行わないもの とします。 お客様サポートホッ トライン 877-999-3732 (米国、 カナダ専用) また +1-310-222-1045 (米国、 カナダ以外) お客様サポート電子メール support@MyArcadeGaming.com ウェブサイト www.MyArcadeGaming.com エミュレーターの情報については、 をご覧ください: www.MyArcadeGaming.com 環境保護のため、 オンラインでの登録をお願いいたします では、 環境に配慮し、 すべての製品の登録をオンラインで行っています。 こ...
  • Seite 67 HDMI® USB-C® microSD™ USB-C®...
  • Seite 68 9 10 HOME SELECT START HDMI OUT HDMI® HDMI® 1...
  • Seite 69 HDMI® 1 USB-C® (5V IN) USB-A .( ) USB-C® USB-C®...
  • Seite 70 MENU RGB • SAVE MENU GAME CONTROLS • MENU Game controls GAME CONTROLS 2600 GAME DIFFICULTY TV TYPE Atari® PADDLE SENSITIVITY microSD™ Atari® Gamestation Pro microSD™ FAT32 microSD™ States microSD™ microSD™ microSD™ SAVE MENU SAVE MENU...
  • Seite 71 microSD™ ) Factory reset ABOUT FACTORY RESET FACTORY RESET SETTINGS microSD™ • • • • • " " ." " " " " " • • • • • • • •...
  • Seite 72 • • • • • • • • • • • • (FCC) • • •...
  • Seite 73 • MY ARCADE® MY ARCADE® MY ARCADE® MY ARCADE® MY ARCADE®...
  • Seite 74 MY ARCADE® MY ARCADE® MY ARCADE® 877-999-3732 +1-310-222-1045 support@MyArcadeGaming.com www.MyArcadeGaming.com www.MyArcadeGaming.com MY ARCADE® MY ARCADE® www.MyArcadeGaming.com/product-registration www.MyArcadeGaming.com/pages/doc...
  • Seite 76 USB Implementers Forum. microSD™ est une marque commerciale de SD-3C, LLC. Fabricado en China. MY ARCADE® y el logotipo de MY ARCADE® son marcas registradas de dreamGEAR®, LLC. Diseño de envase © 2023 de dreamGEAR®, LLC. El color y la decoración pueden variar de los del envase. © 2023 Atari Interactive, Inc. ATARI, el logotipo de ATARI y todos los nombres y logotipos individuales de juegos de Atari son marcas comerciales o marcas registradas de Atari Interactive, Inc.