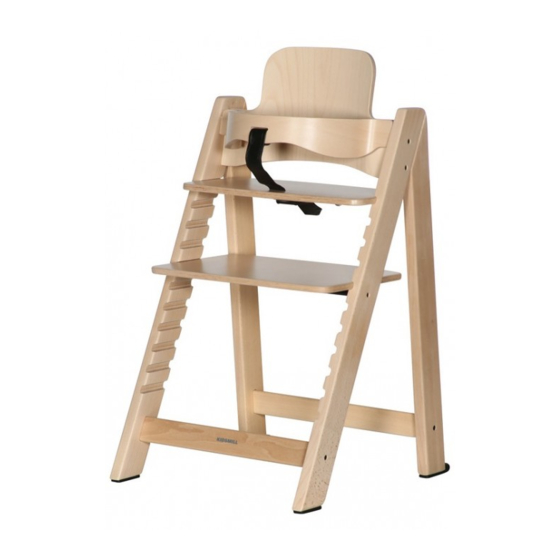
Kidsmill UP! Gebrauchsanleitung
Vorschau ausblenden
Andere Handbücher für UP!:
- Gebrauchsanleitung (12 Seiten) ,
- Gebrauchsanleitung (16 Seiten)

Verwandte Anleitungen für Kidsmill UP!


Inhaltszusammenfassung für Kidsmill UP!
- Seite 1 Newborn Wipstoel - Gebruiksaanwijzing Newborn Rocker - User manual Newborn Babywippe - Gebrauchsanleitung...
-
Seite 2: Inhaltsverzeichnis
INHOUDSOPGAVE/INDEX/INHALTSVERZEICHNIS Gefeliciteerd (NL) Waarschuwingen/Veiligheidsmaatregelen/Onderhoud Congratulations (EN) Warnings/Safety measures/Maintenance Glücklwunsch (D) Warnungen/Sicherheitsmaßnahmen/Pflege Onderdelen/Parts/Teile Montage/Installation/Montage Gebruik/Use/ Gebrauch Garantie (NL) Warranty (EN) Garantie (D) BELANGRIJK! BEWAAR DEZE INSTRUCTIES VOOR TOEKOMSTIGE REFERENTIE EN LEES ZORGVULDIG IMPORTANT! RETAIN THESE INSTRUCTIONS FOR FUTURE REFERENCE AND READ CAREFULLY WICHTIG! BEWAHREN SIE DIESE HINWEISE GUT FÜR KÜNFTIGE FRAGEN AUF UND LESEN SIE DIESE SORGFÄLTIG... -
Seite 3: Gefeliciteerd (Nl)
KIDSMILL WIPSTOEL UP! GEFELICITEERD Gefeliciteerd met de aankoop van deze wipstoel. Dit product voldoet inclusief het newborn zitje aan de meest strenge veiligheidseisen en is getest volgens de Europese norm EN-12790:2009. Het gebruik van deze wipstoel kan alleen veilig zijn, wanneer het wordt gebruikt volgens de voorschriften. Lees deze gebruiksaanwijzing daarom aandachtig door en bewaar deze als naslagwerk. -
Seite 4: Congratulations (En)
KIDSMILL ROCKER UP! CONGRATULATIONS Congratulations on the purchase of this baby rocker. This product together with the newborn seat meets the most stringent safety requirements and is approved according to the European standard EN 12790:2009. Using this baby rocker can only be safe when used according to these instructions. -
Seite 5: Sicherheitsmaßnahmen
KIDSMILL BABYWIPPE UP! GLÜCKWUNSCH Herzlichen Glückwunsch zum Erwerb dieser Babywippe. Dieses Produkt zusammen mit dem Newbornsitz erfüllt die höchsten Sicherheitsstandards und die Norm NEN-EN 12790:2009. Befolgen Sie alle Punkte in dieser Gebrauchsanleitung genau und sorgfältig. Bewahren Sie diese Gebrauchsanweisung gut für künftige Fragen auf. Ein Missachten der Gebrauchsanleitung gefährdet die Sicherheit ihres Kindes! -
Seite 6: Onderdelen/Parts/Teile
ONDERDELEN/PARTS/TEILE 5. Stift M6 (2x) 3. Schroef M6x65 (2x) 7. Stelschroef M6(2x) 3. Screw M6x65(2x) 7. Set screw M6(2x) 5. Pin M6 (2x) 5. Stift M6(2x) 3. Schraube M6x65(2x) 7. Stellschraube M6(2x) 8. Inbussleutel 4 (1x) 8. Hex Key 4 (1x) 8. -
Seite 7: Montage/Installation/Montage
MONTAGE/INSTALLATION/MONTAGE Stap 1: Schroef(1) de cilinderstoppen(2) op het linker- en rechterdeel(9+10) van het wipstoeltje. Step 1: Screw(1) the cylinder stops(2) to the left and right part(9+10) of the rocker. Schritt 1: Schrauben(1) Sie die Zylinderstoppen(2) auf dem linken und rechten Teil(9+10) der Babywippe. Stap 2: Plaats de metalen spanstang (11) vast tussen de twee delen (9+10) van de wipstoel en draai de schroeven(3) handvast. - Seite 8 MONTAGE/INSTALLATION/MONTAGE Stap 4a: Bevestig het achterdeel(12) van de wipstoel aan de delen (9+10). Step 4a: Attach the rear section(12) of the bouncer to parts(9 + 10). Schritt 4a: Befestigen Sie der Hinterteil(12) des Babywippe an den Teilen(9 + 10). Stap 4b: Plaats de behuizing(6) in de delen (9+10).
-
Seite 9: Gebruik/Use/Gebrauch
GEBRUIK/USE/GEBRAUCH Stap 1a: Schuif het Up! Newborn zitje vanaf de bovenzijde op de wipstoel. Step 1a: Slide the Up! Newborn seat on the rocker from the upper side. Schritt 1a: Schieben Sie den Up! Newborn Sitz von der oberen Seite an die Babywippe. Stap 1b: Schuif het zitje door totdat het is vergrendeld met een duidelijk hoorbare "Klik"... -
Seite 10: Garantie (Nl)
GARANTIE/WARRANTY/GARANTIE GARANTIE - NL Geldigheidsduur: 2 jaar vanaf de aankoopdatum. Dit garantiecertificaat is alleen geldig in combinatie met het aankoopbewijs. De garantie geeft recht op vervanging van het gehele product of onderdelen wanneer er sprake is van een fabrieksfout. Na de vervaldatum zijn aan reparaties kosten verbonden. De leverancier neemt geen enkele verantwoording voor ontstane schade of letsel aan personen, dieren of goederen door verkeerd gebruik van het veiligheidstuigje of door het niet opvolgen van de bijgeleverde instructies. - Seite 11 GARANTIEFORMULIER/WARRANTY FORM/GARANTIEKARTE NL - In geval van beschadigde of ontbrekende onderdelen, vul dan Timgro B.V. onderstaande forumulier in en verstuur naar het volgende E-mailadres: Afdeling Service EN - In case of damaged or missing parts, please fill in this form and send service@timgro.com to the following E-mail address: DE - Im Fall von beschädigten oder fehlenden Teilen, bitte füllen Sie dieses...
- Seite 12 De informatie in dit document is onderhevig aan verandering zonder kennisgeving. Timgro BV is niet aansprakelijk voor technische fouten of omissies in dit document. Het gekochte product kan afwijken van het product zoals beschreven in deze gebruikershandleiding The information contained herein is subject to change without notice. Timgro BV shall not be liable for technical errors or omissions contained herein.
- Seite 13 Newborn Set - Gebruiksaanwijzing Newborn Set - User manual Newborn Set - Gebrauchsanleitung...
-
Seite 14: Garantie (D)
INHOUDSOPGAVE/INDEX/INHALTSVERZEICHNIS Gefeliciteerd (NL) Waarschuwingen/Veiligheidsmaatregelen/Onderhoud Congratulations (EN) Warnings/Safety measures/Maintenance Glücklwunsch (D) Warnungen/Sicherheitsmaßnahmen/Pflege Onderdelen/Parts/Teile Montage/Installation/Montage Gebruik/Use/ Gebrauch Instellen/Adjustment/Einstellen Garantie (NL) Warranty (EN) Garantie (D) BELANGRIJK! BEWAAR DEZE INSTRUCTIES VOOR TOEKOMSTIGE REFERENTIE EN LEES ZORGVULDIG IMPORTANT! RETAIN THESE INSTRUCTIONS FOR FUTURE REFERENCE AND READ CAREFULLY WICHTIG! BEWAHREN SIE DIESE HINWEISE GUT FÜR KÜNFTIGE FRAGEN AUF UND LESEN SIE DIESE SORGFÄLTIG... -
Seite 15: Gefeliciteerd (Nl)
KIDSMILL NEWBORNSET UP! GEFELICITEERD Gefeliciteerd met de aankoop van deze newbornset voor de Up! kinderstoel. Dit product voldoet aan de meest strenge veiligheidseisen en is getest volgens de Europese norm EN 14988-1:2006+A1:2012. Het gebruik van dit newbornset kan alleen veilig zijn, wanneer het wordt gebruikt volgens de voorschriften. Lees deze gebruiksaanwijzing daarom aandachtig door en bewaar deze als naslagwerk. -
Seite 16: Congratulations (En)
KIDSMILL NEWBORN SET UP! CONGRATULATIONS Congratulations on the purchase of this newborn set for the Up! high chair. This product meets the most stringent safety requirements and is approved according to the European standard EN 14988-1:2006+A1:2012. Using this newborn set can only be safe when used according to these instructions. - Seite 17 KIDSMILL NEWBORNSET UP! GLÜCKWUNSCH Herzlichen Glückwunsch zum Erwerb dieses Up! Newbornset. Dieses Produkt erfüllt die höchsten Sicherheitsstandards und entsprecht der Europäischen Norm EN 14988-1:2006+A1:2012. Das Newbornset ist nur wirklich sicher, wenn sie vorschriftsmäßig benutzt wird. Befolgen Sie all Punkte in dieser Gebrauchs-anleitung genau und sorgfältig und heben Sie diese Anweisungen zum späteren Nachschlagen...
-
Seite 18: Onderdelen/Parts/Teile
ONDERDELEN/PARTS/TEILE Onderdelen uit kinderstoel 4. Schroef M6x12(4x) 5. Schroef M6x85(2x) Fittings from high chair 4. Screw M6x12(4x) 5. Screw M6x85(2x) Teile von Hochstuhl 4. Schraube M6x12(4x) 5. Schraube M6x85(2x) 7. Schroef M4x16(4x) 7. Screw M4x16(4x) 7. Schraube M4x16(4x) 2. Moer M6 (2x) 6. -
Seite 19: Montage/Installation/Montage
Let op! Bewaar de onderdelen voor later gebruik. Step 1: Remove the back, safety bar and seat of the Kidsmill Up! high chair. Beware! Keep the parts for later use. Schritt 1: Entfernen Sie die Rückseite, Sicherheitsbügel und den Sitz des Kidsmill Up! Stuhl. -
Seite 20: Gebruik/Use/Gebrauch
MONTAGE/INSTALLATION/MONTAGE Stap 4: Schroef(7) de clips(6) vast op het frame(12). Step 4: Screw(7) the clips(6) onto the frame(12). Schritt 4: Schraube(7) Sie die Clips(6) auf dem Rahmen(12). Stap 5: Bevestig de bekleding aan het frame(12) met de drukknopen. Step 5: Attach the fabric to the frame(12) with the press-studs. -
Seite 21: Instellen/Adjustment/Einstellen
GEBRUIK/USE/GEBRAUCH Stap 2: Trek, om het zitje te ontgrendelen, de beide knoppen van het zitje omhoog en schuif daarna het zitje van de kinderstoel. Step 2: To unlock the seat, pull up both buttons, at the sides of the seat, at the same time and slide the seat off the high chair. -
Seite 22: Garantie (Nl)
GARANTIE/WARRANTY/GARANTIE GARANTIE - NL Geldigheidsduur: 2 jaar vanaf de aankoopdatum. Dit garantiecertificaat is alleen geldig in combinatie met het aankoopbewijs. De garantie geeft recht op vervanging van het gehele product of onderdelen wanneer er sprake is van een fabrieksfout. Na de vervaldatum zijn aan reparaties kosten verbonden. De leverancier neemt geen enkele verantwoording voor ontstane schade of letsel aan personen, dieren of goederen door verkeerd gebruik van het veiligheidstuigje of door het niet opvolgen van de bijgeleverde instructies. - Seite 23 GARANTIEFORMULIER/WARRANTY FORM/GARANTIEKARTE NL - In geval van beschadigde of ontbrekende onderdelen, vul dan Timgro B.V. onderstaande forumulier in en verstuur naar het volgende E-mailadres: Afdeling Service EN - In case of damaged or missing parts, please fill in this form and send service@timgro.com to the following E-mail address: DE - Im Fall von beschädigten oder fehlenden Teilen, bitte füllen Sie dieses...
- Seite 24 De informatie in dit document is onderhevig aan verandering zonder kennisgeving. Timgro BV is niet aansprakelijk voor technische fouten of omissies in dit document. Het gekochte product kan afwijken van het product zoals beschreven in deze gebruikershandleiding The information contained herein is subject to change without notice. Timgro BV shall not be liable for technical errors or omissions contained herein.