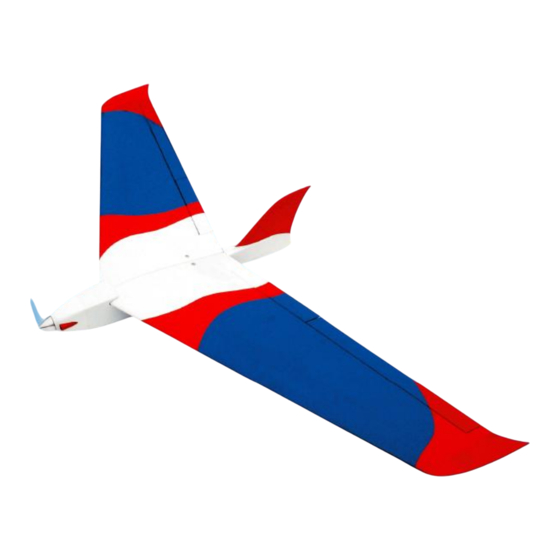
Inhaltsverzeichnis
Werbung
Quicklinks
Montageanleitung
ALL BALSA- PLYWOOD CONSTRUCTION.
COVERED WITH ORACOVER®
Technische Daten:
Spannweite:
1.930 mm
Länge:
840 mm
Abfluggewicht:
ca. 1.400 g
RC-Funktionen:
Quer-, Höhenruder
Wölbklappen, Motor
Servos (empf):
4 x Servo S3212 [#C1130]
Antrieb (empf.)
Antriebset Hai 2 [#C4390]
Akku (empf.)
REDPOWER 3200-11,1V [#C3164]
Instruction Manual
KONSTRUKTION AUS BALSA UND SPERRHOLZ.
MIT ORACOVER BESPANNT®
# C4329
Specifications:
Wingspan:
Length:
Flying weight:
R/C functions:
Servos (rec.)
Propulsion (rec.)
Battery (rec.):
1.930 mm
840 mm
approx. 1.400 g
Aileron, Elevator,
Flaps, Motor
4 x Servo S3212 [#C1130]
Propulsion Set Hai 2
#C4390
[
REDPOWER 3200-11,1V
]
#C3164
[
]
Werbung
Inhaltsverzeichnis

Inhaltszusammenfassung für pichler HAI 2
- Seite 1 Wölbklappen, Motor Flaps, Motor Servos (empf): 4 x Servo S3212 [#C1130] Servos (rec.) 4 x Servo S3212 [#C1130] Antrieb (empf.) Antriebset Hai 2 [#C4390] Propulsion (rec.) Propulsion Set Hai 2 #C4390 Akku (empf.) REDPOWER 3200-11,1V [#C3164] Battery (rec.): REDPOWER 3200-11,1V...
-
Seite 2: Warnhinweis
Flugmodell zu bauen. Bitte lesen Sie die Anleitung auf- great flying aeroplane. Please read this manual thoroughly merksam durch, bevor Sie mit dem Bau des Modells Hai 2 before starting assembly of your Hai 2. Use the parts list- beginnen. - Seite 3 Sie es verkleben. Nur so erhalten Sie ein exakt ing! This will assure proper assembly. Hai 2 ARF is hand fliegendes Modell Hai 2. Das Modell ist größtenteils in made from natural materials, every plane is unique and Handarbeit aus natürlichen Materialien hergestellt, jedes...
- Seite 4 Bedienungsanleitung Instruction Manual Hai 2 HAUPTBESTANDTEILE THE MAIN PARTS ANBRINGEN DER QUERRUDER- UND WÖLBKLAPPEN -SERVOS BZW. DER RUDER- HÖRNER MONTIEREN DER QUERRUDERSERVOS INSTALLING THE AILERON – FLAP SERVO CONTROL HORN. INSTALLING THE AILERON SERVO.
- Seite 5 Servos S3212 getestet und wir empfehlen diese für maximale Leistung und Zuverlässigkeit. We have tested the HAI 2 with the suggested Servos S3212 and highly recommend you to use it for best performance and reliability. Bringen Sie die metallische Anlenkung auf dem Servohebel Install the metal connector onto servo arm.
- Seite 6 Bedienungsanleitung Instruction Manual Hai 2 Using a modeling knife, remove the covering at position show below. Montieren Sie den Anlenkung am Servohebel an. Sichern Sie die Mutter mit Sekundenkleber, allerdings muss sich die Anlenkung leicht drehen lassen. Attach the micro control connector to the servo arms. Be sure the lock tie but it could free rotation.
-
Seite 7: Ruderhorn Für Querruder Anbringen
Bedienungsanleitung Instruction Manual Hai 2 Bringen Sie das Ruderhorn am Querruder an. Install aileron control horn to the aileron. RUDERHORN FÜR QUERRUDER ANBRINGEN INSTALLING THE AILERON CONTROL HORN Benutzen Sie ein Lineal und einen Stift und zeichnen Sie die Position des Ruderhorns an, wie auf dem folgenden Bild zu erkennen. -
Seite 8: Anbringen Der Querruderanlenkung
Bedienungsanleitung Instruction Manual Hai 2 ANBRINGEN DER QUERRUDERANLENKUNG EINBAU DER WÖLBKLAPPENSERVO. INSTALLING THE AILERON PUSHROD INSTALLING THE FLAP SERVO. -
Seite 9: Ruderhorn Für Wölbklappe Anbringen
Bedienungsanleitung Instruction Manual Hai 2 RUDERHORN FÜR WÖLBKLAPPE ANBRINGEN INSTALLING THE FLAP CONTROL HORN ANBRINGEN DER WÖLBKLAPPENANLENKUNG INSTALLING THE FLAP PUSHROD... - Seite 10 Bedienungsanleitung Instruction Manual Hai 2 Wiederholen Sie die gleichen Schritte für die andere Tragflächen- hälfte. Erstellen Sie eine komplett identische zweite Flächenhälfte. Repeat the procedure fort he other wing half.
-
Seite 11: Flächenbefestigung
Abbildungen! INSTALLING BOOST 30 ELECTRIC MOTOR We highly suggest to use the BOOST 30 motor. It is best for HAI 2. The motor must be rear mounted as shown here. You probably have to loosen... -
Seite 12: Motorhaube Montieren
Bedienungsanleitung Instruction Manual Hai 2 MOTORHAUBE MONTIEREN INSTALLING THE COWLING Schieben Sie die Motorhaube über den Motor bis nach hinten auf den Rumpf und markieren Sie die Position. Während Sie die hintere Kante der Motorhaube anzeichnen, richten Sie die Haube exakt aus. Die Motorachse, bzw. die der Luftschrauben Mitnehmer muss sich mittig in der vorde- ren Öffnung der Haube befinden. -
Seite 13: Seitenleitwerk Montieren
Bedienungsanleitung Instruction Manual Hai 2 SEITENLEITWERK MONTIEREN INSTALLING THE RUDDER... - Seite 14 Bedienungsanleitung Instruction Manual Hai 2 ANTRIEBSAKKU BEFESTIGEN Benutzen Sie ein Haken/Schlaufenband für die Akkumontage...
-
Seite 15: Modell Auswiegen
Bedienungsanleitung Instruction Manual Hai 2 USE LOOP N LOCK TIE STRAP TO FASTEN THE FLIGHT BATTERY Montieren Sie die Tragfläche am Rumpf, wie auf den folgenden Bildern dargestellt. How to attach the wings to the fuselage MODELL AUSWIEGEN BALANCING THE MODEL Es ist absolut wichtig, dass der Schwerpunkt bei Ihrem Modell korrekt eingestellt wird. -
Seite 16: Control Throws
Bedienungsanleitung Instruction Manual Hai 2 Drehen Sie das Modell um und unterstützen Sie es mit Ihren Fingerspitzen an den markierten Stellen. Die Schwerpunktangabe von 188mm empfiehlt sich für die ersten Flüge. Später, wenn Sie mit dem Modell vertraut sind können Sie den Schwerpunkt nach eigenem Ermessen um bis zu 10 mm nach vorn oder nach hinten legen. -
Seite 17: Weitere Hinweise
Landung verwenden will benötigt man einen Butterfly- Mischer. Dies lässt sich mit fast jedem Sender realisieren, da But please do not hesitate to fly the Hai 2, the model fly very well zwei Mischer in der Regel Standard eines modernen Senders without the elaborate settings and is also good to fly with a simple sind. - Seite 18 After a few rounds of acclimatization, the emphasis should be veri- fied. Is the Hai 2 itself with a slightly drawn heavily elevator down and not be slow to make the centre of gravity too far forward. If the model with a slightly up elevator restless or tipping off the elevator with a fully drawn, the centre of gravity is too far back.


