Tomahawk Mistral Handbuch
Inhaltsverzeichnis
Verfügbare Sprachen
Verfügbare Sprachen
Inhaltsverzeichnis

Verwandte Anleitungen für Tomahawk Mistral


Inhaltszusammenfassung für Tomahawk Mistral
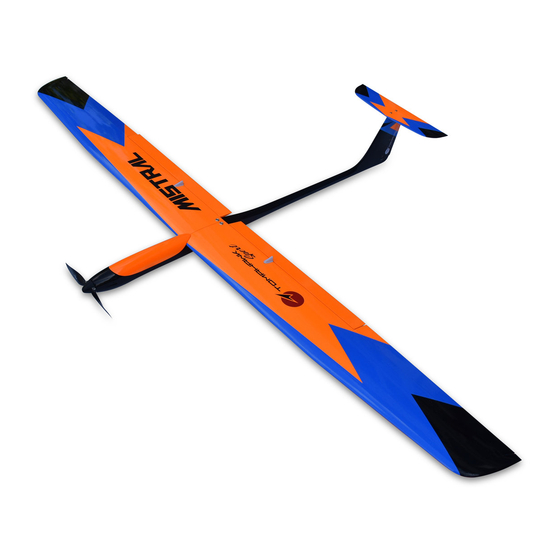
- Seite 1 MISTRAL INSTRUCTION MANUAL ART. 20600 | ART. 20610 www.tomahawk-aviation.com...
-
Seite 2: Sicherheitshinweise
Ihres Produkts. KONTAKT KONFORMITÄTSERKLÄRUNG Dieses Produkt entspricht den wesentlichen Schutzanforderungen gemäß den EU-Richtlinien zur elektromagnetischen Verträglichkeit. Eine Konformitätserklärung liegt vor und kann unter Tomahawk Aviation GmbH www.tomahawk-aviation.com Auenland 8 eingesehen werden. 25336 Klein Nordende Deutschland www.tomahawk-aviation.com contact@tomahawk-aviation.com +49 -7302 782 182... -
Seite 3: Spezifikationen
Kennzeichnung der Modelle. Gerne sind wir Ihnen bei der Lösung behilflich. Wir von Tomahawk Aviation wünschen Ihnen nun viel Spaß bei der Fertigstellung Ihres Modells und einen erfolgreichen Einsatz. Sollten Sie Fragen haben, melden Sie sich jederzeit bei uns. Wir stehen gerne mit Rat und Tat zur Seite. -
Seite 4: Montage Des Rumpfes
DEUTSCH MONTAGE DES RUMPFES Montieren Sie das Höhenruder mit den zwei Kontrollieren Sie die Länge des Höhenru- M3x10 Schrauben auf dem Rumpf und fä- dersgestänges und korrigieren Sie diese ggf. deln gleichzeitig das Höhenrudergestänge in am Gabelkopf. Das Ruder sollte sich bei 90° die Bohrung des Ruderhorns. - Seite 5 DEUTSCH Montieren Sie den beigefügten Alu-Mit- nehmer auf der Motorwelle. Ziehen Sie die Mutter bedacht, aber nicht zu fest an, da es sich um ein Alu Gewinde handelt. Die Pro- pellerblätter werden mit 3mm Bolzen und Si- cherungsringen am Mittelteil befestigt. Zum Schluss wird die Spinnerkappe montiert.
-
Seite 6: Montage Der Tragflächen
DEUTSCH MONTAGE DER TRAGFLÄCHEN Bei den Wölbklappen handelt es sich um eine Kreuzanlenkung. Dazu wird das Gestänge von unten am inneren Servo zur Oberseite an das Ruderhorn der Wölbklappe geführt. Bei 90° Servoarm Stellung in Neutral Position sollte die Wölbklappe bereits ca. 15mm Ausschlag nach unten haben. - Seite 7 DEUTSCH Tipp: Es geht nichts über ein mechanisch gut eingestelltes Modell. Nehmen Sie sich die Zeit dafür. Kleben Sie mit Epoxy die Aluminium Anpress- scheiben zur Flächenbesfestigung auf die Bohrungen der Flächenschrauben. Entfernen Sie zuvor die Folie darunter. Den 3mm Tor- sionsstift kleben Sie in die Wurzelrippe der rechten Tragfläche ein (vorher leicht anrauen und entfetten).
-
Seite 8: Montage Und Justage Arbeiten
DEUTSCH MONTAGE UND JUSTAGE ARBEITEN Stecken Sie beide Tragflächenhälften mit dem Flächenverbinder zusammen und verbinden die Flächenservostecker. Befestigen Sie die Fläche mit den M3x20 Senkschrauben auf dem Rumpf. Achten Sie darauf, dass keine Kabel zwischen Rumpf und Fläche eingeklemmt werden! Schalten Sie nun Ihren Sender mit voreingestelltem Modellspeicher und Empfänger ein und jus- tieren Sie zunächst, so weit möglich, alle Gestänge mechanisch. -
Seite 9: Sicherheitswarnungen
Suchen Sie sich für den Erstflug einen windstillen Tag aus und nehmen Sie sich genügend Zeit das Modell einzufliegen. Lassen Sie den Mistral von einem Helfer waagerecht in die Luft werfen und nehmen sie etwas Fahrt auf, bevor Sie in den Steigflug übergehen. Wir wünschen Ihnen viele schö- ne und entspannte Flugstunden mit Ihrem neuen Tomahawk Sport Mistral. - Seite 18 NOTICE / NOTIZEN...
- Seite 19 NOTICE / NOTIZEN...