Herunterladen Inhalt Inhalt Diese Seite drucken
Reloop RMP-3 Bedienungsanleitung

Reloop RMP-3 Bedienungsanleitung

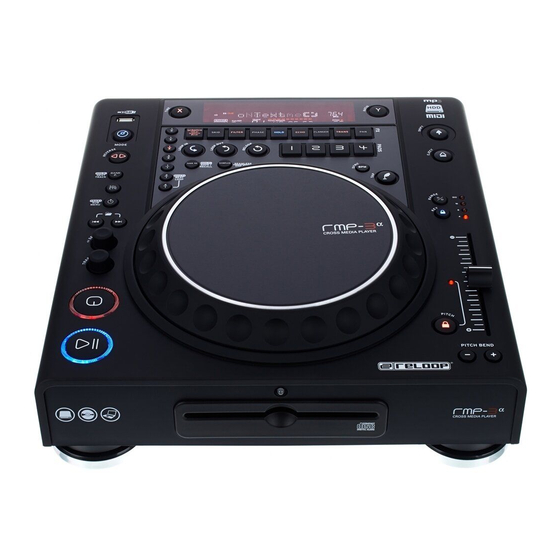
Professioneller crossmedia player
Quelle: reloop.com

Werbung

Verfügbare Sprachen

Verfügbare Sprachen

RMP-3
Professioneller Crossmedia Player
Bedienungsanleitung
ACHTUNG!
Lesen Sie sich vor der ersten Inbetriebnahme zur eigenen Sicherheit diese
Bedienungsanleitung sorgfältig durch! Alle Personen, die mit der Aufstel-
lung, Inbetriebnahme, Bedienung, Wartung und Instandhaltung dieses Gerä-
tes zu tun haben, müssen entsprechend qualifiziert sein und diese Betriebs-
anleitung genau beachten. Dieses Produkt erfüllt die Anforderungen der
geltenden europäischen und nationalen Richtlinien, die Konformität wurde
nachgewiesen, die entsprechenden Erklärungen und Unterlagen sind beim
Hersteller hinterlegt.
Instruction Manual
CAUTION!
For your own safety, please read this operation manual carefully before ini-
tial operation! All persons involved in the installation, setting-up, operation,
maintenance and service of this device must be appropriately qualified and
observe this operation manual in detail. This product complies with the requi-
rements of the applicable European and national regulations. Conformity has
been proven. The respective statements and documents are deposited at the
manufacturer.
Mode d'emploi
ATTENTION!
Pour votre propre sécurité, veuillez lire attentivement ce mode d'emploi
avant la première utilisation ! Toutes les personnes chargées de l'installation,
de la mise en service, de l'utilisation, de l'entretien et la maintenance de
cet appareil doivent posséder les qualifications nécessaires et respecter les
instructions de ce mode d'emploi. Ce produit est conforme aux directives
européennes et nationales, la conformité a été certifiée et les déclarations
et documents sont en possession du fabricant.
DeuTsCh ........................... 02-27
eNGLIsh ............................28-53
FRANçAIs .........................54-79
WARNUNG!
Um Feuer oder einen elektrischen Schock zu
vermeiden, setzen Sie dieses Gerät nicht Was-
ser oder Flüssigkeiten aus! Öffnen Sie niemals
das Gehäuse!
WARNING!
To prevent fire or avoid an electric shock
do not expose the device to water or fluids!
Never open the housing!
ATTENTION !
Afin d'éviter un incendie ou une décharge
électrique, veillez à tenir cet appareil à l'écart
des liquides et de l'humidité ! N´ouvrez jamais
le boîtier !
Für weiteren Gebrauch aufbewahren!
Keep information for further reference!
Gardez ces instructions pour des utilisa-
tions ultérieurs!
www.reloopdj.com
Reloop Trademark
Global Distribution GmbH
Schuckertstr. 28
48153 Muenster / Germany
© 2009
Nachdruck verboten!
1

Werbung

Inhaltsverzeichnis
loading

Inhaltszusammenfassung für Reloop RMP-3

  • Seite 1 This product complies with the requi- rements of the applicable European and national regulations. Conformity has been proven. The respective statements and documents are deposited at the manufacturer. RMP-3 Mode d‘emploi ATTENTION! Pour votre propre sécurité, veuillez lire attentivement ce mode d‘emploi avant la première utilisation ! Toutes les personnes chargées de l‘installation,...
  • Seite 2: Sicherheitshinweise

    Discjockey - Technologie Ihr Vertrauen schenken. Vor Inbetriebnahme bitten wir Sie, alle Anweisungen sorgfältig zu studieren und zu befolgen. Nehmen Sie den Reloop RMP-3 Apha aus der Verpackung. Bitte überprüfen Sie vor der ersten Inbe- triebnahme, ob kein offensichtlicher Transportschaden vorliegt. Sollten Sie Schäden am Stromkabel oder am Gehäuse entdecken, nehmen Sie das Gerät nicht in Betrieb und setzen Sie sich bitte mit...
  • Seite 3: Bestimmungsgemässe Verwendung

    • Das Gerät darf nicht in Betrieb genommen werden, wenn es von einem kalten Raum in einen war- men Raum gebracht wurde. Das dabei entstehende Kondenswasser kann unter Umständen Ihr Ge- rät zerstören. Lassen Sie das Gerät solange uneingeschaltet, bis es Zimmertemperatur erreicht hat! Regler und Schalter sollten niemals mit Sprühreinigungsmitteln und Schmiermitteln behan- delt werden.
  • Seite 5: Bedienung

    INsTALLATIONshINWeIse A) Verbinden Sie die Ausgangsbuchsen -42- mit den Line In Buchsen Ihres Mischpultes oder Ver- stärkers. Verbinden Sie optional die digitale Ausgangsbuchse -43- mit einem Gerät mit digitalem Eingang, beispielsweise einen CD-Brenner, MD-Rekorder, Digital-Mixer oder Audiokarte. B) Verbinden Sie die Anschlussbuchse -45- mit dem Netzkabel und schließen Sie es an Ihre Steck- dose an.
  • Seite 6 Track-Drehrad -4- und den folder Search-Tasten -6- zum gewünschten Song navigieren. Um das Stück sofort zu starten, drücken Sie das Track-Drehrad -4- direkt. Ansonsten spielt Ihr RMP-3 das gewünschte Lied als nächsten Song automatisch ab bzw. lädt diesen im Single-Modus. Um den Advance Track Search Modus zu deaktivieren, drücken Sie erneut die bank P.-Taste -9-.
  • Seite 7: Anti-Shock Speicher-Anzeige

    9. Bank Programm-Taste Mit der Bank Programm-Funktion -9- können Sie eine Abfolge von den auf den Samplebänken abge- speicherten Loops abspielen. Sofern Loops auf den Samplebänken abgespeichert sind können Sie die Bank Programm-Funktion durch betätigen der Taste Bank-P. -9- aktivieren. Wie man Loops abspeichert erfahren Sie im Abschnitt „Sampling“.
  • Seite 8 Bei vorheriger Betätigung der Loop In-Taste geht der Player in den Loop-Modus über (Nahtlos- Schleife) - „Reloop“ blinkt im Display. Um den Loop zu verlassen, drücken Sie erneut die Loop Out- Taste. Weitere Informationen zum Thema Loopen finden sie im Abschnitt „Sampling“. Um den Loop- Out Punkt neu zu setzen, halten Sie die Loop-Out Taste ca.
  • Seite 9 16. Memory-Taste Mit Hilfe der Memory-Taste -16- werden erstellte Loops den vier Sample-Bänken zugewiesen und ge- speichert. Nachdem Sie mit Hilfe der Loop In- und Loop Out-Taste einen Loop erstellt haben, drücken Sie die Memory-Taste -16-, die Memory-LED leuchtet auf. Danach wählen Sie eine der vier Sample- Bänke aus, um den eben erstellten Loop darauf zu speichern, die jeweilige Sample-Bank leuchtet auf.
  • Seite 10 hINWeIs! Im Display -11 F- werden diese schritte lediglich mit einer Nachkommastelle angezeigt. eine ge- naue Angabe wird beim Bewegen des Pitch-Faders temporär im Display -11 J- angezeigt. 23. Pitch On/Off-Taste Durch die Pitch On/Off-Taste -23- wird der Pitch Fader de/aktiviert. 24.
  • Seite 11 29. Filter-Taste Mit der Filter-Taste -29- aktivieren Sie einen Bandpassfilter, der nur die Wiedergabe auf einer be- stimmten Frequenz erlaubt. Ihr Gerät synchronisiert die Effekte automatisch zum aktuellen BPM- Wert. Mittels der Beatverknüpfungstasten -36- können Sie taktgenau die Frequenz ändern. Um die Taktfrequenz des Effektes manuell zu verändern, drücken Sie die Parameter Time-Taste -25- und regulieren Sie den Frequenzwert mittels des Jog-Wheels (von 0 - 9990 mSek.).
  • Seite 12 33. Flanger-Taste Mit der Flanger-Taste -33- aktivieren Sie den Flanger-Effekt. Dieser oft eingesetzte Effekt ähnelt dem Phase-Effekt, ist jedoch etwas harmonischer, betont die Obertöne mehr und erinnert an ein vor- bei fliegendes Flugzeug. Ihr Gerät synchronisiert die Effekte automatisch zum aktuellen BPM-Wert. Mittels der Beatverknüpfungstasten -36- können Sie taktgenau die Frequenz ändern.
  • Seite 13: Shift-Taste

    BPM-Taste -37- um den automatischen Beatcounter wieder zu aktivieren. 39. Relay-/Faderstart-Anschlussbuchse Wenn Sie Ihren Player über die Anschlussbuchse -39- mit einem anderen Reloop CD-Spieler (der auch über eine Relay-/Faderstart-Anschlussbuchse verfügt) mit dem beiliegenden 3,5 mm Klinkeka- bel verbinden, ist Relay-Play verfügbar. Wählen Sie dazu bei beiden Playern mit den Single/Continue- Tasten -8- den Single-Abspielmodus;...
  • Seite 14 Mit der Source Select-Taste können Sie zwischen den drei Medien-Modi wechseln. Nach Einschalten des Gerätes ist der RMP-3 automatisch im USB-Modus. Drücken Sie die Source Select-Taste im Pau- se Modus, um in den CD-Modus zu wechseln. Halten Sie die Source Select-Taste ca. 2 Sekunden, um in den MIDI-Modus zu gelangen.
  • Seite 15 -6- können sie direkt zwischen den angelegten Ordnern vor- oder zurück navigie- ren. Die weiteren Player-Funktionen gleichen dem normalen CD/MP3-Modus. WIsseNsWeRTes! Beachten sie auch das Kapitel „usB Audio Link“, um zwei RMP-3 Player miteinander zu koppeln und um auf eine usB MIDI-Quelle zuzugreifen.
  • Seite 16 Im Display wird der aktuelle Kanal und ggf. das virtuelle Deck-Laufwerk an- gezeigt. Wenn Sie beispielsweise mit einem RMP-3 vier virtuelle Decks kontrollieren möchten, so können Sie durch Drücken der Deck Switch-Taste zwischen den virtuellen Decks umschalten. Die Kanal-Presets können Sie im Submenü...
  • Seite 17 • Ordner öffnen/schließen Einstellung der Loop-Länge Loop-Länge Navigiert durch die Liste der Effektnavigation Wechselt das Deck; das ausgewählte Deck wird auf dem Display des RMP-3 (11) Deck wechseln angezeigt Das ausgewählte Deck wird auf dem Display des RMP-3 (11) angezeigt Deckanzeige Loop IN Setzt den Loop-Anfangspunkt für das ausgewählte Deck...
  • Seite 18 Hold Tasten LED angezeigt. Die Cue-Tasten LED geht aus. Das Jog Wheel und die PAD Tasten fun- gieren nun als Effektmodulations-Tool. Beachten Sie bitte, dass nur die erweiterten Effekteinheiten unterstützt werden. Für Updates und mögliche neue Mappings schauen Sie regelmäßig ins Reloop Support Forum: element erklärung...
  • Seite 19 |<< SHIFT zum Ursprungswert wird die Veränderung EJECT angezeigt. Dabei steht 0x43 für eine posi- RELOOP tive Änderung von 3 und eine Anzeige von 0x31 für eine negativen Wert von 15. sWITCh ON/OFF (sW,CeNTeR,CW,CCW) Diese Befehle werden für Umschalter ver-...
  • Seite 20: Mehrere Rmp-3 Koppeln

    • zwei RMP-3 Player in Verwendung mit TRAKTOR PRO Das bei TRAKTOR PRO implementierte RMP-3 Mapping ist auf den Kanälen 1 – 4 ausgelegt. (Channel 1 = Deck A, Channel 2 = Deck B, Channel 3 = Deck C, Channel 4 = Deck D). Bei Verwendung von zwei Playern sollten Sie bspw.
  • Seite 21: Jog Sensitivity

    Dazu ist diese einstellung sinnvoll. ein Wert von 25 Millisekunden entspricht 40 events pro sekunde. edit: edit On/Off: Ist Edit auf „On“ gestellt, können die MIDI-Parameter (MIDI Note, MIDI LED) editiert werden. Ist Edit auf „Off“ gestellt, sendet der RMP-3 die voreingestellten MIDI-Befehle. Bitte beachten Sie hierzu auch die MIDI-Map in dieser Bedienungsanleitung.
  • Seite 22 RMP-3E RMP-3F RMP-3G RMP-3H Dies ist sinnvoll, wenn Sie mehrere RMP-3 Player auf einem Computer koppeln wollen. So wird jeder Player mit einer individuellen Hardware ID angezeigt. Beachten Sie auch den Abschnitt „Mehrere RMP-3 koppeln“. I/O (Input/Output) Es kann eingestellt werden, ob die MIDI-Parameter im Display angezeigt werden sollen oder nicht.
  • Seite 23 Alternativ können sie das Menü auch durch Bestätigen der Time-Taste -7- verlassen. usB AuDIO LINK Es ist möglich, zwei RMP-3 Player zu koppeln, um Tracks von einer USB-Quelle abzuspielen. Auf der beiliegenden CD befindet sich ein spezielles Programm „Database Builder“. Dieses Programm analysiert den USB-Datenträger und legt spezielle Index-Dateien an, damit der RMP-3 schneller und...
  • Seite 24 1. RMP-3 Database Builder software-Installation Führen Sie das Programm „Database Builder“ auf der beiliegenden CD aus. Im ersten Schritt klicken Sie auf „Next“. Wählen Sie hier den Ordner, in dem der Database Builder gespeichert werden soll und bestätigen mit „Next“.
  • Seite 25 Ihr USB-Speichermedium wird nun analysiert. Nach erfolgreicher Analyse können Sie das Pro- gramm schließen. Ihr USB-Speichermedium ist nun erfolgreich analysiert worden und ist zur Ver- wendung mit dem RMP-3 bereit. hINWeIs! sollten sich bei der Verwendung des Database Builder unter Windows Vista Probleme ergeben, können sie folgende hilfe zur Fehlerbehebung...
  • Seite 26 3. Zwei RMP-3 Player für den Audio-Link-Modus miteinander verbinden Player 1 (Master) = RMP-3 der mit dem USB-Laufwerk verbunden ist. Stellen Sie beim Master-Player im Submenü „USB = LINK“ ein. Pfad: Time + Track-Tasten drücken > Punkt C. MIDI SET > USB = LINK Halten Sie die Shift-Taste -46- und drehen Sie das Track-Drehrad -4-, um zwischen den Modi zu wechseln.
  • Seite 27: Hilfe Zur Fehlersuche

    ZuR FehLeRsuChe Falls Schwierigkeiten mit dem Reloop RMP-3 auftreten sollten, suchen Sie in der folgenden Tabelle nach den Störungssymptomen und folgen Sie den Korrekturmaßnahmen, die in der Tabelle vorge- schlagen werden. symptome • Das Gerät bekommt keinen Strom, wenn man es mit dem EIN/AUS Schalter aktiviert.
  • Seite 28: Safety Instructions

    Before operating this equipment we ask you to carefully study and observe all instructions. Please remove the RMP-3 Alpha from its packaging. Check before initial operation to make sure that the device did not suffer any visible damage during transport. If you detect any damage to the power cable or the casing, do not operate the device.
  • Seite 29: Application In Accordance With Regulations

    • The device must not be operated after being taken from a cold environment into a warm environ- ment. The condensation caused hereby may destroy your device. Do not switch on or operate the device until it has reached ambient temperature! •...
  • Seite 31: Operation

    INStaLLtION NOtES A) Connect the Out Hub -42- to the line in hub of your mixing console or amplifier. Optionally, con- nect the Digital Out Hub -43- with any device that features a digital in hub, such as a CD burner, MD recorder, digital mixer or audio card.
  • Seite 32 In order to play the track instantly, press the Treack Wheel -4- ditrectly. Other- wise your RMP-3 will play the next track automatically or it will load the track when in Single mode. In order to deactivate the Advanced Track Search mode please press the Bank P button -9-.
  • Seite 33 9. Bank programme Button Use the Bank Programme function -9- to play a sequence of loops saved on the banks. If loops have been saved on the sample banks, activate the Bank Programme function with the Bank Programme button -9-. >>...
  • Seite 34 Now you can shorten and lengthen the Loop Out point by turning the Jog Wheel. 14. reloop Button Press the Reloop Button -14- for the player to return to the last loop that was played. To exit the loop, press the Loop Out Button again.
  • Seite 35 16. Memory Button Use the Memory Button -16- to assign and store loops in the four sample banks. After creating a Loop with the help of the Loop In and Loop Out Buttons, press the Memory Button -16-. The Memory LED goes on.
  • Seite 36 24. pitch Bend Buttons Use the Pitch Bend buttons -24- to briefly change the pitch of the respective track by +4/8/16% (+ button), or by -4/8/16% (- button) by holding it. Release the button for the player to return to the pitch set with the Pitch Fader.
  • Seite 37 NOtE: as soon as the time or ratio Buttons are activated, the Scratch mode is temporarily deactivated. tIp: to create a great filter sweep effect, set the time parameter value to „0“ mSec. and activate „Hold“. use the parameter ratio Button and the Jog Wheel to infinitely filter the frequency of your track from the value „0“...
  • Seite 38 Start Connection Hub -39- with the Fader Start connection hub of a compa- tible mixing console, such as the reloop rMX-40 DSp. By simply operating the fader of a mixing console you can start or stop playing from the CD player.
  • Seite 39: Shift Button

    Via the Source Select Button it is possible to switch between the three media modes. When turning on the device the RMP-3 will automatically be in USB mode. In pause mode push the Source Select Button in order to change to CD mode. Hold the Source Select Button for approximately 2 seconds in order to switch to MIDI mode.
  • Seite 40: Usb Mode

    Select a loop starting point by pressing the Loop In Button -12-. Select the loop ending point by pressing the Loop Out Button -13-. The player goes automatically into Loop mode and the Reloop dis- play flashes. The sequence thus chosen is seamlessly replayed until the Loop Out Button - 13- is pressed a second time.
  • Seite 41: Midi Mode

    -6- it is possible to navigate directly through the generated folders. all further player functions are equal to the normal CD/Mp3 mode. WOrtH KNOWING! please also refer to the chapter „uSB audio Link“ in order to connect two rMp-3 players and to access one uSB MIDI source. MIDI MODE By holding the Source Select Button -48- for a longer period of time you will change to MIDI Mode.
  • Seite 42 Adjusts the loop's size Effect rotation Navigates through the list of available effects of active deck Switches deck control; the selected deck is shown on the RMP-3's display (11) Deck switch Selected deck is shown on the RMP-3's display (11)
  • Seite 43 LED. The CUE mode button LED will be turned off. The jog and the PADs will now interact as effect modulation tool. Please note that only the advanced effect units are supported. It is possible that a mapping update will be Released to additionally support the chained effect unit. Regularly check the Reloop support forum for updates: http://www.reloopdj.com/forum/ Control Behaviour •...
  • Seite 44: Midi Mapping

    SHIFT the controller. This is an offset to 0x40 EJECT “one’s complement” notation. A mes- RELOOP sage with data 0x43 indicates a positive change of 3. A messages with data 0x31 indicates a negative change of 15. SWItCH ON/OFF (SW,CENtEr,CW,CCW)
  • Seite 45 • two rMp-3 in use with traKtOr prO The RMP-3 mapping implemented in TRAKTOR PRO is layed out for channel 1 - 4 (Channel 1 = Deck A, Channel 2 = Deck B, Channel 3 = Deck C, channel 4 = Deck D). When using two players you should adjust player 1 via the Reverse/Deck Switch Button to „DeckA CH1“...
  • Seite 46: Jog Sensitivity

    If Edit has been turned on it is possible to edit the MIDI parameters (MIDI Note, MIDI LED). If Edit is turned off the RMP-3 sends the preset MIDI commands. Please also refer to the MIDI Mapp in this manual.
  • Seite 47 RMP-3F RMP-3G RMP-3H This is suggestive if you would like to connect several RMP-3 players on one computer. This way each player will be displayed with an individual hardware ID. Please also refer to the chapter „Connecting several RMP-3 players“.
  • Seite 48 Button -7-. uSB auDIO LINK It is possible to connect two RMP-3 players in order to play tracks from one USB source. On the in- cluded CD you will find a special program „Database Builder“. This program analyzes the USB data carrier and creates special index files in order for the RMP-3 to access music files more easily and quickly.
  • Seite 49 1. rMp-3 Database Builder Software Installation Carry out the program „Database Builder“ on the included CD. As first step click on „Next“. Select the folder where you wish to store the Da- tabase Builder and confirm by clicking „Next“. Now the program can be installed. To do so click „Install“.
  • Seite 50 After a successful analysis you can close the pro- gram. Your USB data carrier has now been suc- cessfully analyzed and is ready for application with the RMP-3. NOtE! If the Database Builder causes problems under Windows Vista, please refer to the fol- lowing trouble shooting.
  • Seite 51 3. Connecting two rMp-3 players for the audio Link Mode player 1 (Master) = RMP-3 connected to the USB data carrier For the master player select „USB = LINK“ in the submenu. Path: push Time + Track Buttons > Item C. MIDI SET > USB = LINK Hold the Shift Button -46- and turn the Track Wheel -4- in order to switch modes.
  • Seite 52: Technical Information

    If you should encounter any kind of trouble with the RMP-3 please check the following chart for the corrersponding symptoms and follow the instructions that are listed. Symptoms • No power when activating the power ON/OFF switch. • the CD replay does not start.
  • Seite 54: Consignes De Sécurité

    Retirez le Reloop RMP-3 Alpha de son emballage. Avant la première mise en service, vérifiez le bon état de l‘appareil. Si le boîtier ou le câble sont endommagés, n‘utilisez pas l‘appareil et contactez votre revendeur.
  • Seite 55: Utilisation Conforme

    tilateurs ou les fentes de ventilation. Assurez toujours une ventilation convenable. • N‘utilisez pas l‘appareil lorsqu‘il est amené d‘une pièce froide dans une pièce chaude. L‘eau de con- densation peut détruire votre appareil. Laissez l‘appareil hors tension jusqu‘à ce qu‘il ait atteint la température ambiante ! •...
  • Seite 57: Instructions D'installation

    INSTRUCTIONS D‘INSTALLATION A) Brancher les prises de sortie -42- sur les prises Line In de votre console de mixage ou de l‘ampli. Raccorder en option la prise de sortie numérique -43- à l‘entrée numérique d‘un équipement tel que graveur de CD, enregistreur MD, console numérique ou carte audio. B) Raccorder la prise de sortie -45- au câble secteur et le brancher sur une prise de courant.
  • Seite 58 Touches Folder Search -6- vous pouvez naviguer la chanson voulue. Si vous appuyez sur la Touch Track -4- la chanson commence tout de suite. Autrement le RMP-3 charge la chanson et la passe automatiquement. Pour désactiver Advanced Track Search appuyez sur la Touche Bank P. -9-.
  • Seite 59 NOTE : Vous disposez de deux modes de lecture, le mode sans fi n et le mode One Shot. Appuyer une fois sur la touche Sampler -17- pour activer le mode sans fi n - la DEL Sampler s‘allume. Le mode sans fi n reproduit la séquence programmée à...
  • Seite 60 Indique si le lecteur est en mode Single („Single“ est affiché) ou en mode Continue (sans affichage). Q) Reloop Indique si le lecteur a mémorisé une séquence, laquelle peut être lancée avec la touche Reloop -14- („Reloop“ est affiché). „Reloop“ clignote lorsque la séquence est active.
  • Seite 61 >> La fonction Memory permet égalment d‘enregister définitivement pour jusqu‘à 500 CD quatre points Cue et des échantillons par banque de données (au total 2.000 points Cue et des échantil- lons). Veuillez lire le paragraphe „Sampling“ pour de plus amples informations. 17.
  • Seite 62 24.Touches Pitch Bend L‘enfoncement des touches Pitch Bend -24- permet de modifier la vitesse de la piste respective de +4/8/16% (touche +), ou de -4/8/16% (touche -). Lorsque la touche est relâchée, le lecteur retourne à la vitesse réglée à l‘aide du Pitch Fader. 25.Touche Parameter Time La touche Parameter Time permet de moduler un effet ou un échantillon sélectionné.
  • Seite 63 NOTE : Lorsque vous appuyez sur les touches Time ou Ratio, le mode Scratch est désactivé momenta- nément. CONSEIL : Pour obtenir un bel effet Filtersweep, régler la valeur Time-Parameter sur „0“ msec. et activer „Hold“. Utiliser la touche Parameter Ratio et la Jog-Wheel pour ajuster progressivement le filtre de fréquence de la piste entre „0“...
  • Seite 64 Pour que la fonction Relay-Play soit disponible, il faut raccorder la prise de connexion -25- de votre lecteur à une autre platine CD Reloop (laquelle dispose aussi d‘une prise de connexion Relay-/Fa- derstart) au moyen du câble 3,5 mm jack fourni avec l‘appareil. Régler ensuite les deux lecteurs sur le mode de lecture Single d‘une pression sur les touches Single/Continue -8- ;...
  • Seite 65 Appuyez sur le bouton Source Select durant pause mode pour basculer entre les trois modes de source multimédia. Lorsque vous allumez l’appareil RMP-3, la source USB est automatiquement sé- lectionnée. Appuyez sur le bouton Source Select pour sélectionner la source CD. Maintenez enfoncé...
  • Seite 66 „RMP-3“ (compatible avec Windows XP/Vista, Mac OS X). Mode Audio Link Vous pouvez associer deux lecteurs RMP-3 et utiliser une source audio USB commune (disque dur USB externe ou stick USB). Pour activer ce mode, vous devez activer «USB = LINK» dans le sous menu.
  • Seite 67: Mode Usb

    Vous pouvez utiliser les boutons Folder Search (Recherche de dossiers) -6- pour parcourir les dossiers. Les autres fonctions du lecteur sont identiques à celles du mode CD/MP3 normal. IMPORTANT! Référez-vous également au chapitre «USB Audio Link» pour associer deux lecteurs RMP-3 et pour accéder à une source USB MIDI. MODE MIDI Maintenez enfoncé...
  • Seite 68 L’écran affiche le canal courant et/ou le lecteur clavier virtuel. Si par exemple vous voulez comman- der quatre claviers à l‘aide d‘un RMP-3, il faut alors basculer entre les claviers virtuels en appuyant sur le bouton Deck Switch. Définissez les canaux préréglés dans le sous-menu (voir chapitre „Sous- menu“).
  • Seite 69 Change de commandes de platine ; la platine choisie est affichée à l'écran du Changer de platine RMP-3 (11) La platine choisie est affichée à l'écran du RMP-3 (11) Affiche la platine choisie Entrée de boucle Définit l'entrée de boucle de la platine choisie Définit le point de sortie de boucle de la platine choisie ;...
  • Seite 70 Notez que seules les unités d‘effets avancées sont prises en charge. Il est possible qu‘une mise à jour du mapping sera publiée pour supporter l‘unité d‘effets chaînée additionnelle. Consultez régulière- ment le forum Reloop support à la recherche de mises à jour : http://www.reloopdj.com/forum/...
  • Seite 71 SHIFT set to 0x40 “one’s complement” notation. EJECT A message with data 0x43 indicates a po- RELOOP sitive change of 3. A messages with data 0x31 indicates a negative change of 15. SWITCH ON/OFF (SW,CENTER,CW,CCW) These messages are used for switches.
  • Seite 72 COMBINER PLUSIEURS RMP-3 Pour combiner plusieurs lecteurs RMP-3 à des fins de contrôle (par ex. : contrôle du logiciel DJ), les possibilités suivantes sont raisonnables : • Deux lecteurs RMP-3 utilisés avec TRAKTOR PRO L‘application RMP-3 implémentée dans TRAKTOR PRO est élaborée sur les canaux 1 – 4 (canal 1 = clavier A, canal 2 = clavier B, canal 3 = clavier C, canal 4 = clavier D).
  • Seite 73 Edit On/Off (activer/désactiver la modification) : Réglez Modifier sur „On“ pour modifier les paramètres MIDI (Notes MIDI, DEL MIDI). Réglez Mo- difier sur „Off“ pour que le RMP-3 transmette les commandes MIDI prédéfinies. Reportez-vous à l‘application MIDI du présent manuel.
  • Seite 74 Channel 1 - 4 Channel 5 - 8 Channel 9 - 12 Channel 13 - 16 Lors de l’utilisation de plusieurs lecteurs RMP-3, on peut définir jusqu’à 4 périphériques pouvant émettre sur différents canaux MIDI. Reportez-vous également au chapitre “Combiner plusieurs RMP-3”.
  • Seite 75 On peut également quitter le menu en appuyant sur le bouton Time -7-. USB AUDIO LINK Il est possible d’associer deux lecteurs RMP-3 pour lire les chansons à partir d’une source USB. Un programme spécial «Database Builder» est disponible sur le CD fourni. Ce programme analyse les périphériques USB amovibles et crée des fichiers index, permettant au RMP-3 d’accéder rapidement...
  • Seite 76 1. Installation du logiciel RMP-3 Database Builder Exécutez le programme «Database Builder» qui est sur le CD fourni. A la première étape, cliquez sur „Next“ («suivant») A ce niveau, sélectionnez le dossier sous lequel le programme Database Builder doit être enregistré...
  • Seite 77 L‘analyse de votre péri- phérique de stockage USB a été effectuée avec succès et vous pouvez maintenant l’utiliser avec le RMP-3. NOTE! Si vous avez des problemes avec le Database Buil- der avec Windows Vista observez cette solution: Avec Windows Vista n‘est pas possible effecuter...
  • Seite 78 3. Connexion de deux lecteurs RMP-3 pour le mode Audio Link Lecteur 1 (Maître) = RMP-3 qui est connecté au port USB Dans le Lecteur principal, sélectionnez l’option USB = LINK. Cheminement: Appuyer sur les touches Time + Track > Point C. MIDI SET > USB = LINK Maintenez la touche Shift -46- enfoncée et tournez la molette Track -4- pour basculer d’un mode à...
  • Seite 79: Dépannage

    AIDE DE DÉPANNAGE Si le Reloop RMP-3 ne fonctionne pas correctement, recherchez le problème dans le tableau suivant et procédez aux mesures de dépannage indiquées. Problème • L‘appareil ne s‘allume pas lorsque vous appuyez sur l‘interrupteur. • La lecture du CD ne démarre pas.
  • Seite 80 WWW.RELOOPDJ.COM Reloop Trademark Global Distribution GmbH Schuckertstr. 28 48153 Muenster / Germany © Copyright 2009 Nachdruck Verboten!

Diese Anleitung auch für:

Rmp-3a

Inhaltsverzeichnis