Werbung
Verfügbare Sprachen
Verfügbare Sprachen
Quicklinks
!
Bitte überprüfen Sie VOR der Montage den Lochabstand zwischen den VESA Befestigungslöchern an Ihrem Bildschirm!
Diese Wandhalterung unterstützt
folgende Lochabstände:
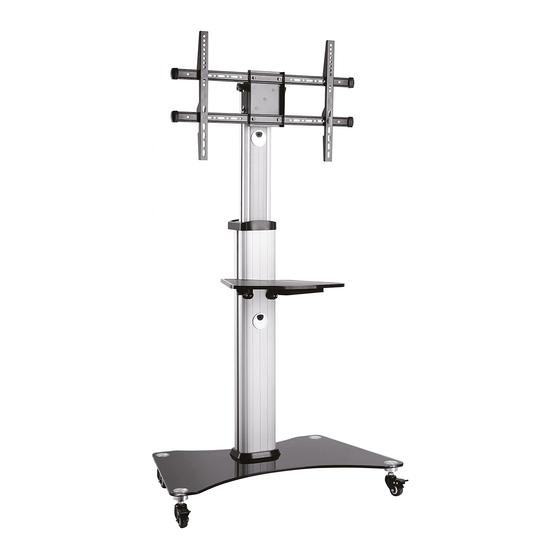
FS07XL
Fahrbarer TV Stand
Horizontal / Waagerecht
Horizontal / Waagerecht
Vertikal / Senkrecht
200x200
400x300
300x200
400x400
300x300
600x400
400x200
MONTAGEANLEITUNG
ACHTUNG: NIEMALS DAS MAXIMAL
ZULÄSSIGE BELASTUNGSGEWICHT
ÜBERSCHREITEN. MISSACHTUNG
KANN ZU SACHSCHÄDEN ODER
SCHWEREN VERLETZUNGEN FÜHREN!
VESA Befestigungslöcher
Vertikal /
Senkrecht
Bildschirm Rückseite
min.200mm - max.600mm
min.200mm - max.400mm
TV
40kg
(88lbs)
(11lbs)
MAX
v.17.09-1
DVD
5kg
MAX
Deutsch
English
Werbung

Verwandte Anleitungen für RICOO FS07XL


Inhaltszusammenfassung für RICOO FS07XL
- Seite 1 VESA Befestigungslöcher Vertikal / Senkrecht Horizontal / Waagerecht Bildschirm Rückseite Horizontal / Waagerecht min.200mm - max.600mm Diese Wandhalterung unterstützt folgende Lochabstände: Vertikal / Senkrecht min.200mm - max.400mm 200x200 400x300 40kg FS07XL 300x200 400x400 (88lbs) (11lbs) 300x300 600x400 400x200 Deutsch English...
-
Seite 2: Kunden-Hotline
Liebe Kundin, lieber Kunde, FS07XL wir freuen uns, dass Sie sich für ein Produkt der Marke "RICOO" entschieden haben Manchmal trotz aller Bemühungen unsererseits Ihnen ein qualitativ hochwertiges Produkt zu liefern, kann es vorkommen, dass einmal ein Zubehörteil fehlt oder ein Teil während des Transports beschädigt wird... -
Seite 3: Lieferumfang
Lieferumfang WICHTIG: Stellen Sie vor der Montage sicher, dass alle Teile welche hier aufgeführt sind, bei der Lieferung dabei sind. Sollten Teile fehlen oder defekt sein, kontaktieren Sie Ihren Händler. C (x1) A (x1) B (x1) H (x4) E (x2) G (x4) D (x1) F (x1) - Seite 4 Rollfüße in die Grundplatte einschrauben. Die gewünschte Höhe der Rollfüße einstellen und die untere Schraubenmutter fest anziehen. ACHTUNG: Bitte beim Lösen der Schrauben, die innere Säule fest- halten. Die gewünschte Höhe einstellen und alle Schrauben festziehen. Deutsch English...
- Seite 5 Die Säule an der Bodenplatte mit Schrauben fixieren. Alle Schrauben festziehen. Deutsch English...
- Seite 6 Deutsch English...
- Seite 7 Für Bildschirme mit flacher Rückseite Oberseite des Bildschirmes Für Bildschirme mit gewölbter Rückseite Oberseite des Bildschirmes Beachten: Wählen Sie die zu Ihrem TV passenden Schrauben, Unterlegscheiben und falls erforderlich die Abstandshalter. · Fixieren Sie die Montageschienen mit Hilfe von den dazugehörigen Schrauben. Ziehen Sie alle Schrauben nach.
- Seite 8 WICHTIG: Bevor Sie das Bildschirm loslassen, stellen Sie bitte sicher, dass der Bildschirm korrekt montiert ist und alle Schrauben fest angezogen sind Deutsch English...
- Seite 9 Deutsch English...
- Seite 10 Deutsch English...
- Seite 11 Fertig Lockern Sie die gezeigten Plastikknobs und stellen Sie die gewünschte Bildschirm-Neigung ein. Danach ziehen +5°/-12° Sie Knobs wieder zu um die Neigungseinstellung zu fixieren. Fertig Wartung • Prüfen Sie in regelmäßigen Abständen (mindestens alle drei Monate), ob alle Schrauben an dem Produkt fest angezogen sind. •...
- Seite 12 VESA Mounting holes Vertical / Perpendicularly Horizintally Display back Horizontally min.200mm - max.600mm This wall mount supports the following distance between holes: Vertical / Perpendicularly min.200mm - max.400mm 200x200 400x300 40kg FS07XL 300x200 400x400 (88lbs) (11lbs) 300x300 600x400 400x200 Deutsch English...
- Seite 13 Dear customer, FS07XL we are pleased that you have decided for a product of the brand "RICOO" Sometimes, despite our efforts to provide you with a high-quality product, it may happen that an accessory is missing or a part is damaged during transport .
- Seite 14 Component Checklist IMPORTANT: Ensure that you have received all parts according to the component checklist prior to installation. If any parts are missing or faulty, telephone your local distributor for a replacement. C (x1) A (x1) B (x1) H (x4) E (x2) G (x4) D (x1)
- Seite 15 Insert the casters into the base plate. Set the desired height of the casters and tighten the lower nut firmly. CAUTION: Please hold the inner column when loosening the screws to adjust height. Adjust to the desired height then tighten all screws. English Deutsch...
- Seite 16 Attach the column to the base with the screws .Tighten all screws using an Allen key. English Deutsch...
- Seite 17 English Deutsch...
- Seite 18 For displays with flat back Top of the display For displays with curved back Top of the display Note: Choose the appropriate screws, washers and spacers (if necessary) according to the type of screen. · Screw the adapter brackets onto the display. Tighten all screws but do not over tighten.
- Seite 19 IMPORTANT: Make sure the display is correctly mounted and the screws are tightened safely before releasing the display. English Deutsch...
- Seite 20 English Deutsch...
- Seite 21 English Deutsch...
- Seite 22 Done Loosen the knobs to adjust the display to the desired angle and tighten the knobs to secure. +5°/-12° Done Maintenance • Check that the bracket is secure and safe to use at regular intervals(at least every three months). • Please contact your distributor if you have any questions. English Deutsch...