Herunterladen Inhalt Inhalt Diese Seite drucken
Inhaltsverzeichnis

Werbung

Verfügbare Sprachen
  • DE

Verfügbare Sprachen

  • DEUTSCH, seite 35
DIGITAL VIDEO CAMERA
User Guide
User Guide
User Guide
User Guide
User Guide
multi-lang cover.indd
Downloaded from
www.Manualslib.com
Français
Português
1
manuals search engine
English
Deutsch
Italiano
Español
Nederlands
中文
5/31/2005, 9:55 AM
82-197-00021

Werbung

Inhaltsverzeichnis
loading

Inhaltszusammenfassung für Mustek DV 8200

  • Seite 1 DIGITAL VIDEO CAMERA User Guide User Guide User Guide User Guide User Guide English Deutsch Italiano Français Español Português Nederlands 中文 82-197-00021 multi-lang cover.indd 5/31/2005, 9:55 AM Downloaded from www.Manualslib.com manuals search engine...
  • Seite 2 This symbol on the product or in the instructions means that your electrical and electronic equipment should be disposed at the end of its life separately from your household waste. There are separate collection systems for recycling in the EU. For more information, please contact the local authority or your retailer where you purchased the product.
  • Seite 3: Inhaltsverzeichnis

    Table of Contents Getting Started Getting to know your Digital Video Camera........3 Understanding the Control Panel..........5 Power...................6 Modes...................7 DV Mode Taking Movies................10 Video Out................11 DSC Mode Taking Pictures..............12 DVR Mode Recording Voice Messages............14 MP3 Mode Listening To MP3 Music............
  • Seite 4: Getting Started

    Getting Started Getting to know your Digital Video Camera Front View Shutter button Zoom Lever Power Button Speaker Focus Ring Lens Battery cover Front LED Flash (Optional) Microphone Back View Control Panel MMC/SD card cover USB/Earphone cover LCD Screen En 3 Downloaded from www.Manualslib.com manuals search engine...
  • Seite 5 Getting Started Getting to know your Digital Video -continued Side View Battery Slot Back View MMC/SD card slot AV out/Earphone jack USB port En 4 Downloaded from www.Manualslib.com manuals search engine...
  • Seite 6: Understanding The Control Panel

    Getting Started Understanding the Control Panel Display Menu DV/DSC/DVR/MP3 Mode Switch Record/ Playback Exit/ Mode Switch Stop Play/Pause/ Enter Back/Down/Self-timer Volume/Hold(Press 2 Sec.) Next/Up/Resolution En 5 Downloaded from www.Manualslib.com manuals search engine...
  • Seite 7: Power

    Getting Started Power Power On/Off Press the power button to turn your digital video camera on and off. Power Low When the battery is running low, a battery icon ( ) will appear on the top of the LCD. When the battery is about to run out, a blinking battery icon ( ) will appear on the top of the LCD.
  • Seite 8: Modes

    Getting Started Modes Power On DV Record Mode DSC Record Mode DVR Record Mode MP3 Mode USB connected PLAYBACK Mode Mass Storage Mode En 7 Downloaded from www.Manualslib.com manuals search engine...
  • Seite 9 Getting Started Modes -continued DV Mode/DSC Mode/DVR Mode/MP3 Mode/PLAYBACK Mode This unit provides 4 modes. These modes are: 1.DV Mode: take videos with sound 2.DSC Mode: take pictures 3.DVR Mode: record voice messages. 4.MP3 Mode: listen to MP3 music. You can switch among these four modes by pressing .
  • Seite 10 Getting Started Modes -continued Connecting to PC (Mass Storage Mode) USB Cable USB port Using Console (Not applicable to MAC computers) Connect your Digital Video to a computer with an USB cable. Mass Storage Mode Connect your digital video camear to a computer. In Mass Storage Mode, it acts exactly like a hard disk.
  • Seite 11: Dv Mode Taking Movies

    DV Mode Taking Movies Press Power Switch to DV Mode Slide Zoom-in or Zoom-out to frame your video Zoom in or Zoom out Press Shutter button to start recording Press Shutter button again to stop En 10 Downloaded from www.Manualslib.com manuals search engine...
  • Seite 12: Video Out

    DV Mode Taking Movies -continued The recording timer While you’re filming, the recording timer will be displayed on the LCD. Before Recording Total estimative recordable time While Recording The recording time Video Out This Digital Video can output analog video to a home TV set. To configure the Digital Video, please refer to the NTSC/PAL section.
  • Seite 13: Dsc Mode Taking Pictures

    DSC Mode Taking Pictures Press Power Switch to DSC Mode Press Zoom lever to adjust the magnification ratio. Zoom in or Zoom out Press Shutter button to take a picture En 12 Downloaded from www.Manualslib.com manuals search engine...
  • Seite 14 DSC Mode Taking Pictures -continued The Picture Counter You can see the picture counter displayed on the upper-right corner of your LCD. It will show the number of the total recordable files of this Digital Video. Total estimative recordable files Macro/Portrait Mode You may set your camera to (macro mode) for closeup focus or to...
  • Seite 15: Dvr Mode

    DVR Mode Recording Voice Messages Press Power Switch to DVR Mode Press Shutter button to start recording Press Shutter button again to stop En 14 Downloaded from www.Manualslib.com manuals search engine...
  • Seite 16 DVR Mode Recording Voice Messages -continued The recording timer While recording voice messages, the recording timer will display on the upper-right corner of your LCD. Before Recording Total estimative recordable time While Recording Total recording time En 15 Downloaded from www.Manualslib.com manuals search engine...
  • Seite 17: Mp3 Mode

    MP3 Mode Listening to MP3 Music Press Power Switch to MP3 Mode Press UP or DOWN to select a track Press to play MP3 music Press to pause En 16 Downloaded from www.Manualslib.com manuals search engine...
  • Seite 18 MP3 Mode Listening to MP3 Music -continued Press to stop MP3 information Current track/ Total tracks The title of the selected track NOTE: The title of the tracks will display ONLY in alphabetical letters. Title with illegal characters will display in “TRACK001”, “TRACK002”, and “TRACK003”...
  • Seite 19: Playback Mode Basic Playback

    PLAYBACK Mode Basic Playback Switch to PLAYBACK mode The information of the selected file will display on the LCD. Current file number/ The total The Mode of the selected file files number The time of the selected file Press BACK or NEXT to navigate En 18 Downloaded from www.Manualslib.com...
  • Seite 20 PLAYBACK Mode Basic Playback -continued The following steps are only applicable to DV and DVR files. Press PLAY to start Press PLAY again to pause Press NEXT or BACK to fast-forward or fast-backward Press STOP to stop En 19 Downloaded from www.Manualslib.com manuals search engine...
  • Seite 21: Advanced Playback

    PLAYBACK Mode Advanced Playback Preview in multiple/single view or hide the information Press to preview in single view Press again to hide the information Press again to preview in multiple view En 20 Downloaded from www.Manualslib.com manuals search engine...
  • Seite 22 PLAYBACK Mode Advanced Playback -continued Edit the beginning and ending of a video clip (optional) This function is only available on certain model Press to bring up the menu Press to select “EDIT FILM” Press to advance to a position and press to set it as the starting point of the video clip.
  • Seite 23 PLAYBACK Mode Advanced Playback -continued Press to reverse to an ending position for the video clip. Press to enter the option menu Select CONTINUE to return to editing screen, PREVIEW to play the edited clip, SAVE AS to save the clip as a new file, or SAVE to save and overwrite the original file.
  • Seite 24: Main Functions

    Main Functions Changing the Resolution Setting DV Record Mode 1. In DV Mode, press the button. 2. The LCD will display your current quality setting on the upper-left corner. “ ” is normal resolution, “ ” is fine resolution and “ ”...
  • Seite 25: Using Self-Timer (For Dv And Dsc Modes)

    Main Functions Using Self-timer (for DV and DSC modes) This Digital Video has a built-in 10 second self-timer. Press Timer Press Shutter button to start The timer starts to count down from 10 seconds. This icon will blink during The count-down number count-down.
  • Seite 26: Using Guide Line/The Lcd Screen

    Main Functions Using Guide Line/The LCD Screen You can use guide line while recording videos or taking pictures. In Record Mode, press , the guide line will show on the LCD screen. The LCD Screen To save energy, Digital Video allows you to switch off the LCD screen. For DV and DSC mode LCD Off LCD On...
  • Seite 27: Using Hold

    Main Functions Using Hold Press and hold for 2 seconds to lock all buttons on the control panel. The buttons on the control panel will be locked while in HOLD function. To release the HOLD function, press and hold for another 2 seconds. buttons locked Volume Adjustment You can adjust playback volume by using...
  • Seite 28: Advanced Functions

    Advanced Functions Attention Icon Memory Full The Memory Full indicator lets you know to switch memory cards or transfer all files to your computer in order to continue taking videos or pictures. Memory Internal Memory Card Indicator Indicator Card Lock When you insert a SD memory card that is write protected, you will see a card lock icon on the upper-left side of the LCD.
  • Seite 29: Menu

    Advanced Functions Menu Press Press NEXT or BACK to select Press to change Press to exit En 28 Downloaded from www.Manualslib.com manuals search engine...
  • Seite 30 Advanced Functions Menu-continued Quality Settings (for DV mode) There are two quality selections for your movies: Fine and Normal. Please keep in mind that the higher the quality setting, the higher the file size. Fader (for DV mode) This function is only available on certain model This function lets you apply a fade effect to your videos.
  • Seite 31 Advanced Functions Menu -continued Quick Review ON/OFF (for DSC mode) The Quick Review feature let’s you preview your video and picture files. When this feature is activated, an icon will appear on the LCD. Attach Voice ON/OFF (for DSC mode) You can attach voice messages to your pictures.
  • Seite 32 Advanced Functions Menu-continued Date Allows you to set the date. Time Allows you to set the time. Beep On/OFF If you choose Beep On, there will be a beep sound when you press the buttons. If you choose Beep Off, there will be no sound. Auto-Off ON/OFF This feature is designed to conserve battery power by letting you set the time increment in which you unit should power off.
  • Seite 33 Advanced Functions Menu -continued 50Hz/60Hz Match the frequency of the main power supply in your country. Please refer to the following figures: 50 Hz : Europe, P.R.C.,Hong kong, Australia, New Zealand and South Africa. 60 Hz : America, Canada, Taiwan, Japan,and Korea. Slide Show You can choose to playback your movies, pictures, voice messages or MP3s in a Slide Show.
  • Seite 34 Advanced Functions Menu -continued Single repeat All repeat Random repeat Rotate ON/OFF (only for image files) You can choose to rotate your pictures. Press to bring up the menu, select ROTATE and then use to select rotation degree. Del One/ Del ALL You can choose to delete one file or all files.
  • Seite 35 DIGITALE VIDEOKAMERA Benutzerhandbuch Benutzerhandbuch Benutzerhandbuch Benutzerhandbuch Benutzerhandbuch Benutzerhandbuch Benutzerhandbuch Benutzerhandbuch Benutzerhandbuch cover.indd 5/31/2005, 10:28 AM Downloaded from www.Manualslib.com manuals search engine...
  • Seite 36 Das Symbol “Mülltonne durchgestrichen” auf dem Produkt bzw. in der Gebrauchsanweisung weist daraufhin, dass Elektro- und Elektronikgeräte separat vom Hausmüll gesammelt und entsorgt werden müssen. In der EU stehen verschiedene Sammlungssysteme zur Rücknahme und Wiederverwertung zur Verfügung. Für weitere Informationen wenden Sie sich bitte an die örtlichen Behörden bzw.
  • Seite 37 Inhaltsverzeichnis Erste Schritte Kennenlernen lhrer digitalen Videokamera ......3 Bedienfeld ..............5 Stromversorgung .............. 6 Betriebsmodi ..............7 Videomodus Aufzeichnen von Videos ........... 10 Video-Ausgang ............... 11 Fotomodus Aufnehmen von Bildern ............ 12 Sprachaufnahmemodus Aufzeichnen von Sprachmemos .......... 14 MP3-Modus Wiedergabe von MP3-Musik ..........
  • Seite 38: Erste Schritte

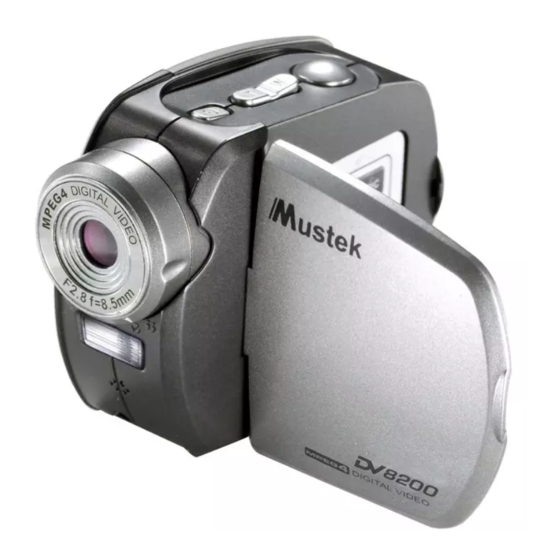
    Erste Schritte Kennenlernen Ihrer digitalen Videokamera Vorderansicht Auslösertaste Zoomtaste Ein-/Aus-Taste Lautsprecher Fokusring Objektiv Akkuabdeckung Vordere LED Blitz (optional) Mikrofon Rückansicht Bedienfeld MMC-/SD- Kartenabdeckung USB-/ Kopfhörerabdeckung LCD-Bildschirm De 3 Downloaded from www.Manualslib.com manuals search engine...
  • Seite 39 Erste Schritte Kennenlernen Ihrer digitalen Videokamera - Fortsetzung Seitenansicht Batteriefach Rückansicht MMC-/SD-Karteneinschub AV-Ausgang / Kopfhörerbuchse USB-Anschluss De 4 Downloaded from www.Manualslib.com manuals search engine...
  • Seite 40: Bedienfeld

    Erste Schritte Bedienfeld Anzeige Modus-Wahlschalter DV/DSC/DVR/MP3 Menü Modus- Wahlschalter Aufnahme/ Beenden/ Wiedergabe Stopp Wiedergabe/ Pause/ Enter Voriges/Ab/Selbstauslöser Lautstärke/Tastensperre (2 sek. drücken) Nächstes/Auf/Auflösung De 5 Downloaded from www.Manualslib.com manuals search engine...
  • Seite 41: Stromversorgung

    Erste Schritte Stromversorgung Ein- und Ausschalten Drücken Sie die Ein-/Aus-Taste, um Ihre digitale Videokamera ein- und auszuschalten. Geringer Niedrige Batterieladung Wenn der die Batterien zu schwach werden schwach wird, erscheint am oberen Rand des LCD-Bildschirms ein Batteriesymbol ( Kurz bevor der die Batterie gänzlich erschöpft ist, wird am oberen Rand des LCD-Bildschirms ein blinkendes Batteriesymbol ( ) angezeigt.
  • Seite 42: Betriebsmodi

    Erste Schritte Betriebsmodi Einschalten Videomodus Fotomodus Sprachaufnahmemodus MP3-Modus USB-Verbindung Wiedergabemodus Speichermodus De 7 Downloaded from www.Manualslib.com manuals search engine...
  • Seite 43 Erste Schritte Betriebsmodi Fortsetzung DV-Modus/DSC-Modus/DVR-Modus/MP3-Modus/Wiedergabemodus Digital Video bietet vier Haupt-Betriebsmodi und einen Wiedergabemodus. Die vier Haupt-Betriebsmodi sind: DV- (Digitalvideo), DSC- (Foto), DVR- (Sprache) und MP3-Modus 1. DV-Modus: zur Aufnahme von Videos mit Ton 2. DSC-Modus: zur Fotoaufnahme 3. DVR-Modus: zur Aufzeichnung von Sprachnotizen 4.
  • Seite 44 Erste Schritte Betriebsmodi - Fortsetzung Anschluss an einen PC (Massenspeichermodus) USB-Kabel USB-Anschluss Verwendung als Konsole (für MAC-Computer nicht verfügbar) Schließen Sie Ihre digitale Videokamera mit einem USB-Kabel an einen Computer an. Massenspeichermodus Schließen Sie Ihre digitale Videokamera an einen Computer an. Im Massenspeichermodus gleichen Ihre Eigenschaften dabei exakt jenen einer Festplatte.
  • Seite 45: Aufzeichnen Von Videos

    Videomodus Aufzeichnen von Videos Drucken Sie die Ein-/Aus-Taste Wechseln Sie in den Videomodus Verwenden Sie die Zoomtaste zum Vergrößern/Verkleinern Ihres Videoaufnahmeobjekts Vergrößern oder Verkleinern Drücken Sie die Auslösertaste, um mit der Aufzeichnung zu beginnen Drücken Sie die Auslösertaste erneut, um die Aufzeichnung zu beenden De 10 Downloaded from www.Manualslib.com...
  • Seite 46: Während Der Aufzeichnung

    Videomodus Aufzeichnen von Videos - Fortsetzung Die Aufnahmezeitanzeige Während Sie filmen, wird die Aufnahmezeitanzeige auf dem LCD-Bildschirm angezeigt. Vor dem Aufzeichnen Geschätzte verfügbare Gesamtaufnahmezeit Während der Aufzeichnung Die Aufnahmezeit Video-Ausgang Diese digitale Videokamera kann analoge Videosignale an ein herkömmliches TV-Gerät ausgeben. Um die digitale Videokamera dafür zu konfigurieren, lesen Sie bitte den Abschnitt NTSC/PAL.
  • Seite 47: Fotomodus

    Fotomodus Aufnehmen von Bildern Drücken Sie die Ein-/Aus-Taste Wechseln Sie in den Fotomodus Verwenden Sie die Zoomtaste, um das Vergrößerungsverhältnis anzupassen. Vergrößern oder Verkleinern Drücken Sie die Auslösertaste, um ein Bild aufzunehmen. De 12 Downloaded from www.Manualslib.com manuals search engine...
  • Seite 48 Fotomodus Aufnehmen von Bildern - Fortsetzung Die Bildzählung In der rechten oberen Ecke des LCD-Bildschirms wird die anzahl der Bilder angezeigt. Dieser gibt an, wie viele Dateien insgesamt auf der digitalen Videokamera aufgenommen werden können. Geschätzte maximale Anzahl aufzeichenbarer Dateien Makro-/Portrait-Modus Sie können Ihre Kamera auf (Makromodus) für Nahaufnahmen oder auf...
  • Seite 49: Sprachaufnahmemodus Aufzeichnen Von Sprachmemos

    Sprachaufnahmemodus Aufzeichnen von Sprachmemos Drücken Sie die Ein-/Aus-Taste Wechseln Sie in den Sprachaufnahmemodus Drücken Sie die Auslösertaste, um mit der Aufzeichnung zu beginnen Drücken Sie die Auslösertaste erneut, um die Aufzeichnung zu beenden De 14 Downloaded from www.Manualslib.com manuals search engine...
  • Seite 50 Sprachaufnahmemodus Aufzeichnen von Sprachmemos- Fortsetzung Anzeige der Aufnahmedauer Während der Aufzeichnung von Sprachmemos wird in der rechten oberen Ecke des LCD-Bildschirms die Aufnahmedauer angezeigt. Vor dem Aufzeichnen Geschätzte verfügbare Aufnahmedauer Während der Aufzeichnung Gesamtaufnahmedauer De 15 Downloaded from www.Manualslib.com manuals search engine...
  • Seite 51: Mp3-Modus

    MP3-Modus Wiedergabe von MP3-Musik Drücken Sie die Ein-/Aus- Wechseln Sie in den MP3-Modus Taste Drücken Sie die Tasten AUFWÄRTS oder ABWÄRTS, um einen Titel auszuwählen Drücken Sie die Taste , um Drücken Sie die Taste , um MP3-Musik wiederzugeben die Wiedergabe anzuhalten De 16 Downloaded from www.Manualslib.com...
  • Seite 52: Wiedergabe Von Mp3-Dateien Bei Geschlossenem Bildschirm

    MP3-Modus Wiedergabe von MP3-Musik - Fortsetzung Drücken Sie die Taste MP3-Informationen um die Wiedergabe zu beenden Aktueller Titel / Titel insgesamt Der Name des aktuellen Titels HINWEIS: Titelnamen werden NUR mit Buchstaben angezeigt. Titelnamen mit unzulässigen Zeichen werden als "TRACK001", "TRACK002", "TRACK003" und so weiter angezeigt.
  • Seite 53: Wiedergabe-Modus Einfache Wiedergabe

    Wiedergabe-Modus Einfache Wiedergabe Wechseln Sie in den Wiedergabe-Modus Die Informationen der ausgewählten Datei werden auf dem LCD- Bildschirm angezeigt. Aktuelle Dateinummer / Der Modus der Anzahl Dateien ausgewählten Datei insgesamt Die Dauer der ausgewählten Datei Drücken Sie zum Navigieren die Tasten ZURÜCK oder VORWÄRTS De 18 Downloaded from www.Manualslib.com...
  • Seite 54 Wiedergabe-Modus Einfache Wiedergabe - Fortsetzung Die folgenden Schritte gelten nur für Video- und Sprachdateien. Drücken Sie die Taste WIEDERGABE, um die Wiedergabe zu starten Drücken Sie die Taste WIEDERGABE erneut, um die Wiedergabe anzuhalten Drücken Sie für schnellen Vorlauf oder schnellen Rücklauf die Tasten VORWÄRTS oder ZURÜCK Drücken Sie die Taste STOP, um die Wiedergabe zu beenden De 19...
  • Seite 55: Erweiterte Wiedergabe

    Wiedergabe-Modus Erweiterte Wiedergabe Vorschau in Mehrfach- oder Einzelansicht bzw. Ausblenden der Informationen Drücken Sie die Taste für die Vorschau in Einzelansicht Drücken Sie die Taste erneut, um die angezeigten Informationen auszublenden Drücken Sie die Taste erneut für die Vorschau in Mehrfachansicht De 20 Downloaded from...
  • Seite 56 Wiedergabe-Modus Erweiterte Wiedergabe - Fortsetzung Bearbeiten des Anfangs und Endes einer Videodatei (optional) Diese Funktion steht nur bei bestimmten Modellen zur Verfügung Drücken Sie die Taste , um das Menü aufzurufen Drücken Sie die Taste , um "EDIT FILM (FILM BEARBEITEN)" auszuwählen Drücken Sie die Taste , um zu einer gewünschten Position vorzurücken und drücken Sie die Taste...
  • Seite 57: Wiedergabemodus

    Wiedergabe-Modus Erweiterte Wiedergabe - Fortsetzung Drücken Sie die Taste , um zu einer Endposition für Ihr Video zu gelangen. Drücken Sie die Taste , um das Optionsmenü aufzurufen. Wählen Sie "CONTINUE (FORTSETZEN)", um zum Bearbeitungsbildschirm zurückzukehren, "PREVIEW (VORSCHAU)", um die bearbeitete Datei wiederzugeben, "SAVE AS (SPEICHERN UNTER)", um die Datei als eine neue Datei zu speichern oder "SAVE (SPEICHERN)", um die Bearbeitung in der ursprünglichen Datei zu speichern und diese zu überschreiben.
  • Seite 58: Hauptfunktionen

    Hauptfunktionen Ändern der Auflösungseinstellung Videoaufnahmemodus 1. Drücken Sie im Videoaufnahmemodus die Taste 2. Auf dem LCD-Bildschirm wird in der linken oberen Ecke die aktuelle Qualitätseinstellung angezeigt. “ ” steht für normale Auflösung, “ ” für feine Auflösung und “ ” für speicherschonende Auflösung. Normale Auflösung Feine Auflösung Speicherschonende...
  • Seite 59: Verwendung Des Selbstauslösers (Für Video- Und Fotomodus)

    Hauptfunktionen Verwendung des Selbstauslösers (für Video- und Fotomodus) Diese digitale Videokamera verfügt über einen eingebauten Selbstauslöser mit 10 Sekunden Intervall. Drücken Sie die Selbstauslösertaste Drücken Sie die Auslösertaste, den Vorgang zu starten. Die Zeit wird beginnend bei zehn Sekunden heruntergezählt. Dieses Symbol Die heruntergezählten blinkt während des...
  • Seite 60: Verwendung Des Hilfsrasters / Der Lcd-Bildschirm

    Hauptfunktionen Verwendung des Hilfsrasters / Der LCD-Bildschirm Sie können für die Aufnahme von Videos oder Fotos ein Hilfsraster verwenden. Drücken Sie im Aufnahmemodus die Taste , um das Hilfsraster auf dem LCD-Bildschirm anzuzeigen. Der LCD-Bildschirm Um Energie zu sparen, ermöglicht es Ihnen die digitale Videokamera, den LCD-Bildschirm auszuschalten.
  • Seite 61: Verwendung Der Tastensperre

    Hauptfunktionen Verwendung der Tastensperre Halten Sie die Taste zwei Sekunden lang gedrückt, um alle Tasten des Bedienfelds zu sperren. Solange die TASTENSPERRE aktiviert ist, bleiben alle Tasten des Bedienfelds gesperrt. Um die TASTENSPERRE aufzuheben, drücken Sie die Taste erneut zwei Sekunden lang. Tasten gesperrt Lautstärkeregelung Sie können die Lautstärke mit Hilfe der Tasten...
  • Seite 62: Erweiterte Funktionen

    Erweiterte Funktionen Warnsymbole Speicher voll Die Meldung "Memory Full (Speicher voll)" weist Sie darauf hin, dass Sie eine andere Speicherkarte einlegen oder alle Dateien auf einen Computer übertragen sollten, damit Sie weiter Videos oder Fotos aufnehmen können. Speicher- Anzeige kartenanzeige internen speicher Kartensperre...
  • Seite 63: Menü

    Erweiterte Funktionen Menü Drücken Sie die Taste Drücken Sie die Taste VORWÄRTS oder ZURÜCK, um Menüpunkte auszuwählen. Drücken Sie die Taste , um Drücken Sie die Taste , um Einstellungen zu ändern das Menü zu– verlassen De 28 Downloaded from www.Manualslib.com manuals search engine...
  • Seite 64 Erweiterte Funktionen Menü - Fortsetzung Quality Settings [Qualitätseinstellungen] (für Videomodus) Für Ihre Filme stehen zwei Qualitätseinstellungen zur Auswahl: Fine (Fein) und Normal. Bitte bedenken Sie, dass die Dateigröße mit der höheren Qualitätseinstellung zunimmt. Fader [Blendeffekt] (für Videomodus) Diese Funktion steht nur bei bestimmten Modellen zur Verfügung Mit Hilfe dieser Funktion können Sie in Ihre Videos einen Blendeffekt einbauen.
  • Seite 65 Erweiterte Funktionen Menü - Fortsetzung Quick Review ON/OFF [Schnellanzeige EIN/AUS] (für Fotomodus) Die Schnellanzeigefunktion ermöglicht Ihnen eine rasche Vorschau auf Ihre Video- und Bilddateien. Ist diese Funktion aktiviert, wird auf dem LCD-Bildschirm ein entsprechendes Symbol angezeigt. Attach Voice ON/OFF [Sprachmemo hinzufügen EIN/AUS] (für Fotomodus) Sie können Ihre Fotos um Sprachmemos ergänzen.
  • Seite 66 Erweiterte Funktionen Menü - Fortsetzung Date [Datum] Ermöglicht Ihnen das Einstellen des Datums. Time [Zeit] Ermöglicht Ihnen das Einstellen der Uhrzeit. Beep On/OFF [Tastentöne EIN/AUS] Wenn Sie die Funktion aktivieren, ist beim Drücken der Tasten ein Ton zu hören. Wenn Sie die Funktion deaktivieren, werden keine Tastentöne ausgegeben. Auto-Off ON/OFF [Auto-Abschaltung EIN/AUS] Diese Funktion ermöglicht es Ihnen, die Batterie zu schonen, indem Sie Leerlaufintervalle einstellen, nach denen das Gerät sich automatisch...
  • Seite 67 Erweiterte Funktionen Menü - Fortsetzung 50Hz/60Hz Passen Sie die Frequenz an jene der Stromversorgung in Ihrem Land an. Bitte beachten Sie hierzu die nachstehenden Angaben: 50 Hz : Europa, Volksrepublik China, Hongkong, Australien, Neuseeland und Südafrika. 60 Hz : Amerika, Kanada, Taiwan, Japan und Korea. Slide Show [Diavorführung] Sie können Ihre Videos, Fotos, Sprachmemos oder MP3-Dateien in Form einer Diavorführung wiedergeben.
  • Seite 68 Erweiterte Funktionen Menü - Fortsetzung Single repeat All repeat Random repeat (Einzelwiederholung) (Alle wiederholen) (Zufallswiederholung) Rotate ON/OFF [Drehen EIN/AUS] (nur für Fotodateien) Sie können Ihre Bilder drehen. Drücken Sie die Taste , um das Menü aufzurufen, wählen Sie "ROTATE (DREHEN)" und verwenden Sie die Taste , um den Drehwinkel auszuwählen.
  • Seite 69 CAMÉRA VIDÉO NUMÉRIQUE Manuel d’utilisation Manuel d’utilisation Manuel d’utilisation Manuel d’utilisation Manuel d’utilisation Manuel d’utilisation Manuel d’utilisation Manuel d’utilisation Manuel d’utilisation cover.indd 5/31/2005, 10:46 AM Downloaded from www.Manualslib.com manuals search engine...
  • Seite 70 Ce symbole qui apparaît sur le produit ou dans les instructions signifi e que votre appareil électrique ou électronique, lorsqu’il ne fonctionne plus, doit être jeté séparément de vos déchets ménagers. En Europe, il existe différents systèmes de collecte pour le recyclage.
  • Seite 71 Table des matières Prise en main Apprendre à connaître votre caméra vidéo numérique ....... 3 Utilisation du panneau de commande ..........5 Alimentation ................6 Utilisation du panneau de commande ..........7 Mode DV Tourner des films ..............10 Sortie vidéo ................11 Mode DSC Prendre des images ..............
  • Seite 72: Prise En Main

    Prise en main Apprendre à connaître votre caméra vidéo numérique Vue en face avant Déclencheur Levier de zoom Bouton d'alimentation Haut-parleur Bague de mise au point Objectif Couvercle batterie LED avant Flash (en option) Microphone Vue arrière Panneau de commande Couvercle carte MMC/SD Couvercle USB/...
  • Seite 73 Prise en main Apprendre à connaître votre caméra vidéo numérique - suite Vue de côté Logement batterie Vue arrière Logement carte MMC/SD Sortie AV / écouteurs Port USB Fr 4 Downloaded from www.Manualslib.com manuals search engine...
  • Seite 74: Utilisation Du Panneau De Commande

    Prise en main Utilisation du panneau de commande Affichage Sélection des modes DV/DSC/DVR/MP3 Menu Sélection des modes Quitter/ Enreg./ Arrêt Lecture Lecture/ Pause/ Entrée Précédent/Vers le bas/ Volume/Verrouillage Retardateur (appuyez pendant 2 sec.) Suivant/Vers le haut/Résolution Fr 5 Downloaded from www.Manualslib.com manuals search engine...
  • Seite 75: Alimentation

    Prise en main Alimentation Marche / Arrêt Appuyez sur le bouton pour allumer ou éteindre votre caméra vidéo numérique. Alimentation faible Lorsque la batterie devient faible, une icône batterie ( ) apparaît en haut de l'écran LCD. Lorsque la batterie est presque déchargée, une icône batterie clignotante ( ) apparaît en haut de l'écran LCD.
  • Seite 76 Prise en main Modes Mise sous tension Mode enregistrement DV Mode enregistrement DSC Mode enregistrement DVR Mode MP3 Connexion USB Mode LECTURE Mode Stockage Fr 7 Downloaded from www.Manualslib.com manuals search engine...
  • Seite 77 Prise en main Modes - Suite Mode DV / Mode DSC / Mode DVR / Mode MP3 / Mode LECTURE Ce caméscope numérique offre 4 modes principaux et un mode de LECTURE. Les 4 modes principaux sont : Mode DV, Mode DSC, Mode DVR et Mode MP3.
  • Seite 78 Prise en main Modes -suite Branchement à un PC (Mode stockage de masse) Câble USB Port USB Utilisation de la console (Non applicable sur les ordinateurs MAC) Branchez votre caméra vidéo numérique sur un ordinateur via le câble USB. Mode stockage de masse Branchez votre caméra vidéo numérique sur un ordinateur.
  • Seite 79: Mode Dv

    Mode DV Tourner des films Appuyez sur Power (Alimentation) Basculez en Mode DV Utilisez Zoom-in (zoomer) ou Zoom-out (dézoomer) pour cadrer votre vidéo Zoomer ou dézoomer Appuyez sur le déclencheur pour démarrer l'enregistrement Appuyez sur le déclencheur de nouveau pour arrêter Fr 10 Downloaded from www.Manualslib.com...
  • Seite 80: Avant D'enregistrer

    Mode DV Tourner des films-suite Le minuteur d'enregistrement Pendant que vous filmez, le minuteur d'enregistrement s'affiche sur le LCD. Avant d'enregistrer Durée totale estimée enregistrable Pendant l'enregistrement La durée d'enregistrement Sortie vidéo La caméra vidéo numérique peut sortir de la vidéo analogique vers un téléviseur.
  • Seite 81: Mode Dsc

    Mode DSC Prendre des images Appuyez sur Power Basculez en Mode DSC (Alimentation) Appuyez sur le Levier de zoom pour régler le taux de grossissement. Zoomer ou dézoomer Appuyez sur le déclencheur pour prendre une image. Fr 12 Downloaded from www.Manualslib.com manuals search engine...
  • Seite 82 Mode DSC Prendre des images -suite Le compteur d'images Vous pouvez voir le compteur d'images affiché dans le coin supérieur droit de votre LCD. Il indique le nombre total de fichiers enregistrables sur cette caméra vidéo numérique. Total fichiers estimés enregistrables Mode Macro/Portrait Vous pouvez régler votre appareil sur...
  • Seite 83: Mode Dvr

    Mode DVR Enregistrer des messages vocaux Appuyez sur Power (Alimentation) Basculez en Mode DVR Appuyez sur le déclencheur pour démarrer l'enregistrement Appuyez sur le déclencheur de nouveau pour arrêter Fr 14 Downloaded from www.Manualslib.com manuals search engine...
  • Seite 84 Mode DVR Enregistrer des messages vocaux -suite Le minuteur d'enregistrement Pendant l'enregistrement de messages vocaux, le minuteur d'enregistrement s'affiche dans le coin supérieur droit de votre LCD. Avant d'enregistrer Durée totale estimée enregistrable Pendant l'enregistrement Durée d'enregistrement totale Fr 15 Downloaded from www.Manualslib.com manuals search engine...
  • Seite 85: Mode Mp3

    Mode MP3 Ecouter de la musique MP3 Basculez en Mode MP3 Appuyez sur Power (Alimentation) Appuyez sur UP (haut) ou DOWN (bas) pour sélectionner un morceau Appuyez sur pour lire la Appuyez sur pour mettre musique MP3 en pause Fr 16 Downloaded from www.Manualslib.com manuals search engine...
  • Seite 86 Mode MP3 Ecouter de la musique MP3 -suite Appuyez sur pour arrêter Informations MP3 Morceau en cours / Total morceaux Le titre du morceau choisi REMARQUE : Le titre des morceaux ne s'affiche QUE par ordre alphabétique. Les titres avec des caractères illégaux s'affichent sous la forme "TRACK001", "TRACK002", and "TRACK003"...
  • Seite 87: Mode Lecture Lecture De Base

    Mode LECTURE Lecture de base Basculez en Mode LECTURE Les informations sur le fichier sélectionné s'affichent sur le LCD. Numéro du fichier en cours / Le mode du fichier choisi Nombre total de fichiers La durée du fichier choisi Appuyez sur BACK (Précédent) ou NEXT (suivant) pour naviguer Fr 18 Downloaded from www.Manualslib.com...
  • Seite 88 Mode LECTURE Lecture de base -suite Les étapes suivantes ne s'appliquent que pour les fichiers DV et DVR. Appuyez sur PLAY (Lecture) pour démarrer Appuyez de nouveau sur PLAY (Lecture) pour mettre en pause Appuyez sur BACK (Précédent) ou NEXT (suivant) pour l'avance ou le retour rapide Appuyez sur STOP (Arrêt) pour arrêter Fr 19...
  • Seite 89: Lecture Avancée

    Mode LECTURE Lecture avancée Prévisualisation en un/plusieurs vue(s) ou cacher les informations Appuyez sur pour prévisualiser en une seule vue Appuyez de nouveau sur pour cacher les informations Appuyez de nouveau sur pour prévisualiser en plusieurs vues Fr 20 Downloaded from www.Manualslib.com manuals search engine...
  • Seite 90 Mode LECTURE Lecture avancée -suite Editer le début et la fin d'une séquence vidéo (en option) Cette fonction n'est disponible que sur certains modèles Appuyez sur pour amener le menu Appuyez sur pour sélectionner "EDIT FILM" (EDITER LE FILM) Appuyez sur pour avancer à...
  • Seite 91 Mode LECTURE Lecture avancée-suite -suite Appuyez sur pour inverser jusqu'à une position finale pour la séquence vidéo. Appuyez sur pour entrer dans le menu d'options. Sélectionnez CONTINUE (CONTINUER) pour revenir à l'écran d'édition, PREVIEW (PREVISUALISATION) pour lire la séquence éditée, SAVE AS (ENREGISTRER SOUS) pour enregistrer la séquence sous un nouveau fichier, ou SAVE (ENREGISTRER) pour enregistrer sur le fichier d'origine.
  • Seite 92: Fonctions Principales

    Fonctions principales Modifier le réglage de résolution Mode Enregistrement DV 1. En mode DV, appuyez sur le bouton 2. Le LCD affiche le réglage de qualité en cours dans le coin supérieur gauche. “ ” est la résolution normale, “ ”...
  • Seite 93: Utiliser Le Retardateur (Pour Les Modes Dv Et Dsc)

    Fonctions principales Utiliser le retardateur (Pour les modes DV et DSC) La caméra vidéo numérique intègre un retardateur de 10 secondes. Appuyez sur Timer Appuyez sur le déclencheur pour (Retardateur) démarrer Le retardateur commence le compte à rebours à partir de 10 secondes.
  • Seite 94: Utiliser Les Règles / L'écran Lcd

    Fonctions principales Utiliser les règles / L'écran LCD Vous pouvez utiliser les règles pendant la prise de vue de vidéos ou d'images. En mode Enregistrement, appuyez sur , la règle apparaît sur l'écran LCD. L'écran LCD Pour économiser l'énergie, la caméra vidéo numérique vous permet d'éteindre l'écran LCD.
  • Seite 95: Utiliser Le Verrouillage (Hold)

    Fonctions principales Utiliser le verrouillage (Hold) Appuyez et maintenez enfoncé pendant 2 secondes pour verrouiller tous les boutons du panneau de commande. Les boutons du panneau de commande sont verrouillés en mode HOLD (VERROUILLAGE). Pour libérer la fonction HOLD (VERROUILLAGE), appuyez et maintenez enfoncé...
  • Seite 96: Fonctions Avancées

    Fonctions avancées Icône Attention Mémoire pleine L'indicateur de mémoire pleine vous signale quand changer de carte mémoire ou quand transférer tous vos fichiers vers l'ordinateur pour pouvoir continuer à prendre des vidéos ou des images. Indicateur Indicateur de mémoire de carte interne mémoire Verrouillage carte...
  • Seite 97: Menu

    Fonctions avancées Menu Appuyez sur Appuyez sur NEXT (Suivant) ou BACK (Précédent) pour sélectionner Appuyez sur pour modifier Appuyez sur pour sortir Fr 28 Downloaded from www.Manualslib.com manuals search engine...
  • Seite 98 Fonctions avancées Menu -suite Réglages qualité (pour le mode DV) Il y a deux choix de qualité pour vos films : Fin et Normal. Veuillez garder à l'esprit que plus la qualité est élevée, plus la taille du fichier est importante.
  • Seite 99 Fonctions avancées Menu -suite Revue rapide MARCHE/ARRET (pour le mode DSC) La fonctionnalité de revue rapide vous permet de prévisualiser vos fichiers vidéo et images. Lorsque qu'elle est activée, une icône batterie apparaît sur l'écran LCD. Attacher Voix MARCHE/ARRET (Pour le mode DSC) Vous pouvez attachez des messages vocaux à...
  • Seite 100 Fonctions avancées Menu -suite Date Vous permet de régler la date. Heure Vous permet de régler l'heure. Bip Marche/Arrêt Si vous choisissez Bip Marche, un bip retentit lorsque vous appuyez sur les boutons. Si vous choisissez Bip Arrêt, aucun son ne retentit. Arrêt auto MARCHE/ARRET Cette fonctionnalité...
  • Seite 101 Fonctions avancées Menu -suite 50Hz/60Hz S'adapte à la fréquence du réseau électrique de votre pays. Veuillez vous référer aux chiffres suivants: 50 Hz : Europe, République Populaire de Chine, Hongkong, Australie, Nouvelle Zélande et Afrique du Sud. 60 Hz : Amérique, Canada, Taiwan, Japon et Corée. Diaporama Vous pouvez choisir de relire vos films, images, messages vocaux et fichiers MP3 dans un diaporama.
  • Seite 102 Fonctions avancées Menu -suite Répéter Unique Répéter Tout Répéter Aléatoire Pivoter MARCHE/ARRET (seulement pour les fichiers images) Vous pouvez choisir de faire pivoter vos images. Appuyez sur pour amener le menu, sélectionnez ROTATE (PIVOTER) puis utilisez pour sélectionnez l'angle de rotation en degrés. Sup Un/ Sup TOUT Vous pouvez choisir de supprimer un fichier ou tous les fichies.
  • Seite 103: Guida Dell'utente

    VIDEOCAMERA DIGITALE Guida dell’utente Guida dell’utente Guida dell’utente Guida dell’utente Guida dell’utente Guida dell’utente Guida dell’utente Guida dell’utente Guida dell’utente cover.indd 5/31/2005, 11:00 AM Downloaded from www.Manualslib.com manuals search engine...
  • Seite 104 Questo simbolo sul prodotto o nelle istruzioni signifi ca che l’apparecchiatura elettrica ed elettronica va smaltita, alla fi ne del suo ciclo di durata, separatamente dai rifi uti domestici. Nell’UE esistono sistemi di raccolta separati per il riciclaggio. Per maggiori informazioni, rivolgersi all’autorità locale o al dettagliante presso il quale il prodotto è...
  • Seite 105 Indice Preparazione Familiarizzare con la videocamera digitale ........3 Il pannello operativo ..............5 Alimentazione ................6 Modalità operative ..............7 Modalità DV Filmare .................. 10 Uscita video ................11 Modalità DSC Fotografare ................12 Modalità DVR Registrazione di messaggi vocali ........... 14 Modalità...
  • Seite 106: Preparazione

    Preparazione Familiarizzare con la videocamera digitale Veduta frontale Tasto Otturatore Leva dello zoom Tasto alimentazione Altoparlante Ghiera messa a fuoco Obiettivo Coperchio scomparto batterie LED frontale Flash (optional) Microfono Veduta posteriore Pannello di controllo Coperchio alloggiamento scheda MMC/SD Coperchio connettore USB/ Cuffie Schermo LCD It 3...
  • Seite 107 Preparazione Familiarizzare con la videocamera digitale -segue Veduta laterale Alloggiamento batterie Veduta posteriore Alloggiamento scheda MMC/SD Connettore uscita AV / Cuffie Porta USB It 4 Downloaded from www.Manualslib.com manuals search engine...
  • Seite 108: Il Pannello Operativo

    Preparazione Il pannello operativo Visualizzazione Interruttore di modalità DV/DSC/DVR/MP3 Menu Interruttore di modalità Esci/ Registrazione/ stop Riproduzione Riproduci/ Pausa/Invio Indietro/basso/autoscatto Volume/Blocco pulsanti (tenere premuto per 2 sec.) Avanti/alto/risoluzione It 5 Downloaded from www.Manualslib.com manuals search engine...
  • Seite 109: Alimentazione

    Preparazione Alimentazione Accensione / spegnimento Premere il tasto alimentazione per accendere e spegnere la videocamera digitale. Batteria scarica Quando la batteria è scarica, in alto sullo schermo LCD apparirà l'icona della batteria Quando la batteria si sta per esaurire, in alto sullo schermo LCD apparirà...
  • Seite 110: Modalità Operative

    Preparazione Modalità operative Accensione Modalità Registrazione DV Modalità Registrazione DSC Modalità Registrazione DVR Modalità MP3 Connessione USB Modalità Riproduzione Modalità Memoria di massa It 7 Downloaded from www.Manualslib.com manuals search engine...
  • Seite 111 Preparazione Modalità operative segue Modalità DV/Modalità DSC/Modalità DVR/Modalità MP3/Modalità Riproduzione Questa Digital Video è dotata di quattro modalità principali più la modalità Riproduzione. Le quattro modalità principali sono: DV, DSC, DVR e MP3. 1. Modalità DV: registra filmati con il sonoro 2.
  • Seite 112 Preparazione Modalità operative -segue Collegamento al PC (Modalità archiviazione di massa) Cavo USB Porta USB Uso come consolle (non applicabile a computer MAC) Collegare la videocamera digitale al computer con un cavo USB. Modalità archiviazione di massa Collegare la videocamera digitale al computer. In modalità archiviazione di massa la videocamera si comporta esattamente come un disco rigido.
  • Seite 113: Modalità Dv

    Modalità DV Filmare Premere il tasto Alimentazione Passare alla modalità DV Usare la leva d'Ingrandimento o Riduzione per inquadrare il soggetto Ingrandimento o riduzione Premere il tasto Otturatore per avviare la registrazione Premere di nuovo il tasto Otturatore per terminare la registrazione It 10 Downloaded from www.Manualslib.com...
  • Seite 114: Uscita Video

    Modalità DV Filmare -segue Il timer di registrazione Il timer di registrazione sarà visualizzato sullo schermo LCD durante la ripresa. Prima di registrare Totale stimato del tempo registrabile Durante la registrazione La durata della registrazione Uscita video Questa videocamera digitale può emettere dati video analogico ad un televisore.
  • Seite 115: Modalità Dsc

    Modalità DSC Fotografare Premere il tasto Alimentazione Passare alla modalità DSC Premere la leva dello Zoom per regolare la percentuale dello zoom. Ingrandimento o riduzione Premere il tasto Otturatore per scattare la fotografia It 12 Downloaded from www.Manualslib.com manuals search engine...
  • Seite 116 Modalità DSC Fotografare -segue Il contatore immagini Nell'angolo in alto a destra dello schermo LCD si può vedere il contatore delle immagini. Mostrerà il numero di file registrabili della videocamera digitale. Totale stimato di file registrabili Modalità Macro/Ritratto È necessario impostare la videocamera su (modalità...
  • Seite 117: Modalità Dvr

    Modalità DVR Registrazione di messaggi vocali Premere il tasto Alimentazione Passare alla modalità DVR Premere il tasto Otturatore per avviare la registrazione Premere di nuovo il tasto Otturatore per terminare la registrazione It 14 Downloaded from www.Manualslib.com manuals search engine...
  • Seite 118 Modalità DVR Registrazione di messaggi vocali -segue Il timer di registrazione Il timer di registrazione sarà visualizzato nell'angolo in alto a destra dello schermo LCD durante la registrazione dei messaggi vocali. Prima di registrare Totale stimato del tempo registrabile Durante la registrazione Tempo totale di registrazione It 15...
  • Seite 119: Modalità Mp3

    Modalità MP3 Ascolto della musica MP3 Premere il tasto Alimentazione Passare alla modalità MP3 Premere il tasto SU o GIÙ per selezionare una traccia Premere per eseguire la Premere per mettere in musica MP3 pausa It 16 Downloaded from www.Manualslib.com manuals search engine...
  • Seite 120 Modalità MP3 Ascolto della musica MP3 -segue Premere Informazioni MP3 per terminare Traccia corrente/ totale tracce Titolo della traccia selezionata NOTA: Il titolo della traccia sarà visualizzato SOLAMENTE con lettere alfabetiche. I titoli con caratteri irregolari saranno visualizzati come "TRACK001", "TRACK002", "TRACK003"...
  • Seite 121: Modalità Riproduzione Riproduzione Di Base

    Modalità Riproduzione Riproduzione di base Passa alla modalità Riproduzione Sullo schermo LCD saranno visualizzate le informazioni del file selezionato. Numero del file attuale / Numero La modalità del file totale di file selezionato La durata del file selezionato Premere BACK (Indietro) o NEXT (Avanti) per navigare It 18 Downloaded from www.Manualslib.com...
  • Seite 122 Modalità Riproduzione Riproduzione di base -segue Le fasi che seguono sono applicabili solamente ai file DV e DVR. Premere PLAY (Esecuzione) per avviare Premere di nuovo PLAY (Esecuzione) per mettere in pausa Premere NEXT (Avanti) o BACK (Indietro) per avanzare o retrocedere rapidamente Premere STOP per terminare It 19...
  • Seite 123: Riproduzione Avanzata

    Modalità Riproduzione Riproduzione avanzata Anteprima con visualizzazione multipla/singola e nascondere le informazioni Premere per eseguire l'anteprima in visualizzazione singola Premere di nuovo per nascondere le informazioni Premere di nuovo per eseguire l'anteprima in visualizzazione multipla It 20 Downloaded from www.Manualslib.com manuals search engine...
  • Seite 124 Modalità Riproduzione Riproduzione avanzata -segue Modificare l'inizio e la fine di una sequenza video (optional) Questa funzione è disponibile solamente con alcuni modelli Premere per fare apparire il menu Premere per selezionare "EDIT FILM" (Modifica filmato) Premere per avanzare alla posizione e premere impostarla come punto d'inizio della sequenza video.
  • Seite 125 Modalità Riproduzione Riproduzione avanzata -segue Premere per arretrare alla posizione finale della sequenza video. Premere per accedere al menu delle opzioni Selezionare CONTINUE (Continua) per tornare alla schermata di modifica, PREVIEW (Anteprima) per eseguire la sequenza video modificata, SAVE AS (Salva come) per salvare la sequenza video come un nuovo file, oppure SAVE (Salva) per salvare e sovrascrivere il file originale.
  • Seite 126: Funzioni Principali

    Funzioni principali Modificare l'impostazione della risoluzione Modalità di registrazione DV 1. Premere il tasto in modalità DV. 2. Lo schermo LCD visualizzerà l'impostazione corrente della qualità nell'angolo in alto a sinistra. “ ” è la risoluzione normale, “ ” è la risoluzione fine e “...
  • Seite 127: Uso Dell'autoscatto (Per La Modalità Dv E Dsc)

    Funzioni principali Uso dell'autoscatto (per la modalità DV e DSC) Questa videocamera digitale ha un autoscatto di 10 secondi. Premere Timer Premere il tasto Otturatore per avviare Il timer inizia il conto alla rovescia di 10 secondi. Questa icona Il numero del conto alla lampeggerà...
  • Seite 128: Uso Delle Linee Guida/Dello Schermo Lcd

    Funzioni principali Uso delle linee guida/dello schermo LCD Le linee guida possono essere usate mentre si registrano i filmati o quando si acquisiscono le fotografie. In modalità Record (Registrazione) premere le linee guida appariranno sullo schermo LCD. Lo schermo LCD La videocamera digitale permette di spegnere lo schermo LCD per risparmiare energia.
  • Seite 129: Uso Della Funzione Di Blocco

    Funzioni principali Uso della funzione di blocco Premere, e mantenere premuto per 2 secondi per bloccare tutti i tasti del pannello di controllo. I tasti del pannello di controllo saranno bloccati mentre la funzione HOLD (Blocco) è attiva. Per disattivare la funzione HOLD (Blocco) premere e mantenere premuto per alti 2 secondi Tasti bloccati Regolazione del volume...
  • Seite 130: Funzioni Avanzate

    Funzioni avanzate Icone di richiamo all'attenzione Memory Full (Memoria esaurita) L'indicatore Memory Full (Memoria esaurita) avverte di cambiare scheda memoria oppure si trasferire tutti i file sul computer per poter continuare ad acquisire filmati e fotografie. Indicatore Indicatore memoria scheda interna memoria Scheda bloccata...
  • Seite 131: Menu

    Funzioni avanzate Menu Premere Premere NEXT (Avanti) o BACK (Indietro) per selezionare Premere per cambiare Premere per uscire It 28 Downloaded from www.Manualslib.com manuals search engine...
  • Seite 132 Funzioni avanzate Menu -segue Quality Settings [Impostazioni qualità] (per modalità DV) Ci sono a disposizione due selezioni per la qualità dei filmati: Fine e Normal (Normale). Si prega di tenere a mente che più alta è l'impostazione della qualità, maggiori saranno le dimensioni dei file. Fader [Dissolvenza] (per modalità...
  • Seite 133 Funzioni avanzate Menu -segue Quick Review ON/OFF [Attivazione/disattivazione della funzione di revisione rapida] (per modalità DSC) La funzione Quick Review (Revisione rapida) permette di vedere l'anteprima dei file video ed immagine. Quando questa funzione è attivata, sullo schermo LCD apparirà un'icona. Attach Voice ON/OFF [Attivazione/disattivazione della funzione d'inserimento dei messaggi vocali] (per modalità...
  • Seite 134 Funzioni avanzate Menu -segue Date [Data] Permette di impostare la data. Time [Ora] Permette di impostare l'ora. Beep On/OFF [Attivazione/disattivazione della funzione sonora] Se si sceglie Beep On (Sonoro attivo), ogni volta che si preme un tasto sarà prodotto un suono. Se si sceglie Beep Off (Sonoro disattivo), non sarà prodotto alcun suono.
  • Seite 135 Funzioni avanzate Menu -segue 50Hz/60Hz Far coincidere la frequenza dell'alimentazione con la frequenza dell'alimentazione erogata nel proprio paese. Fare riferimento alle figure che seguono: 50 Hz : Europa, Repubblica Popolare Cinese, Hong Kong, Australia, Nuova Zelanda e Sud Africa. 60 Hz : America, Canada, Taiwan, Giappone e Corea. Slide Show [Presentazione] I filmati, le immagini, i messaggi vocali o gli MP3 possono essere riprodotti in forma di presentazione.
  • Seite 136 Funzioni avanzate Menu -segue Single repeat All repeat Random repeat (Ripetizione singola) (Ripetizione totale) (Ripetizione casuale) Rotate ON/OFF [Attivazione/disattivazione della funzione di rotazione] (solamente per i file immagine) Le immagini possono essere ruotate. Premere per fare apparire il menu, selezionare ROTATE (Rotazione) e poi usare per selezionare il grado di rotazione.
  • Seite 137 CÁMARA DE VÍDEO DIGITAL Guía del usuario Guía del usuario Guía del usuario Guía del usuario Guía del usuario Guía del usuario Guía del usuario Guía del usuario Guía del usuario cover.indd 5/31/2005, 11:15 AM Downloaded from www.Manualslib.com manuals search engine...
  • Seite 138 Este símbolo que puede aparecer en el producto o en las instrucciones indica que el aparato electrónico o eléctrico no deberá desecharse al fi nal de su vida con el resto de los desechos domésticos sino por separado. En la UE existen sistemas de recogida selectiva para el reciclado.
  • Seite 139 Índice Procedimientos iniciales Familiarizarse con la cámara de vídeo digital ........3 Utilizar el panel ................. 5 Encendido ................6 Modos ..................7 Modo DV Grabar películas ..............10 Salida de vídeo ................ 11 Modo DSC Tomar fotografías ..............12 Modo DVR Grabar mensajes de voz ............
  • Seite 140: Procedimientos Iniciales

    Procedimientos iniciales Familiarizarse con la cámara de vídeo digital Vista frontal Botón del disparador Control de zoom Botón de encendido Altavoz Anillo de enfoque Objetivo Tapa de la batería LED frontal Flash (opcional) Micrófono Vista posterior Panel de control Tapa de la tarjeta MMC/SD Tapa del puerto USB y auricular...
  • Seite 141 Procedimientos iniciales Familiarizarse con la cámara de vídeo digital -continuación Vista lateral Ranura de la batería Vista posterior Ranura para tarjeta MMC/SD Salida de AV/Conector hembra del auricular Puerto USB Es 4 Downloaded from www.Manualslib.com manuals search engine...
  • Seite 142: Utilizar El Panel

    Procedimientos iniciales Utilizar el panel Visualización Selector de modo DV/DSC/DVR/MP3 Menú Selector de modo Salir / Grabación / Parar Reproducción Reproducción / Pausa / Intro Anterior / Abajo / Volumen / Bloqueo Temporizador (pulsar durante 2 s) Siguiente / Arriba / Resolución Es 5 Downloaded from www.Manualslib.com...
  • Seite 143: Encendido

    Procedimientos iniciales Encendido Encender y apagar la unidad Presione el botón de alimentación para encender y apagar la cámara de vídeo digital. Energía baja Cuando la carga de la batería es baja, aparecerá un icono de batería ( ) en la parte superior de la pantalla LCD.
  • Seite 144: Modos

    Procedimientos iniciales Modos Modo de grabación de Encendido vídeo digital Modo de grabación de instantáneas Modo de grabación de voz Modo MP3 Conexión USB Modo de reproducción Modo de almacenamiento masivo Es 7 Downloaded from www.Manualslib.com manuals search engine...
  • Seite 145 Procedimientos iniciales Modos - continuación Modo DV / Modo DSC / Modo DVR / Modo MP3 / Modo de reproducción Digital Vídeo soporta cuatro modos principales y un modo de reproducción. Los cuatro modos principales son: modo de vídeo digital (DV), modo de instantánea (DSC), modo de grabación de voz (DVR) y modo MP3.
  • Seite 146 Procedimientos iniciales Modos -continuación Conectar a su PC (modo de almacenamiento masivo) Cable USB Puerto USB Usar la consola (no aplicable a equipos MAC) Conecte la cámara de vídeo digital a un equipo con un cable USB. Modo de almacenamiento masivo Conecte la cámara de vídeo digital a un equipo.
  • Seite 147: Modo Dv

    Modo DV Grabar películas Presione el botón de encendido Cambie al modo DV Desplace los botones Acercar o Alejar para encuadrar el vídeo Acercar o alejar Presione el botón Disparador para iniciar la grabación Vuelva a presionar el botón Disparador para detener la grabación Es 10 Downloaded from www.Manualslib.com...
  • Seite 148: Salida De Vídeo

    Modo DV Grabar películas -continuación El temporizador de grabación Mientras está filmando, el temporizador de grabación se mostrará en la pantalla LCD. Antes de grabar Duración estimada de la grabación que se puede realizar Durante la grabación Tiempo de grabación Salida de vídeo Esta cámara de vídeo digital puede proporcionar vídeo analógico a un equipo de televisión doméstico.
  • Seite 149: Modo Dsc

    Modo DSC Capturar imágenes Presione el botón de encendido Cambie al modo DSC Presione el control de zoom para ajustar la relación de ampliación Ampliar o reducir Presione el botón Disparador para capturar una imagen Es 12 Downloaded from www.Manualslib.com manuals search engine...
  • Seite 150 Modo DSC Capturar imágenes -continuación El contador de imágenes Puede ver el contador de imágenes en la esquina superior derecha de la pantalla LCD. Mostrará el número total de archivos que se pueden grabar en esta cámara de vídeo digital. Número estimado de archivos que se pueden grabar...
  • Seite 151: Modo Dvr

    Modo DVR Grabar mensajes de voz Presione el botón de encendido Cambie al modo DVR Presione el botón Disparador para iniciar la grabación Vuelva a presionar el botón Disparador para detener la grabación Es 14 Downloaded from www.Manualslib.com manuals search engine...
  • Seite 152 Modo DVR Grabar mensajes de voz -continuación El temporizador de grabación Durante el proceso de grabación de mensajes de voz, el temporizador de grabación aparecerá en la esquina superior derecha de la pantalla LCD. Antes de grabar Duración estimada de la grabación que se puede realizar Durante la grabación...
  • Seite 153: Modo Mp3

    Modo MP3 Escuchar música MP3 Presione el botón de encendido Cambie al modo MP3 Presione ARRIBA o ABAJO para seleccionar una pista Presione para reproducir Presione para pausar la música MP3 reproducción Es 16 Downloaded from www.Manualslib.com manuals search engine...
  • Seite 154: Escuchar Música Mp3

    Modo MP3 Escuchar música MP3 -continuación Presione para Información MP3 detener la grabación Pista actual/Número total de pistas Título de la pista seleccionada NOTA: El título de las pistas SOLAMENTE aparecerá en caracteres alfabéticos. El título con caracteres no válidos se mostrará como "TRACK001" [PISTA001], "TRACK002"...
  • Seite 155: Modo Reproducir

    Modo REPRODUCIR Reproducción básica Cambie al modo REPRODUCIR. La información del archivo seleccionado aparecerá en la pantalla LCD. Número de archivo actual/Número Modo del archivo seleccionado total de archivos Modo del archivo seleccionado Presione BACK [ATRÁS] o NEXT [SIGUIENTE] para desplazarse Es 18 Downloaded from www.Manualslib.com...
  • Seite 156 Modo REPRODUCIR Reproducción básica -continuación Los pasos siguientes solamente se aplican a archivos DV y DVR. Presione REPRODUCIR para iniciar la reproducción Presione REPRODUCIR de nuevo para pausar la reproducción Presione NEXT [SIGUIENTE] o BACK [ATRÁS] para hacer avanzar rápidamente la reproducción hacia adelante y hacia atrás Presione STOP [DETENER] para parar la reproducción Es 19 Downloaded from...
  • Seite 157: Reproducción Avanzada

    Modo REPRODUCIR Reproducción avanzada Realice una presentación preliminar en vista múltiple o única u oculte información Presione para realizar una presentación preliminar con una sola vista Vuelva a presionar para ocultar la información Presione nuevamente para realizar una presentación preliminar con vista múltiple Es 20 Downloaded from...
  • Seite 158 Modo REPRODUCIR Reproducción avanzada -continuación Edite el principio y el final del clip de vídeo (opcional) Esta función solamente está disponible en ciertos modelos Presione para mostrar el menú Presione para seleccionar "EDIT FILM" [EDITAR PELÍCULA] Presione para avanzar una posición y para establecerla como el punto de inicio del clip de vídeo.
  • Seite 159 Modo REPRODUCIR Reproducción avanzada -continuación Presione para ir a una posición de finalización para el vídeo clip. Presione para entrar en el menú de opciones Seleccione CONTINUE [CONTINUAR] para editar la pantalla, PREVIEW [PRESENTACIÓN PRELIMINAR] para reproducir el clip de vídeo, SAVE AS [GUARDAR COMO] para guardar el cli de vídeo como nuevo archivo o SAVE [GUARDAR] para guardar y sobrescribir el archivo original.
  • Seite 160: Funciones Principales

    Funciones principales Cambiar la configuración de resolución Modo de grabación DV 1. En el modo DV, presione el botón 2. La pantalla LCD mostrará la configuración de calidad actual en la esquina superior izquierda. " " indica la resolución normal, " "...
  • Seite 161: Usar El Temporizador Automático (Para Los Modos Dv Y Dsc)

    Funciones principales Usar el temporizador automático (para los modos DV y DSC) Esta cámara de vídeo digital tiene un temporizador integrado de 10 segundos para disparado automático. Presione Temporizador Presione el botón Disparador para iniciar la cuenta atrás El temporizador iniciará la cuenta atrás a partir de 10 segundos. Este icono parpadeará...
  • Seite 162: Usar La Línea De Guía Y La Pantalla Lcd

    Funciones principales Usar la línea de guía y la pantalla LCD Puede utilizar la línea de guía mientras graba vídeos o captura imágenes. En el modo de grabación, presione . La línea de guía aparecerá en la pantalla LCD. La pantalla LCD Para ahorrar energía, la cámara de vídeo digital le permite desconectar la pantalla LCD.
  • Seite 163: Funciones Principales

    Funciones principales Usar el bloqueo Mantenga presionado el botón durante 2 segundos para bloquear todos los botones del panel de control. Los botones del panel de control se bloquearán mientras la función HOLD [BLOQUEAR] está activa. Para desactivar dicha función, mantenga presionado el botón durante otros 2 segundos.
  • Seite 164: Funciones Avanzadas

    Funciones avanzadas Icono de atención Memoria llena El indicador Memoria llena permite cambiar tarjetas de memoria o transferir todos los archivos a su equipo para que pueda seguir grabando vídeos o imágenes. Indicador Indicador de memoria de tarjeta interna memoria Bloqueo de tarjeta Cuando inserte una tarjeta de memoria SD protegida contra escritura, verá...
  • Seite 165: Menú

    Funciones avanzadas Menú Presione Presione NEXT [SIGUIENTE] o BACK[ATRÁS] para realizar una selección Presione para cambiar Presione para salir Es 28 Downloaded from www.Manualslib.com manuals search engine...
  • Seite 166 Funciones avanzadas Menú -continuación Quality Settings [Configuración de la calidad] (para el modo DV) Hay dos opciones de calidad que puede seleccionar para sus películas: Fine [Buena] y Normal. Recuerde que cuanto mayor sea el valor de calidad, mayor será el tamaño del archivo. Fader [Atenuador] (para el modo DV) Esta función solamente está...
  • Seite 167 Funciones avanzadas Menú -continuación Quick Review [Revisión rápida]: ON/OFF [ACTIVAR/DESACTIVAR] (para el modo DSC) La función Quick Review [Vista rápida] permite realizar presentaciones preliminares de los archivos de vídeo e imagen. Cuando esta función está activada aparece un icono en la pantalla LCD. Attach Voice [Adjuntar voz]: ON/OFF [ACTIVAR/DESACTIVAR] (para el modo DSC) Puede adjuntar mensajes de voz a las imágenes.
  • Seite 168 Funciones avanzadas Menú -continuación Date [Fecha] Permite seleccionar la fecha. Time [Hora] Permite seleccionar la hora. Beep ON/OFF [Pitido ACTIVAR/DESACTIVAR] Si opta por activar la función Beep [Pitido], se emitirá un pitido cuando presione los botones. Si opta por desactivar la función Beep [Pitido], no se emitirá...
  • Seite 169 Funciones avanzadas Menú -continuación 50Hz/60Hz Haga coincidir la frecuencia de la fuente de alimentación principal de su país. Consulte los valores siguientes: 50 Hz: Europa, PRC, Hong Kong, Australia, Nueva Zelanda y Sudáfrica. 60 Hz: América, Canadá, Taiwán, Japón y Corea. Slide Show [Presentación de diapositivas] Puede optar por reproducir los vídeos, imágenes, mensajes de voz o archivos MP3 en una presentación de diapositivas.
  • Seite 170 Funciones avanzadas Menú -continuación Repetir una Repetir todo Repetición aleatoria Rotate ON/OFF [Girar ACTIVAR/DESACTIVAR] Puede girar las imágenes si lo desea. Presione para mostrar el menú, seleccione ROTATE [GIRAR] y, a continuación, utilice para seleccionar el grado de giro. Del One [Eliminar uno]/ Del ALL [Eliminar TODO] Si lo desea, puede eliminar un archivo o todos los archivos.
  • Seite 171 DIGITALE VIDEOCAMERA Gebruiksaanwijzing Gebruiksaanwijzing Gebruiksaanwijzing Gebruiksaanwijzing Gebruiksaanwijzing Gebruiksaanwijzing Gebruiksaanwijzing Gebruiksaanwijzing Gebruiksaanwijzing Gebruiksaanwijzing Gebruiksaanwijzing cover.indd 5/31/2005, 12:14 PM Downloaded from www.Manualslib.com manuals search engine...
  • Seite 172 Dit symbool op het product of de handleiding betekent dat u elektrische en elektronische apparatuur aan het einde van de levensduur, gescheiden van huishoudelijk afval moet weggooien. Er zijn afzonderlijke inzamelsystemen voor recyclage in de EU. Neem contact op met uw lokale instanties of met de verkoper waar u het product hebt gekocht voor meer informatie.
  • Seite 173 Inhoud Aan de slag Kennismaken met uw digitale videocamera ........3 Het paneel gebruiken ..............5 Voeding ................... 6 Modi ..................7 DV-stand Video's opnemen ..............10 Video-uitgang ................. 11 DSC-stand Foto ’s maken ................. 12 DVR-stand Spraakberichten opnemen ............14 MP3-stand Luisteren naar MP3-muziek ............
  • Seite 174: Aan De Slag

    Aan de slag Kennismaken met uw digitale videocamera Vooraanzicht Ontspanknop Zoomhendel Voedingsknop Luidspreker Scherpstelring Lens Batterijklep LED vooraan Flitser (optioneel) Microfoon Achteraanzicht Bedieningspaneel MMC-/SD- kaartklep USB-/ oortelefoonklep LCD-scherm Ne 3 Downloaded from www.Manualslib.com manuals search engine...
  • Seite 175: Zijaanzicht

    Aan de slag Kennismaken met uw digitale videocamera -vervolg Zijaanzicht Batterijsleuf Achteraanzicht MMC-/SD-kaartsleuf AV-uitgang/aansluiting oortelefoon USB-poort Ne 4 Downloaded from www.Manualslib.com manuals search engine...
  • Seite 176: Het Paneel Gebruiken

    Aan de slag Het paneel gebruiken Display Schakelaar DV/DSC/DVR/MP3- Menu modus Schakelaar Sluiten/ opname-/ Stop afspeelmodus Start/ Pauze/ Bevestigen Terug/Omlaag/Zelfontspanner Volume/Hold (2 sec. indrukken) Vooruit/Omhoog/Resolutie Ne 5 Downloaded from www.Manualslib.com manuals search engine...
  • Seite 177: Voeding

    Aan de slag Voeding Voeding aan/uit Druk op de voedingsknop om uw digitale videocamera in en uit te schakelen. Voeding laag Wanneer de batterij een laag vermogen heeft, verschijnt het batterijpictogram ( bovenaan in het LCD-scherm. Wanneer de batterij bijna leeg is, verschijnt een knipperend batterijpictogram ( ) bovenaan in het LCD-scherm.
  • Seite 178: Modi

    Aan de slag Modi Ingeschakeld DV-opnamemodus DSC-opnamemodus DVR-opnamemodus MP3-modus Aangesloten via USB Afspeelmodus Modus voor massaopslag Ne 7 Downloaded from www.Manualslib.com manuals search engine...
  • Seite 179 Aan de slag Modi -vervolg DV-modus/DSC-modus/DVR-modus/MP3-modus/afspeelmodus Deze digitale camera biedt vier hoofdmodi en een afspeelmodus. De vier hoofdmodi zijn DV-modus, DSC-modus, DVR-modus en MP3-modus. 1. DV-modus: video’s met geluid opnemen 2. DSC-modus: foto’s maken 3. DVR-modus: gesproken berichten opnemen 4. MP3-modus: luisteren naar MP3-muziek U schakelt tussen deze vier modi door op te drukken.
  • Seite 180 Aan de slag Modi -vervolg Aansluiten op een pc (Massaopslagmodus) USB-kabel USB-poort De console gebruiken (niet van toepassing voor MAC-computers) Sluit uw digitale video aan via een USB-kabel aan op een computer. Massaopslagmodus Sluit uw digitale videocamera aan op een computer. In de Massaopslagmodus zal deze net op dezelfde manier werken als een harde schijf.
  • Seite 181: Dv-Stand Video's Opnemen

    DV-stand Video's opnemen Druk op de Voedingsknop Schakel naar de DV-stand Schuif de knop naar Inzoomen of Uitzoomen om uw video in te stellen Inzoomen of uitzoomen Druk op de Ontspanknop om de opname te starten Druk opnieuw op de Ontspanknop om de opname te stoppen Ne 10 Downloaded from...
  • Seite 182: Video-Uitgang

    DV-stand Video's opnemen -vervolg De opnametimer Wanneer u een video opneemt, wordt de opnametimer weergegeven op het LCD-scherm. Vóór de opname Totaal geschatte opneembare tijd Tijdens de opname De opnametijd Video-uitgang Deze digitale video-uitgang kan analoge video uitvoeren naar het gewone televisietoestel.
  • Seite 183: Dsc-Stand

    DSC-stand Foto's maken Druk op de Voedingsknop Schakel naar de DSC-stand Druk op de Zoomhendel om de vergrotingsfactor aan te passen. Inzoomen of uitzoomen Druk op de Ontspanknop om een foto te maken Ne 12 Downloaded from www.Manualslib.com manuals search engine...
  • Seite 184 DSC-stand Foto's maken -vervolg De fototeller De fototeller wordt weergegeven in de rechterbovenhoek van uw LCD- scherm. Deze teller toont het totale aantal opneembare bestanden voor deze digitale videocamera. Totaal geschatte opneembare bestanden Macro/Portretstand U kunt de camera instellen op (macrostand) voor het scherpstellen bij close-upfoto's of op (portretstand) voor het scherpstellen binnen normaal...
  • Seite 185: Dvr-Stand

    DVR-stand Spraakberichten opnemen Druk op de Voedingsknop Schakel naar de DVR-stand Druk op de Ontspanknop om de opname te starten Druk opnieuw op de Ontspanknop om de opname te stoppen Ne 14 Downloaded from www.Manualslib.com manuals search engine...
  • Seite 186 DVR-stand Spraakberichten opnemen -vervolg De opnametimer Tijdens het opnemen van spraakberichten, wordt de opnametimer weergegeven in de rechterbovenhoek van uw LCD-scherm. Vóór de opname Totaal geschatte opneembare tijd Tijdens de opname Totale opnametijd Ne 15 Downloaded from www.Manualslib.com manuals search engine...
  • Seite 187: Mp3-Stand

    MP3-stand Luisteren naar MP3-muziek Druk op de Voedingsknop Schakel naar de MP3-stand Druk op OMHOOG of OMLAAG om een nummer te selecteren Druk op om MP3-muziek Druk op om te pauzeren af te spelen Ne 16 Downloaded from www.Manualslib.com manuals search engine...
  • Seite 188 MP3-stand Luisteren naar MP3-muziek -vervolg Druk op MP3-informatie om te stoppen Huidig nummer/ Totaal aantal nummers Titel van het geselecteerde nummer OPMERKING: De titel van de nummers wordt ALLEEN weergegeven in alfabetische letters. Titels met ongeldige tekens zullen worden weergegeven als "TRACK001", "TRACK002", "TRACK003", enzovoort.
  • Seite 189: Basisweergave

    WEERGAVESTAND Basisweergave Schakel naar de WEERGAVESTAND De informatie van het geselecteerde bestand zal worden weergegeven op het LCD-scherm. Huidig bestandsnummer/ totaal aantal De stand van het geselecteerde bestand bestanden Duur van het geselecteerde bestand Druk op VORIGE of VOLGENDE om te navigeren Ne 18 Downloaded from www.Manualslib.com...
  • Seite 190 WEERGAVESTAND Basisweergave -vervolg De volgende stappen zijn alleen van toepassing op DV- en DVR-bestanden. Druk op AFSPELEN om te starten Druk opnieuw op AFSPELEN om te pauzeren Druk op VOLGENDE of VORIGE om snel vooruit of achteruit te spoelen Druk op STOP om te stoppen Ne 19 Downloaded from www.Manualslib.com...
  • Seite 191: Geavanceerde Weergave

    WEERGAVESTAND Geavanceerde weergave Voorbeeld weergeven in meervoudige / enkelvoudige weergave of informatie verbergen Druk op om een voorbeeld weer te geven in enkelvoudige weergave Druk opnieuw op om de informatie te verbergen Druk opnieuw op om een voorbeeld weer te geven in meervoudige weergave Ne 20 Downloaded from...
  • Seite 192 WEERGAVESTAND Geavanceerde weergave -vervolg Het begin en einde van een videoclip bewerken (optioneel) Deze functie is alleen beschikbaar op bepaalde modellen Druk op om het menu te openen Druk op om "EDIT FILM" (VIDEO BEWERKEN) te selecteren Druk op om verder te gaan naar een positie en druk op deze positie in te stellen als het beginpunt van de videoclip.
  • Seite 193 WEERGAVESTAND Geavanceerde weergave -vervolg Druk op om terug te keren naar een eindpositie voor de videoclip. Druk op om het menu Option (Optie) te openen Selecteer CONTINUE (DOORGAAN) om terug te keren naar het bewerkingsscherm, PREVIEW (VOORBEELD) om de bewerkte clip af te spelen, SAVE AS (OPSLAAN ALS) om de clip op te slaan als een nieuw bestand of SAVE (OPSLAAN) om het bestand op te slaan en het originele bestand te overschrijven.
  • Seite 194: De Resolutie-Instelling Wijzigen

    Hoofdfuncties De resolutie-instelling wijzigen DV-opnamestand 1. Druk in de DV-stand op de knop 2. Het LCD zal uw huidige kwaliteitsinstelling weergeven in de linkerbovenhoek. “ ” is de normale resolutie, “ ” is de fijne resolutie en “ ” is de economische resolutie. Normale resolutie Fijne resolutie Economische resolutie...
  • Seite 195: De Zelfontspanner Gebruiken (Voor Dv- En Dsc-Stand)

    Hoofdfuncties De zelfontspanner gebruiken (voor DV- en DSC-stand) Deze digitale video heeft een ingebouwde zelfontspanner voor 10 seconden. Druk op de Timerknop Druk op de Ontspanknop om te starten De timer begint af te tellen vanaf 10 seconden. Dit pictogram zal knipperen tijdens De aftelling het aftellen.
  • Seite 196: Hulplijnen/Het Lcd-Scherm Gebruiken

    Hoofdfuncties Hulplijnen/het LCD-scherm gebruiken U kunt de hulplijnen gebruiken wanneer u video's opneemt of foto's maakt. Druk in de Opnamestand op om de hulplijn weer te geven op het LCD-scherm. Het LCD-scherm De digitale video biedt u de mogelijkheid het LCD-scherm uit te schakelen om energie te sparen.
  • Seite 197: De Knop Vergrendelen Gebruiken

    Hoofdfuncties De knop Vergrendelen gebruiken Houd gedurende 2 seconden ingedrukt om alle knoppen op het bedieningspaneel te vergrendelen. De knoppen op het bedieningspaneel zullen worden vergrendeld terwijl ze in de functie VERGRENDELEN zijn. Om de functie VERGRENDELEN vrij te geven, houdt u opnieuw 2 seconden ingedrukt.
  • Seite 198: Geavanceerde Functies

    Geavanceerde functies Waarschuwingspictogram Memory Full (Geheugen vol) De indicator Memory Full (Geheugen vol) laat u weten wanneer u de geheugenkaart moet vervangen of alle bestanden moeten overdragen naar uw computer om te kunnen doorgaan met het opnemen van video's en het maken van foto's.
  • Seite 199: Menu

    Geavanceerde functies Menu Druk op Druk op VOLGENDE of VORIGE om uw selectie te maken Druk op om te wijzigen Druk op om af te sluiten Ne 28 Downloaded from www.Manualslib.com manuals search engine...
  • Seite 200 Geavanceerde functies Menu -vervolg Quality Settings [Kwaliteitsinstellingen] (voor DV-stand) Voor uw video's hebt u de keuze tussen twee kwaliteitsselecties: Fine (Fijn) en Normal (Normaal). Denk eraan dat het bestand groter wordt naarmate u de kwaliteitsinstelling verhoogt. Fader (voor DV-stand) Deze functie is alleen beschikbaar op bepaalde modellen Met deze functie kunt u een sluiereffect toepassen op uw video's.
  • Seite 201 Geavanceerde functies Menu -vervolg Quick Review ON/OFF [Snelweergave AAN/UIT] (voor DSC-stand) De functie Snelweergave biedt u de mogelijkheid een voorbeeld te bekijken van uw video- en fotobestanden. Wanneer deze functie geactiveerd is, verschijnt een pictogram op het LCD. Attach Voice ON/OFF [Spraak koppelen AAN/UIT] (voor DSC-stand) U kunt spraakberichten koppelen aan uw foto's.
  • Seite 202 Geavanceerde functies Menu -vervolg Date [Datum] Hiermee kunt u de datum instellen. Time [Tijd] Hiermee kunt u de tijd instellen. Beep On/OFF [Pieptoon AAN/UIT] Als u kiest voor Beep On (Pieptoon aan) wordt een pieptoon weergegeven wanneer u op de knoppen drukt. Als u kiest voor Beep Off (Pieptoon uit) wordt er geen geluid weergegeven.
  • Seite 203 Geavanceerde functies Menu -vervolg 50Hz/60Hz Pas de frequentie aan volgens de hoofdvoeding in uw land. Raadpleeg de volgende indeling: 50 Hz : Europa, Volksrepubliek China, Hongkong, Australië, Nieuw-Zeeland en Zuid-Afrika. 60 Hz : Amerika, Canada, Taiwan, Japan en Korea. Slide Show [Diavoorstelling] U kunt uw video's, foto's, spraakberichten of MP3's weergeven in een diavoorstelling.
  • Seite 204 Geavanceerde functies Menu -vervolg Single repeat All repeat Random repeat (Eén herhalen) (Alles herhalen) (Willekeurig herhalen) Rotate ON/OFF [DRAAIEN AAN/UIT] (alleen voor fotobestanden) Als u dat wenst kunt u uw foto's draaien. Druk op om het menu te openen, selecteer ROTATE (DRAAIEN) en gebruik vervolgens om de draaihoek te selecteren.
  • Seite 205: Guia Do Utilizador

    CÂMARA DE VÍDEO DIGITAL Guia do utilizador Guia do utilizador Guia do utilizador Guia do utilizador Guia do utilizador Guia do utilizador Guia do utilizador Guia do utilizador Guia do utilizador cover.indd 5/31/2005, 11:30 AM Downloaded from www.Manualslib.com manuals search engine...
  • Seite 206 Este símbolo presente no produto ou nas instruções signifi ca que o seu equipamento eléctrico ou electrónico deve ser eliminado no fi m da sua vida útil mas separadamente do lixo doméstico. Existem diferentes sistemas de recolha para reciclagem na EU. Para mais informações, contacte as entidades locais ou o vendedor junto do qual comprou o seu produto.
  • Seite 207 Índice Introdução Conheça a sua câmara de vídeo digital ..........3 Utilizar o painel ................. 5 Alimentação ................6 Modos ..................7 Modo DV Gravação de ficheiros de vídeo ........... 10 Saída de vídeo ................. 11 Modo DSC Tirar fotografias ..............12 Modo DVR Gravação de mensagens de voz ...........
  • Seite 208: Introdução

    Introdução Conheça a sua câmara de vídeo digital Vista Frontal Botão do obturador Botão de zoom Botão de alimentação Altifalante Anel de focagem Tampa do Lente compartimento da bateria Flash (Opcional) frontal Microfone Vista Traseira Painel de controlo Tampa da ranhura para cartões de memória MMC/SD Tampa da ficha...
  • Seite 209: Vista Lateral

    Introdução Conheça a sua câmara de vídeo digital -continuação Vista Lateral Compartimento da bateria Vista Traseira Ranhura para cartões de memória MMC/SD Saída AV/Tomada do auricular Porta USB Po 4 Downloaded from www.Manualslib.com manuals search engine...
  • Seite 210: Utilizar O Painel

    Introdução Utilizar o painel Visor Selecção do modo DV/DSC/ Menu DVR/MP3 Selecção do modo de gravação/ Sair/ gravação parar Reproduzir/ pausar/ aceder Anterior/para baixo/ Volume/manter (prima temporizador automático durante 2 segundos) Seguinte/para cima/resolução Po 5 Downloaded from www.Manualslib.com manuals search engine...
  • Seite 211: Alimentação

    Introdução Alimentação Ligar/Desligar Prima o botão de alimentação para ligar e desligar a sua câmara de vídeo digital. Carga fraca Quando a carga da bateria está fraca, o ícone ) aparece no topo do ecrã LCD. Quando a carga da bateria está prestes a esgotar-se, o ícone intermitente ( ) é...
  • Seite 212: Modos

    Introdução Modos Ligar Modo de gravação em DV Modo de gravação em DSC Modo de gravação em DVR Modo MP3 Ligado através de USB Modo de reprodução Modo de armazenamento de massa Po 7 Downloaded from www.Manualslib.com manuals search engine...
  • Seite 213 Introdução Modos - continuação Modo DV/Modo DSC/modo DVR/modo MP3/modo de reprodução Há quatro modos principais e um modo de REPRODUÇÃO na câmara de vídeo digital. Os quatro modos principais, são o modo DV, modo DSC, modo DVR e modo MP3. 1.
  • Seite 214 Introdução Modos -continuação Ligação ao PC (Modo de armazenamento em massa) Cabo USB Porta USB Utilização da consola (não aplicável aos computadores MAC) Ligue a sua câmara de vídeo digital ao computador através de um cabo USB. Modo de armazenamento em massa Ligue a sua câmara de vídeo digital ao computador.
  • Seite 215: Modo Dv

    Modo DV Gravação de ficheiros de vídeo Prima o botão de alimentação Defina a câmara para o modo DV Utilize o botão de zoom para aplicar mais zoom ou menos zoom de forma a obter o enquadramento pretendido. Mais zoom ou menos zoom Prima o botão do obturador para iniciar a gravação Prima novamente o botão do obturador para parar a gravação Po 10...
  • Seite 216: Saída De Vídeo

    Modo DV Gravação de ficheiros de vídeo -continuação O temporizador de gravação Durante a gravação, o temporizador de gravação é apresentado no ecrã LCD. Antes da gravação Estimativa da duração total da gravação Durante a gravação Duração da gravação Saída de vídeo É...
  • Seite 217: Modo Dsc

    Modo DSC Tirar fotografias Prima o botão de alimentação Defina a câmara para o modo DSC Prima o botão de zoom para ajustar a taxa de zoom. Mais zoom ou menos zoom Prima o botão do obturador para tirar uma fotografia Po 12 Downloaded from www.Manualslib.com...
  • Seite 218 Modo DSC Tirar fotografias -continuação O contador de fotografias Pode ver o contador de fotografias no canto superior direito do ecrã LCD. Este indica o número total de ficheiros graváveis que esta câmara de vídeo digital pode guardar. Número total de ficheiros graváveis O modo macro/retrato Pode definir a sua câmara para funcionar no modo...
  • Seite 219: Modo Dvr

    Modo DVR Gravação de mensagens de voz Prima o botão de alimentação Defina a câmara para o modo Prima o botão do obturador para iniciar a gravação Prima novamente o botão do obturador para parar a gravação Po 14 Downloaded from www.Manualslib.com manuals search engine...
  • Seite 220 Modo DVR Gravação de mensagens de voz -continuação O temporizador de gravação Durante a gravação de mensagens de voz, o temporizador de gravação é apresentado no canto superior direito do ecrã LCD. Antes da gravação Estimativa da duração total da gravação Durante a gravação Duração total da...
  • Seite 221: Modo Mp3

    Modo MP3 Ouvir música MP3 Prima o botão de alimentação Defina a câmara para o modo MP3 Prima os botões de direcção para cima ou para baixo para seleccionar uma faixa Prima o botão para Prima o botão para fazer reproduzir os ficheiros MP3 uma pausa na reprodução Po 16...
  • Seite 222: Ouvir Música Mp3

    Modo MP3 Ouvir música MP3 -continuação Prima o botão para parar a Informação MP3 reprodução Faixa actual / Número total de faixas Título da faixa seleccionada NOTA: Os títulos das faixas apenas podem ser apresentados com caracteres alfabéticos. Os títulos contendo caracteres não permitidos serão apresentados da seguinte forma: "TRACK001", "TRACK002"...
  • Seite 223: Modo Reproduzir Funções Básicas De Reprodução

    Modo REPRODUZIR Funções básicas de reprodução Defina a câmara para o modo REPRODUZIR A informação relativa ao ficheiro seleccionado é apresentada no ecrã LCD. Número do ficheiro actual / Número Modo do ficheiro seleccionado total de ficheiros Duração do ficheiro seleccionado Prima o botão ANTERIOR ou SEGUINTE para navegar Po 18...
  • Seite 224 Modo REPRODUZIR Funções básicas de reprodução -continuação As etapas seguintes aplicam-se apenas aos ficheiros DV e DVR. Prima o botão REPRODUZIR para começar Prima novamente o botão REPRODUZIR para fazer uma pausa Prima o botão SEGUINTE ou ANTERIOR para se deslocar rapidamente para a frente ou para trás Prima o botão PARAR para parar Po 19...
  • Seite 225: Funções Avançadas De Reprodução

    Modo REPRODUZIR Funções avançadas de reprodução Com as funções avançadas de reprodução pode ver a informação numa única janela, em múltiplas janelas ou até ocultar a informação Prima o botão para ver a informação numa única janela Prima novamente o botão para ocultar a informação Prima novamente o botão para ver a informação em múltiplas...
  • Seite 226 Modo REPRODUZIR Funções avançadas de reprodução -continuação Edite o início e fim de um clip de vídeo (opcional) Esta função apenas está disponível nalguns modelos Prima o botão para aceder ao menu Prima o botão para seleccionar a opção"EDIT FILM" (Editar clip de vídeo) Prima o botão para avançar para a posição desejada e prima o...
  • Seite 227 Modo REPRODUZIR Funções avançadas de reprodução -continuação Prima o botão para ir para a posição que deseja definir como posição de fim do clip de vídeo. Prima o botão para aceder ao menu de opções Seleccione a opção CONTINUE (Continuar) para voltar ao ecrã de edição, PREVIEW (Pré-visualizar) para reproduzir o clip editado, SAVE AS (Guardar como) para guardar o clip como um novo ficheiro, ou SAVE (Guardar) para guardar e substituir o ficheiro original.
  • Seite 228: Funções Principais

    Funções principais Alteração das definições de resolução Gravação no modo DV 1. No modo DV, prima o botão 2. No canto superior esquerdo do ecrã LCD, verá o ícone relativo à definição de resolução actual. O ícone " " representa uma resolução normal, o ícone "...
  • Seite 229: Utilização Do Temporizador (Para Os Modos Dv E Dsc)

    Funções principais Utilização do temporizador (para os modos DV e DSC) Esta câmara de vídeo digital inclui um temporizador com um atraso de 10 segundos. Prima o botão do Prima o botão do temporizador obturador para iniciar a contagem O temporizador inicia a contagem decrescente a partir dos 10 segundos.
  • Seite 230: Utilização De Guias/O Ecrã Lcd

    Funções principais Utilização de guias/O ecrã LCD Pode utilizar guias durante a gravação de clips de vídeo ou durante a captura de imagens. No modo de gravação, prima o botão para que as guias apareçam no ecrã LCD. O ecrã LCD Para poupar energia, esta câmara de vídeo digital permite-lhe desligar o ecrã...
  • Seite 231: Utilização Do Botão Hold (Bloquear)

    Funções principais Utilização do botão Hold (Bloquear) Mantenha premido o botão durante 2 segundos para bloquear todos os botões do painel de controlo. Os botões do painel de controlo ficarão bloqueados enquanto a função HOLD (Bloquear) estiver activada. Para desactivar a função HOLD (Bloquear), mantenha premido o botão durante 2 segundos.
  • Seite 232: Funções Avançadas

    Funções avançadas Mensagens de aviso Memory Full (Memória cheia) A mensagem "Memory Full" (Memória cheia) assinala a necessidade de mudar de cartão de memória ou de transferir todos os ficheiros para o computador de forma a poder continuar a gravar ficheiros de vídeo ou de imagens. Ícone do Ícone da memória...
  • Seite 233: Menu

    Funções avançadas Menu Prima o botão Prima o botão SEGUINTE ou ANTERIOR para seleccionar Prima o botão para fazer Prima o botão para sair alterações Po 28 Downloaded from www.Manualslib.com manuals search engine...
  • Seite 234 Funções avançadas Menu -continuação Quality Settings (Definições de qualidade) (para o modo DV) Existem duas definições de qualidade para os seus ficheiros de vídeo: Fine (Excelente) e Normal (Normal). Tenha em atenção que quanto maior for a definição de qualidade maior será também o tamanho do ficheiro. Fader (Atenuador) (para o modo DV) Esta função permite-lhe aplicar um efeito de atenuação aos seus ficheiros de vídeo.
  • Seite 235 Funções avançadas Menu -continuação Activar/Desactivar a função Quick Review (Visualização rápida) (para o modo DSC) A função de visualização rápida permite-lhe pré-visualizar os seus ficheiros de vídeo e de imagens. Quando esta função está activada, um ícone aparece no ecrã LCD. Activar/Desactivar a função Attach Voice (Anexar voz) (para o modo DSC) É...
  • Seite 236 Funções avançadas Menu -continuação Date (Data) Permite-lhe definir a data. Time (Hora) Permite-lhe definir a hora. Activar/Desactivar a função Beep (Bip) Se escolher a opção Beep On (Bip activado), ouvirá um bip sempre que premir qualquer um dos botões da câmara. Se escolher a opção Beep Off (Bip desactivado), não ouvirá...
  • Seite 237 Funções avançadas Menu -continuação 50Hz/60Hz Escolha a frequência que corresponde à do seu país. Consulte as imagens seguintes: 50 Hz : Europa, R.P.C, Hong Kong, Austrália, Nova Zelândia e África do Sul. 60 Hz : América, Canadá, Taiwan, Japão e Coreia. Slide Show (Apresentação de diapositivos) Pode optar por reproduzir os seus ficheiros de vídeo, de imagens, de mensagens de voz ou de MP3 sob a forma de diapositivos.
  • Seite 238 Funções avançadas Menu -continuação Repetir um Repetir todos Repetir aleatoriamente Rotate ON/OFF (Rodar ACTIVAR/DESACTIVAR)(apenas para ficheiros de imagens) É possível fazer a rotação das suas imagens. Prima o botão para aceder ao menu, seleccione ROTATE (Rodar) e use o botão para escolher o grau de rotação.
  • Seite 239 數碼攝像機 使用手冊 使用手冊 使用手冊 使用手冊 cover.indd 2005/5/30, 05:56 Downloaded from www.Manualslib.com manuals search engine...
  • Seite 240 ................3 ............... 5 ................... 6 ..................7 ................10 ................11 ................12 ..............14 M P 3 ............... 16 ................18 ................20 ...............23 ..............24 ..............25 ............... 26 ................26 ................27 ................28 Downloaded from www.Manualslib.com manuals search engine...
  • Seite 241 MMC/SD Downloaded from www.Manualslib.com manuals search engine...
  • Seite 242 MMC/SD Downloaded from www.Manualslib.com manuals search engine...
  • Seite 243 /MP3 Downloaded from www.Manualslib.com manuals search engine...
  • Seite 244 L C D Downloaded from www.Manualslib.com manuals search engine...
  • Seite 245 Downloaded from www.Manualslib.com manuals search engine...
  • Seite 246 / M P 3 M P 3 4. MP3 Downloaded from www.Manualslib.com manuals search engine...
  • Seite 247 C o n s o l e ( M A C ) Downloaded from www.Manualslib.com manuals search engine...
  • Seite 248 Downloaded from www.Manualslib.com manuals search engine...
  • Seite 249 L C D Downloaded from www.Manualslib.com manuals search engine...
  • Seite 250 Downloaded from www.Manualslib.com manuals search engine...
  • Seite 251 L C D Downloaded from www.Manualslib.com manuals search engine...
  • Seite 252 Downloaded from www.Manualslib.com manuals search engine...
  • Seite 253 L C D Downloaded from www.Manualslib.com manuals search engine...
  • Seite 254 Downloaded from www.Manualslib.com manuals search engine...
  • Seite 255 “TRACK001” “TRACK002” “TRACK003” M P 3 上 一 首 下 一 首 Downloaded from www.Manualslib.com manuals search engine...
  • Seite 256 Downloaded from www.Manualslib.com manuals search engine...
  • Seite 257 Downloaded from www.Manualslib.com manuals search engine...
  • Seite 258 Downloaded from www.Manualslib.com manuals search engine...
  • Seite 259 Downloaded from www.Manualslib.com manuals search engine...
  • Seite 260 “ M E M O RY F U L L ” Downloaded from www.Manualslib.com manuals search engine...
  • Seite 261 2. L C D “ ” “ ” “ ” 2. L C D “ ” “ ” “ ” Downloaded from www.Manualslib.com manuals search engine...
  • Seite 262 Downloaded from www.Manualslib.com manuals search engine...
  • Seite 263 /LCD L C D L C D L C D L C D L C D M P 3 L C D L C D L C D Downloaded from www.Manualslib.com manuals search engine...
  • Seite 264 Downloaded from www.Manualslib.com manuals search engine...
  • Seite 265 Downloaded from www.Manualslib.com manuals search engine...
  • Seite 266 Downloaded from www.Manualslib.com manuals search engine...
  • Seite 267 L C D Downloaded from www.Manualslib.com manuals search engine...
  • Seite 268 L C D L C D “ AT TA C H V O I C E ! ” L C D Downloaded from www.Manualslib.com manuals search engine...
  • Seite 269 Beep On/OFF A u t o - O f f NTSC/PAL N T S C / PA L N T S C PA L NTSC: PA L : NTSC SECAM Downloaded from www.Manualslib.com manuals search engine...
  • Seite 270 50Hz/60Hz 5 0 H z : 6 0 H z : M P 3 M P 3 M P 3 M P 3 Downloaded from www.Manualslib.com manuals search engine...
  • Seite 271 R O T A T E D E L . O N E D E L . A L L Downloaded from www.Manualslib.com manuals search engine...

Inhaltsverzeichnis