Herunterladen Inhalt Inhalt Diese Seite drucken
Inhaltsverzeichnis

Werbung

Verfügbare Sprachen
  • DE

Verfügbare Sprachen

  • DEUTSCH, seite 4
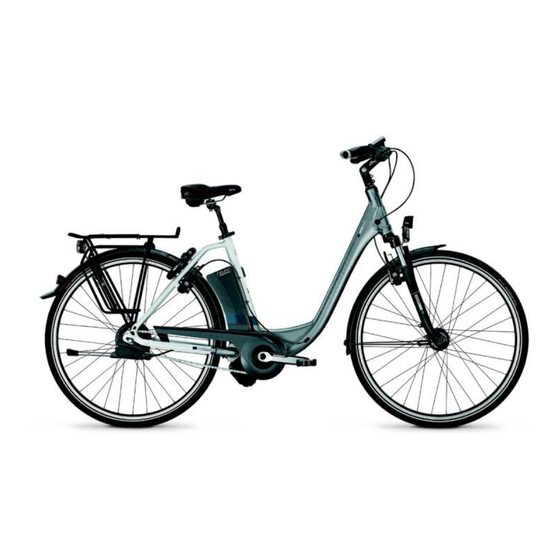
DE Originalbetriebsanleitung Pedelec Impulse 2.0 Ergo
EN Original User Manual Pedelec Impulse 2.0 Ergo
FR Mode d´emploi original Pedelec Impulse 2.0 Ergo
NL Originele gebruiksaanwijzing Pedelec Impulse 2.0 Ergo
IT Istruzioni per l´uso originali Pedelec Impulse 2.0 Ergo
ES Instrucciones de empleo Pedelec Impulse 2.0 Ergo
SK Návod na obsluhu Pedelec Impulse 2.0 Ergo
CZ Návod k použití Pedelec Impulse 2.0 Ergo

Werbung

Inhaltsverzeichnis
loading

Inhaltszusammenfassung für Kalkhoff Pedelec Impulse 2.0 Ergo

  • Seite 1 FR Mode d´emploi original Pedelec Impulse 2.0 Ergo NL Originele gebruiksaanwijzing Pedelec Impulse 2.0 Ergo IT Istruzioni per l´uso originali Pedelec Impulse 2.0 Ergo ES Instrucciones de empleo Pedelec Impulse 2.0 Ergo SK Návod na obsluhu Pedelec Impulse 2.0 Ergo...
  • Seite 2 Derby Cycle Werke GmbH / Raleigh Univega GmbH...
  • Seite 4: Wichtige Zusatzinformation

    Sehr geehrte Kundin, sehr geehrter Kunde, Auch wenn Sie sofort Ihre erste Fahrt starten ¡ möchten, lesen Sie zu Ihrer Sicherheit unbe- vielen Dank, dass Sie sich ür das Pedelec Impulse Ergo dingt vorher sorgfältig den Abschnitt Kapitel 1 aus dem Hause Derby Cycle entschieden haben! Dieses „Schnellstart“...
  • Seite 5: Warnhinweise

    Warnhinweise Elektrische Geräte gehören nicht in Kinderhände. Das Pedelec arbeitet mit Niederspannung (36 V). Lassen Sie bei Anwesenheit von Kindern beson- Versuchen Sie nie, das Pedelec mit einer anderen dere Vorsicht walten, vor allem wenn sie Gegen- Spannungsquelle als einer passenden Original- stände durch Gehäuseöfnungen in das Gerät Batterie zu betreiben.
  • Seite 6: Empfehlungen

    Empfehlungen Hatungsausschluss Bei den im Folgenden beschriebenen Inhalten handelt Frage: Was ist der vorgesehene Einsatzbereich es sich lediglich um Empfehlungen. Hatungsansprüche, des Pedelec Impulse Ergo? welche sich auf Schäden beziehen, die durch die Nutzung Der vorgesehene Einsatzbereich ist oder Nichtnutzung der dargebotenen Informationen ver- ursacht wurden, sind grundsätzlich ausgeschlossen.
  • Seite 7: Inhaltsverzeichnis

    Inhalt Warnhinweise Bedienelement und Display Empfehlungen Hatungsausschluss Inhalt 1 Schnellstart Fahren im Unterstützungsmodus ERGO Grundunktionen Fehlerdiagnose 5.1.1 Ein- / Ausschalten Unterstützungsmodus ERGO 5.1.2 Schiebehilfe 2 Gesetzliche Grundlagen 5.1.3 Tasten ür die Stärke der Bedeutung ür den Fahrer Motorunterstützung 3 Besonderheiten des Pedelecs 5.1.4 Anzeige des Unterstützungsmodus mit Impulse-Antrieb 5.1.5 Anzeige des Batterieladezustands...
  • Seite 8 5.2.3 Kostenvorgaben Batterieinformationssystem 5.2.3.1 Kratstofpreis 8.4.1 Batterieladezustand kontrollieren 5.2.3.2 Stromkosten 8.4.2 Batteriekapazität kontrollieren 5.2.3.3 Kratstoverbrauch Lebensdauer und Gewährleistung 5.2.3.4 Kratstofart 8.5.1 des Antriebs 5.2.4 ERGO Einstellungen 8.5.2 der Batterie Transport und Versand der Batterie 5.2.4.1 Sollpuls 5.2.4.2 Warnpuls 8.6.1 Transport 6 Schaltung NuVinci Harmony 8.6.1.1 Das E-Bike im Auto...
  • Seite 9: Schnellstart

    1 Schnellstart 6. Sollten Sie die Batterie in der Ladestation geladen haben, setzen Sie die Batterie von der linken Seite des 1. Laden Sie die Batterie vor der ersten Fahrt komplett Pedelecs in die Halterung zurück. Dazu halten Sie die auf.
  • Seite 10: Fahren Im Unterstützungsmodus Ergo

    Sobald der Puls angezeigt wird, können Sie weitere Einstellungen vornehmen. Sie haben vom ersten Moment an volle Unterstützung. Das ist ungewohnt, aber komfortabel. Üben Sie das Anfahren an einem sicheren Ort, bevor Sie sich in den Straßenverkehr wagen. Fahren im Unterstützungs - modus ERGO 1.
  • Seite 11 Nun können Sie sowohl a. Sollpuls als auch b. Warn- Die Herzrequenz unterscheidet sich von Mensch puls einstellen. Navigieren Sie mit den Pfeiltasten zu zu Mensch. Abweichungen ergeben sich zum dem gewünschten Punkt und drücken Sie die Set-Taste. Beispiel durch Erkrankungen (zum Beispiel Schilddrüsenunktionsstörungen) oder die Ein- nahme von brady- oder tachykardisierende Medi- kamenten (zum Beispiel Digitalis, Kalziumanta-...
  • Seite 12 7. Wenn Sie die Set-Taste drücken, gelangen Sie wieder zu den Menüunterpunkten. Im Stand können Sie nicht von minimaler bis maxima- ler Trittrequenz, oder umgekehrt, durchschalten. Das geht nur während der Fahrt. 11. Sie können nun wie mit einem normalen Fahrrad los- fahren.
  • Seite 13: Fehlerdiagnose Unterstützungsmodus Ergo

    Durch längeres, gleichmäßiges Fahren, erlernt Beachten Sie folgende Hinweise, um starke kurzristi- das ERGO-System Ihr Fahrverhalten und stellt ge Veränderungen der Herzrequenz zu vermeiden: sich auf Ihr persönliches Fahrverhalten und das Treten Sie gleichmäßig mit gleichbleibendem Verhalten Ihres Pulses besser ein. Dazu benötigt Kratauwand.
  • Seite 14: Gesetzliche Grundlagen

    2 Gesetzliche Grundlagen 3 Besonderheiten des Pedelecs mit Impulse-Antrieb Die Grundidee beim Pedelec ist, auch größere Entfernun- gen zügig und trotzdem komfortabel zurücklegen zu kön- Ihr Pedelec weist Besonderheiten auf, die Ihrer Sicherheit nen. Sie haben die Wahl, die Unterstützung zu genießen und Ihrem Komfort dienen: und entspannt in die Pedale zu treten, sich sportlich zu betätigen oder möglichst schnell von A nach B zu kommen.
  • Seite 15: Funktion Der Unterstützung

    Das geht natürlich nur im manuellen Betrieb der NuVinci Harmony Nabe und ist im ERGO-Modus nicht empfehlenswert. IMPULSE ANTRIEB ANDERER MITTELMOTOR UMDREHUNGEN GESCHWINDIG­ MOTOR­ UMDREHUNGEN GESCHWINDIG­ MOTOR­ GANG DER KURBELN / MIN KEIT (KM / H) DREHZAHL DER KURBELN / MIN KEIT (KM / H) DREHZAHL 4.300...
  • Seite 16: Batterie Laden

    4 Batterie laden Batterie entnehmen 1. Fassen Sie die Batterie am Grif, stecken Sie den Schlüssel in das Schloss und drehen Sie ihn gegen den Uhrzeigersinn. Nun ist die Batterie entriegelt. Sie können die Batterie laden, während sie im Pedelec verbleibt ( ¡ Kapitel 1 „Schnellstart“). Entriegeln der Batterie 2.
  • Seite 17: Lernzyklus

    Lernzyklus Decken Sie das Ladegerät nicht ab. Nur so kann die beim Ladevorgang erwärmte Lut aus den umlaufenden Lütungsschlitzen abgeührt werden. 3. Verbinden Sie den Stecker des Ladegerätes mit der Ladestation. Die LED im Ladegerät leuchtet jetzt kurz rot auf und danach permanent grün. Nachdem Sie die Batterie zum ersten Mal vollgeladen haben und anschließend etwa jedes halbe Jahr ein- 4.
  • Seite 18: Batterie Einbauen

    5 Bedienelement und Display Beschädigte Batterien dürfen weder geladen, noch weiterhin genutzt werden. Grundunktionen Die Batterie kann beim Laden warm werden. Eine Bedienelement Temperatur von maximal 45° C ist möglich. Wird die Batterie wärmer, unterbrechen Sie sofort den Ladevorgang. Batterie einbauen 1.
  • Seite 19: Ein- / Ausschalten

    Display 5.1.1 Ein- / Ausschalten Durch Druck auf die Powertaste schalten Sie das Impulse- System ein. Nach dem Einschalten beindet sich das Sys- tem stets in dem Anzeigemodus, in dem Sie es ausgeschal- tet haben. Sollten Sie keine Unterstützung spüren, treten Sie Fahrgeschwindigkeit kurz zurück und wieder nach vorne, damit der Sys- Unterstützungmodus...
  • Seite 20: Tasten Ür Die Stärke Der Motorunterstützung

    5.1.3 Tasten ür die Stärke der ANZEIGE BATTERIE LADEZUSTAND Motorunterstützung 100 – 85,5% • Mit den Pfeiltasten können Sie die Stärke der Motor unterstützung einstellen. 85,5 – 71,5% • Mit jedem Drücken einer Pfeiltaste verändern Sie 71,5 – 57,5% die Stärke der Motorunterstützung um eine Stufe. •...
  • Seite 21: Fehlerdiagnose Und -Behebung

    5.1.7 Fehlerdiagnose und -behebung Einstellung und Programmierung des Displays Durch Drücken der Set-Taste können Sie zwischen den verschiedenen Anzeigen im Informationsfeld (auch Haupt- menü genannt) wechseln. Wenn Ihr Pedelec ür eine längere Zeit nass geworden Wenn Sie die Set-Taste längere Zeit drücken, gelangen Sie ist, zum Beispiel nach einer Tour in starkem Regen, von jeder beliebigen Anzeige im Informationsfeld zu den oder bei großen Temperaturunterschieden, kann die...
  • Seite 22: Tripdaten Löschen

    Mit den beiden Pfeiltasten am Bedienelement können Sie und gelangen danach wieder zur Anzeige der Menüunter- die Menüunterpunkte anwählen. Durch Drücken der Set- punkte. Taste bestätigen Sie Ihre Auswahl. Es werden Ihnen die jeweiligen Inhalte angezeigt. Um von den Menüunterpunk- 5.2.2.2 Helligkeit ten wieder zur Anzeige des Informationsfeldes/ Haupt- Die Helligkeit der Anzeige können Sie in der voreingestell-...
  • Seite 23: Einheit

    5.2.2.5 Einheit 5.2.2.8 Sotware Unter dem Unterpunkt „Einheit“ können Sie auswählen, Über den Unterpunkt „Sotware“ gelangen Sie zu den Un- ob die Angaben in Bezug zur gefahrenen Strecke und der terpunkten „Version“ und „Update“, die Sie über die Pfeil- Geschwindigkeit in Kilometern (km) oder in Meilen (mi) tasten am Bedienelement anwählen können.
  • Seite 24: Ergo Einstellungen

    5.2.3.2 Stromkosten 5.2.4.1 Sollpuls Im Unterpunkt „Stromkosten“ können Sie den Strompreis Im Unterpunkt „Sollpuls“ können Sie den ür Sie optima- in Cent (ct) angeben. Diesen können Sie durch Betätigen len Sollpuls einstellen. Diesen können Sie durch Betätigen der beiden Pfeiltasten am Bedienelement auf einen Wert der beiden Pfeiltasten am Bedienelement auf einen Wert von 0 bis 99 Cent in 1-Cent-Schritten einstellen.
  • Seite 25: Warnpuls

    6 Schaltung NuVinci Harmony 5.2.4.2 Warnpuls Im Unterpunkt „Warnpuls“ können Sie den ür Sie optima- Sobald Sie den Drehgrif bedienen oder losfahren, geht len Warnpuls einstellen. Diesen können Sie durch Betäti- die Schaltung NuVinci Harmony an. gen der beiden Pfeiltasten am Bedienelement auf einen Wert von „Sollpuls +5“...
  • Seite 26: Handbetrieb

    Handbetrieb Stellen Sie mit dem Drehgrif die gewünschte Trittrequenz ein. Sie können zwischen 12 verschiedenen Trittrequen- zen wählen. Je mehr Sie den Drehgrif nach vorne bewe- gen, desto schneller wird die Trittrequenz. Die Anzahl orange leuchtender Kästchen steigt. Je mehr Sie den Dreh- grif zurück bewegen, umso langsamer wird die Trittre- quenz.
  • Seite 27: Unterstützung Durch Den Elektromotor

    7 Unterstützung durch den • Welche Unterstützung Sie gewählt haben. Im Unterstützungsmodus POWER hilt Ihnen der Elektromotor Motor mit der höchsten Leistung, verbraucht dann aber auch am meisten Energie. Fahren Sie im Mo- dus SPORT, gibt der Motor etwas weniger Leistung Funktionsweise der Unterstützung ab.
  • Seite 28: Unterstützungsmodi

    Unterstützungsmodi Durch die Entladung im Motorbetrieb heizt sich die Batterie ausreichend selbst auf, um bei niedrigen Sie können selbst zwischen den Unterstützungs modi Außentemperaturen nicht zu stark an Leistung zu ERGO, POWER, SPORT und ECO wählen ( Kapitel 5.1.4 verlieren. Die Entladetemperatur der Batteriezellen „Anzeige des Unterstützungsmodus“).
  • Seite 29: Wirtschatlich Pedelec Fahren

    8 Batterie Wirtschatlich Pedelec fahren Sie können die Kosten Ihrer Fahrten mit dem Pedelec Bei Ihrer Batterie handelt es sich um eine Lithium-Ionen- selbst kontrollieren und beeinlussen. Wenn Sie die Rat- Batterie, die vorteilhateste Form von Batterien ür diese schläge ür eine große Reichweite berücksichtigen, senken Anwendung.
  • Seite 30: Lernzyklus

    8.1.1 Lernzyklus rie in einen Schlafmodus. Das kann nach unterschiedlich langen Zeiten ohne Nutzung geschehen. Abhängig vom Ladezustand der Batterie kann dies bei niedrigerem La- dezustand rüher und bei höherer Ladung später erfolgen. Spätestens nach 10 Tagen ohne Nutzung der Batterie akti- viert das Management den Schlafmodus.
  • Seite 31: Batterieinformationssystem

    nicht geladen. Es empiehlt sich, die Batterie bei ANZEIGE BATTERIELADE ZUSTAND niedrigen Außentemperaturen im Haus oder in ••••• 5 LEDs leuchten 100 – 84% einer warmen Garage zu laden und zu lagern. Setzen Sie sie in diesen Fällen erst kurz vor der ••••...
  • Seite 32: Batteriekapazität Kontrollieren

    8.4.2 Batteriekapazität kontrollieren Durch seine zusätzliche Leistung werden Verschleißteile wie Antrieb und Bremsen stärker beansprucht als bei ei- Wenn Sie ür ünf Sekunden den roten Push-Knopf drü- nem normalen Fahrrad. Durch die erhöhte Krateinwirkung cken, zeigen Ihnen die Leuchtdioden die momentane verschleißen die Teile stärker.
  • Seite 33: Transport Und Versand Der Batterie

    Sie verlängern die Lebensdauer der Batterie, 8.6.1.2 Das E-Bike in der Bahn • indem Sie die Batterie auch nach kurzem Ge- Sie können Ihr E-Bike in Zügen, die mit einem Fahrradsym- brauch wieder voll auladen. Die Impulse-Li- bol gekennzeichnet sind, mitnehmen. In IC- und EC-Zügen Ionen Batterie hat keinen Memory-Efekt.
  • Seite 34: Entsorgung Von Batterien

    9 Ladegerät Entsorgung von Batterien Batterien gehören nicht in den Hausmüll. Verbraucher Lesen Sie vor der ersten Benutzung des Ladegeräts die sind gesetzlich verplichtet, gebrauchte oder beschädigte darauf angebrachten Typenschilder. Batterien an den daür vorgesehenen Stellen abzugeben Ihr Pedelec mit Impulse-Antrieb kann direkt über eine (Batterie-Sammelstelle oder Fachhandel).
  • Seite 35: Reinigung

    10 Reinigung Verwenden Sie keine anderen Ladegeräte. Laden Sie Ihre Batterie ausschließlich mit dem mitgelieferten oder einem von uns zugelassenen Ladegerät. Zum Reinigen des Pedelecs entfernen Sie bitte die Batterie aus dem Fahrzeug. • Wenn ein Ladefehler autritt, blinkt die LED im Ladegerät rot.
  • Seite 36: Reinigung Des Displays

    10.3 Reinigung des Displays Die Reinigung des Display-Gehäuses darf nur mit einem feuchten (nicht nassen) Tuch erfolgen. 10.4 Reinigung Bedienelement Das Bedienelement kann bei Bedarf mit einem feuchten Tuch gereinigt werden. 10.5 Reinigung Brustgurt Säubern Sie den Brustgurt regelmäßig mit Wasser oder einer milden Seifenlösung.
  • Seite 37 Wir wünschen Ihnen viel Freude bei der Benutzung Ihres neuen Pedelecs Impulse Ergo. Copyright © 2013 Derby Cycle Werke GmbH / Raleigh Univega GmbH Nachdruck, auch auszugsweise, nur mit Genehmigung der Derey Cycle Werke GmeH / Raleigh Univega GmbH. Druckfehler, Irrtümer und technische Änderungen vorenthalten.
  • Seite 40 Dear Customer, Even if you can’t wait to go for your irst ride, in ¡ the interest of your own safety you should read Chapter 1 “Quick start” careully without fail Thank you for choosing the Impulse Ergo Pedelec rom before use.
  • Seite 41 Warnings Keep children away rom electrical appliances. If The Pedelec operates using low voltage children are present, keep a close eye on them, (36 volts). Never attempt to operate the Pedelec especially if there is a possibility they could in- using power rom a source other than a suitable sert objects into the appliance through apertures genuine battery.
  • Seite 42 Recommendations Disclaimer Question: What is the intended ield of application of the The contents described hereater are merely recommenda- Impulse Ergo Pedelec? tions. Liability claims relating to damage or injury caused by the use or disuse of the information presented therein The intended ield of application is are strictly excluded.
  • Seite 43 Contents Warnings Control panel and display Recommendations Disclaimer Content 1 Quick start Basic unctions Riding in the ERGO power-assist mode 5.1.1 Switching on/of Troubleshooting for the ERGO power-assist mode 5.1.2 Pushing assistance 2 Legal principles 5.1.3 Buttons for power-assist level Meaning for the rider 5.1.4 Display of the power-assist mode 3 Special features of the Pedelec with...
  • Seite 44 5.2.3 Target cost Battery information system 5.2.3.1 Fuel price 8.4.1 Checking the battery charge state 5.2.3.2 Electricity costs 8.4.2 Checking the battery capacity 5.2.3.3 Fuel consumption Service life and warranty 5.2.3.4 Fuel type 8.5.1 Service life and warranty of the drive 5.2.4 ERGO settings 8.5.2 Service life and warranty of the battery 31 5.2.4.1...
  • Seite 45: Quick Start

    1 Quick start 6. If you have charged the battery in the docking station, reinsert the battery into the holder on the Pedelec 1. Charge the battery completely before riding for the rom the let-hand side. Tilt the battery outwards at an irst time.
  • Seite 46: Riding In The Ergo Power-Assist Mode

    As soon as the heart rate is displayed, you can adjust the settings urther. From the irst moment on, you have ull assistance. This is unfamiliar but comfortable. Practice starting up in a safe location before venturing into the road traic.
  • Seite 47 Now you can set both a. the target heart rate and b. the Heart rates difer rom person to person. Varia- warning heart rate. Navigate to the desired item using tions occur as a result of illness (such as unc- the arrow buttons and press the Set button. tional disorders of the thyroid gland), for exam- ple, or the intake of bradycardia- or tachycardia- inducing medication (such as digitalis, calcium...
  • Seite 48 7. Pressing the Set button will take you back to the menu sub-items. When the bike is stationary, you cannot switch rom minimum to maximum pedalling cadence, or vice versa. You can only do this whilst riding. 11. You can now ride of just as you would if you were riding a normal bike.
  • Seite 49: Troubleshooting For The Ergo Power-Assist Mode

    Riding steadily for extended periods allows the switches of as soon as you begin to ride using ERGO system to learn how you handle the bike the power-assist mode once more. and adapt better to your own personal handling Observe the following points to avoid major short- style and the behaviour of your heart rate.
  • Seite 50: Legal Principles

    2 Legal principles 3 Special features of the Pedelec with Impulse drive The essential idea behind the Pedelec is not only to be able to cover greater distances more quickly, but also Your Pedelec is equipped with special features that are more comfortably.
  • Seite 51 Of course, this only applies in the manual mode of the NuVinci Harmony hub and is not recommended in the ERGO mode. IMPULSE DRIVE OTHER CENTRE MOTOR CRANK REVOLU- MOTOR CRANK REVOLU- MOTOR GEAR SPEED (KM/H) SPEED (KM/H) TIONS / MIN. SPEED TIONS / MIN.
  • Seite 52: Charging The Battery

    4 Charging the battery Removing the battery 1. Grip the battery by the handle, insert the key into the lock and turn it anticlockwise. Now the battery is un- locked. You can charge the battery whilst it is on the Pedelec ( ¡...
  • Seite 53: Learning Cycle

    Learning cycle hot air around the battery warmed during the charging operation can dissipate via the surrounding ventila- tion slots. 3. Connect the plug of the charger to the docking station. The LED in the charger now lights up briely in red and then permanently in green.
  • Seite 54: Fitting The Battery

    5 Control panel and display Damaged batteries may not be charged, and urther use is not permitted. Basic unctions The battery may heat up during charging. A maxi- Control panel mum temperature of 45°C may be reached. If the battery becomes any warmer than this, suspend the charging process immediately.
  • Seite 55: Switching On/Of

    Display 5.1.1 Switching on/of Press the power button to switch the Impulse system on. Ater switching on, the system is always in the display mode in which you switched it of. If you cannot feel any assistance, simply back-pedal briely and then pedal forwards again to trigger the Speed system check.
  • Seite 56: Buttons For Power-Assist Level

    5.1.3 Buttons for power-assist level DISPLAY BATTERY CHARGE STATE • You can speciy the power-assist level using the 100-85.5% arrow buttons. • Each time you press an arrow button, the power 85.5-71.5% assist changes by one level. 71.5-57.5% • If you press the upper arrow button, the level of assistance increases by one level each time you 57.5-42.4% press it.
  • Seite 57: Troubleshooting

    5.1.7 Troubleshooting Setting and programming the display You can switch between the various displays within the information area (also referred to as the “main menu”) by pressing the Set button. If your bike has been exposed to wet conditions for Pressing and holding the Set button will take you rom any an extended period, e.g.
  • Seite 58: Delete Trip Data

    You can select the menu sub-items using the two arrow 5.2.2.2 Brightness buttons on the control panel. You can conirm your selec- You can leave the brightness of the display at its preset tion by pressing the Set button. The respective contents level or adjust it in 5% steps to between 0% and 50% by are then displayed for you.
  • Seite 59: Unit

    5.2.2.5 Unit 5.2.2.8 Sotware Under the sub-item “Unit”, you can choose whether in- Via the sub-item “Sotware” you can access the sub-items formation relating to distance travelled and speed is dis- “Version” and “Update”, which can be selected using the played in kilometres (km) or miles (mi).
  • Seite 60: Fuel Consumption

    5.2.3.2 Electricity costs 5.2.4.1 Target heart rate Under the sub-item “Power cost”, you can speciy the price Under the sub-item “Target heart rate”, you can set your of electricity in cents (ct). You can set this to a value of be- optimal target heart rate.
  • Seite 61: Warning Heart Rate

    6 NuVinci Harmony gears 5.2.4.2 Warning heart rate Under the sub-item “Warning heart rate”, you can set your As soon as you operate the twist-grip shiter or start optimal warning heart rate. You can set this to a value of riding, the NuVinci Harmony gears switch on.
  • Seite 62: Manual Mode

    Manual mode Set the desired pedalling cadence using the twist-grip shiter. You can choose between 12 diferent pedalling ca- dences. The urther forward you move the twist-grip shit- er, the faster the pedalling cadence becomes. The number of boxes lit up in orange increases. The urther back you move the twist-grip shiter, the slower the pedalling ca- dence becomes.
  • Seite 63: Assistance By The Electric Motor

    7 Assistance by the electric motor • The level of assistance you have selected. In the power-assist mode POWER, the motor assists you with the highest output and therefore also uses the most energy. If you ride in the SPORT Operating principle of assistance mode, the motor produces slightly less power.
  • Seite 64: Power-Assist Modes

    Power-assist modes its power at low ambient temperatures. The bat- tery cells can discharge at temperatures of -15 to You can choose between the power-assist modes ERGO, +60°C. This is also the temperature range within POWER, SPORT and ECO ( Chapter 5.1.4 “Display of the which you can use your battery.
  • Seite 65: Riding Your Pedelec Eiciently

    Riding your Pedelec eiciently 8 Battery You can monitor and inluence the cost of your journeys Your battery is a lithium-ion battery, the ideal type of bat- with the Pedelec yourself. You can reduce your consump- tery for this application. tion and therefore costs by following the tips for increas- One of the main beneits of this battery is its low weight ing the range.
  • Seite 66: Learning Cycle

    8.1.1 Learning cycle discharge. This can occur ater diferent lengths of time without being used. Depending on the charge state of the battery, this can occur earlier with a lower charge and later with a higher charge. At the latest, the management system activates the sleep mode ater 10 days without using the battery.
  • Seite 67: Battery Information System

    in a warm garage when the outside temperature DISPLAY BATTERY CHARGE STATE is low. In this case you should only it the battery ••••• 5 LEDs light up 100-84% on your bike just before using it. •••• 4 LEDs light up 83-68% If you are transporting your Pedelec by car, take ¡...
  • Seite 68: Checking The Battery Capacity

    8.4.2 Checking the battery capacity 8.5.2 Service life and warranty of the battery If you press the red Push button for ive seconds, the LEDs Batteries are wear parts. Wear parts come with a two-year show the current capacity of the battery. warranty.
  • Seite 69: Transportation And Shipping Of The Battery

    If you always ride with maximum motor output, 8.6.1.3 The E-Bike on aeroplanes • your motor will always require a higher current. Your E-Bike is generally subject to the policies of the re- Higher currents cause the battery to age more spective airline concerning bikes.
  • Seite 70: Disposal Of Batteries

    Disposal of batteries 9 Charger Batteries are not to be disposed of with domestic waste. Read the type plates on the charger before using it for the Consumers are legally bound to dispose of used or dam- irst time. aged batteries at the locations designated for the purpose You can charge your Pedelec with Impulse drive directly (battery collection point or specialist cycle shop).
  • Seite 71: Cleaning

    10 Cleaning Do not use other chargers. Only charge the battery us- ing the charger provided, or a charger approved by us. Remove the battery before you clean your • If a charging fault occurs, the LED in the charger Pedelec.
  • Seite 72: Cleaning The Control Panel

    10.4 Cleaning the control panel The control panel can be cleaned with a damp cloth where necessary. 10.5 Cleaning the chest belt Clean the chest belt regularly with water or a mild soap solution. 11 Technical data MOTOR Brushless electric motor with gear unit and reewheel 250 W rated output/ Output 650 W maximum output...
  • Seite 73 We hope you thoroughly enjoy using your new Impulse Ergo Pedelec. Copyright © 2013 Derby Cycle Werke GmbH / Raleigh Univega GmbH Reproduction, in whole or in part, is not permitted without the consent of Derby Cycle Werke GmbH / Raleigh Univega GmbH. Subject to misprints, errors and technical modiications.
  • Seite 74 Derby Cycle Werke GmbH / Raleigh Univega GmbH...
  • Seite 76 Chère cliente, cher client, Pour votre sécurité, veuillez lire impérativement ¢ Chapitre 1 « Démarrage rapide » avec atten- tion avant d'essayer votre nouveau vélo. Vous vous êtes décidé pour un Pedelec Impulse Ergo de la société Derby Cycle et nous vous en remercions. Ce vélo, Nous vous recommandons également expressé- ¢...
  • Seite 77 Mises en garde Mettez les appareils électriques hors de portée Le Pedelec travaille à basse tension (36 V). des enfants. En présence d'enfants, soyez par- N'essayez jamais de faire fonctionner le Pedelec ticulièrement vigilant, notamment lorsqu'il y a avec une autre source de tension qu'une batterie risque d'introduction d'objets dans les ouver- d'origine appropriée.
  • Seite 78: Clause De Non-Responsabilité

    Recommandations Clause de non-responsabilité Les textes contenus ci-après ne sont que des recommanda- Question : Quel est le domaine d'utilisation prévu pour le tions. Tout droit de responsabilité relatif à des dommages Pedelec Impulse Ergo ? résultant de l'utilisation ou de la non-utilisation des Le domaine d'utilisation prévu est : informations proposées est formellement exclu.
  • Seite 79 Sommaire Mises en garde Console de commande et écran Recommandations Clause de non-responsabilité Sommaire 1 Démarrage rapide Fonctions de base Rouler en mode d'assistance ERGO 5.1.1 Mise sous/hors tension Diagnostic d'erreurs du mode d'assistance ERGO 5.1.2 Accélérateur de pouce 2 Bases légales 5.1.3 Touches de réglage de la puissance de l'assistance moteur Ce que cela signiie pour le cycliste...
  • Seite 80 5.2.3 Coûts Indicateur d'état de la batterie 8.4.1 Contrôle de l'état de charge de la batterie 30 5.2.3.1 Prix du carburant 8.4.2 Contrôle de la capacité de la batterie 5.2.3.2 Coût électricité Durée de vie et garantie 5.2.3.3 Consommation de carburant 8.5.1 de l'entraînement 5.2.3.4 Type de carburant...
  • Seite 81: Démarrage Rapide

    1 Démarrage rapide 6. Si vous avez chargé la batterie dans le poste de charge, repositionnez-la dans son support par le côté 1. Avant la première sortie, chargez entièrement la batte- gauche du Pedelec. Pour cela, inclinez la batterie de rie.
  • Seite 82: Rouler En Mode D'assistance Ergo

    Vous pouvez procéder à d'autres réglages dès que le pouls s'aiche. Le niveau d'assistance maximal se déclenche dès le départ. Il s'agit d'une sensation inhabituelle, mais confortable. Entraînez-vous à démarrer dans un en- droit sûr avant de circuler avec votre VAE. Rouler en mode d'assistance ERGO 1.
  • Seite 83 Vous pouvez maintenant régler a. la FC cible et b. la FC La réquence cardiaque difère d'une personne à avertissement. Avec les touches léchées, naviguez au une autre. Des maladies (par ex. dérèglements point souhaité, puis appuyez sur la touche « Set ». de la thyroïde) ou la prise de médicaments ta- chycardisants ou bradycardisants (par ex.
  • Seite 84 7. Appuyez sur la touche « Set » pour accéder de nouveau tique adapte le braquet à la réquence de pédalage aux sous-menus. que vous avez réglée. Il est impossible de passer de la réquence de péda- lage minimale à la réquence de pédalage maximale (ou inversement) à...
  • Seite 85: Diagnostic D'erreurs Du Mode D'assistance Ergo

    Lors de longues excursions à efort constant, le recommencez à rouler avec le mode d'assistance, système ERGO apprend votre comportement de la batterie s'arrête immédiatement. conduite et s'adapte personnellement à vous et Respectez les remarques suivantes pour éviter tout à votre pouls. Pour cela, le système nécessite un bref changement brusque de la réquence cardiaque : certain temps et doit de nouveau « apprendre »...
  • Seite 86: Bases Légales

    2 Bases légales 3 Particularités du Pedelec avec entraînement Impulse À la base, le Pedelec est conçu pour pouvoir efectuer rapidement de grandes distances à vélo sans faire de Nous avons doté votre Pedelec de particularités dans le concession au niveau du confort. Plusieurs modes d'assis- but d'augmenter votre sécurité...
  • Seite 87 Ceci n'est évidemment possible que lorsque le moyeu NuVinci Harmony est en mode manuel et n'est pas recommandé en mode ERGO. ENTRAÎNEMENT IMPULSE AUTRE MOTEUR CENTRAL ROTATIONS VITESSE RÉGIME ROTATIONS VITESSE RÉGIME VITESSE DES BIELLES/MIN. (KM/H) MOTEUR DES BIELLES/MIN. (KM/H) MOTEUR 4 300 3 000...
  • Seite 88: Chargement De La Batterie

    4 Chargement de la batterie Retrait de la batterie 1. Saisissez la batterie au niveau de sa poignée, introdui- sez la clé dans l'antivol et tournez-la dans le sens in- verse des aiguilles d'une montre. La batterie est main- tenant déverrouillée. Pour charger la batterie, vous pouvez la laisser dans le Pedelec ( ¡...
  • Seite 89: Cycle D'apprentissage

    Cycle d'apprentissage pas le chargeur. Seule une telle position permet d'éva- cuer l'air chaufé pendant le chargement par les fentes d'aération situées autour. 3. Raccordez la iche du chargeur au poste de charge. La LED du chargeur s'allume brièvement en rouge, puis passe et reste allumée en vert.
  • Seite 90: Montage De La Batterie

    5 Console de commande et écran Il est interdit de charger ou de continuer à utili- ser des batteries endommagées. Fonctions de base La batterie peut chaufer pendant le chargement. Console de commande Il est possible que sa température atteigne jusqu'à...
  • Seite 91: Mise Sous/Hors Tension

    Écran 5.1.1 Mise sous/hors tension Appuyez sur la touche Marche/Arrêt (Power) pour mettre le système Impulse sous tension. À la mise sous tension du système, celui-ci se trouve systématiquement dans le mode d'aichage dans lequel vous l'avez éteint. Si vous ne percevez pas l'assistance, pédalez briève- Vitesse ment une fois en arrière, puis de nouveau en avant Mode d'assistance...
  • Seite 92: Touches De Réglage De La Puissance De L'assistance Moteur

    5.1.3 Touches de réglage de la puissance de représentant une batterie le niveau de chargement actuel de la batterie. Les segments s'éteignent à mesure que l'assistance moteur l'état de charge de la batterie faiblit. • Vous pouvez régler le niveau de l'assistance mo- AFFICHAGE ÉTAT DE CHARGE DE LA BATTERIE teur avec les touches léchées.
  • Seite 93: Diagnostic D'erreurs Et Solutions

    Réglage et programmation de 5.1.7 Diagnostic d'erreurs et solutions l'écran Vous pouvez permuter entre les diférents aichages dans la zone d'informations (également appelée Menu princi- pal) en appuyant sur la touche « Set ». Si votre Pedelec a été exposé à l'humidité pendant En exerçant une longue pression sur la touche « Set », un certain temps, par exemple pendant un trajet vous accédez depuis n'importe quel aichage de la zone...
  • Seite 94: Supprimer Le Trajet

    Vous pouvez sélectionner les sous-menus au moyen des conirmez votre sélection et accédez de nouveau à l'ai- deux touches léchées igurant sur la console de com- chage des sous-menus. mande. Pour conirmer votre sélection, appuyez sur la touche « Set ». Les contenus correspondants s'aichent. 5.2.2.2 Luminosité...
  • Seite 95: Unité

    5.2.2.5 Unité 5.2.2.8 Logiciel Sous le point de menu « Unité », vous pouvez choisir d'af- À partir du point de menu « Logiciel », vous accédez aux icher les données en kilomètres (km) ou en miles (mi) en points de menu « Version » et « Mise à jour » que vous ce qui concerne le trajet parcouru et la vitesse.
  • Seite 96: Mise Au Point Ergo

    5.2.3.2 Coût électricité 5.2.4.1 FC cible Dans le point de menu « Coût électricité », vous pouvez Vous pouvez régler la réquence cardiaque cible qui vous indiquer le prix de l'électricité en centimes (ct). Actionnez convient le mieux dans le point de menu « FC cible ». les deux touches léchées igurant sur la console de com- Actionnez les deux touches léchées igurant sur la console mande pour régler le prix sur une valeur comprise entre 0...
  • Seite 97: Fc Avertissement

    6 Transmission NuVinci Harmony 5.2.4.2 FC avertissement Vous pouvez régler la réquence cardiaque d'avertisse- La transmission NuVinci Harmony se met en marche dès ment qui vous convient le mieux dans le point de menu que vous actionnez la poignée tournante ou dès que vous « FC avertissement ».
  • Seite 98: Mode Manuel

    Mode manuel Réglez la réquence de pédalage souhaitée avec la poi- gnée tournante. Vous pouvez sélectionner 12 réquences de pédalage diférentes. Plus vous tournez la poignée tournante vers l'avant, plus la réquence de pédalage aug- mente. Le nombre de cases allumées en orange augmente. Plus vous tournez la poignée tournante vers l'arrière, plus la réquence de pédalage diminue.
  • Seite 99: Assistance Grâce Au Moteur Électrique

    7 Assistance grâce au moteur • Le niveau d'assistance que vous avez sélectionné. Si vous choisissez le mode d'assistance POWER, électrique le moteur fournit la puissance la plus élevée ; il consomme alors également plus d'énergie. Si vous choisissez le mode SPORT, le moteur restitue une Fonctionnement de l'assistance puissance légèrement moins élevée.
  • Seite 100: Modes D'assistance

    Modes d'assistance Lorsqu'elle se décharge en entraînant le moteur, la batterie s'échaufe d'elle-même. Cette chaleur Vous pouvez choisir entre les modes d'assistance ERGO, produite suit à éviter une trop grande baisse de la POWER, SPORT et ECO ( Chapitre 5.1.4 « Aichage du performance lorsque la température extérieure est mode d'assistance »).
  • Seite 101: Conduite Économique Du Pedelec

    Conduite économique du Pedelec 8 Batterie Vous pouvez vous-même contrôler et inluencer les coûts Votre batterie est une batterie lithium-ion, la forme la plus de vos trajets avec le Pedelec. En respectant les conseils avantageuse des batteries pour cette utilisation. pour atteindre une plus grande autonomie, vous réduisez L'un des principaux avantages de cette batterie est son la consommation du moteur et donc les coûts.
  • Seite 102: Cycle D'apprentissage

    8.1.1 Cycle d'apprentissage tard selon la durée d'inutilisation de la batterie. En fonc- tion de l'état de charge de la batterie, cela peut se pro- duire plus tôt (état de charge faible) ou plus tard (état de charge élevé). Le système de gestion de batterie active le mode sommeil au plus tard après 10 jours d'inutilisation de la batterie.
  • Seite 103: Indicateur D'état De La Batterie

    ture dépasse +30 °C, la batterie ne se charge ÉTAT DE CHARGE DE LA AFFICHAGE pas. Lorsque les températures extérieures sont BATTERIE basses, il est recommandé de charger et de stoc- ••••• 5 LED s'allument 100 – 84 % ker la batterie à la maison ou dans un garage chaufé.
  • Seite 104: Contrôle De La Capacité De La Batterie

    8.4.2 Contrôle de la capacité de la batterie s'agit d'une pièce d'usure pour laquelle une garantie de deux ans est accordée. Les pièces d'usure, comme l'entraî- Lorsque vous appuyez sur le bouton « Push » rouge pen- nement et les reins, sont plus fortement sollicitées que dant cinq secondes, les LED indiquent la capacité...
  • Seite 105: Transport Et Expédition De La Batterie

    d'environ 5 % ou 3 % par an en raison du stockage 8.6.1.2 Le VAE dans le train et des chargements. Vous pouvez transporter votre VAE dans les trains mar- Vous pouvez augmenter la durée de vie de la qués avec un symbole de vélo. En Allemagne, dans les •...
  • Seite 106: Élimination Des Batteries

    Élimination des batteries 9 Chargeur Il est interdit d'éliminer les batteries avec les déchets Avant le premier emploi du chargeur, lisez les plaques ménagers. Les consommateurs sont tenus par la loi de signalétiques ixées dessus. déposer les batteries usagées ou endommagées dans des Il est possible de charger la batterie de votre Pedelec avec lieux prévus à...
  • Seite 107: Nettoyage

    10 Nettoyage N'utilisez pas d'autre chargeur. Chargez votre batterie exclusivement avec le chargeur inclus dans la livrai- son ou avec un chargeur autorisé par nous. Pour nettoyer votre Pedelec, veuillez retirer la batterie du véhicule. • En cas d'erreur de chargement, la LED du chargeur clignote en rouge.
  • Seite 108: Nettoyage De L'écran

    10.3 Nettoyage de l'écran Ne nettoyez le boîtier de l'écran qu'avec un chifon humide (pas mouillé). 10.4 Nettoyage de la console de commande Au besoin, nettoyez la console de commande avec un chif- fon humide. 10.5 Nettoyage de la ceinture poitrine Nettoyez régulièrement la ceinture poitrine avec de l'eau ou une solution savonneuse douce.
  • Seite 109 Nous vous souhaitons beaucoup de plaisir avec votre nouveau Pedelec Impulse Ergo. Copyright © 2013 Derby Cycle Werke GmbH / Raleigh Univega Werke GmbH Toute reproduction totale ou partielle sans l'autorisation expresse de Derby Cycle Werke GmbH / Raleigh Univega GmbH est interdite.
  • Seite 110 Derby Cycle Werke GmbH / Raleigh Univega GmbH...
  • Seite 112 Geachte klant, Ook al wilt u meteen een eerste rit op uw iets ¡ maken, dient u voor uw eigen veiligheid toch in elk geval eerst het gedeelte Hoofdstuk 1 “Snel Hartelijk dank dat ui hebt gekozen voor de Pedelec Impulse aan de slag”...
  • Seite 113: Waarschuwingen

    Waarschuwingen ¢ Elektrische apparaten dienen buiten het bereik De Pedelec werkt op een lage spanning (36 V). U van kinderen te worden gehouden. Wees voorzich- mag nooit proberen de Pedelec met een andere tig wanneer er kinderen in de buurt zijn, vooral stroomvoorziening dan de bijbehorende origi- als zij voorwerpen door openingen in de behui- nele accu te gebruiken.
  • Seite 114: Uitsluiting Van Aansprakelijkheid

    Aanbevelingen Uitsluiting van aansprakelijkheid Vraag: Wat is het bedoelde toepassingsgebied van de De volgende inhoud ungeert slechts als aanbeveling. Aan- Pedelec Impulse Ergo? sprakelijkheidsclaims die betrekking hebben op schade die door het gebruik of niet-gebruik van de aangeboden Het bedoelde toepassingsgebied is informatie is ontstaan, zijn in principe uitgesloten.
  • Seite 115 Inhoud Waarschuwingen Bedieningselement en display Aanbevelingen Uitsluiting van aansprakelijkheid Inhoud 1 Snel aan de slag Basisuncties Fietsen met het ondersteuningsniveau ERGO 9 5.1.1 In- / uitschakelen Foutdiagnose ondersteuningsniveau ERGO 12 5.1.2 Duwhulp 2 Wettelijke bepalingen 5.1.3 Knoppen voor het niveau van de Betekenis voor de gebruiker motorondersteuning 3 Bijzonderheden van de Pedelec met Impulse-...
  • Seite 116 5.2.3 Prijsopgaaf 8.4.1 Laadstatus accu controleren 8.4.2 Accucapaciteit controleren 5.2.3.1 Brandstofprijs Levensduur en garantie 5.2.3.2 Stroomkosten 5.2.3.3 Brandstoverbruik 8.5.1 Levensduur en garantie van de aandrijving 5.2.3.4 Brandstof 8.5.2 Levensduur en garantie van de accu 5.2.4 ERGO-instellingen Transport en verzending van de accu 5.2.4.1 Gewenste hartslag 8.6.1 Transport...
  • Seite 117: Snel Aan De Slag

    1 Snel aan de slag 6. Als u de accu via het oplaadstation hebt opgeladen, plaatst u de accu vanaf de linker kant van de Pedelec 1. Laad de accu voor de eerste rit volledig op. Oplaad- terug in de houder. Houd de accu ongeveer 45° naar temperatuur: 0 °C –...
  • Seite 118: Fietsen Met Het Ondersteuningsniveau Ergo

    Zodra de hartslag wordt weergegeven, kunt u de ove- rige instellingen uitvoeren. U geniet dus vanaf het eerste moment van de volledi- ge ondersteuning. Dat is in het begin onwennig, maar zeer comfortabel. Oefen het wegrijden op een veilige plaats voordat u deelneemt aan het verkeer. Fietsen met het ondersteuningsniveau ERGO 1.
  • Seite 119 Nu kunt u zowel de a. Gewenste hartslag alsook de De hartrequentie is van persoon tot persoon ver- b. Waarschuwing hartslag instellen. Navigeer met de pijl- schillend. Awijkingen worden bijvoorbeeld ver- toetsen naar de gewenste optie en druk de Set-toets in. oorzaakt door aandoeningen (bijvoorbeeld unc- tiestoornissen van de schildklier) of het gebruik van brady- of tachycardiserende medicijnen (zoals...
  • Seite 120 7. Als u de Set-toets indrukt, gaat u weer naar de menuo- pties. In stilstand kunt u niet van een minimale naar een maximale traprequentie of omgekeerd doorschake- len. Dat is alleen tijdens het ietsen mogelijk. 11. U kunt net als met een gewone iets wegrijden. De ondersteuning van de motor wordt geactiveerd zodra u de pedalen intrapt.
  • Seite 121: Foutdiagnose Ondersteuningsniveau Ergo

    Wanneer u gedurende langere tijd gelijkmatig Zie onderstaande tips om een snelle/grote verande- ietst, “leert” het ERGO-systeem uw rijden en ring van de hartslag te voorkomen: stelt zich beter op uw persoonlijke rijgedrag en Trap gelijkmatig met een gelijkblijvende uw hartslag in. Hiervoor is enige tijd nodig. Wan- krachtinspanning in de pedalen..
  • Seite 122: Wettelijke Bepalingen

    2 Wettelijke bepalingen 3 Bijzonderheden van de Pedelec met Impulse-aandrijving Het basisidee achter de Pedelec is om ook grote afstanden snel en toch comfortabel te kunnen aleggen. U kunt kie- Uw Pedelec beschikt over bijzonderheden ten behoeve zen of u geniet van de ondersteuning en ontspannen een van uw veiligheid en comfort: stukje gaat ietsen, of u sportief aan de slag wilt of zo snel mogelijk van A naar B wilt ietsen.
  • Seite 123 Dat is natuurlijk alleen in de handmatige modus van de NuVinci Harmony naaf mogelijk en is in de ERGO-modus niet aan te raden. IMPULSE-AANDRIJVING ANDERE MIDDENMOTOR OMWENTELINGEN VAN SNELHEID MOTOR- OMWENTELINGEN VAN SNELHEID MOTOR- VERSNELLING DE CRANKARM / MIN (KM / UUR) TOERENTAL DE CRANKARM / MIN (KM / UUR)
  • Seite 124: Accu Opladen

    4 Accu opladen Accu verwijderen 1. Pak de accu vast aan de greep, steek de sleutel in het slot en draai de sleutel tegen de richting van de wij- zers van de klok. Nu is de accu ontgrendeld. U kunt de accu opladen terwijl deze op de Pedelec zit ( ¡...
  • Seite 125: Leercyclus

    Leercyclus tijdens het laadproces verwarmde lucht uit de rondlo- pende ventilatieopeningen wegstromen. 3. Verbind de stekker van het oplaadapparaat met het oplaadstation. De LED van het oplaadapparaat brandt nu even rood en daarna permanent groen. Nadat u de accu voor het eerst volledig hebt opgela- 4.
  • Seite 126: Accu Plaatsen

    5 Bedieningselement en display Beschadigde accu’s mogen niet worden opgela- den en ook niet meer worden gebruikt. Basisuncties De accu kan tijdens het opladen warm worden. Er Bedieningselement kan een temperatuur van maximaal 45 °C worden bereikt. Als de accu warmer wordt, dient u het oplaadproces onmiddellijk te onderbreken.
  • Seite 127: In- / Uitschakelen

    Display 5.1.1 In- / uitschakelen Door een druk op de Power-toets schakelt u het Impulse- systeem in. Na het inschakelen staat het systeem altijd in de weergavemodus waarin u het systeem hebt uitgescha- keld. Wanneer u geen ondersteuning opmerkt, dient u even Fietssnelheid terug te trappen en daarna weer naar voren, zodat de Ondersteuningsniveau...
  • Seite 128: Knoppen Voor Het Niveau Van De Motorondersteuning

    5.1.3 Knoppen voor het niveau van de WEERGAVE LAADSTATUS ACCU motorondersteuning 100 – 85,5% • Met de pijltoetsen kunt u het niveau van de mo- torondersteuning instellen. 85,5 – 71,5% • Met elke druk op de pijltoets verandert de kracht 71,5 –...
  • Seite 129: Foutdiagnose En Fouten Oplossen

    5.1.7 Foutdiagnose en fouten oplossen Instelling en programmering van het display Door het indrukken van de Set-toets kunt u wisselen tus- sen diverse weergaven in het informatieveld (ook hoofd- menu genoemd). Wanneer u Pedelec langere tijd nat is geworden, Als u de Set-toets gedurende langere tijd indrukt, gaat u bijvoorbeeld na een rit in een hevige regenbui, of bij van elke willekeurige weergave in het informatieveld naar grote temperatuurverschillen, kan het glas van het...
  • Seite 130: Wis Tripdata

    Met de twee pijltoetsen van het bedieningselement kunt u 5.2.2.2 Helderheid de menuopties selecteren. Door een druk op de Set-toets De helderheid van de weergave kunt u ingesteld laten op bevestigt u uw keuze. De betrefende inhoud van de me- de fabrieksinstelling of door een druk op de pijltoetsen in nuoptie wordt dan getoond.
  • Seite 131: Eenheid

    5.2.2.5 Eenheid 5.2.2.8 Sotware Via de menuoptie “Eenheid” kunt u instellen of de in- Via de menuoptie “Sotware” gaat u naar de opties “Ver- formatie met betrekking tot het afgelegde traject en de sie” en “Update” die u via de pijltoetsen op het bedie- snelheid in kilometers (km) of in mijlen (mi) moet worden ningselement kunt selecteren.
  • Seite 132: Brandstof

    5.2.3.2 Stroomkosten 5.2.4.1 Gewenste hartslag Onder de optie “Stroomkosten” kunt u de stroomprijs Via de menuoptie “Gewenste hartslag” kunt u de voor u in centen (ct) opgeven. Deze kunt u via de twee pijltoet- optimale gewenste hartslag instellen. Deze kunt u door sen op het bedieningselement op een waarde van 0 tot het indrukken van beide pijltoetsen op het bedienings- 99 cent in stappen van 1 cent instellen.
  • Seite 133: Automatische Modus

    6 Versnelling NuVinci Harmony 5.2.4.2 Waarschuwing hartslag Via de menuoptie “Waarschuwing hartslag” kunt u de voor Zodra u de draaigreep bedient of wegrijdt, wordt de ver- u optimale waarschuwing hartslag instellen. Deze kunt snelling NuVinci Harmony ingeschakeld. Kies nu of u de u door het indrukken van beide pijltoetsen op het bedie- versnelling NuVinci Harmony handmatig of automatisch ningselement op een waarde tussen “gewenste hartslag...
  • Seite 134: Handmatig Bedrijf

    Handmatig bedrijf Stel de draaigreep op de gewenste traprequentie in. U kunt kiezen uit 12 verschillende traprequenties. Hoe verder u de draaigreep naar voren beweegt, des te snel- ler wordt de traprequentie. Het aantal oranje brandende hokjes neemt toe. Hoe verder u de draaigreep terugdraait, des te langzamer wordt de traprequentie.
  • Seite 135 7 Ondersteuning door de • Welke ondersteuning u gekozen hebt. Bij het ondersteuningsniveau POWER ondersteunt elektrische motor de motor u met het hoogste vermogen, maar ver- bruikt dan ook de meeste energie. Wanneer u voor de modus SPORT kiest, levert de motor iets minder Werking van de ondersteuning vermogen.
  • Seite 136 Ondersteuningsniveaus Door de ontlading bij motorgebruik verwarmt de accu zichzelf voldoende om bij een koude bui- U kunt tussen de ondersteuningsniveaus ERGO, POWER, tentemperatuur niet te veel aan prestatiekracht SPORT en ECO kiezen ( Hoofdstuk 5.1.4 “Weergave van te verliezen. De ontladingstemperatuur van de het ondersteuningsniveau”).
  • Seite 137: De Pedelec Economisch Gebruiken

    De Pedelec economisch gebruiken 8 Accu U kunt de kosten voor uw ritten met de Pedelec zelf in de Uw accu is een lithium-ion-accu, de meest voordelige hand houden en beïnvloeden. Wanneer u de tips voor een vorm van accu’s voor deze toepassing. grotere actieradius volgt, verlaagt u het verbruik en dus Een van de hoofdvoordelen van dit accutype is het lage de kosten.
  • Seite 138 8.1.1 Leercyclus kan dit bij een lage laadstatus eerder en bij een hogere lading later gebeuren. Op zijn laatst na 10 dagen zonder dat de accu is gebruikt, activeert het accubeheer de slaap- stand. De slaapstand wordt beëindigd als u de accu op het oplaadapparaat aansluit of als u op de Push-knop op de accu drukt.
  • Seite 139 Wanneer u uw Pedelec met de auto transpor- ¡ WEERGAVE LAADSTATUS ACCU teert, dient u de accu uit de houder te halen en ••••• 5 LED’s branden 100 – 84% apart te transporteren. •••• 4 LED’s branden 83 – 68% Ideaal voor een langdurige opslag zijn een laad- ¡...
  • Seite 140: Accucapaciteit Controleren

    8.4.2 Accucapaciteit controleren normale iets. Door de verhoogde krachtinwerking slijten de onderdelen sneller. Wanneer u vijf seconden de rode Push-knop indrukt, laten de lichtdioden de actuele capaciteit van de accu zien. 8.5.2 Levensduur en garantie van de accu WEERGAVE CAPACITEIT De accu’s behoren tot de slijtageonderdelen.
  • Seite 141: Transport

    Ook door een gericht gebruik van de ondersteu- 8.6.1.2 De E-Bike in de trein • ning kunt u de levensduur van uw accu verlen- U kunt uw E-Bike in treinstellen meenemen die van een gen. Idealiter rijdt u met een kleine versnelling ietssymbool zijn voorzien.
  • Seite 142 Verwijdering van accu’s 9 Oplaadapparaat Accu’s mogen niet via het huisvuil worden verwijderd. Lees voor het eerste gebruik van het oplaadapparaat de Consumenten zijn er wettelijk toe verplicht om afgedankte op het apparaat aangebrachte typeplaatjes. of beschadigde accu’s bij de hiervoor bestemde plaatsen Uw Pedelec met Impulse-aandrijving kan direct via een af te geven (inzamelplaats voor accu’s of dealers).
  • Seite 143 10 Reiniging Gebruik geen andere oplaadapparaten. Laad uw accu uitsluitend met het meegeleverde of een door ons erkend oplaadapparaat op. Voor de reiniging van de Pedelec moet u de accu uit de iets verwijderen. • Wanneer er sprake is van een oplaadfout, knippert de LED in het oplaadapparaat rood.
  • Seite 144: Technische Speciicaties

    10.4 Reiniging van het bedieningselement Het bedieningselement kan indien nodig met een vochtige doek worden gereinigd. 10.5 Reiniging van de borstgordel Reinig de borstgordel regelmatig met water of mild zeepsop. 11 Technische speciicaties MOTOR Borstelloze elektromotor met aandrijving en vrijloop 250 W nominaal / 650 W Vermogen maximaal vermogen...
  • Seite 145 Wij wensen u veel plezier bij het gebruik van uw nieuwe Pedelec Impulse Ergo. Copyright © 2013 Derby Cycle Werke GmbH / Raleigh Univega GmbH Nadruk, ook gedeeltelijk, alleen met toestemming van Derby Cycle Werke GmbH / Raleigh Univega GmbH. Drukfouten, fouten en technische wijzigingen voorbehouden.
  • Seite 146 Derby Cycle Werke GmbH / Raleigh Univega GmbH...
  • Seite 148 Gentile Cliente, Prima di iniziare ad utilizzare la bicicletta, ai ini ¡ della sicurezza è fondamentale leggere prima attentamente il Capitolo 1 “Guida rapida”. La ringraziamo per aver scelto la bicicletta Pedelec Impulse Ergo di Derby Cycle! Questa bicicletta La assiste durante Si consiglia tuttavia vivamente di leggere le pre- ¡...
  • Seite 149: Avvertimenti

    Avvertimenti Tenere le apparecchiature elettriche lontano La Pedelec unziona a bassa tensione (36 V). Non dalla portata dei bambini. Prestare particolare tentare mai di utilizzare la Pedelec con una sor- attenzione in presenza di bambini, soprattutto gente di tensione diversa da una batteria origi- se vi è...
  • Seite 150: Consigli

    Consigli Esonero dalla responsabilità I contenuti descritti di seguito sono soltanto consigli. Le Domanda: Qual è il campo di impiego previsto della Pedelec rivendicazioni di responsabilità riferite a danni dovuti Impulse Ergo? all'utilizzo o non utilizzo delle informazioni fornite sono Il campo di impiego previsto è...
  • Seite 151: Indice

    Indice Avvertimenti Elemento di comando e display Consigli Esonero dalla responsabilità Indice 1 Guida rapida Funzioni di base Funzionamento nella modalità di assistenza ERGO 5.1.1 Accensione/Spegnimento Diagnosi degli errori modalità di 5.1.2 Spinta ausiliaria assistenza ERGO 5.1.3 Tasti per l’intensità dell’assistenza 2 Requisiti di legge motore Conseguenze per il ciclista...
  • Seite 152 5.2.3 Costi prestabiliti 8.4.1 Controllo del livello di carica della batteria 5.2.3.1 Prezzo carburante 8.4.2 Controllo della capacità della batteria 31 5.2.3.2 Costo energia el. Durata di vita e garanzia 5.2.3.3 Consumo carburante 8.5.1 Durata di vita e garanzia del motore 5.2.3.4 Tipo propellente 8.5.2 Durata di vita e garanzia della batteria 31...
  • Seite 153: Guida Rapida

    1 Guida rapida 6. Se la batteria è stata caricata nella stazione di carica, reinserirla dal lato sinistro della Pedelec nel relativo 1. Caricare completamente la batteria prima del primo supporto. Per farlo, mantenere la batteria inclinata utilizzo. Temperatura di carica: da 0°C a 45°C. verso l'esterno di circa 45°...
  • Seite 154: Funzionamento Nella Modalità Di Assistenza Ergo

    Appena viene visualizzata la requenza cardiaca, è possibile efettuare altre impostazioni. Si ha in da subito un'assistenza piena, l'efetto è inso- lito ma confortevole. Prima di arontare il traico, si consiglia di esercitarsi nella partenza presso un luogo sicuro. Funzionamento nella modalità di assistenza ERGO 1.
  • Seite 155 Ora è possibile impostare sia a. Freq. card. obiettivo La requenza cardiaca varia da persona a perso- che b. Freq. card. allarme. Spostarsi con i tasti reccia na. Gli scostamenti sono causati ad esempio da ino al punto desiderato e premere il tasto Set. malattie (ad esempio disunzioni della tiroide) o dall'assunzione di farmaci bradicardizzanti o tachicardizzanti (ad esempio digitalici, calcio-...
  • Seite 156 7. Premendo il tasto Set si torna alle sottovoci di menu. Da fermi non si può passare dalla requenza di peda- lata minima a quella massima, o viceversa. Lo si può fare solo durante l'utilizzo. 11. La bicicletta unziona ora come una bicicletta norma- le.
  • Seite 157: Diagnosi Degli Errori Modalità Di Assistenza Ergo

    Con una pedalata più lunga ed omogenea, il Osservare le seguenti indicazioni per evitare modii- sistema ERGO apprende il comportamento di che forti e repentine della requenza cardiaca: marcia personale e si adatta meglio ad esso e Pedalare in modo omogeneo con una forza eser- al comportamento della requenza cardiaca.
  • Seite 158: Requisiti Di Legge

    2 Requisiti di legge 3 Peculiarità della Pedelec con motore Impulse L'idea alla base della bicicletta Pedelec è quella di poter coprire velocemente e in tutta comodità anche distanze La Sua Pedelec presenta peculiarità per la Sua sicurezza e più lunghe. Il ciclista può scegliere se farsi assistere il Suo comfort: dalla bicicletta e pedalare in modo più...
  • Seite 159 Ciò vale naturalmente solo per l'esercizio manuale del mozzo NuVinci Harmony e non è consigliabile in modalità ERGO. MOTORE IMPULSE ALTRO MOTORE CENTRALE ROTAZIONI DELLE VELOCITÀ REGIME DEL ROTAZIONI DELLE VELOCITÀ REGIME DEL MARCIA PEDIVELLE / MIN (KM / H) MOTORE PEDIVELLE / MIN (KM / H)
  • Seite 160: Ricarica Della Batteria

    4 Ricarica della batteria Rimozione della batteria 1. Aferrare la maniglia della batteria, inserire la chiave nella serratura e ruotarla in senso antiorario. Ora la batteria è sbloccata. La batteria può essere caricata senza smontarla dalla Pedelec ( ¡ Capitolo 1 “Guida rapida”). Sbloccare la batteria 2.
  • Seite 161: Ciclo Di Apprendimento

    Ciclo di apprendimento asciutta e non iniammabile, o il diodo luminoso deve trovarsi sulla parte superiore. Non coprire il carica- batteria. Solo così l'aria riscaldata durante la ricari- ca può essere espulsa dalle feritoie di ventilazione circostanti. 3. Collegare la spina del caricabatteria alla stazione di Dopo aver efettuato per la prima volta una carica carica.
  • Seite 162: Installazione Della Batteria

    5 Elemento di comando e display Se si riscontrano danni alla batteria, non ricari- carla e sospenderne l'uso. Funzioni di base Durante la carica, la batteria potrebbe riscaldar- Elemento di comando si. La temperatura massima consentita è pari a 45°C. Se la batteria si scalda oltre questo limite, interrompere immediatamente la procedura di carica.
  • Seite 163: Accensione/Spegnimento

    Display 5.1.1 Accensione/Spegnimento Premendo il tasto di accensione, si accende il sistema Impulse. Dopo l'accensione, il sistema si trova sempre nella modalità di visualizzazione in cui era quando è stato spento. Se non si dovesse avvertire alcuna assistenza, pedala- Velocità di marcia re un po' all'indietro e poi di nuovo in avanti, in modo Modalità...
  • Seite 164: Tasti Per L'intensità Dell'assistenza Motore

    5.1.3 Tasti per l'intensità dell'assistenza batteria suddivisa in segmenti, indica quanto è ancora carica la batteria. Minore è il livello di carica della batte- motore ria, minore è il numero dei segmenti visualizzati. • I tasti reccia consentono di regolare l'intensità LIVELLO DI CARICA dell'assistenza fornita dal motore.
  • Seite 165: Diagnosi E Risoluzione Degli Errori

    Impostazione e programmazione 5.1.7 Diagnosi e risoluzione degli errori del display Premendo il tasto Set è possibile spostarsi tra le varie visualizzazioni nel campo informazioni (chiamato anche menu principale). Se la Pedelec è rimasta per un tempo prolungato in Tenendo premuto più a lungo il tasto Set, si passa da qual- condizioni di bagnato, come ad esempio dopo un siasi visualizzazione nel campo informazioni alle sottovoci viaggio sotto la pioggia battente, oppure in caso di...
  • Seite 166: Eliminazione Dei Dati Corsa / Eliminazione Di Tutti I Dati

    Con i due tasti reccia sull'elemento di comando è possibi- 5.2.2.2 Luminosità le selezionare le sottovoci di menu. Premendo il tasto Set, La luminosità della visualizzazione può essere lasciata si conferma la selezione efettuata. Vengono visualizzati i come preimpostata o modiicata premendo i due tasti rispettivi contenuti.
  • Seite 167: Unità

    5.2.2.5 Unità 5.2.2.8 Sotware Nella sottovoce “Unità” è possibile selezionare se i dati Attraverso la sottovoce “Sotware” si arriva alle sottovoci riferiti al tragitto percorso e alla velocità devono essere “Versione” e “Aggiornamento”, che è possibile scegliere visualizzati in chilometri (km) o in miglia (mi). Con i tasti mediante i tasti reccia sull'elemento di comando.
  • Seite 168 5.2.3.2 Costo energia el. 5.2.4.1 Frequenza cardiaca obiettivo Nella sottovoce “Costo energia el.” si può indicare il costo Nella sottovoce “Frequenza cardiaca obiettivo” è possibile della corrente in centesimi (ct). Azionando i due tasti rec- impostare la propria requenza cardiaca obiettivo ottima- cia sull'elemento di comando, è...
  • Seite 169 6 Cambio NuVinci Harmony 5.2.4.2 Frequenza cardiaca allarme Nella sottovoce “Freq. card. allarme” è possibile imposta- Appena si aziona la manopola rotante o si parte, si attiva re la propria requenza cardiaca allarme ottimale. Azio- il cambio NuVinci Harmony. nando i due tasti reccia sull'elemento di comando, è pos- Decidere ora se si desidera azionare il cambio NuVinci sibile impostarla su un valore compreso tra “Freq.
  • Seite 170: Diagnosi Degli Errori

    Esercizio manuale Impostare la requenza di pedalata desiderata con la ma- nopola rotante. Si può scegliere tra 12 diverse requenze di pedalata. Più si sposta in avanti la manopola rotante, più diventa veloce la requenza di pedalata. Il numero di caselle arancioni illuminate aumenta.
  • Seite 171 7 Assistenza del motore elettrico • Assistenza selezionata. Nella modalità di assistenza POWER il motore fornisce assistenza con la massima potenza, ma consuma anche il massimo livello di energia. Se Funzionamento dell'assistenza si viaggia nella modalità SPORT, il motore eroga un po' meno potenza.
  • Seite 172 Modalità di assistenza La scarica che ha luogo durante il unzionamento del motore provoca un surriscaldamento della bat- Si può scegliere tra le modalità di assistenza ERGO, PO- teria suiciente ad impedire una perdita eccessiva WER, SPORT e ECO ( Capitolo 5.1.4 “Visualizzazione della di potenza anche a basse temperature esterne.
  • Seite 173: Utilizzare La Pedelec Risparmiando

    Utilizzare la Pedelec risparmiando 8 Batteria La Pedelec permette di controllare e determinare i costi La batteria impiegata è una batteria agli ioni di litio, ossia del suo utilizzo. Rispettando i consigli forniti per la mag- il tipo di batteria più eiciente per questo tipo di applica- giore autonomia possibile, si riducono i consumi e di con- zione.
  • Seite 174 8.1.1 Ciclo di apprendimento evitare una scarica profonda, il sistema di gestione della batteria porta la batteria in modalità sleep. Ciò può acca- dere dopo periodi di inutilizzo di diversa durata, in un- zione del maggiore o minore livello di carica della batte- ria.
  • Seite 175: Sistema Di Informazione Della Batteria

    Per trasportare la Pedelec con l'auto, rimuovere LIVELLO DI CARICA ¡ VISUALIZZAZIONE la batteria dal suo supporto e trasportarla sepa- DELLA BATTERIA ratamente. ••••• 5 LED accesi 100 – 84% La condizione ideale in cui conservare la batteria •••• ¡ 4 LED accesi 83 –...
  • Seite 176: Controllo Della Capacità Della Batteria

    • Se il LED lampeggia ancora, portare la batteria da La potenza aggiuntiva del motore comporta una maggiore un rivenditore specializzato per un controllo. usura di componenti quali trasmissione e reni rispetto a quanto avviene su una normale bicicletta. A causa dell'elevata forza applicata, i componenti si usurano 8.4.2 Controllo della capacità...
  • Seite 177 Per prolungare la durata di vita della batteria, 8.6.1.2 E-Bike in treno • ricaricarla completamente dopo ogni utilizzo, È consentito trasportare la E-Bike sui treni recanti il con- anche breve. La batteria agli ioni di litio Impul- trassegno per le biciclette. Sui treni IC ed EC, il trasporto se non ha alcun efetto memoria.
  • Seite 178: Smaltimento Della Batteria

    Smaltimento della batteria 9 Caricabatteria Non gettare le batterie tra i riiuti domestici. I consuma- Leggere le targhette identiicative applicate sul caricabat- tori sono tenuti per legge a consegnare batterie esauste teria prima di utilizzarlo per la prima volta. o danneggiate presso i centri preposti (centri di raccolta La Pedelec con motore Impulse può...
  • Seite 179: Pulizia Della Batteria

    10 Pulizia Non utilizzare altri caricabatteria. Caricare la batteria solamente con il caricabatteria fornito in dotazione o con uno approvato dal costruttore. Per pulire la Pedelec, rimuovere la batteria dalla bicicletta. • Se si veriica un errore di carica, il LED del carica- batteria lampeggia in rosso.
  • Seite 180: Dati Tecnici

    10.4 Pulizia dell'elemento di comando L'elemento di comando può all'occorrenza essere pulito con un panno umido. 10.5 Pulizia della cintura toracica Pulire regolarmente la cintura toracica con acqua o una soluzione di sapone delicata. 11 Dati tecnici MOTORE Motore elettrico brushless con cambio e ruota libera Potenza nominale 250 W / Potenza potenza max.
  • Seite 181 Vi auguriamo buon divertimiento con la Vostra nuova Pedelec Impulse Ergo. Copyright © 2013 Derby Cycle Werke GmbH / Raleigh Univega GmbH La riproduzione, anche parziale, è consentita solo previa autorizzazione di Derby Cycle Werke GmbH. Con riserva di errori di stampa, sbagli e modiiche tecniche.
  • Seite 182 Derby Cycle Werke GmbH/ Raleigh Univega GmbH...
  • Seite 184 ejemplo, sobre la técnica de bicicleta de su Pedelec, igura Estimada clienta, estimado cliente: en las Instrucciones generales de empleo. Muchas gracias por su decisión de adquirir una Pedelec Impulse Ergo de la casa Derby Cycle. Esta bicicleta le asis- Aunque sienta un deseo irresistible de efectuar ¡...
  • Seite 185: Indicaciones De Advertencia

    Indicaciones de advertencia Mantenga los aparatos eléctricos uera del alcan- La Pedelec trabaja con baja tensión (36 V). No ce de los niños. Preste especial atención en pre- intente nunca hacer uncionar la Pedelec con otra sencia de niños, sobre todo si pueden introducir uente de tensión que no sea una batería original objetos en el aparato a través de los oriicios de adecuada.
  • Seite 186: Exclusión De Responsabilidad

    Recomendaciones Exclusión de responsabilidad Las siguientes indicaciones se dan únicamente a título de Pregunta: ¿Cuál es el ámbito de aplicación previsto de la recomendación. Queda excluida toda responsabilidad por Pedelec Impulse Ergo? acciones contra nosotros basadas en daños cuyo origen El ámbito de aplicación previsto es derive de la utilización o no utilización de la información orecida.
  • Seite 187: Índice

    Índice Indicaciones de advertencia Dispositivo de mando y visualizador Recomendaciones Exclusión de responsabilidad Índice 1 Guía rápida Funciones básicas Circular en modo de asistencia ERGO 5.1.1 Conexión/desconexión Diagnóstico de fallos en el modo de asistencia ERGO 5.1.2 Asistencia activa 2 Bases legales 5.1.3 Teclas para la intensidad de la asistencia del motor Importante para el conductor...
  • Seite 188 5.2.3 Especiicación de costes Sistema de información de la batería 8.4.1 Controlar el nivel de carga de la batería 30 5.2.3.1 Precio del combustible 8.4.2 Comprobar la capacidad de la batería 31 5.2.3.2 Costes eléctricos Vida útil y garantía 5.2.3.3 Consumo de combustible 8.5.1 Vida útil y garantía del motor 5.2.3.4...
  • Seite 189: Guía Rápida

    1 Guía rápida 6. Si ha cargado la batería en la estación de carga, vuelva a colocarla en su soporte introduciéndola por el lado 1. Cargue por completo la batería antes de realizar la izquierdo de la Pedelec. Para ello, mantenga la batería primera salida.
  • Seite 190: Circular En Modo De Asistencia Ergo

    En cuanto aparezca el número de pulsaciones, puede realizar otros ajustes. Desde el primer momento dispone de asistencia ple- na. Esto es algo a lo que hay que acostumbrarse, pero que resulta cómodo. Practique el inicio de la marcha en un lugar seguro antes de adentrarse en el tráico rodado.
  • Seite 191 Ahora puede conigurar tanto el a. pulso meta como el La recuencia cardíaca varía de persona a perso- b. pulso de alerta. Navegue con las teclas de lecha na. Las desviaciones dependen, por ejemplo, de hasta la opción deseada y pulse la tecla "Set". las enfermedades (p.
  • Seite 192 7. En cuanto pulse la tecla “Set”, regresará a las opciones secundarias del menú. Estando parado, no puede cambiarse la recuencia de pedaleo de mínima a máxima, ni viceversa. Eso sólo es posible durante la conducción. 11. Ahora puede iniciar la marcha como con una bicicleta normal.
  • Seite 193: Diagnóstico De Fallos En El Modo De Asistencia Ergo

    Tras una conducción prolongada y constante, el Preste atención a las siguientes indicaciones para sistema ERGO aprende su estilo de conducción evitar repentinos cambios bruscos en la recuencia personal, adaptándose mejor a él y al patrón de cardíaca: su recuencia cardíaca. Esto requiere algo de Pedalee de forma regular y con un esuerzo cons- tiempo y el sistema debe volver a “aprender”...
  • Seite 194: Bases Legales

    2 Bases legales 3 Particularidades de la Pedelec con propulsión Impulse La Pedelec nació con la idea de poder recorrer también distancias largas de un modo rápido y cómodo a la vez. Su Pedelec presenta algunas particularidades pensadas Puede optar: entre disrutar de la asistencia y pedalear para su confort y seguridad.
  • Seite 195 Esto es posible únicamente en el modo manual del buje NuVinci Harmony, y no es recomendable en el modo ERGO. PROPULSIÓN IMPULSE OTRO MOTOR CENTRAL MAR- VUELTAS DE VELOCIDAD R.P.M. DEL VUELTAS DE VELOCIDAD R.P.M. DEL LAS BIELAS/MIN (KM/H) MOTOR LAS BIELAS/MIN (KM/H) MOTOR...
  • Seite 196: Carga De La Batería

    4 Carga de la batería Extracción de la batería 1. Sujete la batería por el asa, introduzca la llave en la cerradura y gírela en sentido antihorario. La batería está ahora desbloqueada. Puede cargar la batería mientras permanece en la Pedelec ( ¡ capítulo 1 “Guía rápida”). Desbloqueo de la batería 2.
  • Seite 197: Ciclo Adaptativo

    Ciclo adaptativo de cubrir el cargador. Sólo de este modo puede eva- cuarse el aire caliente generado durante el proceso de carga por las ranuras de ventilación situadas a lo largo de todo el contorno. 3. Enchufe el conector del cargador a la estación de car- ga.
  • Seite 198: Montaje De La Batería

    5 Dispositivo de mando y visualizador No está permitido recargar ni seguir utilizando las baterías deterioradas. Funciones básicas La batería se calienta durante el proceso de carga. La temperatura máxima es de 45 °C. Si la Dispositivo de mando batería supera esa temperatura, interrumpa de inmediato el proceso de carga.
  • Seite 199: Conexión/Desconexión

    Visualizador 5.1.1 Conexión/desconexión Pulse la tecla "Power" para conectar el sistema Impulse. Después de conectarse, el sistema se encuentra siempre en el modo de indicación que presentaba al ser desconec- tado. Si no percibe ninguna asistencia, pedalee brevemente Velocidad de marcha hacia atrás y de nuevo hacia delante para que se lleve Modo de asistencia a cabo la comprobación del sistema.
  • Seite 200: Teclas Para La Intensidad De La Asistencia Del Motor

    5.1.3 Teclas para la intensidad de la intensidad con la que su batería está cargada en ese mo- mento. Cuanto menor sea el nivel de carga de la batería, asistencia del motor menos segmentos se muestran: • Con las teclas de lecha puede regular la intensidad INDICADOR NIVEL DE CARGA DE LA BATERÍA de la asistencia del motor.
  • Seite 201: Diagnóstico Y Solución De Fallos

    Coniguración y programación del 5.1.7 Diagnóstico y solución de fallos visualizador Tiene la posibilidad de alternar entre las diferentes indi- caciones en el campo de información (también llamado “Menú principal”), pulsando para ello la tecla "Set". Si su Pedelec ha permanecido mojada durante un Si mantiene pulsada la tecla "Set", accederá...
  • Seite 202: Coniguración

    Para seleccionar las opciones secundarias del menú, ahora la tecla "Set" para conirmar su selección y regresar use las dos teclas de lecha en el dispositivo de mando. después a las opciones secundarias del menú. Si desea conirmar su selección, pulse la tecla "Set". Se muestran los respectivos contenidos.
  • Seite 203: Unidad

    5.2.2.5 Unidad 5.2.2.8 Sotware En la opción secundaria “Unidad” tiene la posibilidad de Bajo la opción secundaria “Sotware” puede acceder a las seleccionar si preiere visualizar los datos referentes al opciones secundarias “Versión” y “Actualización”, selec- trayecto recorrido y la velocidad en kilómetros (km) o en cionándolas con las teclas de lecha en el dispositivo de millas (mi).
  • Seite 204: Consumo De Combustible

    5.2.3.2 Costes eléctricos 5.2.4.1 Pulso meta La opción secundaria “Costes eléctricos” le permite indi- La opción secundaria “Pulso meta” le permite conigurar car el precio de la electricidad en céntimos (ct). Para ello, el pulso meta ideal para usted. Usando las dos teclas de puede ajustar un valor de 0 a 99 céntimos en etapas de 1 lecha en el dispositivo de mando, puede ajustarlo en un céntimo usando las dos teclas de lecha en el dispositivo...
  • Seite 205: Pulso De Alerta

    6 Cambio NuVinci Harmony 5.2.4.2 Pulso de alerta La opción secundaria “Pulso de alerta” le permite con- Una vez que utilice el puño giratorio o inicie la marcha, el igurar el pulso de alerta ideal para usted. Usando las cambio NuVinci Harmony entra en uncionamiento. dos teclas de lecha en el dispositivo de mando, puede Seleccione si desea utilizar el cambio NuVinci Harmony en ajustarlo en un valor entre “pulso meta +5”...
  • Seite 206: Modo Manual

    Modo manual Ajuste la recuencia de pedaleo deseada mediante el puño giratorio. Puede seleccionar entre 12 recuencias de pedaleo diferentes. Cuanto más mueva el puño giratorio hacia delante, mayor será la recuencia de pedaleo. El número de barras iluminadas en naranja aumenta. Cuanto más mueva el puño giratorio hacia atrás, menor será...
  • Seite 207: Asistencia Del Motor Eléctrico

    7 Asistencia del motor eléctrico • El nivel de asistencia seleccionado. En el modo de asistencia POWER, el motor le asiste con la máxima potencia, pero también consume la mayor cantidad de energía. Si pedalea en el Modo de uncionamiento de la modo SPORT, el motor le entrega algo menos de asistencia potencia.
  • Seite 208: Modos De Asistencia

    Modos de asistencia La propia batería ya se calienta lo bastante debido a su descarga durante el uncionamiento del motor, Usted mismo puede seleccionar entre los modos de asis- como para perder demasiada potencia en entornos tencia ERGO, POWER, SPORT y ECO ( capítulo 5.1.4 “In- ríos.
  • Seite 209: Conducción Económica De La Pedelec

    Conducción económica de la 8 Batería Pedelec Su batería es una batería de iones de litio, el modelo de batería más idóneo para esta aplicación. Usted mismo puede controlar e inluir en los costes de sus salidas con la Pedelec. Si sigue los consejos para alcanzar Una de las principales ventajas de esta batería es su esca- una gran autonomía, reducirá...
  • Seite 210: Ciclo Adaptativo

    8.1.1 Ciclo adaptativo tras un corto trayecto. Para evitar una descarga total, la gestión de la batería conecta la batería en modo de repo- so. Esto puede tener lugar después de períodos de inac- tividad cuya duración varía en unción del nivel de carga de la batería, produciéndose antes en caso de bajo nivel de carga y después, cuando la carga sea alta.
  • Seite 211: Sistema De Información De La Batería

    res se alarga el tiempo de carga; a temperaturas NIVEL DE CARGA DE LA INDICADOR por encima de +30 °C no se carga la batería. Si la BATERÍA temperatura exterior es baja, se aconseja cargar ••••• 5 LED encendidos 100 – 84 % y guardar la batería en la vivienda o en un gara- je caliente.
  • Seite 212: Comprobar La Capacidad De La Batería

    8.4.2 Comprobar la capacidad de la batería a desgaste como la transmisión o los renos suran una mayor solicitación que en una bicicleta normal. Las piezas Si presiona el pulsador rojo durante cinco segundos, los suren un mayor desgaste debido a que las uerzas que diodos luminosos le indicarán la capacidad actual de la actúan sobre ellas también son superiores.
  • Seite 213: Transporte Y Envío De La Batería

    Para prolongar la vida útil de la batería, cárgue- 8.6.1.2 La bicicleta eléctrica en el ferrocarril • la al completo después de cada uso, por muy Puede llevar consigo su bicicleta eléctrica en trenes breve que este sea. La batería de iones de litio identiicados con el símbolo de una bicicleta.
  • Seite 214: Eliminación De La Batería Como Residuo

    Eliminación de la batería como 9 Cargador residuo Antes de utilizar el cargador por primera vez, lea las pla- cas de características que iguran en el mismo. Las baterías no se deben desechar junto con la basura doméstica. Los usuarios están obligados por ley a entre- Su Pedelec con propulsión Impulse puede cargarse direc- gar las baterías usadas o deterioradas en los puntos de tamente a través de una hembrilla de carga situada en la...
  • Seite 215: Limpieza

    10 Limpieza No utilice ningún otro cargador. Utilice exclusivamen- te el cargador incluido en el suministro u otro autori- zado por nosotros para cargar su batería. Para limpiar la Pedelec, retire antes la batería del soporte. • Cuando se presenta un fallo de carga, el LED del cargador parpadea en color rojo.
  • Seite 216: Limpieza Del Dispositivo De Mando

    10.4 Limpieza del dispositivo de mando El dispositivo de mando se puede limpiar en caso necesa- rio con un paño húmedo. 10.5 Limpieza del cinturón de pecho Limpie el cinturón de pecho de forma regular con agua o una solución jabonosa suave. 11 Datos técnicos MOTOR Motor eléctrico sin escobillas con engranaje y piñón libre...
  • Seite 217 Deseamos que disrute mucho durante el uso de su nueva Pedelec Impulse Ergo. Copyright © 2013 Derby Cycle Werke GmbH / Raleigh Univega GmbH Reimpresión, incluso parcial, sólo con la autorización de Derby Cycle Werke GmbH / Raleigh Univega GmbH. Salvo erratas de imprenta, errores y modiecaciones técnicas.
  • Seite 218 Návod na obsluhu Pedelec Impulse Ergo Slovensky...
  • Seite 219 Ovládacia jednotka Displej Radenie Nu Vinci Harmony Nabíjačka a nabíjacia základňa Hrudný pás Ovládacia jednotka Displej Radenie Nu Vinci Harmony 4a. Nabíjačka 4b. Nabíjacia základňa 5a. Batéria Hrudný pás Motor VI Návod na obsluhu | Pedelec Impulse Ergo...
  • Seite 220 Vážené zákazníčky, vážení zákazníci, Ak sa chcete vydať na svoju prvú jazdu ihneď, prečítajte si najprv bezpodmienečne, kvôli ďakujeme vám, že ste sa rozhodli pre náš bicykel Pedelec svojej bezpečnosti, starostlivo oddiel v kapitole Impulse Ergo z obchodu Derby Cycle! Tento bicykel vás 1 "Rýchly štart"...
  • Seite 221 VAROVANIE deťom. Elektrické prístroje nepatria rúk Pedelec pracuje s nízkym napätím (36 V). V prítomnosti detí buďte obzvlášť opatrní, najmä ak Nepokúšajte nikdy bicykel Pedelec by mohli strčiť rôzne predmety otvoreným krytom do prevádzkovať s iným zdrojom napätia než je vhodná...
  • Seite 222 Odporúčanie Vylúčenie zo záruky Otázka: Aká je predpokladaná oblasť použitia Pedelec V následne popísanom texte sa jedná iba o odporúčania. Nároky na záruku, ktoré sa vzťahujú na škody, ktoré boli Impulse Ergo spôsobené užívaním či nerešpektovaním poskytnutých informácií, sú v zásade vylúčené. Predpokladaná...
  • Seite 223 Obsah Varovanie Ovládacia jednotka a displej Odporúčanie Vylúčenie zo záruky Obsah 1 Rýchly štart Jazda v režime podpory ERGO Základné funkcie Diagnóza chýb 5.1.1 Zapnutie/ vypnutie Režim podpory ERGO 5.1.2 Pomoc pri tlačení 2 Zákonné ustanovenia 5.1.3 Tlačidlá sily podpory Motorom Význam pre cyklistov 3 Zvláštnosti bicykla Pedelec...
  • Seite 224 Informačný systém batérie 5.2.3 Údaje o nákladoch 8.4.1 Kontrola stavu nabitia batérie 5.2.3.1 Cena pohonných hmôt 8.4.2 Kontrola kapacity batérie 5.2.3.2 Náklady na elektrinu Životnosť a záruka 5.2.3.3 Spotreba pohonných hmôt 8.5.1 Životnosť a záruka pohonu 5.2.3.4 Druh pohonných hmôt 8.5.2 Životnosť...
  • Seite 225: Rýchly Štart

    Rýchly štart Ak ste batériu nabíjali v nabíjacej základni, nasaďte ju z ľavej strany Pedelec späť do držiaka. Pritom držte batériu naklonenú smerom von pod uhlom 45°, rovnako Pred prvou jazdou batériu úplne nabite. Skladovacia tak ako ste ju predtým vybrali. Posúvajte batériu do teplota: 0°...
  • Seite 226: Jazda V Režime Podpory Ergo

    Akonáhle sa zobrazuje pulz, môžete sa pustiť do ďalšieho nastavenia Od prvej chvíle máte už plnú podporu. Je to nezvyklé, ale komfortné. Cvičte rozbiehanie na bezpečnom mieste skôr, než sa vydáte do rušných ulíc Jazda v režime podpory ERGO Riaďte sa krokmi 1. až 9. v kapitole 1 "Rýchly štart “.
  • Seite 227 Teraz môžete nastaviť a.) Sollpuls (ideálny pulz) alebo Frekvencia tepu sa u každého človeka líši. b.) Warnpuls (varovný pulz). Navigujte pomocou tlačidiel so šípkami k požadovanému bodu a stlačte Odchýlky sa udávajú napríklad pri ochorení tlačidlo "Set" (napr. poruchy štítnej žľazy), alebo pri užívaní liekov tachykardiu (napr.
  • Seite 228 Ak stlačíte tlačidlo "Set", dostanete sa zase k ďalším položkám v menu Ak stojíte, nemôžete opätovne radiť z minimálnej na maximálnu nášľapnú frekvenciu, ani obrátene. To možno len počas jazdy Teraz sa môžete rozbehnúť ako na normálnom bicykli. Podpora motorom začne fungovať, akonáhle šliapnete do pedálov Teraz sa môžete pustiť...
  • Seite 229: Diagnóza Chýb Režim Podpory Ergo

    Vďaka dlhšej, rovnomernej jazde, sa ERGO- Dbajte na nasledujúce pokyny, aby ste sa vyhli silným Systém naučí váš štýl jazdy a nastaví sa primerane krátkodobým zmenám srdcovej frekvencie k vášmu osobnému štýlu jazdy a reakcii vášho pulzu. K tomu potrebuje trocha času a musí sa to Šliapte rovnomerne, s rovnomerným úsilím pri nových nastaveniach ERGO systému znovu "učiť".
  • Seite 230: Zákonné Ustanovenia

    2 Zákonné ustanovenia 3 Zvláštnosti bicykla Pedelec s pohonom Impulse Základná myšlienka Pedelec je prejsť aj väčšie vzdiale- nosti plynulo a napriek tomu komfortne. Máte možnosť užívať si podpory a uvoľnene šliapať do pedálov, športovo Bicykel Pedelec vykazuje zvláštnosti, ktoré slúžia vášmu bezpečiu a komfortu sa pohybovať...
  • Seite 231 To ide samozrejme iba pri ručnej prevádzke náboja NuVinci Harmony a neodporúča sa pre režim ERGO. IMPULZNÝ POHON INÝ STREDOVÝ MOTOR RÝCHLOSŤ OTÁČKY RÝCHLOSŤ OTÁČKY MOTOR- MOTOR- STUPEŇ OTÁČKY OTÁČKY PEDÁLU / MIN (KM / H) PEDÁLU / MIN (KM / H) 4.300 3.000 4.300...
  • Seite 232: Nabíjanie Batérie

    4 Nabíjanie batérie Odpojenie batérie Uchopte batériu za držadlo, zasuňte kľúč do zámky a otočte proti smeru hodinových ručičiek. Teraz je batéria uvoľnená Batériu môžete nabíjať aj keď zostáva v Pedelec (Kapitola 1 "Rýchly štart Uvoľnenie batérie 2. Vyklopte batériu z bicykla Pedelec do strany. Položte ju na vhodnú...
  • Seite 233: Cyklus Výuky

    Nabíjačku neprikrývajte. Len tak môže ohriaty vzduch Cyklus výuky počas procesu nabíjania unikať vetracími otvormi Spojte zástrčku nabíjačky s nabíjacou základňou. LED ukazovatele v nabíjačke zasvieti krátko na červeno a potom svieti trvale zeleno Potom, čo ste batériu prvýkrát kompletne dobili, následne asi raz za pol roka musíte ísť...
  • Seite 234: Pripojenie Batérie

    5 Ovládacia jednotka a displej Poškodené batérie sa nesmú nabíjať ani ďalej používať Základné funkcie Batéria priebehu nabíjania môže Ovládacia jednotka zahrievať. Prípustné zahriatie, ktoré nepresahuje teplotu 45°C. Ak dôjde k vyššiemu ohrevu, okamžite prerušte nabíjanie Pripojenie batérie Vložte batériu z ľavej strany, naklonenú smerom von asi pod uhlom 45°, do držiaka batérie Pedelec.
  • Seite 235: Zapnutie/Vypnutie

    Displej 5.1.1 Zapnutie/vypnutie Stlačením vypínača "Power" zapnete impulzný systém. Po zapnutí sa systém nachádza v rovnakom režime údajov, v ktorom ste ho vypli Ak necítite žiadnu podporu, šliapnite krátko späť a Rýchlosť jazdy zase dopredu, aby sa vykonala kontrola systému. Režim podpory Ak ani teraz nie je poskytovaná...
  • Seite 236: Tlačidlá Sily Podpory

    5.1.3 Tlačidlá sily podpory motorom INDIKÁTOR STAV NABITIA BATÉRIE 100 – 85,5% Tlačidlami so šípkami môžete nastaviť silu • podpory motorom 85,5 – 71,5% Každým stlačením šípky meníte silu podpory • motorom o jeden stupeň 71,5 – 57,5% Ak sa dotknete hornej šípky, je podpora každým •...
  • Seite 237: Diagnóza Chýb A Ich Odstránenie

    5.1.7 Diagnóza chýb a ich odstránenie Nastavenie a programovanie displeja Stlačením tlačidla "Set" môžete prepínať medzi rôznymi ukazovateľmi v informačnom poli (nazývanom tiež "menu/ ponuka"). Ak držíte tlačidlo "Set" dlhšiu dobu, dostanete sa Ak bol bicykel Pedelec dlhšiu dobu vystavený vode, napríklad pri jazde v silnom daždi alebo pri veľkých z každého ľubovoľného ukazovatele v informačnom poli teplotných rozdieloch, môže sa plocha displeja orosiť.
  • Seite 238: Vymazanie Dát Jednotlivej Jazdy/ Vymazanie Celkových Dát

    Tlačidlami so šípkami na ovládacej jednotke môžete voliť sa potom späť na zobrazenie položiek v menu jednotlivé položky ponuky. Stlačením tlačidla "Set" potvrďte svoju voľbu. Budú sa vám zobrazovať aktuálne obsahy. Aby ste sa ukazovateľu dostali položiek ponuky zasa 5.2.2.2 Jas informačného poľa, tj.
  • Seite 239: Jednotka

    5.2.2.5 Jednotka 5.2.2.8 Sotware U položky "jednotka" si môžete zvoliť, či sa údaje majú V položke "Sotware" sa dostanete k podrozdeleniam verzia zobrazovať vzťahu ("Version") a aktualizovať ("Update"), ktoré môžete navoliť vzdialenosti rýchlosti v kilometroch (km) alebo v míľach (mi). Tlačidlom so šípkou tlačidlami so šípkami na obslužnom prvku na obslužnom prvku si vyberiete voľbu "km"...
  • Seite 240: Ergo Nastavenie

    5.2.3.2 Náklady na elektrinu 5.2.4.1 Ideálny pulz V položke ideálny pulz ("Sollpuls") si môžete nastaviť pre V položke náklady na elektrinu ("Stromkosten") môžete zadať cenu elektriny v centoch. Túto môžete nastaviť vás ideálny pulz. Tento nastavíte stlačením tlačidiel so stlačením tlačidiel so šípkami na obslužnom prvku na šípkami na obslužnom prvku na hodnotu od 40 do 240.
  • Seite 241: Varovný Pulz

    6 Radenie NuVinci Harmony 5.2.4.2 Varovný pulz V položke varovný pulz ("Warnpuls") si môžete nastaviť Akonáhle začnete s ovládaním otočnej rukoväte alebo sa pre vás optimálny varovný pulz. Tento môžete nastaviť rozbiehate, radenie NuVinci Harmony sa zapne stlačením tlačidiel so šípkami na ovládacej jednotke na hodnotu "Sollpuls +5"...
  • Seite 242: Ručná Prevádzka

    Ručná prevádzka Nastavte na otočnej rukoväti požadovanú nášľapnú frekvenciu. Môžete voliť medzi 12 rôznymi nášľapnými frekvenciami. Ak otáčate rukoväťou dopredu, nášľapná frekvencia je rýchlejšia. Počet oranžovo svietiacich políčok stúpa. Ak otáčate rukoväťou späť, nášľapná frekvencia je pomalšia. Počet oranžovo svietiacich políčok klesá. Oranžové...
  • Seite 243: Podpora Elektromotorom

    Akú podporu ste si zvolili. Podpora elektromotorom • V režime podpory POWER vám motor pomáha najvyšším výkonom, spotrebováva ale tiež najviac energie. Ak idete v režime SPORT, podáva motor o niečo menší výkon. Spôsob fungovania podpory Ak zvolíte ECO, ste podporovaní najmenej, máte ale za to najdlhší...
  • Seite 244: Režim Podpory

    Batéria sa vďaka vybíjaniu za prevádzky motora Režim podpory zahrieva dostatočne, tak aby ani pri nízkej vonkajšej teplote nestrácala príliš rýchlo na Môžete si sami vybrať z týchto režimov podpory: ERGO, výkone. Teplota vybíjania článkov akumulátora POWER, SPORT a ECO (Kapitola 5.1.4 – „Ukazovateľ môže činiť...
  • Seite 245: Úsporná Jazda Na Bicykli Pedelec

    Úsporná jazda na bicykli Pedelec 8 Batéria Náklady svojich jázd na bicykli Pedelec môžete sami Vaša batéria je lítium-iónová batéria, ktorá je najvhod- kontrolovať a ovplyvňovať. Keď zohľadníte rady pre dlhý nejšou formou batérie pre toto použitie dojazd, znížite aj cenu spotreby a tým aj náklady Hlavnou výhodou tejto batérie je nízka hmotnosť...
  • Seite 246: Výukový Cyklus

    To sa môže stať po rôzne dlhých dobách bez používania. 8.1.1 Výukový cyklus Nezávisle na stave nabitia batérie sa to môže stať pri nižšom stave nabitia skôr a pri vyššom nabití neskôr. Najneskôr po 10 dňoch bez používania batérie aktivuje management režim spánku.
  • Seite 247: Informačný Systém Batérie

    Pri nižších vonkajších teplotách sa odporúča INDIKÁTOR STAV NABITIA BATÉRIE nabíjať a skladovať batériu doma alebo v teplej garáži. Nasaďte ju v týchto prípadoch na 5 LED svieti 100 – 84% ••••• bicykel až krátko pred použitím 4 LED svietia 83 –...
  • Seite 248: Kontrola Kapacity Batérie

    dodatočnému 8.4.2 Kontrola kapacity batérie Kvôli výkonu sú diely podliehajúce opotrebovaniu, ako je pohon a brzdy, viac namáhané ako u normálneho bicykla. Kvôli väčšiemu pôsobeniu sily sa Keď na päť sekúnd stlačíte červené tlačidlo "Push", diely opotrebovávajú silnejšie znázornia vám svietiace diódy momentálnu kapacitu batérie 8.5.2 Životnosť...
  • Seite 249: Doprava A Zasielanie Batérií

    Životnosť batérie predĺžite aj tým, že ju aj • 8.6.1.2 E-Bike vo vlaku po krátkom používaní znovu do plna Bicykel môžete prevážať vo vlakoch, ktoré sú označené nabijete. Impulzne-iónová batéria nemá pamäťový efekt (Memory-Efekt symbolom bicykla. Vo vlakoch IC a EC je pre prepravu povinná rezervácie. Vo vlakoch ICE nie je v zásade možné...
  • Seite 250: Likvidácia Batérií

    9 Nabíjačka Likvidácia batérií Pred prvým použitím nabíjačky si prečítajte pozorne Batérie nepatria do domového odpadu. Spotrebitelia majú zákonnú povinnosť použité alebo poškodené batérie informácie na štítku s technickými údajmi odovzdať na určených zberných miestach (zberné miesto batérií alebo v predajni Svoj Pedelec s pohonom Impulse môžete nabíjať...
  • Seite 251: Čistenie

    10 Čistenie Nepoužívajte žiadne iné nabíjačky. Nabíjajte batériu výhradne s dodávanou alebo nami zaslanou nabíjačkou Pred čistením Pedelec vyberte prosím z bicykla batériu Ak dôjde k chybe pri nabíjaní, bliká LED svetlo • v nabíjačke červeno. V tomto prípade je nabíjací Pri všetkých čistiacich procesoch nepoužívajte prúd príliš...
  • Seite 252: Čistenie Displeja

    10.3 Čistenie displeja Čistenie krytu displeja sa smie vykonávať iba vlhkou (nie mokrou) handričkou 10.4 Čistenie obslužného prvku Obslužný prvok sa smie čistiť iba vlhkou handričkou 10.5 Čistenie hrudného pásu Čistite hrudný pás pravidelne vodou alebo jemným mydlo- vým roztokom 11 Technické...
  • Seite 253 Prajeme Vám veľa radosti pri používaní bicykla Pedelec s pohonom Impulse Ergo. Dotlač, aj čiastočná, je možná len s povolením spoločnosti Derby Cycle Werke GmbH / Raleigh Univega GmbH. Chyby v tlači, omyly a technické zmeny vyhradené...
  • Seite 254 Návod k použití Pedelec Impulse Ergo Česky...
  • Seite 255: Ovládací Jednotka

    Ovládací jednotka Řazení NuVinci Harmony Displej Hrudní pás Nabíječka a nabíjecí základna 1. Ovládací jednotka 2. Displej 3. Řazení NuVinci Harmony 4a. Nabíječka 4b. Nabíjecí základna 5a. Baterie 6. Hrudní pás 7. Motor...
  • Seite 256 Vážené zákaznice, vážení zákazníci, I kdybyste hned chtěli vyrazit na svou první jízdu, přečtěte si bezpodmínečně předem, kvůli své děkujeme vám, že jste se rozhodlit pro náš Pedelec Impulse bezpečnosti, pečlivě oddíl v kapitole 1 „Rychlý Ergo od firmy Derby Cycle! Toto kolo vás bude během jízdy start“.
  • Seite 257 Varování Elektrické přístroje nepatří do rukou dětem. Dbejte Pedelec pracuje s nízkým napětím (36 V). v přítomnosti dětí zvláštní opatrnosti, především Nepokoušejte se nikdy Pedelec provozovat s jiným pokud by mohly strčit různé předměty otevřeným zdrojem napětí než je vhodná originální baterie. krytem do přístroje.
  • Seite 258: Vyloučení Záruky

    Doporučení Vyloučení záruky V následně popsaném textu se jedná pouze o doporučení. Otázka: Jaká je předpokládaná oblast použití Nároky na záruku, jež se vztahují na škody, které byly Pedelecu Impulse Ergo? způsobeny užíváním či nerespektováním poskytnutých Předpokládaná oblast použití je informacích, jsou v zásadě...
  • Seite 259 Obsah Varování Ovládací jednotka a displej Doporučení Vyloučení záruky Obsah 1 Rychlý start Jízda v režimu podpory ERGO Základní funkce Diagnóza chyb 5.1.1 Vypnutí / Zapnutí Režim podpory ERGO 5.1.2 Pomoc při tlačení 2 Zákonná ustanovení 5.1.3 Tlačítka pro sílu podpory Význam pro jezdce motorem Ukazatel režimu podpory...
  • Seite 260 Údaje o nákladech Informační systém baterie 5.2.3 5.2.3.1 Cena pohonných hmot 8.4.1 Kontrola stavu nabití baterie Náklady na proud 5.2.3.2 8.4.2 Kontrola kap acity Spotřeba pohonných hmot Životnost a záruka 5.2.3.3 Druh pohonných hmot 5.2.3.4 8.5.1 pohonu ERGO nastavení 5.2.4 8.5.2 baterie Ideální...
  • Seite 261: Rychlý Start

    1 Rychlý start 6. Pokud jste baterii nabíjeli v nabíjecí základně, nasaďte baterii z levé strany Pedelecu zpět do držáku. Přitom 1. Před první jízdou nabijte plně baterii. Skladovací držte baterii nakloněnou směrem ven pod úhlem teplota: 0° C – 45° C. 45°, stejně...
  • Seite 262: Jízda V Režimu Podpory Ergo

    Jakmile se zobrazuje puls, můžete se pustit do dalšího nastavení. Od první chvíle máte již plnou podporu. Je to nezvyklé, ale komfortní. Cvičte rozjíždění na bezpečném místě, dřív než se rozjedete do rušných ulic. Jízda v režimu podpory ERGO 1. Řiďte se kroky 1. až 9. v kapitole 1 „Rychlý start“. 2.
  • Seite 263 Nyní si můžete nastavit jak a.Sollpuls ( ideální puls) tak Tepová frekvence se liší člověk od člověka. Odchylky se b. Warnpuls (varovný puls). Navigujte pomocí tlačítek se udávají např. při onemocnění (např. poruchy štítné žlázy), šipkami k požadovanému bodu a stiskněte tlačítko „Set“. anebo při užívání...
  • Seite 264 7. Stisknete-li tlačítko“Set“, dostanete se zase k podbodům v menu. Při stání nemůžete přeřazovat z minimální na maximální nášlapnou frekvenci ani obráceně. To lze pouze během jízdy. 11. Nyní se můžete rozjet jako na normálním kole. Podpora motorem začne fungova, jakmile šlápnete do pedálů. 8.
  • Seite 265: Diagnóza Chyb Režim Podpory Ergo

    Díky delší, rovnoměrné jízdě, se ERGO-Systém Dbejte na následující pokyny, abyste se vyhnuli naučí váš styl jízdy a nastaví se lépe na váš osobní silným krátkodobým změnám srdeční frekvence: jízdní styl a reakci vašeho pulsu. K tomu potřebuje Šlapejte rovnoměrně se stejnoměrným trochu času a musí...
  • Seite 266: Zákonná Ustanovení

    2 Zákonná ustanovení 3 Zvláštnosti Pedelecu s pohonem Impulse Základní myšlenka Pedelecu je moci urazit i větší vzdálenosti plynule a přesto komfortně. Máte možnost Váš Pedelec vykazuje zvláštnosti, které slouží vašemu užívat si podpory a uvolněně šlapat do pedálů, sportovně bezpečí...
  • Seite 267 To jde samozřejmě jen v ručním provozu náboje NuVinci Harmony a nedoporučuje se pro režim ERGO. JINÝ STŘEDOVÝ MOTOR IMPULSNÍ POHON OTÁČKY PEDÁDLU OTÁČKY RYCHLOST­ MOTOR / RYCHLOST MOTOR/ STUPEŇ OTÁČKY (KM / H) PEDÁLU / MIN OTÁČKY (KM / H) 4.300 3.000 4.300...
  • Seite 268: Nabíjení Baterie

    4.1 Vyjmutí baterie 4 Nabíjení baterie 1. Uchopte baterii za držadlo, zasuňte klíč do zámku a otočte proti směru hodinových ručiček. Nyní je baterie uvolněna. Můžete nabíjet svou baterii, i když zůstává v Pedelecu (Kapitola 1 „Rychlý start“). Uvolnění baterie 2.
  • Seite 269: Výukový Cyklus

    Nabíječku nepřikrývejte. Jen tak může ohřátý vzduch Výukový cyklus během procesu nabíjení unikat větracími otvory. 3. Spojte zástrčku nabíječky s nabíjecí základnou. LED ukazatele v nabíječce zasvítí krátce červeně a poté svítí trvale zeleně. Poté, co jste baterii poprvé kompletně dobili a následně asi jednou za půl roku musíte jet až...
  • Seite 270: Ovládací Jednotka A Displej

    5. Ovládací jednotka a displej Poškozené baterie nesmí být nabíjeny ani dále používány. 5.1 Základní funkce Baterie se v průběhu nabíjení může zahřívat. Ovládací jednotka Přípustné je zahřátí, které nepřesahuje teplotu 45°. Jestliže dojde k vyššímu ohřevu, okamžitě přerušte nabíjení. Nasazení...
  • Seite 271: Pomoc Při Tlačení

    5.1.1 Zapnutí- / Vypnutí Displej Stisknutím tlačítka „Power“ zapnete impulsní systém. Po zapnutí se systém nachází ve stejném režimu údajů, ve kterém jste jej vypnuli . Pokud necítíte žádnou podporu, šlápněte krátce zpět a zase dopředu, aby se provedla kontrola systému. Rychlost jízdy Režim podpory Pokud ani nyní...
  • Seite 272: Motorem

    5.1.3 Tlačítka síly podpory motorem UKAZATEL STAV BATERIE • Tlačítky se šipkami můžete nastavit sílu podpory 100 – 85,5% motorem. • Každým stisknutím šipky měníte sílu podpory 85,5 – 71,5% motorem o jeden stupeň. 71,5 – 57,5% • Dotknete-li se horní šipky, je podpora každým stisknutím o jeden stupeň...
  • Seite 273: Diagnóza Chyb A Jejich Odstranění

    5.1.7 Diagnóza chyb a jejich odstranění Nastavení a programování displeje Stisknutím tlačítka „Set“ můžete přepínat mezi různými ukazateli v informačním poli (nazývaném též „menu/nabídka“). Pokud byl váš Pedelec delší dobu vystaven vodě, např. při Pokud držíte tlačíto „Set“ delší dobu, dostanete se jízdě...
  • Seite 274: Nastavení Přístroje

    bude bezprostředně provedena. Stisknutím tlačítka S oběma tlačítky se šipkami na ovládací jednotce můžete „ Set“ svou volbu potvrdíte a dostanete se poté zpět zase navolit podbody nabídky. Stlačením tlačítka „Set“potvrďte k zobrazení podbodů v menu. svoji volbu. Budou se vám zobrazovat aktuální obsahy. Abyste se dostali z podbodů...
  • Seite 275: Jednotka

    5.2.2.5 Jednotka 5.2.2.8 Sotware U podbodu „jednotka“ si můžete zvolit, zda se údaje mají V podbodu „Sotware“ se dostanete k podbodům „Version“ zobrazovat ve vztahu k ujeté vzdálenosti a rychlosti v (verze) a „Update“, které můžete navolit tlačítky se šipkami kilometrech (km) nebo v mílích (mi).
  • Seite 276: Ergo Nastavení

    5.2.4.1 Ideální puls 5.2.3.2 Náklady na elektřinu V podbodu „Sollpuls“ (ideální puls) si můžete nastavit pro V podbodu „Stromkosten“ (náklady na elektřinu) můžete vás ideální puls. Tento nastavíte stisknutím obou tlačítek se zadat cenu elektřiny v centech. Tuto můžete nastavit šipkami na obslužném prvku na hodnotu od 40 d o 240.
  • Seite 277: Varovný Puls

    6 Řazení NuVinci Harmony 5.2.4.2 Varovný puls V podbodu „Warnpuls“ (varovný puls) si můžete Jakmile ovládnete otočnou rukojeť anebo se rozjíždíte, nastavit pro vás optimální varovný puls. Tento můžte řazení NuVinci Harmony se zapne. nastavit stisknutím obou tlačítek se šipkami na ovládací jednotce na hodnotu „Sollpuls +5“...
  • Seite 278: Ruční Provoz

    Ruční provoz Nastavte si na otočné rukojeti požadovanou nášlapnou frekvenci. Můžete volit mezi 12 různými nášlapnými frekvencemi. Čím více otáčíte rukojetí dopředu, tím je rychlejší nášlapná frekvence. Počet oranžově svítících políček stoupá. Čím více otáčíte rukojetí zpět, tím pomalejší nášlapná frekvence je. Počet oranžově svítících políček klesá. Oranžové LED znázorňují přesné...
  • Seite 279: Podpora Elektromotorem

    • Jakou podporu jste si zvolili. 7 Podpora elektromotorem V režimu podpory POWER vám motor pomáhá nejvyšším výkonem, spotřebovává ale také nejvíce energie. Jedete-li v režimu SPORT, podává motor o Způsob fungování podpory něco menší výkon. Zvolíte-li ECO, jste podporováni nejméně, máte ale za to nejdelší...
  • Seite 280: Dojezd

    Režim podpory Baterie se díky vybíjení za provozu motoru zahřívá dostatečně, tak, aby ani při nízké venkovní teplotě neztrácela příliš rychle na výkonu. Vybíjecí teplota Můžete si sami vybrat z těchto režimů podpory:ERGO, článků baterie může činit -15° C až +60° C. To je POWER, SPORT a ECO (Kapitola 5.1.4 - Ukazatel režimu oblast teplot, v níž...
  • Seite 281: Úsporná Jízda S Kolem Pedelec

    Úsporná jízda s kolem Pedelec 8 Baterie Náklady svých jízd s kolem Pedelec můžete sami kontrolovat Vaše baterie baterie, která je je lithium-iontová a ovlivňovat. Když zohledníte rady pro dlouhý dojezd, nejvhodnější formou baterie pro toto užití. snížíte i cenu spotřeby a tím i náklady. Hlavní...
  • Seite 282: Výukový Cyklus

    To se může stát po různě dlouhých dobách bez používání. 8.1.1 Výukový cyklus Nezávisle na stavu nabití baterie se to může stát při nižším stavu nabití dříve a při vyšším nabití později. Nejpozději po 10 dnech bez používání baterie aktivuje management režim spánku.
  • Seite 283: Informační Systém Baterie

    Při nižších venkovních teplotách se doporučuje STAV NABITÍ BATERIE UKAZATEL nabíjet a skladovat baterii doma anebo v teplé 5 LED svítí 100 – 84% garáži. Nasaďte ji v těchto případech na kolo až krátce před použitím. 4 LED svítí 83 – 68% 3 LED svítí...
  • Seite 284: Kontrola Kap Acity

    Kvůli dodatečnému výkonu jsou opotřebitelné díly, jako je 8.4.2 Kontrola kapacity baterie pohon a brzdy, více namáhány než u normálního kola. Kvůli většímu působení síly se díly opotřebovávají silněji. Když na pět sekund stisknete červené tlačítko „Push“, znázorní vám svítící diody momentální kapacitu baterie. 8.5.2 Životnost a záruka baterie UKAZATEL KAPACITA...
  • Seite 285: Transport

    Životnost baterie prodloužíte i tím, že ji i po • 8.6.1.2 E-Bike ve vlaku krátkém používání znovu do plna nabijete. Své kolo můžete převážet ve vlacích, které jsou označeny Impulsně- iontová baterie nemá pamětový symbolem kola. Ve vlacích IC a EC je pro přepravu povinná efekt (Memory-Efekt).
  • Seite 286: Likvidace Baterií

    Likvidace baterií 9 Nabíječka Baterie nepatří do domovního odpadu. Spotřebitelé mají Přečtěte si před prvním použitím nabíječky informace na zákonnou povinnost použité či poškozené baterie odevzdat štítku s technickými údaji. na k tomu určených sběrných místech (sběrné místo baterií Svůj Pedelec s pohonem Impulse můžete nabíjet přímo nebo v prodejně).
  • Seite 287: Čištění

    10 Čištění Nepoužívejte žádné jiné nabíječky. Nabíjejte svou baterii výhradně s dodanou nebo námi zaslanou nabíječkou. Před čištěním Pedelecu vyjměte prosím z kola • Pokud dojde k chybě při nabíjení, bliká LED světlo baterii. v nabíječce červeně. V tomto případě je nabíjecí proud Při veškerých čisticích procesech nepoužívejte příliš...
  • Seite 288: Čištění Displeje

    10.3 Čištění displeje Čištění krytu displeje se smí provádět pouze vlhkým (nikoli mokrým) hadříkem. 10.4 Čištění obslužného prvku Obslužný prvek se smí čistit pouze vlhkým hadříkem. 10.5 Čištění hrudního pásu Čistěte hrudní pás pravidelně vodou nebo jemným mýdlovým roztokem. 11 Technické údaje MOTOR Bezkartáčový...
  • Seite 289 Přejeme Vám mnoho radosti při používání kola Pedelc s pohonem Impulse. Dotisk, i částečný, je možný pouze s povolením společnosti Derby Cycle Werke GmbH / Raleigh Univega GmbH. Chyby v tisku, omyly a technické změny vyhrazeny. Derby Cycle Werke GmbH / Raleigh Univega GmbH Siemensstraße 1-3 D-49661 Cloppenburg + 49 (4471) 966-0...

Diese Anleitung auch für:

Pedelesc impuls ergo

Inhaltsverzeichnis