Anmelden
Hochladen
Anleitungen
Marken
Pioneer Anleitungen
Auto Navigationssysteme
AVIC-F550BT
Pioneer AVIC-F550BT Handbücher
Anleitungen und Benutzerhandbücher für Pioneer AVIC-F550BT. Wir haben
2
Pioneer AVIC-F550BT Anleitungen zum kostenlosen PDF-Download zur Verfügung: Installationsanleitung, Kurzanleitung
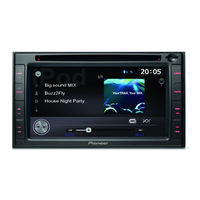
Pioneer AVIC-F550BT Installationsanleitung (136 Seiten)
Navigation AV System
Marke:
Pioneer
| Kategorie:
Auto Navigationssysteme
| Dateigröße: 5.84 MB
Inhaltsverzeichnis
English
2
Inhaltsverzeichnis
2
Precautions
3
Your New Navigation System and this Manual
3
Important Safeguards
3
Handling the Microsd Card
4
Connecting the System Precautions before Connecting the System
5
Before Installing this Product
5
To Prevent Damage
6
Notice for the Blue/White Lead
6
Parts Supplied
7
Connecting the System
8
Connecting the Control Line Cable
10
When Connecting to Separately Sold Power Amp
11
When Connecting a Rear View Camera
12
When Connecting the External Video Component
13
Using an AV Input (AUX)
13
Using an AV Input (USB)
13
When Connecting the Rear Display
14
When Using a Rear Display Connected to Rear Video Output
14
Installation Precautions before Installation
15
Installation
15
Precautions before Installation
15
To Avoid Electromagnetic Interference
15
Before Installing
15
Installing the Navigation System
16
Installation Notes
16
Parts Supplied
16
Before Installing this Navigation Unit
17
Installation Using the Screw Holes on the Side of the Navigation Unit
17
Installing the GPS Aerial
18
Installation Notes
18
Parts Supplied
18
When Installing the Aerial Inside the Vehicle (on the Dashboard or Rear Shelf)
19
Installing the Microphone
20
Parts Supplied
20
Mounting on the Sun Visor
20
Installation on the Steering Column
21
After Installation
22
After Installing this Product
22
Français
23
Importantes Mesures de Sécurité
24
Précautions
24
Votre Nouveau Système de Navigation et Ce Manuel
24
Manipulation de la Carte Microsd
25
Avant D'installer Ce Produit
26
Branchement du Système
26
Précautions à Prendre Avant de Brancher le Système
26
Pour Éviter Toute Détérioration
27
Remarque Concernant le Fil Bleu/Blanc
27
Pièces Fournies
28
Branchement du Système
30
Branchement du Câble de Ligne de Contrôle
32
Branchement D'un Amplificateur de Puissance Vendu Séparément
33
Branchement D'une Caméra de Rétrovisée
34
Branchement D'un Élément VIDéo Externe
35
Utilisation D'une Entrée AV (AUX)
35
Utilisation D'une Entrée AV (USB)
35
Branchement de L'écran Arrière
36
Utilisation D'un Écran Arrière Raccordé à la Sortie VIDéo Arrière
36
Installation
37
Pour Éviter les Parasites Électromagnétiques
37
Précautions à Prendre Avant L'installation
37
Avant de Procéder à L'installation
38
Installation du Système de Navigation
38
Remarques Sur L'installation
38
Pièces Fournies
39
Avant D'installer Cette Unité de Navigation
39
Installation en Utilisant les Trous de Vis Sur les Côtés de Cette Unité de Navigation
39
Installation de L'antenne GPS
40
Remarques Sur L'installation
40
Pièces Fournies
40
Installation de L'antenne Dans le Véhicule (Sur le Tableau de Bord ou la Lunette Arrière)
41
Installation du Microphone
42
Pièces Fournies
42
Installation Sur le Pare-Soleil
42
Installation Sur la Colonne de Direction
43
Après Avoir Installé Ce Produit
44
Après L'installation
44
Italiano
45
Il Nuovo Sistema DI Navigazione E Il Presente Manuale
46
Misure DI Sicurezza Importanti
46
Precauzioni
46
Gestione Della Scheda Microsd
47
Collegamento del Sistema
48
Precauzioni Prima DI Collegare Il Sistema
48
Prima DI Installare Questo Prodotto
48
Per Evitare Danni
49
Informazione Sul Cavetto Blu/ Bianco
49
Parti in Dotazione
50
Collegamento del Sistema
52
Collegamento del Cavo Della Linea DI Controllo
54
Quando si Effettua Il Collegamento a un Amplificatore in Vendita Separatamente
55
Quando si Effettua Il Collegamento a una Telecamera DI Visione Posteriore
56
Quando si Collega Il Componente Video Esterno
57
Uso DI un Ingresso AV (AUX)
57
Uso DI un Ingresso AV (USB)
57
Quando si Collega Il Display Posteriore
58
Quando si Utilizza un Display Posteriore Collegato a Un'uscita Video Posteriore
58
Installazione
59
Per Evitare Disturbi Elettromagnetici
59
Precauzioni Prima Dell'installazione
59
Installazione del Sistema DI Navigazione
60
Note Sull'installazione
60
Parti in Dotazione
61
Prima DI Installare L'unità DI Navigazione
61
Installazione Usando I Fori Delle Viti Sul Lato Dell'unità DI Navigazione
61
Prima Dell'installazione
60
Installazione Dell'antenna GPS
62
Note Sull'installazione
62
Parti in Dotazione
62
Quando si Installa L'antenna All'interno del Veicolo (Sul Cruscotto O Sul Piano Portaoggetti Posteriore)
63
Installazione del Microfono
64
Parti in Dotazione
64
Montaggio Sul Parasole
64
Installazione Sulla Colonna DI Sterzo
65
Dopo L'installazione
66
Dopo L'installazione del Prodotto
66
Español
67
Precauciones
68
Precauciones Importantes
68
Su Nuevo Sistema de Navegación y Este Manual
68
Uso de la Tarjeta Microsd
69
Antes de Instalar Este Producto
70
Conexión del Sistema
70
Precauciones Antes de Conectar el Sistema
70
Para Impedir Daños
71
Aviso para el Cable Conductor Azul/Blanco
71
Piezas Suministradas
72
Conexión del Sistema
74
Conexión del Cable de Línea de Control
76
Conexión al Amplificador de Potencia que Se Vende por Separado
77
Conexión de una Cámara de Retrovisor
78
Conexión del Componente de Vídeo Externo
79
Uso de la Entrada AV (AUX)
79
Uso de la Entrada AV (USB)
79
Conexión de la Pantalla Trasera
80
Uso de una Pantalla Trasera Conectada a la Salida de Vídeo Trasera
80
Instalación
81
Para Impedir que Se Produzcan Interferencias Electromagnéticas
81
Precauciones Antes de la Instalación
81
Antes de la Instalación
82
Instalación del Sistema de Navegación
82
Notas Acerca de la Instalación
82
Piezas Suministradas
83
Antes de Instalar Esta Unidad de Navegación
83
Instalación Utilizando Los Orificios de Tornillo del Lado de la Unidad de Navegación
83
Instalación de la Antena GPS
84
Notas Acerca de la Instalación
84
Piezas Suministradas
84
Cuando Instale la Antena en el Interior del Vehículo (en el Tablero de Instrumentos O en la Bandeja Trasera)
85
Instalación del Micrófono
86
Piezas Suministradas
86
Montaje en el Parasol
86
Instalación en la Columna de Dirección
87
Después de Instalar Este Producto
88
Después de la Instalación
88
Deutsch
89
Ihr Neues Navigationssystem und diese Anleitung
90
Vorsichtsmaßnahmen
90
Wichtige Sicherheitshinweise
90
Handhabung der Microsd-Karte
91
Anschluss des Systems
92
Vor dem Anschließen des Systems zu
92
Vor dem Einbau dieses Produkts
92
Zur Vermeidung von Schäden
93
Anmerkung zum Blau/Weißen Kabel
94
Mitgelieferte Teile
94
Anschluss des Systems
96
Steuerleitungskabel Anschließen
98
Beim Anschluss an den Separat Erhältlichen Leistungsverstärker
99
Beim Anschluss einer Heckkamera
100
Bei Anschluss der Externen Videokomponente
101
Verwendung eines AV-Eingangs (AUX)
101
Verwendung eines AV-Eingangs (USB)
101
Bei Anschluss des Zusätzlichen Displays
102
Bei Verwendung eines Zusätzlichen Displays, das an den Hinteren Videoausgang Angeschlossen ist
102
Einbau
103
Vor der Installation zu Beachten
103
Zur Vermeidung Elektromagnetischen Rauschens
103
Einbau des Navigationssystems
104
Hinweise zur Befestigung
104
Mitgelieferte Teile
105
Vor der Installation der Navigationseinheit
105
Installation mit Hilfe der Schraubenbohrungen an der Seite der Navigationseinheit
106
Vor dem Einbau
104
Einbau der GPS-Antenne
106
Hinweise zur Befestigung
106
Mitgelieferte Teile
106
Einbau der Antenne IM
107
Fahrzeuginnenraum (auf dem Armaturenbrett oder der Hutablage)
107
Einbau des Mikrofons
108
Mitgelieferte Teile
108
Montage an der Sonnenblende
108
Befestigung auf der Lenksäule
109
Nach dem Einbau
110
Nach dem Einbau dieses Produkts
110
Dutch
111
Belangrijke Veiligheidsvoorschriften
112
Uw Nieuwe Navigatiesysteem en Deze Handleiding
112
Voorzorgen
112
Behandeling Van de Microsd-Kaart
113
Systeemcomponenten Aansluiten
114
Voor U Dit Product Inbouwt
114
Voorzorgen Voor Het Aansluiten Van Het Systeem
114
Voorkomen Van Beschadigingen
115
Opmerking over de Blauw/Witte Draad
115
Meegeleverde Onderdelen
116
Systeemcomponenten Aansluiten
118
De Regelsignaalkabel Aansluiten
120
Bij Aansluiting Op Een Los Verkrijgbare Eindversterker
121
Bij Aansluiting Van Een Achteruitkijkcamera
122
Bij Aansluiting Van Een Externe Videocomponent
123
Gebruik Van Een AV-Ingang (AUX)
123
Gebruik Van Een AV-Ingang (USB)
123
Bij Aansluiten Van Het Achterdisplay
124
Bij Gebruik Van Een Achterdisplay Dat Op de Achtervideo-Uitgang Is Aangesloten
124
Inbouwen
125
Voorkomen Van Elektromagnetische Storingen
125
Voorzorgen Voor Installatie
125
Inbouwen Van Het Navigatiesysteem
126
Opmerkingen Betreffende de Installatie
126
Meegeleverde Onderdelen
127
Vóór Het Installeren Van Deze Navigatie-Eenheid
127
Installatie Met Gebruik Van de Schroefgaten Aan de Zijkant Van de Navigatie-Eenheid
127
Voor de Installatie
126
Installeren Van de GPS-Antenne
128
Opmerkingen Betreffende de Installatie
128
Meegeleverde Onderdelen
128
Bevestigen Van de Antenne Binnen in de Auto (Op Het Dashboard of de Hoedenplank)
129
De Microfoon Installeren
130
Meegeleverde Onderdelen
130
Montage Op de Zonneklep
130
Installatie Op Stuurkolom
131
Na de Installatie Van Dit Product
132
Na Installatie
132
Werbung
Pioneer AVIC-F550BT Kurzanleitung (2 Seiten)
navigations-/av-system
Marke:
Pioneer
| Kategorie:
Auto Navigationssysteme
| Dateigröße: 0.64 MB
Werbung
Verwandte Produkte
Pioneer AVIC-F50BT
Pioneer AVIC-F500BT
Pioneer AVIC-F250
Pioneer AVIC-F9110BT
Pioneer AVIC-F160-2
Pioneer AVIC-F70DAB
Pioneer AVIC-F970DAB
Pioneer AVIC-F9770BT
Pioneer AVIC-F80DAB
Pioneer AVIC-F310BT
Pioneer Kategorien
Autoradios
Empfänger
Auto Navigationssysteme
Receiver
Lautsprecher-Systeme
Weitere Pioneer Anleitungen
Anmelden
Anmelden
ODER
Mit Facebook anmelden
Mit Google anmelden
Anleitung hochladen
Von PC hochladen
Von URL hochladen