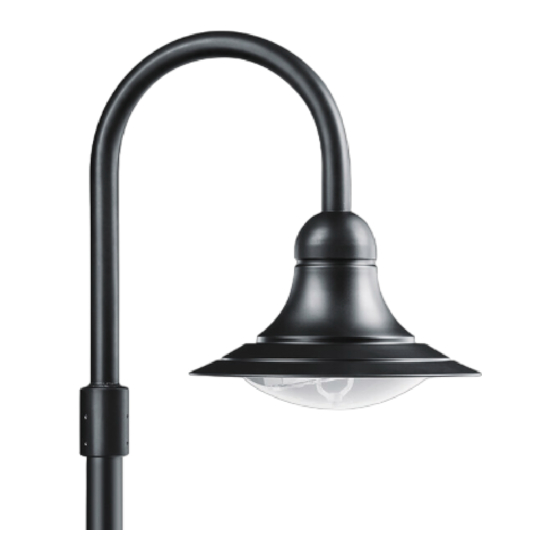
TRILUX 9301 Serie Demontageanleitung
Vorschau ausblenden
Andere Handbücher für 9301 Serie:
- Demontageanleitung (30 Seiten) ,
- Montageanleitung (19 Seiten)
Inhaltszusammenfassung für TRILUX 9301 Serie
- Seite 1 DEMONTAGEANLEITUNG EN DISASSEMBLY INSTRUCTIONS INSTRUCTIONS DE DÉMONTAGE ISTRUZIONI DI SMONTAGGIO INSTRUCCIONES DE DESMONTAJE DEMONTAGEHANDLEIDING INSTRUKCJA DEMONTAŻU 9301 LED 9301 ··· DMA-10013 | 220118...
- Seite 2 TIPP. Die Anleitung zeigt die Hand- rät. lungsschritte exemplarisch für 80 Entnehmen Sie das Betriebsgerät. den dargestellten Leuchtentyp. Die Anzahl der Bauteilkomponenten 80 Das Betriebsgerät ist vollständig kann ggf. variieren. ausgebaut. 2 | 30 DMA-10013 | 220118 | © trilux.com...
- Seite 3 9301 LED © trilux.com | 220118 | DMA-10013 3 | 30...
- Seite 4 XX Überprüfen Sie die korrekte Montage und alle Anschlüsse der neuen Kom- ponenten. XX Schließen Sie die Leuchte. WICHTIG. Beachten Sie alle Anforde- rungen an die Schutzart (IP). 4 | 30 DMA-10013 | 220118 | © trilux.com...
- Seite 5 9301 LED © trilux.com | 220118 | DMA-10013 5 | 30...
- Seite 6 The number of 80 Remove the control gear unit. components may vary. 80 The control gear unit is completely removed. 6 | 30 DMA-10013 | 220118 | © trilux.com...
- Seite 7 9301 LED © trilux.com | 220118 | DMA-10013 7 | 30...
- Seite 8 XX Close the luminaire. NOTICE. Observe all requirements for the protection rating (IP). XX Check the luminaire for correct mounting. Observe the installation instructions for the luminaire. 8 | 30 DMA-10013 | 220118 | © trilux.com...
- Seite 9 9301 LED © trilux.com | 220118 | DMA-10013 9 | 30...
- Seite 10 Prenez des mesures de protection ESD. 80 Retirez l’appareillage. CONSEIL. La notice montre les 80 L’appareillage est entièrement étapes à suivre à titre d'exemple démonté. pour le type de luminaire repré- 10 | 30 DMA-10013 | 220118 | © trilux.com...
- Seite 11 9301 LED © trilux.com | 220118 | DMA-10013 11 | 30...
- Seite 12 XX Vérifiez que le montage et tous les raccordements des nouveaux com- posants sont corrects. XX Fermez le luminaire. IMPORTANT. Respectez toutes les exigences en matière d'indice de protection (IP). 12 | 30 DMA-10013 | 220118 | © trilux.com...
- Seite 13 9301 LED © trilux.com | 220118 | DMA-10013 13 | 30...
- Seite 14 70 Allentare la vite. (2x) elettrostatiche (ESD). SUGGERIMENTO. Le istruzioni XX Servendosi di un attrezzo apposito, mostrano a titolo di esempio i passi staccare il cavo dall'alimentatore. da compiere per il tipo di apparec- 14 | 30 DMA-10013 | 220118 | © trilux.com...
- Seite 15 9301 LED © trilux.com | 220118 | DMA-10013 15 | 30...
- Seite 16 XX Verificare il montaggio corretto e tutte le connessioni dei nuovi compo- nenti. XX Chiudere l'apparecchio. AVVISO. Tenere conto di tutti i requi- siti in termini di protezione (IP). 16 | 30 DMA-10013 | 220118 | © trilux.com...
- Seite 17 9301 LED © trilux.com | 220118 | DMA-10013 17 | 30...
- Seite 18 XX Desconecte el cable del equipa- actuación para el tipo de luminario miento eléctrico utilizando una indicado. El número de componentes herramienta auxiliar. estructurales puede variar. 18 | 30 DMA-10013 | 220118 | © trilux.com...
- Seite 19 9301 LED © trilux.com | 220118 | DMA-10013 19 | 30...
- Seite 20 XX Asegúrese de que todos los con- ductores de tierra y funciones estén conectados. XX Compruebe el correcto montaje y todas las conexiones de los compo- nentes nuevos. XX Cierre la luminaria. 20 | 30 DMA-10013 | 220118 | © trilux.com...
- Seite 21 9301 LED © trilux.com | 220118 | DMA-10013 21 | 30...
- Seite 22 (ESD) XX Maak de leiding met een werktuig los TIP. De handleiding toont de hande- van het hulpapparaat. lingen die moeten worden uitgevoerd bij het weergegeven armatuurtype. 22 | 30 DMA-10013 | 220118 | © trilux.com...
- Seite 23 9301 LED © trilux.com | 220118 | DMA-10013 23 | 30...
- Seite 24 XX Zorg ervoor dat alle vereiste verbin- dingen van aarddraden en functies zijn gemaakt en aangesloten. XX Controleer de correcte montage en alle aansluitingen van de nieuwe componenten. XX Sluit de armatuur. 24 | 30 DMA-10013 | 220118 | © trilux.com...
- Seite 25 9301 LED © trilux.com | 220118 | DMA-10013 25 | 30...
- Seite 26 70 Odkręcić śrubę. (2x) nymi (ESD). PORADA. W instrukcji przedstawiono XX Za pomocą narzędzia pomocniczego przykładowe czynności dla danego odłączyć przewód od zasilacza. 26 | 30 DMA-10013 | 220118 | © trilux.com...
- Seite 27 9301 LED © trilux.com | 220118 | DMA-10013 27 | 30...
- Seite 28 XX Sprawdzić poprawność montażu i wszystkich połączeń nowych kompo- nentów. XX Zamknąć oprawę. WSKAZÓKWA. Przestrzegać wszyst- kich wymagań dotyczących stopnia ochrony (IP). 28 | 30 DMA-10013 | 220118 | © trilux.com...
- Seite 29 9301 LED © trilux.com | 220118 | DMA-10013 29 | 30...
- Seite 30 TRILUX Gmbh & Co. KG Heidestraße D-59759 Arnsberg +49 2932 301-0 info@trilux.com www.trilux.com...


