Inhaltszusammenfassung für eQ-3 homematic IP HmIP-RGBW
Seite 1
Installations- und Bedienungsanleitung Installation and operating manual Notice d‘installation et d‘emploi Manual de instalación y uso Istruzioni per l‘installazione e l‘uso Installatie- en bedieningshandleiding LED Controller - RGBW S. 2 LED Controller – RGBW p. 24 LED Contrôleur – RGBW p.
Hinweise zur Anleitung Hinweise zur Anleitung Lesen Sie diese Anleitung sorgfältig, bevor Sie Ihr Homematic IP Gerät in Betrieb nehmen. Bewahren Sie die Anleitung zum späteren Nachschla- gen auf! Wenn Sie das Gerät anderen Personen zur Nutzung überlassen, überge- ben Sie auch diese Anleitung. Benutzte Symbole: Achtung! Hier wird auf eine Gefahr hingewiesen.
Seite 13
Gefahrenhinweise Das Gerät ist kein Spielzeug! Erlauben Sie Kindern nicht damit zu spielen. Lassen Sie das Verpackungsmaterial nicht achtlos liegen. Plastikfolien/ -tüten, Styroporteile etc. können für Kinder zu einem gefährlichen Spielzeug werden. Bei Sach- oder Personenschäden, die durch unsachgemäße Hand- habung oder Nichtbeachten der Gefahrenhinweise verursacht wer- den, übernehmen wir keine Haftung.
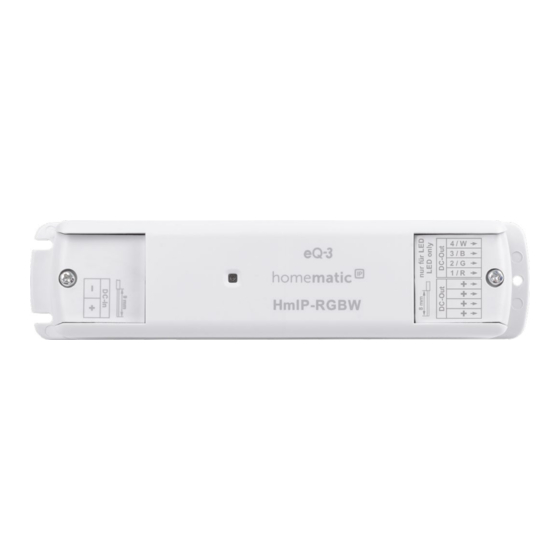
Funktion und Geräteübersicht Funktion und Geräteübersicht Der Homematic IP LED Controller – RGBW ermöglicht die einfache Steu- erung von RGBW-LED-Beleuchtungen direkt per Funk über das Home- matic IP System. Farbe, Helligkeit und Sättigung können unabhängig von- einander angesteuert werden. Der LED Controller bietet die Möglichkeit entweder einen RGB(W)-Stripe, zwei Tunable White Stripes oder vier Einzelkanäle anzusteuern.
Allgemeine Systeminformationen Allgemeine Systeminformationen Dieses Gerät ist Teil des Homematic IP Smart-Home-Systems und kom- muniziert über das Homematic IP Funkprotokoll. Alle Geräte des Systems können komfortabel und individuell per Smartphone über die Home- matic IP App konfiguriert werden. Alternativ haben Sie die Möglichkeit, Homematic ...
Inbetriebnahme Zugelassene Leitungsquerschnitte zum Anschluss der Versorgungsspan- nung von 12-24 V sind: Starre Leitung [mm 0,5-2,5 Zugelassene Leitungsquerschnitte zum Anschluss der LED-Stripes sind: Starre Leitung [mm 0,2-1,5 Montage und Installation Bitte lesen Sie diesen Abschnitt erst vollständig, bevor Sie mit der Installation beginnen.
Inbetriebnahme Für die Installation des LED Controllers in Zwischenwand- oder Decke gehen Sie wie folgt vor: Lösen Sie die Schraube an der Abdeckkappe (E) mit Hilfe eines • Schraubenziehers (Abbildung 3). • Öffnen Sie die Abdeckkappe (Abbildung 5). • Schließen Sie das Netzteil an die Anschlussklemme (C) (Eingang 2-polig) gemäß...
Inbetriebnahme Damit das Gerät in Ihr System integriert und per kostenloser Homema- tic IP App gesteuert werden kann, muss es an den Homematic IP Access Point angelernt werden. Zum Anlernen des Geräts gehen Sie wie folgt vor: • Öffnen Sie die Homematic IP App auf Ihrem Smartphone. Wählen Sie den Menüpunkt „Gerät anlernen“...
Fehlerbehebung Fehlerbehebung Fehlercodes und Blinkfolgen Blinkcode Bedeutung Lösung Kurzes oranges Funkübertragung/ Warten Sie, bis die Übertra- Blinken Sendeversuch/Da- gung beendet ist. tenübertragung 1x langes grünes Vorgang bestätigt Sie können mit der Bedie- Leuchten nung fortfahren. Kurzes oranges Anlernmodus aktiv Geben Sie die letzten Blinken (alle 10 s) vier Ziffern der Geräte- Seriennummer zur...
Wiederherstellung der Werkseinstellungen Duty Cycle Der Duty Cycle beschreibt eine gesetzlich geregelte Begrenzung der Sendezeit von Geräten im 868 MHz-Bereich. Das Ziel dieser Regelung ist es, die Funktion aller im 868 MHz-Bereich arbeitenden Geräte zu ge- währleisten. In dem von uns genutzten Frequenzbereich 868 MHz beträgt die maxi- male Sendezeit eines jeden Geräts 1 % einer Stunde (also 36 Sekunden in einer Stunde).
Empfänger spielen Umwelteinflüsse wie Luftfeuchtigkeit neben baulichen Gegebenheiten vor Ort eine wichtige Rolle. Hiermit erklärt die eQ-3 AG, Maiburger Str. 29, 26789 Leer, Deutsch- land, dass der Funkanlagentyp Homematic IP HmIP-RGBW der Richt- linie 2014/53/EU entspricht. Der vollständige Text der EU-Konfor- mitätserklärung ist unter der folgenden Internetadresse verfügbar:...
Technische Daten Technische Daten Geräte-Kurzbezeichnung: HmIP-RGBW Versorgungsspannung: 12-24 V Stromaufnahme: 8,5 A (max. 2,1 A pro Kanal) Leistungsaufnahme Ruhebetrieb: 60 mW @ 24 V PWM-Grundfrequenz: 1 kHz Leitungsart und -querschnitt: (Starre Leitung) Eingangsklemmen 0,5-2 mm² Ausgangsklemmen 0,2-1,5 mm² Leitungslänge (Eingangs- und Ausgangsklemmen) <...
Seite 23
Technische Daten Lastart Kanal 1-4 Ohmsche Last 2,1 A LED ohne Vorschaltgerät 2,1 A/50,4 VA Entsorgungshinweis Gerät nicht im Hausmüll entsorgen! Elektronische Geräte sind ent- sprechend der Richtlinie über Elektro- und Elektronik-Altgeräte über die örtlichen Sammelstellen für Elektronik-Altgeräte zu entsorgen. Konformitätshinweis Das CE-Zeichen ist ein Freiverkehrszeichen, das sich ausschließlich an die Behörden wendet und keine Zusicherung von Eigenschaften...
Seite 25
Table of contents Information about this manual ............26 Hazard information ................26 Function and device overview ..............27 General system information ..............29 Start-up ..................... 29 Installation instructions ..............29 Mounting and installation ..............30 Pairing ....................31 Basic settings ..................32 Troubleshooting ..................32 Error codes and flashing sequences ..........
Information about this manual Information about this manual Please read this manual carefully before beginning operation with your Homematic IP device. Keep the manual so you can refer to it at a later date if you need to. If you hand over the device to other persons for use, please hand over this manual as well.
Function and device overview We accept no liability for damage to property or personal injury caused by improper use or the failure to observe the hazard warn- ings. In such cases, all warranty claims are void. We accept no liabil- ity for any consequential damage.
General system information example, you can set customised initial brightness levels or automatic switch-offs after a configurable switch-on time. All current technical documents and updates are provided at www.homematic-ip.com. Device overview (figure 1): (A) System button (pairing button and device LED) (B) Mounting lugs (C) Terminal with 2-pin input (D) Terminal with 4-pin output...
Start-up Please observe the hazard information in section “2 Hazard informa- tion” auf Seite 26 during installation. Please note the insulation stripping length of the conductor to be connected, indicated on the device. Permitted cable cross-sections for connection to a supply voltage of 12–24 V are: Rigid cable [mm...
Start-up Proceed as follows to mount the LED controller in a partition wall or false ceiling: • Loosen the screw on the cap (E) using a screwdriver (fig. 3). • Open the cap (fig. 5). Connect the power supply unit to the terminal (C) (2-pin input) •...
Start-up To add the device, please proceed as follows: • Open the Homematic IP app on your smartphone. Select the menu item “Add device”. • • When the power supply is switched on, the actuator’s pairing mode is active for 3 minutes (fig. 11). You can manually launch the pairing mode for another 3 minutes by briefly pressing the system button (A) (fig.
Troubleshooting Troubleshooting Error codes and flashing sequences Flashing code Meaning Solution Short orange flash- Radio transmission/ Wait until the transmission attempting to trans- is completed. mit/data transmis- sion 1x long green flash Transmission con- You can continue opera- firmed tion. Short orange flash- Pairing mode active Enter the last four numbers es (every 10 s)
Restoring factory settings Duty cycle The duty cycle is a legally regulated limit of the transmission time of de- vices in the 868 MHz range. The aim of this regulation is to safeguard the operation of all devices working in the 868 MHz range. In the 868 MHz frequency range we use, the maximum transmission time of any device is 1% of an hour (i.e.
Hereby, eQ-3 AG, Maiburger Str. 29, 26789 Leer/Germany declares that the radio equipment type Homematic IP HmIP-RGBW is in com- pliance with Directive 2014/53/EU. The full text of the EU decla- ration of conformity is available at the following internet address: www.homematic-ip.com.
Seite 35
Technical specifications Cable type and cross section: (Rigid cable) Input terminals 0.5–2 mm² Output terminals 0.2–1.5 mm² Cable length (input and output terminals) < 3 m External diameter Input cables 7 mm Output cables 5 mm Protection rating: IP20 Ambient temperature: 5 to 40 °C Dimensions (W x H x D): 170 x 40 x 26 mm...
Seite 36
Technical specifications Instructions for disposal Do not dispose of the device with normal domestic waste! Electron- ic equipment must be disposed of at local collection points for waste electronic equipment in compliance with the Waste Electrical and Electronic Equipment Directive. Information about conformity The CE mark is a free trademark that is intended exclusively for the authorities and does not imply any assurance of properties.
Seite 38
Table des matières Remarques sur la notice ................ 39 Mises en garde ..................39 Fonction et aperçu de l’appareil ............40 Informations générales sur le système ..........42 Mise en service ..................42 Instructions d’installation ..............42 Montage et installation ..............43 Apprentissage ..................44 Réglages de base ................
Remarques sur la notice Remarques sur la notice Lisez attentivement la présente notice avant de mettre votre appareil Ho- mematic IP en service. Conservez la notice pour pouvoir vous y référer ultérieurement ! Si vous laissez d’autres personnes utiliser l’appareil, n’oubliez pas de leur remettre également cette notice d’utilisation.
Fonction et aperçu de l’appareil Cet appareil n’est pas un jouet ! Tenez-le hors de portée des enfants. Ne laissez pas traîner le matériel d’emballage. Les sachets/films en plastique, éléments en polystyrène, etc. peuvent constituer des jouets dangereux pour les enfants. Notre responsabilité...
Seite 41
Fonction et aperçu de l’appareil bandeaux Tunable White ou jusqu’à quatre bandeaux LED simples (mo- dulation de la largeur d’impulsions). Lors de l’usage de bandeaux Tunable White, ces bandeaux peuvent être utilisés en mode « Dim2Warm » ou « Lumière du jour dynamique (HCL) ». Grâce à...
Informations générales sur le système Informations générales sur le système Cet appareil fait partie du système Smart Home Homematic IP et com- munique par le biais du protocole Homematic IP. Vous pouvez configurer très simplement chaque appareil du système en passant par l’interface utilisateur de la centrale CCU3 ou tout simplement par votre smartphone, via l’application Homematic IP et le cloud Homematic IP.
Mise en service Sections de câble autorisées pour le raccordement des bandeaux LED : Câble rigide [mm de 0,2 à 1,5 Montage et installation Merci de lire attentivement cette section avant de procéder à l’ins- tallation. Assurez-vous qu’aucun câble ne passe à l’emplacement de mon- tage souhaité...
Mise en service Le bloc d'alimentation doit être un modèle avec SELV avec protec- tion basse tension pour modules LED selon EN 61347-1, Annexe L. Le bloc d’alimentation doit être pourvu d’une protection contre les court-circuits (sous condition ou sans condition) ou intrinsèque (fail-safe).
Mise en service • Ouvrez l’application Homematic IP sur votre smartphone. Sélectionnez le point de menu « Procéder à l’apprentissage de • l'appareil ». • Après avoir mis sous tension le bloc d'alimentation secteur, le mode d’apprentissage est actif pendant 3 minutes (Figure 11). Vous pouvez relancer manuellement le mode d'apprentissage pour 3 autres minutes en appuyant brièvement sur la touche système (A) (Figure 11).
Élimination des défauts Élimination des défauts Codes d'erreurs et séquences de clignotement Code de clignote- Signification Solution ment Bref clignotement Transmission radio/ Attendez que la transmis- orange essai d’émission/ sion soit terminée. transmission des données 1 long éclairage vert Opération confir- Vous pouvez poursuivre mée avec la commande.
Restauration des réglages d’usine charge, blocage mécanique, etc.) ou • récepteur défectueux. Duty Cycle Le Duty Cycle décrit une limitation régulée légalement du temps d’émis- sion des appareils dans la plage de 868 MHz. L’objectif de ce règlement est de garantir la fonction de tous les appareils qui travaillent dans la plage de 868 MHz.
Par la présente, eQ-3 AG, basée à Maiburger Str. 29, 26789 Leer, en Allemagne, déclare que l’équipement radioélectrique Homematic IP HmIP-RGBW est conforme à la directive 2014/53/EU. L’intégralité de la déclaration européenne de conformité...
Caractéristiques techniques Caractéristiques techniques Désignation abrégée de l’appareil : HmIP-RGBW Tension d’alimentation : 12-24 V Courant absorbé : 8,5 A (max. 2,1 A par canal) Puissance absorbée Mode repos : 60 mW @ 24 V Fréquence PWM de base : 1 kHz Type et section de câble : (câble rigide) Bornes d’entrée de 0,5 à...
Seite 50
Caractéristiques techniques Type de charge Canaux 1 à 4 Charge ohmique 2,1 A LED sans ballast 2,1 A/50,4 VA Consignes pour l’élimination L’appareil ne doit pas être jeté avec les ordures ménagères ! Les ap- pareils électroniques sont à éliminer conformément à la directive relative aux appareils électriques et électroniques usagés via les points de collecte locaux d’appareils usagés.
Seite 52
Índice Advertencias sobre estas instrucciones ..........53 Advertencias de peligro ................53 Funciones y esquema del dispositivo ..........54 Información general del sistema ............56 Puesta en servicio ................... 56 Instrucciones de instalación ............56 Montaje e instalación ................ 57 Conexión ..................... 58 Ajuste básico ..................
Advertencias sobre estas instrucciones Advertencias sobre estas instrucciones Lea atentamente estas instrucciones antes de poner en servicio su dispo- sitivo Homematic IP. ¡Conserve estas instrucciones para consultas pos- teriores! Si cede este dispositivo para que lo utilicen otras personas, entregue también estas instrucciones junto con el dispositivo.
Funciones y esquema del dispositivo ¡Este dispositivo no es un juguete! No permita que los niños jueguen con él. No deje tirado el material de embalaje de forma descuidada. Las láminas o bolsas de plástico, las piezas de corcho blanco, etc. pueden convertirse en un juguete peligroso para los niños.
Seite 55
Funciones y esquema del dispositivo natural dinámica (HCL). Gracias a la robusta carcasa, el controlador de LED es ideal para el mon- taje oculto en la pared o falso techo. Además, el fácil manejo a distancia vía app ofrece aún más confort. Así, por ejemplo, es posible personalizar la intensidad de la luz al encenderse o también el apagado automático tras un tiempo de encendido definido.
Información general del sistema Información general del sistema Este dispositivo es parte del sistema smart home Homematic IP y se co- munica por el protocolo de radio Homematic IP. Se puede configurar todos los dispositivos del sistema confortablemente e indivualmente a travès la aplicación Homematic IP.
Puesta en servicio Las secciones de cable permitidas para conectar las tiras LED son: Cable rígido [mm 0,2-1,5 Montaje e instalación Por favor, lea íntegramente este capítulo antes de realizar la instala- ción. ¡Compruebe que no haya ninguna otra línea de suministro en el lu- gar de la instalación! El equipo solo puede ser utilizado en instalaciones fijas.
Puesta en servicio La fuente de alimentación tiene que ser un mecanismo de control con muy baja tensión de protección (SELV) para módulos LED, de conformidad con la norma EN 61347-1, anexo L. La fuente de ali- mentación tiene que ser resistente al cortocircuito (condicionado o no condicionado) o a prueba de fallos (fail-safe).
Puesta en servicio • Al conectar la alimentación se activa el modo de conexión del actuador durante 3 minutos (figura 11). También se puede activar el modo de conexión durante 3 minutos manualmente con una pulsación corta del botón del sistema (A) (fi- gura 11).
Reparación de fallos Reparación de fallos Códigos de errores y secuencias intermitentes Secuencia intermi- Significado Solución tente Luz naranja intermi- Transmisión ina- Espere hasta que finalice la tente corta lámbrica, intento de transmisión. transmisión o trans- misión de datos 1 vez luz verde larga Confirmación de Puede continuar con el una operación manejo.
Restablecimiento de la configuración de fábrica • el receptor no puede ejecutar el comando (fallo de tensión, blo- queo mecánico, etc.) • receptor defectuoso Duty Cycle Duty Cycle describe una limitación del tiempo de transmisión regulada por ley para dispositivos en la banda de 868 MHz. El objeto de esta regu- lación es garantizar el funcionamiento de todos los aparatos que trabajan en la banda de 868 MHz.
AG, Maiburger Str. 29, 26789 Leer, Alemania, declara que la ins- talación inalámbrica, Homematic IP HmIP-RGBW, cumple la Di- rectiva 2014/53/UE. El texto de la declaración de conformidad CE está...
Datos técnicos Datos técnicos Nombre abreviado del dispositivo: HmIP-RGBW Tensión de alimentación: 12-24 V Consumo de corriente: 8,5 A (máx. 2,1 A por canal) Potencia absorbida Modo de reposo: 60 mW @ 24 V Frecuencia de base para PWM: 1 kHz Tipo de cable y sección: (Conducto rígido) Bornes de entrada...
Seite 64
Datos técnicos Clase de carga Canal 1-4 Carga óhmica 2,1 A LED sin balasto 2,1 A/50,4 VA Indicaciones sobre la eliminación ¡No desechar el dispositivo en la basura doméstica! La eliminación de los equipos electrónicos debe efectuarse siguiendo la directiva de equipos eléctricos y electrónicos usados, en los puntos de reco- gida locales para ese tipo de aparatos.
Seite 66
Indice Indicazioni su queste istruzioni .............67 Indicazioni di pericolo ................67 Funzioni e vista d'insieme dell'apparecchio ........68 Informazioni generali sul sistema ............70 Messa in funzione ................... 70 Avvertenze per l'installazione ............70 Montaggio e installazione ..............71 Accoppiamento ................. 72 Impostazioni di base .................
Indicazioni su queste istruzioni Indicazioni su queste istruzioni Leggere attentamente queste istruzioni prima di mettere in funzione questo dispositivo Homematic IP. Conservare questo manuale per poter- lo consultare anche in futuro! Se si affida l’utilizzo dell’apparecchio ad altre persone consegnare anche queste istruzioni per l’uso.
Funzioni e vista d'insieme dell'apparecchio Questo apparecchio non è un giocattolo! Non consentire ai bambi- ni di giocare con l’apparecchio. Non lasciare incustodito il materiale dell’imballaggio. Le pellicole o i sacchetti di plastica, le parti di poli- stirolo, ecc. possono diventare un giocattolo pericoloso. L’azienda declina qualsiasi responsabilità...
Seite 69
Funzioni e vista d'insieme dell'apparecchio Tunable White possono essere utilizzate in modalità Dim2Warm oppure in modalità dinamica Luce diurna (HCL). La robusta custodia rende il controller LED ideale per il montaggio invisi- bile in pareti divisorie o soffitti. In più, la possibilità di inviare facilmente comandi a distanza tramite app assicura un maggiore comfort.
Informazioni generali sul sistema Informazioni generali sul sistema Questo apparecchio fa parte del sistema Homematic IP Smart-Home e comunica tramite il protocollo radio Homematic IP. Tutti gli apparecchi del sistema possono essere configurati comodamente e singolarmen- te dallo smartphone tramite l’app Homematic IP. In alternativa gli appa- recchi Homematic IP possono essere gestiti tramite la centralina CCU3 oppure tramite un collegamento con numerosi sistemi di fornitori terzi.
Messa in funzione Le sezioni dei cavi approvate per il collegamento della tensione di ali- mentazione di 12-24 V sono: cavo rigido [mm 0,5-2,5 Le sezioni dei cavi approvate per il collegamento delle strisce LED sono: cavo rigido [mm 0,2-1,5 Montaggio e installazione Leggere interamente questo paragrafo prima di iniziare ad installare l’apparecchio.
Messa in funzione Allentare la vite del coperchio (E) con l’aiuto di un cacciavite (im- • magine 3). • Aprire il coperchio (immagine 5). Collegare l’alimentatore al terminale di collegamento (C) (entrata • a 2 poli) secondo i disegni di collegamento (immagini da 6 a 10). Per l’alimentazione di rete utilizzare un alimentatore con bassissima tensione di sicurezza (SELV) per moduli a LED secondo la norma EN 61347-1, Allegato L.
Messa in funzione Affinché il dispositivo possa essere integrato nel sistema e controllato tramite l’app gratuita Homematic IP, deve essere appreso dal punto di accesso Homematic IP. Per l'accoppiamento del dispositivo procedere nel modo seguente: • Aprire l'app Homematic IP sullo smartphone. Selezionare la voce del menu “Accoppiamento dell’apparec- •...
Risoluzione dei guasti • 1 x RGBW (immagine 9) • 2 x tunable white (immagine 10) Risoluzione dei guasti Codici di errore e sequenze di spie lampeggianti Codice di segnala- Significato Soluzione zione Luce arancione Trasmissione radio/ Attendere che la trasmis- lampeggiante per tentativo d'invio/tra- sione sia conclusa.
Ripristino delle impostazioni di fabbrica • ricevitore non raggiungibile, • ricevitore che non può eseguire un comando (interruzione di ca- rico, blocco meccanico, ecc.) oppure • ricevitore difettoso. Duty Cycle Il Duty Cycle indica un limite disciplinato dalla legge e applicato al tem- po di trasmissione degli apparecchi nella gamma 868 MHz.
Con la presente la eQ-3 AG, Maiburger Str. 29, 26789 Leer, Germania, dichiara che l’apparecchio radio Homematic IP modello HmIP-RGBW è conforme alla Direttiva 2014/53/UE. Il testo integrale della dichiarazione di conformità...
Dati tecnici Dati tecnici Sigla dell'apparecchio: HmIP-RGBW Tensione di alimentazione: 12-24 V Corrente assorbita: 8,5 A (max. 2,1 A per canale) Potenza assorbita funzionamento a riposo: 60 mW @ 24 V Frequenza base PWM: 1 kHz Tipo di cavo e sezione cavo: (linea rigida) Morsetti d’ingresso 0,5-2 mm²...
Seite 78
Dati tecnici Tipo di carico Canale 1 -4 carico ohmico 2,1 A LED senza stabilizzatore 2,1 A/50,4 VA Avvertenze per lo smaltimento Non smaltire l'apparecchio nei rifiuti domestici! Gli apparecchi elet- tronici devono essere smaltiti conformemente alla direttiva sui rifiu- ti di apparecchi elettrici ed elettronici ed essere consegnati presso un apposito centro di raccolta.
Seite 80
Inhoudsopgave Instructies bij deze handleiding ............81 Gevarenaanduidingen ................81 Werking en overzicht van het apparaat ..........82 Algemene systeeminformatie .............. 84 Inbedrijfstelling ..................84 Installatie-instructies .................84 Montage en installatie............... 85 Inleren ....................86 Basisinstellingen ................. 87 Storingen oplossen ................. 88 Foutcodes en knipperreeksen ............88 Commando niet bevestigd ..............88 Duty cycle ..................89 Herstellen van de fabrieksinstellingen ..........
Instructies bij deze handleiding Instructies bij deze handleiding Lees deze handleiding zorgvuldig door voordat u uw Homematic IP ap- paraat in gebruik neemt. Bewaar de handleiding, om ze ook later nog te kunnen raadplegen! Als u het apparaat door andere personen laat gebruiken, geef dan ook deze handleiding mee.
Werking en overzicht van het apparaat Het apparaat is geen speelgoed! Laat kinderen er niet mee spelen. Laat verpakkingsmateriaal niet rondslingeren. Plastic folies en zak- ken, vormstukken van styropor enz. kunnen door kinderen als ge- vaarlijk speelgoed worden gebruikt. Voor zaak- of personenschade die door een onjuist gebruik of niet-naleving van de gevarenaanduidingen veroorzaakt is, stellen wij ons niet aansprakelijk.
Seite 83
Werking en overzicht van het apparaat LED-stripes. Bij het gebruik van Tunable White Stripes kunnen deze in de Dim2Warm-modus of in de dynamische daglichtmodus (HCL) worden bediend. Dankzij de robuuste behuizing is de LED Controller optimaal geschikt voor de onzichtbare montage in de tussenwand of een verlaagd plafond. De eenvoudige bediening op afstand per app biedt extra comfort.
Algemene systeeminformatie Algemene systeeminformatie Dit apparaat is een onderdeel van het Homematic IP Smart Home Sys- teem en communiceert via het Homematic IP zendprotocol. Alle ap- paraten van het systeem kunnen comfortabel en individueel via een smartphone met de Homematic IP App worden geconfigureerd. U hebt ook de mogelijkheid om de Homematic IP apparaten via de cen- trale CCU3 of in combinatie met vele partneroplossingen te gebruiken.
Inbedrijfstelling De toegestane leidingdoorsnedes voor de aansluiting op de LED-stripes: Starre kabel [mm 0,2-1,5 Montage en installatie Lees dit hoofdstuk volledig door, voordat u met de installatie begint. Waarborg dat op de gewenste montageplaats geen leidingen verlo- pen! Het apparaat mag alleen voor vaste installaties worden gebruikt. Het apparaat dient veilig in een vaste installatie te worden bevestigd.
Inbedrijfstelling Het voedingsapparaat moet een apparaat met extra lage spanning (SELV) voor ledmodules conform EN 61347-1 zijn. Het voedingsap- paraat moet kortsluitvast (voorwaardelijk of onvoorwaardelijk) of faalveilig (failsafe) zijn. Draai de schroef aan de tegenoverliggende afdekkap (F) (afbeel- • ding 4) los. •...
Inbedrijfstelling • Na het inschakelen van het voedingsapparaat is de inleermodus van de actor gedurende 3 minuten actief (afbeelding 11). U kunt de inleermodus handmatig voor nog eens 3 minuten starten door kort op de systeemtoets (A) te drukken (afbeelding 11). •...
Storingen oplossen Storingen oplossen Foutcodes en knipperreeksen Knippercode Betekenis Oplossing Kort oranje knippe- Draadloze over- Wacht tot de overdracht dracht, zendpoging, beëindigd is. gegevensoverdracht 1x lang groen op- Proces bevestigd U kunt met de bediening lichten doorgaan. Kort oranje knippe- Inleermodus actief Voer ter bevestiging de ren (om de 10 sec.)
Herstellen van de fabrieksinstellingen Duty cycle De duty cycle beschrijft een wettelijk geregelde begrenzing van de zend- tijd van apparaten in het 868MHz-bereik. Het doel van deze regeling is om de werking van alle in het 868MHz-bereik werkende apparaten te garanderen.
Hierbij verklaart eQ-3 AG, Maiburger Str. 29, 26789 Leer, Duitsland, dat het draadloze apparaattype Homematic IP HmIP-RGBW in overeenstem- ming is met de richtlijn 2014/53/EU. De volledige tekst van de EUconfor- miteitsverklaring is beschikbaar onder het volgende internetadres: www.homematic-ip.com.
Seite 91
Technische gegevens Kabeltype en -doorsnede: (starre kabel) Ingangsklemmen 0,5-2 mm² Uitgangsklemmen 0,2-1,5 mm² Leidinglengte (ingangs- en uitgangsklemmen) < 3 m Buitendiameter Ingangskabels 7 mm Uitgangskabels 5 mm Beschermingsgraad: IP20 Omgevingstemperatuur: 5 tot 40 °C Afmetingen (b x h x d): 170 x 40 x 26 mm Gewicht: 79 g...
Seite 92
Technische gegevens Verwijdering Het apparaat hoort niet in de vuilnisbak! Elektronische apparaten moeten overeenkomstig de richtlijn voor afgedankte elektrische en elektronische apparaten worden ingeleverd bij de inzamelpunten voor afgedankte apparaten. Informatie met betrekking tot de conformiteit De CE-markering is een label voor het vrije verkeer van goederen binnen de Europese Unie en is uitsluitend bedoeld voor de desbe- treffende autoriteiten.
Seite 93
Kostenloser Download der Homematic IP App! Free download of the Homematic IP app! Bevollmächtigter des Herstellers: Manufacturer’s authorised representative: eQ-3 AG Maiburger Straße 29 26789 Leer / GERMANY www.eQ-3.de...