Herunterladen Inhalt Inhalt Diese Seite drucken
Smartwares SH4-99751LI18 Montage-, Bedienungs- Und Sicherheitshinweise

Smartwares SH4-99751LI18 Montage-, Bedienungs- Und Sicherheitshinweise

Funk-lichtschalter-set
Inhaltsverzeichnis

Werbung

Verfügbare Sprachen
  • DE

Verfügbare Sprachen

  • DEUTSCH, seite 1
FUNK-LICHTSCHALTER-SET/WIRELESS LIGHT SWITCHES/
SET D'INTERRUPTEURS TÉLÉCOMMANDÉS SH4-99751
FUNK-LICHTSCHALTER-SET
Montage-, Bedienungs- und Sicherheitshinweise
SET DRAADLOZE LICHTSCHAKELAARS
Montage-, bedienings- en veiligheidsinstructies
VYPÍNAČE NA DIAĽKOVÉ OVLÁDANIE
Pokyny pre montáž, obsluhu a bezpečnostné pokyny
IAN 380872_2110
WIRELESS LIGHT SWITCHES
Assembly, operating and safety instructions
SET D'INTERRUPTEURS TÉLÉCOMMANDÉS
Instructions de montage, d'utilisation et consignes de
sécurité
SADA VYPÍNAČŮ ŘÍZENÝCH
RÁDIOVÝM SIGNÁLEM
Pokyny k montáži, obsluze a bezpečnostní pokyny

Werbung

Inhaltsverzeichnis
loading

Inhaltszusammenfassung für Smartwares SH4-99751LI18

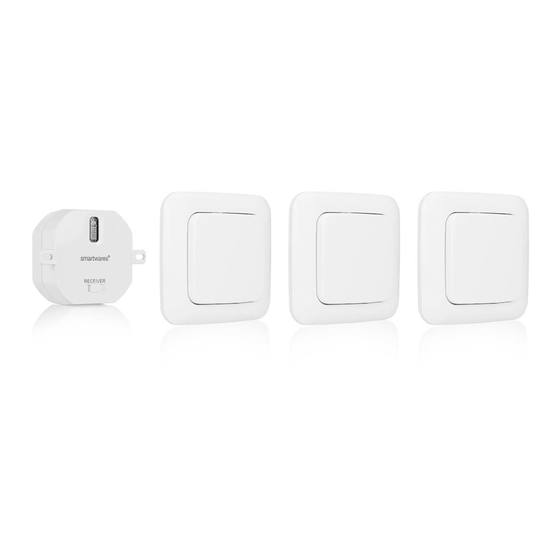
  • Seite 1 FUNK-LICHTSCHALTER-SET/WIRELESS LIGHT SWITCHES/ SET D’INTERRUPTEURS TÉLÉCOMMANDÉS SH4-99751 FUNK-LICHTSCHALTER-SET WIRELESS LIGHT SWITCHES Montage-, Bedienungs- und Sicherheitshinweise Assembly, operating and safety instructions SET DRAADLOZE LICHTSCHAKELAARS SET D’INTERRUPTEURS TÉLÉCOMMANDÉS Montage-, bedienings- en veiligheidsinstructies Instructions de montage, d‘utilisation et consignes de sécurité VYPÍNAČE NA DIAĽKOVÉ OVLÁDANIE SADA VYPÍNAČŮ...
  • Seite 2 Klappen Sie vor dem Lesen die Seite mit den Abbildungen aus und machen Sie sich anschließend mit allen Funktionen des Gerätes vertraut. Before reading, unfold the page containing the illustrations and familiarise yourself with all functions of the device Avant de lire le mode d‘emploi, ouvrez la page contenant les illustrations et familiarisez-vous ensuite avec toutes les fonctions de l‘appareil.
  • Seite 3 IN L OUT...
  • Seite 5: Inhaltsverzeichnis

    Legende der verwendeten Piktogramme ... Seite 6 Einleitung ................... Seite 6 Bestimmungs-gemäße Verwendung ............. Seite 7 Lieferumfang ..................Seite 7 Teilebeschreibung .................. Seite 7 Technische Daten................... Seite 8 Sicherheitshinweise ..............Seite 8 Sicherheits-hinweise für Batterien/Akkus ..........Seite 10 Montage ..................... Seite 12 Benötigtes Werkzeug und Material .............
  • Seite 6: Legende Der Verwendeten Piktogramme

    Legende der verwendeten Piktogramme Bedienungsanleitung lesen! Volt (Wechselspannung) Hertz (Frequenz) Watt (Wirkleistung) Gleichstrom d.c. DC Warn- und Sicherheitshinweise beachten! Lebens- und Unfallgefahr für Kleinkinder und Kinder! Warnung! Gefahr von elektrischem Schlag Entsorgen Sie Verpackung und Gerät umweltgerecht! Funk-Lichtschalter-Set haben sich damit für ein hochwer- tiges Produkt entschieden.
  • Seite 7: Bestimmungs-Gemäße Verwendung

    Lieferumfang hinweisen vertraut. Benutzen Sie das Produkt nur wie beschrieben und für die angegebenen Einsatz- Kontrollieren Sie unmittelbar nach bereiche. Händigen Sie alle Unter- dem Auspacken immer den Liefer- lagen bei Weitergabe des Produkts umfang auf Vollständigkeit sowie an Dritte mit aus. den einwandfreien Zustand des Produkts.
  • Seite 8: Technische Daten

    Technische Daten mit verringerten physischen, sensorischen oder mentalen Artikel-Nummer: SH4-99751 Fähigkeiten oder Mangel an Erfahrung und Wissen benutzt Empfänger werden, wenn sie beaufsichtigt Eingangsstrom: 230 V ∼ oder bezüglich des sicheren 50 Hz Gebrauchs des Produkts unter- Leistung: max. wiesen wurden und die daraus 1000 W resultierenden Gefahren ver- Betriebstemperatur: 0–35 °C...
  • Seite 9 elektronischen Schaltkreise Beschädigungen feststellen. beschädigen. Entfernen Sie vor der Montage Dieses Produkt darf nur von die Sicherung oder schalten einer zugelassenen Werkstatt Sie den Leitungsschutzschalter repariert oder geöffnet im Sicherungskasten aus werden. (0-Stellung). Stellen Sie den Kabellose Systeme können Leitungsschutzschalter auf Störungen bei kabellosen Position „OFF“...
  • Seite 10: Brand- Und Verletzungsgefahr

    Für eine unsachgemäße Wand- mit Vernunft vor. Montieren Dübel-Verbindung und dadurch Sie das Produkt in keinem Fall, entstandene Schäden über- wenn Sie unkonzentriert sind nimmt der Hersteller keine oder sich unwohl fühlen. Haftung. Vermeiden Sie Feuchtigkeit auf Sicherheits- allen elektrischen Komponenten. hinweise für Alle elektrischen Anschlüsse Batterien/...
  • Seite 11: Risiko Des Auslaufens Von Batterien/Akkus

    EXPLOSIONS- SCHUTZHAND- GEFAHR! Laden SCHUHE TRAGEN! Ausge- Sie nicht auflad- bare Batterien niemals wieder laufene oder beschädigte auf. Schließen Sie Batterien/ Batterien/Akkus können bei Akkus nicht kurz und/oder Berührung mit der Haut Ver- öffnen Sie diese nicht. Über- ätzungen verursachen. Tragen hitzung, Brandgefahr oder Sie deshalb in diesem Fall Platzen können die Folge sein.
  • Seite 12: Montage

    Empfänger Batterie/Akku und des Pro- montieren dukts ein. Reinigen Sie Kontakte an Wichtig: Lassen Sie die Elektro- Batterie/Akku und im Batterie- fach vor dem Einlegen! installation durch einen ausge- Entfernen Sie erschöpfte Bat- bildeten Elektriker oder eine für terien/Akkus umgehend aus Elektroinstallationen eingewiesene dem Produkt.
  • Seite 13 IN L OUT IN L OUT 230V∼ 50Hz Schließen Sie das stromfüh- rende Kabel (braun) an den Verbinden Sie den Empfänger Anschluss „L in“ an und den mit der Leuchte, indem Nullleiter (blau) an den Sie das schwarze bzw. braune Anschluss „N in“.
  • Seite 14: Sender Vorbereiten

    Dimmer verbinden, das Produkt Nehmen Sie zunächst die selbst verfügt aber über keine Tastfläche und dann den Dimmfunktion. Die Leuchte leuchtet Blendrahmen von der entsprechend mit der zuletzt ein- Montageplatte gestellten Intensität. Wenn die vorhandene Lam- peninstallation einer Wechsel- schaltung entspricht, (zwei Schalter schalten die gleiche Lampe –...
  • Seite 15: Variante 1: Sender Mit Schrauben Montieren

    Führen Sie die Dübel die Bohrlöcher ein. Setzen Sie die Tastfläche auf die Montageplatte zurück, beachten Sie den Aufwärtspfeil. Befestigen Sie die Montage- platte mit den beigelegten Variante 1: Sender Schrauben an der Wand. mit Schrauben Beachten Sie den Aufwärtspfeil. montieren Setzen Sie den Blendrahmen auf die Montageplatte...
  • Seite 16: Funkverbindung Zwischen Sender Und Empfänger Einrichten

    fettfrei und trocken ist. Andernfalls Drücken und halten Sie die kann die Haftbarkeit des Klebe- Empfänger-Taste 3 Sekun- streifens beeinträchtigt sein. den lang und lassen Sie sie wieder los. Während dieses Wählen Sie eine geeignete Vorgangs beginnt die LED Montagefläche aus. zu blinken.
  • Seite 17: Bedienung

    Bedienung (Alle) Funkverbindungen Empfänger ein-/ löschen ausschalten Drücken und halten Sie die Empfänger-Taste Empfänger 10 Sekunden Bringen Sie die Tastfläche lang. Während dieses Vor- in die Position „I“/„EIN“, um gangs beginnt die LED den Sender einzuschalten. blinken. Wenn die LED Die verbundene Leuchte wird am Empfänger erlischt,...
  • Seite 18: Wartung Und Reinigung

    Fehler beheben Setzen Sie eine neue Batterie desselben Typs (siehe „Technische Daten“) in das Das Produkt enthält empfindliche Batteriefach ein. Achten Sie elektronische Bauteile. Es ist auf die Polarität. Das +-Symbol möglich, dass das Produkt durch muss nach vorne weisen. Funkübertragungsgeräte in unmit- Setzen Sie die Tastfläche telbarer Nähe gestört wird.
  • Seite 19: Entsorgung

    Kälte (Temperaturen unter - 10 °C) Möglichkeiten zur kann die Batterieleistung des Entsorgung des ausge- Senders und dadurch die Funk dienten Produkts erfah- übertragung ebenfalls negativ ren Sie bei Ihrer Gemeinde- oder beinträchtigen. Ein weiterer Faktor, Stadtverwaltung. der zu Empfangsstörungen führen kann, sind leere oder zu schwache Das Symbol der durch- Batterien des Senders...
  • Seite 20: Garantie Und Service

    Umweltschäden vor der Rückgabe alle personen- durch falsche bezogenen Daten. Bitte entnehmen Entsorgung der Sie vor der Rückgabe Batterien Batterien/Akkus! oder Akkumulatoren, die nicht vom Altgerät umschlossen sind, sowie Lampen, die zerstörungs- Batterien/Akkus dürfen nicht über frei entnommen werden können den Hausmüll entsorgt werden.
  • Seite 21: Serviceadresse

    63128 Dietzenbach Die Garantiefrist beginnt mit dem DEUTSCHLAND Kaufdatum. Bitte bewahren Sie 00800 333 00 888* den Original-Kassenbon gut auf. smartwares-service-de@teknihall.com Diese Unterlage wird als Nachweis smartwares-service-ch@teknihall.com für den Kauf benötigt. smartwares-service-at@teknihall.com * Kostenfreie Nummer Tritt innerhalb von 3 Jahren ab...
  • Seite 22 Der Hersteller gewährleistet, dass die Funkanlage so konstruiert ist, dass sie in mindestens einem Mit- gliedstaat betrieben werden kann, ohne die geltenden Vorschriften über die Nutzung der Funkfrequen- zen zu verletzen. 22 DE/AT/CH...
  • Seite 23 List of pictograms used ............Page 24 Introduction ..................Page 24 Intended use ..................Page 25 Scope of delivery ...................Page 25 Parts description..................Page 25 Technical data ..................Page 26 General safety instructions ..........Page 26 Safety instructions for batteries/rechargeable batteries .....Page 28 Installation ..................Page 29 Tools and materials required ..............Page 29 Mounting the receiver ................Page 30 Preparing the transmitter ...............Page 31...
  • Seite 24: List Of Pictograms Used

    List of pictograms used Please read the operating instructions! Volts (alternating voltage) Hertz (frequency) Watts (effective power) Direct current d.c. DC Observe the warnings and safety notes! Danger to life and risk of accidents for infants and children! Warning! Risk of electric shock Dispose of the packaging and device in an environmen- tally friendly manner! Wireless Light Switches...
  • Seite 25: Intended Use

    Only use the product as described 1 Receiver and for the specified applications. 3 Transmitters If you pass the product on to any- 8 Screws one else, please ensure that you 8 Wall plugs also pass on all the documenta- 3 Adhesive strips tion with it.
  • Seite 26: Technical Data

    Technical data mental capacities or lacking experience and knowledge, Item number: SH4-99751 so long as they are supervised or instructed in the safe use Receiver of the product and understand Input current: 230 V ∼ 50 Hz the associated risks. Do not Power: max.
  • Seite 27 other wireless devices oper- pipes or power cables where ating in the 2.4 GHz range. you intend to drill. Keep the product at least 3 m Installation must be performed away from these devices dur- by skilled persons. ing installation and operation. It is essential that you take note of the wall quality, as AVOID THE RISK...
  • Seite 28: Safety Instructions For Batteries/Rechargeable Batteries

    Risk of burns and swallowing batteries. Seek injury! immediate medical attention. DANGER TO LIFE! Keep Never open any of the elec- batteries/rechargeable bat- trical equipment or insert any teries out of reach of children. objects into this equipment. If accidentally swallowed Such interferences pose a seek immediate medical risk of fatal injury from elec-...
  • Seite 29: Installation

    Risk of damage of the If batteries/rechargeable product batteries have leaked, avoid contact with skin, eyes and Only use the specified type mucous membranes with the of battery/rechargeable bat- chemicals! Flush immediately tery! the affected areas with fresh Insert batteries/rechargeable water and seek medical at- batteries according to polar- tention!
  • Seite 30: Mounting The Receiver

    The nature of the material is de- Use a voltage tester to verify termined by the specific local cables are not live. conditions. Unscrew possible existing light switches from the distri- – Pencil/marking tool bution box and disconnect – Voltage tester them from the mains supply –...
  • Seite 31: Preparing The Transmitter

    If the existing light fixture is a two-way circuit, (two switches for the same lamp, as is often found in hallways, stairwells or bedrooms), the second switch must be connected through. If you are unsure or IN L OUT have questions, always con- tact a qualified electrician! Preparing the transmitter...
  • Seite 32: Variant 1: Mounting The Transmitter With Screws

    Put the button back on the mounting plate , ob- Activate the battery serve the up arrow. pulling out the separator Variant 1: Mounting the transmitter with screws First remove the button and then the cover frame from the mounting plate Use the slotted holes of the mounting plate intended...
  • Seite 33: Variant 2: Stick The Transmitter In Place

    Choose a suitable installation area. Remove the protective film from the back of the adhesive strip and stick it to the back of the mounting plate Remove the protective film from the front of the adhesive strip Fasten the mounting plate Stick the transmitter to the to the wall with the enclosed...
  • Seite 34: Operation

    Operation release it again. During this process the LED starts Switching the flashing. Your receiver receiver on/off has now been switched to pairing mode. Move the button to the Switch the button to the “I”/“ON” position to connect “I”/“ON” position to switch the transmitter to the re- on the transmitter...
  • Seite 35: Clear (All) Radio Connections

    Clear (all) radio polarity. The + symbol must connections point forward. Put the button back on the mounting plate , observe the up arrow. Maintenance and cleaning DANGER OF ELECTRIC SHOCK! For electrical Press and hold the receiver button on the receiver safety reasons, the product must for 10 seconds.
  • Seite 36: Disposal

    Disposal Electrostatic discharges can lead to malfunctions. If the device fails to work, remove the batteries for The packaging is made entirely a short while and then place them of recyclable materials, which you back in. Obstacles, e.g. concrete may dispose of at local recycling walls, may make the reception facilities.
  • Seite 37: Warranty And Service

    Faulty or used batteries/recharge- treatment rules and regulations. able batteries must be recycled The chemical symbols for heavy in accordance with Directive metals are as follows: Cd = cad- 2006/66/EC and its amendments. mium, Hg = mercury, Pb = lead. Please return the batteries/recharge- That is why you should dispose of able batteries and/or the product...
  • Seite 38: Service Address

    Directive 2014/53/EU. The fragile parts, e.g. switches, recharge- full text of the EU declaration of able batteries or glass parts. conformity is available at: www.smartwares.eu Service address The manufacturer shall ensure Teknihall Elektronik GmbH that the radio system is designed Assar-Gabrielsson-Str.
  • Seite 39 Légende des pictogrammes utilisés ......Page 40 Introduction ..................Page 41 Utilisation conforme ................Page 41 Contenu de la livraison .................Page 41 Descriptif des pièces ................Page 42 Caractéristiques techniques ..............Page 42 Consignes de sécurité .............Page 42 Consignes de sécurité relatives aux piles/aux piles rechargeables ...Page 45 Montage .....................Page 46 Outils et matériels nécessaires ..............Page 46...
  • Seite 40: Légende Des Pictogrammes Utilisés

    Légende des pictogrammes utilisés Lire le mode d'emploi ! Volt (tension alternative) Hertz (fréquence) Watt (puissance active) Courant continu d.c. DC Respectez les avertissements et les consignes de sécurité ! Danger de mort et d'accident pour les enfants en bas âge et les enfants ! Avertissement ! Attention, risque d'électrocution Mettez l'emballage et l'appareil au rebut dans le...
  • Seite 41: Introduction

    Set d’interrupteurs destiné à un usage en intérieur. télécommandés Ce produit est uniquement destiné à un usage domestique et privé. Toute utilisation autre que celle Introduction décrite plus haut ou toute modifi- cation de ce produit est interdite Nous vous félicitons et peut causer des dommages.
  • Seite 42: Descriptif Des Pièces

    Descriptif des convient pour : lampes LED, ha- pièces logène et à économie d'énergie Émetteur Récepteur Type de pile : Touche de récepteur (receiver) CR2032 Émetteur (pré-installée) Plaque de montage Portée : jusqu'à 30 m Surface tactile Fréquence : 433,92 MHz Cadre-cache Bande de séparation Consignes de...
  • Seite 43 qu'ils aient été informés de Les réparations ou l'ouverture l'utilisation sûre du produit de ce produit peuvent uni- et qu'ils en comprennent les quement être confiés à un risques liés à son utilisation. atelier autorisé. Les enfants ne doivent pas Les systèmes sans fil peuvent jouer avec le produit.
  • Seite 44 coupez le disjoncteur de la Évitez d'exposer les compo- boîte à fusibles (position 0). sants électriques à l'humidité. Mettez le disjoncteur sur la Tous les branchements élec- position « OFF » (Arrêt). triques et câbles de connexion Assurez-vous avant le montage doivent satisfaire aux pres- que la tension de secteur à...
  • Seite 45: Consignes De Sécurité Relatives Aux Piles/Aux Piles Rechargeables

    Consignes provoquer une surchauffe, un de sécurité incendie ou une explosion. relatives aux Ne jetez jamais des piles/ piles/aux piles piles rechargeables au feu rechargeables ou dans l’eau. Ne pas soumettre les piles/ GARDER LES piles rechargeables à une PILES HORS DE charge mécanique.
  • Seite 46: Risque D'endommagement Du Produit

    des fuites peuvent provoquer compartiment à pile avant des brûlures au contact de la d‘insérer la pile ! peau. Vous devez donc porter Retirez immédiatement les des gants adéquats pour les piles/piles rechargeables manipuler. usées du produit. En cas de fuite des piles/piles rechargeables, retirez-les aus- Montage sitôt du produit pour éviter...
  • Seite 47: Montage Du Récepteur

    Montage du récepteur Important : L'installation élec- trique doit être effectuée par un électricien ou par une personne dûment formée à cet effet. IN L OUT Avant l'installation, familiari- sez-vous avec l'ensemble des instructions et des illustrations 230V∼ 50Hz du présent mode d'emploi et avec le produit lui-même.
  • Seite 48: Préparation De L'émetteur

    est allumée avec l'intensité ajustée en dernier. Si l'installation d'éclairage existante correspond à un circuit va-et-vient (deux inter- rupteurs allument le même IN L OUT éclairage - se rencontre fré- quemment dans les couloirs, les cages d'escalier ou les dortoirs), le second interrup- teur doit être raccordé.
  • Seite 49: Variante 1 : Montage De L'émetteur À L'aide De Vis

    Retirez tout d'abord la surface tactile puis le cadre-cache de la plaque de montage Replacez la surface tactile sur la plaque de montage Respectez la flèche vers le haut. Variante 1 : Montage de Activez la pile en retirant l'émetteur à pour ceci la bande de sépa- l'aide de vis ration...
  • Seite 50: Variante 2 : Fixation De L'émetteur Par Collage

    Insérez les chevilles dans exempte de graisse et sèche. les trous de perçage. Sinon, l'adhérence de la bande adhésive peut être altérée. Choisissez une surface de montage adaptée. Retirez le film de protection au dos de la bande adhésive et collez-la sur la face arrière de la plaque de montage Retirez le film de protection de la face avant de la bande...
  • Seite 51: Utilisation

    Appuyez sur la touche de et le récepteur sont récepteur et maintenez cependant toujours connectés. cette touche enfoncée durant env. 3 secondes. Relâchez-la Utilisation ensuite. Pendant cette opéra- tion, le voyant LED com- Allumer/éteindre mence à clignoter. Votre le récepteur récepteur a basculé...
  • Seite 52: Supprimer (Toutes) Les Connexions Radio

    Supprimer (toutes) compartiment à pile. Vérifiez les connexions radio que la polarité est correcte. Le symbole + doit être dirigé vers l'avant. Replacez la surface tactile sur la plaque de montage Respectez la flèche vers le haut. Entretien et nettoyage Pressez et maintenez la touche de récepteur le récepteur...
  • Seite 53: Problèmes Et Solutions

    Problèmes et Le froid (températures inférieures solutions à - 10°C) peut influencer la puis- sance de la pile d'émetteur Le produit contient des composants ainsi réduire la transmission radio. électroniques sensibles. Certaines Un autre facteur pouvant conduire interférences du produit dues aux à...
  • Seite 54 Votre mairie ou votre Les piles/piles rechargeables municipalité vous ren- défectueuses ou usagées doivent seigneront sur les pos- être recyclées conformément à la sibilités de mise au rebut des directive 2006/66/CE et ses mo- produits usagés. difications. Les piles et/ou piles rechargeables et/ou le produit Afin de contribuer à...
  • Seite 55: Garantie Et Service Après-Vente

    Garantie et service du Code de la consommation et après-vente aux articles 1641 à 1648 et 2232 du Code Civil. Garantie Article L217-4 du Code de la consommation Article L217-16 du Code de la consommation Le vendeur livre un bien conforme au contrat et répond des défauts Lorsque l‘acheteur demande au de conformité...
  • Seite 56: Article L217-12 Du Code De La Consommation

    Le vendeur est tenu de la garantie FR : 00800 333 00 888* à raison des défauts cachés de BE : 03 293 2611* la chose vendue qui la rendent smartwares@teknihall.fr impropre à l‘usage auquel on la smartwares@teknihall.be destine, ou qui diminuent tellement * Numéro gratuit cet usage que l‘acheteur ne l‘aurait...
  • Seite 57: Déclaration De Conformité Ue Simplifiée

    2014/53/UE. La déclaration de conformité européenne est disponible en version complète à l'adresse Internet suivante : www.smartwares.eu Le fabricant garantit que l'installa- tion radio est construite de manière à pouvoir être mise en service dans au moins un état membre sans en- freindre les prescriptions en vigueur relatives à...
  • Seite 59 Legenda van de gebruikte pictogrammen ..Pagina 60 Inleiding ...................Pagina 61 Correct en doelmatig gebruik ............Pagina 61 Omvang van de levering ..............Pagina 61 Beschrijving van de onderdelen ............Pagina 62 Technische gegevens .................Pagina 62 Veiligheidsinstructies ............Pagina 62 Veiligheidsi- nstructies voor batterijen/accu‘s ........Pagina 64 Montage ..................Pagina 66 Benodigd gereedschap en materiaal..........Pagina 66...
  • Seite 60: Legenda Van De Gebruikte Pictogrammen

    Legenda van de gebruikte pictogrammen Lees a.u.b. de gebruiksaanwijzing! Volt (wisselspanning) Hertz (frequentie) Watt (nuttig vermogen) Gelijkstroom d.c. DC Neem de waarschuwingen en veiligheidsinstructies in acht! Levensgevaar en kans op ongevallen voor kleuters en kinderen! Waarschuwing! Kans op een elektrische schok Voer de verpakking en het apparaat op een milieuvrien- delijke manier af! 60 NL/BE...
  • Seite 61: Inleiding

    Set draadloze om de verlichting te regelen. Het lichtschakelaars is alleen geschikt voor gebruik binnenshuis. Dit product is uitslui- tend bedoeld voor het gebruik in Inleiding privé-huishoudens. Een ander ge- bruik dan hiervoor beschreven of Hartelijk gefeliciteerd een verandering aan het product met de aankoop van is niet toegestaan en leidt tot be- uw nieuwe product.
  • Seite 62: Beschrijving Van De Onderdelen

    Beschrijving van Zender de onderdelen Batterijtype: , CR2032 (reeds geïnstalleerd) Ontvanger Reikwijdte: tot 30 m Frequentie: 433,92 MHz Ontvanger-knop (receiver) Zender Veiligheids- Montageplaat instructies Bedieningsknop Afdekraam Isolatiestrip Batterij Aansluiting (stroom/lamp) Schroef Plug LEVENSGEVAAR EN KANS Plakstrip OP ONGEVALLEN VOOR KLEUTERS EN KINDEREN! Dit product kan door kinderen Technische vanaf 8 jaar en ouder alsmede...
  • Seite 63 VERMIJD LEVENS- onderhoud mogen niet door GEVAAR DOOR kinderen zonder toezicht ELEKTRISCHE worden uitgevoerd. SCHOKKEN Laat het product of het ver- pakkingsmateriaal niet achte- loos liggen. Plastic folie/- Voor materiële schade of zakken, kunststof delen etc. persoonlijk letsel dat wordt kunnen voor kinderen een veroorzaakt door onjuist ge- gevaarlijk speelgoed vormen.
  • Seite 64: Veiligheidsi- Nstructies Voor Batterijen/Accu's

    Brand- en Let vooral ook op het wand- letselgevaar! type, aangezien het meege- leverde bevestigingsmateriaal niet geschikt is voor alle soorten Open nooit een van de elek- wanden/muren. trische componenten en steek Informeer in de vakhandel er geen voorwerpen in. Bij naar de voor de desbetref- dergelijke handelingen be- fende wand geschikte plug-...
  • Seite 65 optreden. Neem direct contact slijmvliezen vermijden! Spoel op met een arts. de desbetreffende plekken LEVENSGEVAAR! Houd direct af met schoon water batterijen/accu‘s buiten het en raadpleeg onmiddellijk bereik van kinderen. Raad- een arts! pleeg bij inslikken onmiddel- DRAAG VEILIG- lijk een arts! HEIDSHAND- EXPLOSIEGE- SCHOENEN!
  • Seite 66: Montage

    Risico op beschadiging van – Potlood/markeerstift het product – Spanningzoeker Gebruik uitsluitend het aan- – Kruiskopschroevendraaier gegeven type batterij/accu! – Boormachine Plaats de batterijen/accu‘s – Zijkniptang volgens de weergegeven po- – Boor (ø 6 mm) lariteit (+) en (-) op batterij/ accu en op product.
  • Seite 67 Schroef een eventueel aan- wezige lichtschakelaar van de verdeeldoos en haal deze los van de stroomleiding in de wand. IN L OUT IN L OUT Verbind de ontvanger met de lamp door de zwarte resp. bruine draad van de 230V∼ 50Hz lamp op de aansluiting “...
  • Seite 68: Zender Voorbereiden

    De lamp brandt overeenkomstig Haal eerst de bedieningsknop de laatst ingestelde intensiteit. en daarna het afdekraam van de montageplaat Als de aanwezige lampen een hotelschakeling hebben (twee schakelaars bedienen dezelfde lamp - vaak te vinden in entrees, trappenhuizen of slaapkamers), moet de tweede schakelaar worden doorver- bonden.
  • Seite 69: Variant 1: Zender Met Schroeven Monteren

    Plaats de pluggen in de boorgaten. Plaats de bedieningsknop terug op de montageplaat let hierbij op de pijl naar boven. Bevestig de montageplaat Variant 1: zender met de meegeleverde schroe- met schroeven aan de wand. Let op monteren de pijl naar boven. Plaats het afdekraam terug Haal eerst de bedieningsknop...
  • Seite 70: Draadloze Verbinding Tussen Zender En Ontvanger Instellen

    van de plakstrip negatief Houd de ontvanger-knop worden beïnvloed. 3 seconden lang ingedrukt en laat deze weer los. Tijdens Zoek een geschikte montage- deze procedure begint de led plek uit. te knipperen. Uw ontvanger Verwijder de beschermfolie is nu in de verbindings- van de achterkant van de plak- modus gezet.
  • Seite 71: Bediening

    Bediening (Alle) draadloze verbindingen Ontvanger in-/ wissen uitschakelen Houd de ontvanger-knop op de ontvanger 10 se- conden lang ingedrukt. Tijdens Zet de bedieningsknop deze procedure begint de de stand “I”/“AAN” om de te knipperen. Zodra de zender in te schakelen. op de ontvanger De aangesloten lamp wordt uit gaat, zijn alle verbindingen...
  • Seite 72: Onderhoud En Reiniging

    Storingen gegevens”) in het batterijvak. verhelpen Let op de polariteit. Het +-sym- bool moet naar voren wijzen. Plaats de bedieningsknop Het product bevat kwetsbare terug op de montageplaat elektronische componenten. Het let hierbij op de pijl naar boven. is mogelijk dat het product door radiografische apparaten in de directe omgeving gestoord wordt.
  • Seite 73: Afvoer

    ontvanger verbetert meestal de betekenis: 1–7: kunststoffen/ overdracht van het signaal. 20–22: papier en vezelplaten/ Kou (temperaturen beneden 80–98: composietmaterialen. - 10 °C) kan de batterij-prestatie van de zender en daardoor Informatie over de mo- de draadloze overdracht eveneens gelijkheden om het uit- negatief beïnvloeden.
  • Seite 74: Garantie En Service

    Garantie en service Triman-logo geldt alleen voor Frankrijk. Garantie Defecte of verbruikte batterijen/ accu‘s moeten volgens de richtlijn Het product wordt volgens strenge 2006/66/EG en veranderingen kwaliteitsrichtlijnen zorgvuldig daarop worden gerecycled. Geef geproduceerd en voor levering batterijen/accu‘s en/of het pro- grondig getest.
  • Seite 75: Serviceadres

    EU-conformiteitsverklaring schakelaars, accu’s of dergelijke is op het volgende internetadres onderdelen, die gemaakt zijn van beschikbaar: glas. www.smartwares.eu De fabrikant waarborgt dat de Serviceadres draadloze installatie zo is gecon- strueerd dat deze in tenminste een Teknihall lidstaat kan worden gebruikt zon- Brusselstraat 33 der de geldende voorschriften m.b.t.
  • Seite 77 Legenda použitých piktogramů ......... Strana 78 Úvod ....................Strana 79 Použití ke stanovenému účelu ............Strana 79 Obsah dodávky .................. Strana 79 Popis dílů ..................... Strana 79 Technická data ................... Strana 80 Bezpečnostní pokyny ............Strana 80 Bezpečnostní pokyny pro baterie a akumulátory ......Strana 82 Montáž...
  • Seite 78: Legenda Použitých Piktogramů

    Legenda použitých piktogramů Přečtěte si návod k obsluze! Volt (střídavé napětí) Hertz (frekvence) Watt (příkon) Stejnosměrný proud d.c. DC Dodržujte výstražná a bezpečnostní upozornění! Nebezpečí ohrožení života a úrazu malých a velkých dětí! Výstraha! Nebezpečí zásahu elektrickým proudem Obal a přístroj odstraňujte do odpadu ekologicky! 78 CZ...
  • Seite 79: Úvod

    Sada vypínačů řízených použití nebo změna na výrobku rádiovým signálem nejsou přípustné a vedou k jeho poškození. Výrobce neručí za škody vzniklé jiným použitím než Úvod k popsanému účelu. Výrobek není určen k živnostenskému podnikání. Blahopřejeme Vám ke koupi nového výrobku. Obsah dodávky Rozhodli jste se pro kvalitní...
  • Seite 80: Technická Data

    Bezpečnostní Izolační pásek pokyny Baterie Přípojka (obvod proudu/ svítidlo) Šroub NEBEZPEČÍ Hmoždinky OHROŽENÍ ŽI- Lepicí páska VOTA A ÚRAZU MALÝCH I VĚTŠÍCH DĚTÍ! Tento vý- robek mohou používat děti Technická data od 8 let, osoby se sníženými fyzickými, smyslovými nebo Artikl č.: SH4-99751 duševními schopnosti nebo s nedostatečnými zkušenostmi...
  • Seite 81 Vyhýbejte se mokrému, chlad- poškozený. Před montáží od- nému nebo teplému prostředí, straňte pojistku nebo vypněte které může poškodit elektro- jistič v pojiskové skříňce (po- nické obvody. loha 0). Nastavte jistič do Zabraňte pádům nebo otře- polohy „OFF“ (vypnuto). sům, které mohou poškodit Před montáží...
  • Seite 82: Bezpečnostní Pokyny Pro Baterie A Akumulátory

    Bezpečnostní odpovídat údajům v návodu pokyny pro k provozu. baterie a Upínací šrouby kontaktů v akumulátory elektrických přípojkách musí být dostatečně utažené. Toto platí obzvlášť pro nízkonapě- UCHOVÁVEJTE ťové vodiče pro napětí 12 V. BATERIE MIMO DOSAH DĚTÍ! Nebezpečí požáru Spolknutí...
  • Seite 83 Nevystavujte baterie nebo Používejte jen baterie nebo akumulátory mechanickému akumulátory stejného typu. zatížení. Nekombinujte staré baterie nebo akumulátory s novými! Nebezpečí vytečení baterií/ Odstraňte baterie nebo aku- akumulátorů mulátory při delším nepouží- Zabraňte extrémním podmín- vání z výrobku. kám a teplotám, např. na to- Nebezpečí...
  • Seite 84: Montáž

    Montáž Před instalací se ujistěte, že je vedení, ke kterému má být Potřebné nářadí přijímač připojený, bez a materiál napětí. Za tímto účelem vy- jměte pojistku nebo vypněte Uvedené nářadí a materiály nejsou jistič v pojistkové skříni (po- součástí dodávky. Jedná se zde loha 0).
  • Seite 85: Příprava Vysílače

    Poznámka: Výrobek můžete Pokud ve Vaší instalaci modrý nebo tzv. nulový vodič chybí, připojit k svítidlu s vestavěným neprodleně se obraťte na stmívačem, vlastní výrobek funkci kvalifikovaného elektrikáře tlumení světla nemá. Svítidlo svítí nebo elektromontéra. s naposledy nastavenou intenzitou světla. Pokud stávající...
  • Seite 86: Varianta 1: Přišroubování Vysílače Šrouby

    Nejdříve sejměte plochu tla- čítka a potom rámeček z montážní desky Nasaďte plochu tlačítka na montážní desku , dbejte přitom na šipku směrem nahoru. Varianta 1: Přišroubování Aktivujte baterii vytažením vysílače šrouby izolačního pásku Nejdříve sejměte plochu tla- čítka a potom rámeček z montážní...
  • Seite 87: Varianta 2: Přilepení Vysílače

    Zvolte si vhodnou montážní plochu. Stáhněte ochrannou folii ze zadní strany lepící pásky a přilepte jí na zadní stranu montážní desky Stáhněte ochrannou folii z přední strany lepící pásky Přilepte vysílač s lepící Přišroubujte montážní desku páskou na montážní plo- přiloženými šrouby chu a pevně...
  • Seite 88: Obsluha

    Obsluha nyní přešel do režimu spojo- vání. Zapínání a vypínání přijímače Ke spojení vysílače s přijí- mačem nastavte plochu tlačítka do polohy „I“/ „ZAP“. Přitom se rozsvítí LED na přijímači. Pro zapnutí vysílače K vypnutí přijímače stavte plochu tlačítka stavte plochu tlačítka polohy „I“/„ZAP“.
  • Seite 89: (Všechna) Rádiová Spojení Smazat

    (Všechna) Rádiová Nasaďte plochu tlačítka spojení smazat na montážní desku , dbejte přitom na šipku směrem nahoru. Údržba a čištění NEBEZPEČÍ ZASAŽENÍ ELEKTRICKÝM PROUDEM! Z důvodů elektrické bezpečnosti se výrobek nikdy ne- Stiskněte a přidržte na 10 vte- smí čistit ostrými čistícími prostředky řin tlačítko přijímače nebo dokonce ponořovat do vody.
  • Seite 90: Zlikvidování

    Zlikvidování Elektrostatické výboje mohou způsobit poruchy funkcí. Při těchto poruchách na chvíli vyndejte a Obal se skládá z ekologických znovu vložte baterie. Překážky, materiálů, které můžete zlikvidovat jako například betonové stěny, prostřednictvím místních sběren mohou vést ke znatelnému rušení recyklovatelných materiálů. příjmu.
  • Seite 91: Záruka A Servis

    odevzdejte opotřebované baterie/ akumulátory u komunální sběrny. Výrobek vč. příslušenství a obalové Záruka a servis materiály jsou recyklovatelné a podléhají rozšířené odpovědnosti Záruka výrobce. Likvidujte je odděleně podle ilustrovaných Info-tri (infor- mace o třídění), abyste mohli lépe Výrobek byl vyroben s nejvyšší nakládat s odpady.
  • Seite 92: Adresa Servisu

    (např. na prohlášení o konformitě je k baterie), dále na poškození křeh- dispozici na webové stránce: kých, choulostivých dílů, např. www.smartwares.eu vypínačů, akumulátorů nebo dílů zhotovených ze skla. Výrobce zaručuje, že je rádiové zařízení konstruované tak, že je ho možné...
  • Seite 93 Legenda použitých piktogramov ......Strana 94 Úvod ....................Strana 95 Používanie v súlade s určeným účelom ..........Strana 95 Obsah dodávky .................Strana 95 Popis častí ..................Strana 96 Technické údaje .................Strana 96 Bezpečnostné upozornenia ..........Strana 96 Bezpečnostné upozornenia týkajúce sa batérií/ aku- mulátorových batérií ..............Strana 98 Montáž...
  • Seite 94: Legenda Použitých Piktogramov

    Legenda použitých piktogramov Prečítajte si návod na používanie! Volt (striedavé napätie) Hertz (frekvencia) Watt (efektívny výkon) Jednosmerný prúd d.c. DC Rešpektujte výstražné a bezpečnostné upozornenia! Nebezpečenstvo ohrozenia života a nebezpečenstvo nehody pre malé a staršie deti! Výstraha! Nebezpečenstvo zásahu elektrickým prúdom Obal a zariadenie ekologicky zlikvidujte! 94 SK...
  • Seite 95: Strana

    Vypínače na diaľkové na prevádzku vo vnútorných priesto- ovládanie roch. Tento výrobok je určený len na používanie v súkromných domác- nostiach. Iné použitie ako vyššie Úvod uvedené alebo úpravy výrobku nie sú povolené a vedú k poško- Blahoželáme Vám ku deniam.
  • Seite 96: Popis Častí

    Popis častí Vysielač Typ batérie: , CR2032 Prijímač (vopred nainšta- lovaná) Tlačidlo prijímača (receiver) Dosah: až do 30 m Vysielač Frekvencia: 433,92 MHz Montážna doska Dotyková plocha Bezpečnostné Vonkajší rám upozornenia Deliaci pásik Batéria Prípojka (prúdový obvod/ svietidlo) Skrutka Hmoždinka Lepiaci pásik NEBEZPEČENSTVO OHROZENIA ŽIVOTA...
  • Seite 97 ZABRÁŇTE OHRO- jeho používaním. Deti sa s ZENIU ŽIVOTA výrobkom nesmú hrať. Čiste- ZÁSAHOM ELEK- nie a údržbu nesmú vykoná- TRICKÝM PRÚDOM vať deti bez dozoru. Produkt alebo obalový mate- riál nenechávajte voľne ležať V prípade vecných škôd alebo bez povšimnutia. Plastové fó- poranenia osôb, ktoré...
  • Seite 98: Bezpečnostné Upozornenia Týkajúce Sa Batérií/Aku- Mulátorových Batérií

    Nebezpečenstvo Vykonanie montáže prene- požiaru a chajte odborníkom. poranenia! Bezpodmienečne zohľadnite vlastnosti steny, pretože prilo- žený upevňovací materiál nie Nikdy neotvárajte žiadny z je vhodný pre všetky typy stien. elektrických prevádzkových V špecializovanej predajni sa prostriedkov ani do nich ne- informujte o vhodných hmož- strkajte žiadne predmety.
  • Seite 99 Riziko vytečenia batérií/ chemické popáleniny, per- akumulátorových batérií foráciu tkaniny mäkkých častí a smrť. Ťažké popáleniny sa Batérie/akumulátorové batérie môžu vyskytnúť dve hodiny nikdy nevystavujte extrémnym po prehltnutí. Okamžite podmienkam a teplotám, ktoré vyhľadajte lekára. by na ne mohli pôsobiť, napr. NEBEZPEČENSTVO na vykurovacích telesách/ OHROZENIA ŽIVOTA!
  • Seite 100: Montáž

    batérie/akumulátorové batérie nezáväzné údaje a hodnoty pre s novými! orientáciu. Ak produkt dlhší čas nepouží- Charakter materiálu sa riadi podľa vate, vyberte z neho batérie/ individuálnych daností na mieste. akumulátorové batérie. – ceruzka/označovací nástroj Riziko poškodenia produktu – prístroj na meranie napätia Používajte výhradne uvedený...
  • Seite 101 Beznapäťový stav prekontro- lujte pomocou skúšačky na- pätia. Odšróbujte prípadný existu- júci spínač svetla od rozvod- nej skrinky a oddeľte ho od stenového kábla. IN L OUT Spojte prijímač so svietid- lom tak, že čierny resp. hnedý IN L OUT kábel svietidla zapojíte na prípojku „...
  • Seite 102: Príprava Vysielača

    Ak existujúca inštalácia svie- tidla zodpovedá obojsmer- nému okruhu (dva spínače spínajú rovnakú lampu, ktorá sa často nachádza na chod- bách, schodiskách alebo spál- ňach), druhý spínač musí byť pripojený cez. V prípade akých- koľvek nejasností alebo otá- zok sa bezodkladne obráťte na kvalifikovaného elektrikára Aktivujte batériu tak, že...
  • Seite 103: Varianta 1: Montáž Vysielača So Skrutkami

    Nasaďte dotykovú plochu naspäť na montážnu dosku Upevnite montážnu dosku všimnite si šípku nahor. pomocou priložených skrutiek na stenu. Všimnite si šípku hore. Varianta 1: Montáž Nasaďte vonkajší rám vysielača so naspäť na montážnu dosku skrutkami , dbajte na upevňovacie špičky.
  • Seite 104: Nastavenie Rádiového Spojenia Medzi Vysielačom A Prijímačom

    Zvoľte vhodnú montážnu procesu začne LED blikať. plochu. Váš prijímač je teraz prep- Odstráňte ochrannú fóliu zo nutý do režimu pripojenia. zadnej strany lepiaceho pá- sika a nalepte ho na zadnú stranu montážnej dosky Odstráňte ochrannú fóliu z prednej strany lepiaceho pásika Nalepte vysielač...
  • Seite 105: Obsluha

    Obsluha Vymazanie (všetkých) Zapnutie/ rádiových spojení Vypnutie prijímača Stlačte a 10 sekúnd podržte stlačené tlačidlo prijímača na prijímači . Počas tohto Uveďte dotykovú plochu procesu začne LED blikať. do pozície „I“/„ZAP“, aby Keď zhasne LED na prijí- ste zapli vysielač .
  • Seite 106: Údržba A Čistenie

    Symbol + musí ukazovať do- prístroje z okolia výrobku, ak predu. produkt vykazuje poruchy. Elek- Nasaďte dotykovú plochu trostatické výboje môžu viesť k naspäť na montážnu dosku funkčným poruchám. Pri takýchto , dbajte na šípku nahor. funkčných poruchách vyberte na krátky čas batériu a znova ju vložte.
  • Seite 107: Likvidácia

    Likvidácia Obal pozostáva z ekologických materiálov, ktoré môžete odovzdať Výrobok vr. príslušenstva a oba- na miestnych recyklačných zber- lové materiály sú recyklovateľné ných miestach. a podliehajú rozšírenej zodpo- vednosti výrobcu. Pre lepšie spra- Všímajte si prosím covanie odpadu ich zlikvidujte označenie obalových oddelene podľa obrázkov Info-tri materiálov pre triede- (informácie o triedení).
  • Seite 108: Záruka A Servis

    Záručná doba začína plynúť dá- Teknihall Elektronik GmbH tumom kúpy. Starostlivo si prosím Assar-Gabrielsson-Str. 11‒13 uschovajte originálny pokladničný 63128 Dietzenbach lístok. Tento doklad je potrebný NEMECKO ako dôkaz o kúpe. 00800 333 00 888* smartwares-service-sk@teknihall.com * Bezplatné telefónne číslo 108 SK...
  • Seite 109: Zjednodušené Eú Konformitné Vyhlásenie

    2014/53/EÚ. Úplný text EÚ konformitného vyhlásenia je k dispozícii na nasledujúcej interne- tovej adrese: www.smartwares.eu Výrobca zaručuje, že rádiový systém je navrhnutý tak, aby sa mohol prevádzkovať aspoň v jednom členskom štáte bez toho, aby to porušovalo platné predpisy...
  • Seite 113 Tristar Europe B.V. Jules Verneweg 87 5015 BH Tilburg THE NETHERLANDS Stand der Informationen · Last Information Update · Version des informations · Stand van de informatie · Stav informací · Stav informácií: 07/2022 · Ident.-No.: SH4-99751072022-8 IAN 380872_2110...

Inhaltsverzeichnis