Herunterladen Diese Seite drucken
PawHut D06-111 Montageanleitung
Vorschau ausblenden Andere Handbücher für D06-111:

Werbung

Verfügbare Sprachen
  • DE

Verfügbare Sprachen

  • DEUTSCH, seite 8
INdbb080V01_GL
INdbb080_GL_D06-111
IMPORTANT, RETAIN FOR FUTURE REFERENCE: READ CAREFULLY
ASSEMBLY & INSTRUCTION MANUAL

Werbung

loading

Inhaltszusammenfassung für PawHut D06-111

  • Seite 1 INdbb080V01_GL INdbb080_GL_D06-111 IMPORTANT, RETAIN FOR FUTURE REFERENCE: READ CAREFULLY ASSEMBLY & INSTRUCTION MANUAL...
  • Seite 2 MANUAL INdbb080_GL D06-111 IMPORTANT, RETAIN FOR FUTURE REFERENCE: READ CAREFULLY Put the position plates on both side of the door way, then mark the screw hold with a pencil Make sure the plate is perpendicular to the ground. Notice: put plate L on left side, plate R on right side.
  • Seite 3 3 . Turn the knob to the off state. 4 . Press down the knob and turn to the Lock state, then finish close the gate. Use M3.5*40 screw when install with wall mat. REMOVE THE GATE TROUBLESHOOTING 1 . Press down the knob and turn to the 2 .
  • Seite 4 fixation B soit tourné vers l'autre INdbb080_GL côté de la porte. Tapis mural D06-111 Mesurer la largeur Largeur d'installation : dans les 140cm Ligne de plinthe Attention ! Utilisez des tapis muraux s'il y a une ligne de plinthe, rendez la porte perpendiculaire au sol.
  • Seite 5 2 Installation de la tête de fixation inférieure du côté gauche 3 .Tournez le bouton en position d'arrêt 4 . Appuyez sur le bouton et tournez-le pour le mettre en Tête de fixation position de verrouillage, puis terminez la fermeture de la barrière inférieure du côté...
  • Seite 6 fijación B oriente hacia el otro lado de la INdbb080_GL Tapete de pared puerta. D06-111 Medir el ancho Ancho de instalación: Dentro de 140 cm Línea de rodapié ¡Consejo! Utilice los tapetes de pared si hay línea de rodapié, haga la puerta perpendicular al piso.
  • Seite 7: Solución De Problemas

    2 Installation de la tête de fixation inférieure du côté gauche 3 . Gire la perilla para cerrarla. 4 . Presione la perilla y gírela a “Lock (Bloquear)”, Tête de fixation entonces la puerta está cerrada. inférieure du côté Trou de 6 mm gauche 3.Installation de la tête de fixation Tête...
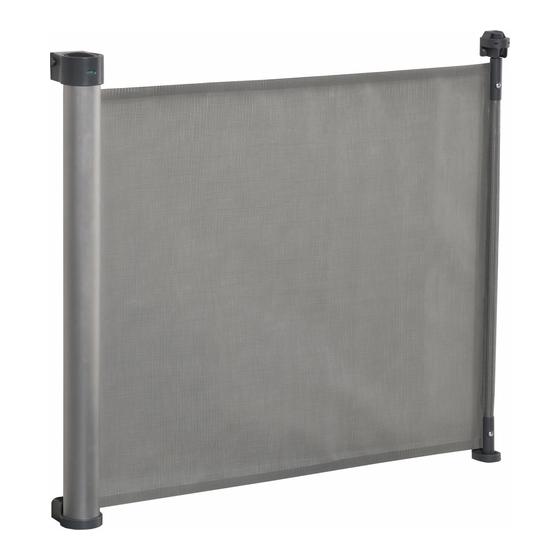
  • Seite 8 INdbb080_GL Wandmatte damit die Befestigungsstange B zur anderen Seite der Tür zeigt. D06-111 Messen Sie die Breite Installationsbreite: bis 140 cm Sockelleiste Tipp! Verwenden Sie Wandabstandshalter, wenn es eine Sockelleiste gibt, damit das Tor senkrecht zum Boden steht. Die untere Fanghalterung und der untere Türsicherungshalter müssen...
  • Seite 9 2 Installation des Türsicherungshalters links unten 3 . Drehen Sie den Drehknopf in den Aus-Zustand 4 . Drücken Sie den Knopf nach unten und drehen Sie ihn Türsicherungshalt in den Zustand Verriegeln, dann schließen Sie das Gitter. er links unten 6 mm Loch 3.Installation der Fanghalterung rechts oben Türsicherungshalter...
  • Seite 10 MANUAL fissaggio B sia rivolto verso l'altro lato della porta. INdbb080_GL Cuscinetto parete D06-111 Misurare la larghezza Larghezza di installazione: entro 140cm MADE IN CHINA IMPORTATO DA: Battiscopa AOSOM Italy srl Centro Direzionale Milanofiori...
  • Seite 11: Risoluzione Problemi

    2 fissaggio della testina della fibbia sinistra inferiore 3 . Ruotare la manopola su chiuso 4 . Premere la manopola in basso e ruotarla fino a bloccarla, quindi chiudere il cancelloetto. Testina fibbia fissaggio sinistra Foro da 6mm inferiore 3 fissaggio della testina della fibbia destra superiore Testina fibbia fissaggio...