Sinapi biomedical XS50 Gebrauchsanleitung
Quicklinks
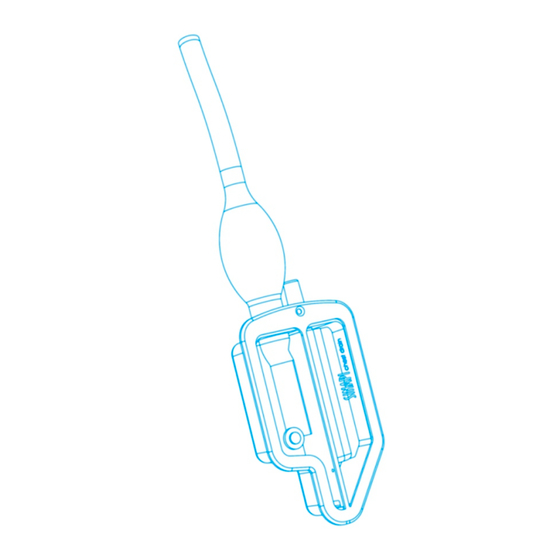
REF
XS50
CONTENTS
1 x 50ml Chest Drain (Pneumothorax) (no suction control)
OBSAH
1 x 50ml hrudní drenáž (Pneumothorax) (bez kontroly sání)
CONTENU
Drain thoracique (pneumothorax) 1 x 50 ml (aucun régulateur d'aspiration)
INHALT
1 x 50ml Thoraxdrainage (Pneumothorax) (ohne Sogregulierung)
İÇİNDEKİLER
1 x 50ml Göğüs Drenaj Seti (Pnömotoraks) (Vakum Kontrolsüz)
CONTENIDO
1 x 50ml Dispositivo quirúrgico para Drenaje Torácico (Neumotórax) (sin control de
succión/aspiración)
CONTEÚDO:
1 x 50ml Dreno Torácico (Pneumotórax) (sem controlo de aspiração)
CONTENUTO:
1x 50ml Drenaggio Toracico (Pneumotorace) (senza regolazione dell'aspirazione)
CAUTION: Federal law restricts this device to sale by or on the order of a physician.
50 C
o
STERILE EO
0
o
C
1639
Single Use
Do not use if unit
If re-used the sterility
See Instructions
Avoid Extreme
package is opened or
of the device is
for Use
Temperatures
compromised, which
damaged.
will greatly increase infection risk
Recommendation: Replace the device after 7 days or sooner if the closed system becomes compromised
MANUFACTURED IN SOUTH AFRICA
SINAPI biomedical, ARC Infruitec North Campus
Lelie Road, Stellenbosch, 7600, South Africa
LOT
Tel: +27 21 887 5260 Fax: +27 86 617 3296
email: sales@sinapbiomedical.com
Use By
Xs50 Instructions For Use Rev 04 02/2020
DEUTSCH
GEBRAUCHSANLEITUNG
A. BESCHREIBUNG
Die SINAPI Thoraxdrainage-Einheit besteht aus einer Gleitringdichtung, einem Behälter für das abgesaugte Sekret, Luftverlustdetektor, Pumpball und Abflusshahn. Bestimmte
Gerätetypen sind mit einem Saugregler ausgestattet.
B. INDIKATION
Anwendung der SINAPI Thoraxdrainage:
1. Zum Absaugen von Flüssigkeit und Luft aus den Mediastinal- und Pleurahöhlen in postoperativen und traumatischen Situationen.
2. Zur Verhinderung der neuerlichen Akkumulation von Flüssigkeit und Luft in den Mediastinal- und Pleurahöhlen.
3. Zur Unterstützung der Wiederausdehnung der Lungen und der Wiederherstellung der normalen Atemdynamik.
C. AUFBAU
WIE SIE SICH GLEICH NACH DEM EINFÜHREN ÜBER DIE POSITION DES BRUSTKATHETERS VERGEWISSERN.
- Der Brustkatheter muss fest auf den Anschluss des Absaugschlauchs gesteckt sein.
Pneumothorax: Achten Sie auf Dampfbildung an der Innenseite des Brustkatheters. Der Pumpball muss sich anfangs wieder ausdehnen, was das Vorhandensein von Luft in der
Pleurahöhle bestätigt. Wenn er sich nicht wieder ausdehnt, bedeutet dies, dass sich keine Luft an der Katheterspitze befindet und somit der Katheter möglicherweise nicht korrekt
positioniert wurde (oder der Pneumothorax hat sich aufgelöst).
EXPANDIERTER
MOBILE PATIENTEN
PUMPBALL
Der kurze Verbindungsschlauch erleichert die Mobilisierung des Patienten
D. MANUELLE STEIGERUNG DER ABFLUSSGESCHWINDIGKEIT
Sie erhöhen die Abflussgeschwindigkeit, indem Sie den Pumpball drücken, bis er zusammengedrückt bleibt (Abb. 1). Falls sich der Ball wieder ausdehnt, klemmen Sie den
Schlauch oberhalb des Ventils ab und drücken den Ball erneut. Lassen Sie Schlauch und Pumpball los. Dann wiederholen Sie das Verfahren. Auf diese Weise wird die
Saugwirkung unterstützt und die Abflussgeschwindigkeit erhöht.
Bei einer bronchopleuralen Fistel (ständiger Luftverlust) bleibt der Pneumothorax, und der Pumpball dehnt sich immer wieder aus – der Arzt wird vermutlich externe Absaugung anordnen.
E. ANSCHLUSS EINER EXTERNEN VAKUUMQUELLE
Bei anhaltendem Luftverlust ist der Anschluss einer externen Vakuumquelle zu empfehlen. Der Sog wird an der Vakuumquelle
auf den vom behandelnden Arzt angeordneten Wert zwischen - 5cm H2O und - 45cm H2O eingestellt.
F. BLASENBILDUNG / STÄNDIGEN LUFTVERLUST ERKENNEN
Drücken Sie den Pumpball. Wenn er zusammengedrückt bleibt, tritt keine Luft aus. Falls er sich wieder ausdehnt, spritzen Sie 20 ml Salzlösung über die
nadellose Öffnung in die Luftverlustkammer.
Blasenbildung oder Bewegung des Salzspiegels = Luftverlust (Abb. 2 – Luftverlustkammer)
Bei Verwendung der Leckagenkontrollkammer zur Überwachung von Luftverlust, muss die Kochsalzlösung bis zur vorgesehenen Markierung eingefüllt werden.
G. ÜBERWACHUNG
Abb. (3a) (das ist gut) ZUSAMMENGEDRÜCKTER Pumpball - Grund: Absaugung findet statt / negativer Druck wird erzielt - sofern der Schlauch nicht blockiert ist.
Abb. (3b) (nicht gut) EXPANDIERTER Pumpball - Mögliche Gründe: 1) Pneumothorax
2) Fistel (ständiger Luftverlust)
3) Undichte Schlauchverbindungen (Luft gelangt in das System)
H. ENTFERNEN DES KATHETERS (Vergewissern Sie sich, dass 1 und 2 gegeben sind)
1. Das Drainagevolumen muss gering sein.
Vergewissern Sie sich auf klinische Weise
2. Drücken Sie den Pumpball fest zusammen: der Ball muss zusammengedrückt und das Ventil abgewinkelt bleiben
und/oder durch Röntgen des Brustkorbs.
(Hinweis auf negativen intrapleuralen / mediastinalen Druck).
I. PFLEGE
- Oberhalb des Scheffler-Einwege-Ventils kann sich Flüssigkeit im Schlauch ansammeln. Das ist normal und ein Anzeichen dafür, dass der Druck oberhalb des Ventils negativ ist.
- Bei mobilen Patienten ist es empfehlenswert, den Behälter am Körper des Patienten zu fixieren, um den sichern Sitz des Thoraxkatheters und die Dichtigkeit des Systems
zu gewährleisten.
K. VORSICHTSMASSNAHMEN
1. Die Sinapi-Thoraxdrainage darf nur auf ärztliche Anweisung und durch entsprechend geschultes Personal eingesetzt werden.
2. Es muss sichergestellt sein, dass die SINAPI-Thoraxdrainage mit den verwendeten Thoraxkathetern kompatibel ist.
3. Die Dichtigkeit des vollständigen Systems vom Thoraxkatheter bis zur SINAPI-Thoraxdrainage muss überprüft werden und sichergestellt sein.
4. Thoraxkatheter sollten okklusiv verbunden werden
5. Der Drainageschlauch zum Patienten darf nicht abgeknickt oder auf andere Weise blockiert sein und darf keine unbeabsichtigten Schlaufen / Syphons bilden.
6. Die Drainagegeschwindigkeit sowie die Menge und Konsistenz des Sekrets das mit der SINAPI-Thoraxdrainage aufgefangen wird, sollte regelmäßig überprüft werden.
7. Wenn wenig oder keine Sekretbildung zu beobachten ist, sollte das komplette System auf eventuelle Blockaden hin überprüft werden.
8. Schlauch nicht abklemmen, dies behindert den Ablauf und kann die Atemfunktion des Patienten beeinträchtigen.
9. Sekretproben können über den nadelfreien Zugang an der Vorderseite der SINAPI-Thoraxdrainage entnommen bzw. der Sammellbehälter entleert werden.
BITTE BEACHTEN:
Die Volumenangaben sind angenähert.
ENGLISH
INSTRUCTIONS FOR USE
A. DESCRIPTION
The SINAPI Chest Drain is a chest drainage unit incorporating a dry seal, small fluid collection reservoir, air leak detector and suction bulb.
B. INDICATIONS
The SINAPI Chest Drain is used for:
1. The evacuation of air from the pleural cavity.
2. The prevention of air re-accumulation in the pleural cavity.
3. The facilitation of lung re-expansion and restoration of normal breathing dynamics.
C. SETUP
HOW TO CONFIRM CHEST CATHETER POSITION DIRECTLY AFTER INSERTION
- Ensure a tight fit between the inlet tubing connector and the chest catheter.
To confirm Pneumothorax: Look for vapour on the inside of the chest tube. Depress the bulb, the bulb will not stay depressed
but initially re-expand. If it does not re-expand it may confirm an absence of air at the catheter tip. This will mean that the catheter
is not placed in the pleural space (or pneumothorax is resolved).
MOBILE:
The short connecting tube facilitates mobilisation of patients.
D. MANUALLY INCREASING THE DRAINAGE RATE
Increase the drainage rate by depressing the bulb until the bulb stays depressed Fig. (1). If the bulb re-expands, pinch the tubing above the valve and then depress
the bulb. Release both. Repeat. This applies suction and increases the drainage rate.
For BP fistula (persistent air-leak) pneumothorax will remain and the bulb will not stay depressed - attach external suction if required by physician.
E. ATTACHING TO WALL SUCTION
If the bulb does not stay depressed, attach suction. Set suction between -5cm H2O and -45cm H2O pressure - as prescribed by physician.
F. DETECTING BUBBLING / PERSISTENT AIR-LEAK
Depress the bulb. If it stays depressed there is no air leak. If it re-expands, syringe 20ml into the air leak chamber via the needle-free port.
Bubbling or saline level movement = air leak Fig. (2) (Air-Leak Chamber)
To monitor air leak, ensure that the saline in the Air Leak Chamber is maintained to the fill line at all times.
G. MONITORING
Fig. (3a) (Good News) DEPRESSED BULB - Reason: Suction/Negative pressure is achieved - provided there is no blockage in tubing
Fig. (3b) (Bad News) EXPANDED BULB - Potential Reasons: 1) Pneumothorax
2) Fistula (Persistent Air Leak)
3) Tube connections are not secure (air leaks into the system)
H. A GUIDE WHEN TO REMOVE THE CATHETER (You need to confirm both 1. and 2.)
1. Drainage volume must be low.
2. Depress the bulb firmly: the bulb must stay depressed and the valve angled (indicating negative intra-pleural / mediastinal pressure). Confirm clinically and/or with chest x-ray.
I. MAINTENANCE
- A small volume of liquid might accumulate in the tube above the valve. This is normal and an indication of negative pressure above the valve.
- During outpatient management, secure the chest drain reservoir to the patient to prevent dislodgement of the catheter.
K. CAUTIONS and WARNINGS
1. This device is only intended for use by appropriately trained personnel.
7. Little or no drainage may indicate a blockage in the drainage system.
2. Compatibility of the Sinapi Chest Drain with thoracic catheters needs to be established
8. Do not clamp tube, this will inhibit drain operation and may compromise respiratory
by the user.
function of patient.
3. Assess the thoracic catheter connections for signs of an air leak.
9. Samples of the drained fluid can be taken directly from the needle-free sampling port
4. Thoracic catheter dressings should be occlusive.
located on the front of the device.
5. Ensure that there are no dependent loops or kinks in the patient drainage tube.
This port can also be used to drain fluid from the collection reservoir.
6. The volume, rate and nature of the fluid collected in the SINAPI Chest Drain should be
10. Replace the XS50 chest drain if it is damaged or if there is evidence of occlusion.
monitored regularly.
11. Connect only ONE chest catheter per chest drain.
PATIENT INFORMATION FOR HOME CARE
Latex Free
free
A. EMPTYING THE DEVICE
B. SHOWERING AND BATHING
1. Wash your hands for at least 30 seconds & dry with a clean towel.
The device should not be submerged - it is best to either wash at a sink or take a shower.
2. Wipe the Needle-free sampling port with an alcohol swab & let it dry.
When showering, cover the dressing with plastic and secure it with tape to keep it dry.
3. Gently push and twist the tip of a new syringe into the port.
C. INFORM YOUR PHYSICIAN & GO TO THE CLOSEST EMERGENCY UNIT IF:
4. Tilt the device to the left to allow fluid to pool at the sampling port.
- The chest tube accidentally comes out:
5. Pull the plunger back on the syringe to remove the fluid.
1. Do not try to reinsert the tube.
6. Remove the syringe & empty the drainage into your toilet.
2. Immediately cover the chest wound with a dressing and plaster.
7. Discard the empty syringe into the bin.
8. Wash and dry your hands.
- The device disconnects from the chest catheter:
9. Record the colour and amount of the fluid that you removed.
1. Kink it and try to reconnect.
IMPORTANT
2. Press the bulb a few times after reconnecting it.
- If the fluid level in the collection chamber exceeds the Max fill line, it may leak out.
3. Keep the tube kinked if you are unable to reconnect it.
- Empty the device when it reaches the Max fill line and preferably before you lie down
- You experience any breathing difficulty or a new chest pain.
- To prevent infection, do not touch the syringe tip or the port when emptying the device
- Your physician or nurse will inform you regarding dressing changes.
- Fluid drainage increases / stops or changes colour.
ESPAÑOL
INSTRUCCIONES DE USO
A. DESCRIPCION
El Dispositivo para Drenaje Torácico SINAPI es un Dispositivo de drenaje que incorpora un sello seco, un receptáculo para drenaje de pequeños volúmenes de fluido, un detector de
pérdida de aire, un bulbo de succión, llave (grifo) de drenaje y, en algunos modelos, regulador de succión.
B. INDICACIONES
El Dispositivo para Drenaje Torácico SINAPI se utiliza para:
1. Evacuar aire de la cavidad pleural.
2. Prevenir la reacumulación de aire en la cavidad pleural.
3. Facilitar la re-expansión pulmonar y restaurar la dinámica de respiración normal.
C. PREPARACION PARA SU USO
COMO CONFIRMAR LA POSICIÓN DEL LA SONDA/CATÉTER DIRECTAMENTE DESPUÉS DE SU INSERCIÓN
- Compruebe que la unión entre el tubo de conexión y la sonda/catéter en el tórax es firme
Neumotórax: Buscar vapor en el interior del tubo de drenaje torácico. Presione el bulbo, éste no permanecerá oprimido sino que se volverá a re-expandir. Si no lo hace, esto
confirma ausencia de aire en la punta del catéter/sonda y por lo tanto que el mismo no está colocado en el espacio de la pleura (o el neumotórax se ha resuelto).
EINGEDRÜCKTER
PACIENTES CON MOVILIDAD
PUMPBALL
El tubo corto de conexión facilita la movilización de los pacientes.
Luft strömt nicht
aus
X
D. INCREMENTAR EL RITMO DEL DRENAJE DE FORMA MANUAL
Abb.
Schlauch
(1)
abklemmen
Aumente el ritmo de drenaje presionando el bulbo hasta que se mantenga presionado (Fig. 1). Si el bulbo vuelve a dilatarse, pellizque el tubo sobrepasando la
válvula y luego comprima el bulbo. Suelte ambos. Repita el procedimiento. Esto produce succión y aumenta el ritmo de drenaje.
Pumpball
Para fístula BP (persistente pérdida de aire) el neumotórax se mantendrá y el bulbo no quedará presionado – si fuera necesario solicite al médico que agregue
drücken
succión externa.
E. CONECTANDO A LA SUCCIÓN DE PARED
Si el bulbo no queda presionado, conectar succión.
Gradúe la presión de succión entre -5cm H2O y -45 cm H2O – como lo prescriba el médico.
F. DETECTANDO BURBUJAS/ PERDIDA PERSISTENTE DE AIRE
Abb. (2)
Presione el bulbo. Si se mantiene presionado, no hay pérdida de aire. Si vuelve a expandirse, inyectar 20ml de solución salina a través del punto de inyección
nadellose
"sin aguja".
öffnung
Blasenbildung
Burbujas o variaciones en el nivel de la solución salina = perdida de aire. Fig. (2) (Recámara de Pérdida de Aire)
Bewegung
2
3
1
des Salzspiegels
5
4
6
Para controlar la pérdida de aire, compruebe la solución salina que la controla, mantenga constantemente el nivel correcto.
G. CONTROL
Abb.
Abb.
Fig. (3a) (buenas noticias) BULBO OPRIMIDO - Motivo: se ha logrado Succión/ Presión - siempre y cuando no esté bloqueado el tubo.
(3a)
(3b)
Fig. (3b) (malas noticias) BULBO EXPANDIDO - Posibles Razones: 1) Neumotórax
X
2) Fístula (Pérdida de Aire Persistente)
Gut
3) Las conexiones al tubo no son seguras (pérdida de aire en el sistema)
H. GUIA PARA RETIRAR EL CATETER/SONDA (Ud. Necesita confirmar aspectos 1 y 2)
1. El volumen de drenaje debe ser bajo.
2. Presione firmemente el bulbo: este debe permanecer comprimido y la válvula en ángulo (indicando presión intra-pleural/del mediastino negativa).
I. MANTENIMIENTO
- El líquido podría acumularse en el tubo que está por encima de la válvula. Esto es normal e indica presión negativa por encima de la válvula.
- Durante visitas del paciente a consultas externas, asegure el drenaje torácico para prevenir que se salga del catéter/sonda.
K. PRECAUCIONES y ADVERTENCIAS
1. Este dispositivo debe ser utilizado únicamente por personal capacitado.
2. La Compatibilidad del Drenaje Torácico SINAPI con catéteres torácicos debe ser establecida por el usuario.
3. Compruebe que la conexión del catéter torácico no muestra signos de pérdida de aire.
4. Los vendajes del catéter torácico deben estar bien cerrados, oclusión total.
5. Compruebe que el tubo de drenaje del paciente no tiene obstrucciones (dobleces u otros)
6. El volumen, velocidad y naturaleza del líquido que se recoge en el dispositivo de Drenaje torácico SINAPI debe ser controlado regularmente.
7. Poca cantidad o ausencia de drenaje puede indicar un bloqueo en el sistema.
8. No clampe o bloquee el tubo, esto inhibirá la operación de drenaje y puede comprometer la función respiratoria del paciente.
9. Pueden tomarse muestras del fluido drenado directamente desde el puerto de muestreo libre de agujas ubicado en la parte frontal del dispositivo.
10. Recambio del dispositivo XS50 si está dañado o presenta signos de oclusión.
11. Conecte solamente UN drenaje por catéter.
ČESKÁ REPUBLIKA
NÁVOD K POUŽITÍ
A. POPIS
Hrudní drenáž SINAPI je sadou pro provedení hrudní drenáže. Obsahuje suchý jednocestný ventil, sběrnou nádobu na tekutiny, detektor úniku vzduchu, sací balónek, výpustný
kohout a u některých jednotek také regulátor sání.
Side effects may include:
Pain, hemorrhage, infection,
B. INDIKACE
re-expansion pulmonary oedema
Hrudní drenáž SINAPI slouží k:
and death (< 0.2% of cases)
1. Evakuaci tekutiny a vzduchu z mediastina a pleurální dutiny při pooperačních a traumatických stavech.
2. Prevenci opětovné akumulace tekutiny a vzduchu v mediastinu a pleurální dutině.
3. Zajištění opětovné expanze plic a obnovení normální dýchací dynamiky.
EXPANDED BULB
DEPRESSED BULB
C. ZAVEDENÍ
X
JAK POTVRDIT POZICI HRUDNÍHO DRÉNU IHNED PO ZAVEDENÍ
- Přesvědčte se o správném propojení konektoru přívodní trubice a hrudního drénu
Jak prokázat pneumothorax: Podívejte se zda se nenachází pára na vnitří straněhrudního drénu. Balónek nezůstane stlačený, ale začne se ihned nafukovat.
(Pokud se znovu nenafoukne, potvrdí se tím nepřítomnost vzduchu ve špičce katetru. To znamená, že katetr není zaveden v pohrudniční dutině (nebo je pneumothorax vyřešen)).
MOBILNÍ PACIENTI
Fig.
pinch
(1)
Krátký spojovací tkatetr usnadňuje mobilizaci pacientů.
tubing
depress
bulb
D. MANUÁLNÍ URYCHLENÍ DRENÁŽE
Rychlost drenáže můžete zvýšit stisknutím balónku tak, aby zůstal stlačený, viz obr. (1). Pokud se balónek znovu nafoukne, stiskněte trubici nad ventilem a
Fig. (2)
balónek znovu stlačte. Obojí pusťte. Opakujte proces. Tím dojde k sání a zvýší se rychlost drenáže.
needle-free
U bronchopleurální píštěle (trvalý únik vzduchu) pneumothorax nezmizí a balónek nezůstane stlačený. Pokud to lékař nařídí, připojte vnější sání.
port
bubbling
saline level
movement
3
2
1
6
5
4
E. PŘIPOJENÍ K NÁSTĚNNÉ SACÍ JEDNOTCE
Pokud balónek nezůstane stlačený, připojte sání.
Fig.
Fig.
Sání nastavte nahodnotu mezi -5 cm a -45 cm vodního sloupce dle pokynů lékaře.
(3a)
(3b)
X
Good
Bad
news
news
F. ODHALENÍ BUBLIN A TRVALÉHO ÚNIKU VZDUCHU
Stiskněte balónek. Pokud zůstane stlačený, k úniku vzduchu nedochází. Pokud se nafukuje, vstřkněte přes bezjehlový vstup 20ml fyziologického roztoku do
komory pro únik vzduchu.
Bublání nebo pohyb hladiny fyziologického roztoku = únik vzduchu Obr. (2) (Komora pro únik vzduchu)
Hladina fyziologického roztoku v komoře pro únik vzduchu by měla být pro účely monitorování úniku vzduchu neustále udržována ve správné výši.
G. MONITOROVÁNÍ
Obr. (3a) (Dobrá zpráva) STISKNUTÝ BALÓNEK - Důvod: Je dosaženo sání/negativního tlaku - pokud ovšem není trubice zablokovaná
Obr. (3b) (Špatná zpráva) NAFOUKNUTÝ BALÓNEK - Možné důvody: 1) Pneumothorax
2) Píštěl (trvalý únik vzduchu)
3) Připojení trubice nejsou zajištěná (do systému vniká vzduch)
H. KDY VYJMOUT Drén (Musí být potvrzeny body 1 I 2)
1. Malý objem tekutiny z drenáže.
2. Pořádně stlačte balónek: Balónek musí zůstat stlačený a ventil musí být v úhlu (poukazuje na negativní intrapleurální/mediastinální tlak). Potvrďte klinicky nebo rentgenem hrudníku!
I. ÚDRŽBA
- V trubici nad ventilem může docházet k akumulaci tekutiny. Jedná se o normální stav, který poukazuje na negativní tlak nad ventilem.
- Při ambulantním ošetřování pacienta připevněte hrudní drenážní vak k pacientovi, aby nedošlo k uvolnění katetru.
K. UPOZORNĚNÍ A VAROVÁNÍ
1. Toto zařízení smí používat pouze náležitě vyškolený personál.
2. Kompatibilitu hrudní drénáže Sinapi s hrudními drény musí zajistit uživatel.
3. Přesvědčte se, zda se ve spojích hrudního drénu nevyskytují známky úniku vzduchu.
4. Krytí hrudního drénu by mělo být uzavřené.
5. Přesvědčte se, zda sena pacientově drenážní trubici nenachází žádné smyčky a uzly.
6. Pravidelně monitorujte objem, rychlost přibývání a povahu tekutiny nasbírané hrudní drénáží SINAPI.
7. Malé nebo nulové množství odvedené tekutiny může poukazovat na ucpání drenážního systému.
8. Nezaškrcujte hadiču pomocí svorky, neboťby to mohlo zabránit odsávání tekutin a ohrozit správné dýchání.
9. Vzorky vyčerpanétekutinylze odebrat přímo z otvoru pro bezjehlový odběr vzorků na přední straně zařízení. Tento port můžebýt taképoužit pro vypouštění tekutiny z odběrovénádoby.
TÜRKÇE
KULLANIM TALİMATLARI
A. AÇIKLAMA
SINAPI Göğüs Drenaj Seti kuru mühür, sıvı toplama haznesi, hava kaçağı dedektörü, vakum balonu, drenaj musluğu ve vakum regülatöründen oluşur.
B. ENDİKASYONLAR
SINAPI Göğüs Drenaj Seti'nin kullanım alanları:
1. Postoperatif dönemde ve travma durumlarında, mediastinal ve plevral boşluklardaki sıvı ve havanın boşaltılması.
2. Mediastinal ve plevral boşluklarda sıvı ve havanın yeniden birikmesinin önlenmesi.
3. Akciğerin yeniden genişlemesinin ve normal nefes alma dinamiğinin onarılmasının kolaylaştırılması..
C. KURULUM
TAKILDIKTAN HEMEN SONRA GÖĞÜS KATETERİ KONUMU NASIL TEYİT EDİLİR?
- İnlet tüp ve göğüs kateteri arasındaki bağlantının sıkı olduğundan emin olunuz.
Pnömotoraksı teyit etmek için: vakum balonuna bastırınız;balon basılı kalmayacak, ancak ilk olarak yeniden genişleyecektir. (Yeniden genişlemezse, kateter ucunda havanın
olmadığı doğrulanmış oluruz. Bu da, kateterin plevral boşluğa yerleştirilmediği (veya pnömotoraksın çözüldüğü) anlamına gelir.
BULBO
BULBO
MOBİL HASTALAR
EXPANDIDO
OPRIMIDO
Kısa bağlantılı tüp hastalara hareket kolaylığı sağlar.
X
D. DRENAJ HIZININ MANUEL OLARAK ARTTIRILMASI
Fig.
Pince
(1)
el tubo
Basılı kalıncaya dek balona bastırarak, drenaj hızını arttırınız. Şekil (1). Balon yeniden genişlerse, valfin üzerindeki tüpü sıkıştırınız ve ardından balona
bastırınız. İkisini de bırakınız. Işlemi tekrarlayınız. Bu, vakum işlemini gerçekleştirir ve drenaj hızını arttırır.
Presione
el bulbo
BP fistül için (sürekli hava kaçağı) pnömotoraks durumunu koruyacak ve balon basılı kalmayacaktır – hekim tarafından gerekli görülürse, dış vakum takınız.
E. DUVAR VAKUM ÜNITESINE BAĞLAMA
Balon basılı kalmıyorsa, vakumu takınız.
Vakumu hekimin belirttiği şekilde -5 cm H2O ile -45 cm H2O basınç arasında ayarlayınız.
Fig. (2)
F. HAVA KABARCIĞI /SÜREKLİ HAVA KAÇAĞI TESPİTİ
puerto para
Balona basınız, eğer balon basılı kalıyorsa hava kaçağı yoktur. Tekrar genişlerse iğnesiz porttan Hava kaçağı bölmesine 20 ml serum fizyolojik enjekte ediniz.
aguja libre
burbujéo
Hava balonu veya serum fizyolojik düzeyi hareketi = hava kaçağı Şekil (2) (Hava Kaçağı Haznesi)
variación en
el nivel de la
1
2
4
3
solución salina
6
5
Fig.
Fig.
G. İZLEME
(3a)
(3b)
X
Şekil (3a) (İyi Haber) Basılı kalmış vakum balonu – Neden: Vakum /Negatif basınca ulaşıldı - tüplerde tıkanma olmaması koşuluyla
Şekil (3b) (Kötü Haber) GENİŞLEMİŞ Vakum balonu – Olası Nedenler: 1) Pnömotoraks
2) Fistül (Sürekli Hava Kaçağı)
3) Tüp bağlantıları güvenli değil (Sistemin içine hava sızıyor)
Confirmar clínicamente y/o
H. KATETERİN ÇIKARILMASI İÇİN (Madde 1 ve 2'yi teyit etmeniz gerekir)
con una radiografía de tórax.
1. Drenaj hacmi düşük olmalıdır.
2. Balona sıkıca bastırınız: balon basılı kalmalı ve valf açılı olmalıdır (intraplevral / mediastinal basıncın negatif olduğunu gösterir).
I. BAKIM
- Az bir sıvı, valfin üzerinde tüp içerisinde birikebilir. Bu normaldir ve valfin üzerinde negatif basınç olduğunu gösterir.
- Ayakta hasta bakımında, göğüs drenaj haznesini, kateterin yerinden çıkmasını önlemek için hastaya sıkıca tutturunuz.
K. UYARILAR
1. Sinapi göğüs drenaj seti yalnızca gerekli eğitimi almış sağlık personelinin kullanımı içindir.
2. Sinapi Göğüs Drenaj Seti'nin torasik kateterler ile uyumu, kullanıcı tarafından sağlanmalıdır.
3. Torasik kateter bağlantılarını, hava kaçağı belirtilerine göre ayarlayınız.
4. Torasik kateter örtüleri tamamen kapatıcı olmalıdır.
5. Hastanın drenaj tüpünde düğüm,kırılma veya kıvrılma olmadığından emin olunuz.
6. SINAPI Göğüs Drenaj Seti içerisinde toplanan sıvının hacmi, oranı ve yapısı düzenli olarak takip edilmelidir.
7. Sıvı boşaltımının az olması veya hiç olmaması, drenaj sisteminde tıkanıklık olduğuna işaret edebilir.
8. Hava kaçağını izlemek için, hava kaçağı haznesindeki serum fizyolojik miktarının her zaman dolum çizgisinde olduğundan emin olunuz.
9. Dren edilmiş sıvı numuneleri doğrudan, cihazın ön tarafında yer alan iğnesiz numune alma portundan alınabilir.
AVISO:
Los volúmenes
Bu port aynı zamanda toplama haznesinden sıvıyı boşaltmak için de kullanılabilir.
del aparato son
aproximados.
FRANÇAIS
A. PRÉSENTATION
Le drain thoracique SINAPI est un système de drainage thoracique intégrant une soupape d'étanchéité, un réceptacle pour le sang, un détecteur de fuite d'air, une poire d'aspiration,
un robinet d'écoulement mais également un régulateur d'aspiration sur certaines unités.
B. INDICATIONS
Le drain thoracique SINAPI est utilisé afin de:
1. Évacuer le liquide et l'air de l'espace pleural et médiastinal dans le cadre de traumatismes et de soins postopératoires.
2. Prévenir l'accumulation de liquide et d'air dans l'espace pleural et médiastinal.
3. Faciliter la ré-expansion pulmonaire ainsi que le rétablissement d'un rythme respiratoire normal.
C. MISE EN PLACE
DÉMARCHE À SUIVRE POUR VALIDER LE POSITIONNEMENT DU CATHÉTER THORACIQUE JUSTE APRÈS SA POSE
- Assurez-vous que le raccord du tube d'entrée et le cathéter thoracique sont solidement fixés ensemble.
Pour confirmer le diagnostic d'un pneumothorax, comprimez la poire. Celle-ci ne restera pas enfoncée, mais reprendra sa forme initiale.
(Si elle demeure enfoncée, alors l'absence d'air à l'extrémité du cathéter est avérée. Cela signifie que le cathéter n'a pas été posé au niveau de l'espace pleural, ou alors que le pneumothorax a été soigné).
PATIENTS MOBILES
NAFOUKNUTÝ
STLAČENÝ
BALÓNEK
BALÓNEK
Le tuyau de raccordement court facilite la mobilisation des patients.
Vzduch
NEPROUDÍ ven
X
D. AUGMENTER MANUELLEMENT LE DÉBIT D'ÉCOULEMENT
Obr.
Stisk
Augmentez le débit d'écoulement en comprimant la poire jusqu'à ce qu'elle maintienne cette position enfoncée Fig. (1). Si la poire reprend sa forme initiale, pincez
(1)
trubice
le tube au-dessus de la vanne, puis, comprimez la poire. Relâchez les deux. Recommencez le procédé. Cela entraîne une aspiration et augmente également le
stlačení
débit d'écoulement.
balónku
En cas de fistule broncho-pleurale (fuite d'air persistante), le pneumothorax demeure, et la poire reprendra sa forme initiale. Fixez un système d'aspiration externe
si le médecin l'exige.
E. FIXER UN SYSTÈME D'ASPIRATION À BASSE PRESSION
Si la poire ne reste pas enfoncée, fixez un système d'aspiration.
Réglez le débit d'aspiration entre -5 cm H2O et -45 cm H2O, selon les prescriptions du médecin.
F. DÉTECTION DE BULLES / FUITES D'AIR PERSISTANTES
Obr. (2)
Comprimez l'ampoule d'aspiration. Si elle reste enfoncée, il n'y a pas de fuite d'air. Si elle reprend sa forme initiale, injectez 20ml de lotion saline dans la
chambre d'évacuation de l'air par le connecteur sans aiguille.
bezjehlový
Si vous observez la formation de bulles ou un changement du niveau salin, cela signifie que de l'air s'échappe. Fig. (2) (Chambre d'évacuation de l'air)
vstup
bublání
Afin de surveiller toute fuite d'air, assurez-vous que la solution saline présente dans la chambre d'évacuation de l'air se maintient en permanence au niveau de
pohyb hladiny
1
2
fyziologického roztoku
5
3
4
6
la ligne de remplissage.
G. CONTRÔLE
Obr.
Obr.
Fig. (3a) (Résultat positif) POIRE ENFONCÉE - Cause: aspiration/pression négative réalisée avec succès - dans la mesure où le tube n'est pas obstrué.
(3a)
(3b)
X
Fig. (3b) (Résultat négatif) Poire reprenant sa FORME INITIALE - Causes possibles:
1) Pneumothorax
2) Fistule (fuite d'air persistante)
3) Les raccords tubulaires n'ont pas été fixés solidement (fuites d'air dans le système)
H. GUIDE POUR RETIRER LE CATHÉTER (Vous devez valider les deux points suivants)
1. Le volume de drainage doit être faible.
2. Comprimez fermement la poire. Celle-ci doit rester enfoncée et la vanne en angle (signe d'une pression médiastinale/intra-pleurale négative).
I. ENTRETIEN
- Il est possible que du liquide s'accumule dans le tube au-dessus de la vanne. Phénomène normal, cela est le signe d'une pression négative au-dessus de la vanne.
- Concernant la gestion des prises en charge ambulatoires, fixez solidement sur le patient le réceptacle du drain thoracique afin que le cathéter ne se détache pas.
K. PRÉCAUTIONS et MISES EN GARDE
1. Ce dispositif est destiné à être utilisé uniquement par du personnel dûment formé.
2. Il est nécessaire que l'utilisateur vérifie la compatibilité entre le drain thoracique Sinapi et les cathéters thoraciques.
3. Examinez les raccords de cathéters thoraciques pour déceler tout signe de fuite d'air.
4. Le pansement du cathéter thoracique doit être occlusif.
5. Assurez-vous que le tube d'écoulement du patient ne présente aucune boucle ni aucun pli.
6. Il est nécessaire de surveiller régulièrement le volume, le débit et la nature du liquide récupéré dans le drain thoracique SINAPI.
7. Il est possible qu'une quantité limitée, voire l'absence, d'écoulement soit le signe d'une obstruction dans le système de drainage.
8. Ne pas clamper le tuyau, sous peine d'inhiber le fonctionnement du drain et de mettre en danger les fonctions respiratoires du patient.
9. Il est possible d'effectuer des prélèvements du liquide drainé directement depuis l'orifice de prélèvement sans aiguille qui se situe
sur le devant du dispositif. Ce port peut également être utilisée pour drainer le liquide depuis le réservoir de collecte.
POZNÁMKA: Objemy na zařízení jsou pouze orientační.
PORTUGUÊS
A. DESCRIÇÃO
O Dreno Torácico SINAPI é uma unidade de drenagem torácica que incorpora um vedante seco, um reservatório de colheita de sangue, um detetor de fugas de ar, um bolbo de
aspiração, uma torneira de drenagem e, em algumas unidades, um regulador de aspiração.
B. INDICAÇÕES
O Dreno Torácico SINAPI destina-se a:
1. Evacuação de fluidos e de ar das cavidades mediastínica e pleurais em situações pós-operatórias e traumáticas.
2. Prevenção da reacumulação de fluidos e de ar nas cavidades mediastínica e pleurais.
3. Facilitação da reexpansão pulmonar e da recuperação da dinâmica respiratória normal.
C. COLOCAÇÃO
COMO VERIFICAR A POSIÇÃO DO CATETER TORÁCICO IMEDIATAMENTE APÓS A INSERÇÃO
- Certificar-se de que a união do tubo de entrada se encontra bem fixa ao cateter torácico.
Pneumotórax: Procurar vapor de agua no tubo de drenagem.O bolbo tem que reexpandir inicialmente confirmando a presença de
ar no espaço pleural. Se ficar colapsado confirma a ausência de ar na extremidade do cateter o que pode indicar que o cateter esta
mal posicionado (ou que o pneumotórax esta resolvido).
PACIENTES EM AMBULATÓRIO O tubo curto de ligação facilita a mobilização de pacientes.
D. AUMENTO MANUAL DO RITMO DE DRENAGEM
BASIK
GENİŞLEMİŞ
VAKUM BALONU
Para aumentar o ritmo de drenagem, premir o bolbo até este permanecer deprimido (Fig. 1). Se o bolbo expandir, apertar o tubo acima da válvula e, seguidamente,
VAKUM BALONU
Hava akışı YOK
premir o bolbo. Soltar o bolbo e o tubo. Repetir o processo. Este método tem um efeito de aspiração e aumenta a taxa de drenagem.
X
Em caso de fístula bronco-pleural (fuga de ar persistente), o pneumotórax não desaparece e o bolbo não fica deprimido. Se o clínico assim o solicitar, aplicar uma
aspiração externa.
E. FIXAÇÃO À ASPIRAÇÃO DA PAREDE
Se a PERA não ficar deprimida, ligar à aspiração. Ajuste de sucção entre H2O -5cm e pressão H2O -45cm - como prescrito pelo médico.
Sekil
Tüpü
(1)
sıkıştırınız
F. DETEÇÃO DE BORBULHAR/ FUGA DE AR PERSISTENTE
Premir o bolbo. Se ficar colapsado, não há fuga de ar. Se este se reexpandir, injetar 20 ml de solução salina na câmara de deteção de fugas de ar através da
balona
bastırınız
porta sem agulha.
Se houver borbulhar ou variação de nível da solução salina= fuga de ar Fig. (2) (Câmara de Fuga de Ar)
Para monitorizar a fuga de ar, confirmar que o nível da solução salina na Câmara de Fuga de Ar é sempre mantido na linha de enchimento.
G. MONITORIZAÇÃO
Fig. (3a) (Boas notícias) BOLBO DEPRIMIDO - Motivo: aspiração/pressão negativa - na condição de não haver obstruções na tubagem
Fig. (3b) (Más notícias) BOLBO EXPANDIDO - Motivos possíveis: 1) Pneumotórax
2) Fístula (fuga de ar persistente)
3) Ligações dos tubos mal apertadas (entrada de ar no sistema)
Şekil (2)
iğnesiz giriş
H. REMOÇÃO DO CATETER (É necessário confirmar os pontos 1 e 2)
portu
hava
1. O volume de drenagem deve ser reduzido.
kabarcığı
serum
fizyolojik
2. Premir firmemente o bolbo: este deve permanecer deprimido com a válvula inclinada (sinal de uma pressão mediastínica/intra-pleural negativa).
1
2
düzeyi hareketi
5
3
4
6
I. MANUTENÇÃO
- O líquido pode acumular-se no tubo acima da válvula. Esta ocorrência é normal e indicativa de uma pressão negativa acima da válvula.
- Em tratamento ambulatório, prender o reservatório de drenagem torácica ao paciente para evitar o deslocamento do cateter.
Şekil
Şekil
(3a)
(3b)
X
K. PRECAUÇÕES E ADVERTÊNCIAS
1. Este dispositivo foi concebido para ser utilizado apenas por pessoal com a devida formação.
İyi Haber
Kötü Haber
2. O utilizador deve verificar a compatibilidade entre o Dreno Torácico Sinapi e o cateter torácico.
3. Inspecionar as ligações do cateter torácico para confirmar a ausência de fugas de ar.
4. Com o cateter torácico, devem ser utilizados pensos oclusivos.
Klinik olarak ve/veya göğüs
5. Confirmar que o tubo de drenagem do paciente não apresenta nós ou vincos.
röntgeni ile kontrol ediniz
6. Monitorizar regularmente o volume, o ritmo de drenagem e as características do fluido recolhido
no Dreno Torácico SINAPI.
7. Pouca ou nenhuma drenagem pode ser sinal de obstrução no sistema de drenagem.
INFORMAÇÕES PARA ATENDIMENTO DOMICILIAR DO PACIENTE
A. ESVAZIAR O DISPOSITIVO
1. Lave as mãos por pelo menos 30 segundos e seque com uma toalha limpa.
2. Limpe o ponto de colheita sem agulha com um algodão embebido em álcool e deixe secar.
3. Com cuidado, empurre e torça a ponta de uma seringa nova no ponto de colheita.
4. Inclinar o dispositivo para a esquerda, para permitir que o fluido entre no ponto de colheita.
5. Puxar o êmbolo da seringa para remover o líquido do dispositivo.
6. Retire a seringa e despejar na sanita.
7. Descarte a seringa vazia para o lixo.
8. Lave e seque as mãos.
9. Registe a cor e a quantidade de líquido removido.
IMPORTANTE
- Se o nível de fluido na câmara de recolha exceder a linha de preenchimento máximo, pode haver vazamento.
NOT:
- Esvaziar o dispositivo quando este atingir a linha de enchimento Max e, de preferência antes de se deitar.
Cihaz hacimleri
- Para prevenir a infeção, não toque a ponta da seringa ou o ponto de colheita ao esvaziar o dispositivo.
yaklaşık değerlerdir.
- O seu médico ou enfermeiro irá informá-lo sobre a troca de pensos.
MODE D'EMPLOI
Si la POIRE
Si la POIRE
REPREND SA
DEMEURE
FORME INITIALE
ENFONCÉE
l'air ne sort PAS
X
Fig.
Pincez
le tube
(1)
et
comprimez
la poire
Fig. (2)
orifice sans
aiguille
formation
de bulles
changement
1
2
du niveau salin
3
4
5
6
Fig.
Fig.
(3a)
(3b)
X
À confirmer avec des tests cliniques
ou à l'aide d'une radiographie du thorax.
REMARQUE: les volumes du dispositif sont approximatifs.
INSTRUÇÕES DE UTILIZAÇÃO
BOLBO
BOLBO
EXPANDIDO
DEPRIMIDO
X
Fig.
Apertar
(1)
o tubo
premir
o bolbo
Fig. (2)
porta sem
agulha
borbulhar
variação de
nível da
3
2
1
solução salina
5
4
6
Fig.
Fig.
(3a)
(3b)
X
Confirmar clinicamente e/ou através de radiografia ao tórax.
8. Não prenda o tubo, isso inibirá a operação do dreno e poderá comprometer a função
respiratória do paciente
9. A recolha de amostras do fluido drenado pode ser feita diretamente na porta de
amostragem sem agulha localizada na frente do dispositivo. Este ponto pode também
ser usado para drenar o líquido a partir do reservatório de recolha.
10. Substituir o dreno XS50, se este estiver danificado ou se houver evidência de oclusão.
11. Ligue apenas um cateter por cada drenagem torácica
B. BANHO E TOMAR BANHO
- O dispositivo não deve ser submerso - é aconselhável o uso de uma bacia
para o banho, ou um duche.
- Quando tomar banho, cobrir o penso com plástico e fixá-lo com fita adesiva
para mantê-lo seco.
C. INFORMAR O SEU MÉDICO E RECORRER
IMEDIATAMENTE ÀS URGÊNCIAS SE:
- O dreno de tórax saiu acidentalmente:
1. Não tente reinserir o tubo.
2. Cubra imediatamente a ferida do peito com um penso plastificado.
- O dispositivo desconectou-se do cateter:
1. Dobre o tubo e tente reconectar.
2. Pressione o tubo algumas vezes depois de voltar a conectar.
3. Manter o tubo dobrado, se for incapaz de reconectá-lo.
- Se sentir qualquer dificuldade em respirar ou nova dor no peito.
- Aumento do fluido drenado/paragem da drenagem ou mudança de cor.

Inhaltszusammenfassung für Sinapi biomedical XS50
- Seite 1 à l'aide d'une radiographie du thorax. 6. The volume, rate and nature of the fluid collected in the SINAPI Chest Drain should be 10. Replace the XS50 chest drain if it is damaged or if there is evidence of occlusion. 50 C monitored regularly.
- Seite 2 ITALIANO ISTRUZIONI PER L'USO A. DESCRIZIONE Il Drenaggio Toracico SINAPI è un'unità di drenaggio toracico che incorpora un serbatoio di raccolta dei liquidi di piccole dimensioni a tenuta stagna, un rilevatore di perdite ed una piccola pompetta di aspirazione. B. INDICAZIONI Il drenaggio toracico Sinapi è...