Herunterladen Inhalt Inhalt Diese Seite drucken
Inhaltsverzeichnis

Werbung

Verfügbare Sprachen

Verfügbare Sprachen

Bedienungsanleitung
Instruction
manual
TECHNIPOLAR 2 M / L

Werbung

Inhaltsverzeichnis
loading

Inhaltszusammenfassung für TechniSat TECHNIPOLAR 2 M

  • Seite 1 Bedienungsanleitung Instruction manual TECHNIPOLAR 2 M / L...
  • Seite 2 CONTENTS DEUTSCH ..................3-28 ENGLISH ..................29-54 POLSKIE ..................55-80...
  • Seite 3 Bedienungsanleitung TECHNIPOLAR 2 M / L Mobile Klimaanlage zum Kühlen und Heizen, mit Ventilator und Entfeuchterfunktion.
  • Seite 4: Inhaltsverzeichnis

    1 Inhaltsverzeichnis Inhaltsverzeichnis ..................... 4 Vorwort ........................5 Sicherheitshinweise ....................6 Verwendete Zeichen und Symbole ..................6 Bestimmungsgemäßer Gebrauch ..................7 Sicherer Umgang mit Klimageräten ..................7 Entsorgungshinweise ........................ 9 Abbildungen ......................10 Installationsanweisungen ..................11 Ableiten der Abluft ........................11 Fenster-Kit installieren ......................12 Aufstellungsort ..........................13 Bedienung .........................
  • Seite 5: Vorwort

    2 Vorwort Sehr geehrte Kunden, vielen Dank, dass Sie sich für ein Klimagerät von TechniSat entschieden haben. Die vorliegende Bedienungsanleitung soll Ihnen helfen, die umfangreichen Funktionen Ihres neuen Gerätes kennen zu lernen und optimal zu nutzen. Sie hilft Ihnen beim bestimmungsgemäßen und sicheren Gebrauch. Sie richtet sich an jede Person, die das Gerät installiert, bedient, reinigt oder entsorgt.
  • Seite 6: Sicherheitshinweise

    3 Sicherheitshinweise 3.1 Verwendete Zeichen und Symbole In dieser Bedienungsanleitung: Kennzeichnet einen Sicherheitshinweis, der bei Nichtbeachtung zu schweren Verletzungen oder zum Tod führen kann. Beachten Sie die folgenden Signalwörter: GEFAHR - Schwere Verletzungen mit Todesfolge WARNUNG - Schwere Verletzungen, eventuell mit Todesfolge ACHTUNG - Verletzungen Kennzeichnet einen Hinweis, den Sie zur Vermeidung von Gerätedefekten, Datenverlusten/-missbrauch oder ungewolltem Betrieb unbedingt beachten...
  • Seite 7: Bestimmungsgemäßer Gebrauch

    3.2 Bestimmungsgemäßer Gebrauch Das TechniSat Klimagerät TECHNIPOLAR 2 M/L ist zum Kühlen, Ventilieren oder Entfeuchten von Wohninnenräumen von mindestens 13 m² bis max. 40 m² (M) oder 46 m² (L) ausgelegt. Das Gerät ist für den privaten Gebrauch konzipiert und nicht für gewerbliche Zwecke geeignet.
  • Seite 8 Techniker durchgeführt werden. > Platzieren Sie weder Netzkabel noch Klimagerät in die Nähe einer Heizung, eines Heizkörpers oder einer anderen Wärmequelle. Es besteht die Gefahr eines Stromschlags oder eines Brandes. > Das Gerät ist mit einem Kabel mit geerdetem Leiter ausgestattet, der mit einem Erdungsstift oder einer Erdungslasche verbunden ist.
  • Seite 9: Entsorgungshinweise

    > Fassen Sie immer am Stecker an, wenn Sie das Klimagerät ein- oder ausstecken. Ziehen Sie niemals den Stecker aus der Steckdose, indem Sie am Kabel ziehen. Andernfalls besteht die Gefahr eines Stromschlags und es kann zu Beschädigungen kommen. > Stellen Sie das Klimagerät auf einem stabilen, ebenen Untergrund auf, der bis zu 50 kg tragen kann.
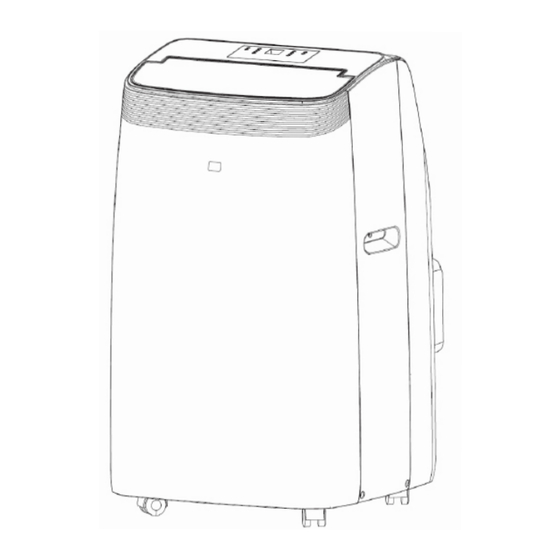
  • Seite 10: Abbildungen

    Durch die getrennte Entsorgung von Haushaltsgeräten werden mögliche negative Auswirkungen auf Umwelt und Gesundheit durch unsachgemäße Entsorgung vermieden. Außerdem wird dadurch die Wiederverwendung von Bestandteilen ermöglicht, sodass signifikante Energie- und Ressourceneinsparungen erzielt werden können. Zur Erinnerung an die Notwendigkeit, Haushaltsgeräte getrennt zu entsorgen, ist das Produkt mit einer durchgestrichenen Mülltonne auf Rädern gekennzeichnet.
  • Seite 11: Installationsanweisungen

    5 Installationsanweisungen 5.1 Ableiten der Abluft Im Kühlmodus muss das Gerät in der Nähe eines Fensters oder einer Öffnung aufgestellt werden, damit die warme Abluft nach außen geleitet werden kann. Stellen Sie das Gerät auf einem ebenen Boden auf und achten Sie darauf, dass um das Gerät herum ein Mindestabstand von 45 cm eingehalten wird und dass es sich in der Nähe einer Schutzkontaktsteckdose befindet.
  • Seite 12: Fenster-Kit Installieren

    5.2 Fenster-Kit installieren Das Fenster-Kit ist zum abdichten von Kipp-Fenstern vorgesehen. Zur Installation gehen Sie Folgendermaßen vor: Kleben Sie das Klett-Band auf Kleben Sie das Klett-Band auf den Rahmen des Fensters. den Fensterrahmen. Achten Sie darauf, dass die Kürzen Sie das Klett-Band an Ecken bündig aneinander den Ecken.
  • Seite 13: Aufstellungsort

    5.3 Aufstellungsort > Das Gerät sollte auf festem Untergrund aufgestellt werden, um Geräusche und Vibrationen zu minimieren. Um einen sicheren Stand zu gewährleisten, stellen Sie das Gerät auf einen glatten, ebenen Boden, der solide genug ist, um das Gerät zu tragen. >...
  • Seite 14: Bedienung

    6 Bedienung Das Bedienfeld befindet sich auf der Oberseite des Geräts. Um das volle Potenzial des Geräts auszuschöpfen, müssen Sie jedoch die Fernbedienung verwenden. 6.1 Bedieneinheit LED der gewählten Betriebsart LED der gewählten Lüfterdrehzahl LED aktiver Sleep-Timer LED aktiver Timer Timer aktivieren Gebläsestufe Temperaturwahl (kälter)
  • Seite 15: Kühlmodus

    6.3 Kühlmodus Ideal für heißes, schwüles Wetter, wenn es darum geht, den Raum zu kühlen und Gleichzeitig zu entfeuchten. > Drücken Sie die Taste MODE (6) mehrmals, bis „Cool“ (A) leuchtet. > Wählen Sie die Soll-Temperatur (18 °C bis 32 °C), indem Sie die Taste Temperaturwahl wärmer/kälter (3, 5) so oft drücken, bis der entsprechende Wert im Display angezeigt wird.
  • Seite 16: Entfeuchtungsmodus

    6.4 Entfeuchtungsmodus Ideal zur Reduzierung der Raumluftfeuchtigkeit (Frühling und Herbst, Feuchträume, Regenperioden, usw.). Beachten Sie, dass im Entfeuchtungsmodus die Luft kontinuierlich entfeuchtet wird und eine große menge an Kondenswasser anfällt. Das anfallende Kondenswasser muss über den oberen Abfluss (11) nach außen geführt werden.
  • Seite 17: Lüftermodus

    6.5 Lüftermodus Wenn Sie das Gerät in diesem Modus verwenden, muss der Abluftschlauch nicht angeschlossen werden. > Drücken Sie die Taste MODE (6) mehrmals, bis Fan (A) leuchtet. Wählen Sie durch mehrmaliges Drücken der Taste FAN SPEED (2) die gewünschte Lüfterdrehzahl aus, wobei High (Hoch), Medium (Mittel) oder Low (Niedrig) ausgewählt werden können.
  • Seite 18: Bedienung Mit Der Fernbedienung

    > Ca. 5 Sekunden nach der Zeitwahl wird die Einstellung gespeichert, die Timer- LED leuchtet und das Display zeigt an, dass sich das Gerät im Standby-Modus befindet (--). > Nach ablauf der eingestellten Zeit startet das Gerät im zuletzt eingestellten Betriebsmodus.
  • Seite 19: Übersicht

    aufsuchen! Bewahren Sie deshalb Batterien für Kleinkinder unerreichbar auf. Das Gerät nur mit den für dieses Gerät zugelassenen Batterien betreiben. Normale Batterien dürfen nicht geladen werden. Batterien dürfen nicht mit anderen Mitteln reaktiviert, nicht auseinandergenommen, erhitzt oder ins offene Feuer geworfen werden (Explosionsgefahr!). Batteriekontakte und Gerätekontakte vor dem Einlegen reinigen.
  • Seite 20: Spezielle Funktionen Mit Der Fernbedienung

    > Richten Sie die Fernbedienung auf die Oberseite des Klimagerätes. Beachten Sie den maximalen Abstand von 7 Metern. 8.3 Spezielle Funktionen mit der Fernbedienung 8.3.1 Lüftungsauslass Der obere Lüftungsauslass öffnet und schließt sich leicht im gleichbleibenden Rhythmus. Möchten Sie den Lüftungsauslass in einer Position arretieren, drücken Sie die Taste Luftauslass auf der Fernbedienung.
  • Seite 21: Service Und Wartung

    9 Service und Wartung 9.1 Kondenswasser ablassen Mit der Zeit sammelt sich im Tank des Klimagerätes Kondenswasser. Insbesondere wenn das Gerät häufig im Kühl-Modus betrieben wird. Ist der Tank voll, stoppt das Gerät und im Display erscheint Ft (Full-Tank = Voller Tank). Kondenswasser manuell ablassen: >...
  • Seite 22: Gerät Reinigen

    9.2 Gerät reinigen Schalten Sie das Gerät vor der Reinigung oder Wartung aus, indem Sie die ON/OFF Taste auf dem Bedienfeld oder der Fernbedienung drücken. Warten Sie einige Minuten und ziehen Sie dann den Netzstecker aus der Steckdose. REINIGUNG DES GERÄTS >...
  • Seite 23: Tätigkeiten Zum Start/Ende Der Saison

    9.3 TÄTIGKEITEN ZUM START/ENDE DER SAISON Start der Saison: > Überprüfen Sie das Netzanschlusskabel und den Netzstecker auf Beschädigungen. Überprüfen Sie die Grundsätzliche Installation des Gerätes und den Standort gemäß dieser Anleitung. Ende der Saison: Wenn die Klimaanlage über einen längeren Zeitraum hinweg nicht benutzt wird: >...
  • Seite 24 Das Klimagerät arbeitet, Fenster /Gardinen / Riegeln Sie den Kühlt aber nicht. Vorhänge sind geöffnet. Raum gegen Sonneneinstrahlung ab und schließen Sie alle Fenster. Andere Geräte im Raum Schalten Sie alle verursachen Hitze (z.B. zusätzlichen Geräte im Fernseher, Öfen, Föhn). Raum ab.
  • Seite 25: Technische Daten

    11 Technische Daten Kühlleistung 12.000 BTU/h / 3.5 kW (M) 14.000 BTU/h / 4,1 kW (L) Modi Kühlen, Ventilator, Entfeuchten, Timer Temperaturbereich 18 - 32 °C Raumgröße (max.) 40 m² (M) 46 m² (L) Entfeuchtungsleistung 32 Liter pro Tag (M) 43 Liter pro Tag (L) Luftumwälzung 350 - 460 m³/h...
  • Seite 26 Lieferumfang Mobiles Klimagerät. Bedienungsanleitung, Fernbedienung, Abluft- und Kondenswasserschlauch, Fensterabdichtungs Kit...
  • Seite 27: Rechtliche Hinweise

    Abschrift und Vervielfältigung nur mit Genehmigung des Herausgebers. Die jeweils aktuelle Version der Anleitung erhalten Sie im PDF-Format im Downloadbereich der TechniSat-Homepage unter www.technisat.de. TechniSat und TECHNIPOLAR 2 M / L sind eingetragene Warenzeichen der: TechniSat Digital GmbH TechniPark Julius-Saxler-Straße 3 D-54550 Daun/Eifel www.technisat.de...
  • Seite 28: Notizen

    13 Notizen...
  • Seite 29 Instruction manual TECHNIPOLAR 2 M / L Mobile air conditioner for cooling and heating, with fan and dehumidifier function.
  • Seite 30: Index 1 Index

    1 Index Index ...........................30 Preface ........................31 Safety instructions ....................32 Signs and symbols used ......................32 Intended use ..........................33 Safe use of air conditioners ....................33 EDisposal instructions ......................35 Illustrations .......................36 Installation instructions ..................37 Exhaust air discharge ......................37 Installing the window kit .......................38 Site of installation ........................39 Operation ........................
  • Seite 31: Preface

    2 Preface Dear Customers, Thank you for choosing this air conditioner from TechniSat. This instruction manual is intended to help you get to know the extensive functions that your new unit offers, and to make the best use of them. It will help you to use the product as intended and safely.
  • Seite 32: Safety Instructions

    3 Safety instructions 3.1 Signs and symbols used In this instruction manual: Indicates a safety instruction which can lead to severe injuries or death if not observed. Note the following signal words: DANGER - Severe injury with fatal consequences WARNING - Severe injury, with possibly fatal consequences CAUTION - Injury Indicates a note that you must observe to avoid equipment defects, data loss/misuse or unintended operation.
  • Seite 33: Intended Use

    3.2 Intended use The TechniSat TECHNIPOLAR 2 M/L air conditioner is for cooling, ventilating and heating living spaces measuring between 13 m² and 40 m² (M) or 46 m (L). The device has been designed for private use and not for commercial purposes.
  • Seite 34 > The unit is equipped with a cable with an earthed conductor connected to an earthing pin or lug. The plug must be plugged into a properly-installed and grounded electrical outlet. Under no circumstances should the earthing pin or tab be cut off or removed from the plug. >...
  • Seite 35: Edisposal Instructions

    IMPORTANT - EARTHING METHOD This product is factory-fitted with a power cord that has a three-pin grounded plug. It must only be connected to an electrical outlet that is equipped in accordance with the National Electrical Code and applicable local codes and regulations for earthing. If the circuit does not have a grounded outlet, it is the responsibility and obligation of the customer to replace the existing outlet in accordance with the National Electrical Code and applicable local codes and regulations.
  • Seite 36: Illustrations

    4 Illustrations Operating panel Grip recesses (both sides) Wheels Fan opening Front Filter unit air inlet Exhaust air connector Filter unit air inlet Mains cable Upper condensate drain Lower condensate drain...
  • Seite 37: Installation Instructions

    5 Installation instructions 5.1 Exhaust air discharge In cooling mode, the unit must be placed near a window or opening so that the warm exhaust air can be directed outside. Place the unit on a level floor, ensure that there is a minimum distance of 45 cm around the unit, and that it is close to an earthed socket.
  • Seite 38: Installing The Window Kit

    5.2 Installing the window kit The window kit is designed to seal tilt windows. To install proceed as follows: Glue the Velcro tape to the Glue the Velcro tape to the frame of the window. window frame. Make sure that the corners Shorten the Velcro tape at are flush.
  • Seite 39: Site Of Installation

    5.3 Site of installation > The unit should be set up on a solid surface to minimise noise and vibration. To ensure a stable and secure state, place the unit on a smooth, level floor that is solid enough to support the weight of the unit. >...
  • Seite 40: Operation

    6 Operation The control panel is located on the top of the unit. However, you need to use the remote control in order to utilise the full potential of the unit. 6.1 Control panel LED of the selected operating mode LED of the selected fan speed LED if the sleep timer is active LED if the timer is active...
  • Seite 41: Cooling Mode

    6.3 Cooling mode The unit is ideal for hot, humid weather when it comes to cooling and dehumidifying the room Dehumidify at the same time. > Press the MODE button (6) several times until "Cool" (A) lights up. > Select the target temperature (18 °C to 32 °C) by pressing the Temperature selection warmer / cooler (3, 5) buttons until the corresponding value is shown on the display.
  • Seite 42: Dehumidifier Mode

    6.4 Dehumidifier mode The unit is ideal for reducing the room humidity (in spring and autumn, damp rooms, rainy periods, etc.). Note that in dehumidification mode the air is continuously dehumidified and a large amount of condensed water is produced. The condensed water must be discharged to the outside via the upper drain (11).
  • Seite 43: Fan Mode

    6.5 Fan mode If you use the unit in this mode, the exhaust hose does not need to be connected. > Press the MODE button (6) several times until Fan (A) lights up. Press the FAN SPEED button (2) several times to select the desired fan speed - High, Medium, or Low can be selected.
  • Seite 44: Using The Remote Control

    > Approximately 5 seconds after the time is selected, the setting is saved, the timer LED lights up and the display indicates that the unit is in standby mode (--). > After the set time has elapsed, the unit will start up in the last set operating mode.
  • Seite 45: Overview

    Only operate the unit using the batteries approved for this unit. Normal batteries must not be charged up. Batteries must not be reactivated by other means, dismantled, heated or thrown into an open fire (risk of explosion!). Clean battery contacts and unit contacts before inserting. There is an explosion hazard if a battery is inserted incorrectly! 8.2 Overview Turn On/Off...
  • Seite 46: Activating Special Functions With The Remote Control

    > Point the remote control at the top of the air conditioner. Observe the maximum distance of 7 metres. 8.3 Activating special functions with the remote control 8.3.1 Ventilation outlet The upper ventilation outlet opens and closes slightly in a constant rhythm. If you want to lock the air outlet in one position, press the Air Outlet button on the remote control.
  • Seite 47: Servicing And Maintenance

    9 Servicing and maintenance 9.1 Draining the condensation Over time, condensation will collect in the air conditioning unit's tank. Especially if the unit is frequently used in cooling mode. If the tank is full, the unit stops and Ft (= full tank) appears on the display. Draining the condensation manually: >...
  • Seite 48: Cleaning The Unit

    9.2 Cleaning the unit Switch off the unit before cleaning or performing maintenance by pressing the ON/OFF button on the control panel or remote control. Wait a few minutes and then pull the plug out of the wall outlet. CLEANING THE UNIT >...
  • Seite 49: Activities At The Start / End Of The Season

    9.3 ACTIVITIES AT THE START / END OF THE SEASON Start of the season: > Check the power cord and plug for damage. Check the basic installation of the unit and the location according to these instructions. End of the season: If the air conditioner is not going to be used for an extended period: >...
  • Seite 50 The air conditioner works Windows / curtains / Protect the room from but does not cool. drapes are open. sunlight and close all windows. Other units in the room Switch off all additional are causing heat (e.g. units in the room. television, stoves, hair dryer).
  • Seite 51: Technical Data

    11 Technical data Cooling performance 12,000 BTU/h / 3.5 kW (M) 14,000 BTU/h / 4,1 kW (L) Modes Cooling, Fan, Dehumidifying, Timer Temperature range 18 - 32 °C Room size (max.) 40 m² (M) 46 m² (L) Dehumidification output 32 litres/day (M) 43 litres/day (L) Air circulation 350 - 460 m³/h...
  • Seite 52 Contents of the Package Mobile air conditioner unit. Instruction manual, remote control, Exhaust hose and condensate hose, window seal kit...
  • Seite 53: Legal Notices

    12 Legal notices TechniSat is not liable for product damage due to external influences, wear and tear or improper handling, unauthorised repair, modifications or accidents. Subject to alterations and printing errors. Version 12/20. Duplication and reproduction only with the publisher's approval. The...
  • Seite 54: Notes

    13 Notes...
  • Seite 55: Instrukcja Obsługi

    Instrukcjaobsługi TECHNIPOLAR 2 M / L Mobilny klimatyzator do chłodzenia i ogrzewania wyposażony w wentylator i funkcję osuszania.
  • Seite 56: Spis Treści

    1 Spis treści Spis treści ........................56 Wstęp ......................... 57 Wskazówki dotyczące bezpieczeństwa ............58 Zastosowane znaki i symbole .....................58 Zastosowanie zgodne z przeznaczeniem ..............59 Bezpieczna obsługa klimatyzatorów ................59 Wskazówki dotyczące utylizacji ...................61 Ilustracje ........................62 Wskazówki dotyczące instalacji ................. 63 Wylot powietrza wylotowego .....................63 Zainstaluj zestaw okienny ....................
  • Seite 57: Wstęp

    2 Wstęp Szanowny Kliencie, Dziękujemy za wybór klimatyzatora firmy TechniSat. Poniższa instrukcja obsługi pomaga w zapoznaniu się z wieloma funkcjami nowego urządzenia i umożliwia ich optymalne wykorzystanie. Jest to pomocne w bezpiecznym i zgodnym z przeznaczeniem użytkowaniu urządzenia. Instrukcja obsługi jest skierowana do każdej osoby ustawiającej, obsługującej, czyszczącej lub utylizującej urządzenie.
  • Seite 58: Wskazówki Dotyczące Bezpieczeństwa

    3 Wskazówki dotyczące bezpieczeństwa 3.1 Zastosowane znaki i symbole W niniejszej instrukcji obsługi: Oznacza wskazówkę bezpieczeństwa, której nieprzestrzeganie może prowadzić do poważnych obrażeń ciała lub śmierci. Uwzględnij następujące słowa ostrzegawcze: NIEBEZPIECZEŃSTWO - ciężkie obrażenia ciała ze skutkiem śmiertelnym OSTRZEŻENIE - ciężkie obrażenia ciała z możliwym skutkiem śmiertelnym UWAGA - obrażenia ciała Oznacza ważną...
  • Seite 59: Zastosowanie Zgodne Z Przeznaczeniem

    3.2 Zastosowanie zgodne z przeznaczeniem Klimatyzator TechniSat TECHNIPOLAR 2 M/L służy do chłodzenia, wentylacji lub osuszania pomieszczeń mieszkalnych o powierzchni od co najmniej 13 m² do maksymalnie 40 m² (M) lub 46 m2 (L). Urządzenie jest przeznaczone do użytku prywatnego i nie jest przystosowane do eksploatacji przemysłowej ani komercyjnej.
  • Seite 60 > Nie umieszczaj przewodu zasilającego ani klimatyzatora w pobliżu grzejnika, kaloryfera lub innego źródła ciepła. Uwzględnij ryzyko porażenia prądem elektrycznym lub pożaru. > Urządzenie wyposażone jest w przewód z żyłą uziemiającą podłączoną do bolca lub końcówki uziemiającej. Wtyczka musi być podłączona do prawidłowo zainstalowanego i uziemionego gniazdka.
  • Seite 61: Wskazówki Dotyczące Utylizacji

    > Podczas podłączania i odłączania klimatyzatora zawsze chwytaj za wtyczkę. Nigdy nie wyciągaj wtyczki z gniazdka, pociągając za kabel. W przeciwnym razie istnieje ryzyko porażenia prądem i uszkodzenia elementów urządzenia. > Ustaw klimatyzator na stabilnej, równej powierzchni o nośności sięgającej 50 kg.
  • Seite 62: Ilustracje

    Oddzielna utylizacja sprzętu gospodarstwa domowego ogranicza ewentualny negatywny wpływ na środowisko naturalne i zdrowie ludzi, występujące w przypadku niewłaściwej utylizacji odpadów. Ponadto prawidłowa utylizacja ułatwia ponowne wykorzystanie elementów składowych i uzyskanie znacznych oszczędności energii i zasobów. W celu zwrócenia uwagi na konieczność oddzielenia produktu od urządzeń...
  • Seite 63: Wskazówki Dotyczące Instalacji

    5 Wskazówki dotyczące instalacji 5.1 Wylot powietrza wylotowego W trybie chłodzenia urządzenie musi być umieszczone w pobliżu okna lub otworu, w celu zapewnienia odprowadzania ciepłego powietrza wylotowego na zewnątrz. Umieść urządzenie na równej podłodze i upewnij się, że w odległości 45 cm wokół urządzenia nie znajdują...
  • Seite 64: Zainstaluj Zestaw Okienny

    5.2 Zainstaluj zestaw okienny Zestaw okienny przeznaczony jest do uszczelniania okien uchylnych. Podczas instalacji wykonaj następujące czynności: Przyklej taśmę rzepową do Przyklej taśmę rzepową do ramy okna. ramy okiennej. Upewnij się, że narożniki są Skróć taśmę rzepową w ustawione w jednej płaszczyźnie narożnikach.
  • Seite 65: Miejsce Ustawienia

    5.3 Miejsce ustawienia > Urządzenie powinno być ustawione na twardym podłożu, aby zminimalizować emisję hałasu i drgań. Aby zapewnić stabilne ustawienie, ustaw urządzenie na gładkim, równym podłożu o wystarczającej nośności. > Urządzenie wyposażone jest w kółka ułatwiające ustawienie. Przesuwanie na kółkach może odbywać...
  • Seite 66: Obsługa

    6 Obsługa Panel sterowania znajduje się w górnej części maszyny. Pełne wykorzystanie potencjału urządzenia wymaga zastosowania pilota zdalnego sterowania. 6.1 Panel sterowania Dioda LED wybranego trybu pracy Dioda LED wybranej prędkości obrotowej wentylatora Dioda LED aktywnego zegara drzemki Dioda LED aktywnego timera Aktywowanie timera Stopień...
  • Seite 67: Tryb Chłodzenia

    6.3 Tryb chłodzenia Idealny na gorącą, wilgotną pogodę i zawsze wtedy, gdy konieczne jest schłodzenie pomieszczenia i jego jednoczesne osuszanie. Kilkakrotnie naciśnij przycisk MODE (6), aż pojawi się symbol „Cool” (A). > Wybierz temperaturę zadaną (od 18 °C do 32 °C), wielokrotnie naciskając przycisk wyboru temperatury wyższej/niższej (3, 5), aż...
  • Seite 68: Tryb Osuszania

    6.4 Tryb osuszania Idealny tryb pracy do zmniejszenia wilgotności powietrza w pomieszczeniach (wiosna i jesień, wilgotne pomieszczenia, okresy deszczowe itp.). Pamiętaj, że w trybie osuszania powietrze jest osuszane w sposób ciągły, co powoduje powstawanie dużych ilości kondensatu. Kondensat wody musi być odprowadzany na zewnątrz przez górny odpływ (11).
  • Seite 69: Tryb Wentylacji

    6.5 Tryb wentylacji W przypadku korzystania z urządzenia w tym trybie nie ma potrzeby podłączania węża powietrza wylotowego. > Kilkakrotnie naciśnij przycisk trybu MODE (6), aż do włączenia się symbolu wentylatora Fan (A). Wybierz żądaną prędkość obrotową wentylatora, kilkakrotnie naciskając przycisk wentylatora FAN SPEED (2) w celu wybrania stopnia High (wysoki), Medium (średni) lub Low (niski).
  • Seite 70: Obsługa Pilota Zdalnego Sterowania

    > Około 5 sekund po ustawieniu czasu ustawienie jest zapisywane, dioda LED timera świeci się, a wyświetlacz wskazuje, że urządzenie znajduje się w trybie czuwania (--). > Po upływie ustawionego czasu urządzenie uruchamia się w ostatnio wykorzystywanym trybie pracy. Aby usunąć dane ustawienie, ponownie naciśnij przycisk timera. Symbol timera zgaśnie.
  • Seite 71: Informacje Ogólne

    Urządzenie może być eksploatowane wyłącznie z zastosowaniem baterii odpowiedniego typu. Normalne baterie nie mogą być poddawane ładowaniu. Baterii nie można też reaktywować na inne sposoby, demontować, ogrzewać ani wrzucać do otwartego ognia (niebezpieczeństwo wybuchu!). Przed włożeniem baterii oczyść styki urządzenia i baterii. Nieprawidłowe włożenie baterii może spowodować...
  • Seite 72: Funkcje Specjalne Kontrolowane Za Pomocą Pilota Zdalnego Sterowania

    > Skieruj pilota w stronę górnej części klimatyzatora. Nie przekraczaj maksymalnej odległości, wynoszącej 7 metrów. 8.3 Funkcje specjalne kontrolowane za pomocą pilota zdalnego sterowania 8.3.1 Wylot wentylacyjny Górny wylot wentylacyjny otwiera się i zamyka w stałym rytmie. Zablokowanie kierunku wylotu powietrza następuje po naciśnięciu przycisku wylot powietrza na pilocie zdalnego sterowania.
  • Seite 73: Serwis I Konserwacja

    9 Serwis i konserwacja 9.1 Spuszczanie kondensatu wody W miarę upływu czasu kondensat wody gromadzi się w zbiorniku klimatyzatora. Dotyczy to w szczególności częstej eksploatacji urządzenia w trybie chłodzenia. Gdy zbiornik jest pełny, urządzenie wyłącza się, a na wyświetlaczu pojawia się napis Ft (Full-Tank = zbiornik pełny).
  • Seite 74: Czyszczenie Urządzenia

    9.2 Czyszczenie urządzenia Przed przystąpieniem do czyszczenia lub serwisowania należy wyłączyć zasilanie, naciskając przycisk zasilania ON/OFF na panelu sterowania lub pilocie zdalnego sterowania. Odczekaj kilka minut, a następnie wyciągnij wtyczkę z gniazda zasilania. CZYSZCZENIE URZĄDZENIA > Urządzenie należy wyczyścić lekko wilgotnym kawałkiem tkaniny, a następnie całkowicie wysuszyć...
  • Seite 75: Czynności Na Początku/Końcu Sezonu

    9.3 CZYNNOŚCI NA POCZĄTKU/KOŃCU SEZONU Początek sezonu: > Sprawdź, czy przewód zasilający i wtyczka zasilania nie są uszkodzone. Sprawdź zgodność instalacji urządzenia i jego ustawienia z niniejszą instrukcją. Koniec sezonu: Wyłączenie klimatyzatora z eksploatacji na dłuższy okres czasu: > Całkowicie opróżnij zbiornik na kondensat wody, pozostawiając dolną zaślepkę...
  • Seite 76 Klimatyzator pracuje, ale Okna / kurtyny / zasłony Zabezpiecz efekt chłodzenia nie jest są otwarte. pomieszczenie przed odczuwalny. światłem słonecznym i zamknij wszystkie okna. Inne urządzenia w Wyłącz wszystkie pomieszczeniu powodują dodatkowe urządzenia w nagrzewanie się (np. pomieszczeniu. telewizor, piekarnik, suszarka do włosów).
  • Seite 77: Dane Techniczne

    11 Dane techniczne Moc chłodnicza 12 000 BTU/h / 3.5 kW (M) 14 000 BTU/h / 4,1 kW (L) Tryby pracy Chłodzenie, wentylacja, osuszanie, timer Zakres temperatury 18 – 32 °C Wielkość pomieszczenia (maks.) 40 m² (M) 46 m² (L) Wydajność osuszania 32 litrów na dzień...
  • Seite 78 Zakres dostawy Mobilny klimatyzator Instrukcja obsługi, pilot zdalnego sterowania, Wąż wylotowy i wąż odpływu kondensatu, zestaw uszczelek okiennych...
  • Seite 79: Informacje Prawne

    Kopiowanie i powielanie możliwe tylko za zgodą wydawcy. Aktualna wersja instrukcji w formacie PDF jest dostępna w obszarze pobierania głównej strony firmy TechniSat pod adresem www.technisat.de TechniSat oraz TECHNIPOLAR 2 M / L to zastrzeżone znaki towarowe firmy TechniSat Digital GmbH TechniPark Julius-Saxler-Strasse 3 D-54550 Daun/Eifel www.technisat.de...
  • Seite 80: Notatki

    13 Notatki...

Diese Anleitung auch für:

Technipolar 2 l

Inhaltsverzeichnis