Inhaltsverzeichnis
Werbung
Verfügbare Sprachen
Verfügbare Sprachen
Quicklinks
Werbung
Kapitel
Inhaltsverzeichnis
Fehlerbehebung

Verwandte Anleitungen für TechniSat TECHNIPOLAR 2 S


Inhaltszusammenfassung für TechniSat TECHNIPOLAR 2 S
- Seite 1 TECHNIPOLAR 2 S...
- Seite 2 CONTENTS DEUTSCH ..................3-27 ENGLISH ..................29-53 POLSKIE ..................55-79...
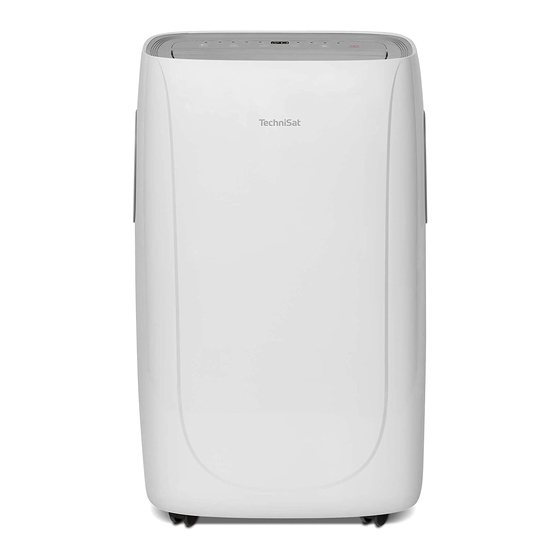
- Seite 3 Bedienungsanleitung TECHNIPOLAR 2 S Mobile Klimaanlage mit Ventilator und Entfeuchterfunktion.
-
Seite 4: Vorwort
2 Vorwort Sehr geehrte Kunden, vielen Dank, dass Sie sich für ein Klimagerät von TechniSat entschieden haben. Die vorliegende Bedienungsanleitung soll Ihnen helfen, die umfangreichen Funktionen Ihres neuen Gerätes kennen zu lernen und optimal zu nutzen. Sie hilft Ihnen beim bestimmungsgemäßen und sicheren Gebrauch. Sie richtet sich an jede Person, die das Gerät installiert, bedient, reinigt oder entsorgt. -
Seite 5: Inhaltsverzeichnis
3 Inhaltsverzeichnis Vorwort ........................4 Inhaltsverzeichnis ..................... 5 Sicherheitshinweise ....................6 Verwendete Zeichen und Symbole ..................6 Bestimmungsgemäßer Gebrauch ..................7 Sicherer Umgang mit Klimageräten ..................7 Entsorgungshinweise ........................ 9 Abbildungen ......................10 Installationsanweisungen ..................11 Ableiten der Abluft ........................11 Fenster-Kit installieren ......................12 Aufstellungsort ..........................13 Bedienung ......................... -
Seite 6: Sicherheitshinweise
4 Sicherheitshinweise 4.1 Verwendete Zeichen und Symbole In dieser Bedienungsanleitung und auf dem Gerät: Kennzeichnet einen Sicherheitshinweis, der bei Nichtbeachtung zu schweren Verletzungen oder zum Tod führen kann. Beachten Sie die folgenden Signalwörter: GEFAHR - Schwere Verletzungen mit Todesfolge WARNUNG - Schwere Verletzungen, eventuell mit Todesfolge ACHTUNG - Verletzungen Kennzeichnet einen Hinweis, den Sie zur Vermeidung von Gerätedefekten, Datenverlusten/-missbrauch oder ungewolltem Betrieb unbedingt beachten... -
Seite 7: Bestimmungsgemäßer Gebrauch
4.2 Bestimmungsgemäßer Gebrauch Das TechniSat Klimagerät TECHNIPOLAR 2 S ist zum Kühlen, Ventilieren oder Entfeuchten von Wohninnenräumen von mindestens 13 m² bis zu max. 25 m² ausgelegt. 4.3 Sicherer Umgang mit Klimageräten Bitte beachten Sie die nachfolgend aufgeführten Hinweise, um Sicherheitsrisiken zu minimieren, Beschädigungen am Gerät zu vermeiden sowie einen Beitrag zum... - Seite 8 andernfalls die Gefahr eines Stromschlags oder eines Brandes besteht. Alle anderen Arbeiten an dem Gerät müssen von an einem qualifizierten Techniker durchgeführt werden. > Platzieren Sie weder Netzkabel noch Klimagerät in die Nähe einer Heizung, eines Heizkörpers oder einer anderen Wärmequelle. Es besteht die Gefahr eines Stromschlags oder eines Brandes.
-
Seite 9: Entsorgungshinweise
> Fassen Sie immer am Stecker an, wenn Sie das Klimagerät ein- oder ausstecken. Ziehen Sie niemals den Stecker aus der Steckdose, indem Sie am Kabel ziehen. Andernfalls besteht die Gefahr eines Stromschlags und es kann zu Beschädigungen kommen. > Stellen Sie das Klimagerät auf einem stabilen, ebenen Untergrund auf, der bis zu 50 kg tragen kann. -
Seite 10: Abbildungen
Durch die getrennte Entsorgung von Haushaltsgeräten werden mögliche negative Auswirkungen auf Umwelt und Gesundheit durch unsachgemäße Entsorgung vermieden. Außerdem wird dadurch die Wiederverwendung von Bestandteilen ermöglicht, sodass signifikante Energie- und Ressourceneinsparungen erzielt werden können. Zur Erinnerung an die Notwendigkeit, Haushaltsgeräte getrennt zu entsorgen, ist das Produkt mit einer durchgestrichenen Mülltonne auf Rädern gekennzeichnet. -
Seite 11: Installationsanweisungen
6 Installationsanweisungen 6.1 Ableiten der Abluft Im Kühlmodus muss das Gerät in der Nähe eines Fensters oder einer Öffnung aufgestellt werden, damit die warme Abluft nach außen geleitet werden kann. Stellen Sie das Gerät auf einem ebenen Boden auf und achten Sie darauf, dass um das Gerät herum ein Mindestabstand von 45 cm eingehalten wird und dass es sich in der Nähe einer Schutzkontaktsteckdose befindet. -
Seite 12: Fenster-Kit Installieren
6.2 Fenster-Kit installieren Das Fenster-Kit ist zum abdichten von Flügelfenster vorgesehen. Zur Installation gehen Sie Folgendermaßen vor: Kleben Sie das Klett-Band auf Kleben Sie das Klett-Band auf den Rahmen des Fensters. den Fensterrahmen. Achten Sie darauf, dass die Kürzen Sie das Klett-Band an Ecken bündig aneinander den Ecken. -
Seite 13: Aufstellungsort
6.3 Aufstellungsort > Das Gerät sollte auf festem Untergrund aufgestellt werden, um Geräusche und Vibrationen zu minimieren. Um einen sicheren Stand zu gewährleisten, stellen Sie das Gerät auf einen glatten, ebenen Boden, der solide genug ist, um das Gerät zu tragen. >... -
Seite 14: Bedienung
7 Bedienung Das Bedienfeld befindet sich auf der Oberseite des Geräts. Um das volle Potenzial des Geräts auszuschöpfen, müssen Sie jedoch die Fernbedienung verwenden. 7.1 Bedieneinheit Betriebsmodus-Umschaltung Zeitsteuerung (Timer) Temperaturwahl (wärmer) Temperaturwahl (kälter) Gebläsestufe Ein-/Ausschalter Kühlfunktion aktiv Luftentfeuchtung aktiv Lüftermodus aktiv Zeitsteuerung aktiv Display Gebläsestufe hoch... -
Seite 15: Kühlmodus
Schalten Sie das Klimagerät nicht sofort nach dem ausschalten wieder ein, sondern warten Sie ein paar Minuten. 7.3 Kühlmodus Ideal für heißes, schwüles Wetter, wenn es darum geht, den Raum zu kühlen und Gleichzeitig zu entfeuchten. > Drücken Sie die Taste MODE (1) mehrmals, bis „Cool“ (7) leuchtet. >... -
Seite 16: Entfeuchtungsmodus
7.4 Entfeuchtungsmodus Ideal zur Reduzierung der Raumluftfeuchtigkeit (Frühling und Herbst, Feuchträume, Regenperioden, usw.). Beachten Sie, dass im Entfeuchtungsmodus die Luft entfeuchtet wird. Das Kondenswasser wird über den oberen Abfluss (10) nach außen geführt. Leiten Sie das Wasser in ein geeignetes Gefäß und leeren Sie es, je nach Größe, regelmäßig aus. -
Seite 17: Automatikmodus
7.6 Automatikmodus Im Automatikmodus entscheidet das Gerät selbstständig anhand der aktuellen Raumtemperatur, in welchem Modus es arbeitet: - Unter 23 °C Raumtemperatur = Lüftermodus - Über 23 °C Raumtemperatur = Kühlmodus > Drücken Sie die Taste MODE (1) mehrmals, bis alle Modus-LEDs ausgeschaltet sind und im Display ein rotierender Balken erscheint. -
Seite 18: Bedienung Mit Der Fernbedienung
Verzögertes Ausschalten > Drücken Sie im eingeschalteten Zustand die Taste TIMER (2). Daraufhin blinken die Timer-LED (10) und die Stundenzahl im Display. > Drücken Sie innerhalb von 5 Sekunden die Taste TIMER erneut mehrmals, um die Stunden einzustellen, um die das Ausschalten des Geräts verzögert werden soll. -
Seite 19: Übersicht
9.2 Übersicht Ein/Ausschalten Lüftermodus Temperatur Betriebsmodus erhöhen Luftauslass Temperatur verringern Timermodus Nachtmodus Umschaltung Temperatureinheit > Die Grundsätzliche Bedienung mit der Fernbedienung erfolgt wie im Kapitel „7 Bedienung“ beschrieben. Drücken Sie die entsprechend beschriftete Taste, analog der Geräteoberseite. > Richten Sie die Fernbedienung auf die Oberseite des Klimagerätes. Beachten Sie den maximalen Abstand von 7 Metern. -
Seite 20: Spezielle Funktionen Mit Der Fernbedienung
9.3 Spezielle Funktionen mit der Fernbedienung 9.3.1 Lüftungsauslass Der obere Lüftungsauslass öffnet und schließt sich leicht im gleichbleibenden Rhythmus. Möchten Sie den Lüftungsauslass in einer Position arretieren, drücken Sie die Taste Luftauslass auf der Fernbedienung. Drücken Sie die Taste erneut, um das Schwenken automatisch zu regulieren. 9.3.2 Umschaltung der Temperatureinheit Drücken Sie die Taste Umschaltung Temperatureinheit, um die Temperatureinheit, die im Display angezeigt wird, zwischen Grad/Celsius und Fahrenheit umzuschalten. -
Seite 21: Service Und Wartung
10 Service und Wartung 10.1 Kondenswasser ablassen Mit der Zeit sammelt sich im Tank des Klimagerätes Kondenswasser. Ist der Tank voll, stoppt das Gerät und im Display erscheint Ft (Full-Tank = Voller Tank). Kondenswasser manuell ablassen: > Ziehen Sie den Netzstecker des Klimagerätes. >... -
Seite 22: Gerät Reinigen
10.2 Gerät reinigen Schalten Sie das Gerät vor der Reinigung oder Wartung aus, indem Sie die POWER Taste auf dem Bedienfeld oder der Fernbedienung drücken. Warten Sie einige Minuten und ziehen Sie dann den Netzstecker aus der Steckdose. REINIGUNG DES GERÄTS >... -
Seite 23: Tätigkeiten Zum Start/Ende Der Saison
10.3 Tätigkeiten zum Start/Ende der Saison Start der Saison: > Überprüfen Sie das Netzanschlusskabel und den Netzstecker auf Beschädigungen. Überprüfen Sie die Grundsätzliche Installation des Gerätes und den Standort gemäß dieser Anleitung. Ende der Saison: Wenn die Klimaanlage über einen längeren Zeitraum hinweg nicht benutzt wird: >... - Seite 24 Das Klimagerät arbeitet, Fenster /Gardinen / Riegeln Sie den Kühlt aber nicht. Vorhänge sind geöffnet. Raum gegen Sonneneinstrahlung ab und schließen Sie alle Fenster. Andere Geräte im Raum Schalten Sie alle verursachen Hitze (z.B. zusätzlichen Geräte im Fernseher, Öfen, Föhn). Raum ab.
-
Seite 25: Technische Daten
12 Technische Daten Kühlleistung 9.000 BTU/h / 2,6 kW Modi Kühlen, Ventilator, Entfeuchten, Timer Temperaturbereich: 18 - 32 °C Raumgröße 25 m² Entfeuchtungsleistung 26 Liter / Tag Lautstärke 53 - 65 dB Kühlmittel R290 (205g) GWP Kühlmittel Leistungsaufnahme Kühlen 1 kW/h* 2.6 (Kälteleistungszahl) Energieklasse Kühlen Ansaugdruck... -
Seite 26: Rechliche Hinweise
13 Rechliche Hinweise TechniSat ist nicht für Produktschäden auf Grund von äußeren Einflüssen, Verschleiß oder unsachgemäßer Handhabung, unbefugter Instandsetzung, Modifikationen oder Unfällen haftbar. Änderungen und Druckfehler vorbehalten. Stand 12/20. Abschrift und Vervielfältigung nur mit Genehmigung des Herausgebers. Die jeweils aktuelle Version der Anleitung erhalten Sie im PDF-Format im Downloadbereich der TechniSat-Homepage unter www.technisat.de. -
Seite 27: Notizen
14 Notizen... - Seite 29 Instruction manual TECHNIPOLAR 2 S Mobile air conditioning unit with fan and dehumidifier function.
-
Seite 30: Preface
2 Preface Dear Customers, Thank you for choosing this air conditioner from TechniSat. This instruction manual is intended to help you get to know the extensive functions that your new unit offers, and to make the best use of them. It will help you to use the product as intended and safely. -
Seite 31: Index
3 Index Preface ........................30 Index ..........................31 Safety instructions ....................32 Signs and symbols used ......................32 Intended use ..........................33 Safe use of air conditioners ....................33 Disposal instructions ........................35 Illustrations .......................36 Installation instructions ..................37 Exhaust air discharge ......................37 Installing the window kit .......................38 Site of installation ........................39 Operation ........................ -
Seite 32: Safety Instructions
4 Safety instructions 4.1 Signs and symbols used In this instruction manual and on the unit: Indicates a safety instruction which can lead to serious injuries or death if not observed. Note the following signal words: DANGER - Severe injury with fatal consequences WARNING - Severe injury, with possibly fatal consequences CAUTION - Injury Indicates a note that you must observe to avoid equipment defects, data... -
Seite 33: Intended Use
4.2 Intended use The TechniSat TECHNIPOLAR 2 S air conditioner is for cooling, ventilating and heating living spaces measuring between 13 m² and 25 m². 4.3 Safe use of air conditioners Please observe the following instructions in order to minimise safety risks, to avoid damage to the unit and to contribute to environmental protection. - Seite 34 > Do not place the mains cable or air conditioner near a radiator, heater or other heat source. There is a risk of electric shock or fire. > The unit is equipped with a cable with an earthed conductor connected to an earthing pin or lug.
-
Seite 35: Disposal Instructions
> Place the air conditioner on a sturdy, level surface that can support a load up to 50 kg. Installation on a non-solid or uneven surface can lead to damage and personal injury. > For the most efficient operation, close all doors and windows in the room. Make sure that the exhaust hose is routed outside to ensure efficient operation. -
Seite 36: Illustrations
The separate disposal of household appliances avoids possible negative effects on the environment and the health of persons resulting from improper disposal. It also enables components to be reused, resulting in significant energy and resource savings. As a reminder of the need to dispose of household appliances separately the product is marked with a crossed out refuse container on wheels. -
Seite 37: Installation Instructions
6 Installation instructions 6.1 Exhaust air discharge In cooling mode, the unit must be placed near a window or opening so that the warm exhaust air can be directed outside. Place the unit on a level floor, ensure that there is a minimum distance of 45 cm around the unit, and that it is close to an earthed socket. -
Seite 38: Installing The Window Kit
6.2 Installing the window kit The window kit is designed to seal casement windows. To install proceed as follows: Glue the Velcro tape to the Glue the Velcro tape to the frame of the window. window frame. Make sure that the corners Shorten the Velcro tape at are flush. -
Seite 39: Site Of Installation
6.3 Site of installation > The unit should be set up on a solid surface to minimise noise and vibration. To ensure a stable and secure state, place the unit on a smooth, level floor that is solid enough to support the weight of the unit. >... -
Seite 40: Operation
7 Operation The control panel is located on the top of the unit. However, you need to use the remote control in order to utilise the full potential of the unit. 7.1 Control panel Switch operating mode Timer Temperature selection (warmer) Temperature selection (cooler) Blower level On/Off switch... -
Seite 41: Cooling Mode
Do not switch the air conditioner back on immediately after switching it off - wait a few minutes. 7.3 Cooling mode The unit is ideal for hot, humid weather when it comes to cooling and dehumidifying the room Dehumidify at the same time. >... -
Seite 42: Dehumidifier Mode
7.4 Dehumidifier mode The unit is ideal for reducing the room humidity (in spring and autumn, damp rooms, rainy periods, etc.). Note that in dehumidifier mode the moisture in the air is reduced. The condensed water is discharged to the outside via the upper drain (10). Direct the water into a suitable container and empty it regularly, depending on the size of the container. -
Seite 43: Automatic Mode
7.6 Automatic mode In automatic mode, the unit independently decides which mode to use based on the current room temperature: - Room temperature under 23°C = Fan mood - Room temperature over 23°C = Cooling mode > Press the MODE button (1) several times until all mode LEDs are switched off and a rotating bar appears on the display. -
Seite 44: Using The Remote Control
Delayed turning off > When the unit is switched on, press the TIMER button (2). The timer LED (10) and the number of hours flash on the display. > Within 5 seconds, press the TIMER button again several times to set the hours by which you want to delay switching off the unit. -
Seite 45: Overview
9.2 Overview Turn On/Off Fan mode Temperature Operating mode higher Air outlet Temperature lower Timer mode Night mode Selecting temperature units > Basic operation using the remote control is as described in section „7 Bedienung“. Press the correspondingly labelled button, analogous to the top of the unit. -
Seite 46: Activating Special Functions With The Remote Control
9.3 Activating special functions with the remote control 9.3.1 Ventilation outlet The upper ventilation outlet opens and closes slightly in a constant rhythm. If you want to lock the air outlet in one position, press the Air Outlet button on the remote control. -
Seite 47: Servicing And Maintenance
10 Servicing and maintenance 10.1 Draining the condensation Over time, condensation will collect in the air conditioning unit's tank. If the tank is full, the unit stops and Ft (= full tank) appears on the display. Draining the condensation manually: >... -
Seite 48: Cleaning The Unit
10.2 Cleaning the unit Switch off the unit before cleaning or performing maintenance by pressing the POWER button on the control panel or remote control. Wait a few minutes and then pull the plug out of the wall outlet. CLEANING THE UNIT >... -
Seite 49: Activities At The Start / End Of The Season
10.3 Activities at the start / end of the season Start of the season: > Check the power cord and plug for damage. Check the basic installation of the unit and the location according to these instructions. End of the season: If the air conditioner is not going to be used for an extended period: >... - Seite 50 The air conditioner works Windows / curtains / Protect the room from but does not cool. drapes are open. sunlight and close all windows. Other units in the room Switch off all additional are causing heat (e.g. units in the room. television, stoves, hair dryer).
-
Seite 51: Technical Data
12 Technical data Cooling performance 9000 BTU/h / 2.6 kW Modes Cooling, Fan, Dehumidifying, Timer Temperature range: 18 - 32 °C Room size 25 m² Dehumidification output 26 litres/day Noise level 53 - 65 dB Coolant R290 (205g) GWP coolant Power consumption - cooling 1 kW/h* 2.6 (refrigeration coefficient) -
Seite 52: Legal Notices
13 Legal notices TechniSat is not liable for product damage due to external influences, wear and tear or improper handling, unauthorised repair, modifications or accidents. Subject to alterations and printing errors. Version 12/20. Duplication and reproduction only with the publisher's approval. The... -
Seite 53: Notes
14 Notes... -
Seite 55: Instrukcja Obsługi
Instrukcjaobsługi TECHNIPOLAR 2 S Mobilny klimatyzator wyposażony w wentylator i funkcję osuszania. -
Seite 56: Wstęp
2 Wstęp Szanowny Kliencie, Dziękujemy za wybór klimatyzatora firmy TechniSat. Poniższa instrukcja obsługi pomaga w zapoznaniu się z wieloma funkcjami nowego urządzenia i umożliwia ich optymalne wykorzystanie. Jest to pomocne w bezpiecznym i zgodnym z przeznaczeniem użytkowaniu urządzenia. Instrukcja obsługi jest skierowana do każdej osoby ustawiającej, obsługującej, czyszczącej lub utylizującej urządzenie. -
Seite 57: Spis Treści
3 Spis treści Wstęp .........................56 Spis treści ........................57 Wskazówki dotyczące bezpieczeństwa ............58 Zastosowane znaki i symbole .....................58 Zastosowanie zgodne z przeznaczeniem ..............59 Bezpieczna obsługa klimatyzatorów ................59 Wskazówki dotyczące utylizacji ...................61 Ilustracje ........................62 Wskazówki dotyczące instalacji ................. 63 Wylot powietrza wylotowego .....................63 Zainstaluj zestaw okienny .................... -
Seite 58: Wskazówki Dotyczące Bezpieczeństwa
4 Wskazówki dotyczące bezpieczeństwa 4.1 Zastosowane znaki i symbole W niniejszej instrukcji obsługi i na urządzeniu: Oznacza wskazówkę bezpieczeństwa, której nieprzestrzeganie może prowadzić do poważnych obrażeń ciała lub śmierci. Uwzględnij następujące słowa ostrzegawcze: NIEBEZPIECZEŃSTWO - ciężkie obrażenia ciała ze skutkiem śmiertelnym OSTRZEŻENIE - ciężkie obrażenia ciała z możliwym skutkiem śmiertelnym UWAGA - obrażenia ciała Oznacza ważną... -
Seite 59: Zastosowanie Zgodne Z Przeznaczeniem
4.2 Zastosowanie zgodne z przeznaczeniem Klimatyzator TechniSat TECHNIPOLAR 2 służy do chłodzenia, wentylacji lub osuszania pomieszczeń mieszkalnych o powierzchni od co najmniej 13 m² do maksymalnie 25 m². 4.3 Bezpieczna obsługa klimatyzatorów Przestrzegaj zamieszczonych poniżej wskazówek w celu uniknięcia wszelkich niebezpieczeństw, uszkodzeń... - Seite 60 ponieważ stwarza to niebezpieczeństwo porażenia prądem elektrycznym lub spowodowania pożaru. Wszystkie inne prace dotyczące urządzenia muszą być wykonywane przez wykwalifikowanego technika. > Nie umieszczaj przewodu zasilającego ani klimatyzatora w pobliżu grzejnika, kaloryfera lub innego źródła ciepła. Uwzględnij ryzyko porażenia prądem elektrycznym lub pożaru.
-
Seite 61: Wskazówki Dotyczące Utylizacji
razie istnieje ryzyko porażenia prądem i uszkodzenia elementów urządzenia. > Ustaw klimatyzator na stabilnej, równej powierzchni o nośności sięgającej 50 kg. Montaż na niestabilnej lub nierównej powierzchni może prowadzić do uszkodzeń i obrażeń ciała. > Zamknij wszystkie drzwi i okna pomieszczenia, aby zapewnić jak najwyższą skuteczność... -
Seite 62: Ilustracje
Oddzielna utylizacja sprzętu gospodarstwa domowego ogranicza ewentualny negatywny wpływ na środowisko naturalne i zdrowie ludzi, występujące w przypadku niewłaściwej utylizacji odpadów. Ponadto prawidłowa utylizacja ułatwia ponowne wykorzystanie elementów składowych i uzyskanie znacznych oszczędności energii i zasobów. W celu zwrócenia uwagi na konieczność oddzielenia produktu od urządzeń... -
Seite 63: Wskazówki Dotyczące Instalacji
6 Wskazówki dotyczące instalacji 6.1 Wylot powietrza wylotowego W trybie chłodzenia urządzenie musi być umieszczone w pobliżu okna lub otworu, w celu zapewnienia odprowadzania ciepłego powietrza wylotowego na zewnątrz. Umieść urządzenie na równej podłodze i upewnij się, że w odległości 45 cm wokół urządzenia nie znajdują... -
Seite 64: Zainstaluj Zestaw Okienny
6.2 Zainstaluj zestaw okienny Zestaw okienny przeznaczony jest do uszczelniania okien skrzydłowych. Podczas instalacji wykonaj następujące czynności: Przyklej taśmę rzepową do Przyklej taśmę rzepową do ramy okna. ramy okiennej. Upewnij się, że narożniki są Skróć taśmę rzepową w ustawione w jednej płaszczyźnie narożnikach. -
Seite 65: Miejsce Ustawienia
6.3 Miejsce ustawienia > Urządzenie powinno być ustawione na twardym podłożu, aby zminimalizować emisję hałasu i wibracji. Aby zapewnić stabilne ustawienie, ustaw urządzenie na gładkim, równym podłożu o wystarczającej nośności. > Urządzenie wyposażone jest w kółka ułatwiające ustawienie. Przesuwanie na kółkach może odbywać... -
Seite 66: Obsługa
7 Obsługa Panel sterowania znajduje się w górnej części maszyny. Pełne wykorzystanie potencjału urządzenia wymaga zastosowania pilota zdalnego sterowania. 7.1 Panel sterowania Przełączanie trybu pracy Sterowanie czasem pracy (timer) Ustawienie temperatury (wyższej) Ustawienie temperatury (niższej) Stopień pracy dmuchawy Włącznik Funkcja chłodzenia aktywna Osuszanie powietrza aktywne Tryb wentylacji aktywny Sterowanie czasowe aktywne... -
Seite 67: Tryb Chłodzenia
Nie włączaj ponownie klimatyzatora bezpośrednio po jego wyłączeniu, ale odczekaj kilka minut. 7.3 Tryb chłodzenia Idealny na gorącą, wilgotną pogodę i zawsze wtedy, gdy konieczne jest schłodzenie pomieszczenia i jego jednoczesne osuszanie. > Kilkakrotnie naciśnij przycisk MODE (1), aż pojawi się symbol „Cool” (7). >... -
Seite 68: Tryb Osuszania
7.4 Tryb osuszania Idealny tryb pracy do zmniejszenia wilgotności powietrza w pomieszczeniach (wiosna i jesień, wilgotne pomieszczenia, okresy deszczowe itp.). Pamiętaj, że w trybie osuszania zachodzi obniżanie wilgotności powietrza. Kondensat wody odprowadzany jest na zewnątrz przez górny odpływ (10). Odprowadzaj wodę do odpowiedniego pojemnika i, w zależności od jego wielkości, opróżniaj go regularnie. -
Seite 69: Tryb Automatyczny
7.6 Tryb automatyczny W trybie automatycznym urządzenie samoczynnie wybiera odpowiedni tryb pracy na podstawie aktualnej temperatury w pomieszczeniu: - Temperatura pokojowa poniżej 23 °C = Tryb wentylacji - Temperatura pokojowa powyżej 23 °C = Tryb chłodzenia > Kilkakrotnie naciśnij przycisk trybu MODE (1), aż wszystkie diody LED trybu pracy wyłączą... -
Seite 70: Obsługa Pilota Zdalnego Sterowania
Opóźnienie wyłączenia > Przy włączonym zasilaniu naciśnij przycisk TIMER (2). Dioda LED timera (10) i liczba godzin na wyświetlaczu zaczną migać. > W ciągu 5 sekund ponownie, kilkakrotnie naciśnij przycisk TIMER w celu ustawienia liczby godzin opóźnienia wyłączenia urządzenia. Zegar sterujący timer może zostać ustawiony w 1-godzinnych odstępach od 1 godziny do 24 godzin. -
Seite 71: Informacje Ogólne
9.2 Informacje ogólne Włączanie/ Tryb wentylacji wyłączanie Temperatura: Tryb pracy - zwiększanie Wylot powietrza Temperatura: - zmniejszanie Tryb timera Tryb nocny Przełączanie jednostki temperatury > Podstawowa obsługa za pomocą pilota została opisana w rozdziale „7 Bedienung“. Naciśnij odpowiedni przycisk, oznaczony analogicznie jak w górnej części urządzenia. -
Seite 72: Funkcje Specjalne Kontrolowane Za Pomocą Pilota Zdalnego Sterowania
9.3 Funkcje specjalne kontrolowane za pomocą pilota zdalnego sterowania 9.3.1 Wylot wentylacyjny Górny wylot wentylacyjny otwiera się i zamyka w stałym rytmie. Zablokowanie kierunku wylotu powietrza następuje po naciśnięciu przycisku wylot powietrza na pilocie zdalnego sterowania. Ponownie naciśnij przycisk w celu powrotu do automatycznej kontroli kierunku wylotu powietrza. -
Seite 73: Serwis I Konserwacja
10 Serwis i konserwacja 10.1 Spuszczanie kondensatu wody W miarę upływu czasu kondensat wody gromadzi się w zbiorniku klimatyzatora. Gdy zbiornik jest pełny, urządzenie wyłącza się, a na wyświetlaczu pojawia się napis Ft (Full-Tank = zbiornik pełny). Ręczne spuszczanie kondensatu wody: >... -
Seite 74: Czyszczenie Urządzenia
10.2 Czyszczenie urządzenia Przed przystąpieniem do czyszczenia lub serwisowania należy wyłączyć zasilanie, naciskając przycisk zasilania POWER na panelu sterowania lub pilocie zdalnego sterowania. Odczekaj kilka minut, a następnie wyciągnij wtyczkę z gniazda zasilania. CZYSZCZENIE URZĄDZENIA > Urządzenie należy wyczyścić lekko wilgotnym kawałkiem tkaniny, a następnie całkowicie wysuszyć... -
Seite 75: Czynności Na Początku/Końcu Sezonu
10.3 Czynności na początku/końcu sezonu Początek sezonu: > Sprawdź, czy przewód zasilający i wtyczka zasilania nie są uszkodzone. Sprawdź zgodność instalacji urządzenia i jego ustawienia z niniejszą instrukcją. Koniec sezonu: Wyłączenie klimatyzatora z eksploatacji na dłuższy okres czasu: > Całkowicie opróżnij zbiornik na kondensat wody, pozostawiając dolną zaślepkę spustową... - Seite 76 Klimatyzator pracuje, ale Okna / kurtyny / zasłony Zabezpiecz efekt chłodzenia nie jest są otwarte. pomieszczenie przed odczuwalny. światłem słonecznym i zamknij wszystkie okna. Inne urządzenia w Wyłącz wszystkie pomieszczeniu powodują dodatkowe urządzenia w nagrzewanie się (np. pomieszczeniu. telewizor, piekarnik, suszarka do włosów).
-
Seite 77: Dane Techniczne
12 Dane techniczne Moc chłodnicza 9000 BTU/h / 2,6 kW Tryby pracy Chłodzenie, wentylacja, osuszanie, timer Zakres temperatury 18–32 °C Wielkość pomieszczenia 25 m² Wydajność osuszania 26 litrów / dzień Głośność 53 / 65 Środek chłodniczy R290 (205g) Środek chłodniczy GWP Pobór mocy przy chłodzeniu 1 kW/h* 2,6 (współczynnik wydajności... -
Seite 78: Informacje Prawne
Kopiowanie i powielanie możliwe tylko za zgodą wydawcy. Aktualna wersja instrukcji w formacie PDF jest dostępna w obszarze pobierania głównej strony firmy TechniSat pod adresem www.technisat.de TechniSat oraz TECHNIPOLAR 2 S to zastrzeżone znaki towarowe firmy TechniSat Digital GmbH TechniPark Julius-Saxler-Straße 3 D-54550 Daun/Eifel www.technisat.de... -
Seite 79: Notatki
14 Notatki...