
Verwandte Anleitungen für Eneo MPD-62V2812P0A


Inhaltszusammenfassung für Eneo MPD-62V2812P0A
- Seite 1 All manuals and user guides at all-guides.com Quick Installation Guide 1/2.8” HD Dome, Fixed, Indoor, Day&Night, 1920x1080, Infra- red, 2.8-12mm, 12VDC MPD-62V2812P0A...
-
Seite 2: Inhaltsverzeichnis
All manuals and user guides at all-guides.com Table of content Parts supplied .......................5 Part names ........................6 Installation instructions ....................7 Pan & Tilt adjustments ..............................8 Zoom & focus adjustments ............................8 Detach the dome camera from the easy adaptor ....................9 Open the dome cover ..............................9 Power supply connections ............................ -
Seite 3: General Safety Instructions
All manuals and user guides at all-guides.com Safety instructions General safety instructions • Before switching on and operating the system, first read this safety advice and the operating instructions. • Keep the operating instructions in a safe place for later use. •... -
Seite 4: Graphical Symbols
All manuals and user guides at all-guides.com Class A device note This is a Class A device. This device can cause malfunctions in the living area; in such an event, the operator may need to take appropriate measures to compensate for these. WEEE (Waste Electronical &... -
Seite 5: Parts Supplied
All manuals and user guides at all-guides.com Parts supplied • Dome Camera • Operating Instruction • Mounting Template • Plastic Anchor: 6 x 30 mm (3x) • Mounting Screw: 3.5 x 25 mm (3x) • Easy Adaptor (Flat type) • Easy Adaptor (Tilted type) •... -
Seite 6: Part Names
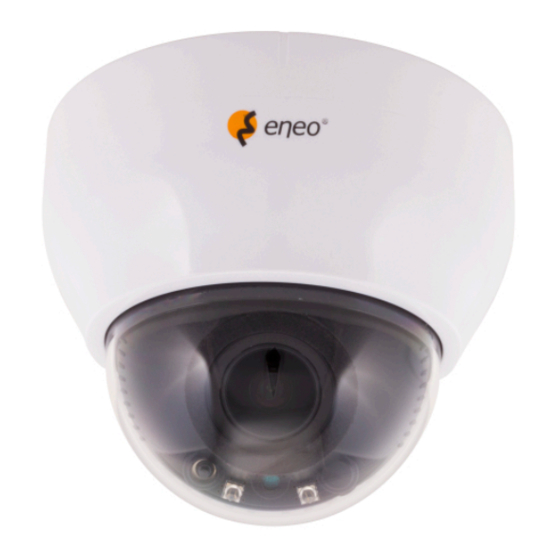
All manuals and user guides at all-guides.com Part names Power Cable Easy Adaptor (Tilted type) Easy Adaptor (Flat type) Dome Base Focus & Zoom adjustment Lens Video format DIP Switch 3-Axis Gimbal Dome Cover Bubble Shield Bubble Light Sensor OSD Control & Video format Joystick SMD LEDs Video Sub-out connector... -
Seite 7: Installation Instructions
All manuals and user guides at all-guides.com Installation instructions CAUTION: The camera’s base should be attached to a structural object, such as concrete, hard wood, wall stud or ceiling rafter that supports the weight of the camera. If necessary use appro- priate mounting material (e.g. -
Seite 8: Pan & Tilt Adjustments
All manuals and user guides at all-guides.com Pan & Tilt adjustments 1. Pan limit: Pan is limited to +/- 165°. Do NOT force to rotate the gimbal over the limit to prevent from the internal damage. 2. Tilt limit: Tilt is limited to 25° min ~ 90° max. -
Seite 9: Detach The Dome Camera From The Easy Adaptor
All manuals and user guides at all-guides.com CAUTION: Extreme care should be taken NOT to scratch the bubble dome surface while the camera installing or adjusting. Care should be taken the cable is NOT to be damaged, kinked or exposed in the hazardous area. -
Seite 10: Power Supply Connections
All manuals and user guides at all-guides.com Power supply connections Camera can be operated with the regulated or unregulated DC12V but the regulated power supply of DC12V is recommended. Camera is protected from the damage by the reverse connection of polarity. VIDEO (BNC) Power... -
Seite 11: Operating Instructions
All manuals and user guides at all-guides.com Operating instructions Using OSD controller Setup menu can be accessed and controlled by OSD control joy stick on the gimbal of the camera unit. Five commands are available with the joy stick. The design of OSD could be different according to the Model. -
Seite 12: Joystick Setting
All manuals and user guides at all-guides.com Joystick setting Switching video format is available by Video format joystick. If you want to set the HD video format, set the DIP Switch to HD mode first. Then set the one of HD Video format by joystick. -
Seite 13: Osd Menu Table
All manuals and user guides at all-guides.com OSD menu table MENU SUB MENU CONFIGURATION MODE INDOOOR, OUTDOOR LENS IRIS SPEED MANUAL FOCUS ASSIST DN DWELL SHUTTER FLK, 1/60(1/50), 1/30(1/25), AUTO, x30~x2, 1/50000~1/200 0~15 SENS UP OFF, AUTO (2x~30x) EXPOSURE BRIGHTNESS 1~100 D-WDR ON(LEVEL:0~8), AUTO, OFF... -
Seite 14: Further Information
ADJUST OFF, ON VIDEO OUT NTSC/PAL COMET (CVBS) OFF, ON MONITOR OUT(HD) AHD, TVI mode, CVI mode, CVBS EXIT SAVE&END, NOT SAVE, RESET (*) Not Available Further information The manual is also available from the eneo web site at www.eneo-security.com. - Seite 15 All manuals and user guides at all-guides.com Inhaltsverzeichnis Lieferumfang .......................18 Bezeichnungen von Gerätekomponenten ...............19 Installationsanweisungen ..................20 Einstellung von Schwenkung und Neigung ......................21 Zoom- und Fokuseinstellung ............................. 21 Trennen der Dome-Kamera vom Easy-Adapter ..................... 22 Öffnen der Dome-Abdeckung ..........................22 Stromversorgungsanschlüsse ............................
-
Seite 16: Sicherheitsanweisungen
All manuals and user guides at all-guides.com Sicherheitsanweisungen Sicherheitshinweise allgemein • Bevor Sie das System anschließen und in Betrieb nehmen, lesen Sie zuerst diese Sicherheitshinweise und die Betriebsanleitung. • Bewahren Sie die Betriebsanleitung sorgfältig zur späteren Verwendung auf. • Montage, Inbetriebnahme und Wartung des Systems darf nur durch dafür autorisierte Personen vorgenom- men und entsprechend den Installationsanweisungen - unter Beachtung aller mitgeltenden Normen und Richtlinien - durchgeführt werden. -
Seite 17: Grafische Symbole
All manuals and user guides at all-guides.com • Bei abgedunkelter Umgebung und direktem Blick in den IR-Scheinwerfer ist ein Sicherheitsabstand von > 1 m zum Scheinwerfer einzuhalten. • Unsichtbare LED Strahlung nicht direkt mit optischen Instrumenten (z.B. Lupe, Vergrößerungsglas oder Mikroskop) betrachten, da dies Augen gefährden kann, LED Klasse 1M. -
Seite 18: Lieferumfang
All manuals and user guides at all-guides.com Lieferumfang • Dome-Kamera • Betriebsanleitung • Bohrschablone • Kunststoffdübel: 6 x 30mm (3x) • Befestigungsschraube: 3,5 x 25 mm (3x) • Einfacher Adapter (flach) • Einfacher Adapter (keilförmig) • Werkzeug zum Öffnen und zur Fokuseinstellung (1x) •... -
Seite 19: Bezeichnungen Von Gerätekomponenten
All manuals and user guides at all-guides.com Bezeichnungen von Gerätekomponenten Netzkabel Easy-Adapter (Keiladapter) Easy-Adapter (flach) Dome-Basis Fokus- und Zoom-Einstellung Objektiv Videoformat-DIP-Schalter 3-Achsen-Aufhängering Dome-Abdeckung Sonnenschutzdach für Kuppel Kuppel Lichtsensor OSD-Steuerung & Videoformat-Joystick SMD-LEDs Video Sub-out Anschluss... -
Seite 20: Installationsanweisungen
All manuals and user guides at all-guides.com Installationsanweisungen ACHTUNG: Die Kamerahalterung sollte an einem Bauelement wie etwa Beton, Hartholz, einem Wandständer oder Deckenbal- ken befestigt werden, welches das Gewicht der Kamera trägt. Verwenden Sie, falls erforderlich, geeignetes Befestigungsmateri- al (z.B. Dübel) anstelle des mitgelieferten Materials. 1. -
Seite 21: Einstellung Von Schwenkung Und Neigung
All manuals and user guides at all-guides.com Einstellung von Schwenkung und Neigung 1. Schwenkwinkel: Der Schwenkwinkel ist auf +/- 165° begrenzt. Den Aufhängebügel nicht über den Anschlag hinausdrücken, da sonst interne Beschädigungen auftreten können. 2. Neigungswinkel: Die Neigung ist auf min. 25°... -
Seite 22: Trennen Der Dome-Kamera Vom Easy-Adapter
All manuals and user guides at all-guides.com ACHTUNG: Achten Sie besonders darauf, die Abdeckkuppel der Dome-Kamera wäh- rend der Installation oder der Einstellung NICHT zu verkratzen. Es muss sorgfältig darauf geachtet werden, das Kabel NICHT zu beschädi- gen, zu knicken oder Gefahrenbereichen auszusetzen. Ziehen sie die Befestigungsschrauben der Dome-Abdeckung so fest, dass KEIN Spalt zwischen der Streulichtblende und der transparenten Kuppel bleibt, um eine Lichteinstrahlung der IR-LEDs in das Objektiv zu... -
Seite 23: Stromversorgungsanschlüsse
All manuals and user guides at all-guides.com Stromversorgungsanschlüsse Die Kamera kann entweder mit einer geregelten oder ungeregelten 12 VDC Stromversor- gung betrieben werden, aber eine geregelte 12 VDC Stromversorgung wird empfohlen. Die Kamera ist vor Schädigung durch falsche Polung der Stromversorgung geschützt. VIDEO (BNC) Stromversorgung... -
Seite 24: Betriebsanleitung
All manuals and user guides at all-guides.com Betriebsanleitung Bildschirmmenü-Steuerung verwenden Zugriff und Steuerung des Konfigurationsmenüs können über den Joystick zur Bild- schirmmenü-Steuerung am Aufhängebügel der Kamera erfolgen. Fünf Befehle stehen mit dem Joystick zur Verfügung. Der Aufbau des Bildschirm-Menüs kann sich je nach Modell unterscheiden. -
Seite 25: Joystick-Einstellung
All manuals and user guides at all-guides.com Sub-Out-Ausgang erzeugt. Das Ändern des Videoformats nimmt etwa 3 bis 5 Sekunden in Anspruch. Standardmäßig ist der DIP-Schalter auf CVBS-Modus geschaltet. Joystick-Einstellung Das Umschalten des Videoformats ist auch über den Videoformat-Joystick möglich. Wenn Sie das HD-Videoformat einstellen möchten, stellen Sie zuerst den DIP-Schalter auf HD-Modus. -
Seite 26: Bildschirmmenü-Übersicht
All manuals and user guides at all-guides.com Bildschirmmenü-Übersicht MENÜ SUB MENU CONFIGURATION MODUS INDOOR, OUTDOOR (Innenräume, Außenbereiche) IRIS SPEED (Geschwin- Objektiv digkeit der Blende) MANUAL (MANUELL) DN DWELL (Tag/ FOCUS ASSIST Nacht Verweilzeit) SHUTTER FLK, 1/60(1/50), 1/30(1/25), AUTO, x30~x2, 1/50000~1/200 (Verschluss) 0~15 SENS UP... -
Seite 27: Weitere Informationen
VIDEO OUT NTSC/PAL COMET (CVBS) OFF (AUS), ON (EIN) MONITOR OUT (HD) AHD, TVI-Modus, CVI-Modus, CVBS EXIT SAVE&END (SPEICHERN&BEENDEN), NOT SAVE (NICHT SPEICHERN), RESET (ZURÜCKSETZEN) (*) Nicht verfügbar Weitere Informationen Dieses Handbuch ist auch auf der eneo-Webseite unter www.eneo-security.com verfügbar. - Seite 28 All manuals and user guides at all-guides.com Contenu Matériel livré .......................31 Noms des pièces ......................32 Instructions d'installation ..................33 Réglages Panoramique/Inclinaisons ........................34 Ajustement du zoom et de la mise au point ......................34 Démonter la caméra dôme de l'Easy Adaptor ....................35 Ouvrir le cache de l’objectif ...........................
-
Seite 29: Instructions De Sécurité
All manuals and user guides at all-guides.com Instructions de sécurité Consignes de sécurité générales • Avant de brancher et de mettre en service le système, veuillez lire d'abord ces consignes de sécurité ainsi que la notice d'instructions. • Conservez soigneusement la notice d'instructions en vue d'une utilisation ultérieure. •... -
Seite 30: Symboles Graphiques
All manuals and user guides at all-guides.com • Une distance de sécurité > 1 m doit être respectée par rapport au projecteur dans un environnement sombre, quand on regarde directement dans le projecteur IR. • Les rayons invisibles des LED ne doivent pas être observés directement avec des instruments optiques (par ex. -
Seite 31: Matériel Livré
All manuals and user guides at all-guides.com Matériel livré • Caméra dôme • Mode d'emploi • Gabarit de perçage • Chevilles en plastique : 6 x 30 mm (3x) • Vis de fixation : 3,5 x 25 mm (3x) • Easy Adaptor (type plat) •... -
Seite 32: Noms Des Pièces
All manuals and user guides at all-guides.com Noms des pièces Câble d'alimentation Easy Adaptor (type incliné) Easy Adaptor (type plat) Base du dôme Réglage du focus et du zoom Objectif Commutateur DIP de format vidéo Cardan sur 3 axes Couvercle du dôme Dôme à... -
Seite 33: Instructions D'installation
All manuals and user guides at all-guides.com Instructions d'installation ATTENTION : La base de la caméra doit être fixée à une surface solide, comme du bois dur, un mur, pilier ou poutre au plafond apte à supporter le poids de la caméra dôme. Si nécessaire, utiliser un matériel de fixation (ancrages) plus adéquat au lieu du matériel fourni avec la caméra. -
Seite 34: Réglages Panoramique/Inclinaisons
All manuals and user guides at all-guides.com Réglages Panoramique/Inclinaisons 1. Limite de panoramique : le panoramique est limité à +/- 165°. Ne forcez PAS la rotation du cadran au-delà de la limite pour éviter des dommages internes. 2. Limite d'inclinaison : l’inclinaison est limitée à... -
Seite 35: Démonter La Caméra Dôme De L'easy Adaptor
All manuals and user guides at all-guides.com ATTENTION : Il faudra veiller à ne pas érafler la surface de la coupole lors de l'installation ou le réglage de la caméra. Veillez à ne PAS endommager, déformer ou exposer le câble dans une zone dangereuse. -
Seite 36: Connexions D'alimentation
All manuals and user guides at all-guides.com Connexions d'alimentation La caméra peut fonctionner en 12V CC régulé ou non régulé, mais une alimentation en courant 12V CC est recommandée. La caméra est protégée de tout endommagement par une connexion inverse de la polarité. VIDÉO (BNC) Alimentation... -
Seite 37: Mode D'emploi
All manuals and user guides at all-guides.com Mode d'emploi Utilisation d'une commande OSD L'accès et la commande du menu de configuration s'effectue en utilisant la manette de contrôle de l'affichage à l'écran (OSD) située sur le support de la caméra. Cinq fonctions de commande sont disponibles avec la manette. -
Seite 38: Réglage Du Joystick
All manuals and user guides at all-guides.com Réglage du joystick Le changement de format vidéo s'effectue à l'aide du joystick de format vidéo. Si vous souhaitez régler le format vidéo HD, réglez d'abord le commutateur DIP en mode HD. Réglez ensuite l'un des formats vidéo HD à l'aide du joystick. Le réglage par défaut est le mode TVI. -
Seite 39: Tableau Du Menu Osd
All manuals and user guides at all-guides.com Tableau du menu OSD MENU SUB MENU (sous-menu) CONFIGURATION MODE INDOOR (intérieur), OUTDOOR (extérieur) IRIS SPEED (vitesse OBJECTIF de l'iris) MANUEL DN DWELL (temps d'arrêt FOCUS ASSIST OBTURATEUR : FLK, 1/60(1/50), 1/30(1/25), AUTO, x30~x2, 1/50000~1/200 0~15 SENS UP (accroissement de OFF, AUTO (2x~30x) - Seite 40 All manuals and user guides at all-guides.com MENU SUB MENU (sous-menu) CONFIGURATION CAM TITLE (titre de la OFF, ON caméra) FREEZE (figer) OFF, ON MIRROR (miroir), V-FLIP (vidéo inversée verticalement), D-EFFECT MIRROR (MIROIR) ROTATE (rotation), OFF NEG. IMAGE SELECT (sélectionner) AREA1~4 (zone 1~4) DISPLAY (affichage) OFF, ON(POSITION, SIZE (taille))
-
Seite 41: Complément D'information
All manuals and user guides at all-guides.com Complément d'information Le manuel complet est également proposé sur le site Web d’eneo : www.eneo-security. com. - Seite 42 All manuals and user guides at all-guides.com Indice Parti fornite .........................45 Denominazione dei componenti ................46 Istruzioni per l'installazione ..................47 Regolazione della panoramica e dell'inclinazione ..................... 48 Regolazione dello zoom e della messa a fuoco....................48 Staccare la telecamera dome dall'Easy Adaptor.................... 49 Apertura del coperchio della cupola........................
-
Seite 43: Istruzioni Generali Per La Sicurezza
All manuals and user guides at all-guides.com Istruzioni per la sicurezza Istruzioni generali per la sicurezza • Prima di collegare e mettere in funzione il sistema, leggete le istruzioni per la sicurezza e le istruzioni per l'uso. • Conservate con cura le istruzioni per l'uso per un eventuale utilizzo futuro. •... - Seite 44 All manuals and user guides at all-guides.com • Deve essere mantenuto un margine di sicurezza di > 1 m dal proiettore se si guarda direttamente nel proiettore IR in un ambiente buio. • Non guardare direttamente le radiazioni LED invisibili utilizzando strumenti ottici (ad es. lente, lente di ingrandimento o microscopio) per prevenire danni agli occhi ( LED classe 1M).
-
Seite 45: Parti Fornite
All manuals and user guides at all-guides.com Parti fornite • Telecamera dome • Istruzioni per l'uso • Dima di montaggio • Tasselli di plastica: 6 x 30 mm (3x) • Viti di montaggio: 3,5 x 25 mm (3x) • Easy Adaptor (tipo piatto) •... -
Seite 46: Denominazione Dei Componenti
All manuals and user guides at all-guides.com Denominazione dei componenti Cavo di alimentazione Easy Adaptor (tipo inclinato) Easy Adaptor (tipo piatto) Base della cupola Regolazione dello zoom e messa a fuoco Obbiettivo Interruttore DIP del formato video Staffa a ruotare a 3 assi Coperchio cupola Protezione cupola Cupola... -
Seite 47: Istruzioni Per L'installazione
All manuals and user guides at all-guides.com Istruzioni per l'installazione CAUTION: The camera’s base should be attached to a structural object, such as concrete, hard wood, wall stud or ceiling rafter that supports the weight of the camera. Se necessario utilizzare materiale di montaggio adatto (ad es. -
Seite 48: Regolazione Della Panoramica E Dell'inclinazione
All manuals and user guides at all-guides.com Regolazione della panoramica e dell'inclinazione 1. Limite panoramica: la panoramica è limitata a +/- 165°. NON forzare la staffa a ruotare oltre il limite per evitare danni interni. 2. Limite inclinazione: l'inclinazione è limitata a 25°... -
Seite 49: Staccare La Telecamera Dome Dall'easy Adaptor
All manuals and user guides at all-guides.com ATTENZIONE: prestare estrema attenzione a NON graffiare la superficie della cupola durante le operazioni di installazione o regolazione. Fare attenzione a NON danneggiare, piegare o avvicinare il cavo alla zona di pericolo. Serrare le viti di fissaggio del coperchio della telecamera in modo che NON vi sia alcuna fessura tra il coperchio dell'obbiettivo e la cupola trasparente per evitare riflessi della luce dei LED IR. -
Seite 50: Collegamento All'alimentazione
All manuals and user guides at all-guides.com Collegamento all'alimentazione La telecamera può essere alimentata con 12 VCC regolata o non regolata, ma si consiglia l'alimentazione regolata di 12 VCC. La telecamera è protetta contro i danni causati da inversione di polarità. VIDEO (BNC) Alimentazione... -
Seite 51: Istruzioni Per L'uso
All manuals and user guides at all-guides.com Istruzioni per l'uso Utilizzo del controller OSD Si può accedere al menu di configurazione e gestirlo tramite il joystick di comando dell'O- SD sulla staffa della telecamera. Tramite il joystick sono disponibili cinque comandi. La progettazione di OSD potrebbe essere diversa a seconda del modello. -
Seite 52: Impostazione Del Joystick
All manuals and user guides at all-guides.com Impostazione del joystick È possibile cambiare il formato video tramite il joystick del formato video. Per impostare il formato video HD, impostare prima l'interruttore DIP sulla modalità HD. Quindi impostare uno dei formati video HD con il joystick. L'impostazione predefinita è la modalità TVI. 1. -
Seite 53: Tabella Menu Osd
All manuals and user guides at all-guides.com Tabella menu OSD MENU SOTTOMENU CONFIGURAZIONE MODE INDOOOR, OUTDOOR LENS (Obbiettivo) IRIS SPEED MANUAL FOCUS ASSIST DN DWELL SHUTTER FLK, 1/60(1/50), 1/30(1/25), AUTO, x30~x2, 1/50000~1/200 0~15 SENS UP OFF, AUTO (2x~30x) EXPOSURE BRIGHTNESS 1~100 D-WDR ON(LEVEL:0~8), AUTO, OFF... -
Seite 54: Altre Informazioni
OFF, ON VIDEO OUT NTSC/PAL COMET (CVBS) OFF, ON MONITOR OUT(HD) AHD, TVI mode, CVI mode, CVBS EXIT (Esci) SAVE&END, NOT SAVE, RESET (*) Non disponibile Altre informazioni Il manuale è disponibile anche sul sito web di eneo all'indirizzo www.eneo-security.com. - Seite 55 All manuals and user guides at all-guides.com...
- Seite 56 All manuals and user guides at all-guides.com eneo® is a registered trademark of VIDEOR E. Hartig GmbH Exclusive distribution through specialised trade channels only. VIDEOR E. Hartig GmbH Carl-Zeiss-Straße 8 63322 Rödermark/Germany Tel. +49 (0) 6074 / 888-0 Technical changes reserved Fax +49 (0) 6074 / 888-100 www.videor.com...