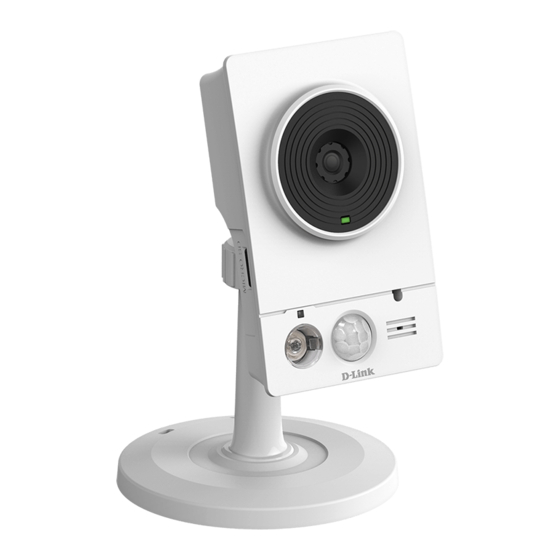
D-Link DCS-4201 Installationsanleitung
Inhaltsverzeichnis
Verfügbare Sprachen
Verfügbare Sprachen
Quicklinks
All manuals and user guides at all-guides.com
Quick Installation Guide
Vigilance HD Wireless Camera
This document will guide you through the basic installation
process for your new D-Link Network Camera.
DCS-4201
Quick Installation Guide
Installationsanleitung
Guide d'installation
Guía de instalación
Guida di Installazione
Краткое руководство по установке
Guia de Instalação Rápida
快速安裝指南
Petunjuk Pemasangan Cepat
Documentation also available on
CD and via the D-Link Website
Inhaltsverzeichnis

Verwandte Anleitungen für D-Link DCS-4201


Inhaltszusammenfassung für D-Link DCS-4201
-
Seite 11: Installationsschritte
DCS-4201 Netzwerkkamera in Ihrem Netzwerk. Zusätzliche Informationen zur Verwendung der Kamera finden Sie im Benutzerhandbuch, das Ihnen auf der CD, die diesem Paket beiliegt, oder über die D-Link Support-Website zur Verfügung steht. Installationsschritte 1. Prüfen Sie den Packungsinhalt, ob er mit den auf der Liste unten aufgeführten Artikeln übereinstimmt. -
Seite 12: Hardware-Überblick
Der IR-Cut Removable (abschaltbarer Infrarotfilter) Sensor prüft die Beleuchtungsbedingungen Infrarot-LED und schaltet entsprechend Zur Ausleuchtung des Sichtfeldes von Farbe auf Infrarot um der Kamera bei Nacht Mikrofon Nimmt Audio-Signale der Passiv-Infrarot Umgebung auf Sensor zur Bewegungserkennung D-Link DCS-4201 Quick Install Guide... -
Seite 13: Linke Seite
All manuals and user guides at all-guides.com Linke Seite microSD-Karteneinschub Lokaler Speicher zum Speichern von Bildern und Videoaufnahmen D-Link DCS-4201 Quick Install Guide... - Seite 14 Schließen Sie die Kamera mithilfe des mitgelieferten Stromkabels des Steckernetzteiles an eine Steckdose an. Hinweis: Sobald die Stromzufuhr hergestellt ist, leuchtet die LED rot auf. Wenn das Gerät eine IP-Adresse erhalten hat und der Zugriff auf das Gerät möglich ist, leuchtet die LED grün. D-Link DCS-4201 Quick Install Guide...
- Seite 15 All manuals and user guides at all-guides.com 4. Konfiguration mithilfe des Assistenten Legen Sie die DCS-4201 CD in das CD-ROM-Laufwerk Ihres Computers, um die Installation zu beginnen. Sollte die CD auf Ihrem Computer nicht automatisch ausgeführt werden oder der D-Link Launcher startet nicht automatisch, klicken Sie auf Start > Ausführen. Geben Sie D:\ autorun.exe ein, wobei D: für den Laufwerkbuchstaben Ihres CD-ROM-Laufwerks steht.
- Seite 16 All manuals and user guides at all-guides.com Klicken Sie auf das Symbol für den D-Link SE Setup- Assistenten, der in Ihrem Windows-Startmenü erstellt wurde. Start > D-Link > Setup Wizard SE Der Setup-Assistent wird aufgerufen und zeigt die MAC- und IP-Adresse Ihrer Kamera(s) an. Wenn in Ihrem Netzwerk ein DHCP-Server vorhanden ist, wird eine gültige IP-Adresse angezeigt.
-
Seite 17: Anzeige Der Kamera Über Einen Webbrowser
All manuals and user guides at all-guides.com Anzeige der Kamera über einen Webbrowser Klicken Sie auf das Symbol für den D-Link SE Setup- Assistenten, der in Ihrem Windows-Startmenü erstellt wurde. Start > D-Link > Setup Wizard SE Wählen Sie die Kamera aus und klicken Sie auf Link, um auf die Web-Konfiguration zuzugreifen. -
Seite 18: Weitere Informationen
Weitere Hilfe und Unterstützung steht Ihnen von unseren auf der Rückseite des Benutzerhandbuchs aufgeführten Niederlassungen oder online zur Verfügung. Wenn Sie an weiteren Einzelheiten zu den Produkten oder an Marketinginformationen von D-Link interessiert sind, besuchen Sie bitte die Website http://www.dlink.com. - Seite 77 All manuals and user guides at all-guides.com FCC Warning This equipment has been tested and found to comply with the limits for a Class A digital device, pursuant to Part 15 of the FCC Rules. These limits are designed to provide reasonable protection against harmful interference when the equipment is operated in a commercial environment.
- Seite 84 Hereby, D-Link Corporation, declares that this is in compliance with the essential English requirements and other relevant provisions of Directive 1999/5/EC. Por medio de la presente D-Link Corporation declara que el cumple con los requisitos Español esenciales y cualesquiera otras disposiciones aplicables o exigibles de la Directiva [Spanish] 1999/5/CE.
- Seite 88 D-Link recommends that you always switch off or unplug your D-Link products when they are not in use. By doing so you will help to save energy and reduce CO2 emissions.