
Verwandte Anleitungen für urmet NVR NEIUS Serie


Inhaltszusammenfassung für urmet NVR NEIUS Serie
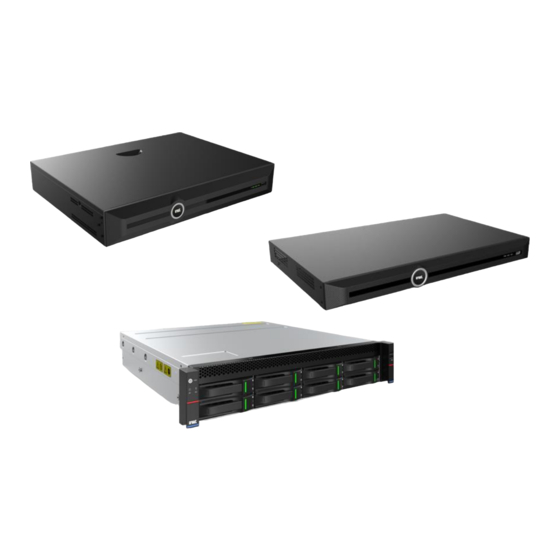
- Seite 1 Quick guide NVR NEIUS SERIES NVR NEIUS & NEIUS PLATINUM S+265/H.265/H.264 1-2-4-8 HDD 5-10-20-40-80 CH 6-8-12MP www.urmet.com IF YOU LOVE YOUR BUILDING...
- Seite 2 GUIDA RAPIDA QUICK GUIDE GUIDE RAPIDE SCHNELLANLEITUNG DS1098-036...
-
Seite 3: Informazioni Generali
*NOTA BENE Per maggiori approfondimenti, fare riferimento al manuale istruzioni presente sul sito Urmet. Per scaricare il Manuale dal Sito vedere il QR code sul foglio di Addendum. AVVERTENZE Alimentazione Prima di collegare l’apparecchio alla rete di alimentazione accertarsi che i dati di targa siano rispondenti... - Seite 4 Se sono necessarie riparazioni, si suggerisce di effettuare un backup di tutti i dati importanti prima di portare il dispositivo al centro di assistenza. URMET S.p.A. non è responsabile per la perdita dei dati memorizzati.
-
Seite 5: Installazione Dell'hardware
è “admin” (utente di login “admin”). Si consiglia di personalizzare sempre la password. Per rilevare il dispositivo in rete ed effettuare le configurazioni base utilizzare il software SearchConfig Tool V2.0 disponibile per il download su sito www.urmet.com nella pagina dedicata al prodotto sotto la sezione DOCUMENTAZIONE E RISORSE. - Seite 6 Fissare le viti del disco rigido nella parte inferiore della custodia del NVR, coprire il coperchio della custodia superiore e fissarlo con le viti 3 Installazione NVR del disco rigido anteriore Installare le viti di fissaggio del disco rigido e inserirle negli slot per disco rigido corrispondenti sul pannello anteriore.
- Seite 7 4 Accensione Prima di accendere, assicurarsi di utilizzare la potenza richiesta dall'NVR e assicurarsi che l'NVR sia correttamente messo a terra prima di iniziare, assicurarsi che l'uscita video e il display dell'NVR siano collegati correttamente. Collegare l'alimentazione e accendere l'interruttore di alimentazione sul pannello posteriore per avviare il dispositivo.
- Seite 8 Fare clic su " " nel dispositivo aggiunto per visualizzare direttamente l'anteprima del canale. Fare clic su " " nel dispositivo aggiunto per modificare nuovamente le informazioni sul canale del dispositivo. 8 Riproduzione Selezionare "Menu principale-> Riproduzione" per accedere all'interfaccia di riproduzione video, quindi selezionare il video da riprodurre in base al tipo di video.
- Seite 9 Descrizione: Alcuni modelli non supportano il monitoraggio dei telefoni cellulari. Fare riferimento al prodotto reale. 10 Spegnimento Seleziona "Menu principale-> " e fai clic su "Spegni". Nella finestra del prompt, fare clic su "Sì" per completare l'operazione di arresto. Nota: 1.
-
Seite 10: General Information
NVR models. Before using the device, read this document carefully and keep in a safe place where it is easily accessible for reference when needed. *NOTE For further information, see the instruction manual on the Urmet website. To download the manual from the site, see the QR code on the Addendum sheet. WARNINGS... -
Seite 11: Installing The Hdd
Image recording This device was designed to record images. It is not a burglar alarm. URMET SpA cannot be held liable for loss or damage due to theft suffered by the user. Make a test recording before using the device to ensure that it is working properly. URMET SpA is not liable for loss of stored data due to loss or damage caused by failure to follow the instructions for installation and use, improper use or malfunctioning of the device. - Seite 12 2. Connect one end of the HDD data cable to the SATA interface of the NVR mother board, and the other end to the HDD. 3. Connect one end of the HDD power cable to the interface of the NVR mother board and the other end to the HDD. 4.
- Seite 13 3 Schematic diagrams for installing the front NVR Attach the HDD mounting screws and insert it into the related HDD slot on the front panel. 4 Startup Make sure that the power supply required by NVR is used, NVR is well grounded, and NVR video output is well connected to the monitor before start up.
- Seite 14 Click “ ” in the Added Devices list to preview this channel. Click “ ” in the Added Devices list to re-edit channel information. 8 Playback Select “Main Menu -> Playback” to enter the Playback interface, where you can select the video to playback according to video type.
- Seite 15 mobile monitoring icon “ ” to enter the mobile monitoring interface, where you can scan the first QR code to download the client and then the ID QR code to obtain the ID for video preview and other operations. Remarks: The mobile monitoring feature is unavailable for some products.
- Seite 16 être conservé à un endroit facile d’accès pour pouvoir le consulter en cas de besoin. * NOTA BENE Pour plus d’informations, faire référence au manuel des instructions présent sur le site Urmet. Pour télécharger le manuel depuis le site, se reporter au code QR en fin de manuel.
- Seite 17 Dans le cas où des réparations seraient nécessaires, il est recommandé d’effectuer un backup de toutes les données avant de remettre le dispositif au centre d’assistance. URMET S.p.A. ne saurait être tenu pour responsable de la perte de données mémorisées.
- Seite 18 Pour détecter l'appareil sur le réseau et effectuer les configurations de base, utilisez le logiciel SearchConfig Tool V2.0 disponible en téléchargement sur le site www.urmet.com dans la page dédiée au produit sous la rubrique DOCUMENTATION ET RESSOURCES.
- Seite 19 Fixez les vis du disque dur au bas du boîtier du NVR, couvrez le couvercle du boîtier, puis fixez avec les vis. 3 Installation du NVR sur le disque dur avant: Installez les vis de fixation du disque dur et insérez-les dans les emplacements de disque dur correspondants sur le panneau avant.
- Seite 20 4 Commencer Avant de commencer, assurez-vous d'utiliser la puissance requise par le NVR et que la borne de mise à la terre du NVR est correctement mise à la terre. Avant de commencer, assurez-vous que la sortie vidéo et l'affichage du NVR sont correctement connectés. Branchez l'alimentation et allumez l'interrupteur d'alimentation sur le panneau arrière pour allumer l'appareil.
- Seite 21 Cliquez sur " " dans l'appareil ajouté pour prévisualiser directement la chaîne. Cliquez sur " " dans l'appareil ajouté pour modifier à nouveau les informations sur le canal de l'appareil. 8 Jouer Sélectionnez "Menu principal-> Lecture" pour accéder à l'interface de lecture vidéo, puis sélectionnez la vidéo à...
- Seite 22 Explication: Certains modèles ne prennent pas en charge la surveillance des téléphones portables. Veuillez vous référer au produit réell. 10 Arrêtez Sélectionnez "Menu principal-> " et cliquez sur "Fermer". Dans la fenêtre d'invite, cliquez sur Oui pour terminer l'opération de fermeture. Remarque: 1.
-
Seite 23: Allgemeine Informationen
Dieses Dokument soll eine einfache Kurzanleitung sein, die Ihnen eine schnelle Inbetriebnahme der Modelle der Serie S+265/H.265/H.264 NVR URMET S.p.A. gestattet. Bitte lesen und bewahren Sie dieses Dokument vor der Benutzung des Gerätes sorgfältig und an einem leicht zugänglichen Ort auf, damit Sie sie bei Bedarf umgehend konsultieren zu können. - Seite 24 Bildaufzeichnungen Dieses Gerät wurde für das Aufzeichnen von Bildern konzipiert und nicht als Einbruchmeldezentrale. URMET S.p.A. kann nicht für Verluste oder Schäden im Anschluss an Diebstähle zu Lasten des Kunden haftbar gemacht werden. Führen Sie vor Inbetriebnahme des Geräts eine Probeaufzeichnung durch, um zu überprüfen, ob es korrekt funktioniert.
-
Seite 25: Installieren Der Festplatte
Regelmäßig den speziellen Bereich der Hersteller-Webseite unter der Adresse www.urmet.com >>Download >>Software auf Aktualisierungen der Software überprüfen. Firmware-Aktualisierung Wenden Sie sich an den Customer Service von URMET S.p.A., um die Verfügbarkeit eventueller Firmware-Aktualisierungen festzustellen. Netzwerkkonfiguration Standardmäßig wird die IP-Adresse des NVR über DHCP vergeben. - Seite 26 Schließen Sie ein Ende des Festplatten-Stromkabel an die Schnittstelle der NVR- Hauptplatine und das andere Ende an die Festplatte an. Ziehen Sie die Festplattenschrauben an der Unterseite des NVR-Gehäuses fest, bringen Sie die obere Abdeckung an und befestigen Sie sie mit Schrauben 3 Schematische Darstellungen zur Installation einer Festplatte an einem NVR mit Front-Steckplätzen Bringen Sie die Befestigungsschrauben der Festplatte an und setzen Sie sie in den entsprechenden...
-
Seite 27: Festplatte Initialisieren
Stellen Sie vor dem Start sicher, dass das für den NVR erforderliche Netzteil verwendet wird, der NVR gut geerdet ist und der NVR-Videoausgang gut mit dem Monitor verbunden ist. Schließen Sie das Netzteil an und schalten Sie den Netzschalter auf der Rückseite ein. Das Gerät startet. -
Seite 28: Mobile Überwachung
Klicken Sie in der Liste der hinzugefügten Geräte auf " ", um eine Vorschau dieses Kanals anzuzeigen. Klicken Sie in der Liste Hinzugefügte Geräte auf " ", um die Kanalinformationen erneut zu bearbeiten. 7 Wiedergabe Wählen Sie „Hauptmenü -> Wiedergabe“, um die Wiedergabeschnittstelle aufzurufen, in der Sie das abzuspielende Video nach Videotyp auswählen können. - Seite 29 Bemerkungen: Die mobile Überwachungsfunktion ist für einige Produkte nicht verfügbar. Das eigentliche Produkt hat Vorrang. 9 Herunterfahren Wählen Sie "Hauptmenü ->” " und klicken Sie auf "Herunterfahren". Klicken Sie im Nachrichtenfenster zum Herunterfahren auf "Ja". Anmerkungen: 1. Unterbrechen Sie nicht die Stromversorgung, wenn das System "System herunterfahren ..." anzeigt. 2.
- Seite 32 MADE IN CHINA To Urmet specification...