Werbung
Quicklinks
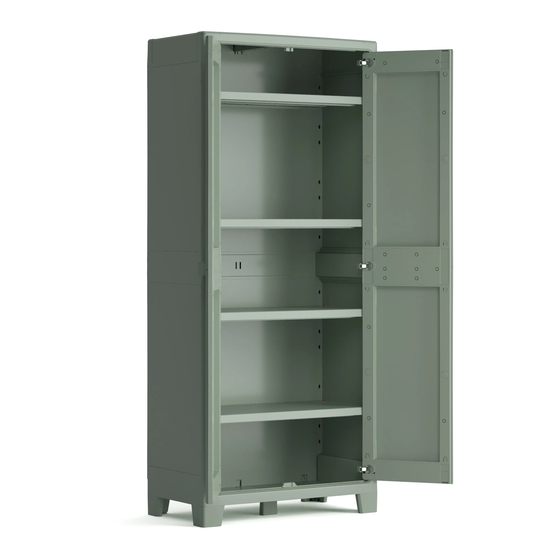
PLANET OUTDOOR - TALL
EN - Assembly instructions FR - Instructions de montage DE - Montageanleitung IT - Istruzioni di montaggio ES - Instrucciones de
montaje PT - Instruções de montagem NL - Montagevoorschrift EL - Οδηγίες συναρμολόγησης PL -Instrukcja montażu ZH - 装配说
明 HU- Összeszerelési útmutató HR - Upute za montažu RO - Instrucțiuni de asamblare SL - Navodila za montažo BG - Инструкция
за монтаж RU - Инструкция по монтажу UA - Інструкція з монтажу CZ - Návod k montáži SK - Montážne pokyny LT - Montavimo
instrukcija LV - Uzstādīšanas instrukcija ET - Paigaldamise juhend
Keter Italia
Via Ing. Taliercio 2, 31024 Ormelle TV
Tel: +39 0422 745900, Fax +39 0422 745929
Werbung

Inhaltszusammenfassung für Keter PLANET OUTDOOR TALL
- Seite 1 за монтаж RU - Инструкция по монтажу UA - Інструкція з монтажу CZ - Návod k montáži SK - Montážne pokyny LT - Montavimo instrukcija LV - Uzstādīšanas instrukcija ET - Paigaldamise juhend Keter Italia Via Ing. Taliercio 2, 31024 Ormelle TV...
- Seite 2 EN - Keep this instruction manual with the product for future reference. Read the instructions carefully before assembly. If there are pieces missing or damaged, contact your local dealer presenting proof of purchase. Indicate the code of the missing or damaged pieces, referring to the list on pages 25 and 26.
- Seite 3 INSIDE...
- Seite 4 INSIDE...
- Seite 5 [A2] [A2] x 2 [A3] x 2 [A3] clic clic [A1] x 1 [A2] [A3] [A1] [A2] [A3]...
- Seite 6 [A4] x 1 [A4] BACK BACK...
- Seite 7 [A5] x 1 [A6] x 1 BACK [A6] [A5] [A7] x 1 [A7] [B1] x 2 [B1] [B1] [B1] BACK...
- Seite 8 INSIDE [B3] x 1 [B3]...
- Seite 9 [B2] [B3] [B2] [B2] x 2 [B4] x 2 [B4] [B4] INSIDE INSIDE...
- Seite 11 [B1] [B1] [B1] INSIDE [B1] x 2 INSIDE...
- Seite 12 clic [C5] clic [C4] [C1] x 1 [C2] x 1 [C1] [C3] x 1 BACK [C4] x 1 clic clic [C3] [C5] x 1 [C2] [C11] [C10] BACK [C10] x 1 BACK BACK click [C11] x 1 BACK...
- Seite 13 [C7] x 2 BACK BACK [C8] [C7] [C8] x 2 [C7] [C8] INSIDE INSIDE INSIDE 6x [4,5x25 mm]...
- Seite 14 [E1] [E1] x 4 BACK...
- Seite 15 [E2] click [E2] [E2] click [E3] [E3] [E3]...
- Seite 16 BACK BACK...
- Seite 18 [D3] x 1 [D4] x 1 [D7] [D5] [D5] x 1 [D7] x 1 [D6] x 1 [D4] [D3] [D8] x 1 [D8] [D6]...
- Seite 19 [D7] x 1 [D2] x 2 [D7] [D2] [D3] x 1 [D8] x 1 [D3] [D2] [D8]...
- Seite 20 [D5] x 1 [D1] x 2 [D5] [D1] [D4] x 1 [D4] [D6] x 1 [D1] [D6]...
- Seite 21 6x [4,5x25 mm]...
- Seite 22 [D21] [D20] [D23] [D22]...
- Seite 23 4x [4,5x25 mm]...
- Seite 24 EN - For optimum stability on uneven surfaces, regulate the cupboard using the screws under the front feet. FR - Pour garantir une meilleure stabilité de l’armoire sur des surfaces irrégulières, utiliser les vis de réglage placées sous les pieds avant. DE - Um dem Schrank auf unebenen Flächen mehr Stabilität zu verleihen, verwenden Sie bitte die Stellschrauben unter den vorderen Füßen.
- Seite 25 EN - Assembly parts FR - Pièces à assembler DE - Montageteile IT - Parti da montare ES - Piezas de ensamble PT - Peças de montagem NL - Montagestukken EL - Ανταλλακτικα συνελευση PL - Części przeznaczone do montażu ZH - 装配零件 HU - Összeszerelendő részek HR - Dijelovi za montažu RO - Componente de asamblat SL - Deli, ki jih je treba sestaviti BG - Части, които...
- Seite 26 After assembly is completed there may be extra small parts, you may dispose of these as they are not needed | Une fois l’assemblage terminé, il se peut que vous ayez quelques petites pièces en trop dont vous pouvez vous débarrasser car elles ne sont pas nécessaires | Soliten nach dem Zusammenbau kleinere Plastikteile übrig geblieben sein, so können Sie diese entsorgen | Finalizado el montaje, pueden sobrar algunas piezas, puede disponer de ellas pues no son necesarias | A montaggio ultimato possono avanzare alcune piccole parti, queste possono essere smaltite perchè...
- Seite 28 © All right reserved, 2021...


