Inhaltsverzeichnis
Werbung
Verfügbare Sprachen
Verfügbare Sprachen
Quicklinks
All manuals and user guides at all-guides.com
Istruzioni per l'uso e l'installazione
IT
Cappa
Instructions for use and installation
GB
Cooker Hood
Mode d'emploi et installation
FR
Hotte de Cuisine
Bedienungsanleitung und Einrichtung
DE
Dunstabzugshaube
Instructies voor het gebruik en installeren
NL
Dampkap
Evolia 610 - 910
110.0184.210
110.0204.682
FEV 610 T PO XS
FEV 910 T PO XS
Werbung
Inhaltsverzeichnis

Verwandte Anleitungen für Franke Evolia 610


Inhaltszusammenfassung für Franke Evolia 610
- Seite 1 Instructions for use and installation Cooker Hood Mode d’emploi et installation Hotte de Cuisine Bedienungsanleitung und Einrichtung Dunstabzugshaube Instructies voor het gebruik en installeren Dampkap Evolia 610 - 910 110.0184.210 FEV 610 T PO XS 110.0204.682 FEV 910 T PO XS...
- Seite 2 All manuals and user guides at all-guides.com...
-
Seite 3: Inhaltsverzeichnis
All manuals and user guides at all-guides.com Libretto di Istruzioni INDICE CONSIGLI E SUGGERIMENTI.............................. . 3 CARATTERISTICHE................................4 INSTALLAZIONE ..................................6 USO......................................8 MANUTENZIONE .................................. . 9 Instructions Manual INDEX RECOMMENDATIONS AND SUGGESTIONS ........................11 CHARACTERISTICS ................................12 INSTALLATION..................................14 USE ......................................16 MAINTENANCE ...................................17 Manuel d’Instructions... -
Seite 4: Consigli E Suggerimenti
All manuals and user guides at all-guides.com CONSIGLI E SUGGERIMENTI INSTALLAZIONE Il produttore declina qualsiasi responsabilità per danni dovuti ad installa- zione non corretta o non conforme alle regole dell’arte. La distanza minima di sicurezza tra il Piano di cottura e la Cappa deve essere di 650 mm. -
Seite 5: Caratteristiche
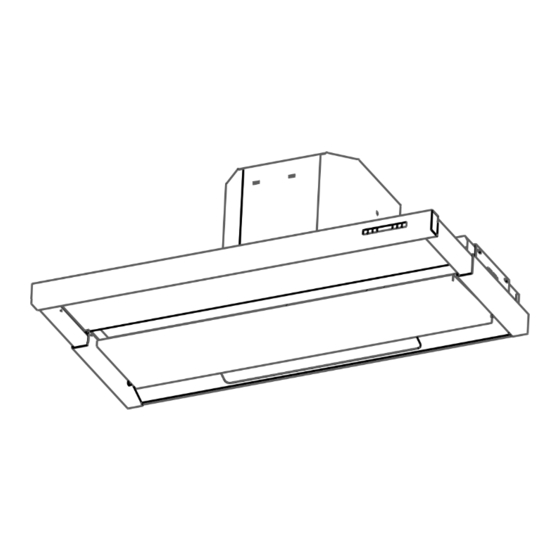
All manuals and user guides at all-guides.com CARATTERISTICHE Ingombro 85 2 26 3 29 8 25 8 Ø 15 0 89 9 27 0 0-17 0 Componenti Rif. Q.tà Componenti di Prodotto Corpo Cappa completo di: Comandi, Luce, Gruppo, Ventilatore, Filtri quadrato ssazione Flangia ø... - Seite 6 All manuals and user guides at all-guides.com Ø150 0-170...
- Seite 7 All manuals and user guides at all-guides.com INSTALLAZIONE Foratura Piano di supporto e Montaggio Cappa l montaggio ed il collegamento devono essere realizzati da un t r u t t o r e e d i q u a l s i a s i r i c o r s o i c a s o d i i n c i d e n t e . •...
- Seite 8 All manuals and user guides at all-guides.com • orare la parte superiore del mobile. • issare i due supporti con le viti fornite. 15 min. - 30 Max. X = Epaisseur porte ( C o m e l a p o s i z i o n e d e l t a g l i o ) •...
- Seite 9 All manuals and user guides at all-guides.com Quadro Comandi TASTO FUNZIONI ON/OFF Motore Attiva e a rresta il m otore d’a spirazione. S ul dis play v iene visualizzato lo step di velocità precedentemente impostata. Decrementa la velocità del motore: V3 →V2 → V1 elocità...
- Seite 10 All manuals and user guides at all-guides.com MANUTENZIONE Pulizia dei Confort Panel • Aprire il c onfort panel agendo sulle apposite manopole, sgan- ciarlo facendo una leggera pressione sulla parte posteriore. • Il confort panel non va assolutamente lavato in lavastoviglie. •...
- Seite 11 All manuals and user guides at all-guides.com Filtri antiodore (Versione Filtrante) SOSTITUZIONE • Non sono lavabili nè rigenerabili, vanno sostituiti ogni 4 m esi circa di utiliz zo o più f requentemente, pe r un uso particolar- mente intenso. • Aprire il Confort Panel, agendo sulle apposite manopoline. •...
-
Seite 12: Recommendations And Suggestions
All manuals and user guides at all-guides.com RECOMMENDATIONS AND SUGGESTIONS INSTALLATION • The manufacturer will not be held liable for any damages resulting from incorrect or improper installation. • The minimum safety distance between the cooker top and the extrac- tor hood is 650 mm. - Seite 13 All manuals and user guides at all-guides.com CHARACTERISTICS Dimensions 85 2 26 3 29 8 25 8 Ø 15 0 89 9 27 0 0-17 0 Components Ref. Q.ty Product Components Hood Body, complete with: Controls, Light, Blower, Filters square xing brackets Flange ø...
- Seite 14 All manuals and user guides at all-guides.com Ø150 0-170...
- Seite 15 All manuals and user guides at all-guides.com INSTALLATION Drilling the Support surface and Fitting the Hood ny permanent electrical installation must comply with the latest regulations concerning this type of instal- lation and a ualified electrician must carry out the work. on compliance could cause serious accidents or injury and would deem the manufacturers guarantee null and void.
- Seite 16 All manuals and user guides at all-guides.com • o drill the outlet onto the top of the wall furniture. • o fi the • o fi the s uares using the provided screws. s uares using the provided screws. 15 min. - 30 Max. X = Epaisseur porte C a u t i o n : T h e p o s i t i o n o f t h e c u t t i n g a n d t h e p o s i t i o n o f t h e f r a m e t h i c k n e s s 3 0 m m .
- Seite 17 All manuals and user guides at all-guides.com Control panel TOUCH CONTROL FUNCTION ON/OFF Motor Switches the ho od m otor on a nd off. T he la test se lected speed appears on the display. Decreases the suction speed: V3 → V2 → V1 Speed - Increases the suction speed: V1 →...
- Seite 18 All manuals and user guides at all-guides.com MAINTENANCE Cleaning the Comfort Panel • Open the comfort panel; turn the hooks and remove the panel by slightly pressing the rear side. • Do not wash the comfort panel in the dish washing machine. •...
-
Seite 19: Light Replacement
All manuals and user guides at all-guides.com Odour lters (Recirculation version) REPLACING ACTIVATED CHARCOAL FILTERS • These filters are not w ashable and cannot be regenerated, and must b e rep laced ap proximately every four months of o pera- tion, or more frequently with heavy usage. -
Seite 20: Conseils Et Suggestions
All manuals and user guides at all-guides.com CONSEILS ET SUGGESTIONS INSTALLATION • Le fabricant décline toute responsabilité en cas de dommage dû à une installa- tion non correcte ou non conforme aux règles de l’art. • La distance minimale de sécurité entre le plan de cuisson et la hotte doit être de 650 mm au moins. -
Seite 21: Caracteristiques
All manuals and user guides at all-guides.com CARACTERISTIQUES Encombrement 85 2 26 3 29 8 25 8 Ø 15 0 89 9 27 0 0-17 0 Composants Réf. Q.té Composants de Produit Corps Hotte équipé de : Commandes, Lumière, Groupe, Ventilateur, Filtres Flasque ø... - Seite 22 All manuals and user guides at all-guides.com Ø150 0-170...
-
Seite 23: Installation
All manuals and user guides at all-guides.com INSTALLATION Perçage Plan de support et Montage Hotte M o n t a g e e t r a c c o r d e m e n t d o i v e n t ê... - Seite 24 All manuals and user guides at all-guides.com • Percer le dessus du meuble haut. • i er les uerres l aide des vis fournies. 15 min. - 30 Max. X = Epaisseur porte At t e n t i o n : La p o s i t i o n d e s é q u e r r e s p o u r r a ê t r e m o d i f i é e s u i v a n t l a p o s i t i o n d u b a n d e a u é...
-
Seite 25: Utilisation
All manuals and user guides at all-guides.com UTILISATION Tableau des commandes TOUCHE FONCTIONS ON/OFF Moteur Actionne et arrête le moteur d’aspiration. Sur l’afficheur est visualisé le pas de la vitesse précédemment sélectionnée. Réduit la vitesse du moteur: V3 → V2 → V1 Vitesse - Augmente la vitesse du moteur: V1 →... -
Seite 26: Entretien
All manuals and user guides at all-guides.com ENTRETIEN Nettoyage des Confort Panel • Ouvrir le confort panel, en intervenant sur le s boutons spécia- lement pr évus, puis le décrocher en exerçant une légère pr es- sion sur la partie arrière. •... - Seite 27 All manuals and user guides at all-guides.com Filtre anti-odeur (Version filtrante) REMPLACEMENT FILTRE AU CHARBON ACTIF • Ils ne sont pas lavables ni régénérables; les remplacer au moins tous les quatre mois d’utilisation ou plus fréquemment en cas d’utilisation très intense. •...
-
Seite 28: Empfehlungen Und Hinweise
All manuals and user guides at all-guides.com EMPFEHLUNGEN UND HINWEISE MONTAGE Das Gerät darf nur vom Fachpersonal angeschlossen werden. Der Hersteller haftet nicht für Schäden, die auf eine fehlerhafte und unsach- gemäße Montage zurückzuführen sind. Der minimale Sicherheitsabstand zwischen Kochmulde und Haube muss 650 mm betragen. -
Seite 29: Charakteristiken
All manuals and user guides at all-guides.com CHARAKTERISTIKEN Platzbedarf 85 2 26 3 29 8 25 8 Ø 15 0 89 9 27 0 0-17 0 Komponenten Pos. Produktkomponenten Haubenkörper mit Schaltern, Beleuchtung, Gebläse-gruppe, Filter Befestigungswinkelmaße Flansch ø 150 mm Abdeckprofil Pos. - Seite 30 All manuals and user guides at all-guides.com Ø150 0-170...
-
Seite 31: Montage
All manuals and user guides at all-guides.com MONTAGE Bohren der Trägerplatte und Montage der Dunstabzugshaube ontage und nschlu m ssen von einem ualifizierten nstallateur durchgef hrt werden. An s p r u c h i m F a l l e e i n e s Un f a l l e s a u f g e h o b e n . h i g k e i t d e r D e c k e o d e r a l t e r n a t i v d e r Tr ä... - Seite 32 All manuals and user guides at all-guides.com • n das ber der Haube vorhandene ord ein Loch bohren. • Die inkeln mit den gelieferten chrauben fi ieren. 15 min. - 30 Max. X = Epaisseur porte Ac h t u n g : d i e La g e d e r W i n k e l k a n n ( e n t s p r e c h e n d e r La g e d e r 3 0 m m b r e i t e n B a n d ) l e i c h t g e ä...
-
Seite 33: Bedienung
All manuals and user guides at all-guides.com BEDIENUNG Bedienfeld TASTE FUNKTIONEN T1 Motor ON/OFF Schaltet den Gebläsemotor ein und aus. Auf dem Display wird die zuvor eingestellte Geschwindigkeitsstufe angezeigt. T2 Geschwindigkeit - Erhöht die Geschwindigkeit des Motors: V3 → V2 → V1 T3 Geschwindigkeit + Verringert die Geschwindigkeit des Motors: V1 →... -
Seite 34: Wartung
All manuals and user guides at all-guides.com WARTUNG Reinigung des Luftleitblechs • Das L uftleitblech durc h be tätigen de r be iden Dre hknöpfe öf f- nen und hinten an den Scharnieren durch leichtes anheben aus- haken. • Das Luftleitblech darf keinesfalls im Geschirrspüler gewaschen werden. -
Seite 35: Geruchs Lter (Umluftversion)
All manuals and user guides at all-guides.com Geruchs lter (Umluftversion) AKTIVKOHLE-GERUCHSFILTER - FILTERAUSTAUSCH • Sie k önnen w eder g ewaschen no ch w iederver-wendet w erden und s ind alle 4 Betriebsmonatebzw. bei s tarkem Eins atz auch häufiger auszutauschen. •... -
Seite 36: Installatie
All manuals and user guides at all-guides.com AD VIES EN S U G G ES T IES Deze gebruiksaanwijzing geldt voor verschillende uitvoeringen van het apparaat. Het is mogelijk dat er een aantal kenmerken worden beschreven die niet van toepassing zijn op uw apparaat. - Seite 37 All manuals and user guides at all-guides.com Afmetingen 85 2 26 3 29 8 25 8 Ø 15 0 89 9 27 0 0-17 0 Componenten Ver. Q.ty Componenten van apparaat Afzuigkap met : Afstandsbediening, Verlichting, Motor, Ventilator, Filters Ophangbeugels Klep ø...
- Seite 38 All manuals and user guides at all-guides.com Ø150 0-170...
-
Seite 39: Montage Afzuigkap
All manuals and user guides at all-guides.com ALLA Montage Afzuigkap M o n t a g e e n i n s t a l l a t i e d i e n e n d o o r e e n b e v o e g d * v a a n t e g e b e u r e n . - Seite 40 All manuals and user guides at all-guides.com • ndien nodig een opening maken in de bovenkant van het meubel voor de afvoerbuis. • De ophangbeugels plaatsen met behulp van de bijgeleverde schroeven. 15 min. - 30 Max. X = Epaisseur porte OP G ELET : d e p o s i t i e v a n d e o p h a n g b e u g e l s i s a f h a n k e l i j k v a n d e p o s i t i e v a n d e a f z u i g k a p .
-
Seite 41: Bedieningspaneel
All manuals and user guides at all-guides.com Bedieningspaneel TOETS FUNCTIES AAN/UIT Schakelt de zuigmotor aan en uit. Op de display verschijnt de snelheid die voordien werd ingesteld. Vermindert de snelheid van de motor: V3 → V2 → V1 Snelheid - Verhoogt de snelheid van de motor: V1 →... -
Seite 42: Metalen Vetfilters
All manuals and user guides at all-guides.com Schoonmaken van het Comfort Panel • Het comfort panel openen en vervolgens loshaken door geringe druk op het achterste deel uit te oefenen. • Het comfort panel mag in de vaatwasser gewassen worden. •... - Seite 43 All manuals and user guides at all-guides.com • D e z e zijn niet wasbaar noch recupereerbaar; ze moeten minstens om de vier maanden vervangen worden of vaker in geval van zeer intensief gebruik. • Het Comfort Panel openen. • De metalen vetfilters verwijderen. •...
- Seite 44 All manuals and user guides at all-guides.com A Z U R - A Z U R - A Z U R B L A U B L A C K - NOI R - S C H W A R Z B L U E - B L E U - B L A U B R OW N - B R U N - B R A U N G R E E N Y E L L OW...
-
Seite 45: Electrical Connection
All manuals and user guides at all-guides.com The wires in this mains ELECTRICAL CONNECTION lead are coloured in ELECTRICAL REQUIREMENTS accordance with the Any permanent electrical installation must comply following code: with the latest I.E.E. Regulations and local Electricity Green & Yellow Earth Board regulations. - Seite 46 All manuals and user guides at all-guides.com Filtre recyclage assemblé Recycling lter Umluftbetrieb Aktivkohle-Filter Filtro riciclaggio riunito Filter verenigde recycling...
- Seite 47 All manuals and user guides at all-guides.com...
- Seite 48 All manuals and user guides at all-guides.com...
- Seite 49 All manuals and user guides at all-guides.com EVOLIA EVOLIA L > 700 mm L > 1000 mm L = 900 mm L = 600 mm...
- Seite 50 All manuals and user guides at all-guides.com...
- Seite 51 All manuals and user guides at all-guides.com...
- Seite 52 All manuals and user guides at all-guides.com 991.0241.156 - 120112...