Inhaltsverzeichnis
Werbung
Verfügbare Sprachen
Verfügbare Sprachen
Quicklinks
Werbung
Inhaltsverzeichnis

Verwandte Anleitungen für VonHaus 3000124


Inhaltszusammenfassung für VonHaus 3000124
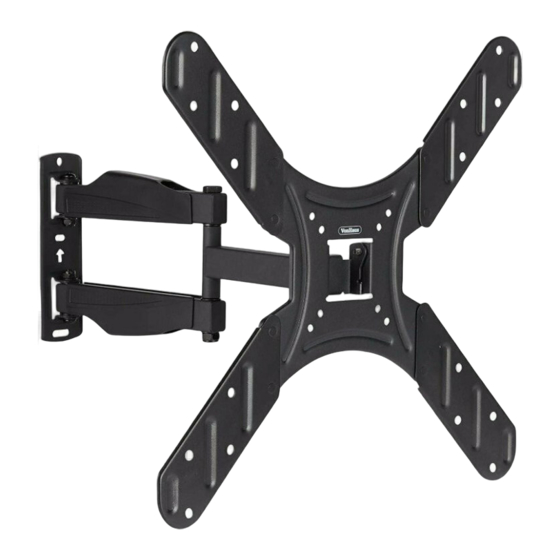
- Seite 1 CANTILEVER TV BRACKET FOR 20 - 50” TVS 3000124 - Instruction Manual...
- Seite 2 CONTENTS Safety Instructions Safety Instructions, Safety Symbols, Tools Required Components Wall Fitmant Guide Assembly Warranty...
- Seite 3 WARNING PLEASE READ THESE INSTRUCTIONS CAREFULLY, AND KEEP FOR FUTURE REFERENCE Please read all instructions carefully only. before use and retain for future If you do not understand these reference. directions, or have any doubts WARNING! Do not exceed the regarding the safety of the maximum stated load capacity of installation, please seek advice and...
-
Seite 4: Safety Symbols
WARNING PLEASE READ THESE INSTRUCTIONS CAREFULLY, AND KEEP FOR FUTURE REFERENCE suitability of the wall, refer to a Use of a Stud Finder (not included) is qualified contractor for guidance. recommended. We recommend two people are present to install this TV Bracket. SAFETY SYMBOLS Please follow the following safety and guidence. - Seite 5 COMPONENTS A. Wood Screw (x3) B. Concrete Anchor (x3) C. M5x15 (x4) D. M6x15 (x4) E. M8x15 (x4) F. M6 Flat Washer (x3) G. M6 Nut (x8)
- Seite 6 WALL FITMENT GUIDE IMPORTANT: When drilling into walls always check that the there are no hidden wires or pipes ect. Ensure that the screws and wall plugs being used are suitable for supporting the unit to be installed. Standard Wall Plug: Suitable for use on most types of wall such as brick, breeze block, con- crete, stone, wood or plaster.
- Seite 7 ASSEMBLY If the mounting holes are spaced 400x400mm apart, use the adaptor plates. Use the wall plate as a template to drill three holes of M10 diameter and 50mm depth into the concrete wall. Insert the concrete anchors into the holes.
- Seite 8 Place the panel on the wall, and then screw 3 Wood screws (A) into the concrete anchors. Install the bracket onto your TV. Use the correct sized bolt that suitable for your TV to secure.
-
Seite 9: Disposal Information
Any abuse of the product or the manner in which it is used will www.VonHaus.com/warranty invalidate the warranty. Please retain a proof of purchase receipt or statement as proof of the purchase date. - Seite 10 SOMMAIRE Consignes de sécurité Consignes de sécurité, Symboles de sécurité, Outils nécessaires Composants Guide de montage mural Montage Garantie...
- Seite 11 AVERTISSEMENT VEUILLEZ LIRE CES INSTRUCTIONS ATTENTIVEMENT ET LES CONSERVEZ POUR POUVOIR LES CONSULTER À L’AVENIR Veuillez lire attentivement ces Vérifiez, avant installation, que la instructions avant utilisation et surface porteuse soutiendra sans conservez-les pour pouvoir les problème le poids combiné de consulter à...
-
Seite 12: Symboles De Sécurité
AVERTISSEMENT VEUILLEZ LIRE CES INSTRUCTIONS ATTENTIVEMENT ET LES CONSERVEZ POUR POUVOIR LES CONSULTER À L’AVENIR veuillez demander l’avis de votre qualifié. Nous recommandons la magasin de bricolage pour obtenir présence de deux personnes pour les informations requises. Si vous avez installer ce Support pour TV. - Seite 13 COMPOSANTS A. Vis à bois (x3) B. Cheville pour béton (x3) C. M5x15 (x4) D. M6x15 (x4) E. M8x15 (x4) F. Rondelle plate M6 (x3) G. Écrou M6 (x8)
- Seite 14 GUIDE DE MONTAGE MURAL IMPORTANT : lorsque vous percez dans un mur, vérifiez toujours qu’il n’y a pas de tuyaux ou de fils cachés. Vérifiez que les vis et les chevilles utilisées conviennent au support de l’unité installée. Cheville standard : convient à la plupart des types de mur, par exemple en briques, en par- paings, en ciment, en pierre, en bois ou en plâtre.
- Seite 15 MONTAGE Si les trous de montage sont espacés de 400 x 400 mm, utilisez les platines de montage. Utilisez les platines de montage en tant que modèle pour percer trois trous de diamètre M10 et d’une profondeur de 50 mm dans le mur en ciment. Insérez les chevilles pour ciment dans les trous.
- Seite 16 Placez le panneau sur le mur, puis vissez 3 vis à bois (A) dans les chevilles pour ciment. Installez le support dans votre TV. Utilisez le boulon de taille appropriée pour bien fixer votre TV.
- Seite 17 : de ce manuel et que toutes les instructions ont été suivies de manière www.VonHaus.com/warranty précise. Tout utilisation abusive du Conservez une preuve d’achat, reçu produit ou de la manière dont il a été...
- Seite 18 INHALT Sicherheitshinweise Sicherheitshinweise, Sicherheitssymbole, Nötiges Werkzeug Komponenten Wandmontageanleitung Aufbau Garantie...
- Seite 19 WARNUNG BITTE LESEN SIE DIESE ANWEISUNGEN SORGFÄLTIG UND BEWAHREN SIE SIE ALS REFERENZ AUF. Bitte lesen Sie die Anleitung sicher trägt. Wenn Sie unsicher sorgfältig und bewahren Sie sie als sind, wenden Sie sich bitte an einen Referenz auf. geeigneten Fachmann. WARNUNG! Überschreiten Sie Überziehen Sie die Schrauben nicht.
-
Seite 20: Sicherheitssymbole
WARNUNG BITTE LESEN SIE DIESE ANWEISUNGEN SORGFÄLTIG UND BEWAHREN SIE SIE ALS REFERENZ AUF. oder Eignung der Wand nicht sicher Die Verwendung eines Balkenfinders sind, wenden Sie sich bitte an (nicht enthalten) wird empfohlen. einen qualifizierten Fachmann. Wir empfehlen, diese TV-Halterung zu zweit aufzubauen. - Seite 21 KOMPONENTEN A. Holzschrauben (x3) B. Betonanker (x3) C. M5x15 (x4) D. M6x15 (x4) E. M8x15 (x4) F. M6 Unterlegscheiben (x3) G. M6 Schrauben (x8)
- Seite 22 WANDMONTAGEANLEITUNG WICHTIG: Achten Sie beim Bohren in Wände immer darauf, dass keine verdeckten Kabel oder Rohre oder ähnliches vorhanden sind. Stellen Sie sicher, dass die verwendeten Schrauben und Dübel geeignet sind, das zu installierende Gerät zu tragen. Standard-Wandstecker: Geeignet für die meisten Mauerarten wie Ziegelstein, Böschungsblock, Beton, Stein, Holz oder Putz.
- Seite 23 AUFBAU Verwenden Sie die Adapter-Platten, wenn die Befestigungslöcher mehr als 400x400mm auseinander liegen. Verwenden Sie die Wandplatte als Vorlage, um drei Löcher im Durchmesser von M10 und einer Tiefe von 50mm in die Betonwand zu bohren. Stecken Sie die Dübel in die Löcher.
- Seite 24 Platzieren Sie die Platte an der Wand und schrauben Sie dann 3 Holzschrauben (A) in die Betonanker. Bringen Sie die Halterung an Ihrem TV- Gerät an. Verwenden Sie die Schraube mit der richtigen Größe, die für Ihr Fernsehgerät geeignet ist.
-
Seite 25: Entsorgung
Warnhinweisen dieser Anleitung Garantie möglich ist, gehen Sie bitte auf: beschrieben verwendet und wenn alle anderen Anweisungen richtig befolgt www.Vonhaus.com/warranty wurden. Jeglicher Missbrauch des Bitte behalten Sie eine Rechnung oder Produkts oder der Art und Weise, in der den Kassenzettel als Nachweis des es verwendet wurde, macht die Garantie Einkaufdatums auf. - Seite 26 CONTENIDO Instrucciones de Seguridad Instrucciones de Seguridad, Símbolos de Seguridad, Herramientas Requeridas Componentes Guía de Montaje de Pared Ensamblaje Garantía...
- Seite 27 ADVERTENCIA LEA TODAS LAS INSTRUCCIONES CON CUIDADO Y MANTENGALAS PARA FUTURAS REFERENCIAS Leed todas las instrucciones no está seguro, comuníquese con un detenidamente antes de usar y contratista calificado para obtener conservadlas para futuras consultas. orientación. ¡ADVERTENCIA! No exceda la No apriete demasiado los tornillos de capacidad de carga máxima indicada montaje.
-
Seite 28: Herramientas Requeridas
ADVERTENCIA LEA TODAS LAS INSTRUCCIONES CON CUIDADO Y MANTENGALAS PARA FUTURAS REFERENCIAS un contratista calificado para obtener Se recomienda el uso de un Buscador orientación. Recomendamos que de Clavos (no incluido). haya dos personas presentes para instalar este Soporte de TV. SIMBOLOS Por favor, siga la siguiente seguridad DE SEGURIDAD... - Seite 29 COMPONENTES A. Tornillo para B. Ancla para concreto (x3) C. M5x15 (x4) D. M6x15 (x4) madera (x3) E. M8x15 (x4) F. M6 Arandela Plana (x3) G. M6 Tuerca (x8)
- Seite 30 GUIA DE MONTAJE DE PARED IMPORTANTE: Al taladrar en las paredes, siempre verifique que no haya cables ocultos o tuberías, etc. Asegúrese de que los tornillos y las clavijas que se utilizan sean adecuados para soportar la unidad que se instalará. Conexión de pared estándar: Adecuado para su uso en la mayoría de los tipos de pared, como ladrillo, bloque de brisa, hormigón, piedra, mad-...
- Seite 31 ENSAMBLAJE Si los orificios de montaje están separados 400x400mm de distancia, utilizad las placas adaptadoras. Utilizad la placa de pared como plantilla para perforar tres orificios de M10 de diámetro y 50 mm de profundidad en la pared de hormigón. Insertad los anclajes de concreto en los orificios.
- Seite 32 Colocad el panel sobre la pared, y luego atornille 3 Tornillos de madera (A) en las anclas de concreto. Instalad el soporte en su televisor. Utilice el perno del tamaño correcto que sea adecuado para su televisor para asegurar.
- Seite 33 Advertencias de este extendida gratuita, vaya a: manual, y todas las otras instrucciones se han seguido con precisión. Cualquier www.VonHaus.com/warranty abuso del producto o la manera en que Conserve un comprobante de recibo de se utiliza invalidará la garantía.
- Seite 34 INDICE Istruzioni di sicurezza Istruzioni di sicurezza, Simboli di sicurezza, Attrezzi richiesti Componenti Guida per il montaggio a parete Montaggio Garanzia...
- Seite 35 ATTENZIONE SI PREGA DI LEGGERE ATTENTAMENTE QUESTE ISTRUZIONI E CONSERVARLE PER UNA FUTURA CONSULTAZIONE Si prega di leggere attentamente Non stringere troppo le viti di queste istruzioni e conservarle per montaggio. una futura consultazione. Questo prodotto è destinato solo a ATTENZIONE! Non superare la un uso interno.
-
Seite 36: Simboli Di Sicurezza
ATTENZIONE SI PREGA DI LEGGERE ATTENTAMENTE QUESTE ISTRUZIONI E CONSERVARLE PER UNA FUTURA CONSULTAZIONE Si consiglia l’uso di un rilevatore di montanti. SIMBOLI DI Si prega di seguire i seguenti simboli di SICUREZZA sicurezza e di guida. ATTENZIONE! Leggere il Indossare Indossare Prestare attenzione... - Seite 37 COMPONENTI A. Vite per legno (x3) B. Tassello per cemento (x3) C. M5x15 (x4) D. M6x15 (x4) E. M8x15 (x4) F. Rondelle piatte M6 (x3) G. Dado M6 (x8)
- Seite 38 GUIDA PER IL MONTAGGIO A PARETE IMPORTANTE: Quando si fora su delle pareti, controllare sempre che non ci siano cavi o tubi nascosti ecc. Accertarsi che le viti e le prese a muro utilizzate siano idonee per supportare l’unità da installare.
- Seite 39 MONTAGGIO Se i fori di montaggio hanno una distanza di 400 x 400mm, usare la piastra adattatrice. Usare la piastra come modello per forare tre fori del diametro di M10 e 50mm di profondità nella parete di cemento. Inserire il tassello per cemento nei fori.
- Seite 40 Posizionare il pannello sulla parete e poi le 3 Viti per legno (A) nei tasselli per cemento. Installare il supporto alla tua TV. Usare il bullone della dimensione giusta, adatto alla TV da fissare.
-
Seite 41: Informazioni Sullo Smaltimento
Per registrare il prodotto e capire se hai nell’utilizzo di questo prodotto invaliderà diritto all’estensione di garanzia, vai su la garanzia. http://VonHaus.com/warranty. I resi non saranno accettati se non riposti nella confezione originale ed Si prega di conservare la ricevuta del... - Seite 42 Thank you for purchasing the Cantilever TV Bracket for 20 - 50” TV’s. VonHaus is a registered trademark of DOMU Brands Ltd Made in China for DOMU Brands Ltd M24 2RW. Merci d’avoir acheté le Support TV cantilever pour TV 20-50.