Herunterladen Inhalt Inhalt Diese Seite drucken
Masterpro BGMP-9132 Bedienungsanleitung

Masterpro BGMP-9132 Bedienungsanleitung

Vakuum-mixer-set
Vorschau ausblenden Andere Handbücher für BGMP-9132:

Werbung

Verfügbare Sprachen
  • DE

Verfügbare Sprachen

  • DEUTSCH, seite 38
Disposal of Old Electrical & Electronic Equipment ( Applicable
in the European Union and other European countries
with separate collection systems )
This symbol on the product or on its packaging indicates that this
product shall not be treated as household waste. Instead it shall be
handed over to the applicable collection point for the recycling of
electrical and electronic equipment. By ensuring this product is
disposed of correctly, you will help prevent potential negative
consequences for the environment and human health, which could
otherwise be caused by inappropriate waste handling of this
product. The recycling of materials will help to conserve natural
resources. For more detailed information about recycling of this
product, please cantact your local city office, your household waste
disposal service or the shop where you purchased the product.
IM Size: 145W x 210H mm (folded) Date: 20201120
BGMP-9132
Batidora al vacío • Vacuum blender set
Frullatore sottovuoto • Mixeur sous vide
Vakuum-mixer-set • Liquidificadora a vácuo
Manual de instrucciones • Instruction manual
Manuale di istruzioni • Manuel d'instructions
Bedienungsanleitung • Manual de instruções
SAVE THIS MANUAL FOR FUTURE REFERENCE

Werbung

Inhaltsverzeichnis
loading

Inhaltszusammenfassung für Masterpro BGMP-9132

  • Seite 1 By ensuring this product is disposed of correctly, you will help prevent potential negative BGMP-9132 consequences for the environment and human health, which could otherwise be caused by inappropriate waste handling of this product.
  • Seite 2: Inhaltsverzeichnis

    Por adquirir la «Batidora al vacío» MasterPRO Fig. 2 - Panel de control La marca MasterPRO se centra en proporcionar una amplia gama innovadora de utensilios de Fig. 3 - Tapa del conector de vacío cocina de excelente calidad que está concebida y diseñada para ofrecer una experiencia de cocina Fig.
  • Seite 3: Advertencias

    LAVAR CON UN LAVAR CON UN PAÑO HÚMEDO PAÑO HÚMEDO LAVAR A MANO LAVAR A MANO CON AGUA CON AGUA LAVAVAJILLAS LAVAVAJILLAS ADVERTENCIAS 1. Los niños con edades comprendidas entre 3 y menos de 8 años solo tienen permitido encender/a- MODOS pagar el aparato si se ha colocado o instalado en su posición prevista de funcionamiento normal y son supervisados o instruidos en relación al uso del aparato de modo seguro y entienden los peligros...
  • Seite 4: Uso De Las Funciones

    personas autorizadas y cualificadas únicamente. • Si las burbujas/espuma se expanden más allá de la marca de nivel MAX, detenga inmediatamente la 13. El aparato debe estar siempre apagado y desenchufado cuando no lo esté utilizando y a la hora de operación de vacío.
  • Seite 5: Vacío

    VACÍO Ciclo de BATIDO AL VACÍO: vacío + 3 pulsaciones + 30 s de batido USO CON EL VASO DE 700 ML Y EL CONJUNTO DE LAS 6 CUCHILLAS 6. Presione el botón de MODO DE BATIDO AL VACÍO 1. Desmonte el conjunto de las 2.
  • Seite 6: Batido

    BATIDO 6. Presione el botón de encendido/apagado hasta escuchar una señal acústica, seleccione la opción en la pantalla LCD y la luz de modo empezará a parpadear. USO CON EL VASO DE 700 ML Y EL CONJUNTO DE LAS 6 CUCHILLAS O VASO DE Presione el botón de modo de vacío para iniciar el ciclo CALENTAMIENTO de vacío.
  • Seite 7: Batido Con Jarra

    BATIDO CON LA JARRA 6. Desmonte el vaso del aparato principal. 1. Abra la tapa de la jarra e 2. Abra la tapa del filtro y eche 3. Cierre la tapa del filtro. inserte el filtro en ella. los ingredientes. USO CON RECIPIENTES Y BOLSAS DE ALMACENAMIENTO AL VACÍO 4.
  • Seite 8: Batido Con Disco De Aireación

    1. Cuando termine de batir, 2. Desbloquee la tapa de la 3. La posición de desbloqueo 4. Coloque el vaso en la 5. Presione el botón de MODO DE BATIDO y la luz del modo levante la jarra. jarra. debe ser así. unidad principal y gírelo en empezará...
  • Seite 9: Batido Con Calor

    NOTA IMPORTANTE - PROTECCIÓN CONTRA SOBRECALENTAMIENTOS: Para mantener un Dos presiones rápidas bajan la temperatura y una presión más cambia a temperatura media. rendimiento óptimo del aparato y prolongar la vida útil del motor, el tiempo total de funcionamiento del aparato es de 230 segundos. Esto es equivalente a 6 ciclos en el modo de BATIDO. Una vez que se ha alcanzado el tiempo máximo de funcionamiento, el aparato se apagará...
  • Seite 10: Limpieza Y Mantenimiento

    LIMPIEZA Y MANTENIMIENTO TABLA DE SÍMBOLOS • Antes de limpiar el aparato, desenchúfelo. ¡ATENCIÓN! Partes giratorias. No las toque, limpie ni reemplace antes de desenchufar • Las cuchillas están afiladas. Lleve cuidado al limpiar las cuchillas. el aparato de la toma de corriente. •...
  • Seite 11 For purchasing the MasterPRO “Vacuum Blender” Fig. 2 - Control panel The MasterPRO brand, focuses on bringing innovative wide range of amazing quality kitchenware Fig. 3 - Vacuuming connector cover that is envisioned and designed to provide delicious, healthy and enjoyable cooking experience (from Fig.
  • Seite 12: Warnings

    WASH WITH WASH WITH DAMP CLOTH DAMP CLOTH HAND WASH HAND WASH WITH WATER WITH WATER DISHWASHER DISHWASHER WARNINGS 1. Children with ages between 3 years and less than 8 years are allowed only to switch ON/OFF the MODES appliance if it has been placed or installed in its intended normal operating position and they are supervised or instructed concerning the use of the appliance in a safe way and understand the hazards Fig.
  • Seite 13: Using The Functions

    replacing accessories or during cleaning. size) and vacuum by pressing the vacuuming button until it stops automatically indicating that 14. Do not submerge the main unit or the heating jug in any liquid when cleaning the device. They are maximum vacuum has been reached. not dishwaher safe! 15.
  • Seite 14 VACUUMING VACUUM BLEND cycle: vacuuming + 3 x pulsing + 30 s blending USAGE WITH 700 ML CUP AND 6 WING BLADE ASSEMBLY 6. Press the VACUUM BLEND MODE button till you 1. Disassemble the blade 2. Fill in the ingredients up to 3.
  • Seite 15: Blending

    BLENDING 6. Press the ON/OFF button till you will hear the beep sound when in position and the mode light will start to flash. Press the VACUUM MODE button to start the USAGE WITH 700 ML CUP AND 6 WING BLADE ASSEMBLY OR HEATING CUP VACUUM cycle, you will hear the beep sound and the mode light will turn on.
  • Seite 16: Blending With Pitcher

    BLENDING WITH THE PITCHER 6. Disassemble the cup from the main device. 1. Open the lid of the jug and 2. Open the lid on the filter and 3. Close the filter lid. insert the filter to the jug. put ingredient . USAGE WITH VACUUM STORAGE CONTAINERS, BAGS •...
  • Seite 17: Blending With Air Disc

    1. When blending completed, 2. Unlock the jug lid. 3. Unlocking position should 4. Place the cup onto the main 5. Press the BLEND MODE button and the mode light will start to flash. Press the button to start the BLEND cycle, you will hear the lift the jug.
  • Seite 18: Heat Blending

    IMPORTANT NOTE – OVERHEATING PROTECTION: To maintain the device at its best Quickly double tap will switch to lower temperature and tap one more time will switch to performance and to prolong the motor life, the total operating time of the unit is 230s, which for medium temperature.
  • Seite 19: Cleaning & Maintenance

    CLEANING AND MAINTENANCE SYMBOL CHART • Before you clean the device, unplug it. CAUTION! Rotating parts. Do not touch, clean or replace before unplugging the device • The blades are sharp. Be careful when you clean blade units. from power supply. •...
  • Seite 20 Per avere acquistato il "Frullatore con sottovuoto" MasterPRO Fig. 2 - Pannello di controllo Il marchio MasterPRO ha l’obiettivo di fornire un'ampia gamma innovativa di utensili da cucina di Fig. 3 - Coperchio connettore di aspirazione qualità eccezionale, ideata e progettata per fornire un'esperienza di cucina deliziosa, sana e Fig.
  • Seite 21 LAVAGGIO CON LAVAGGIO CON PANNO UMIDO PANNO UMIDO LAVAGGIO A LAVAGGIO A MANO CON ACQUA MANO CON ACQUA LAVASTOVIGLIE LAVASTOVIGLIE AVVERTENZE 1. I bambini di età compresa tra i 3 e gli 8 anni possono accendere o spegnere l'apparecchio solo se è MODALITÀ...
  • Seite 22: Uso Delle Funzioni

    persona autorizzata e qualificata. cibo dalle pareti. 13. Questo dispositivo non deve mai essere collegato alla rete elettrica o essere acceso quando non è • Se le bolle/schiuma si espandono oltre l'indicazione di livello MAX, interrompere immediatamente in uso, durante la sostituzione di accessori o durante la pulizia. l'operazione di produzione del vuoto.
  • Seite 23 UTILIZZO DEL SOTTOVUOTO Ciclo di FRULLATURA SOTTOVUOTO aspirazione + 3 impulsi + 30 sec. di frullatura UTILIZZO CON CONTENITORE DA 700 ML E GRUPPO LAME A 6 ALETTE 6. Premere il tasto MODALITÀ FRULLATURA 1. Smontare il gruppo lame dal 2.
  • Seite 24 FRULLATURA 6. Premere il tasto ON/OFF finché non si sente il segnale acustico quando è in posizione e la spia della modalità non inizia a lampeggiare. UTILIZZO CON CONTENITORE DA 700 ML E GRUPPO LAME A 6 ALETTE O CARAFFA Premere il pulsante MODALITÀ...
  • Seite 25 FRULLATURA CON CARAFFA 6. Smontare il contenitore dal dispositivo principale. 1. Aprire il tappo della caraffa e 2. Aprire il tappo sul filtro e 3. Chiudere il tappo del filtro. inserire il filtro. introdurre gli ingredienti. UTILIZZO CON CONTENITORI SOTTOVUOTO, SACCHETTI •...
  • Seite 26 1. Al termine della frullatura, 2. Sbloccare il tappo della 3. La posizione di sblocco 4. Posizionare il contenitore 5. Premere il tasto MODALITÀ FRULLATURA e la luce della sollevare la caraffa caraffa deve essere questa sull'unità principale e ruotarla in modalità...
  • Seite 27 NOTA IMPORTANTE - PROTEZIONE CONTRO IL SURRISCALDAMENTO: Per mantenere il Un doppio tocco rapido farà andare l’apparecchio alla temperatura più bassa e un altro tocco dispositivo alle sue migliori prestazioni e per prolungare la vita utile del motore, il tempo totale di passerà...
  • Seite 28: Pulizia E Manutenzione

    PULIZIA E MANUTENZIONE SCHEMA DEI SIMBOLI • Prima di pulire l'apparecchio, scollegarlo. ATTENZIONE! Parti rotanti. Non toccarle, pulirle o sostituirle prima di avere scollegato • Le lame sono affilate. Fare attenzione quando si puliscono i gruppi lame. l’apparecchio dall'alimentazione. • Assicurarsi che il lato tagliente delle lame non venga a contatto con oggetti duri. Ciò potrebbe causare un danno al filo delle lame, spuntandole.
  • Seite 29 D’avoir acheté le « Mixeur sous vide » MasterPRO Schéma 2 - Panneau de contrôle La marque MasterPRO, se concentre sur l'offre d'une large gamme innovante d'ustensiles de cuisine Schéma 3 - Couvercle du connecteur d'aspiration de qualité exceptionnelle, conçue pour offrir une expérience culinaire délicieuse, saine et agréable Schéma 4 - Câble...
  • Seite 30: Mises En Garde

    LAVAR CON LAVAR CON PAÑO HÚMEDO PAÑO HÚMEDO LAVAGE À LA LAVAGE À LA MAIN À L'EAU MAIN À L'EAU LAVE-VAISSELLE LAVE-VAISSELLE MISES EN GARDE 1. Les enfants âgés de 3 à 8 ans ne sont autorisés à mettre en marche et à éteindre l'appareil que si MODES celui-ci a été...
  • Seite 31: Utilisation Des Fonctions

    d'éviter tout danger. • Si les aliments collent à la paroi du bol mixeur, éteignez l'appareil et débranchez-le. Utilisez ensuite 13. Cet appareil ne doit jamais être branché sur l'alimentation électrique ni être mis en marche lorsqu'il une spatule souple (non fournie avec le produit) pour retirer les aliments de la paroi. n'est pas utilisé, lors du remplacement d'accessoires ou lors du nettoyage.
  • Seite 32 MISE SOUS VIDE Cycle MISE SOUS VIDE DU MÉLANGE : mise sous vide + 3 x pulsation + 30 secondes de mélange UTILISATION AVEC LE VERRE DE 700 ML ET L’ASSEMBLAGE DES 6 LAMES VENTILÉES 6. Appuyez sur le bouton MODE MISE SOUS VIDE DU 1.
  • Seite 33: Mélange

    MÉLANGE 6. Appuyez sur le bouton MARCHE / ARRÊT et lorsque vous entendrez le bip sonore, « CHOOSE » s’affichera sur l'écran LCD, appuyez sur n'importe quelle fonction UTILISATION AVEC LE VERRE DE 700 ML ET L’ASSEMBLAGE DES 6 LAMES VENTILÉES OU LE pour démarrer.
  • Seite 34: Mélange Avec Le Bol

    MÉLANGE AVEC LE BOL 6. Démontez le verre de l'unité principale. 1. Ouvrez le couvercle du bol 2. Ouvrez le couvercle du filtre 3. Fermez le couvercle du et insérez le filtre dans le bol. et versez les ingrédients. filtre. UTILISATION AVEC DES RÉCIPIENTS, DES SACS DE STOCKAGE SOUS VIDE •...
  • Seite 35: Mélange Avec Le Disque À Air

    1. Une fois le mélange 2. Déverrouillez le couvercle 3. La position de 4. Placez le verre sur l'unité 5. Appuyez sur le bouton MODE MÉLANGE et le voyant du mode terminé, soulevez le bol. du bol. déverrouillage doit être la principale et tournez-le dans le commencera à...
  • Seite 36: Mélange À Chaud

    REMARQUE IMPORTANTE - PROTECTION CONTRE LA SURCHAUFFE Pour maintenir l'appareil Appuyez deux fois rapidement pour passer à une température plus basse et appuyez une fois à son meilleur niveau de performance et pour prolonger la durée de vie du moteur, la durée totale de de plus pour passer à...
  • Seite 37: Nettoyage Et Entretien

    NETTOYAGE ET ENTRETIEN TABLEAU DES SYMBOLES • Avant de nettoyer l'appareil, débranchez-le. ATTENTION ! Pièces rotatives. Ne touchez pas, ne nettoyez pas et ne remplacez pas • Les lames sont tranchantes. Soyez prudent(e) lorsque vous nettoyez les lames. avant de débrancher l'appareil de l'alimentation électrique. •...
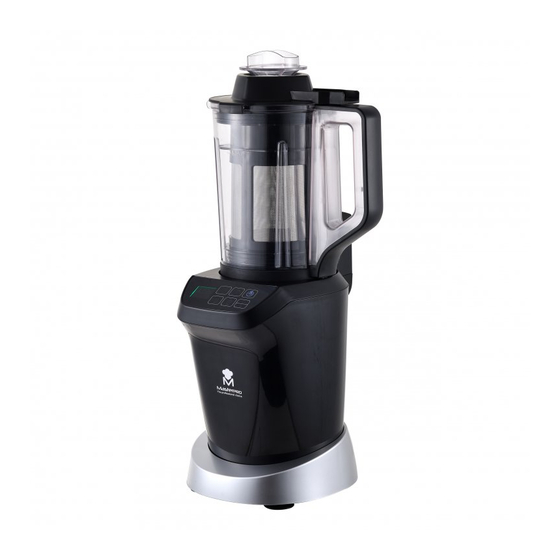
  • Seite 38 Dass Sie sich für den MasterPRO „Vakuummixer“ entschieden haben. Abb. 2 - Bedienfeld Das erklärte Ziel der Marke MasterPRO ist, eine innovative und breite Auswahl an äußerst Abb. 3 - Abdeckung des Vakuumanschlusses hochwertigen Küchengeräten zu liefern, die entwickelt wurden, um ein angenehmes Kocherlebnis Abb.
  • Seite 39: Warnungen

    MIT FEUCHTEM MIT FEUCHTEM TUCH WASCHEN TUCH WASCHEN HANDWASCHEN HANDWASCHEN MIT WASSER MIT WASSER GESCHIRRSPÜ- GESCHIRRSPÜ- LMASCHINE LMASCHINE WARNUNGEN 1. Kinder von 3 bis unter 8 Jahre dürfen das Gerät nur ein-/ausschalten, wenn es in seiner normalen MODI Betriebsposition aufgestellt oder installiert wurde und sie überwacht oder in den sicheren Gebrauch des Geräts unterwiesen wurden und die damit verbundenen Gefahren verstehen.
  • Seite 40: Benutzung Der Funktionen

    nicht, das Gerät umzubauen, zu modifizieren oder selbst zu reparieren. • Wenn Lebensmittel an den Wänden des Mixer-Behälters kleben, schalten Sie das Gerät aus und ziehen Sie den Netzstecker aus der Steckdose. Entfernen Sie dann die Lebensmittel mit einem 12. Wenn das Netzkabel beschädigt ist, muss es unverzüglich von einer befugten und qualifizierten weichen Teigschaber (nicht inbegriffen) von den Wänden.
  • Seite 41 VAKUUMIEREN VAKUUMMIX-Zyklus: Vakuumieren + 3 x Impulsfunktion aktivieren + 30 s mixen BENUTZUNG MIT DEM 700-ML-BECHER UND DEM 6-KLINGEN-SCHLAGMESSER 6. Drücken Sie die VAKUUMMIXEN-Taste, bis Sie 1. Entfernen Sie das 2. Füllen Sie die Zutaten bis 3. Befestigen Sie das einen Piepton hören.
  • Seite 42: Mixen

    MIXEN 6. Drücken Sie die EIN/AUS-Taste, bis Sie einen Piepton hören. Auf der LCD-Anzeige wird „CHOOSE“ angezeigt. Drücken Sie eine beliebige Funktionstaste, BENUTZUNG MIT DEM 700-ML-BECHER UND DEM 6-KLINGEN-SCHLAGMESSER ODER um zu starten. Drücken Sie die Vakuum-Taste, um den HEIZBECHER Vakuumier-Zyklus zu starten.
  • Seite 43: Mixen Mit Der Kanne

    MIXEN MIT DER KANNE 6. Entfernen Sie den Becher von dem Hauptgerät. 1. Öffnen Sie den Deckel der 2. Öffnen Sie den Deckel auf 3. Schließen Sie den Kanne und setzen Sie den dem Filter und geben Sie die Filterdeckel. Filter in die Kanne.
  • Seite 44: Mixen Mit Luftscheibe

    1. Wenn der Mixvorgang 2. Entriegeln Sie den Deckel 3. Die entriegelte Position sieht 4. Setzen Sie den Becher auf 5. Drücken Sie die MIXEN-Taste. Die Modusanzeige beginnt nun zu blinken. Drücken Sie die Taste, um den MIX-Zyklus zu starten. abgeschlossen ist, nehmen Sie der Kanne.
  • Seite 45: Mixen Und Erhitzen

    WICHTIGER HINWEIS - ÜBERHITZUNGSSCHUTZ: Damit die optimale Leistung des Geräts Wenn Sie die Taste kurz zweimal antippen, reduzieren Sie die Temperatur. Tippen Sie die erhalten bleibt und die Lebensdauer des Motors verlängert wird, beträgt die Gesamtbetriebsdauer Taste noch einmal an, um die Temperatur auf die mittlere Stufe einzustellen. des Geräts 230 s;...
  • Seite 46: Reinigung Und Pflege

    REINIGUNG UND PFLEGE SYMBOL-TABELLE • Bevor Sie das Gerät reinigen, ziehen Sie seinen Netzstecker aus der Steckdose. VORSICHT! Rotierende Teile Nicht berühren, reinigen oder ersetzen, bevor das Gerät • Die Klingen sind scharf. Seien Sie beim Reinigen des Messers vorsichtig. vom Netzstrom getrennt wurde.
  • Seite 47 “Liquidificadora a vácuo” MasterPRO Imagem 2 - Painel de controlo A marca MasterPRO procura fornecer uma variada gama de acessórios de cozinha de alta Imagem 3 - Cobertura do conetor de aspiração qualidade e inovadores, para que obtenha uma experiência a cozinhar agradável, saudável e Imagem 4 - Fio deliciosa (desde a preparação, confeção e consumo dos alimentos), tentando inspirar a cozinha...
  • Seite 48 LAVAR COM LAVAR COM PANO HÚMIDO PANO HÚMIDO LAVAR AS MÃOS LAVAR AS MÃOS COM ÁGUA COM ÁGUA MÁQUINA DE MÁQUINA DE LAVAR LOIÇA LAVAR LOIÇA AVISOS 1. As crianças dos 3 aos 8 anos de idade só deverão ligar/desligar o aparelho se este for colocado ou MODOS instalado na sua posição normal de funcionamento, e se forem supervisionadas ou ensinadas a usar o aparelho de um modo seguro e compreendam os perigos envolvidos.
  • Seite 49: Proteção Contra O Sobreaquecimento

    autorizado e qualificado. • Se bolhas/espuma se expandirem para além da indicação do nível MAX, pare imediatamente a 13. Este aparelho nunca deverá ser ligado à alimentação ou ser deixado ligado quando não o usar, ao operação de vácuo. substituir acessórios ou durante a limpeza. •...
  • Seite 50 ASPIRAR Ciclo de LIQUIDIFICAR A VÁCUO: aspirar + 3 x impulso + 30 segundos a liquidificar UTILIZAÇÃO COM A TAÇA DE 700 ML E O CONJUNTO DA LÂMINA DE 6 ASAS 6. Prima o botão do MODO DE LIQUIDIFICAR A 1.
  • Seite 51 LIQUIDIFICAR 6. Prima o botão de LIGAR/DESLIGAR até ouvir um beep, e a luz do modo começa a piscar. Prima o botão do MODO DE VÁCUO para iniciar o ciclo de vácuo. UTILIZAÇÃO COM A TAÇA DE 700 ML E O CONJUNTO DA LÂMINA DE 6 ASAS OU JARRO DE Ouvirá...
  • Seite 52 LIQUIDIFICAR COM JARRO 6. Desmontar a taça do aparelho principal. 1. Abra a tampa do jarro e 2. Abra a tampa no filtro e 3. Feche a tampa do filtro. insira o filtro no jarro. insira os ingredientes. UTILIZAÇÃO COM RECIPIENTES DE ARMAZENAMENTO A VÁCUO, SACOS 4.
  • Seite 53 1. Quando terminar de 2. Liberte a tampa do jarro. 3. A posição de desbloqueado 4. Coloque a taça na unidade 5. Prima o botão do MODO DE LIQUIDIFICAÇÃO e a luz do liquidificar, levante o jarro. deverá ser assim principal e rode no sentido dos modo começa a piscar.
  • Seite 54 • NOTA IMPORTANTE - PROTEÇÃO CONTRA O SOBREAQUECIMENTO: Para manter o aparelho Toque duas vezes para passar para uma temperatura mais baixa, e toque novamente para com o seu melhor desempenho, e para prolongar o tempo de vida do motor, o tempo total de passar para a temperatura média.
  • Seite 55: Limpeza E Manutenção

    LIMPEZA E MANUTENÇÃO TABELA DOS SÍMBOLOS • Antes de limpar o aparelho, desligue-o da alimentação. CUIDADO! Partes rotativas. Não toque, limpe nem substitua antes de desligar o • As lâminas estão muito afiadas. Tenha cuidado quando limpar as lâminas. aparelho da alimentação. •...

Inhaltsverzeichnis