Herunterladen Inhalt Inhalt Diese Seite drucken

Werbung

Verfügbare Sprachen
  • DE

Verfügbare Sprachen

  • DEUTSCH, seite 7
Quick Installation Guide
( WAB-5010 )
HW: v2
QIG: V1.0

Werbung

Inhaltsverzeichnis
loading

Inhaltszusammenfassung für LevelOne WAB-5010

  • Seite 1 Quick Installation Guide ( WAB-5010 ) HW: v2 QIG: V1.0...
  • Seite 3: Inhaltsverzeichnis

    Content English…………………………………………………………………………...1 Deutsch………………………………………………………………………….4 Français………………………………………………………………………….8 Español………………………………………………………………....11 Português………………………………………………………………………15 Italiano………………………………………………………………....19 Figure 1……………………………………………………………….....23 Figure 2………………………………………………………………………..23 Figure 3………………………………………………………………………..24 Figure 4………………………………………………………………………..24 Package Contents 1. Quick Installation Guide 2. RJ45 Network Cable 3. Pole Mounting Hose Clamp (40-64mm) 4. Resource CD (User Manual, QIG)
  • Seite 4: English

    English Default Settings 192.168.188.253 IP Address user Admin User name admin root Password Connections : Front Panel Panel Back Side 1 . 5G 2 . LAN 3 . WAN 4 . SYS 5 . Bubble spirit level Color Status Description Green Blinking On 5.8G WIFI is on...
  • Seite 5: Interface Description

    Interface Description Marked LED/Button/Interface Description number LED display Function Select modify location Button show AP/Client operation mode, Channels, IP address and RF LED display Power .(If not operate this LED display in 10 mins, the screen will be automatically black screen) Can select the Increase or decrease LED display Selection value ;...
  • Seite 6: Hardware Installation

    (Figure 1) Software Installation To login to the LevelOne AP, please perform the following steps: 1. Check Your Network Settings to login web UI. Please make sure your PC can get IP address automatically, so the router can communicate with your PC during configuration.
  • Seite 7: Deutsch

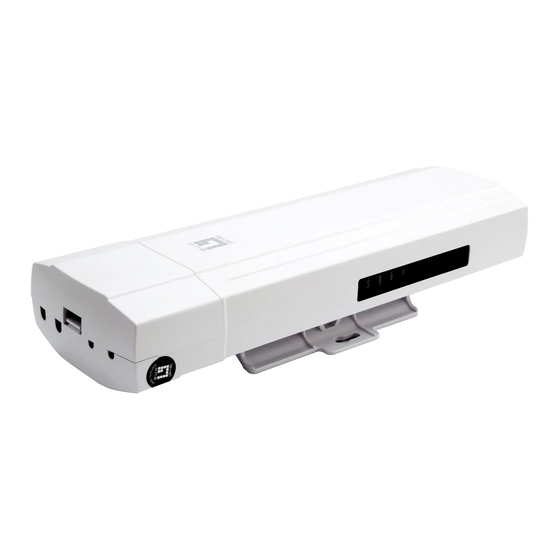
    Deutsch Default Settings 192.168.188.253 Standard-IP-Adresse User Admin Benutzername admin root Kennwort Anschlüsse : Vorderseite Anschlüsse an der Rückseite 1 . 5G 2 . LAN 3 . WAN 4 . SYS 5 . Blase Wasserwaage Farbe Status Beschreibung Grün Blinkt An 5,8-G-WLAN ist ein Grün An LAN ist verbunden Grün...
  • Seite 8: Anschlussbeschreibung

    Anschlussbeschreibung Markierte LED / Taste / Schnittstelle Beschreibung Nummer LED-Display Änderungsort wählen taste Funktions AP/Client-Betriebsmodus, Kanäle, IP-Adresse und HF-Leistung LED-Display wählen .(Wenn dieses LED-Display in 10 Minuten nicht benutzt wird, wird der Bildschirm automatisch schwarz) Kann Wert erhöhen oder verringern; LED-Display Kanäle, IP-Adresse und Signalstärke Auswahltaste...
  • Seite 9: Gerät Konfigurieren

    LED-Anzeigeinhalt Inhaltsanweisung Anmerkung H: Hotspot, WDS-Modus, Kanal von Zugangspunkt und Master-Zugangspunkt 149: Client anzeigen; bitte beachten, Kanal ist 149 dass der Kanal von Zugangspunkt und Client identisch sein sollte. C: Client, WDS-Modus, Falls dieses LED-Display nicht innerhalb von 10 Minuten bedient Slave-Zugangspunkt 149: Kanal ist 149 wird, wird der Bildschirm...
  • Seite 10 l Wählen Sie das TCP/IP-Protokoll für Ihre Netzwerkkarte. l IP-Adresse des PCs ändern: Zur Konfiguration der IP-Adresse klicken Sie auf das Netzwerksymbol oder öffnen die Netzwerkeinstellungen in der Systemsteuerung. Klicken Sie auf „Properties“ (Eigenschaften) wählen Sie „Internet Protocol (TCP/IP)“ (Internetprotokoll (TCP/IP)), klicken Sie anschließend auf „Properties“...
  • Seite 11: Français

    Français Default Settings 192.168.188.253 Adresse IPpardéfaut User Admin Nom d'utilisateur admin root Mot de passe Branchements : Face avant Panneau en face arrière 1 . 5G 2 . LAN 3 . WAN 4 . SYS 5 . Niveau à bulle Couleur Statut Description...
  • Seite 12: Description De L'interface

    Description de l'interface Numéro LED/Bouton/Interface Description indiqué Affichage LED Bouton Sélectionner modifier emplacement Fonction Indique Mode de fonctionnement PA/Client, Canaux, Adresse IP et Affichage LED Alimentation RF .(Si cet affichage LED n'est pas utilisé dans les 10 minutes, l'écran devient automatiquement noir) Peut sélectionner l'augmentation ou la Affichage LED Bouton diminution de la valeur ;...
  • Seite 13: Installation De L'équipement

    (Figure 1) Installation du logiciel Pour se connecter au PA LevelOne, veuillez effectuer les étapes suivantes : 1. Vérifiez vos paramètres réseau pour vous connecter à l'IU Web. Assurez-vous que votre PC peut obtenir l'adresse IP automatiquement, afin que le routeur puisse communiquer avec votre PC pendant la configuration.
  • Seite 14: Español

    Español Default Settings 192.168.188.253 IP predeterminada User Admin Nombre de usuario admin root Contraseña Conexiones : Panel frontal Parte posterior del panel 1 . 5G 2 . LAN 3 . WAN 4 . SYS 5 . Burbuja Nivel Color Status Description En WIFI de 5,8G Verde...
  • Seite 15: Descripción De La Interfaz

    Descripción de la interfaz Número LED/Botón/Interfaz Descripción marcado Botón de función de la Seleccionar la modificación de la pantalla de LED ubicación Mostrar el modo de funcionamiento de PA y cliente, los canales, la dirección IP y la potencia de RF. (Si la Pantalla de LED pantalla de LED no funciona en 10 minutos, la pantalla se quedará...
  • Seite 16: Instalación Del Hardware

    (Figure 1) Instalación del software Para iniciar sesión en un PA LevelOne, realice los pasos siguientes: 1. Comprobar la configuración de red para iniciar sesión en la interfaz de usuario Web. Asegúrese de que su PC puede obtener la dirección IP automáticamente de forma que el enrutador pueda comunicarse con su PC durante la configuración.
  • Seite 17 “Properties” (Propiedades), después “Internet Protocol (TCP/IP)” (Protocolo de Internet (TCP/IP)) y, por último, “Properties” (Propiedades) . Introduzca la dirección IP “192.168.188.2 ~ 192.168.188.250” y continúe.. (Figure 2) 2. Inicié el explorador web (Microsoft Internet Explorer 8 por ejemplo), escriba la dirección IP LAN predeterminada del PA 192.168.188.253en la barra de direcciones y, a continuación, presione Entrar, tal y como se muestra en la figura siguiente.
  • Seite 18: Português

    Português Default Settings 192.168.188.253 IP predefinido User Admin Nome de utilizador admin root Palavra-passe Conexões : Painel Frontal Painel Traseiro 1 . 5G 2 . LAN 3 . WAN 4 . SYS 5 . Nível de bolha Estado Descrição Verde A piscar Ligação WIFI 5,8G ativada Verde...
  • Seite 19 Descrição da interface Número LED/Botão/Interface Descrição marcado Botão de função do Modificar a seleção visor LED Mostrar o modo de funcionamento PA/Cliente, Canais, endereço IP e Visor LED Potência de RF. (Em caso de inatividade durante 10 minutos, o visor LED irá...
  • Seite 20: Instalação Do Software

    Conteúdo do visor Instruções do Observação conteúdo H: Ponto de Acesso, Modo Mostra o canal do PA e do Cliente. WDS, PA Principal Tenha em atenção que o canal do PA e 149: O canal é 149 do Cliente deve ser o mesmo. C: Cliente, Modo Em caso de inatividade durante 10 minutos, o visor LED irá...

Inhaltsverzeichnis