Herunterladen Inhalt Inhalt Diese Seite drucken

Werbung

Verfügbare Sprachen
  • DE

Verfügbare Sprachen

  • DEUTSCH, seite 24
GHS48 - Grow Light Hydroponic
System
PLEASE READ ALL THE INSTRUCTIONS BEFORE USE

Werbung

Inhaltsverzeichnis
loading

Inhaltszusammenfassung für Duronic GHS48 - Grow Light Hydroponic System

  • Seite 1 GHS48 - Grow Light Hydroponic System PLEASE READ ALL THE INSTRUCTIONS BEFORE USE...
  • Seite 3: Inhaltsverzeichnis

    Contents English Manual Manuel d’utilisation en français Gebrauchsanleitung auf Deutsch Manual de Instrucciones en Español Manuale D’istruzioni In Italiano Instrukcja obsługi. Polski Gebruikershandleiding Nederlands...
  • Seite 5: English Manual

    English Manual...
  • Seite 6: Safety Instructions

    For indoor household/domestic use only. Do not use outdoors. • Do not operate this appliance if the power cable or plug is damaged. If either is damaged return it to Duronic for service or repair by professional technician. • Avoid placing the Hydroponic System in direct sunlight.
  • Seite 7 GHS48 Grow Box Components Before using your grow box, please check that you have everything you need: 1 power adapter, 1 water pump 8x Seed pod kit (Baskets & Cones) Two bottles of plant food: Nutrients A & Nutrients B 1.
  • Seite 8 Key Prompts and What They Mean 1. When the power adapter is plugged into the grow light system and switched on at the mains socket, the system will sound a long “beep” to indicate it is ready to work. 2. After the machine runs for several days, the water level in the tank will naturally fall.
  • Seite 9: Set Up Instructions

    Set Up Instructions 2. Lay the LED light assembly upside 1. Attach the two side panels by down on a flat surface and plug in the screwing them into the LED light black power cable into the jack. Then assembly. Ensure that the panel with thread the black cable into the groove the groove on the inside is fixed on on the side panel towards the base.
  • Seite 10 Preparing the Nutrient Solution 1. Fill bottle ‘A’ with water, put the lid 2. Using the measuring caps, add on and shake to fully mix the contents 5ml of each solution to 1 litre of until fully dissolved. Repeat the same water.
  • Seite 11: Using The Control Panel

    Using the Control Panel Power button Press this button it will sound a “beep” and the system will be switched on into ‘standby mode’. NORMAL CYCLE: 14 hours on / 10 hours Press this button and the system will be switched on.
  • Seite 12: Care And Maintenance

    Setting the Mode From the moment the system is connected and switched on at the plug, the power button will luminate and the lamp will be in ‘standby mode’. When you select a mode, it will turn on the lamp and activate a 24-hour clock to coincide with the cycle of the mode you have chosen.
  • Seite 13 Refund or replacement is at the discretion of that company. Duronic Products are offered with a 1 year guarantee under the following conditions: The product must be returned to the retailer with original proof of purchase.
  • Seite 14: Manuel D'utilisation En Français

    Manuel d’utilisation en français...
  • Seite 15 • Cet appareil est conçu pour un usage intérieur/domestique. Ne l’utilisez pas à l’extérieur. • Si le câble ou la prise sont endommagés et/ou ne fonctionnent pas correctement, contactez Duronic ou faites réparer l’appareil par un professionnel. • Evitez de placer la lampe sous la lumière directe du soleil.
  • Seite 16 Contenu de la boite Avant d’utiliser votre système de culture hydroponique, veuillez vérifier que vous avez tous les éléments nécessaires : 1 adaptateur de puissance, 1 pompe à eau 8x Kits de semences (Paniers & eponges) Deux bouteilles de nourriture pour plantes : les nutriments A et les nutriments B.
  • Seite 17 Les instructions clés et ce qu’elles signifient 1. Lorsque l’adaptateur est connecté au système de culture hydroponique et qu’il est branché dans une prise, une alarme produit un long « bip » pour indiquer qu’il est prêt à être utilisé. 2.
  • Seite 18 Instructions d'installation 2. Retournez l’assemblage de lumières 1. Attachez les deux planches latérales LED sur une surface plate et stable. Enfilez à l’assemblage de lumières LED à le câble noir attaché au bas et à l’arrière de l’aide de vis. Assurez-vous que la la planche inférieure dans la rainure de la planche avec une rainure à...
  • Seite 19 Préparer la s olution nutritive 1. Remplissez la bouteille « A » avec 2. En utilisant les bouchons doseurs, de l’eau, placez le couvercle et ajoutez 5 ml de chaque solution à 1 secouez afin de mélanger le contenu L d’eau. Mélangez bien afin de jusqu’à...
  • Seite 20 Utiliser le panneau de contrôle Touche d’alimentation Appuyez sur cette touche et le system s’allumera en mode veille. Vous entendrez un « bip ». CYCLE NORMAL : allumé 14 heures / éteint 10 heures Si vous appuyez sur cette touche, vous entendrez un «...
  • Seite 21: Nettoyage Et Maintenance

    Paramétrer un mode À partir du moment où le système est connecté et branché, la touche d’alimentation va s’illuminer et la lumière sera en veille. Lorsque vous sélectionnez un mode, la lumière va s’allumer et activer une horloge de 24 heures pour coïncider avec le cycle que vous avez choisi. En fonction de l’heure à...
  • Seite 22 Garantie Garantie et service après-vente 1 an de garantie de la part de Shine-Mart Ltd, propriétaire de la marque Duronic. NOTE : CES DÉCLARATIONS N’AFFECTENT EN RIEN VOTRE DROIT STATUTAIRE EN TANT QUE CONSOMMATEUR Ce produit a été produit en suivant les procédures de contrôle de qualité les plus strictes en utilisant des matériaux de qualité...
  • Seite 23: Gebrauchsanleitung Auf Deutsch

    Gebrauchsanleitung auf Deutsch...
  • Seite 24: Sicherheitshinweise

    Verwenden Sie dieses Gerät nicht, wenn das Netzkabel oder der Stecker beschädigt ist. Wenn einer der beiden beschädigt ist, senden Sie ihn zur Wartung oder Reparatur durch einen professionellen Techniker an Duronic zurück. • Setzen Sie das Hydroponische Anzuchtsysteme keinem Sonnenlicht aus.
  • Seite 25: Spezifikationen

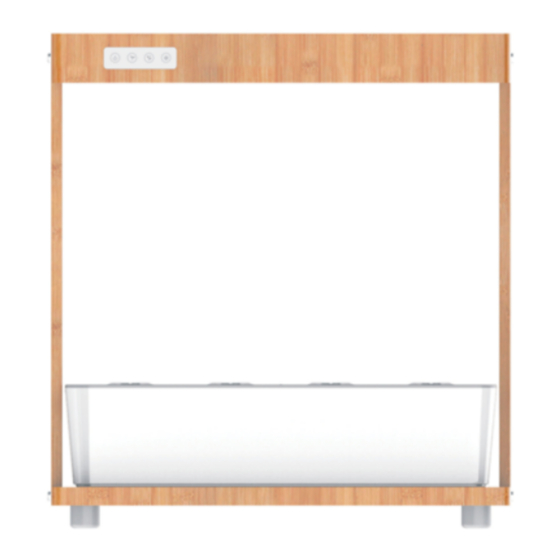
    GHS48 Packungsinhalt Überprüfen Sie vor der Nutzung des Hydroponische Anzuchtsysteme, ob Sie über alles verfügen, was Sie benötigen: 1 Adapter 1 Wasser Pumpe 8x Netztöpfe Nährstoffe A & Nährstoffe B 1. LED-Leuchtenbaugruppe 2. Linke Seitenplatte Werkzeug 3. Obere Abdeckung des Tanks Tools 4.
  • Seite 26: Wichtige Tipps

    Wichtige Tipps Wenn das Gerät angeschlossen ist, wird einen langen akustischen Ton ertönen. Wenn das Hydroponische Anzuchtsysteme über mehrere Tage genutzt wird, sinkt der Wasserstand im Tank automatisch. Wenn der Wasserstand unter dem Minimum liegt, wird ein akustisches Geräusch ertönen. Füllen Sie in diesem Fall den Tank mit Wasser.
  • Seite 27 Installationsanleitung 1. Befestigen Sie die beiden 2. Stellen Sie die LED-Leuchte Seitenwände, indem Sie sie diese an verkehrt herum auf eine ebene die LED-Leuchtenbaugruppe Fläche und stecken Sie das einschrauben. Stellen Sie sicher, dass Netzkabel in die Steckdose. Führen die Seitenwände mit Schlitz an der Sie dann das Kabel in den Schlitz an linken Seite des Bedienfeld (am der Seitenwand ein.
  • Seite 28: Nährlösung Vorbereiten

    Nährlösung vorbereiten 1. Füllen Sie die Flasche "A" mit 2. Fügen Sie mit den Messkappen 5 Wasser, setzen Sie den Deckel auf und ml jeder Lösung zu 1 Liter Wasser schütteln, um den Inhalt vollständig zu hinzu. Rühren oder gut schütteln, mischen, bis er vollständig aufgelöst ist.
  • Seite 29: Systemsteuerung

    Systemsteuerung Ein/Aus Schalter Drücken Sie diese Taste, es ertönt ein akustisches Signal und das System wird in den Standby-Modus geschaltet. NORMALER ZYKLUS: 14 Stunden an / 10 Stunden aus Wenn Sie diese Taste drücken, ertönt ein Piepton und der Modus wird im mittleren Zyklus ausgeführt.
  • Seite 30: Pflege Und Wartung

    Einstellen des Modus Sobald es am Stecker angeschlossen und eingeschaltet ist, leuchtet der Ein/Aus Schalter auf und die Lampe befindet sich im Standby-Modus. Wenn Sie einen Modus auswählen, wird die Lampe eingeschaltet und eine 24-Stunden-Uhr aktiviert, die mit dem Zyklus des von Ihnen gewählten Modus übereinstimmt.
  • Seite 31: Gewährleistung

    Gewährleistung Shine-Mart Ltd, der Markeninhaber von Duronic Produkten, bietet 1 Jahr Gewährleistung. HINWEIS: DIESE BEDINGUNGEN BEEINFLUSSEN IHRE GESETZLICHE RECHTE ALS VERBRAUCHER NICHT Dieses Produkt wurde unter strengen Qualitätskontrollen produziert und aus hochwertigen Materialien hergestellt, um ausgezeichnete Leistung und Zuverlässigkeit zu gewährleisten.
  • Seite 32: Manual De Instrucciones En Español

    Manual De Instrucciones En Español...
  • Seite 33: Instrucciones De Seguridad

    • Nunca utilice el aparato si el cable o la unidad no funcionan correctamente. Si la máquina o el cable se ha estropeado, devuélvalo al servicio de Duronic o póngase en contacto con un técnico profesional para repararlo. • No exponga la lámpara directamente al sol.
  • Seite 34 Partes del Mini invernadero GHS48 Antes de utilizar el producto, compruebe que tiene todos los componentes: 1 cable de alimentación 1 bomba de agua X8 semilleros (maceta y cono) Dos botes de fertilizante: Vitaminas A y Vitaminas B 1. Panel para la bombilla LED 2.
  • Seite 35 Sonidos de la máquina Al encender el invernadero, escuchará un largo pitido. Esto es señal de que está listo para usarse. Tras varios días de uso, el nivel de agua va bajando. Escuchará un largo pitido como señal de que necesita rellenar el depósito cuanto antes.
  • Seite 36 Instalación 2. Coloque la placa de la bombilla 1. Atornille las dos placas laterales hacia arriba para conectar el cable a la placa de la bombilla LED. negro en la entrada. Después, pase Asegúrese de poner la placa que este cable a través de la ranura de contiene una ranura interna en el la placa lateral de manera que vaya lado que pega al panel de control...
  • Seite 37 Cómo preparar el fertilizante 1. Llene el bote A con agua, ciérrelo 2. Con ayuda de los tapones de y agite para mezclar los ingredientes medición, añada 5 ml de cada bote correctamente. Haga lo mismo con el a un litro de agua. Mezcle bien esta bote B.
  • Seite 38: Panel De Control

    Panel de control Botón de encendido Al presionar este botón, escuchará un pitido, señal de que la unidad está encendida y entra en modo standby. CICLO NORMAL: 14 h. encendido, 10 h. apagado Presione este botón para encender la unidad. Escuchará un pitido que activará el modo Ciclo Normal, el cual hará...
  • Seite 39: Limpieza Y Mantenimiento

    Ajustar los ciclos Tras enchufar y encender el invernadero, este se pondrá en modo standby (pausa) automáticamente. Al elegir un ciclo, este empezará y activará un temporizador de 24 horas que hará que el ciclo empiece y termine a la hora que usted lo puso a funcionar.
  • Seite 40 Reembolso o reemplazo es a discreción de la compañía. Productos Duronic se ofrecen con una garantía de 1 año bajo las siguientes condiciones: El producto debe ser devuelto al vendedor con comprobante de compra original.
  • Seite 41: Manuale D'istruzioni In Italiano

    Manuale D’istruzioni In Italiano...
  • Seite 42: Istruzioni Di Sicurezza

    Solo per uso domestico. Non utilizzare all'aperto. • Non utilizzare questo apparecchio se il cavo di alimentazione o la spina sono danneggiati. Se uno dei due è danneggiato, restituirlo a Duronic per assistenza o riparazione da parte di un tecnico professionista. •...
  • Seite 43 GHS48 Contenuto della confezione Prima di utilizzare la serra idroponica, controllare di avere tutto ciò di cui necessita: adattatore alimentazione 1 pompa dell'acqua 8x cesti per piante Nutrienti A e Nutrienti B 1. Gruppo luci LED 2. Piastra laterale sinistra Un pacchetto di 3.
  • Seite 44 Suggerimenti chiave Quando l'adattatore di alimentazione viene collegato al sistema di illuminazione, emetterà un lungo suono acustico. Dopo che la serra idroponica viene utilizzata per diversi giorni, il livello di acqua nel serbatoio diminuirà. Quando il livello d’acqua è sotto il minimo emetterà un suono acustico. In questo caso riempire il serbatoio con acqua.
  • Seite 45: Istruzioni Per L'installazione

    Istruzioni per l'installazione 2. Appoggiare il gruppo luce LED 1. Fissare i due pannelli laterali capovolto su una superficie piana e avvitandoli nel gruppo luce LED. inserire il cavo di alimentazione nella Assicurarsi che il pannello con la presa. Quindi infilare il cavo nella scanalatura all'interno sia fissato sul scanalatura sul pannello laterale.
  • Seite 46 Preparare la soluzione nutritiva 1. Riempire la bottiglia "A" con acqua, 2. Utilizzando i tappi per aggiungere metti il coperchio e agita per mescolare 5 ml di ogni soluzione a 1 litro di completamente il contenuto fino a acqua. Mescola o agita bene per completo scioglimento.
  • Seite 47: Pannello Di Controllo

    Pannello di controllo Tasto di accensione Premendo questo pulsante verrà emesso un segnale acustico e il sistema verrà accesso in modalità standby. CICLO NORMALE: 14 ore di accensione / 10 ore di pausa Se si preme questo pulsante, verrà emesso un segnale e funzionerà...
  • Seite 48: Cura E Manutenzione

    Impostazione della modalità Dal momento in cui il sistema è collegato, il pulsante di accensione si illuminerà e la lampada sarà in "modalità standby". Quando selezioni una modalità, accenderà la lampada e attiverà un orologio di 24 ore in coincidenza con il ciclo della modalità che hai scelto. A seconda dell'ora in cui è...
  • Seite 49 Inoltre, non possiamo garantire l’apparecchio se è stato modificato o riparato dall’acquirente o da terzi. 1 anno di garanzia da Shine-Mart Ltd, proprietari del marchio commerciale Duronic. NOTA: QUESTE DICHIARAZIONI NON INFLUISCONO SUI DIRITTI LEGALI DEL CONSUMATORE Questo prodotto è...
  • Seite 50: Instrukcja Obsługi. Polski

    Instrukcja obsługi. Polski...
  • Seite 51: Bezpieczeństwo Użytkowania

    Urządzenie przeznaczone jest tylko do użytku domowego w pomieszczeniach. Nie używać na wolnym powietrzu. • Nigdy nie włączaj urządzenia, gdy przewód zasilający lub wtyczka są uszkodzone. Zwróć urządzenie do Duronic w celu naprawy lub skontaktuj się z wykwalifikowanym technikiem. • Unikaj umieszczania urządzenia w bezpośrednim nasłonecznieniu.
  • Seite 52: Specyfikacja

    GHS48 Elemementy urządzenia Sprawdź kompletność opakowania przed pierwszym użyciem. 1 Zasilacz 1 Pompa wodna 8x Zestaw nasienny (koszyk + gąbka hydroponiczna) 2x butelki z odżywką: Odżywka A i Odżywka B 1. Panel 2. Lewy panel Opakowanie z 3. Pokrywka zbiornika na wodę akcesoriami Tools 4.
  • Seite 53 Oznaczenia sygnałów dźwiękowych 1. Po podłączeniu zasilacza do pojemnika wzrostu roślin, a następnie do gniazdka elektrycznego usłyszysz długi sygnał dźwiękowy, co jest oznaką gotowości urządzenia do użycia. 2. Jeżeli urządzenie pracuje przez kilka dni, poziom wody w zbiorniku znacznie się zmniejszać. Jeżeli poziom wody osiągnie niewystarczający poziom dla wzrostu roślin usłyszysz dłuższy sygnał...
  • Seite 54: Instrukcja Montażu

    Instrukcja montażu 2. Panel LED umieść na płaskiej 1. Zamontuj dwa boczne panele do powierzchni do góry nogami i podłącz panelu LED. Upewni się, że panel z czarny kabel do odpowiedniego wejścia. rowkiem jest zamontowany po lewej Następnie przeciągnij go przez rowek stronie (bliżej panelu kontrolnego).
  • Seite 55 Przygotowywanie odżywek 1. Napełnij butelkę "A" wodą, zakręć 2. Przy użyciu miarki odmierz po 5 nakrętkę i wstrząśnij, aby dokładnie ml z każdej odżywki i rozcieńcz z 1l wymieszać składniki. Powtórz wody. Zamieszaj lub wstrząśnij, aby czynność z butelką "B". połączyć...
  • Seite 56: Obsługa Panelu Kontrolnego

    Obsługa panelu kontrolnego Przycisk Włącznika Po naciśnięciu tego przycisku usłyszysz krótki sygnał dźwiękowy, a urządzenie przejdzie w stan czuwania. CYKL NORMALNY: 14 godz. włączenia / 10 godz. wyłączenia Przyciśnij przycisk, aby uruchomić cykl. Usłyszysz krótki sygnał dźwiękowy, a lampa zacznie pracować w normalnym cyklu. Oznacza to, że panele LED będą...
  • Seite 57: Czyszczenie I Pielęgnacja

    Ustawienie cyklu Od momentu, gdy system jest podłączony do zasilania, przycisk włączenia będzie podświetlony, a lampa pozostanie w trybie czuwania. Po wybraniu właściwego trybu lampa LED zostanie uruchomiona zgodnie z wybranym cyklem (normalny, krótki, długi). W zależności od wybranego cyklu światło będzie uruchamiane każdego dnia o tych samych godzinach. Dla przykładu: po wybraniu przy pierwszym użyciu cyklu normalnego o 10 rano, system uruchomi 14 godz.
  • Seite 58: Warunki Gwarancji

    Warunki Gwarancji 1 Rok Gwarancji firmy Shine-Mart LTD, marki handlowej Duronic Products. UWAGA: ten dokument nie wpływa na twoje ustawowe prawo jako konsumenta. Ten produkt został wykonany zgodnie z restrykcyjnymi normami kontroli i wykorzystuje najwyższej jakości materiały dla uzyskania doskonałej wydajności i niezawodności.
  • Seite 59: Gebruikershandleiding Nederlands

    Gebruikershandleiding Nederlands...
  • Seite 60: Veiligheidsinstructies

    • Gebruik dit apparaat niet als de stroomkabel of stekker beschadigd is. Als één van deze onderdelen beschadigd raakt, retourneer het dan naar Duronic voor onderhoud of reparatie door een professionele technicus. • Plaats de lamp niet in direct zonlicht.
  • Seite 61: Specificaties

    GHS48 Kweekset Onderdelen Zorg voor u uw kweekset gebruikt dat u alle benodigde onderdelen heeft: 1 voedingsadapter 1 waterpomp 8 Plantenmandjes (8 mandjes en 8 schuimkegeltjes) Twee flesjes plantenvoeding: Voedingsstoffen A & Voedingsstoffen B 1. Led lamp installatie 2. Zijpaneel linkerkant Gereedschapspakket 3.
  • Seite 62 Pieptonen en Betekenis 1. Als de voedingsadapter aan de kweekset wordt gesloten, laat het systeem een lange pieptoon horen om aan te geven dat het klaar is voor gebruik. 2. Nadat het apparaat enkele dagen aan heeft gestaan daalt op natuurlijke wijze het waterniveau.
  • Seite 63: Installatie-Instructies

    Installatie Instructies 2. Leg de LED lamp installatie 1. Bevestig de twee zijpanelen met ondersteboven op een vlakke schroeven aan de LED lamp ondergrond neer en steek de zwarte installatie. Zorg dat het paneel met voedingskabel in de aansluiting. Werk de groef aan de binnenkant aan de de voedingskabel netjes weg in de linkerkant (naast het invoerpaneel)
  • Seite 64 Bereiden van de Voedingsoplossing 1. Vul flesje ‘A’ met water, draai de 2. Gebruik de meetdopjes om 5ml dop vast en schud het flesje tot de van elke oplossing toe te voegen inhoud volledig opgelost is. Doe aan 1 liter water. Roer of schud de hetzelfde voor flesje ‘B’.
  • Seite 65 Gebruik van het Invoerpaneel Aan/Uit knop Als u op deze knop drukt hoort u een pieptoon en wordt het systeem op stand-by mode gezet. NORMALE CYCLUS: 14 uur aan / 10 uur Druk op deze knop om het apparaat aan te zetten.
  • Seite 66: Functie Instellen

    Functie Instellen Vanaf het moment dat het systeem aan is gesloten op de netvoeding, brandt de aan/uit knop en staat de lamp op ‘stand-by’. Na het selecteren van een functie, gaat de lamp aan en activeert een 24-uurs klok aan de hand van de gekozen functie. Afhankelijk van de tijd, wanneer u de gekozen cyclus activeert, gaat de lamp elke volgende dag op hetzelfde moment weer aan.
  • Seite 67 Garantie 1 Jaar Garantie van Shine-Mart Ltd Handelsmerk eigenaars van Duronic Producten. LET OP: DEZE STELLINGEN HEBBEN GEEN INVLOED OP UW WETTELIJKE RECHTEN ALS CONSUMENT Dit product is vervaardigd onder de strengste kwaliteitscontrole procedures, met materialen van de hoogste kwaliteit, om uitstekende werking en betrouwbaarheid te verzekeren. Het zal zeer goed en langdurig dienstdoen, naar gelang het correct gebruikt en onderhouden wordt.

Inhaltsverzeichnis