Herunterladen Inhalt Inhalt Diese Seite drucken

Werbung

Verfügbare Sprachen
  • DE

Verfügbare Sprachen

  • DEUTSCH, seite 31
enigma
Instructions
Istruzioni
IT
EN
FR
DE
ES
2
12
20
30
40

Werbung

Inhaltsverzeichnis
loading

Inhaltszusammenfassung für Fabita enigma

  • Seite 1 Instructions Istruzioni...
  • Seite 2 Fabita Srl Contrada Serralta 49 | A Serra San Quirico Ancona | 60048 | ITALY info@fabita.it www.fabita.it In vendita su fabitashop.it/en/ For sale on fabitashop.it/en/...
  • Seite 3 Mensola 90 | Shelf 90 Mensola 30 | Shelf 30 Dimensione cappa | Hood size 898 | 898 Finitura vasi | Finish Vases Personalizzabili | Customizable Mensola; Mensola 30: Mensola 90 | Shelf; Shelf; 30; Shelf 90; Legno | Wood Comando | Control Touch control | Touch control N°...
  • Seite 4: Avvertenze Per La Sicurezza

    _ITALIANO INFO GENERALI Attenersi strettamente alle istruzioni riportate in questo manuale. Si declina ogni responsabilità per eventuali inconvenienti, danni o incendi provocati all’apparecchio derivati dall’inosservanza delle istruzioni riportate in questo manuale. La cappa è concepita per l’aspirazione dei fumi e vapori della cottura ed è...
  • Seite 5: Istruzioni Per L'installazione

    • E’ severamente vietato fare cibi alla fiamma sotto la cappa. L’impiego di fiamma libera è dannoso ai filtri e può dar luogo ad incendi, pertanto deve essere evitato in ogni caso. • La frittura deve essere fatta sotto controllo onde evitare che l’olio surriscaldato prenda fuoco.
  • Seite 6: Pulizia E Manutenzione

    MONTAGGIO !ATTENZIONE! Prodotto dal peso eccessivo, la movimentazione e installazione della cappa deve essere fatta da almeno due o più persone. !ATTENZIONE! Utilizzare dei guanti e degli occhiali nelle operazioni di installazione e di manutenzione. !ATTENZIONE! La mancata installazione di viti e dispositivi di fissaggio in conformità di queste istruzioni può...
  • Seite 7 Pulizia La cappa va frequentemente pulita (almeno con la stessa frequenza con cui si esegue la manutenzione dei filtri grassi), sia internamente che esternamente. Particolare attenzione merita la/le mensola/e in legno, le quali vanno regolarmente finite, in caso di macchie durante l’utilizzo della cucina.
  • Seite 8 Questa funzione è presente anche per gli altri livelli di potenza, la quale viene attivata premendo il tasto del livello della potenza desiderata per 3 sec., dopo di che il temporizzatore automatico farà in modo che dopo 15 min. la cappa Enigma si spegnerà automaticamente.
  • Seite 9: Collegamento Elettrico

    Filtro antigrasso Trattiene le particelle di grasso derivanti dalla cottura. Deve essere pulito una volta al mese (o quando il sistema di indicazione di saturazione dei filtri - se previsto sul modello in possesso- indica questa necessità), con detergenti non aggressivi, manualmente oppure in lavastoviglie a basse temperature ed a ciclo breve.
  • Seite 10: Consigli In Materia Di Risparmio Energetico

    CONSIGLI IN MATERIA DI RISPARMIO ENERGETICO Suggerimenti per un corretto utilizzo al fine di ridurre l’impatto ambientale • Quando iniziate a cucinare, accendere la cappa alla velocità minima, lasciandola accesa per alcuni minuti anche dopo il termine della cottura. Aumentare la velocità solo in caso di grandi quantità...
  • Seite 11 NOTE...
  • Seite 12: General Information

    _ENGLISH GENERAL INFORMATION Strictly follow the instructions set forth in this manual. The manufacturer hereby declines any liability for any inconveniences, damages or fires caused by failure to comply with the instructions given in this manual. The hood has been designed for catching cooking fumes and steam and is intended only for domestic use.
  • Seite 13: Installation Instructions

    detrimental to the filters and may cause a fire risk, and shall therefore be avoided in all circumstances. • Frying shall be done with care in order to make sure that the oil does not overheat and ignite. • Accessible parts of the hood may become hot when the cooktop/hob is in operation.
  • Seite 14 MOUNTING OPERATIONS WARNING: Very heavy product; hood handling and installation must be carried out by at least two persons. WARNING: Wear gloves and goggles when carrying out installation and maintenance operations. WARNING: Failure to install the screws or fixing devices in accordance with these instructions may result in electrical hazards.
  • Seite 15 _ON/OFF Key. _1st power level. _2nd power level. _3rd power level. 4th power level. Timer.
  • Seite 16: Electrical Connection

    C, if key D is desired at 3, while if the maximum level is desired, select 4, and then key E. The Enigma hood has an automatic timer, ked F, which allows you to automatically go down to level 3 when you are at maximum power (i.e.
  • Seite 17: Maintenance And Cleaning Operations

    The hood is provided with a special power cord; if the cord is damaged, order a new one at our Technical Assistance Service. MAINTENANCE AND CLEANING OPERATIONS Warning! Before performing any cleaning or maintenance operations , disconnect the hood from power supply by removing the plug or disconnecting the home master switch.
  • Seite 18: Lamp Replacement

    LAMP REPLACEMENT The hood is equipped with a lighting system based on LED technology : 5 watt for 1 strip Led. The LEDs guarantee optimal lighting, up to 10 times longer life than traditional lamps and save 90% of electricity. For replacement, contact the technical assistance service ADVISE ON ENERGY SAVING Suggestions for a correct use in order to reduce the environmental...
  • Seite 19 NOTE...
  • Seite 20 Fabita Srl Contrada Serralta 49 | A Serra San Quirico Ancona | 60048 | ITALY info@fabita.it www.fabita.it En vente sur fabitashop.it/en/ For sale on fabitashop.it/en/...
  • Seite 21 Mensola 90 | Shelf 90 Mensola 30 | Shelf 30 Hood size | Dimension Hotte 898 | 898 Vases Finish | Finition des vases Personalized | Personnalisables Shelf; Shelf 30; Shelf 90; | Étagère; Étagère 30; Étagère 90 Wood | Bois Control | Contrôle Touch control | Touch control No.
  • Seite 22: Informations Générales

    _FRANÇAIS INFORMATIONS GÉNÉRALES Veuillez suivre strictement les instructions de ce manuel. Nous déclinons toute responsabilité pour tout inconvénient, dommage ou incendie de l’appareil résultant du non-respect des instructions de ce manuel. La hotte est conçue pour extraire les fumées et les vapeurs de cuisson et est destinée à...
  • Seite 23: Mode D'installation

    • L’air aspiré ne doit pas être acheminé dans un conduit utilisé pour évacuer les vapeurs produites par des appareils à gaz ou à autres combustibles. • Il est strictement interdit de préparer des aliments à la flamme sous la hotte. L’utilisation d’une flamme nue est nocive pour les filtres et peut provoquer des incendies ;...
  • Seite 24: Montage

    MODE RECYCLAGE La hotte purifie l’air et le renvoi propre dans la pièce. MONTAGE !ATTENTION! Produit excessivement lourd, la manipulation et l’installation de la hotte doivent être effectuées par au moins deux personnes ou plus. !ATTENTION! Utilisez des gants et des lunettes de protection lors des opérations d’installation et de maintenance.
  • Seite 25 _ON/OFF Key. _1st power level. _2nd power level. _3rd power level. 4th power level. Timer.
  • Seite 26: Branchement Électrique

    3, tandis que si le niveau d’aspiration maximum est souhaité, sélectionner 4, puis la touche E. La hotte Enigma dispose d’une minuterie automatique, la touche F, qui vous permet de descendre automatiquement au niveau 3 lorsque vous êtes à la puissance maximale (soit 4), après 7 minutes.
  • Seite 27: Nettoyage Et Entretien

    Attention! La hotte est équipée d’un câble d’alimentation; si le câble est endommagé, veuillez contacter le service d’assistance technique. NETTOYAGE ET ENTRETIEN Attention! Avant toute opération de nettoyage ou d’entretien, débranchez la hotte de l’alimentation électrique en retirant la fiche ou en déconnectant l’interrupteur principal de la maison.
  • Seite 28: Conseils D'économie D'énergie

    REMPLACEMENT LAMPES La hotte est équipée d’un système d’éclairage basé sur la technologie à LED : 5 watt pour une bande Led. Les LEDs garantissent un éclairage optimal, une durée de vie jusqu’à 10 fois plus longue que les lampes traditionnelles et économisent 90% d’électricité. Pour le remplacement, contactez le service d’assistance technique.
  • Seite 29 NOTE...
  • Seite 30 Fabita Srl Contrada Serralta 49 | A Serra San Quirico Ancona | 60048 | ITALY info@fabita.it www.fabita.it In vendita su fabitashop.it/en/ Verkauf auf fabitashop.it/en/...
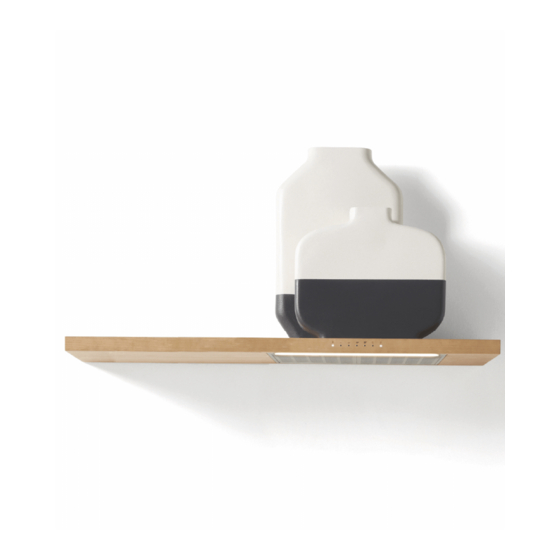
  • Seite 31 Mensola 90 | Shelf 90 Mensola 30 | Shelf 30 Hood size | Dunsthauben-Größe 898 | 898 Vases finish | Vasen beenden Personalized | Gepersonaliseerd Shelf; Shelf 30; Shelf 90; | Regal; Regal 30; Regal 90; Wood | Holz Control | Bedienung Touch control | Touch control No.
  • Seite 32: Allgemeine Hinweise

    DEUTSCH ALLGEMEINE HINWEISE Befolgen Sie genau die Anweisungen in diesem Handbuch. Der Hersteller übernimmt keine Haftung für Unannehmlichkeiten, Schäden oder Brände, die durch die Nichtbeachtung der Anweisungen in diesem Handbuch am Gerät verursacht werden. Die Dunstabzugshaube dient zum Absaugen von Kochdämpfen und Dämpfen und ist nur für den Hausgebrauch bestimmt.
  • Seite 33 angegeben. • Der Raum muss über eine hinreichende Belüftung verfügen, wenn die Dunstabzugshaube mit anderen gas- oder brennstoffbetriebenen Geräten gleichzeitig verwendet wird. • Es ist strengstens verboten unter der Dunstabzugshaube zu flambieren. Offene Flammen sind für die Filter schädlich und können Brände verursachen.
  • Seite 34: Funktionsweise

    VERSAMMLUNG !WARNUNG! Bei übermäßig schwerem Produkt muss die Handhabung und Installation der Dunstabzugshaube von mindestens zwei oder mehr Personen durchgeführt werden. !WARNUNG! Verwenden Sie bei Installations- und Wartungsarbeiten Handschuhe und Schutzbrillen. !WARNUNG! Schrauben und Befestigungselemente müssen gemäß den Anweisungen installiert werden, um elektrische Gefahren auftreten. !Der Mindestabstand zwischen dem Kochfeld und dem untersten Teil der Dunstabzugshaube muss bei Elektrokochfelder mindestens 550 mm und bei Gas- oder Kombikochfelder 650 mm betragen.
  • Seite 35 _ON/OFF Key. _1st power level. _2nd power level. _3rd power level. 4th power level. Timer.
  • Seite 36 3 erwünscht. Wenn die maximale Saugleistung gewünscht wird, wählen Sie 4 und dann Taste E. Die Enigma-Haube verfügt über einen automatischen Timer, Taste F, mit dem Sie nach 7 Minuten automatisch auf Stufe 3 zurückkehren können, wenn Sie die maximale Leistung (d. H. 4) erreicht haben.
  • Seite 37: Reinigung Und Wartung

    gewährleistet. Warnung! Überprüfen Sie immer, ob das Netzkabel richtig verlegt wurde, bevor Sie die Dunstabzugshaube wieder an das Stromnetz anschließen sowie den ordnungsgemäßen Betrieb. Warnung! Die Dunstabzugshaube ist mit einem Stromkabel ausgestattet; Wenn das Kabel beschädigt ist, wenden Sie sich an den technischen Kundendienst.
  • Seite 38: Lampen Ersetzen

    Aktiv-Kohlefilter Die unangenehmen Gerüche, die beim Kochen entstehen, bleiben erhalten. Die Sättigung der Aktivkohle ist abhängig von der mehr oder weniger langen Benutzung des Gerätes, von der Art des Kochens und von der Regelmäßigkeit, mit der der Fettfilter gereinigt wird. In jedem Fall muss die Patrone mindestens alle vier Monate ausgetauscht werden.
  • Seite 39 NOTE...
  • Seite 40 Fabita Srl Contrada Serralta 49 | A Serra San Quirico Ancona | 60048 | ITALY info@fabita.it www.fabita.it En venta en fabitashop.it/en/ For sale on fabitashop.it/en/...
  • Seite 41 Mensola 90 | Shelf 90 Mensola 30 | Shelf 30 Hood size | Tamaño de la campana 898 | 898 Vases finish | Acabado de jarrones Personalized | Personalizado Shelf; Shelf 30; Shelf 90; | Estante; Estante 30; Estante 90; Wood | Madera Control | Comando Touch control | Touch control...
  • Seite 42: Informaciones Generales

    ESPAÑOL INFORMACIONES GENERALES Siga meticulosamente las instrucciones indicadas en este manual. No se asume ninguna responsabilidad por posibles inconvenientes, daños o incendios provocados al aparato derivados del incumplimientos de las instrucciones indicadas en este manual. La campana está concebida para la aspiración de humos y vapores de cocción y está...
  • Seite 43: Instrucciones Para La Instalación

    los filtros y puede provocar incendios, por lo tanto de todas maneras se tiene que evitar. • Los fritos tienen que ser controlados para evitar que el aceite se caliente y se incendie. • Cuando la encimera està funcionando las partes accesibles de la campana pueden calentarse.
  • Seite 44: Montaje

    MONTAJE ¡ATENCIÓN! Producto con peso excesivo, la manipulación e instalación de la campana tiene que ser realizada al menos por dos o más personas. ¡ATENCIÓN! Utilizar guantes y gafas cuando se realiza el mantenimiento. ¡ATENCIÓN! La falta de instalación de tornillos y dispositivos de fijación con arreglo a estas instrucciones puede causar riesgos de origen eléctrico.
  • Seite 45 _ON/OFF Key. _1st power level. _2nd power level. _3rd power level. 4th power level. Timer.
  • Seite 46: Conexión Eléctrica

    3, mientras que si se desea el nivel máximo de succión, seleccione 4 y luego la tecla E. La campana Enigma tiene un temporizador automático, tecla F, que le permite bajar automáticamente al nivel 3 cuando está en la potencia máxima (es decir, 4), después de 7 minutos.
  • Seite 47: Limpieza Y Mantenimiento

    ¡Atención! La campana está equipada con un cable de alimentación; en caso de que el cable esté dañado, pedirlo al servicio de asistencia técnica. LIMPIEZA Y MANTENIMIENTO ¡Atención! Antes de cualquier operación de limpieza o mantenimiento, desconectar la campana de la red eléctrica quitando el enchufe o desconectando el interruptor general de la habitación.
  • Seite 48 SUSTITUCIÓN DE LÁMPARAS La campana está equipada con un sistema de iluminación basado en tecnología LED: 5 watt para 1 tira de Led. Los LED garantizan una iluminación optimal, una duración hasta 10 veces mayor de las lámparas tradicionales y permiten un ahorro del 90% de energía eléctrica.
  • Seite 49 NOTE...
  • Seite 50: Installazione

    4,8x40mm SE SI DESIDERA E’ POSSIBILE AGGIUNGERE ALLA CAPPA ENIGMA, (Fig.1), UNA O PIU’ MENSOLE: DA 30; DA 90. IF YOU WANT YOU CAN ADD TO ENIGMA’ HOOD, (Fig.1), ONE OR MORE SHELFS: FROM 30 (Fig.2.1); FROM 90 (Fig.2.2). Fg_2...
  • Seite 51 30 ALIGN THE TWO CENTERS ALIGN THE TWO CENTERS Installation of ENIGMA’S hood bracket + ALTEZZA INSTALLAZIONE DAL TOP: MIN 580 mm MAX 630 mm (PIANO INDUZIONE); bracket’s shelf 30’s MIN 670 mm MAX 730 mm (PIANO GAS) HEIGHT’S INSTALLATION FROM THE TOP: MIN 580 mm MAX 630 mm (INDUCTION HOB);...
  • Seite 52 HEIGHT’S INSTALLATION FROM THE TOP: MIN 580 mm MAX 630 mm (INDUCTION HOB); MIN 670 mm MAX 730 mm (GAS HOB); staffa mensola 90 Installation of ENIGMA’S hood bracket + bracket’s shelf 30’s ATTENZIONE AL FISSAGGIO DELLA STAFFA. INSTALLARE COME INDICATO.
  • Seite 53 Retro Back PER INSERIRE LA STAFFA UTILIZZARE LA FORATURA POSIZIONATA POSTERIORMENTE AL MANTELLO DELLA CAPPA. N.B. FARE MOLTA ATTENZIONE AL CAVO DI CONNESSIONE LAMPADE. TO INSERT THE BRACKET USE THE HOLE POSITIONED BEHIND THE COVER OF THE HOOD. N.B. PAY CLOSE ATTENTION TO THE CABLE LAMPS CONNECTOR. Fg_8 RONDELLA WASHER VITE SCREW...
  • Seite 54 DOPO AVER DIPINTO E PERSONALIZZATO IL VASO PIU’ PICCOLO SI PUO’ PROCEDERE AL MONTAG- Fg_9 GIO DEL MOTORE. ESEGUIRE L’ASSIEMAGGIO COME INDICATO NELLE IMMAGINI. AFTER PAINTING AND CUSTOMIZING THE SMALLEST VASE THE ENGINE CAN BE MOUNTED. ASSEMBLY AS SHOWN IN THE PICTURES. N°4 VITI 3.5 X 9 MT N°4 SCREWS 3.5 X 9 MT VISTA SUPERIORE: CORRETTO...
  • Seite 55 N.B. NEL CASO IN CUI FOSSE STATA ACQUISTATA LA CAPPA CON MENSOLA 30 O MENSOLA 90 PRIMA DEL MONTAGGIO DEI VASI, ESEGUIRE LA CONNESSIONE ELETTRICA DELLA BARRA LED. Fg_11 (Fig. 17 c) IF THE HOOD WITH SHELF 30 OR SHELF 90 WAS PURCHASED, BEFORE ASSEMBLING THE VASES, CARRY OUT THE ELECTRICAL CONNECTION OF THE LED BAR.
  • Seite 56 Fg_13 FOR LEVELLING USE THE SCREWS FOR MANTLE PRESENTED AND REPORTED IN Fig.8 A. SUBSEQUENTLY TIGHTEN THE SCREWS PRESENT IN Fig. 8B.° SCHEMA ELETTRICO ENIGMA e ENIGMA + MENSOLA ELECTRICAL DIAGRAM ENIGMA AND ENIGMA + SHELF Fg_14 IMPIANTO ELETTRICO LUCI E MOTORE...
  • Seite 57 CONNESSIONE RIPIANO-CAPPA CONNESSIONE RIPIANO-CAPPA SHELF-HOOD CONNECTION SHELF-HOOD CONNECTION Fg_15 ENTRATA CAVO ALIMENTAZIONE POWER SUPPLY CABLE INTPUT ESEGUIRE TUTTE LE CONNESSIONI ELETTRICHE (da Fig. 14 A fino a Fig.14 D). RIAVVITARE IL PARTICOLARE CON LE N.4 VITI PRECEDENTEMENTE RIMOSSE. FARE MOLTA ATTENZIONE AL PASSAGGIO CAVI.
  • Seite 58 MANTELLO DELLA CAPPA NON DEVE ESSERE AVVITATO, DEVE ESSERE LIBERO RISPETTO ALLA SUA STAFFA. 3. SECURE THE BRACKET TO THE RIGHT OR LEFT OF THE ENIGMA HOOD, PROCEED AS INDICATED (Fig. 4 and 5). WHEN THIS OPERATION IS CARRIED OUT, THE VESSELS MUST NOT BE MOUNTED AND THE HOOD MUST NOT BE...
  • Seite 59 ENIGMA, QUANTO BASTA PER PERMETTERE INSERTED. RISK OF BREAKING LA CONNESSIONE LAMPADE SU ZONA THE UPPER FRAME SHELF. POSTERIORE. 5. BRING THE ENIGMA COVER FORWARD ENOUGH TO ALLOW THE LAMPS TO BE CONNECTED TO THE REAR AREA. DETTAGLIO INSERIMENTO STAFFA NEL RIPIANO.
  • Seite 60 N. 2 VITI M4x16; N. 2 RONDELLE Ø5 - Ø10 N.2 SCREWS M4x16; N. 2 VITI M5x20; N.2 WASHERS Ø5 - Ø10 N. 2 RONDELLE Ø6 - Ø16 N.2 SCREWS M5x20; N.2 WASHERS Ø6 - Ø16 AVVITARE IL RIPIANO CON LE VITI RIPORTATE. NON SERRARE.
  • Seite 61 Fg_18 PRIMA DI SERRARE LE VITI DEL MANTELLO DI ENIGMA E DELLA MENSOLA 30 E MENSOLA 90, MONTARE I VASI CON LA SUCCESSIONE E LE MODALITA’ DESCRITTE NELLE IMMAGINI (Fig. 11 ; Fig. 12). BEFORE CLAMPING THE SCREWS ON THE ENIGMA...
  • Seite 62 Fg_20 POSIZIONARE NELL’APPOSITO ALLOGGIO LA CHIUSURA SUPERIORE DELLA MENSOLA. PLACE IN THE APPROPRIATE HOUSING THE UPPER CLOSING OF THE SHELF.
  • Seite 63 NOTE...
  • Seite 64 enigma...

Inhaltsverzeichnis