Herunterladen Inhalt Inhalt Diese Seite drucken
AERMEC GLL10N Installationshandbuch

AERMEC GLL10N Installationshandbuch

Ausblasͳ und ansauggitter
Vorschau ausblenden Andere Handbücher für GLL10N:

Werbung

Verfügbare Sprachen
  • DE

Verfügbare Sprachen

  • DEUTSCH, seite 29
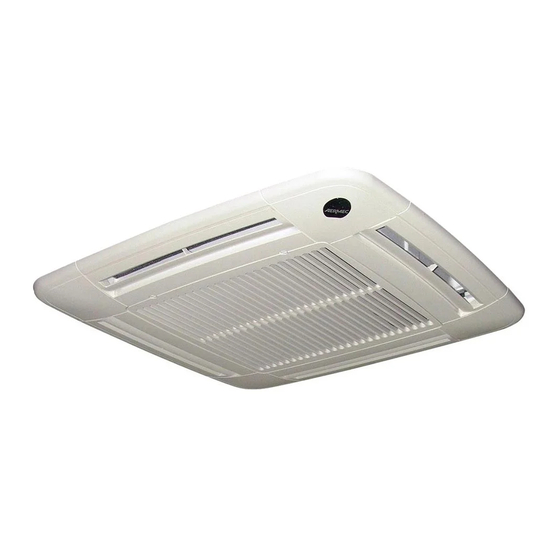
CORNICE DI MANDATA E D'ASPIRAZIONE
DELIVERY AND INTAKE FRAME
GRILLE DE SOUFFLAGE ET D'ASPIRATION
AUSBLAS UND ANSAUGGITTER
PLAFON DE ENVÍO Y DE ASPIRACIÓN
IT
GB
pag.6
pag.12
MANUALE INSTALLAZIONE
INSTALLATION MANUAL
MANUEL D'INSTALLATION
INSTALLATIONSHANDBUCH
MANUAL INSTALACIÓN
GLL10N
GLL20N
FR
DE
ES
pag.18
pag.24
pag.30
AGLL10/20NFJ 1403_4528566_01

Werbung

Inhaltsverzeichnis
loading

Inhaltszusammenfassung für AERMEC GLL10N

  • Seite 1 MANUALE INSTALLAZIONE INSTALLATION MANUAL MANUEL D'INSTALLATION INSTALLATIONSHANDBUCH MANUAL INSTALACIÓN CORNICE DI MANDATA E D’ASPIRAZIONE DELIVERY AND INTAKE FRAME GRILLE DE SOUFFLAGE ET D'ASPIRATION AUSBLAS UND ANSAUGGITTER PLAFON DE ENVÍO Y DE ASPIRACIÓN GLL10N GLL20N pag.6 pag.12 pag.18 pag.24 pag.30 AGLL10/20NFJ 1403_4528566_01...
  • Seite 2 “DANGER” or “WARNING” signals as failure to comply AERMEC S.p.A. declines all responsibility for any damage what- with them can cause damage to the machine and/or persons or soever caused by improper use of the machine, and a partial or objects.
  • Seite 3 INDICE DICHIARAZIONE DI CONFORMITÀ DECLARATION OF CONFORMITY DÉCLARATION DE CONFORMITÉ KONFORMITÄTSERKLÄRUNG DECLARACIÓN DE CONFORMIDAD Trasporto • Simboli di sicurezza Transport • Safety symbols Transport • Symboles de sécurité Transport • Sicherheitssymbole Transporte • Símbolos de seguridad Italiano English Français Deutsche Español AGLL10/20NIJ 07/11 - 4528566_00...
  • Seite 4: Dichiarazione Di Conformità

    - info@aermec.com I presenti prodotti devono essere installati, esclusivamente, in abbina- The above equipments must be used with AERMEC units FCL series only. mento con le unità FCL. Solo rispettando tali abbinamenti è valida la Following declaration applIes to the combinations as above stated only:...
  • Seite 5 TRASPORTO • TRANSPORT • TRANSPORT • TRANSPORT • TRANSPORTE NICHT nass machen. NON bagnare. Tenere al KEEP DRY. Keep out of NE PAS mouiller. Tenir à NO mojar. Conservar Vor Regen geschützt riparo dalla pioggia. the rain. l’abri de la pluie. protegido de la lluvia.
  • Seite 6: Anomalie Di Funzionamento

    Se si effettuano misurazioni sull’unità è un certo periodo di funzionamento. necessario, prima di eseguire le ope- razioni, scaricare dal corpo le cariche DESCRIZIONE GLL10N (600x600) "Master") consente di collegare data sono state studiate per avere la GLL20N (840x840) il ventilconvettore ad un sistema...
  • Seite 7 Posizione alette (GLL10N) Nel funzionamento in riscaldamento Nel funzionamento in raffrescamento Con le alette chiuse la ventilazione è si consiglia una apertura delle alet- si consiglia una apertura delle alet- consentita. te di 20°, indicata con una linea in te di 10°, indicata con una linea in rilievo sulle alette (vedi figure).
  • Seite 8: Installazione

    “personale provvi- Sulla sezione laterale dei deflettori sto di specifica competenza tecnica”). (GLL10N) sono indicate le posizioni di In particolare per i collegamenti elettri- apertura per un corretto funzionamento ci si richiedono le verifiche relative a : a caldo (apertura 20°) e a freddo (aper-...
  • Seite 9 - Montare la griglia di aspirazione ma elettrico. ne di montaggio, l'angolo della corni- agganciandola alla cerniera sulla cor- ce il vetrino con il logo AERMEC deve nice. - Fissare tutti i cavi con il blocca cavo. coincidere con l'angolo della scatola...
  • Seite 10 INSTALLAZIONE E SOSTITUZIONE DEL FILTRO "GLL10N" PERICOLO: Togliere tensione prima d’iniziare le operazioni di pulizia del filtro e/o dell’unità. DANGER: Switch off power supply before cleaning filter and/or unit. DANGER: Couper la tension avant de commencer les opérations de nettoyage du filtre et/ou de l'unité.
  • Seite 11 - Rimontare il tutto seguendo la proce- ne di montaggio, l'angolo della corni- nice. dura inversa allo smontaggio. ce il vetrino con il logo AERMEC deve - Richiudere la griglia di aspirazione e • Smontaggio per manutenzione - Prima di eseguire qualsiasi operazione sull'unità...
  • Seite 12 INSTALLAZIONE E SOSTITUZIONE DEL FILTRO "GLL20N" PERICOLO: Togliere tensione prima d’iniziare le operazioni di pulizia del filtro e/o dell’unità. DANGER: Switch off power supply before cleaning filter and/or unit. DANGER: Couper la tension avant de commencer les opérations de nettoyage du filtre et/ou de l'unité. GEFAHR: Vor der Reinigung des Filters und/oder des Gerätes die Strom versorgung abschalten.
  • Seite 13 F2, come raffigura- to nell'immagine sottostante COLLEGAMENTI ELETTRICI CON GLI ACCESSORI GLL10N E GLL20N Prima di installare la scatola elettrica è V M F - E 4 , i l c avo d e l l a r e t e d i...
  • Seite 14 After-Sales Service promptly. tive manner with the electronic poten- tial of his surrounding environment can accumulate electrostatic charges. DESCRIPTION GLL10N (600x600) supervisor system. and delivery through the adjustable, GLL20N (840x600) The FCL units are available in two basic outer slots. In plastic, colour RAL 9010,...
  • Seite 15 Fins position (GLL10N) In heating operation, a fin opening In cooling operation, a fin opening of When the louvres are closed ventila- of 20° is recommended; this is indi- 10° is recommended; this is indi- tion is permitted. cated by a raised line on the fins cated by a raised line on the fins themselves (see figures).
  • Seite 16: Installation

    "persons with (GLL10N) for correct machine heating specific technical skills"). (20° opening) and cooling (10° open- In the specific case of electrical wirings, ing) operation.
  • Seite 17 - Close the intake grid and tighten the wiring diagram. the AERMEC logo holder must coin- two ratchets (on the side opposite the - Fix all cables using the cable gland. cide with the corner of the FCL unit hinge) by ¼...
  • Seite 18 INSTALLATION AND REPLACEMENT OF THE "GLL10N" FILTER PERICOLO: Togliere tensione prima d’iniziare le operazioni di pulizia del filtro e/o dell’unità. DANGER: Switch off power supply before cleaning filter and/or unit. DANGER: Couper la tension avant de commencer les opérations de nettoyage du filtre et/ou de l'unité.
  • Seite 19 - Close the intake grid and tighten the position, the corner of the frame with two ratchets (on the side opposite the the AERMEC logo holder must coin- hinge) by ¼ of a turn. • Disassembly for maintenance - Before performing any operation on the unit, the electric power supply must be interrupted.
  • Seite 20 INSTALLATION AND REPLACEMENT OF THE "GLL20N" FILTER PERICOLO: Togliere tensione prima d’iniziare le operazioni di pulizia del filtro e/o dell’unità. DANGER: Switch off power supply before cleaning filter and/or unit. DANGER: Couper la tension avant de commencer les opérations de nettoyage du filtre et/ou de l'unité. GEFAHR: Vor der Reinigung des Filters und/oder des Gerätes die Strom versorgung abschalten.
  • Seite 21 F2, as shown in the image procedures on the unit. below. ELECTRICAL CONNECTIONS WITH GLL10N AND GLL20N ACCESSORIES Before installing the electric box, the network cable, and probe and valve configuration of the electronic board cables based on system requirements.
  • Seite 22: Anomalies De Fonctionnement

    élec- de fonctionnement. trostatiques. À cette fin, il suffit de tou- DESCRIPTION GLL10N (600x600) grille GLLN assortie au panneau de d'air, comprennent le boîtier électrique GLL20N (840x840) commande VMF-E4 (configuration spécifique.
  • Seite 23 Position des ailettes (GLL10N) En fonctionnement en mode chauf- (voir figures). 10°, indiquée par un trait en relief fage il est conseillé de placer l'ou- Pendant le fonctionnement en mode sur les ailettes (voir figures). verture des ailettes à 20°, indiquée refroidissement il est conseillé...
  • Seite 24: Branchements Électriques

    (ouverture de 20°) et à froid (ouverture En particulier, les vérifications suivantes de 10°) sont indiquées sur la section sont requises pour les branchements latérale des déflecteurs (GLL10N). électriques : Pour les unités avec des grilles GLL20N, - Mesure de la résistance d'isolement de il est recommandé...
  • Seite 25 - Fixer tous les câbles à l'aide de de montage, l'angle du cadre avec cadre. l'arrêtoir de câble. le verre portant le logo AERMEC doit - Refermer la grille d'aspiration et visser coïncider avec l'angle du boîtier - Refermer le couvercle de la barrette de les deux cliquets (sur le côté...
  • Seite 26 INSTALLATION ET REMPLACEMENT DU FILTRE "GLL10N" PERICOLO: Togliere tensione prima d’iniziare le operazioni di pulizia del filtro e/o dell’unità. DANGER: Switch off power supply before cleaning filter and/or unit. DANGER: Couper la tension avant de commencer les opérations de nettoyage du filtre et/ou de l'unité.
  • Seite 27 - Refermer la grille d'aspiration et visser ensemble cadre de soufflage et grille le verre portant le logo AERMEC doit les deux cliquets (sur le côté opposé à d'aspiration, retirer la grille de l'embal- coïncider avec l'angle du boîtier élec-...
  • Seite 28 électrique est de 10 A dans le logement F2, comme débranchée. illustré sur l'image suivante. BRANCHEMENTS ÉLECTRIQUES AVEC LES ACCESSOIRES GLL10N ET GLL20N Avant d'installer le boîtier électrique, l'installation, brancher le panneau tenir aux schémas électriques du il faut vérifier la configuration des...
  • Seite 29: Funktionsstörungen

    Gerät sind nicht sofort erkennbar, zei- statischen Ladungen vom Gehäuse gen sich aber nach einer bestimmten abgeleitet werden, bevor mit den Betriebsdauer. BESCHREIBUNG GLL10N (600x600) (max 5) installiert wird. GLL_N in und zu den Zuluftlamellen, einen GLL20N (840x840) Kombination mit dem Bedienelement dazugehörigen Schaltkasten.
  • Seite 30 Lamellenposition (GLL10N) H e i z b e t r i e b w i r d e i n Abbildungen). auf den Lamellen angezeigt (siehe Öffnungswinkel der Lamellen von K ü h l b e t r i e b...
  • Seite 31: Installation In Der Wand

    Kühlen durch den Coanda-Effekt in der Lage sind, die Anlagen auf der Decke entlang austritt. Sicherheit und Funktionalität zu prü- Seitlich der Lamellen (GLL10N) sind fen, ausgeführt werden (in diesem die Öffnungspositionen für einen kor- Handbuch werden diese Techniker rekten Heizbetrieb (20°-Öffnung) und...
  • Seite 32 - Ansauggitter durch Einhaken in das achten, die Ecke des Rahmens mit Scharnier am Rahmen montieren. - Deckel der Elektro-Klemmleiste schlie- AERMEC-Glaslogo muss mit der Ecke ßen. - Ansauggitter schließen und die bei- des Schaltkastens der FCL-Einheit über- den Klinken (an der dem Scharnier - Schaltkasten in die Führungsschienen...
  • Seite 33 INSTALLATION UND AUSTAUSCH DES FILTERS "GLL10N" PERICOLO: Togliere tensione prima d’iniziare le operazioni di pulizia del filtro e/o dell’unità. DANGER: Switch off power supply before cleaning filter and/or unit. DANGER: Couper la tension avant de commencer les opérations de nettoyage du filtre et/ou de l'unité.
  • Seite 34 Steckverbinder Dichtigkeit zwischen Ansaugung Ecke mit dem Aermec-Logo entfernen. Kontakt haben. u n d L u f t a u s t r i t t , d a h e r i s t e r...
  • Seite 35 INSTALLATION UND AUSTAUSCH DES FILTERS "GLL20N" PERICOLO: Togliere tensione prima d’iniziare le operazioni di pulizia del filtro e/o dell’unità. DANGER: Switch off power supply before cleaning filter and/or unit. DANGER: Couper la tension avant de commencer les opérations de nettoyage du filtre et/ou de l'unité. GEFAHR: Vor der Reinigung des Filters und/oder des Gerätes die Strom versorgung abschalten.
  • Seite 36: Wiring Mit Zubehör Und Gll10N Gll20N

    Abbildung unten gezeigt WIRING mit Zubehör und GLL10N GLL20N Vor der Installation der elektrischen Feld S y s t e m s t e u e r u n g V M F - E 4 , d a s...
  • Seite 37: Anomalías De Funcionamiento

    Si se realizan mediciones en la unidad se deben, antes de realizar las opera- A C U M U L A C I Ó N DESCRIPCIÓN GLL10N (600x600) de mandos VMF-E4 (configuración ventilación han sido estudiados para GLL20N (840x840) "Master") permite conectar el fan coil obtener la mejor distribución posible...
  • Seite 38 Posición de las aletas (GLL10N) Para el funcionamiento en calefacción Para el funcionamiento en enfriamiento Con las aletas cerradas se permite la se aconseja una apertura de las ale- se aconseja una apertura de las ale- ventilación. tas de 20°, indicada con una raya en tas de 10°, indicada con una raya en...
  • Seite 39: Instalación

    En la sección lateral de los deflectores cionamiento correcto de las mismas (GLL10N) se especifican las posiciones (en este manual se los llamará gené- de apertura para lograr un funciona- ricamente "personal con competencia miento correcto del aparato en calor técnica específica").
  • Seite 40 ángulo del marco chándola a la bisagra en el marco. con el logotipo AERMEC debe coinci- - Vuelva a cerrar la tapa del bornero - Vuelva a cerrar la rejilla de aspiración dir con el ángulo de la caja eléctrica eléctrico.
  • Seite 41 INSTALACIÓN Y SUSTITUCIÓN DEL FILTRO "GLL10N" PERICOLO: Togliere tensione prima d’iniziare le operazioni di pulizia del filtro e/o dell’unità. DANGER: Switch off power supply before cleaning filter and/or unit. DANGER: Couper la tension avant de commencer les opérations de nettoyage du filtre et/ou de l'unité.
  • Seite 42 - Vuelva a montar todo siguiendo el posición de montaje, el ángulo del marco. procedimiento inverso al desmontaje. marco con el logotipo AERMEC debe - Vuelva a cerrar la rejilla de aspiración coincidir con el ángulo de la caja y enrosque los dos trinquetes (en el •...
  • Seite 43 INSTALACIÓN Y SUSTITUCIÓN DEL FILTRO "GLL20N" PERICOLO: Togliere tensione prima d’iniziare le operazioni di pulizia del filtro e/o dell’unità. DANGER: Switch off power supply before cleaning filter and/or unit. DANGER: Couper la tension avant de commencer les opérations de nettoyage du filtre et/ou de l'unité. GEFAHR: Vor der Reinigung des Filters und/oder des Gerätes die Strom versorgung abschalten.
  • Seite 44 CONEXIONES ELÉCTRICAS CON LOS ACCESORIOS GLL10N y GLL20N Antes de instalar la caja eléctrica, de supervisión, el cable de la red TTL controlar la configuración de los Dip- y los cables de las sondas y de las switch de la tarjeta electrónica para...
  • Seite 45 DATI DIMENSIONALI • DIMENSIONS • DONNÉES DES LES DIMENSIONS • ABMESSUNGEN • DATOS DIMENSIONALES [mm] GLL20N GLL10N AGLL10/20NIJ 07/11 - 4528566_00...
  • Seite 46 SCHEMI ELETTRICI • WIRING DIAGRAMS • SCHEMAS ELECTRIQUES • SCHALTPLÄNE • ESQUEMAS ELÉCTRICOS LEGENDA • READING KEY • LEGENDE • LEGENDE • LEYENDA AL = Supply Bomba de desagüe de condensado = Componenti non forniti = Alimentatore Components not supplied MV = Motore ventilatore •...
  • Seite 47 SCHEMI ELETTRICI • WIRING DIAGRAMS • SCHEMAS ELECTRIQUES • SCHALTPLÄNE • ESQUEMAS ELÉCTRICOS 230V 50Hz GLL10N / GLL20N WMF-SW1 TX/RX GND-TTL MODE TX/RX 1 2 3 4 1 2 3 4 VHL1 VHL20 VHL2 VHL22 Dis.4818570_03 RXLE ATTENZIONE con RXLE: non utilizzare il collegamento V1, ma solo i collegamenti V2, V3 e V4.
  • Seite 48 SCHEMI ELETTRICI • WIRING DIAGRAMS • SCHEMAS ELECTRIQUES • SCHALTPLÄNE • ESQUEMAS ELÉCTRICOS 230V 50Hz GLL10N / GLL20N WMF-SW1 TX/RX GND-TTL MODE TX/RX 1 2 3 4 1 2 3 4 VHL1 VHL20 VHL2 VHL22 Dis.4818571_03 FCL_VL RXLE ATTENZIONE con RXLE: non utilizzare il collegamento V1, ma solo i collegamenti V2, V3 e V4.
  • Seite 50 AERMEC S.p.A. si riserva la facoltà di apportare in qualsiasi momento tutte le modifiche ritenute necessarie per il miglioramento del prodotto. Les données mentionnées dans ce manuel ne constituent aucun engagement de notre part. Aermec S.p.A. se réserve le droit de modifier à tous moments les données considérées nécessaires à...

Diese Anleitung auch für:

Gll20n

Inhaltsverzeichnis