Herunterladen Inhalt Inhalt Diese Seite drucken
Inhaltsverzeichnis

Werbung

Verfügbare Sprachen

Verfügbare Sprachen

2.1 CH SoundBar with Wireless Subwoofer
Model: HS212F
USER MANUAL
Before using the sound bar, please read this manual
thoroughly and retain it for future reference.
EN
FR
DE
PT

Werbung

Inhaltsverzeichnis
loading

Inhaltszusammenfassung für Hisense HS212F

  • Seite 1 2.1 CH SoundBar with Wireless Subwoofer Model: HS212F USER MANUAL Before using the sound bar, please read this manual thoroughly and retain it for future reference.
  • Seite 2: Inhaltsverzeichnis

    Contents Important Safety Instructions Safety ......................................3 Warning.......................................4 What’s in the Box Identifying the Parts Main Unit ....................................6 Wireless Subwoofer ................................6 Remote Control..................................7 Instructions Prepare the Remote Control..............................7 Replace the Remote Control Battery..........................7 Placement and Mounting..............................8 Wall Mounting (if using option-B) .............................8 Connections Connect to OPTICAL Socket ...............................9 Connect to AUX Socket ...............................9...
  • Seite 3: Important Safety Instructions

    Important Safety Instructions C AUT IO N RISK OF ELECTRIC SHOCK DO NOT OPEN AV IS 10 Protect the power cord from being walked on or pinched particularly at plugs, convenience RISQUE DE CHOC receptacles, and the point where they exit ÉLECTRIQUE NE PAS PUVRIR from the apparatus.
  • Seite 4: Warning

    • Before operating this unit, check the voltage of this unit to see if it is identical to Hereby, Hisense International the voltage of your local power supply. Co., Ltd declares that the 2.1 channel • Do not place this unit close to strong magnetic...
  • Seite 5: What's In The Box

    What’s in the Box Main Unit Remote Control / Wireless Subwoofer AAA Batteries x 2 AC Power Cord Optical Cable HDMI Cable Wall Mounting Kit User Manual/Quick Start Guide •...
  • Seite 6: Identifying The Parts

    Identifying the Parts Main Unit 1 Display Window 7 AC IN Socket Show the current status. Connect to the power supply. 2 Remote Control Sensor 8 USB Socket Receive signal from the remote control. Insert the USB device to play music. 9 OPTICAL Socket (ON/OFF) Button Switch the unit between ON and STANDBY mode.
  • Seite 7: Remote Control

    Remote Control Switch the unit between ON and STANDBY mode. (SOURCE) Select the play mode. 3 SURR Adjust the surround ON/OFF. (BT) Select the Bluetooth mode. 5 EQ Select MUSIC/MOVIE/NEWS/SPORT/NIGHT Skip to previous/next track in BT/USB mode. 7 VOL+/VOL- Increase/decrease the volume level. Play/pause/resume playback in BT/USB mode.
  • Seite 8: Placement And Mounting

    Placement and Mounting Placement A If your TV is placed on a table, you can place the unit on the table directly in front of the TV stand, centered with the TV screen. B If your TV is attached to a wall, you can mount the unit on the wall directly below the TV screen.
  • Seite 9: Connections

    Connections Connect to OPTICAL Socket Remove the protective cap of the OPTICAL socket, then connect an OPTICAL cable to the TV’s OPTICAL OUT socket and the OPTICAL socket on the unit. Connect to AUX Socket A Use a RCA to 3.5mm audio cable to connect the TV’s audio output sockets to the AUX socket on the unit.
  • Seite 10: Connect To Coaxial Socket

    Connect to COAXIAL Socket • You can use the COAXIAL cable to connect the TV's COAXIAL OUT socket and COAXIAL socket on the unit. Tip: The unit may not be able to decode all digital audio formats from the input source. In this case, the unit will mute.
  • Seite 11: Basic Operation

    The Pair indicator on the subwoofer will rapidly sequentially. While in STANDBY mode, the LED blink. is in solid red. 2 The Pair indicator on the subwoofer will become solid when successful. The unit automatically turns to STANDBY mode 3 If the Pair indicator still keeps blinking, repeat after about 15 minutes if the TV or the external step 1-2.
  • Seite 12: Optical / Coaxial / Hdmi Arc / Aux Operation

    "Pairing" from the unit. 2 Press the button repeatedly on the unit or 3 Select “Hisense HS212F ” in the pairing list. After on the remote control to select the OPTICAL, successful pairing, you will hear "Paired" from COAXIAL, HDMI ARC, BT, USB, AUX mode.
  • Seite 13: Usb Operation

    • Insert the battery with its polarities (+/-) USB Operation aligned as indicated. • Replace the battery. 1 Insert the USB device. • Aim the remote control directly at the sensor on the front of the unit. No sound Increase the volume. Press VOL + on the remote control or on the soundbar.
  • Seite 14: Remote Control

    Model Name HS212F Soundbar Power Supply AC100-240V 50/60Hz Power Consumption Standby Power ≤ 0.5 W USB port for playback 0.5A USB Compatibility Hi-Speed USB (2.0) / FAT32 32G (max) , MP3/WAV/WMA Dimension (WxDxH) 38 x 2.17 x 3.35 inches (960 x 55 x 85.08mm ) Net weight 3.79 lbs (1.72kg)
  • Seite 15 Modèle : HS212F MANUEL DE L'UTILISATEUR Avant d'utiliser la barre de son, veuillez lire attentivement ce manuel et le conserver pour référence ultérieure.
  • Seite 16 Table des matières Consignes de sécurité Sécurité .......................................3 Avertissement ...................................4 Contenu de l’emballage Unité principale ..................................6 ..................................6 Télécommande ..................................7 Instructions Préparer la télécommande ..............................7 Remplacer la pile de la télécommande ..........................7 Placement et montage .................................8 Support mural (si vous utilisez l’option-B) ........................8 Connexions Connexion à...
  • Seite 17: Consignes De Sécurité

    Consignes de sécurité C AU TION pas dans votre prise murale, consultez un RISK OF ELECTRIC SHOCK électricien pour le remplacement de la prise DO NOT OPEN secteur inutile. 10 Protégez le cordon d’alimentation de tout piétinement et empêchez qu’il soit pincé, et plus particulièrement au niveau des prises de courant et de l’endroit où...
  • Seite 18: Avertissement

    • Si un objet solide ou du liquide tombe dans le Par la présente, Hisense International Co., Ltd déclare que la barre de son 2.1 CH avec subwoofer sans l est marche. conforme aux exigences essentielles et aux autres •...
  • Seite 19: Contenu De L'emballage

    Contenu de l’emballage Unité principale Télécommande / Piles × 2 Câble optique Cordon d’alimentation CA × 2 Câble HDMI Kit du support mural Manuel d’utilisation / Guide de démarrage rapide •...
  • Seite 20: Unité Principale

    Unité principale 7 Prise alimentation CA Permet le branchement à l’alimentation électrique. 8 Prise USB 2 Capteur de télécommande Permet d’insérer un périphérique USB pour écouter Permet de recevoir le signal de la télécommande. de la musique. Bouton (MARCHE/ARRÊT) 9 Prise OPTICAL Permet de commuter l’appareil entre le mode Permet de se connecter à...
  • Seite 21: Préparer La Télécommande

    Télécommande Permet de commuter l’appareil entre le mode MARCHE et le mode VEILLE. (SOURCE) Sélectionner le mode de lecture. SURR Permet d’activer/désactiver le son Surround. (BT) Sélectionner le mode Bluetooth. ACTUALITÉS /SPORT/NUIT. Passer à la piste précédente/suivante en mode BT/USB. VOL+/VOL- Permet d’augmenter/diminuer le volume.
  • Seite 22: Placement Et Montage

    Placement et montage Position A Si votre téléviseur est placé sur une table, vous pouvez placer l’appareil sur la table directement devant le support de téléviseur, au centre de l’écran du téléviseur. installer l’appareil sur le mur directement sous l’écran du téléviseur.
  • Seite 23: Connexions

    Connexions Connexion à la prise OPTICAL Retirez le capuchon protecteur de la prise OPTICAL, puis connectez un câble OPTIQUE à la prise OPTICAL OUT (SORTIE OPTIQUE) de votre téléviseur, puis connectez le câble à la prise OPTICAL de l’unité. Connexion à la prise AUX inclus) pour connecter la prise de sortie audio du téléviseur et la prise AUX de l’appareil.
  • Seite 24: Connexion À La Prise Coaxial

    Connexion à la prise COAXIAL • Vous pouvez également utiliser le câble COAXIAL (non inclus) pour connecter la prise COAXIAL OUT (SORTIE COAXIALE) du téléviseur et la prise COAXIALE de l’appareil. Conseil : L’appareil pourrait ne pas être en mesure de décoder tous les formats audio numériques fournis par la source d’entrée.
  • Seite 25: Fonctionnement De Base

    REMARQUE : Fonction d’arrêt automatique • Le subwoofer doit se trouver à moins de 6 m de Après environ 15 minutes, l’appareil passe la barre de son dans une zone dégagée (le plus automatiquement en mode VEILLE si le téléviseur ou près sera le mieux).
  • Seite 26: Fonctionnement Optique / Coaxial / Hdmi Arc / Aux

    « Pairing » [Association]. 4 Appuyez sur la touche VOL +/- pour régler le 3 Sélectionnez « Hisense HS212F » dans la liste volume comme il vous convient. d’association. Lorsque l’association est réussie, Conseil : l’appareil annoncera «...
  • Seite 27: Fonctionnement Usb

    1 Associez votre appareil avec le lecteur. • Appuyez sur le bouton de VEILLE pour allumer 2 Lisez la musique stockée sur votre appareil (s’il est l’appareil. compatible avec la norme A2DP). La télécommande ne fonctionne pas 3 Utilisez la télécommande fournie pour contrôler la •...
  • Seite 28: Nom Du Modèle

    Nom du modèle HS212F Barre de son Alimentation électrique CA 100-240 V ~ 50/60 Hz Consommation électrique 15 W Énergie en mode veille ≤ 0,5 W Port USB pour la lecture 0,5 A Compatibilité USB USB haute vitesse (2.0) / FAT32...
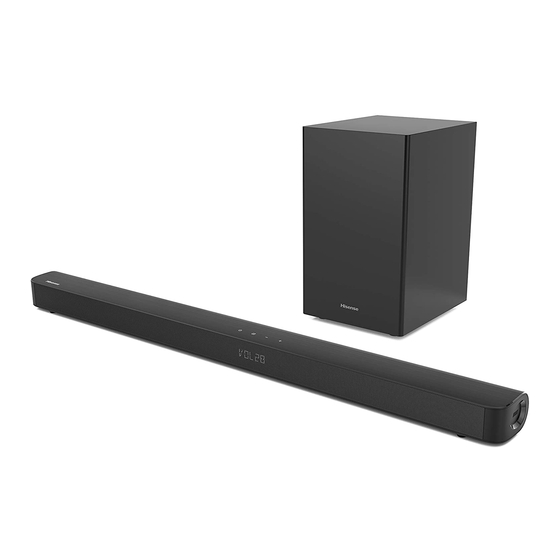
  • Seite 29: Kanal Soundbar Mit Drahtlos-Subwoofer Modell: Hs212F

    2.1-Kanal Soundbar mit Drahtlos-Subwoofer Modell: HS212F BENUTZERHANDBUCH Bevor Sie die Soundbar verwenden, lesen Sie bitte dieses Handbuch gründlich durch und bewahren Sie es zum späteren Nachschlagen auf.
  • Seite 30 Inhalt Wichtige Sicherheitshinweise Sicherheit....................................3 Warnung .....................................4 Lieferumfang Bedienelemente und Funktionen Soundbar ....................................6 Drahtlos-Subwoofer ................................6 Fernbedienung ..................................7 Bedienungshinweise Benutzung der Fernbedienung ............................7 Batterien der Fernbedienung austauschen ........................7 Aufstellung und Montage ..............................8 Wandmontage (Option B) ..............................8 Anschlüsse Optischer Anschluss ................................9 AUX-Anschluss ..................................9 HDMI (ARC)-Anschluss ................................9 Koaxialanschluss ...................................
  • Seite 31: Wichtige Sicherheitshinweise

    Wichtige Sicherheitshinweise nicht in Ihre Steckdose passt, wenden Sie sich C AUT IO N an einen Elektriker, um die veraltete Steckdose RISK OF ELECTRIC SHOCK auszutauschen. DO NOT OPEN 10 Schützen Sie das Netzkabel davor, dass darauf getreten oder es eingeklemmt wird, VO RS ICH T insbesondere an den Steckern und an der STROMSCHLAGGEFAHR...
  • Seite 32: Warnung

    Produkt einem umweltgerechten oder Receiver. Recycling zuführen. • Wenn Gegenstände oder Flüssigkeiten in das Hiermit erklärt Hisense International System eingedrungen sind, ziehen Sie den Co., Ltd., dass die 2.1-Kanal Soundbar Netzstecker und lassen Sie das System von mit Drahtlos-Subwoofer den grundlegenden Anforderungen und anderen weiter betreiben.
  • Seite 33: Lieferumfang

    Lieferumfang Soundbar Fernbedienung / 2 × AAA-Batterien Drahtlos-Subwoofer 2 × Netzkabel Optisches Kabel HDMI-Kabel Wandmontage-Set Benutzerhandbuch / Kurzanleitung • Design und technische Daten können ohne vorherige Ankündigung geändert werden.
  • Seite 34: Bedienelemente Und Funktionen

    Bedienelemente und Funktionen Soundbar 7 Netzeingang 1 Display Hier schließen Sie das Gerät am Stromnetz an. Zeigt den aktuellen Status an. 8 USB-Port 2 Sensor für die Fernbedienung Hier schließen Sie ein USB-Gerät zur Empfängt Signale von der Fernbedienung. Musikwiedergabe an. (EIN/AUS) 9 Optischer Eingang Hier schalten Sie das Gerät ein und aus oder in...
  • Seite 35: Fernbedienung

    Fernbedienung Hier schalten Sie das Gerät ein und in den STANDBY- Modus aus. (QUELLE) Hier wählen Sie die Eingangsquelle. SURR Hier schalten Sie die Surround-Funktion ein und aus. (BT) Hier wählen Sie den Bluetooth-Modus. NACHRICHTEN/SPORT/NACHT. Hier springen Sie im BT/USB-Modus zum vorherigen bzw.
  • Seite 36: Aufstellung Und Montage

    Aufstellung und Montage Aufstellung A Wenn Ihr Fernseher auf einem Tisch steht, können Sie das Gerät auf dem Tisch direkt vor dem TV-Standfuß, mittig unter dem Bildschirm, aufstellen. B Wenn Ihr Fernseher an der Wand befestigt ist, können Sie das Gerät direkt unter dem Bildschirm an der Wand montieren.
  • Seite 37: Anschlüsse

    Anschlüsse Optischer Anschluss Entfernen Sie die Schutzkappe des optischen Anschlusses und schließen Sie ein Optisches Kabel am optischen Ausgang des Fernsehers und am Optischen Eingang des Geräts an. AUX-Anschluss A Verwenden Sie ein Cinch (RCA)-zu-3,5-mm- Audiokabel (nicht im Lieferumfang enthalten), um den Audioausgang des Fernsehers am AUX-Anschluss des Geräts anzuschließen.
  • Seite 38: Koaxialanschluss

    Koaxialanschluss • Sie können ein Koaxialkabel (nicht im Lieferumfang enthalten) verwenden, um den Koaxialausgang des Fernsehers am Koaxialeingang des Geräts anzuschließen. Tipp: Das Gerät ist möglicherweise nicht in der Lage, alle digitalen Audioformate von der Eingangsquelle zu decodieren. In diesem Fall schaltet das Gerät stumm. Dies ist KEIN Defekt.
  • Seite 39: Allgemeine Bedienungshinweise

    3 Wenn die Kopplungsanzeige weiterhin blinkt, Automatische Abschaltfunktion wiederholen Sie die Schritte 1 - 2. Das Gerät schaltet nach ca. 15 Minuten HINWEISE: automatisch in den STANDBY-Modus, wenn der • Der Subwoofer muss sich innerhalb von 6 m Fernseher oder das externe Gerät getrennt oder ausgeschaltet wird.
  • Seite 40: Wiedergabe Über Optischen, Koaxial-, Hdmi-Arc- Oder Aux-Eingang Wählen

    Im Display wird „PAIR“ angezeigt und Sie hören die Ansage „Pairing“ vom Gerät. 1 Vergewissern Sie sich, dass das Gerät am 3 Wählen Sie „Hisense HS212F“ in der Fernseher oder Audiogerät angeschlossen ist. Kopplungsliste. Nach erfolgreicher Kopplung 2 Drücken Sie wiederholt (QUELLE) auf dem hören Sie die Ansage „Paired“...
  • Seite 41: Usb-Wiedergabe

    Um zum vorherigen bzw. nächsten Titel zu Fernbedienung funktioniert nicht springen, drücken Sie auf der • Bevor Sie eine Taste der Wiedergabesteuerung Fernbedienung. drücken, wählen Sie zunächst die korrekte Quelle. • Verringern Sie den Abstand zwischen der USB-Wiedergabe Fernbedienung und dem Gerät. •...
  • Seite 42: Technische Daten

    Technische Daten Modell HS212F Soundbar Stromversorgung 100 - 240 V/AC, 50/60 Hz Leistungsaufnahme 15 W Standby-Leistungsaufnahme ≤ 0,5 W USB-Port zur Wiedergabe 0,5 A USB-Kompatibilität Hi-Speed USB (2.0) / FAT32 Unterstützte Dateiformate zur USB- 32 GB (max) , MP3/WAV/WMA Wiedergabe Abmessungen (B ×...
  • Seite 43 Barra de som de 2.1 canais com Subwoofer Sem Fios Modelo: HS212F MANUAL DO UTILIZADOR Antes de utilizar a soundbar, leia cuidadosamente este manual e guarde para futuras consultas.
  • Seite 44 Conteúdo Instruções de segurança importantes Segurança ....................................3 Aviso ......................................4 Conteúdos da embalagem Soundbar ....................................6 ................................6 Controlo remoto ..................................7 Instruções Preparar o controlo remoto ..............................7 Substituir as pilhas do controlo remoto .........................7 Colocação e montagem ...............................8 Montagem na parede (se utilizar a opção B) ........................8 Ligações Ligar a tomada OPTICAL ...............................9 Ligar a uma tomada AUX ..............................9...
  • Seite 45: Instruções De Segurança Importantes

    Instruções de segurança importantes cha fornecida não encaixar na sua tomada C AUT IO N elétrica, consulte um eletricista para trocar a RISK OF ELECTRIC SHOCK tomada elétrica obsoleta. DO NOT OPEN 10 Proteja o cabo elétrico de ser pisado ou dobrado, C UI DAD O principalmente nas chas, recetáculos de conveniência e no ponto de onde saem do...
  • Seite 46: Aviso

    • Se qualquer objeto sólido ou liquido cair no A Hisense International Co., Ltd declara sistema, desligue o sistema e leve para ser desta forma que a barra de som de 2.1 veri cado por um técnico quali cado antes de continuar a utilizar.
  • Seite 47: Conteúdos Da Embalagem

    Conteúdos da embalagem Soundbar Controlo Remoto / 2 × pilhas AAA Cabo ótico 2 × Cabos de alimentação CA Cabo HDMI Kit para montagem na parede Manual do utilizador / Guia de início rápido •...
  • Seite 48: Soundbar

    Soundbar 7 Tomada de entrada CA (AC IN) 1 Ecrã de Exibição Mostra o estado atual. Ligar à corrente elétrica. 2 Sensor do controlo remoto 8 Tomada USB Sinal de receção do controlo remoto. Ligar o dispositivo USB para reproduzir música. 3 Tecla (LIGAR/DESLIGAR) 9 Tomada OPTICAL...
  • Seite 49: Controlo Remoto

    Controlo remoto Ligar o aparelho ou colocar em modo STANDBY. (ENTRADA) Seleciona o modo de reprodução. SURR Ajustar LIGAR/DESLIGAR o som surround. (BT) Seleciona modo Bluetooth. Selecionar o efeito sonoro MÚSICA / FILME / NOTÍCIAS / ESPORTE / NOITE. Saltar para a faixa anterior/seguinte no modo BT/ USB.
  • Seite 50: Colocação E Montagem

    Colocação e montagem Colocação A Se a sua televisão estiver em cima de uma mesa, pode colocar o equipamento na mesa diretamente em frente do suporte da televisão, centrado com o ecrã da televisão. o equipamento na parede diretamente por baixo do ecrã...
  • Seite 51: Ligações

    Ligações Ligar a tomada OPTICAL Remova a capa protetora da tomada OPTICAL e ligue um cabo ÓTICO à tomada OPTICAL OUT (SAÍDA ÓTICA) e à tomada OPTICAL no equipamento. Ligar a uma tomada AUX A Utilize um cabo áudio de RCA para 3,5 mm (não incluído) para ligar as tomadas de saída áudio da televisão e a tomada AUX no equipamento.
  • Seite 52: Ligar A Tomada Coaxial

    Ligar a tomada COAXIAL • Também pode utilizar o cabo COAXIAL (não incluído) para ligar à tomada COAXIAL OUT (SAÍDA COAXIAL) da TV e à tomada COAXIAL no aparelho. Dica: O aparelho pode não conseguir da fonte de entrada. Neste caso, o aparelho irá fonte de entrada (por ex.
  • Seite 53: Funcionamento Básico

    NOTA: Função desligar automático • O subwoofer deve estar a 6 metros da barra de som, numa área aberta (quanto mais modo STANDBY após cerca de 15 se a TV ou o próximo melhor). equipamento externo estiverem desligados. • Remova quaisquer objetos entre o subwoofer •...
  • Seite 54: Funcionamento Ótico/Coaxial/Hdmi Arc/Aux

    2 Ative o seu dispositivo Bluetooth e selecione o Funcionamento ÓTICO/COAXIAL/ modo de pesquisa. “Hisense HS212F” irá surgir na HDMI ARC/AUX lista de dispositivos Bluetooth. Se não conseguir encontrar o aparelho, mantenha premida a tecla no controlo remoto para TV ou ao equipamento áudio.
  • Seite 55: Funcionamento Usb

    conforme indicado. Funcionamento USB • Troque as pilhas. • Direcione o controlo remoto diretamente para o 1 Insira um dispositivo USB. sensor na frente do equipamento. Sem som Aumentar o volume. Prima VOL+ no controlo remoto ou + no equipamento. Prima (MUDO) no controlo remoto para garantir que a soundbar não está...
  • Seite 56 Nome do modelo HS212F Barra de som Fonte de alimentação CA de 100-240 V~50/60 Hz Consumo elétrico 15 W Potência em standby ≤ 0,5 W Porta USB para reprodução 0,5 A Compatibilidade USB Hi-Speed USB (2.0) / FAT32 Suporte de reprodução USB / formatos de 32 GB (max) , MP3/WAV/WMA Dimensões (L×A×P)
  • Seite 57 HS212F...

Inhaltsverzeichnis