Herunterladen Inhalt Inhalt Diese Seite drucken
Thermo Scientific GLD Pro Bedienungsanleitung
Vorschau ausblenden Andere Handbücher für GLD Pro:

Werbung

Verfügbare Sprachen

Verfügbare Sprachen

GLD Pro Gas Leak Detector
User Manual
Version 4
BR21603
October 2020

Werbung

Inhaltsverzeichnis

Fehlerbehebung

loading

Inhaltszusammenfassung für Thermo Scientific GLD Pro

  • Seite 1 GLD Pro Gas Leak Detector User Manual Version 4 BR21603 October 2020...
  • Seite 3: Inhaltsverzeichnis

    Contents Introduction Battery charging Powering up Zeroing the unit Prior to operation Detecting leaks Specifications Maintenance Troubleshooting 10.0 Technology 11.0 Interpretation of results 12.0 Back label explanation 13.0 Case specifications 14.0 Service...
  • Seite 4: Introduction

    Operating instructions 1.0 Introduction The Thermo Scientific leak detector is specifically designed for use with gas ™ chromatography (GC) systems. It detects minute leaks of any gas with a thermal conductivity different from air. The reference gas inlet (Figure 1) draws in ambient air for comparison to air drawn into the sample probe.
  • Seite 5: Battery Charging

    2.0 Battery charging The leak detector should be fully charged prior to use. Only use the AC adaptor provided. To charge the battery, first install the correct plug for your country’s AC outlets onto the provided AC adaptor. Insert the AC adaptor into an electrical outlet, and then insert the barrel plug on the other end of the AC adaptor into the connector on the bottom of the leak detector unit.
  • Seite 6: Powering Up

    3.0 Powering up Depress and hold the power button (Figure 1) until the unit responds with the wake-up mode. The leak detector will run through a self calibration sequence for approximately 15 seconds. During this time DO NOT attempt to zero the unit. 4.0 Zeroing the unit After the LED lights stop flashing, the unit is ready for use.
  • Seite 7: Detecting Leaks

    6.0 Detecting leaks Slowly move the probe tip around fittings and other potential leak sources. If the leak detector senses a gas other than air, the LED bar graph will begin to light, with more lights indicating a more significant leak. On the 3rd red or 2nd yellow LED, an audible tone will begin to beep.
  • Seite 8: Maintenance

    8.0 Maintenance Avoid spilling liquids onto the unit, or it may malfunction. If a liquid is spilled onto the unit, turn off the power immediately, remove heavy liquids with a dry towel, and let the unit sit until the liquid dries. Dust and debris can enter the probe tip of the leak detector and, over time, can clog the smallbore tubing inside the unit.
  • Seite 9: Technology

    10.0 Technology The leak detector measurement is based on thermal conductivity comparisons between the probe air and a reference air. The device employs a dual thermistor technology that measures the ratio of [probe]:[reference] heat exchange values and displays the results on an LED scale (Figure 4).
  • Seite 10: Interpretation Of Results

    11.0 Interpretation of results Figure 5 illustrates the leak detector’s LED light response range. The greater the number of red or yellow LED lights lit correlates in general to the size of the leak. NOTE: The leak detector is not a quantitative device, rather it is designed to detect leaks in gas line connections commonly associated with laboratory equipment.
  • Seite 11: Back Label Explanation

    12.0 Back label explanation 1. Product name. 2. Product catalog number. 3. Product serial number. 4. Passed California Energy Commission (CEC) Battery Charging System (BCS) testing. 5. CE mark: see Declaration of Conformity 6. KC mark - Korea Certification 7. Electrical parameters. 8.
  • Seite 12: Case Specifications

    13.0 Case specifications 14.0 Service The Thermo Scientific leak detector carries a 1-year limited warranty from time of purchase. Please have the leak detector serial number available when calling Thermo Fisher Scientific with any concerns you may have. Additional charges may apply if the warranty is expired or the damage is due to misuse.
  • Seite 15 Inhaltsverzeichnis Einführung Akku-Aufladung Einschalten Nullabgleich des Geräts Vor der Inbetriebnahme Erkennung von Lecks Technische Daten Wartung Fehlersuche 10.0 Technologie 11.0 Interpretation der Ergebnisse 12.0 Erklärung des Labels auf der Rückseite 13.0 Spezifikationen des Gehäuses 14.0 Service...
  • Seite 16: Einführung

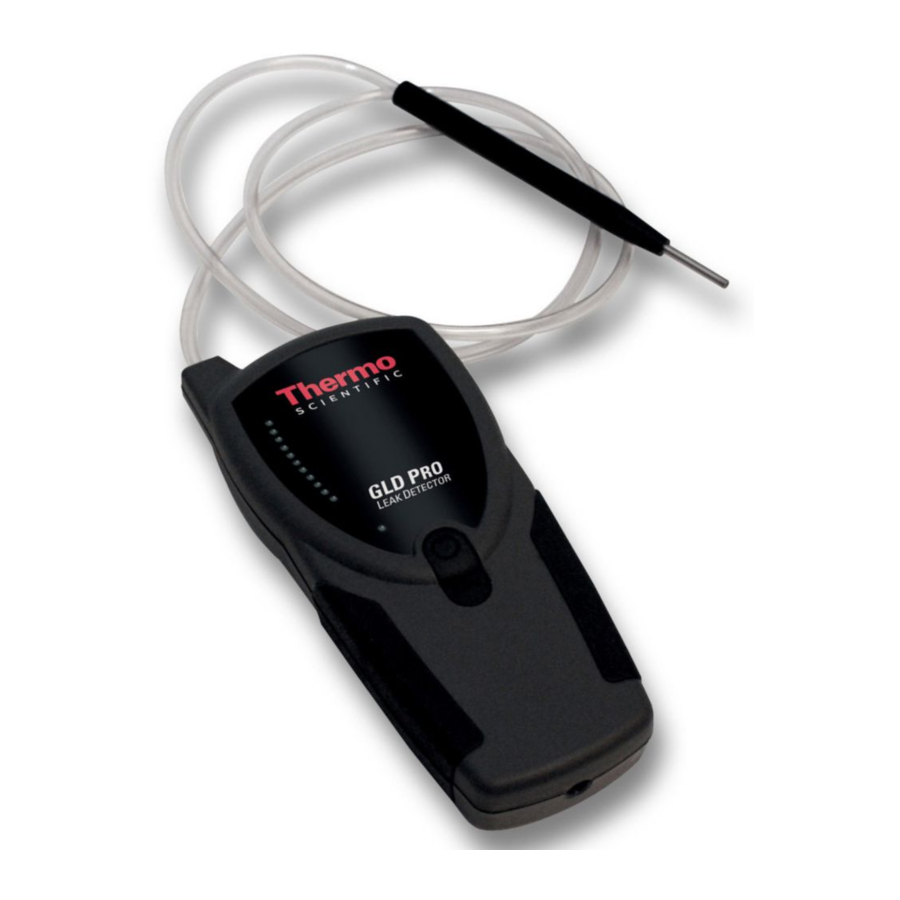
    Betriebsanleitung 1.0 Einführung Der Lecksucher von Thermo Scientific wurde speziell zur Verwendung mit gaschromatographischen (GC) Systemen entwickelt. Er detektiert kleine Lecks von Gasen, die eine andere Wärmeleitfähigkeit als Luft aufweisen. Der Referenzgas-Einlass (Abbildung 1) saugt Umgebungsluft an, die dann mit dem Gas in der Probensonde verglichen wird.
  • Seite 17: Akku-Aufladung

    2.0 Akku-Aufladung Der Lecksucher sollte vor der Verwendung voll aufgeladen sein. Verwenden Sie dazu bitte nur den AC-Adapter oder das USB-Kabel, die beide mit dem Gerät geliefert werden. Um den Akku mithilfe des AC-Adapters aufzuladen, befestigen Sie bitte zunächst den passenden Stecker für die Netzsteckdosen Ihres Landes am mitgelieferten AC-Adapter.
  • Seite 18: Einschalten

    3.0 Einschalten Drücken Sie den Betriebsschalter (Abbildung 1) und halten Sie ihn solange gedrückt, bis das Gerät eine etwa 15 Sekunden dauernde Startsequenz einleitet; während dieser Zeit blinken die roten und gelben LEDs. Während der Startsequenz darf das Gerät NICHT genullt werden.
  • Seite 19: Erkennung Von Lecks

    Der Lecksucher spricht auf praktisch jedes Gas an. Lösemitteldämpfe, Abgas aus Splitausgängen und sogar starke Luftströme um die Sonde oder den Referenzgas-Einlass können Instabilität verursachen oder falsche positive Messwerte liefern. Achten Sie darauf, dass bei der Prüfung auf Lecks keine Atemluft in den Referenzeinlass gelangt und blockieren oder decken Sie ihn nicht mit der Hand ab.
  • Seite 20: Technische Daten

    7.0 Technische Daten Nennleistung: 5 Volt DC, 1 A (AC-Adapter und USB-Ladekabel werden mitgeliefert) Akkuleistung: 12 Betriebsstunden Umgebungstemperatur: 10-37 °C (50-98,6 °F) Luftfeuchtigkeit: 0–97% Gewährleistung: 1 Jahr Zertifizierungen: CE (EU, Korea, Japan, Australien); CSA/UL-geprüft, nicht gelistet Konformität: WEEE, CEC, China RoHS 2 Höhe: bis zu 2000 m über dem mittleren Meeresspiegel Verschmutzungsgrad:...
  • Seite 21: Fehlersuche

    Angaben über Reparatur- oder Servicebetriebe* für Ihr Gerät finden Sie am Ende dieses Dokuments. Abbildung 2: Abgeschraubte und teilweise Abbildung 3: Entfernte Verschlusskappe, entfernte Verschlusskappe zur Reinigung freigelegte Bürste der Sondenspitze 9.0 Fehlersuche Störung Mögliche Ursache Vorgeschlagene Lösung Sonde verstopft Sondenspitze reinigen, um etwaige Verunreinigungen zu Beobachtete Änderung der...
  • Seite 22: Technologie

    10.0 Technologie Siehe Seite 9 11.0 Interpretation der Ergebnisse Abbildung 5 zeigt den Ansprechbereich der LED-Anzeigen des Lecksuchers. Eine größere Anzahl leuchtender roter oder gelber LED-Anzeigen korreliert in der Regel mit einem größeren Leck. HINWEIS: Der Lecksucher ist keine quantitative Vorrichtung, sondern dient lediglich zur Erkennung von Lecks an Gasleitungsanschlüssen, die oft an Laborgeräten zu finden sind.
  • Seite 23 Spitzenabweichung Das als Spitzenabweichung bezeichnete Phänomen tritt auf, wenn bei schneller Bewegung der Sonde oder des Geräts eine falsche Reaktion der LEDs registriert wird. Die Spitzenabweichung ist charakteristisch für die gesamte Lecksuchtechnik mit zwei Thermistoren und basiert zum großen Teil auf der Ungleichmäßigkeit der Flusszellen. Schütteln oder Kippen des Geräts beeinflusst das Strömungsprofil der Luft, was seinerseits die Geschwindigkeit des Wärmeaustausches beeinflusst.
  • Seite 24: Anmerkungen Auf Der Rückseite

    12.0 Anmerkungen auf der Rückseite 1. Produktbezeichnung. 2. Artikelnummer des Produkts. 3. Seriennummer des Produkts. 4. Prüfung des Batterieladesystems (BCS, Battery Charging System) gemäß Richtlinie der Kalifornischen Energiebehörde (California Energy Commission - CEC) bestanden. 5. CE-Kennzeichen: siehe Konformitätserklärung 6. KC-Kennzeichen - Korea-Zertifizierung 7.
  • Seite 25: Gehäusespezifikationen

    SCHWARZ MIT MT-11030 OBERFLÄCHENSTRUKTUR 14.0 Service Der Lecksucher von Thermo Scientific ist durch eine einjährige Gewährleistung ab dem Zeitpunkt des Kaufes abgedeckt. Bei Anfragen an Thermo Fisher Scientific zu diesem Produkt sollten Sie die Seriennummer Ihres Lecksuchers bereithalten. Die erwartete Lebensdauer des Akkus beträgt zwei Jahre ab dem Zeitpunkt des Kaufes.
  • Seite 27 Contenu du manuel Introduction Recharge de la batterie Mise en marche Mise à zéro Avant l’utilisation Détection des fuites Caractéristiques Entretien Résolution des problèmes 10.0 Technologie 11.0 Interprétation des résultats 12.0 Signification des informations au dos de l’appareil 13.0 Matériaux composant la coque de l’appareil 14.0 Dépannage...
  • Seite 28: Introduction

    Manuel d’utilisation 1.0 Introduction Ce détecteur de fuites de gaz portatif est spécialement conçu pour les besoins de la chromatographie en phase gazeuse (GC). Il peut détecter les micro-fuites de tout gaz dont la conductivité thermique est différente de celle de l’air. Un orifice situé à l’arrière de l’appareil (Figure 1) permet l’introduction d’air ambiant dont la conductivité...
  • Seite 29: Recharge De La Batterie

    2.0 Recharge de la batterie La batterie doit être rechargée avant l’utilisation du détecteur de fuites. Seuls le transformateur ou le câble USB fournis avec l’appareil peuvent être utilisés pour la recharge de la batterie. L’appareil pouvant être utilisé dans différents pays, l’adaptateur secteur approprié...
  • Seite 30: Mise En Marche

    3.0 Mise en marche Sortir la sonde de son logement. Presser et maintenir le bouton Marche/Arrêt/Mise à zéro (Figure 1) jusqu’à la mise en marche de l’appareil. Celui-ci effectue alors un cycle de démarrage qui dure environ 15 secondes durant lesquelles les diodes rouge et jaune clignotent.
  • Seite 31: Détection Des Fuites

    Le détecteur de fuites détecte presque tous les gaz odorants et la plupart des gaz inodores. Des vapeurs de solvants ou même de forts courants d’air circulant près de la sonde ou de l’orifice d’admission d’air, peuvent provoquer une certaine instabilité de l’appareil et une mauvaise interprétation du signal obtenu.
  • Seite 32: Caractéristiques

    7.0 Caractéristiques Alimentation : 5 volts DC, 1 A (chargeur et câble USB fournis) Autonomie : 12 heures en utilisation normale Températures d‘utilisation : 10 - 37°C. Taux d’humidité acceptable à l’utilisation : 0–97% Garantie : 1 an Certifications : CE (UE, Corée, Japon, Australie);...
  • Seite 33: Résolution Des Problèmes

    N’utiliser aucun liquide pour cette opération au risque d’endommager le détecteur. Figure 2: Démontage de l’embout de la Figure 3: Le démontage de l’embout permet sonde. le nettoyage de la brosse-filtre. 9.0 Résolution des problèmes Problème Causes possibles Actions recommandées Sonde bouchée Nettoyer la brosse-filtre de la sonde...
  • Seite 34: Technologie

    10.0 Technologie Regardez à la page 9. 11.0 Interprétation des résultats La Figure 5 explique la signification de l’allumage des diodes de couleur. De façon générale, plus il y a de diodes allumées, plus la fuite est importante. IMPORTANT : Cet appareil ne permet pas des mesures quantitatives mais uniquement de détecter des fuites sur des lignes de gaz, des points de raccordement, des réservoirs.
  • Seite 35 A noter : Le fait de basculer brusquement, retourner ou agiter le détecteur de fuites conduit à l’allumage des diodes. Ce phénomène tient au principe de fonctionnement de l’appareil basé sur l’asymétrie des flux dans les chambres renfermant les thermistances. Des mouvements brusques modifient la circulation de l’air et altèrent les échanges thermiques.
  • Seite 36: Signification Des Informations Au Dos De L'appareil

    12.0 Signification des informations au dos de l’appareil 1. Nom du produit 2. Référence 3. Numéro de série 4. Système de charge de la batterie conforme CEC 5. Marquage CE : voir la Déclaration de Conformité 6. Marquage KC - Certification coréenne 7.
  • Seite 37: Matériaux Composant La Coque De L'appareil

    13.0 Matériaux composant la coque de l’appareil 14.0 Dépannage Le fonctionnement de cet appareil est couvert par une garantie d’un an. En cas de dysfonctionnement, contacter Thermo Fisher Scientific ou votre distributeur habituel et indiquer son numéro de série. La durée de vie de la batterie est de 2 ans à partir de la date d’achat.
  • Seite 39 Indice Introduzione Ricarica della batteria Accensione Azzeramento dell’unità Prima della messa in funzione Rilevamento delle fughe Specifiche Manutenzione Risoluzione dei problemi 10.0 Tecnologia 11.0 Interpretazione dei risultati 12.0 Spiegazione etichetta posteriore 13.0 Specifiche relative alla custodia 14.0 Assistenza...
  • Seite 40: Istruzioni Per Il Funzionamento

    Istruzioni per il funzionamento 1.0 Introduzione Il leak detector elettronico di Thermo Scientific, è stato progettato specificamente per l’utilizzo con i sistemi per gascromatografia (GC). Può rilevare micro-perdite di qualsiasi gas la cui conducibilità termica è diversa da quella dell’aria. Un orifizio situato nella parte posteriore del dispositivo (Figura 1) permette l’ingresso di aria ambientale, e la...
  • Seite 41: Ricarica Della Batteria

    2.0 Ricarica della batteria Il leak detector deve essere completamente carico prima dell’utilizzo. Usare unicamente l’adattatore AC o il cavo USB forniti insieme all’unità. Per caricare la batteria usando l’adattatore AC, per prima cosa montare la spina corretta per la presa di corrente del vostro Paese sull’adattatore AC in dotazione.
  • Seite 42: Accensione

    3.0 Accensione Rimuovere la sonda dal supporto. Tenere premuto il pulsante di accensione (Figura 1) fino all’inizio della sequenza di avvio che dura circa 15 secondi, durante i quali lampeggeranno i LED rosso e giallo. Durante la sequenza di avvio NON provare a eseguire l’azzeramento dell’unità..
  • Seite 43: Rilevamento Delle Fughe

    NOTA: Il leak detector è adatto per quasi ogni tipo di gas. Vapori dei solventi, scarico dello split, e anche forti correnti d’aria intorno alla sonda o all’ingresso di riferimento possono provocare instabilità o falsi positivi. Fare attenzione a non respirare verso l’ingresso di riferimento durante la verifica della presenza di eventuali perdite e a non coprire/bloccare l’ingresso di riferimento con la mano.
  • Seite 44: Specifiche

    7.0 Specifiche Potenza nominale: 5 volt CC, 1 A (fornito con adattatore CA e cavo USB per ricarica) Capacità della batteria: 12 ore di funzionamento Temperatura ambiente: 50 – 98,6 °F (10 – 37 °C) Intervallo di umidità: 0–97% Garanzia: Garanzia di 1 anno Certificazioni: CE (UE, Corea, Giappone, Australia);...
  • Seite 45: Risoluzione Dei Problemi

    Le informazioni relative a dove inviare l’unità in caso di manutenzione o di interventi di assistenza* sono riportate alla fine del presente documento. Figura 2: Cappuccio svitato e parzialmente Figura 3: Cappuccio rimosso, che espone rimosso. lo spazzolino della punta della sonda per la pulizia.
  • Seite 46: Tecnologia

    10.0 Tecnologia Vedi pag. 9. 11.0 Interpretazione dei risultati La Figura 5 mostra l’intervallo di risposta dei LED del leak detector. Un numero maggiore di LED rossi o gialli accesi è correlato, in generale, a una perdita superiore. NOTA: Il leak detector non è...
  • Seite 47 Tip drift Il tip drift è un fenomeno per il quale viene registrata una risposta falsa dei LED quando la sonda o l’unità viene spostata velocemente. Il tip drift è intrinseco in tutti i leak detector provvisti di tecnologia a doppio termistore e si basa, in gran parte, sull’asimmetria delle celle di flusso;...
  • Seite 48: Spiegazione Etichetta Posteriore

    12.0 Spiegazione della targhetta sul retro 1. Nome del prodotto 2. Codice catalogo del prodotto 3. Numero di serie del prodotto 4. Superato il test della Commissione energetica della California (California Energy Commission - CEC) per i sistemi di carica delle batterie (Battery Charging System - BCS) 5.
  • Seite 49: Specifiche Relative Alla Custodia

    13.0 Specifiche relative alla custodia 14.0 Assistenza Il leak detector Restek usufruisce di una garanzia limitata di un anno dal momento dell’acquisto. Quando chiamate Restek per eventuali dubbi, tenete a portata di mano il numero di serie del leak detector. Possono essere applicati costi aggiuntivi se la garanzia è...
  • Seite 52 Find out more at thermofisher.com/gcconsumables For Research Use Only. Not for use in diagnostic procedures. © 2017 Thermo Fisher Scientific Inc. All rights reserved. All trademarks are the property of Thermo Fisher Scientific and its subsidiaries unless otherwise specified. BR21603-EN 1219S_ALL...

Inhaltsverzeichnis