
Verwandte Anleitungen für ZyXEL ES-1552


Inhaltszusammenfassung für ZyXEL ES-1552
-
Seite 1: Inhaltsverzeichnis
Ethernet Switches Quick Start Guide 5/2006 Edition 2 Table of Contents ENGLISH DEUTSCH ESPAÑOL FRANÇAIS ITALIANO РУССКИЙ 繁體中文... -
Seite 3: Desktop Installation
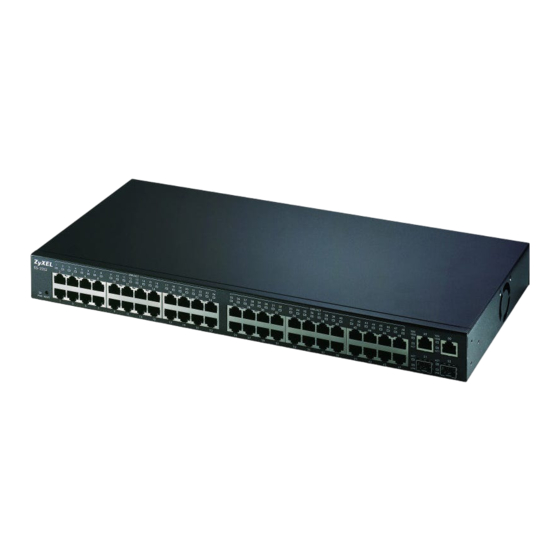
ENGLISH ENGLISH 1 Introduction This Quick Start Guide is for use with all ZyXEL Ethernet switches. Your device may differ from the illustrations below. 2 Installation All switches can be used as a standalone device while some can alternatively be mounted on standard EIA racks. - Seite 4 ENGLISH rubber feet help protect the switch from shock or vibration and ensure space between devices when stacking. 2.2 Rack-mounted Installation 1 Align one bracket with the holes on one side of the switch and secure it with bracket screws smaller than the rack- mounting screws.
-
Seite 5: Hardware Connections
ENGLISH appropriate holes on the rack. Secure the switch to the rack with the rack-mounting screws. 3 Hardware Connections 3.1 Auto-negotiating and Auto-crossover RJ- 45 ports Your switch comes with auto-negotiating, auto-crossover ports. Depending on the model, these ports are either fast Ethernet (10/100 Mbps) or Gigabit (10/100/1000 Mbps) ports. -
Seite 6: Power Connection
ENGLISH 3.2 Network Cables You can use unshielded twisted pair (UTP) or shielded twisted-pair (STP) Ethernet cables for RJ-45 ports. Make sure the cable length between connections does not exceed 100 meters (328 feet). The following table describes the types of network cable used for different connection speeds. - Seite 7 ENGLISH 3.4 Console Port (Managed Switches Only) If your switch has a console port, you can use a terminal emulator for local management. Connect the male 9-pin end of a console cable to the console port of the switch. Connect the female end to a serial port (COM1, COM2 or other COM port) of your computer.
- Seite 8 ENGLISH...
-
Seite 9: Einleitung
DEUTSCH DEUTSCH 1 Einleitung Diese Kurzanleitung dient der Verwendung aller ZyXEL Ethernet-Switche. Das Aussehen ihres Gerätes kann von den unten gezeigten Abbildungen abweichen. 2 Installation Note: Alle Switche können als Einzelgeräte verwendet werden, wobei einige alternativ in 19 Zoll Standardracks montiert werden können. Für eine ausreichende Belüftung sollte vor dem Switch ein... -
Seite 10: Rackmontage
DEUTSCH Freiraum zwischen den Geräten wenn diese übereinander angeordnet werden. 2.2 Rack-Montage 1 Richten Sie die Bügel an den seitlich angeordneten Löchern des Switch aus und sichern Sie diese mit den dafür vorgesehenen Schrauben, die kleiner sind, als die Schrauben die dafür verwendet werden, um das Gerät im Rack zu befestigen. -
Seite 11: Hardware-Anschlüsse
DEUTSCH 2 Nachdem beide Montagebügel angebracht sind, positionieren Sie den Switch im Rack, indem Sie die Löcher der Montage-bügel an den Montagelöchern des Rack ausrichten. Sichern Sie den Switch mit den Rack- Schrauben. 3 Hardware-Anschlüsse 3.1 10Base-T/100Base-TX RJ-45 Ports mit Auto-Negotiating, Auto-Sensing- (MDI/ MDIX)-Funktion Ihr Switch ist mit 10/100/1000 Mbit/s-RJ-45-Ports mit Auto-... -
Seite 12: Stromversorgung
DEUTSCH 3.2 Netzwerkkabel Für RJ-45-Ports können Sie UTP (unshielded twisted-pair)- oder STP (shielded twisted-pair)-Netzwerkkabel verwenden. Achten Sie darauf, dass die Kabellänge zwischen den Anschlüssen weniger als 100 Meter beträgt. Die folgende Tabelle verdeutlicht die für die verschiedenen Geschwindigkeiten verwendeten Netzwerkkabel-typen Table 1 Netzwerkkabeltypen GESCHWINDIGKEIT NETZWERKKABELTYP... - Seite 13 DEUTSCH 3.4 Konsolen-Port (nur managebare Switche) Besitzt Ihr Switch einen Konsolen-Port, so können Sie zu Konfigurationszwecken eine Terminal-Emulation verwenden. Verbinden Sie den männlichen 9-Pin-Stecker eines Konsolenkabels mit dem Konsolen-Port des Switch. Verbinden Sie entsprechend den weiblichen Stecker mit einem seriellen Port (COM1, COM2 oder anderer COM-Port) Ihres Computers.
- Seite 14 DEUTSCH 4 Fehlersuche PROBLEM KORREKTURMASSNAHME Nach Anschluss Stellen Sie sicher, dass das mitgelieferte Stromkabel oder Netzteil mit dem dafür Stromversorgun vorgesehenen Anschluss am Switch, bzw. g leuchtet keine mit der entsprechenden Stromquelle der LEDs verbunden ist. Sollte das Problem weiterhin bestehen, haben Sie möglicherweise ein Hardwareproblem.
-
Seite 15: Español
ESPAÑOL ESPAÑOL 1 Introducción Esta Guía de Instalación Rápida puede usarse con todos los switches Ethernet de ZyXEL. Su equipo puede ser diferentes al de las ilustraciones de abajo. 2 Instalación Note: Todos los switches pueden usarse como dispositivo independiente, mientras que algunos modelos alternativamente pueden ser montados en racks EIA estándares. -
Seite 16: Instalación En Rack
ESPAÑOL de caucho protegen el switch de golpes o vibraciones y crean un espacio entre dispositivos en caso de estacar. 2.2 Instalación en Rack 1 Alinee uno de los anclajes con los agujeros en un lado del switch y fíjelo con los tornillos. Haga lo mismo con el otro anclaje en el otro lado del switch. - Seite 17 ESPAÑOL anclajes con los agujeros del rack. Fije el switch al rack con los tornillos de fijación al rack. 3 Conexiones Hardware 3.1 Puertos 10Base-T/100Base-TX RJ-45 autonegociables, (MDI/MDIX) autodetectables Su switch incorpora puertos RJ-45 10/100/1000 Mbps con auto negociación, lo que permite que el switch detecte la velocidad de transmisión entrante y ajustar automáticamente sin intervención de configuración manual.
-
Seite 18: Conexión De Alimentación
ESPAÑOL 3.2 Cables de red Puede usar cables Ethernet de pares trenzados (UTP) o pares trenzados apantallados (STP) para los puertos RJ-45. Asegúrese de que la longitud de los cables no supera los 100 metros (328 pies). La siguiente tabla describe los tipos de cable usados para las diferentes velocidades de conexión. - Seite 19 ESPAÑOL 3.4 Puerto consola (Solo switches gestionables) Si su switch tiene puerto consola puede usar un emulador de terminal para gestión local. Conecte el extremo macho de 9 pines del cable consola al puerto consola del switch. Conecte el extremo hembra al puerto serie (COM1, COM2 o otro puerto COM) de su ordenador.
-
Seite 20: Solución De Problemas
ESPAÑOL 4 Solución de problemas PROBLEMA ACCIÓN Ningún LED Verifique que el cable de alimentación o está activo y el cable adaptador de alimentación está cable de conectado al conector de alimentación del alimentación switch y a la toma de alimentación está... -
Seite 21: Français
FRANÇAIS FRANÇAIS 1 Introduction Ce Guide de Prise en Main est destiné à l'utilisation des swithces Ethernet Dimension. Votre appareil peut différer des illustrations ci-dessous. 2 Installation Tous les switches peuvent être utilisés comme appareils autonomes (sur un bureau) tandis que certains peuvent être montés dans des châssis au standard EIA. - Seite 22 FRANÇAIS chocs et assurent l'espace nécessaire si vous montez plusieurs switches en cascade. 2.2 Installation en Châssis 1 Placez un angle sur les trous d'un côté du switch, et fixez le avec les vis, qui sont plus petites que les vis de montage en châssis.
- Seite 23 FRANÇAIS trous appropriés sur le châssis. Fixez le switch sur le châssis avec les vis de montage en châssis. 3 Connexions Matérielles 3.1 Ports RJ-45 à négociation et croisement automatiques Votre switch est livré avec des ports à négociation et croisement automatiques.
- Seite 24 FRANÇAIS 3.2 Câbles Réseau Vous pouvez utiliser des câbles Ethernet paire de cuivre non blindés (UTP) ou blindés (STP) pour les ports RJ-45. Assurez vous que la longueur entre les connexions ne dépasse pas 100 mètres. Le tableau suivant décrit les types de câbles réseau utilisés pour différentes vitesses de connexions.
- Seite 25 FRANÇAIS 3.4 Port Console (Switches Manageables Uniquement) Si votre switch a un port console, vous pouvez utiliser un émulateur de terminal pour la gestion locale. Connectez l'extrémité mâle 9 broches d'un câble console sur le port console de votre switch. Connectez l'extrémité femelle sur un port série (COM1, COM2 ou autre port COM) de votre ordinateur.
-
Seite 26: Résolution D'erreurs
FRANÇAIS 4 Résolution d'Erreurs PROBLEME ACTION CORRECTIONNELLE Aucune des Vérifiez que le câble ou l'adaptateur LEDs est d'alimentation fourni est correctement allumée lorsque branché sur la prise du switch et la prise le courant est électrique. Si l'erreur persiste, vous avez connecté. - Seite 27 ITALIANO ITALIANO 1 Introduzione La guida utente è generalizzata per tutti gli switch Ethernet ZyXEL. Il suo prodotto potrebbe essere differente rispetto alle illustrazioni seguenti. 2 Installazione Tutti gli switch possono essere usati come periferica standalone ma possono anche essere montati in armadi standard EIA.
-
Seite 28: Italiano
ITALIANO vibrazioni e assicurano lo spazio fra le periferiche se incolonnate. 2.2 Installazione in armadio Rack 1 Allineare una staffa con i buchi su un lato dello switch e fissarla con viti da staffa più piccole di quelle per il montaggio dell'armadio. - Seite 29 ITALIANO dell'armadio. Fissare lo switch all'armadio con le viti di montaggio. 3 Collegamenti Hardware 3.1 Porte RJ-45 Auto-negozianti e Auto- invertenti Le porte dello switch sono auto-negozianti e auto-invertenti. A seconda del modello, le porte possono essere di tipo Fast Ethernet (10/100 Mbps) o Gigabit (10/100/1000 Mbps).
-
Seite 30: Collegamenti Di Alimentazione
ITALIANO 3.2 Cavi di rete Si possono usare cavi a coppia incrociata non schermati (UTP) o a coppia incrociata schermati (STP) per port RJ-45. Assicurarsi che la lunghezza dei cavi fra i collegamenti non superi i 100 metri. La seguente tabella descrive i tipi di cavi di rete usati per le diverse velocità... - Seite 31 ITALIANO 3.4 Porta Console (Solo Switch programmabili) Se lo switch ha una porta console, si può usare un emulatore di controllo locale. Collegare il capo maschio 9-pin del cavo console alla porta console dello switch. Collegare il capo femmina alla porta seriale (COM1, COM2 o altre porte COM) del computer.
-
Seite 32: Analisi Dei Guasti
ITALIANO 4 Analisi dei guasti PROBLEMA AZIONE CORREYTIVA Nessun LED si Verificare che l'adattatore fornito o il cavo accende di alimentazione dello switch sia collegato quando viene alla presa di corrente. Se il problema collegata persiste, potrebbe trattarsi di un guasto l'alimentazione. -
Seite 33: Русский
РУССКИЙ РУССКИЙ 1 Введение Этот Ускоренный вводный курс предназначен для использования со всеми коммутаторами Ethernet производства ZyXEL. Ваше устройство может отличаться от изображений на приведенных ниже иллюстрациях. 2 Простота Все коммутаторы могут использоваться как самостоятельные устройства, а некоторые модели коммутаторов могут быть также установлены в стойку... -
Seite 34: Установка В Стойку
РУССКИЙ обеспечивают необходимый зазор между устройствами при их установке друг на друга. 2.2 Установка в стойку 1 Совместите отверстия на одном кронштейне с отверстиями на боковой стороне коммутатора и закрепите кронштейн винтами меньшего размера, чем винты для крепления в стойке. Таким же образом прикрепите... - Seite 35 РУССКИЙ в кронштейнах с соответствующими отверстиями в стойке. Закрепите коммутатор в стойке с помощью винтов для крепления в стойке. 3 Подключение аппаратных средств 3.1 Порты RJ-45 с автоматическим выбором скорости и распознаванием типа кабеля Порты коммутатора автоматического выбора скорости и автоматического...
- Seite 36 РУССКИЙ распознавание типа кабеля означает, что коммутатор можно подключить к компьютеру или концентратору, используя как прямой, так и перекрестный кабель Ethernet. 3.2 Сетевые кабели Для подключения к портам RJ-45 можно использовать кабели Ethernet типа "неэкранированная витая пара" (UTP) или "экранированная витая пара" (STP). Убедитесь, что...
-
Seite 37: Подключение Питания
РУССКИЙ 3.3 Подключение питания Подсоедините один конец поставляемого шнура питания или адаптер питания к розетке питания коммутатора, а другой конец - к соответствующему источнику питания. Светодиод PWR должен гореть постоянно, если коммутатор получает питание. 3.4 Консольный порт (Только управляемые коммутаторы) Если... -
Seite 38: Устранение Неисправностей
РУССКИЙ 4 Устранение неисправностей Проблема Рекомендации При Убедитесь, что поставляемый адаптер включенном питания подсоединен к розетке питания питании ни коммутатора и к соответствующему один из источнику питания. Если проблема не светодиодов исчезла, возможно, имеет место не горит. аппаратная неисправность. Вам следует связаться... - Seite 39 繁體中文 繁體中文 介紹 本快速安裝手冊僅提供合勤乙太交換器之說明。本快速安裝手 冊之說明圖僅供參考。 2 硬體安裝 此交換器相當適合有多數電腦之辦公環境使用或安裝在標準 EIA 機架。 註 : 為有利於散熱,請在前方保留約 4 英吋 ( 或 10 公分 ) 且後方約 3.4 英吋 ( 或 8 公分 ) 的空間。當堆疊放置 時,交換器間應留一定空間。 2.1 安裝於桌上 1 將交換器放置於平坦並足夠堅固可支撐設備及連接線材的平 台。 2 使用紙盒內所附的防滑防震腳墊,貼於交換器下四方。...
-
Seite 40: 繁體中文
繁體中文 2.2 安裝於標準機架上 1 將耳翼上的錐孔和交換器的鎖孔對齊,再用內附 M3 平頭螺 絲鎖上。 2 鎖上耳翼後,確定交換器和機架的螺絲孔已對齊並用機架螺 絲將交換器鎖緊上機架。... - Seite 41 繁體中文 3 硬體連接 3.1 自動偵測及自動交換的 RJ-45 埠 本交換器 RJ-45 埠均為自動偵測及自動交換埠。自動偵測的功 能讓交換器在不需要手動設定下,能針對所連接之傳輸速率自 動更換至相對應之速率。不論是在全雙工或半雙工下 ,它將依 你的乙太網路環境自動調整至 10Mbps、100Mbps 或 1000Mbps 資料傳輸速率 ( 高速乙太交換器不支援 10Mbps 資料 傳輸速率 )。自動交換的功能讓交換器在不需要變更乙太網路設 定下,自動選擇正向連接或反向連接,方便連接至個人電腦或 串接至另一部交換器。 3.2 網路線種類 請使用 UTP 或 STP 網路線來連接 RJ-45 埠。 註 : 請確定網路連接線不可超過 100 公尺 (328 英呎 ) 以下的表格敘述了適用各種不同的連線速度的網路線。...
- Seite 42 繁體中文 表 1 網路線種類 連線速度 網路線種類 10Mbps 100 Ω 2-pair UTP/STP Category 3/4/5 100Mbps 100 Ω 2-pair UTP/STP Category 5 1000Mbps 100 Ω 4-pair UTP/STP Category 5 當網路線和電源接上時,如有資料傳輸 LNK/ACT 指示燈會閃 示。 3.3 電源之連接 將電源轉接器一端接至電插座,另一端接至交換器之後背板。 此時,電源指示燈會正常顯示。 3.4 控制埠 ( 只提供給可設定交換器 ) 如你的交換器有附控制埠,你可以透過終端機模擬程式控制你的交換器。...
- Seite 43 繁體中文 4 問題排除 問題 問題排除 當電源接上時所 請確定您已使用內附電源轉接器接至交換器 有指示燈無顯 並開電源。 示。 如持續無法開交換器請通知購買之廠商。 當網路線和電源 請確定您已開交換器並使用網路線接上一台 接上時 LNK/ 電腦。 ACT指示燈無顯 請確定此電腦的網路卡運作正常。 示。 請確定網路連接線沒有超過 100 公尺 (328 英呎 )