Inhaltsverzeichnis
Werbung
Quicklinks
Assembly, operation and maintenance
INSTRUCTIONS
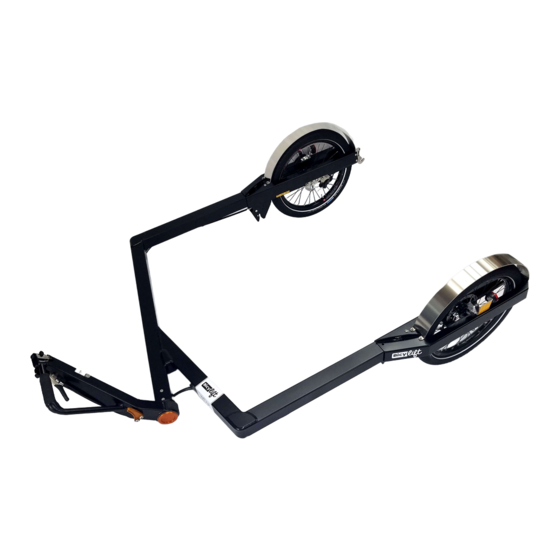
BicyLift trailer BTL04
Euro-Pallet fork FEU01
Montage, Gebrauch, Wartung
GEBRAUCHSANLEITUNG
Anhänger BicyLift BTL04
Gabel für Europalette FEU01
MANUEL
de montaje, de uso, de mantenimiento
Remolque BicyLift BLT04
Horquilla palet Euro FEU01
15 rue de Bray - 35510 Cesson Sévigné - FRANCE
de montage, d'utilisation et d'entretien
Remorque BicyLift BTL04
Fourche Palette Europe FEU01
Montage, gebruik, onderhoud
BicyLift BLT04 fietstrailer
contact@fleximodal.fr
+33 222 930 940
www.fleximodal.fr
NOTICE
HANDLEIDING
Europaletvork FEU01
Werbung
Inhaltsverzeichnis

Verwandte Anleitungen für FlexiModal BicyLift BTL04

Inhaltszusammenfassung für FlexiModal BicyLift BTL04
- Seite 1 Assembly, operation and maintenance INSTRUCTIONS BicyLift trailer BTL04 Euro-Pallet fork FEU01 NOTICE de montage, d’utilisation et d’entretien Remorque BicyLift BTL04 Fourche Palette Europe FEU01 Montage, Gebrauch, Wartung GEBRAUCHSANLEITUNG Anhänger BicyLift BTL04 Gabel für Europalette FEU01 Montage, gebruik, onderhoud HANDLEIDING BicyLift BLT04 fietstrailer...
- Seite 2 You have just acquired a BicyLift trailer; we are delighted and hope that it will give you satisfaction in your activity. In this document you will find all the information relating to the fitting, use and maintenance of your equipment. Vous venez de faire l’acquisition d’une remorque BicyLift, nous en sommes ravis et espérons qu’elle vous apportera satisfaction dans votre activité.
- Seite 3 Description / Produktbeschreibung / Beschrijving / Descripción Chassis / Chasis Fork / Fourche / Gabel / Vork / Horquilla Tools required for the assembly / Outils requis pour le montage / Erforderlichen Montagewerkzeug / Gereedschap voor de montage / Herramientas necesarias para el montaje...
- Seite 4 Arrange the components in their assembly positions Unfold the cardboard box an use it to protect your work area Disposer les éléments dans leur position de montage. Utiliser le carton déplié pour protéger votre espace de travail Legen Sie die Teile in der Montageposition hin. Nutzen Sie den aufgefalteten Karton als Unterlage Leg de onderdelen op de plaats waar ze moeten worden gemonteerd.
- Seite 5 Fix the joint with the bolts, washers and M8 nuts supplied (5 mm Allen key and 13 mm open ended spanner). To ensure perfect parallelism between the two wheel blocks, mount a fork or container before tightening the nuts until any play is removed. Solidariser la liaison avec les vis, rondelles et écrous M8 fournis (clé...
- Seite 6 - Die Gesamtmasse der Ladung, inklusive der Gabel (ca. 3,5kg) darf 180 kg nicht überschreiten, wenn Big Apple + Reifen auf dem Anhänger montiert sind, und 200 kg, wenn es Super Moto-X Reifen gibt. Sie können den Typ wissen, als sie Ihren Reifen oder Ihre Rechnung überprüfen.
- Seite 7 Tip: If you know the place the load will be removed, remember to insert the fork on the correct side so that it can be removed easily. Astuce : Si vous connaissez les lieux de dépose du chargement, pensez à insérer la fourche du bon côté pour qu’elle puisse être facilement retirée.
- Seite 8 Securing the load / Arrimage du chargement / Befestigung der Ladung / Vastzetten van de lading / Estiba de la carga If necessary, use straps to secure the load to the fork with the tie down points provided for this purpose on the fork.
- Seite 9 2 - the strikers / les gâches / die Auslösevorrichtung / de schoenplaten / los cierres If this is not already the case, put the drawbar in the raised position (see next §) Press on the front of the trailer progressively until the strikers engage the remaining anchors. You will then hear a metallic "click" on each side.
- Seite 10 Removing the load / Déposer la charge / Abladen / De lading neerzetten / Descarga de la carga Press on the front of the trailer to release the load locking the strikers. Appuyer sur l'avant de la remorque afin de retirer la charge qui verrouille les gâches. Drücken Sie auf die Vorderseite des Anhängers, da die Last die Auslösevorrichtung blockiert Duw op de voorkant van de trailer om de lading die met de schootplaten vergrendeld is vrij te maken.
- Seite 11 Adjusting the drawbar / Réglage du timon / Einstellung der Deichsel / Afregeling van de boom / Ajuste del timón The angle of the drawbar is adjustable in order to be able to use the trailer in different configurations: L'inclinaison du timon est réglable afin de pouvoir utiliser la remorque dans différentes configurations : Die Neigung der Deichsel ist entsprechend dem Gebrauch verstellbar : Om de trailer in verschillende configuraties te kunnen gebruiken is de hoek van de boom regelbaar.
- Seite 12 #2 Con tu mano derecha, presiona la palanca. Incline el brazo de la barra de tiro hasta la posición deseada y suelte la palanca. #3 C ompruebe que el botón esté en su posición correcta (para evitar que el brazo del timón se desbloquee bajo carga). Hitching to the bike / Attelage au vélo / Fahrradanhängerkupplung / Vastmaken aan de fiets / Enganche a la bicicleta Moving on the bike / Déplacement à...
- Seite 13 - aangepaste weersomstandigheden, bijvoorbeeld zorgen dat de lading niet te veel wind vangt, bescherming tegen neerslag, weersinvloeden, - onder controle houden van de snelheid (altijd minder dan 25 km/u), remafstanden inschatten en voldoende bewegingsruimte voor de weg die de trailer volgt (stoep, verkeersomstandigheden, opstopping, respect voor andere weggebruikers, …) en de stabiliteit van de lading en de trailer.
- Seite 14 Maintenance / Entretien / Wartung / Onderhoud / Mantenimiento Your equipment is subjected to high stresses, due to the load being transported and the riding conditions which are sometimes severe. To ensure that the equipment remains safe to use, check the following regularly (at least every 20 hours of use or weekly, whichever comes first) : refer to the ...
-
Seite 15: Inhaltsverzeichnis
De par l’amélioration continue de la BicyLift, certaines pièces advice, ont pu évoluer par rapport au modèle que vous possédez. Ces améliorations sont possibles grâce à vos retours. FlexiModal technical team Restant à votre disposition pour échanger ou pour tout conseil sur les produits, L’équipe technique FlexiModal T able of contents ... -
Seite 16: Trailer Frame / Cadre De La Remorque
Trailer frame / Cadre de la remorque - Check the tightness of the frame/wheel blocks with a 5mm Allen key and a 13 mm wrench - Check that the ducts are securely fastened to the frame with the 9 plastic hose clamps. - Vérifier le serrage fort cadre / blocs roues avec une clé... -
Seite 17: Lighting / Eclairages
Lighting / Eclairages - Check that the lights are screwed onto their support and that the support itself is tightened onto the wheel block (4mm Allen key). - Check that the front and rear lights on both wheels are working when each wheel turns. If necessary, move the magnet so that it passes in front of the lights. - Seite 18 1. If the trailer is carrying a load, set the load down as usual 2. Turn the trailer over 1. Si la remorque porte une charge, poser la charge au sol. 2. Retourner la remorque. 3. Loosen and remove the screw on the axle of the punctured wheel (Allen 6mm) 4.
- Seite 19 5. To remove the wheel without removing the brake caliper, the wheel must be completely deflated. 6. If wheel repair, inner tube 20inch Schrader valve. Repair as on the wheel of a classic bicycle. Check the condition of the inner and outer tire as well as the inside of the rim.
-
Seite 20: Lifting - Unloading / Levage - Déchargement
Lifting - Unloading / Levage - Déchargement Rear hooks • Check the condition of the rubber roller which limits vibrations. It is a wearing part, available as a spare part, which is fixed with TBHC M4x16 screws. • Check that the rear hooks don’t vibrate in the wheel blocks. If necessary, tighten the two M8 screws again with a 5mm Allen key and a 13mm flat spanner. - Seite 21 Settings & repairs If you are having problems picking up or dropping off the load, identify the problem as appropriate: • Problem depositing the charge Reminder: To drop the load, the load must rest firmly on the ground at the front (lower the front of the trailer) before pulling the white trigger to release the latch hooks.
- Seite 22 6. While holding the spring compression, with the other hand, tighten the associated trigger screw. Tighten to secure the cable. Do not over-tighten as this may cause the cable to be completely crushed, preventing it from passing through the housing. 7.
- Seite 23 5. Remove the clamps securing the latch sheaths on the trailer frame 6. Remove the rubber cover 5. Retirer les colliers de serrage qui bloquent la ou les gaines de gâche 6. Retirer le cache en caoutchouc 7. Unscrew the M8 screw that serves as the rotation axis for the white trigger with a 5mm Allen key 8.
-
Seite 24: Braking System / Freinage
Braking system / Freinage Checkpoints • Check the brake pads and disc for wear : The padding of the brake pads must be sufficient. Noise may occur during braking if the pads are too worn. The brake pads are Shimano M515 type, to change them you can follow the TRP manual supplied with the trailer documentation. - Seite 25 Settings & repairs For easy adjustment, use the black knurls on the brake calipers to adjust cable tension. Place the brake caliper upright against a wall and let the wheel turning while adjusting with the knurl so that the pads are as close to the disc as possible without touching it. If the adjustment with the knurl is not sufficient because it reaches the end of its travel, you can screw it back a few turns and adjust the position of each brake pad in its caliper.
-
Seite 26: Hitch Trailer-Bike / Attelage
Hitch trailer-bike / Attelage Checkpoints • Bike hitch Check that the bike hitch ball is vertical and free of any abnormalities. Check the attachment of the BicyLift attachment to the bicycle (tightening of screws, condition of the clamps, etc.). • Trailer hitching system Make sure that the bushing that slides on the trailer hitch does not have the corners bent so that the hitch ball can escape. -
Seite 27: Drawbar / Timon
Drawbar / Timon Checkpoints • Check that the lever is firm in the 3 fixed positions of the drawbar, that it has no rotational play. Settings & repairs • If the rotation becomes complicated, or a position has difficulty passing Check the indexing ring on the drawbar. - Seite 28 Need advice or spare parts: contact us ! Besoin de conseils ou de pièces de rechange : contactez-nous ! contact@fleximodal.fr +33 (0) 222 930 940...
-
Seite 29: Checkpoint Summary On The Bicylift
Checkpoint summary on the BicyLift Refer to the complete B icyLift maintenance guide for more details on each checkpoint. You can display this checklist in your premises to make sure it is being observed. Indicative frequencies for intensive daily use of the trailer Check frequency Wheels Control in case of shock / loss of pressure... -
Seite 30: Récapitulatif Des Points De Contrôles De Maintenance Bicylift
Récapitulatif des points de contrôles de maintenance BicyLift Se référer au g uide de maintenance BicyLift pour plus de précisions sur chaque point de contrôle. Pour s’assurer qu’ils soient respectés, vous pouvez afficher cette checklist dans vos locaux. Fréquences indicatives pour une utilisation quotidienne intense de la remorque. Fréquence de contrôle Roues Contrôle en cas de choc / perte de pression...