Herunterladen Inhalt Inhalt Diese Seite drucken
Inhaltsverzeichnis

Werbung

Verfügbare Sprachen
  • DE

Verfügbare Sprachen

  • DEUTSCH, seite 38
Texi Tegra 4 INSTRUKCJA 2019.indb 1
OVERLOCK & SAFETY STITCH
1
2
1
1
1
2
2
2
4
3
2
18.09.2020 09:42
18.09.2020 09:42

Werbung

Inhaltsverzeichnis
loading

Inhaltszusammenfassung für Texi Tegra 4

  • Seite 1 OVERLOCK & SAFETY STITCH Texi Tegra 4 INSTRUKCJA 2019.indb 1 Texi Tegra 4 INSTRUKCJA 2019.indb 1 18.09.2020 09:42 18.09.2020 09:42...
  • Seite 2 Texi Tegra 4 INSTRUKCJA 2019.indb 2 Texi Tegra 4 INSTRUKCJA 2019.indb 2 18.09.2020 09:42 18.09.2020 09:42...
  • Seite 3: Uživatelský Manuál

    Uživatelský manuál Benutzerhandbuch User manual Manual de usuario Manuel d’utilisation Instrukcja obsługi Руководство пользователя Texi Tegra 4 INSTRUKCJA 2019.indb 3 Texi Tegra 4 INSTRUKCJA 2019.indb 3 18.09.2020 09:42 18.09.2020 09:42...
  • Seite 4: Důležité Bezpečnostní Pokyny

    úprav zmíněných v tomto návodu, vypněte šicí stroj a odpojte přívodní kabel ze zásuvky. UCHOVEJTE TENTO NÁVOD K OBSLUZE Tento šicí stroj je navržen a vyroben pouze pro domácí použití. Texi Tegra 4 Texi Tegra 4 INSTRUKCJA 2019.indb 4 Texi Tegra 4 INSTRUKCJA 2019.indb 4 18.09.2020 09:42 18.09.2020 09:42...
  • Seite 5 Texi Tegra 4 Texi Tegra 4 INSTRUKCJA 2019.indb 5 Texi Tegra 4 INSTRUKCJA 2019.indb 5 18.09.2020 09:42 18.09.2020 09:42...
  • Seite 6: Inhaltsverzeichnis

    VODÍCÍ TYČ SEZNAM VŠECH STEHŮ NASTAVENÍ NAPĚTÍ JEHLOVÉ NITĚ 4-NIŤOVÉ OBNITKOVÁNÍ 3-NIŤOVÉ OBNITKOVÁNÍ 3-NIŤOVÝ OVERLOCK 3-NIŤOVÉ DEKORATIVNÍ OBNITKOVÁNÍ 3-NIŤOVÝ KRIMPOVANÝ OVERLOCK Texi Tegra 4 Texi Tegra 4 INSTRUKCJA 2019.indb 6 Texi Tegra 4 INSTRUKCJA 2019.indb 6 18.09.2020 09:42 18.09.2020 09:42...
  • Seite 7 2-NIŤOVÝ OVERLOCK 2-NIŤOVÝ KRIMPOVANÝ OVERLOCK ÚDRŽBA STROJE VÝMĚNA SPODNÍHO NOŽE LÁTKA, NIT A DÉLKA STEHU BĚŽNÉ PROBLÉMY A JEJICH ŘEŠENÍ SPECIFIKACE STROJE Texi Tegra 4 Texi Tegra 4 INSTRUKCJA 2019.indb 7 Texi Tegra 4 INSTRUKCJA 2019.indb 7 18.09.2020 09:42 18.09.2020 09:42...
  • Seite 8: Názvy Součástí

    Páka nastavení diferenciálního podávání Regulátor stehu Páka pro zdvih přítlačné patky Vodítko nitě na horním krytu Kontejner na odpad Pedál ovládání rychlosti Konektor Zástrčka Texi Tegra 4 Texi Tegra 4 INSTRUKCJA 2019.indb 8 Texi Tegra 4 INSTRUKCJA 2019.indb 8 18.09.2020 09:42 18.09.2020 09:42...
  • Seite 9: Box S Příslušenstvím

    Stejný vypínač zapojte do elektrické sítě. ovládá jak stroj, tak osvětlení stroje. Pokud ponecháváte stroj bez dozoru, odpojte přívodní kabel. Texi Tegra 4 Texi Tegra 4 INSTRUKCJA 2019.indb 9 Texi Tegra 4 INSTRUKCJA 2019.indb 9 18.09.2020 09:42 18.09.2020 09:42...
  • Seite 10: Kontejner Na Odpad

    Pozn.: Z bezpečnostních důvodů, před otvíráním krytu kličkaře vypněte stroj! STOJAN NA CÍVKY Před usazením cívek na kolíky, nasuňte držák cívek. Texi Tegra 4 Texi Tegra 4 INSTRUKCJA 2019.indb 10 Texi Tegra 4 INSTRUKCJA 2019.indb 10 18.09.2020 09:42 18.09.2020 09:42...
  • Seite 11: Příprava Pro Navlékání

    Usaďte držák cívky na kolík cívky. Je-li cívka velká, použijte disk cívky z boxu s příslušenstvím. Nasuňte cívku s nití na držák. Texi Tegra 4 Texi Tegra 4 INSTRUKCJA 2019.indb 11 Texi Tegra 4 INSTRUKCJA 2019.indb 11 18.09.2020 09:42 18.09.2020 09:42...
  • Seite 12: Poloha Jehly

    Před znovu navlečením spodního kličkaře odstraňte nejdříve nit z jehly, poté znovu navlékněte spodní kličkař. Tím přededete zamotání nití. Poznámka: Napětí nitě je uvolněno, jakmile vihnete přítlačnou patku. Texi Tegra 4 Texi Tegra 4 INSTRUKCJA 2019.indb 12 Texi Tegra 4 INSTRUKCJA 2019.indb 12 18.09.2020 09:42 18.09.2020 09:42...
  • Seite 13: Navlékání Horního Kličkaře

    Vraťte rukojeť zpět na místo. NAVLÉKÁNÍ HORNÍHO KLIČKAŘE Pozn.: Při navlékání využijte pinzety z boxu s příslušenstvím. Postupujte dle kroků 1-4. Texi Tegra 4 Texi Tegra 4 INSTRUKCJA 2019.indb 13 Texi Tegra 4 INSTRUKCJA 2019.indb 13 18.09.2020 09:42 18.09.2020 09:42...
  • Seite 14: Navlékání Spodního Kličkaře

    Pozn.: Při navlékání použijte pinzetu z boxu s příslušenstvím. Nejzazší poloha vpravo Otáčejte ručním kolem směrem k sobě, Postupujte dle kroků 1-10. dokud spodní kličkař nedosáhne nejzazší polohy vpravo. Texi Tegra 4 Texi Tegra 4 INSTRUKCJA 2019.indb 14 Texi Tegra 4 INSTRUKCJA 2019.indb 14 18.09.2020 09:42 18.09.2020 09:42...
  • Seite 15: Navlékání Pravé Jehly

    Nitě protáhněte vytáhněte cca 10 cm nitě vodítky 6 a 7. a vložte ji pod přítlačnou Postupujte patku. dle kroků 1-9. Texi Tegra 4 Texi Tegra 4 INSTRUKCJA 2019.indb 15 Texi Tegra 4 INSTRUKCJA 2019.indb 15 18.09.2020 09:42 18.09.2020 09:42...
  • Seite 16: Navlékání Levé Jehly

    Obr. 1 kličkaře a poté část jehlové nitě. Obr. 2 znázorňuje její špatné umístění. představuje správné uložení. Texi Tegra 4 Texi Tegra 4 INSTRUKCJA 2019.indb 16 Texi Tegra 4 INSTRUKCJA 2019.indb 16 18.09.2020 09:42 18.09.2020 09:42...
  • Seite 17: Nápověda Výměna Špulek Nití

    Viz obrázky ruky a pevně jej zaklapněte do výše. spojky A. Texi Tegra 4 Texi Tegra 4 INSTRUKCJA 2019.indb 17 Texi Tegra 4 INSTRUKCJA 2019.indb 17 18.09.2020 09:42 18.09.2020 09:42...
  • Seite 18: Páka Přítlačné Patky

    Spusťte držák patky, abyste patku nacvakli na místo. Jak je zobrazeno na obrázku A, ciferník na přítlačné patce indikuje rozsah pohybu jehly. Během šití může sloužit jako vodítko. Texi Tegra 4 Texi Tegra 4 INSTRUKCJA 2019.indb 18 Texi Tegra 4 INSTRUKCJA 2019.indb 18 18.09.2020 09:42 18.09.2020 09:42...
  • Seite 19: Nůž Nitě

    ZAPNUTÍ HORNÍHO NOŽE Zatlačte rameno horního nože doprava a vytočte jej do jeho původní polohy. Otevřete kryt kličkaře a nasuňte kontejner na odpad. Texi Tegra 4 Texi Tegra 4 INSTRUKCJA 2019.indb 19 Texi Tegra 4 INSTRUKCJA 2019.indb 19 18.09.2020 09:42 18.09.2020 09:42...
  • Seite 20: Instalace 2-Niťového Rozšíření

    Otočte rozšířením doleva a zlehka zatlačte zadní část lehce dozadu. Špička rozšíření bude uzamknuta v otvoru na horním kličkaři. Opačným postupem naopak můžete rozšíření vyjmout. Texi Tegra 4 Texi Tegra 4 INSTRUKCJA 2019.indb 20 Texi Tegra 4 INSTRUKCJA 2019.indb 20 18.09.2020 09:42 18.09.2020 09:42...
  • Seite 21: Změna Nastavení Chapače

    Šířka je označena na stehové desce, “R” indikuje šířku ořezu pro rolovací lemy. Pozn: Pokud je kryt kličkaře otevřený, nastavení šířky ořezu je jednodušší. Texi Tegra 4 Texi Tegra 4 INSTRUKCJA 2019.indb 21 Texi Tegra 4 INSTRUKCJA 2019.indb 21 18.09.2020 09:42 18.09.2020 09:42...
  • Seite 22: Nastavení Délky Stehu

    Volné rameno je vhodné pro šití tubusových částí, jako jsou rukávy či nohavice atd. Jakmile leží kryt kličkaře a přední podstava paralelně k sobě, zatlačte podstavu směrem doprava, dokud s kliknutím nezapadne na místo. Texi Tegra 4 Texi Tegra 4 INSTRUKCJA 2019.indb 22 Texi Tegra 4 INSTRUKCJA 2019.indb 22 18.09.2020 09:42 18.09.2020 09:42...
  • Seite 23: Nastavení Diferenciálního Podávání

    Při šití na pleteniny může toto nastavení zabránit v natahování látky a šití plochých stehů (C). Pomocí tohoto nastavení lze rovněž šít ozdobné stehy. Nastavení lze využít pro nabírání lemů na tenkých látkách (D). Texi Tegra 4 Texi Tegra 4 INSTRUKCJA 2019.indb 23 Texi Tegra 4 INSTRUKCJA 2019.indb 23 18.09.2020 09:42 18.09.2020 09:42...
  • Seite 24 “3” ve chvíli, kdy je páčka nastavení nastavena na 2.0. Pozn: Pro normální lemování nastavte páčku nastavení na hodnotu “1.0”. Texi Tegra 4 Texi Tegra 4 INSTRUKCJA 2019.indb 24 Texi Tegra 4 INSTRUKCJA 2019.indb 24 18.09.2020 09:42 18.09.2020 09:42...
  • Seite 25: Začátek Šití

    Při šití krycího a 2-niťového řetízkového stehu se vodící tyč hodí pro běžné intervalové stehy. Texi Tegra 4 Texi Tegra 4 INSTRUKCJA 2019.indb 25 Texi Tegra 4 INSTRUKCJA 2019.indb 25 18.09.2020 09:42 18.09.2020 09:42...
  • Seite 26: Seznam Všech Stehů

    3-niťový krimpovaný overlock Šití středně silných látek 3-niťový krimpovaný overlock (lem) Šití středně silných látek 2-niťové obnitkování (široké) Šití tenkých látek Texi Tegra 4 Texi Tegra 4 INSTRUKCJA 2019.indb 26 Texi Tegra 4 INSTRUKCJA 2019.indb 26 18.09.2020 09:42 18.09.2020 09:42...
  • Seite 27: Nastavení Napětí Jehlové Nitě

    Nit levé jehly Je-li dosaženo ideálního nastavení, nitě horního Líc kličkaře (zelená) a spodního kličkaře (fialová) jsou vidět na rubové straně látky. Texi Tegra 4 Texi Tegra 4 INSTRUKCJA 2019.indb 27 Texi Tegra 4 INSTRUKCJA 2019.indb 27 18.09.2020 09:42 18.09.2020 09:42...
  • Seite 28: 3-Niťové Obnitkování

    Nit spodního kličkaře Je-li jehlová nit (žlutý či zelená) příliš volná, nastavte regulátor (žlutý či modrý) na vyšší hodnotu. Nit jehly Líc Texi Tegra 4 Texi Tegra 4 INSTRUKCJA 2019.indb 28 Texi Tegra 4 INSTRUKCJA 2019.indb 28 18.09.2020 09:42 18.09.2020 09:42...
  • Seite 29: 3-Niťový Overlock

    (fialový) na vyšší hodnoty, popřípadě regulátor horního kličkaře Nit jehly (zelený) na hodnoty nižší. Líc Texi Tegra 4 Texi Tegra 4 INSTRUKCJA 2019.indb 29 Texi Tegra 4 INSTRUKCJA 2019.indb 29 18.09.2020 09:42 18.09.2020 09:42...
  • Seite 30: 3-Niťové Dekorativní Obnitkování

    Je-li nit pravé jehly (zelená) příliš volná, nastavte Nit horního kličkaře regulátor nitě pravé jehly (modrý) na vyšší hodnotu. Nit spodního Líc kličkaře Texi Tegra 4 Texi Tegra 4 INSTRUKCJA 2019.indb 30 Texi Tegra 4 INSTRUKCJA 2019.indb 30 18.09.2020 09:42 18.09.2020 09:42...
  • Seite 31: 3-Niťový Krimpovaný Overlock (Lem)

    (fialový) na vyšší hodnoty, případně nastavte regulátor horního Nit jehly kličkaře (zelený) na hodnoty nižší. Líc Texi Tegra 4 Texi Tegra 4 INSTRUKCJA 2019.indb 31 Texi Tegra 4 INSTRUKCJA 2019.indb 31 18.09.2020 09:42 18.09.2020 09:42...
  • Seite 32: 2-Niťové Obnitkování

    Je-li nit spodního kličkaře (fialová) příliš volná, nastavte Nit jehly regulátor spodního kličkaře (fialový) na vyšší hodnoty. Nit spodního kličkaře Líc Texi Tegra 4 Texi Tegra 4 INSTRUKCJA 2019.indb 32 Texi Tegra 4 INSTRUKCJA 2019.indb 32 18.09.2020 09:42 18.09.2020 09:42...
  • Seite 33: 2-Niťový Krimpovaný Overlock

    Pozn.: Před operací vypněte stroj. horní nůž, spodní nůž a oblast kličkaře kartáčkem z boxu s příslušenstvím. Texi Tegra 4 Texi Tegra 4 INSTRUKCJA 2019.indb 33 Texi Tegra 4 INSTRUKCJA 2019.indb 33 18.09.2020 09:42 18.09.2020 09:42...
  • Seite 34: Výměna Spodního Nože

    TĚŽKÉ LÁTKY: Tvíd, látky obleku, Bavlna:30-50# 2.0-4.0mm denim, silné látky atd. Příze:70-140# Bavlna:40-60# PLETENINY 2.0-4.0mm Příze:70-140# 2-niťové či 3-niťové lemování Bavlna: 1 20-140# 1.0-2.0mm Texi Tegra 4 Texi Tegra 4 INSTRUKCJA 2019.indb 34 Texi Tegra 4 INSTRUKCJA 2019.indb 34 18.09.2020 09:42 18.09.2020 09:42...
  • Seite 35: Běžné Problémy A Jejich Řešení

    2. Zvyšte přítlak patky HLADCE 3. Při šití tenkých látek má patka příliš 3. Snižte přítlak patky vysoký příklad Texi Tegra 4 Texi Tegra 4 INSTRUKCJA 2019.indb 35 Texi Tegra 4 INSTRUKCJA 2019.indb 35 18.09.2020 09:42 18.09.2020 09:42...
  • Seite 36: Specifikace Stroje

    2014/30/EU o elektromagnetické kompatibilitě. Mějte, prosím, na paměti, že tento výrobek je třeba bezpečně recyklovat s ohledem na platnou legislativu České republiky o elektrických/elektronických výrobcích. V případě pochyb kontaktujte svého prodejce. Texi Tegra 4 Texi Tegra 4 INSTRUKCJA 2019.indb 36 Texi Tegra 4 INSTRUKCJA 2019.indb 36 18.09.2020 09:42 18.09.2020 09:42...
  • Seite 37 Texi Tegra 4 Texi Tegra 4 INSTRUKCJA 2019.indb 37 Texi Tegra 4 INSTRUKCJA 2019.indb 37 18.09.2020 09:42 18.09.2020 09:42...
  • Seite 38: Allgemeine Sicherheitsregeln

    Nach der Arbeit lassen Sie die Nadel immer in ihrer obersten Stelle, um die Beschädigung der Nadel oder andere Beschädigung der Maschine vorzubeugen. Texi Tegra 4 Texi Tegra 4 INSTRUKCJA 2019.indb 38 Texi Tegra 4 INSTRUKCJA 2019.indb 38 18.09.2020 09:42...
  • Seite 39 Trennen Sie die Maschine vor der Stromversorgung immer wenn Sie die Wartungsarbeiten durchführen BEHALTEN SIE DIESE BEDIENUNGSANLEITUNG Die Maschine ist nur für den Hausgebrauch bestimmt. Texi Tegra 4 Texi Tegra 4 INSTRUKCJA 2019.indb 39 Texi Tegra 4 INSTRUKCJA 2019.indb 39 18.09.2020 09:42 18.09.2020 09:42...
  • Seite 40 VERTEILERINSTALLATION ( ZWEIFADENKONVENTER) ÄNDERN DER ZAHNEINSTELLUNGEN EINSTELLEN DER NAHTBREITE EINSTELLEN DER STICHLÄNGE FREIARM DIFFERENTIALTRANSPORTEINSTELLUNGEN NÄH-BEGINN NÄH-ENDE FÜHRUNG ALLE STICHARTEN EINSTELLUNGEN FÜR FADENNADELSPANNUNG 4-FADEN-OVERLOCKSTICH Texi Tegra 4 Texi Tegra 4 INSTRUKCJA 2019.indb 40 Texi Tegra 4 INSTRUKCJA 2019.indb 40 18.09.2020 09:42 18.09.2020 09:42...
  • Seite 41 WARTUNG DER MASCHINE AUSTAUSCH DES UNTEREN MESSERS STOFF, FADEN UND STICHLÄNGE DIE HÄUFIGSTEN PROBLEME UND METHODEN, UM SIE ZU BEHEBEN TECHNISCHE DATEN Texi Tegra 4 Texi Tegra 4 INSTRUKCJA 2019.indb 41 Texi Tegra 4 INSTRUKCJA 2019.indb 41 18.09.2020 09:42 18.09.2020 09:42...
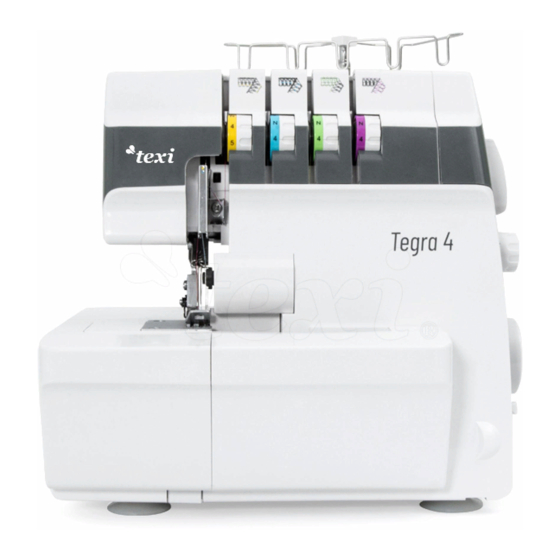
  • Seite 42: Teilenamen

    Spulenhalter Maschinensteckdose Ein-/Ausschalter Drehknopf (Handrad) Einstellhebel für den Differentialtransport Sticheinstellrad Nähfußhebel Fadenführung der oberen Abdeckung Fach für Schnittreste Geschwindigkeitsreglerpedal Verbindung Stecker Texi Tegra 4 Texi Tegra 4 INSTRUKCJA 2019.indb 42 Texi Tegra 4 INSTRUKCJA 2019.indb 42 18.09.2020 09:42 18.09.2020 09:42...
  • Seite 43: Schachtel Mit Zubehör

    Nählicht. Wenn die Maschine unbeaufsichtigt bleibt oder wenn Sie sie warten oder reinigen möchten, soll sie von der Stromversorgung getrennt werden. Texi Tegra 4 Texi Tegra 4 INSTRUKCJA 2019.indb 43 Texi Tegra 4 INSTRUKCJA 2019.indb 43 18.09.2020 09:42 18.09.2020 09:42...
  • Seite 44: Flusenbehälter

    Stromversorgung aus, bevor Sie die Greiferabdeckung öffnen! SPULENSTÄNDER Ziehen Sie den Spulenständer in Ihre Richtung und setzen Sie den Spulenhalter ein. Texi Tegra 4 Texi Tegra 4 INSTRUKCJA 2019.indb 44 Texi Tegra 4 INSTRUKCJA 2019.indb 44 18.09.2020 09:42 18.09.2020 09:42...
  • Seite 45: Einfädelnvorbereitung

    Setzen Sie den Spulenhalter auf den Spulenstift. Wenn die Garnrolle groß ist, verwenden Sie die Spulenscheibe aus der Zubehörschachtel. Legen Sie die Spule auf den Halter. Texi Tegra 4 Texi Tegra 4 INSTRUKCJA 2019.indb 45 Texi Tegra 4 INSTRUKCJA 2019.indb 45 18.09.2020 09:42 18.09.2020 09:42...
  • Seite 46: Nadelposition

    ACHTUNG: Bei dem Nähfußhub wird die Fadenspannung gelockert. Öffnen Sie die Greiferabdeckung, um das Einfädeln zu erleichtern. Sie sehen ein farbiges Einfädelungsbild. In der Reihenfolge 1-5 einfädeln. Texi Tegra 4 Texi Tegra 4 INSTRUKCJA 2019.indb 46 Texi Tegra 4 INSTRUKCJA 2019.indb 46 18.09.2020 09:42 18.09.2020 09:42...
  • Seite 47: Einfädeln Des Oberen Greifers

    EINFÄDELN DES OBEREN GREIFERS Hinweis: Verwenden Sie die Pinzette aus der Zubehörschachtel, um das Einfädeln zu erleichtern. Folgen Sie den Schritten 1-4 Texi Tegra 4 Texi Tegra 4 INSTRUKCJA 2019.indb 47 Texi Tegra 4 INSTRUKCJA 2019.indb 47 18.09.2020 09:42 18.09.2020 09:42...
  • Seite 48: Einfädeln Des Unteren Greifers

    Drehen Sie den Knopf in Ihre Richtung, bis der Folgen Sie den Schritten 1-10. untere Greifer die äußerste rechte Position erreicht. Texi Tegra 4 Texi Tegra 4 INSTRUKCJA 2019.indb 48 Texi Tegra 4 INSTRUKCJA 2019.indb 48 18.09.2020 09:42 18.09.2020 09:42...
  • Seite 49: Einfädeln Der Rechten Nadel

    Folgen Sie den Faden durch das rechte Schritten 8-9. Nadelloch und legen Sie Folgen ihn unter den Nähfuß. Sie den Schritten 1-9. Texi Tegra 4 Texi Tegra 4 INSTRUKCJA 2019.indb 49 Texi Tegra 4 INSTRUKCJA 2019.indb 49 18.09.2020 09:42 18.09.2020 09:42...
  • Seite 50: Einfädeln Der Linken Nadel

    Abb. 1 zeigt die zuerst den Greiferfaden und dann den falsche Anordnung. Nadelfaden ein. Abb. 2 zeigt die richtige Anordnung. Texi Tegra 4 Texi Tegra 4 INSTRUKCJA 2019.indb 50 Texi Tegra 4 INSTRUKCJA 2019.indb 50 18.09.2020 09:42 18.09.2020 09:42...
  • Seite 51: Wechseln Der Garnrollen

    Ziehen Sie dann mit der linken Hand fest daran Greiferdeckel und lassen Sie und nehmen Sie den Deckel ab. Siehe Fotos weiter die Klemme A fest einrasten. oben. Texi Tegra 4 Texi Tegra 4 INSTRUKCJA 2019.indb 51 Texi Tegra 4 INSTRUKCJA 2019.indb 51 18.09.2020 09:42 18.09.2020 09:42...
  • Seite 52: Nähfusshebel

    Wie in der Abbildung gezeigt, gibt die Skala am Nähfuß (“A” im Bild) den Bewegungsbereich der Nadel an. Dies kann beim Nähprozess hilfreich sein. Texi Tegra 4 Texi Tegra 4 INSTRUKCJA 2019.indb 52 Texi Tegra 4 INSTRUKCJA 2019.indb 52 18.09.2020 09:42...
  • Seite 53: Fadenabschneider

    Sie das obere Messer zurück in die Ausgangsposition. Entfernen Sie die Greiferabdeckung und bringen Sie das Fach für Schnittreste an. Texi Tegra 4 Texi Tegra 4 INSTRUKCJA 2019.indb 53 Texi Tegra 4 INSTRUKCJA 2019.indb 53 18.09.2020 09:42 18.09.2020 09:42...
  • Seite 54: Verteilerinstallation ( Zweifadenkonventer)

    Teil leicht nach hinten. Die Verteilerspitze wird im oberen Greiferloch verriegelt. Wenn Sie umgekehrt vorgehen, können Sie den Verteiler entfernen. Texi Tegra 4 Texi Tegra 4 INSTRUKCJA 2019.indb 54 Texi Tegra 4 INSTRUKCJA 2019.indb 54 18.09.2020 09:42 18.09.2020 09:42...
  • Seite 55: Ändern Der Zahneinstellungen

    Die Breite der Einstellung ist auf der Stichplatte markiert, “R” bedeutet die Breite beim Nähen des Saums. Hinweis: Bei geöffneter Greiferabdeckung ist es einfacher, die Nahtbreite einzustellen. Texi Tegra 4 Texi Tegra 4 INSTRUKCJA 2019.indb 55 Texi Tegra 4 INSTRUKCJA 2019.indb 55 18.09.2020 09:42 18.09.2020 09:42...
  • Seite 56: Einstellen Der Stichlänge

    Tischmontage. Positionieren Sie den Tisch so, dass er bündig mit dem Greifergehäuse abschließt, und schieben Sie ihn dann nach rechts, bis er einrastet. Texi Tegra 4 Texi Tegra 4 INSTRUKCJA 2019.indb 56 Texi Tegra 4 INSTRUKCJA 2019.indb 56 18.09.2020 09:42 18.09.2020 09:42...
  • Seite 57: Differentialtransporteinstellungen

    Stich erhalten (C). Diese Einstellung ermöglicht auch stilvolles Nähen. Auf diese Weise erzielen Sie einen Falteneffekt auf empfindlichen Stoffen (D). Texi Tegra 4 Texi Tegra 4 INSTRUKCJA 2019.indb 57 Texi Tegra 4 INSTRUKCJA 2019.indb 57 18.09.2020 09:42 18.09.2020 09:42...
  • Seite 58 “3”, wenn das Einstellrad auf “2,0” gestellt ist. Hinweis: Stellen Sie für normales Nähen das Einstellrad für den Differentialtransport auf “1,0”. Texi Tegra 4 Texi Tegra 4 INSTRUKCJA 2019.indb 58 Texi Tegra 4 INSTRUKCJA 2019.indb 58 18.09.2020 09:42 18.09.2020 09:42...
  • Seite 59: Näh-Beginn

    Position. Die Anleitung ist nützlich, wenn Sie mit einer Leiter und einem 2-Faden- Kettenstich mit regelmäßigem Abstand nähen. Texi Tegra 4 Texi Tegra 4 INSTRUKCJA 2019.indb 59 Texi Tegra 4 INSTRUKCJA 2019.indb 59 18.09.2020 09:42 18.09.2020 09:42...
  • Seite 60: Alle Sticharten

    3-Faden-Plisseestich Nähen von mitteldicken Stoffen 3-Faden-Plissee- Overlockstich (Saum) Nähen von dünnen und mitteldicken Stoffen 2-Faden- Overlockstich (breit) Nähen von mitteldicken Stoffen Texi Tegra 4 Texi Tegra 4 INSTRUKCJA 2019.indb 60 Texi Tegra 4 INSTRUKCJA 2019.indb 60 18.09.2020 09:42 18.09.2020 09:42...
  • Seite 61: Einstellungen Für Fadennadelspannung

    Wenn die Spannung optimal eingestellt ist, erscheinen der obere Greiferfaden (grün) und der untere Linker Nadelfaden Greiferfaden (lila) auf der linken Stoffseite. Linke Rechte Seite Seite Texi Tegra 4 Texi Tegra 4 INSTRUKCJA 2019.indb 61 Texi Tegra 4 INSTRUKCJA 2019.indb 61 18.09.2020 09:42 18.09.2020 09:42...
  • Seite 62: 3-Faden-Overlockstich

    Wenn der Nadelfaden (gelb oder blau) zu locker ist: Stellen Sie den Nadelspannknopf (gelb oder blau) auf Nadelfaden eine höhere Zahl. Rechte Seite Linke Seite Texi Tegra 4 Texi Tegra 4 INSTRUKCJA 2019.indb 62 Texi Tegra 4 INSTRUKCJA 2019.indb 62 18.09.2020 09:42 18.09.2020 09:42...
  • Seite 63: 3-Faden-Overlockstich

    Seite sichtbar ist: Stellen Sie den unteren Greiferknopf (lila) auf höhere Zahlen oder den oberen Greiferknopf Nadelfaden (grün) auf niedrigere Zahlen. Rechte Linke Seite Seite Texi Tegra 4 Texi Tegra 4 INSTRUKCJA 2019.indb 63 Texi Tegra 4 INSTRUKCJA 2019.indb 63 18.09.2020 09:42 18.09.2020 09:42...
  • Seite 64: 3-Faden-Zierstich

    Wenn der rechte Nadelfaden (blau) zu locker ist: Stellen Faden des Sie den rechten Nadelspannknopf (blau) auf eine oberen Greifers Unterer höhere Zahl. Rechte Greiferfaden Seite Linke Seite Texi Tegra 4 Texi Tegra 4 INSTRUKCJA 2019.indb 64 Texi Tegra 4 INSTRUKCJA 2019.indb 64 18.09.2020 09:42 18.09.2020 09:42...
  • Seite 65: 3-Faden-Plissee-Overlockstich (Saum)

    Seite sichtbar ist: Stellen Sie den unteren Greiferknopf (lila) auf höhere Zahlen oder den oberen Greiferknopf Nadelfaden (grün) auf niedrigere Zahlen. Rechte Linke Seite Seite Texi Tegra 4 Texi Tegra 4 INSTRUKCJA 2019.indb 65 Texi Tegra 4 INSTRUKCJA 2019.indb 65 18.09.2020 09:42 18.09.2020 09:42...
  • Seite 66: 2-Faden-Overlockstich

    Wenn der untere Greiferfaden (lila) zu locker ist: Stellen Nadelfaden Sie den unteren Greiferspannungsknopf (lila) auf Unterer Greiferfaden Rechte höhere Zahlen. Seite Linke Seite Texi Tegra 4 Texi Tegra 4 INSTRUKCJA 2019.indb 66 Texi Tegra 4 INSTRUKCJA 2019.indb 66 18.09.2020 09:42 18.09.2020 09:42...
  • Seite 67: 2-Faden-Plisseestich

    HINWEIS: Schalten Sie die Stromversorgung Messer sowie Greiferbereich mit aus, bevor Sie die Aktion ausführen. der Bürste aus der Schachtel mit Zubehör. Texi Tegra 4 Texi Tegra 4 INSTRUKCJA 2019.indb 67 Texi Tegra 4 INSTRUKCJA 2019.indb 67 18.09.2020 09:42 18.09.2020 09:42...
  • Seite 68: Austausch Des Unteren Messers

    Anzugstoff, Jeansstoff, dicker 2.0-4.0mm Garn: 70-140# Tuchstoff etc. Baumwolle: 40-60# STRICKWARE 2.0-4.0mm Garn: 70-140# UMRANDUNG MIT Baumwolle: 120-140# 1.0-2.0mm 2-FADENODER 3-FADEN-NAHT Texi Tegra 4 Texi Tegra 4 INSTRUKCJA 2019.indb 68 Texi Tegra 4 INSTRUKCJA 2019.indb 68 18.09.2020 09:42 18.09.2020 09:42...
  • Seite 69: Die Häufigsten Probleme Und Methoden, Um Sie Zu Beheben

    2. Erhöhen Sie den Nähfußdruck STOFFVORSCHUB 3. Beim Nähen von dünnen Stoffen ist 3. Reduzieren Sie den Nähfußdruck der Nähfuß zu hoch Texi Tegra 4 Texi Tegra 4 INSTRUKCJA 2019.indb 69 Texi Tegra 4 INSTRUKCJA 2019.indb 69 18.09.2020 09:42 18.09.2020 09:42...
  • Seite 70: Technische Daten

    Optimierung des Gewinns und der Wiederverwendung der in dem Produkt verwendeten Stoffe. Willkürliche Entsorgung des Gerätes durch den Benutzer droht mit Verhängen von Strafen auf der Grundlage des geltenden Rechts. Texi Tegra 4 Texi Tegra 4 INSTRUKCJA 2019.indb 70 Texi Tegra 4 INSTRUKCJA 2019.indb 70 18.09.2020 09:42 18.09.2020 09:42...
  • Seite 71 Texi Tegra 4 Texi Tegra 4 INSTRUKCJA 2019.indb 71 Texi Tegra 4 INSTRUKCJA 2019.indb 71 18.09.2020 09:42 18.09.2020 09:42...
  • Seite 72: Important Safety Instructions

    Always unplug this sewing machine from the electrical outlet when removing covers, lubricating, or when making any other adjustments mentioned in this owner’s manual. Texi Tegra 4 Texi Tegra 4 INSTRUKCJA 2019.indb 72 Texi Tegra 4 INSTRUKCJA 2019.indb 72 18.09.2020 09:42 18.09.2020 09:42...
  • Seite 73 SAVE THESE INSTRUCTIONS This sewing machine is designed and manufactured for household use only. Texi Tegra 4 Texi Tegra 4 INSTRUKCJA 2019.indb 73 Texi Tegra 4 INSTRUKCJA 2019.indb 73 18.09.2020 09:42 18.09.2020 09:42...
  • Seite 74 STITCH LENGTH SETTING FREE ARM DIFFERENTIAL FEED ADJUSTMENT START SEWING FINISH SEWING GUIDE BAR TYPES OF STITCHES NEEDLE THREAD TENSION ADJUST 4-THREAD OVERCASTING Texi Tegra 4 Texi Tegra 4 INSTRUKCJA 2019.indb 74 Texi Tegra 4 INSTRUKCJA 2019.indb 74 18.09.2020 09:42 18.09.2020 09:42...
  • Seite 75 2-THREAD OVERCASTING 2-THREAD OVERLOCK 2-THREAD CRIMPED OVERLOCK MACHINE MAINTENANCE REPLACE THE LOWER KNIFE FABRIC, THREAD AND STITCH LENGTH HELPFUL HINTS MACHINE SPECIFICATIONS Texi Tegra 4 Texi Tegra 4 INSTRUKCJA 2019.indb 75 Texi Tegra 4 INSTRUKCJA 2019.indb 75 18.09.2020 09:42 18.09.2020 09:42...
  • Seite 76: Main Parts

    Hand wheel Differential adjustment lever Stitch adjustment knob Presser foot lift lever Thread guide Cloth waste box Pedal speed controller Connector Plug Texi Tegra 4 Texi Tegra 4 INSTRUKCJA 2019.indb 76 Texi Tegra 4 INSTRUKCJA 2019.indb 76 18.09.2020 09:42 18.09.2020 09:42...
  • Seite 77: Accessories Box

    When leaving the machine unattended, or servicing the machine, remove the power line plug from supply outlet. Texi Tegra 4 Texi Tegra 4 INSTRUKCJA 2019.indb 77 Texi Tegra 4 INSTRUKCJA 2019.indb 77 18.09.2020 09:42 18.09.2020 09:42...
  • Seite 78: Cloth Waste Box

    SPOOL STAND Pull the spool stand before put the spool holder on the spool pin. Texi Tegra 4 Texi Tegra 4 INSTRUKCJA 2019.indb 78 Texi Tegra 4 INSTRUKCJA 2019.indb 78 18.09.2020 09:42 18.09.2020 09:42...
  • Seite 79: Preparation For Threading

    While using large cone spool use spool holders which are located in the accosory box. Put the thread spool on the spool holder. Texi Tegra 4 Texi Tegra 4 INSTRUKCJA 2019.indb 79 Texi Tegra 4 INSTRUKCJA 2019.indb 79 18.09.2020 09:42 18.09.2020 09:42...
  • Seite 80: Needle Position

    Before re-threading lower looper, remove thread from needle eye first, then re-thread the lower looper. This will prevent tangling. NOTE: Thread tension is released when the presser foot is lifted up. Texi Tegra 4 Texi Tegra 4 INSTRUKCJA 2019.indb 80 Texi Tegra 4 INSTRUKCJA 2019.indb 80 18.09.2020 09:42 18.09.2020 09:42...
  • Seite 81: Threading The Upper Looper Thread

    THREADING THE UPPER LOOPER THREAD Note: Please use the tweezers in accessories box to help threading. Follow the 1-4 steps. Texi Tegra 4 Texi Tegra 4 INSTRUKCJA 2019.indb 81 Texi Tegra 4 INSTRUKCJA 2019.indb 81 18.09.2020 09:42 18.09.2020 09:42...
  • Seite 82: Threading The Lower Looper Thread

    Right extreme position Turn the hand wheel toward you until the Follow the 1-10 steps. lower looper reached the rightmost position. Texi Tegra 4 Texi Tegra 4 INSTRUKCJA 2019.indb 82 Texi Tegra 4 INSTRUKCJA 2019.indb 82 18.09.2020 09:42 18.09.2020 09:42...
  • Seite 83: Threading The Right Needle

    6 and 7. needle hole and put it Follow the under the presser foot. 1-9 steps. Texi Tegra 4 Texi Tegra 4 INSTRUKCJA 2019.indb 83 Texi Tegra 4 INSTRUKCJA 2019.indb 83 18.09.2020 09:42 18.09.2020 09:42...
  • Seite 84: Threading Left Needle Thread

    The fig 1 is wrong. on the looper thread, and then string on the needle thread. The fig 2 is right. Texi Tegra 4 Texi Tegra 4 INSTRUKCJA 2019.indb 84 Texi Tegra 4 INSTRUKCJA 2019.indb 84 18.09.2020 09:42 18.09.2020 09:42...
  • Seite 85: Replacing Thread Spools

    Cloth waste with left hand and snap onto the cover. See above pictures. buckle A firmly. Texi Tegra 4 Texi Tegra 4 INSTRUKCJA 2019.indb 85 Texi Tegra 4 INSTRUKCJA 2019.indb 85 18.09.2020 09:42 18.09.2020 09:42...
  • Seite 86: Presser Foot Lifter Lever

    As shown in the figure, the dial (See fig “A”) on the presser foot is used to indicate the range of motion of the needle Texi Tegra 4 Texi Tegra 4 INSTRUKCJA 2019.indb 86 Texi Tegra 4 INSTRUKCJA 2019.indb 86 18.09.2020 09:42...
  • Seite 87: Thread Cutter

    Push the upper knife arm to the right and turn the upper knife back to its original position. Turn off the looper cover, Then install cloth waste box. Texi Tegra 4 Texi Tegra 4 INSTRUKCJA 2019.indb 87 Texi Tegra 4 INSTRUKCJA 2019.indb 87 18.09.2020 09:42 18.09.2020 09:42...
  • Seite 88: 2-Thread Spreader Installation

    With the reverse step, you can remove the 2-thread spreader. Texi Tegra 4 Texi Tegra 4 INSTRUKCJA 2019.indb 88 Texi Tegra 4 INSTRUKCJA 2019.indb 88 18.09.2020 09:42 18.09.2020 09:42...
  • Seite 89: Change Feed Dog Settings

    Note: If the looper cover is opened, it is easier to adjust the trimming width. Texi Tegra 4 Texi Tegra 4 INSTRUKCJA 2019.indb 89 Texi Tegra 4 INSTRUKCJA 2019.indb 89 18.09.2020 09:42 18.09.2020 09:42...
  • Seite 90: Stitch Length Setting

    To install again front cloth base, push it to the right until it will be safely locked. Texi Tegra 4 Texi Tegra 4 INSTRUKCJA 2019.indb 90 Texi Tegra 4 INSTRUKCJA 2019.indb 90 18.09.2020 09:42 18.09.2020 09:42...
  • Seite 91: Differential Feed Adjustment

    (C). The settings can also sew out the stylish stitch. In the sewing thin fabric, can to gather the selvage (D). Texi Tegra 4 Texi Tegra 4 INSTRUKCJA 2019.indb 91 Texi Tegra 4 INSTRUKCJA 2019.indb 91 18.09.2020 09:42...
  • Seite 92 “3” automatically when adjusting lever knob is set to 2.0 Note: For normal overedge stitching, set differential feed adjusting lever knob to graduation “1.0”. Texi Tegra 4 Texi Tegra 4 INSTRUKCJA 2019.indb 92 Texi Tegra 4 INSTRUKCJA 2019.indb 92 18.09.2020 09:42 18.09.2020 09:42...
  • Seite 93: Start Sewing

    In the sewing cover stitch and 2-thread chain stitch, guide bar for regular interval overcast stitch is very useful. Texi Tegra 4 Texi Tegra 4 INSTRUKCJA 2019.indb 93 Texi Tegra 4 INSTRUKCJA 2019.indb 93 18.09.2020 09:42 18.09.2020 09:42...
  • Seite 94: Types Of Stitches

    3-thread crimped overlock Sewing medium thickness fabric 3-thread crimped overlock (hem) Sewing medium thickness fabric 2-thread overcasting (wide) Sewing medium thickness fabric Texi Tegra 4 Texi Tegra 4 INSTRUKCJA 2019.indb 94 Texi Tegra 4 INSTRUKCJA 2019.indb 94 18.09.2020 09:42 18.09.2020 09:42...
  • Seite 95: Needle Thread Tension Adjust

    If the tension is set in the best condition, the upper looper thread (green) and the lower looper thread (purple) can be seen on the back side of the fabric. Texi Tegra 4 Texi Tegra 4 INSTRUKCJA 2019.indb 95 Texi Tegra 4 INSTRUKCJA 2019.indb 95 18.09.2020 09:42 18.09.2020 09:42...
  • Seite 96: 3-Thread Overcasting

    If the needle thread (yellow or blue) is too loose. Adjust the needle tension knob (yellow or blue) to higher value. Texi Tegra 4 Texi Tegra 4 INSTRUKCJA 2019.indb 96 Texi Tegra 4 INSTRUKCJA 2019.indb 96 18.09.2020 09:42 18.09.2020 09:42...
  • Seite 97: 3-Thread Overlock

    Adjust the lower looper thread tension knob (purple) to higher value, or adjust upper looper thread tension knob (green) to lower value. Texi Tegra 4 Texi Tegra 4 INSTRUKCJA 2019.indb 97 Texi Tegra 4 INSTRUKCJA 2019.indb 97 18.09.2020 09:42 18.09.2020 09:42...
  • Seite 98: 3-Thread Decorative Overcasting

    GREEN PURPLE If the right needle thread (blue) is too loose. Adjust the right needle tension knob (blue) to higher value. Texi Tegra 4 Texi Tegra 4 INSTRUKCJA 2019.indb 98 Texi Tegra 4 INSTRUKCJA 2019.indb 98 18.09.2020 09:42 18.09.2020 09:42...
  • Seite 99: 3-Thread Crimped Overlock (Hem)

    Adjust the lower looper thread tension knob (purple) to higher value, or adjust the upper looper thread tension knob (green) to lower value. Texi Tegra 4 Texi Tegra 4 INSTRUKCJA 2019.indb 99 Texi Tegra 4 INSTRUKCJA 2019.indb 99 18.09.2020 09:42 18.09.2020 09:42...
  • Seite 100: 2-Thread Overcasting

    (yellow) to lower value. If the lower looper thread (purple) is too loose. Adjust the lower looper tension knob (purple) to higher value. Texi Tegra 4 Texi Tegra 4 INSTRUKCJA 2019.indb 100 Texi Tegra 4 INSTRUKCJA 2019.indb 100 18.09.2020 09:42 18.09.2020 09:42...
  • Seite 101: 2-Thread Crimped Overlock

    Needle plate nife, the lower knife and the looper area with NOTE: Turn off the power before operation. the brush in the accessory box. Texi Tegra 4 Texi Tegra 4 INSTRUKCJA 2019.indb 101 Texi Tegra 4 INSTRUKCJA 2019.indb 101 18.09.2020 09:42 18.09.2020 09:42...
  • Seite 102: Replace The Lower Knife

    Cotton:30-50# 2.0-4.0mm fabric, Denim, Thick cloth etc. Yarn:70-140# Cotton:40-60# KNITWEAR 2.0-4.0mm Yarn:70-140# 2-THREAD OR 3-THREAD Cotton: 1 20-140# 1.0-2.0mm HEMMING SEWING Texi Tegra 4 Texi Tegra 4 INSTRUKCJA 2019.indb 102 Texi Tegra 4 INSTRUKCJA 2019.indb 102 18.09.2020 09:42 18.09.2020 09:42...
  • Seite 103: Helpful Hints

    SMOOTH foot 3. When sewing thin fabrics, presser 3. Reduce the pressure of presser foot foot is too high Texi Tegra 4 Texi Tegra 4 INSTRUKCJA 2019.indb 103 Texi Tegra 4 INSTRUKCJA 2019.indb 103 18.09.2020 09:42 18.09.2020 09:42...
  • Seite 104: Machine Specifications

    National legislation relating to electrical/ electronic products. If in doubt please contact your retailer for guidance. Texi Tegra 4 Texi Tegra 4 INSTRUKCJA 2019.indb 104 Texi Tegra 4 INSTRUKCJA 2019.indb 104 18.09.2020 09:42 18.09.2020 09:42...
  • Seite 105 Texi Tegra 4 Texi Tegra 4 INSTRUKCJA 2019.indb 105 Texi Tegra 4 INSTRUKCJA 2019.indb 105 18.09.2020 09:42 18.09.2020 09:42...
  • Seite 106: Condiciones De Seguridad

    Para desconectar la máquina, no tire del cable, sino debe estirar del enchufe. Debe prestar atención a no colocar los dedos de las manos cerca de las partes móviles de la máquina. Texi Tegra 4 Texi Tegra 4 INSTRUKCJA 2019.indb 106 Texi Tegra 4 INSTRUKCJA 2019.indb 106 18.09.2020 09:42 18.09.2020 09:42...
  • Seite 107 Antes de proceder a los trabajos de mantenimiento, descritos en el manual. CONSERVE EL SIGUIENTE MANUAL DE INSTRUCCIONES La máquina está diseñada solo para uso doméstico. Texi Tegra 4 Texi Tegra 4 INSTRUKCJA 2019.indb 107 Texi Tegra 4 INSTRUKCJA 2019.indb 107 18.09.2020 09:42 18.09.2020 09:42...
  • Seite 108 BARRA DE GUIADO TODO TIPO DE COMPONENTES DE COSTRURA AJUSTE DE LA TENSIÓN ENTRE EL HILO Y LA AGUJA SOBREHILADO DE 4 HILOS Texi Tegra 4 Texi Tegra 4 INSTRUKCJA 2019.indb 108 Texi Tegra 4 INSTRUKCJA 2019.indb 108 18.09.2020 09:42 18.09.2020 09:42...
  • Seite 109 RECAMBIO DEL CUCHILLO INFERIOR LARGO DEL MATERIAL, EL HILO Y LA COSTURA PROBLEMAS MÁS COMUNES Y SU RESOLUCIÓN ESPECIFICACIONES TÉCNICAS DE LA MÁQUINA Texi Tegra 4 Texi Tegra 4 INSTRUKCJA 2019.indb 109 Texi Tegra 4 INSTRUKCJA 2019.indb 109 18.09.2020 09:42 18.09.2020 09:42...
  • Seite 110: Lista De Componentes

    Alfiler de ajuste de la costura Palanca del pie Guía del hilo de recubrimiento Recipiente para retales Controlador de la velocidad del pedal Conector Enchufe Texi Tegra 4 Texi Tegra 4 INSTRUKCJA 2019.indb 110 Texi Tegra 4 INSTRUKCJA 2019.indb 110 18.09.2020 09:42 18.09.2020 09:42...
  • Seite 111: Caja Deaccesorios

    Al dejar la máquina sin vigilancia o al realizar tareas de mantenimiento, debe desconectar la alimentación. Texi Tegra 4 Texi Tegra 4 INSTRUKCJA 2019.indb 111 Texi Tegra 4 INSTRUKCJA 2019.indb 111 18.09.2020 09:42 18.09.2020 09:42...
  • Seite 112: Recipiente Para Retales

    SOPORTEDEL CARRETE Tirar por el soporte del carrete antes de poner el carrete en el alfiler. Texi Tegra 4 Texi Tegra 4 INSTRUKCJA 2019.indb 112 Texi Tegra 4 INSTRUKCJA 2019.indb 112 18.09.2020 09:42 18.09.2020 09:42...
  • Seite 113: Soporte Para Hilos

    Si el carrete es grande, usar el soporte del carrete que se encuentra en la caja de accesorios. Poner el carrete sobre el sostenedor del carrete. Texi Tegra 4 Texi Tegra 4 INSTRUKCJA 2019.indb 113 Texi Tegra 4 INSTRUKCJA 2019.indb 113 18.09.2020 09:42 18.09.2020 09:42...
  • Seite 114: Posición De La Aguja

    Eleve la aguja hasta su posición más alta, girando el volante en su dirección, y levante el pie prensatelas. PRECAUCIÓN: Al levantar el pie prensatelas, se libera la tensión del hilo. Texi Tegra 4 Texi Tegra 4 INSTRUKCJA 2019.indb 114 Texi Tegra 4 INSTRUKCJA 2019.indb 114 18.09.2020 09:42 18.09.2020 09:42...
  • Seite 115: Enhebramiento Del Hilo De La Lanzadera Superior

    ENHEBRAMIENTO DEL HILO DE LA LANZADERA SUPERIOR Comentario: Usar las pinzas que se encuentran en la caja de accesorios. Seguir los pasos 1 a 4. Texi Tegra 4 Texi Tegra 4 INSTRUKCJA 2019.indb 115 Texi Tegra 4 INSTRUKCJA 2019.indb 115 18.09.2020 09:42 18.09.2020 09:42...
  • Seite 116: Enhebramiento Del Hilo De La Lanzadera Inferior

    Poner la rueda manual hacia sí hasta que la Seguir los pasos 1 a 10. lanzadera inferior llegue a la posición derecha extrema.osiągnie prawą skrajną pozycję. Texi Tegra 4 Texi Tegra 4 INSTRUKCJA 2019.indb 116 Texi Tegra 4 INSTRUKCJA 2019.indb 116 18.09.2020 09:42 18.09.2020 09:42...
  • Seite 117: Enhebramiento De La Aguja Derecha

    6 y 7. y ponerlo por debajo del Seguir pie prensatelas. los pasos 1 a 9. Texi Tegra 4 Texi Tegra 4 INSTRUKCJA 2019.indb 117 Texi Tegra 4 INSTRUKCJA 2019.indb 117 18.09.2020 09:42 18.09.2020 09:42...
  • Seite 118: Enhebramiento De La Aguja Izquierda

    La costura en la figura 1 es el hilo de la aguja. La costura en la figura incorrecta. 2 es incorrecta. Texi Tegra 4 Texi Tegra 4 INSTRUKCJA 2019.indb 118 Texi Tegra 4 INSTRUKCJA 2019.indb 118 18.09.2020 09:42 18.09.2020 09:42...
  • Seite 119: Cambio De Bobinas De Hilo

    Después, tirar fuerte con la debajo de la lanzadera con la mano izquierda y retirar la tapa. Cf. Figuras arriba. mano izquierda hasta sentir resistencia. Texi Tegra 4 Texi Tegra 4 INSTRUKCJA 2019.indb 119 Texi Tegra 4 INSTRUKCJA 2019.indb 119 18.09.2020 09:42 18.09.2020 09:42...
  • Seite 120: Palanca Del Pie Prensatelas

    Como se ve en la figura (cf. fig. «A»), el indicador en el pie se usa para ver el rango de movimiento de la aguja. Este elemento puede servir de guía durante la costura. Texi Tegra 4 Texi Tegra 4 INSTRUKCJA 2019.indb 120 Texi Tegra 4 INSTRUKCJA 2019.indb 120 18.09.2020 09:42...
  • Seite 121: Cortador De Hilo

    Girar la tapa de la lanzadera e instalar el recipiente para retales. Texi Tegra 4 Texi Tegra 4 INSTRUKCJA 2019.indb 121 Texi Tegra 4 INSTRUKCJA 2019.indb 121 18.09.2020 09:42 18.09.2020 09:42...
  • Seite 122: 2-Instalación Del Esparcidor De Hilo (Lanzadera "Ciega")

    Realizando el procedimiento al revés, se puede retirar el esparcidor de 2 hilos. Texi Tegra 4 Texi Tegra 4 INSTRUKCJA 2019.indb 122 Texi Tegra 4 INSTRUKCJA 2019.indb 122 18.09.2020 09:42 18.09.2020 09:42...
  • Seite 123: Selector De Configuración

    Comentario: Si la tapa de la lanzadera está abierta, es más fácil ajustar el ancho del corte. Texi Tegra 4 Texi Tegra 4 INSTRUKCJA 2019.indb 123 Texi Tegra 4 INSTRUKCJA 2019.indb 123 18.09.2020 09:43 18.09.2020 09:43...
  • Seite 124: Configuración Del Largo De La Costura

    Texi Tegra 4 Texi Tegra 4 INSTRUKCJA 2019.indb 124 Texi Tegra 4 INSTRUKCJA 2019.indb 124 18.09.2020 09:43 18.09.2020 09:43...
  • Seite 125: Ajuste Diferencial

    (C). Con el uso de esta configuración, también se puede realizar una costura con estilo. De este modo, se puede conseguir un efecto de fruncido sobre telas suaves (D). Texi Tegra 4 Texi Tegra 4 INSTRUKCJA 2019.indb 125 Texi Tegra 4 INSTRUKCJA 2019.indb 125 18.09.2020 09:43 18.09.2020 09:43...
  • Seite 126 2.0. Comentario: Para la costura normal sobre los bordes, poner la leva en el valor de “1.0”. Texi Tegra 4 Texi Tegra 4 INSTRUKCJA 2019.indb 126 Texi Tegra 4 INSTRUKCJA 2019.indb 126 18.09.2020 09:43 18.09.2020 09:43...
  • Seite 127: Inicio De La Costura

    En caso de la costura de recubrimiento y la en cadeneta de 2 hilos, la barra es muy útil para tener distancias regulares. Texi Tegra 4 Texi Tegra 4 INSTRUKCJA 2019.indb 127 Texi Tegra 4 INSTRUKCJA 2019.indb 127 18.09.2020 09:43 18.09.2020 09:43...
  • Seite 128: Todo Tipo De Componentes De Costrura

    Sobrehilado de 2 hilos (ancho) Costura de telas de grosor medio Sobrehilado de 2 hilos (estrecho) Costura de tela ligera Texi Tegra 4 Texi Tegra 4 INSTRUKCJA 2019.indb 128 Texi Tegra 4 INSTRUKCJA 2019.indb 128 18.09.2020 09:43 18.09.2020 09:43...
  • Seite 129: Ajuste De La Tensión Entre El Hilo Y La Aguja

    (verde) y de la lanzadera inferior Hilo de la aguja izquierda (violeta) se pueden ver por el lado trasero de la tela. Atrás Frente Texi Tegra 4 Texi Tegra 4 INSTRUKCJA 2019.indb 129 Texi Tegra 4 INSTRUKCJA 2019.indb 129 18.09.2020 09:43 18.09.2020 09:43...
  • Seite 130: Sobrehilado De 3 Hilos

    Si el hilo de la aguja (amarillo o azul) está flojo. Ajustar la tensión del hilo (amarillo o azul) subiendo el valor. Hilo de la aguja Frente Atrás Texi Tegra 4 Texi Tegra 4 INSTRUKCJA 2019.indb 130 Texi Tegra 4 INSTRUKCJA 2019.indb 130 18.09.2020 09:43 18.09.2020 09:43...
  • Seite 131: Sobrehilado De 3 Hilos

    Hilo de la aguja superior o ajustar la tensión del hilo de la lanzadera Frente superior (verde) hasta un valor inferior. Atrás Texi Tegra 4 Texi Tegra 4 INSTRUKCJA 2019.indb 131 Texi Tegra 4 INSTRUKCJA 2019.indb 131 18.09.2020 09:43 18.09.2020 09:43...
  • Seite 132: Sobrehilado Decorativo De 3 Hilos

    Si el hilo derecho (azul) está flojo. Ajustar la tensión del Hilo de la lanzadera hilo derecho (azul) subiendo el valor. superior Hilo de la lanzadera Frente inferior Atrás Texi Tegra 4 Texi Tegra 4 INSTRUKCJA 2019.indb 132 Texi Tegra 4 INSTRUKCJA 2019.indb 132 18.09.2020 09:43 18.09.2020 09:43...
  • Seite 133: Sobrehilado Rizado De 3 Hilos (Dobladillo)

    Hilo de la aguja un valor superior o ajustar la tensión del hilo de la Frente lanzadera superior (verde) hasta un valor inferior. Atrás Texi Tegra 4 Texi Tegra 4 INSTRUKCJA 2019.indb 133 Texi Tegra 4 INSTRUKCJA 2019.indb 133 18.09.2020 09:43 18.09.2020 09:43...
  • Seite 134: Sobrehilado De 2 Hilos

    Hilo de la Ajustar la tensión del hilo de la lanzadera inferior Hilo de la lanzadera (violeta) subiendo el valor. Frente inferior Atrás Texi Tegra 4 Texi Tegra 4 INSTRUKCJA 2019.indb 134 Texi Tegra 4 INSTRUKCJA 2019.indb 134 18.09.2020 09:43 18.09.2020 09:43...
  • Seite 135: Sobrehilado Rizado De 2 Hilos

    área de la lanzadera antes de la operación. con el cepillo que se encuentra en la caja de accesorios. Texi Tegra 4 Texi Tegra 4 INSTRUKCJA 2019.indb 135 Texi Tegra 4 INSTRUKCJA 2019.indb 135 18.09.2020 09:43 18.09.2020 09:43...
  • Seite 136: Recambio Del Cuchillo Inferior

    Hilo: 70-140# Algodón: 40-60# TELAS DE PUNTO 2.0-4.0mm Hilo: 70-140# DOBLADILLOS DE 2 O 3 HILOS Algodón: 120-140# 1.0-2.0mm Texi Tegra 4 Texi Tegra 4 INSTRUKCJA 2019.indb 136 Texi Tegra 4 INSTRUKCJA 2019.indb 136 18.09.2020 09:43 18.09.2020 09:43...
  • Seite 137: Problemas Más Comunes Y Su Resolución

    2. Aumentar la presión del pie INTERRUMPE 3. A la hora de coser telas finas, el pie 3. Disminuir la presión del pie está demasiado alto Texi Tegra 4 Texi Tegra 4 INSTRUKCJA 2019.indb 137 Texi Tegra 4 INSTRUKCJA 2019.indb 137 18.09.2020 09:43 18.09.2020 09:43...
  • Seite 138: Especificaciones Técnicas De La Máquina

    La eliminación inadecuada del producto por parte del usuario puede dar lugar a sanciones administrativas, de acuerdo con la legislación vigente. Texi Tegra 4 Texi Tegra 4 INSTRUKCJA 2019.indb 138 Texi Tegra 4 INSTRUKCJA 2019.indb 138 18.09.2020 09:43 18.09.2020 09:43...
  • Seite 139 Texi Tegra 4 Texi Tegra 4 INSTRUKCJA 2019.indb 139 Texi Tegra 4 INSTRUKCJA 2019.indb 139 18.09.2020 09:43 18.09.2020 09:43...
  • Seite 140: Exigences De Securite

    Il faut faire attention à ce que le câble ne touche pas une surface chaude et ne crée pas de risque trébuchement ou d’accrochement. Texi Tegra 4 Texi Tegra 4 INSTRUKCJA 2019.indb 140 Texi Tegra 4 INSTRUKCJA 2019.indb 140 18.09.2020 09:43...
  • Seite 141 Avant de commencer les travaux d’entretien décrits dans la notice il faut débrancher la machine de l’alimentation. CONSERVER LA PRESENTE NOTICE La machine est conçue pour un usage domestique uniquement. Texi Tegra 4 Texi Tegra 4 INSTRUKCJA 2019.indb 141 Texi Tegra 4 INSTRUKCJA 2019.indb 141 18.09.2020 09:43 18.09.2020 09:43...
  • Seite 142 TOUS LES TYPES DE POINTS DE COUTURE RÉGLAGE DE LA TENSION DU FIL DE L’AIGUILLE POINT DE SURJET À 4 FILS Texi Tegra 4 Texi Tegra 4 INSTRUKCJA 2019.indb 142 Texi Tegra 4 INSTRUKCJA 2019.indb 142 18.09.2020 09:43 18.09.2020 09:43...
  • Seite 143 TISSU, FIL ET LONGUEUR DE POINT LES PROBLÈMES LES PLUS COURANTS ET LES MÉTHODES POUR LES RÉSOUDRE SPECIFICATION DE LA MACHINE Texi Tegra 4 Texi Tegra 4 INSTRUKCJA 2019.indb 143 Texi Tegra 4 INSTRUKCJA 2019.indb 143 18.09.2020 09:43 18.09.2020 09:43...
  • Seite 144: Nom Des Pièces

    Levier élévateur du pied-de-biche Guide-fil du capot supérieur Réceptacle pour chutes Pédale de commande de vitesse Prise de connexion Fiche de connexion Texi Tegra 4 Texi Tegra 4 INSTRUKCJA 2019.indb 144 Texi Tegra 4 INSTRUKCJA 2019.indb 144 18.09.2020 09:43 18.09.2020 09:43...
  • Seite 145: Boîte À Accessoires

    En laissant la machine sans contrôle ou en effectuant des activités d’entretien il faut débrancher l’alimentation. Texi Tegra 4 Texi Tegra 4 INSTRUKCJA 2019.indb 145 Texi Tegra 4 INSTRUKCJA 2019.indb 145 18.09.2020 09:43 18.09.2020 09:43...
  • Seite 146: Réceptacle Pour Chutes

    électrique avant d’ouvrir le couvercle du crochet ! SUPPORTS POUR BOBINES Tirez le support de la bobine vers vous et placez le porte-bobine. Texi Tegra 4 Texi Tegra 4 INSTRUKCJA 2019.indb 146 Texi Tegra 4 INSTRUKCJA 2019.indb 146 18.09.2020 09:43 18.09.2020 09:43...
  • Seite 147: Preparation A L'enfilage

    Si la bobine de fil est grande, utiliser le disque pour bobine de la boîte d’accessoires. Mettez la bobine sur le porte-bobine. Texi Tegra 4 Texi Tegra 4 INSTRUKCJA 2019.indb 147 Texi Tegra 4 INSTRUKCJA 2019.indb 147 18.09.2020 09:43 18.09.2020 09:43...
  • Seite 148: Position De L'aiguille

    Pour faciliter l’enfilage, ouvrez le couvercle du crochet, vous verrez un dessin d’enfilage coloré. Effectuez l’enfilage du fil dans l’ordre 1-4. Texi Tegra 4 Texi Tegra 4 INSTRUKCJA 2019.indb 148 Texi Tegra 4 INSTRUKCJA 2019.indb 148 18.09.2020 09:43 18.09.2020 09:43...
  • Seite 149: Enfilage De La Griffe Superieure

    ENFILAGE DE LA GRIFFE SUPERIEURE Attention : Utilisez la précelle de la boîte d’accessoires pour faciliter l’enfilage. Suivez les étapes 1 à 4. Texi Tegra 4 Texi Tegra 4 INSTRUKCJA 2019.indb 149 Texi Tegra 4 INSTRUKCJA 2019.indb 149 18.09.2020 09:43 18.09.2020 09:43...
  • Seite 150: Enfilage De La Griffe Inferieure

    Tournez le bouton rotatif vers vous jusqu’à ce Suivez les étapes 1 à 10. que le crochet inférieur atteigne la position extrême droite. Texi Tegra 4 Texi Tegra 4 INSTRUKCJA 2019.indb 150 Texi Tegra 4 INSTRUKCJA 2019.indb 150 18.09.2020 09:43 18.09.2020 09:43...
  • Seite 151: Enfilage Du Fil Dans L'aiguille Droite

    à travers le trou droit de 6 et 7. l’aiguille et le placer sous Suivez les le pieddebiche. étapes 1 à 9. Texi Tegra 4 Texi Tegra 4 INSTRUKCJA 2019.indb 151 Texi Tegra 4 INSTRUKCJA 2019.indb 151 18.09.2020 09:43 18.09.2020 09:43...
  • Seite 152: Enfilage Du Fil Dans L'aiguille Gauche

    être incomplet. La figure 1 montre crochet, puis dans l’aiguille. La figure 2 montre une disposition incorrecte. la disposition correcte. Texi Tegra 4 Texi Tegra 4 INSTRUKCJA 2019.indb 152 Texi Tegra 4 INSTRUKCJA 2019.indb 152 18.09.2020 09:43 18.09.2020 09:43...
  • Seite 153: Changement Des Bobines Avec Le Fil

    Voir les photos ci-dessus. enclenchez fermement le loquet A. Texi Tegra 4 Texi Tegra 4 INSTRUKCJA 2019.indb 153 Texi Tegra 4 INSTRUKCJA 2019.indb 153 18.09.2020 09:43 18.09.2020 09:43...
  • Seite 154: Levier Du Pied-De-Biche

    (A sur la photo) indique l’amplitude du mouvement de l’aiguille. Cela peut être utile dans le processus de couture. Texi Tegra 4 Texi Tegra 4 INSTRUKCJA 2019.indb 154 Texi Tegra 4 INSTRUKCJA 2019.indb 154 18.09.2020 09:43...
  • Seite 155: Coupe-Fil

    Retirer le couvercle du crochet, et ensuite installer le réceptacle pour chutes. Texi Tegra 4 Texi Tegra 4 INSTRUKCJA 2019.indb 155 Texi Tegra 4 INSTRUKCJA 2019.indb 155 18.09.2020 09:43 18.09.2020 09:43...
  • Seite 156: Installation Du Séparateur (Griffe « Aveugle »)

    L’extrémité du séparateur est verrouillée dans l’ouverture du crochet supérieur. Si vous faites le contraire, vous pouvez démonter le distributeur. Texi Tegra 4 Texi Tegra 4 INSTRUKCJA 2019.indb 156 Texi Tegra 4 INSTRUKCJA 2019.indb 156 18.09.2020 09:43 18.09.2020 09:43...
  • Seite 157: Modifier Les Réglages Des Griffes

    Attention : Lorsque le couvercle du crochet est ouvert, il est plus facile de régler la largeur de la couture. Texi Tegra 4 Texi Tegra 4 INSTRUKCJA 2019.indb 157 Texi Tegra 4 INSTRUKCJA 2019.indb 157 18.09.2020 09:43 18.09.2020 09:43...
  • Seite 158: Réglage De La Longueur Du Point

    Texi Tegra 4 Texi Tegra 4 INSTRUKCJA 2019.indb 158 Texi Tegra 4 INSTRUKCJA 2019.indb 158 18.09.2020 09:43 18.09.2020 09:43...
  • Seite 159: Réglage Du Déplacement Différentiel

    (C). Ce réglage vous permet également d’effectuer une couture élégante. De cette façon, vous pouvez obtenir un effet plissé sur les tissus délicats (D). Texi Tegra 4 Texi Tegra 4 INSTRUKCJA 2019.indb 159 Texi Tegra 4 INSTRUKCJA 2019.indb 159 18.09.2020 09:43...
  • Seite 160 « 2,0 ». Attention : Pour une couture normale, réglez le bouton de réglage du déplacement différentiel sur « 1,0 ». Texi Tegra 4 Texi Tegra 4 INSTRUKCJA 2019.indb 160 Texi Tegra 4 INSTRUKCJA 2019.indb 160 18.09.2020 09:43 18.09.2020 09:43...
  • Seite 161: Debut De La Couture

    Ce guide est utile pour coudre avec un point de recouvrement et un point chainette à 2 fils à espacement régulier. Texi Tegra 4 Texi Tegra 4 INSTRUKCJA 2019.indb 161 Texi Tegra 4 INSTRUKCJA 2019.indb 161 18.09.2020 09:43 18.09.2020 09:43...
  • Seite 162: Tous Les Types De Points De Couture

    3 fils (ourlet) Couture de tissus fins et d’épaisseur moyenne Point de surjet à 2 fils (large) Couture de tissus tricotés d’épaisseur moyenne Texi Tegra 4 Texi Tegra 4 INSTRUKCJA 2019.indb 162 Texi Tegra 4 INSTRUKCJA 2019.indb 162 18.09.2020 09:43 18.09.2020 09:43...
  • Seite 163: Réglage De La Tension Du Fil De L'aiguille

    (vert) et inférieur (violet) Fil de l’aiguille gauche apparaissent sur le côté gauche du tissu. Côté Côté droit gauche Texi Tegra 4 Texi Tegra 4 INSTRUKCJA 2019.indb 163 Texi Tegra 4 INSTRUKCJA 2019.indb 163 18.09.2020 09:43 18.09.2020 09:43...
  • Seite 164: Point De Surjet À 3 Fils

    (jaune ou bleu) Fil d’aiguille sur un chiffre plus élevé. Côté Côté droit gauche Texi Tegra 4 Texi Tegra 4 INSTRUKCJA 2019.indb 164 Texi Tegra 4 INSTRUKCJA 2019.indb 164 18.09.2020 09:43 18.09.2020 09:43...
  • Seite 165: Point De Surjet À 3 Fils

    (violette) sur des chiffres plus élevés ou la molette du Fil d’aiguille crochet supérieur (verte) sur un chiffre inférieur. Côté Côté droit gauche Texi Tegra 4 Texi Tegra 4 INSTRUKCJA 2019.indb 165 Texi Tegra 4 INSTRUKCJA 2019.indb 165 18.09.2020 09:43 18.09.2020 09:43...
  • Seite 166: Point Décoratif À 3 Fils

    (bleue) sur un Fil du crochet supérieur Côté Fil du crochet chiffre plus élevé. droit inférieur Côté gauche Texi Tegra 4 Texi Tegra 4 INSTRUKCJA 2019.indb 166 Texi Tegra 4 INSTRUKCJA 2019.indb 166 18.09.2020 09:43 18.09.2020 09:43...
  • Seite 167: Point Plissé De Surjet À 3 Fils (Ourlet)

    élevés ou la molette du crochet Fil d’aiguille supérieur (verte) sur des chiffres plus bas. Côté Côté droit gauche Texi Tegra 4 Texi Tegra 4 INSTRUKCJA 2019.indb 167 Texi Tegra 4 INSTRUKCJA 2019.indb 167 18.09.2020 09:43 18.09.2020 09:43...
  • Seite 168: Point De Surjet À 2 Fils

    Régler la molette de tension du crochet inférieur Fil du crochet inférieur Côté (violet) sur un chiffre plus élevé. droit Côté gauche Texi Tegra 4 Texi Tegra 4 INSTRUKCJA 2019.indb 168 Texi Tegra 4 INSTRUKCJA 2019.indb 168 18.09.2020 09:43 18.09.2020 09:43...
  • Seite 169: Point Plissé À 2 Fils

    ATTENTION : Mettez l’appareil hors tension supérieur, le couteau inférieur avant d’effectuer l’opération. et la zone du crochet avec le pinceau de la boîte d’accessoires. Texi Tegra 4 Texi Tegra 4 INSTRUKCJA 2019.indb 169 Texi Tegra 4 INSTRUKCJA 2019.indb 169 18.09.2020 09:43 18.09.2020 09:43...
  • Seite 170: Remplacement Du Couteau Inférieur

    TISSU TRICOTÉ 2.0-4.0mm Fil textile : 70-140# OURLET AVEC COUTURE À 2 Coton : 120-140# 1.0-2.0mm FILS OU À 3 FILS Texi Tegra 4 Texi Tegra 4 INSTRUKCJA 2019.indb 170 Texi Tegra 4 INSTRUKCJA 2019.indb 170 18.09.2020 09:43 18.09.2020 09:43...
  • Seite 171: Les Problèmes Les Plus Courants Et Les Méthodes Pour Les

    3. Lors de la couture de tissus fins, le piedde- 3. Diminuez la pression du pied-de-biche biche est trop haut Texi Tegra 4 Texi Tegra 4 INSTRUKCJA 2019.indb 171 Texi Tegra 4 INSTRUKCJA 2019.indb 171 18.09.2020 09:43 18.09.2020 09:43...
  • Seite 172: Specification De La Machine

    à optimiser la récupération et la réutilisation des parties composantes de l’appareil. Une élimination incorrecte du produit par son utilisateur peut entraîner des sanctions administratives conformément aux lois applicables. Texi Tegra 4 Texi Tegra 4 INSTRUKCJA 2019.indb 172 Texi Tegra 4 INSTRUKCJA 2019.indb 172 18.09.2020 09:43 18.09.2020 09:43...
  • Seite 173 Texi Tegra 4 Texi Tegra 4 INSTRUKCJA 2019.indb 173 Texi Tegra 4 INSTRUKCJA 2019.indb 173 18.09.2020 09:43 18.09.2020 09:43...
  • Seite 174: Wymogi Bezpieczeństwa

    W celu wyłączenia maszyny, należy ustawić wyłącznik w pozycji STOP („0”), a następnie wyjąć wtyczkę z gniazdka. Texi Tegra 4 Texi Tegra 4 INSTRUKCJA 2019.indb 174 Texi Tegra 4 INSTRUKCJA 2019.indb 174 18.09.2020 09:43 18.09.2020 09:43...
  • Seite 175 Przed przystąpieniem do zabiegów konserwacyjnych, opisanych w instrukcji, należy wyłączyć maszynę z gniazdka. NALEŻY ZACHOWAĆ NINIEJSZĄ INSTRUKCJĘ OBSŁUGI Maszyna jest zaprojektowana tylko do użytku domowego. Texi Tegra 4 Texi Tegra 4 INSTRUKCJA 2019.indb 175 Texi Tegra 4 INSTRUKCJA 2019.indb 175 18.09.2020 09:43 18.09.2020 09:43...
  • Seite 176 USTAWIANIE DŁUGOŚCI ŚCIEGU WOLNE RAMIĘ REGULACJA TRANSPORTU RÓŻNICOWEGO ROZPOCZĘCIE SZYCIA ZAKOŃCZENIE SZYCIA PROWADNIK WSZYSTKIE RODZAJE ŚCIEGÓW USTAWIENIA NAPRĘŻENIA NICI IGŁY ŚCIEG 4-NITKOWY OWERLOKOWY Texi Tegra 4 Texi Tegra 4 INSTRUKCJA 2019.indb 176 Texi Tegra 4 INSTRUKCJA 2019.indb 176 18.09.2020 09:43 18.09.2020 09:43...
  • Seite 177 ŚCIEG 2-NITKOWY MARSZCZONY KONSERWACJA MASZYNY WYMIANA DOLNEGO NOŻA TKANINA, NIĆ I DŁUGOŚĆ ŚCIEGU NAJCZĘSTSZE PROBLEMY I METODY ICH USUWANIA SPECYFIKACJA MASZYNY Texi Tegra 4 Texi Tegra 4 INSTRUKCJA 2019.indb 177 Texi Tegra 4 INSTRUKCJA 2019.indb 177 18.09.2020 09:43 18.09.2020 09:43...
  • Seite 178: Nazwy Części

    Dźwignia regulacji transportu różnicowego Pokrętło regulacji ściegu Dźwignia podnośnika stopki dociskowej Prowadnik nici Pojemnik na ścinki Pedał regulacji prędkości Kabel Wtyczka Texi Tegra 4 Texi Tegra 4 INSTRUKCJA 2019.indb 178 Texi Tegra 4 INSTRUKCJA 2019.indb 178 18.09.2020 09:43 18.09.2020 09:43...
  • Seite 179: Pudełko Z Akcesoriami

    / światła. Przełącznik do gniazdka elektrycznego. ten steruje zasilaniem i światłem maszyny. Pozostawiając maszynę bez nadzoru lub przeprowadzając czynności serwisowe, należy rozłączyć zasilanie. Texi Tegra 4 Texi Tegra 4 INSTRUKCJA 2019.indb 179 Texi Tegra 4 INSTRUKCJA 2019.indb 179 18.09.2020 09:43 18.09.2020 09:43...
  • Seite 180: Pojemnik Na Resztki Tkaniny

    Uwaga: Dla bezpieczeństwa wyłącz zasilanie przed otwarciem pokrywy chwytacza! MONTOWANIE STOJAKA NA SZPULKI Pociągnij stojak na szpulki do siebie, a następnie umieść uchwyt na szpulki. Texi Tegra 4 Texi Tegra 4 INSTRUKCJA 2019.indb 180 Texi Tegra 4 INSTRUKCJA 2019.indb 180 18.09.2020 09:43 18.09.2020 09:43...
  • Seite 181: Przygotowanie Do Nawlekania

    Załóż uchwyt szpulki na trzpień szpulki. Jeśli szpulka nici jest duża, należy użyć tarczy szpulki z pudełka z akcesoriami. Załóż szpulkę na uchwyt. Texi Tegra 4 Texi Tegra 4 INSTRUKCJA 2019.indb 181 Texi Tegra 4 INSTRUKCJA 2019.indb 181 18.09.2020 09:43 18.09.2020 09:43...
  • Seite 182: Pozycja Igły

    Unieś igły do najwyższego położenia obracając koło napędowe w swoją stronę i podnieś stopkę dociskową. UWAGA: Po podniesieniu stopki dociskowej zwolnione zostaje naciągnięcie nici. Texi Tegra 4 Texi Tegra 4 INSTRUKCJA 2019.indb 182 Texi Tegra 4 INSTRUKCJA 2019.indb 182 18.09.2020 09:43 18.09.2020 09:43...
  • Seite 183: Nawlekanie Górnego Chwytacza

    NAWLEKANIE GÓRNEGO CHWYTACZA Uwaga: Użyj pincety z pudełka z akcesoriami, aby ułatwić sobie nawlekanie. Postępuj zgodnie z krokami 1-4. Texi Tegra 4 Texi Tegra 4 INSTRUKCJA 2019.indb 183 Texi Tegra 4 INSTRUKCJA 2019.indb 183 18.09.2020 09:43 18.09.2020 09:43...
  • Seite 184: Nawlekanie Dolnego Chwytacza

    Uwaga: Użyj pincety z pudełka z akcesoriami, aby ułatwić sobie nawlekanie. Prawa skrajna pozycja Obróć pokrętło do siebie, aż dolny chwytacz Postępuj zgodnie z krokami 1-10. osiągnie prawą skrajną pozycję. Texi Tegra 4 Texi Tegra 4 INSTRUKCJA 2019.indb 184 Texi Tegra 4 INSTRUKCJA 2019.indb 184 18.09.2020 09:43 18.09.2020 09:43...
  • Seite 185: Nawlekanie Prawej Igły

    6 i 7. i umieść ją pod stopką Postępuj dociskową. zgodnie z krokami 1-9. Texi Tegra 4 Texi Tegra 4 INSTRUKCJA 2019.indb 185 Texi Tegra 4 INSTRUKCJA 2019.indb 185 18.09.2020 09:43 18.09.2020 09:43...
  • Seite 186: Nawlekanie Lewej Igły

    Następnie nawlec w pierwszej kolejności ściegu. Rys. 1 pokazuje błędny układ. nić chwytacza, a następnie igły. Rys. 2 pokazuje prawidłowy układ. Texi Tegra 4 Texi Tegra 4 INSTRUKCJA 2019.indb 186 Texi Tegra 4 INSTRUKCJA 2019.indb 186 18.09.2020 09:43 18.09.2020 09:43...
  • Seite 187: Wymiana Szpulki

    ścinki pod pokrywę chwytacza ręką i zdejmij pokrywę. Patrz zdjęcia wyżej. i zatrzaśnij mocno zacisk A. Texi Tegra 4 Texi Tegra 4 INSTRUKCJA 2019.indb 187 Texi Tegra 4 INSTRUKCJA 2019.indb 187 18.09.2020 09:43 18.09.2020 09:43...
  • Seite 188: Dźwignia Stopki Dociskowej

    Opuść uchwyt stopki, aby zablokować stopkę na miejscu. Jak pokazano na rysunku, podziałka na stopce (A) wskazuje zakres ruchu igły. Może to być pomocne w procesie szycia. Texi Tegra 4 Texi Tegra 4 INSTRUKCJA 2019.indb 188 Texi Tegra 4 INSTRUKCJA 2019.indb 188 18.09.2020 09:43 18.09.2020 09:43...
  • Seite 189: Obcinacz Nici

    Przesuń ramię górnego noża w prawo i obróć górny nóż z powrotem do pozycji wyjściowej. Zdejmij pokrywę chwytacza, a następnie załóż pojemnik na ścinki. Texi Tegra 4 Texi Tegra 4 INSTRUKCJA 2019.indb 189 Texi Tegra 4 INSTRUKCJA 2019.indb 189 18.09.2020 09:43 18.09.2020 09:43...
  • Seite 190: Przełączenie Na Dwie Nici

    Obróć go w lewo i naciśnij górną część lekko do tyłu. Końcówka ślepego chwytacza zostanie zablokowana w otworze górnego chwytacza. Postępując odwrotnie można zdemontować ślepy chwytacz. Texi Tegra 4 Texi Tegra 4 INSTRUKCJA 2019.indb 190 Texi Tegra 4 INSTRUKCJA 2019.indb 190 18.09.2020 09:43 18.09.2020 09:43...
  • Seite 191: Zmiana Ustawień Transportera

    Szerokość regulacji jest zaznaczona na płytce ściegowej, „R” oznacza szerokość przy szyciu owerlokowym. Uwaga: Gdy pokrywa chwytacza jest otwarta, łatwiej jestustawić szerokość ściegu. Texi Tegra 4 Texi Tegra 4 INSTRUKCJA 2019.indb 191 Texi Tegra 4 INSTRUKCJA 2019.indb 191 18.09.2020 09:43 18.09.2020 09:43...
  • Seite 192: Ustawianie Długości Ściegu

    Aby ponownie zamontować stolik ustaw go tak, aby był wyrównany z obudową chwytacza, po czym wsuń go w prawo, aż zaskoczy na miejsce. Texi Tegra 4 Texi Tegra 4 INSTRUKCJA 2019.indb 192 Texi Tegra 4 INSTRUKCJA 2019.indb 192 18.09.2020 09:43 18.09.2020 09:43...
  • Seite 193: Regulacja Transportu Różnicowego

    ścieg (C). Ustawienie to pozwala również na wykonanie stylowego szycia. W ten sposób można uzyskać efekt marszczenia na delikatnych tkaninach (D). Texi Tegra 4 Texi Tegra 4 INSTRUKCJA 2019.indb 193 Texi Tegra 4 INSTRUKCJA 2019.indb 193 18.09.2020 09:43 18.09.2020 09:43...
  • Seite 194 „3”, gdy pokrętło regulacji jest ustawione na „2,0”. Uwaga: W przypadku normalnego szycia należy ustawić pokrętło regulacji transportu różnicowego na wartość „1,0”. Texi Tegra 4 Texi Tegra 4 INSTRUKCJA 2019.indb 194 Texi Tegra 4 INSTRUKCJA 2019.indb 194 18.09.2020 09:43 18.09.2020 09:43...
  • Seite 195: Rozpoczęcie Szycia

    Prowadnik jest przydatny podczas szycia ściegiem drabinkowym i 2- nitkowym łańcuszkowym z regularnymi odstępami. Texi Tegra 4 Texi Tegra 4 INSTRUKCJA 2019.indb 195 Texi Tegra 4 INSTRUKCJA 2019.indb 195 18.09.2020 09:43 18.09.2020 09:43...
  • Seite 196: Wszystkie Rodzaje Ściegów

    Szycie tkanin o średniej grubości Ścieg 3-nitkowy marszczony Szycie tkanin owerlokowy cienkich i średniej grubości Ścieg 2-nitkowy owerlokowy (szeroki) Szycie tkanin o średniej grubości Texi Tegra 4 Texi Tegra 4 INSTRUKCJA 2019.indb 196 Texi Tegra 4 INSTRUKCJA 2019.indb 196 18.09.2020 09:43 18.09.2020 09:43...
  • Seite 197: Ustawienia Naprężenia Nici Igły

    (zielona) i dolnego chwytacza Nić igły lewej (fioletowa) pojawiają się po lewej stronie tkaniny. Lewa Prawa strona strona Texi Tegra 4 Texi Tegra 4 INSTRUKCJA 2019.indb 197 Texi Tegra 4 INSTRUKCJA 2019.indb 197 18.09.2020 09:43 18.09.2020 09:43...
  • Seite 198: Ścieg 3-Nitkowy Owerlokowy

    Jeśli nić igłowa (żółta lub niebieska) jest zbyt luźna: ustaw pokrętło naprężenia igły (żółte lub niebieskie) Nić igłowa na wyższą wartość. Prawa strona Lewa strona Texi Tegra 4 Texi Tegra 4 INSTRUKCJA 2019.indb 198 Texi Tegra 4 INSTRUKCJA 2019.indb 198 18.09.2020 09:43 18.09.2020 09:43...
  • Seite 199: Ścieg 3-Nitkowy Owerlokowy

    (fioletowe) na wyższą wartość lub pokrętło górnego Nić igłowa chwytacza (zielone) na niższą. Prawa Lewa strona strona Texi Tegra 4 Texi Tegra 4 INSTRUKCJA 2019.indb 199 Texi Tegra 4 INSTRUKCJA 2019.indb 199 18.09.2020 09:43 18.09.2020 09:43...
  • Seite 200: Ścieg 3-Nitkowy Dekoracyjny

    Jeśli nić prawej igły (niebieska) jest zbyt luźna: ustaw Nić górnego pokrętło naprężenia prawej igły (niebieskie) na wyższą chwytacza Nić dolnego wartość. Prawa chwytacza strona Lewa strona Texi Tegra 4 Texi Tegra 4 INSTRUKCJA 2019.indb 200 Texi Tegra 4 INSTRUKCJA 2019.indb 200 18.09.2020 09:43 18.09.2020 09:43...
  • Seite 201: Ścieg 3-Nitkowy Marszczony Owerlokowy

    Ustaw pokrętło dolnego chwytacza (fioletowe) na wyższą wartość lub pokrętło górnego Nić igłowa chwytacza (zielone) na niższą. Prawa Lewa strona strona Texi Tegra 4 Texi Tegra 4 INSTRUKCJA 2019.indb 201 Texi Tegra 4 INSTRUKCJA 2019.indb 201 18.09.2020 09:43 18.09.2020 09:43...
  • Seite 202: Ścieg 2-Nitkowy Owerlokowy

    Jeśli nić dolnego chwytacza (fioletowa) jest zbyt luźna: Nić igłowa ustaw pokrętło naprężenia dolnego chwytacza Nić dolnego chwytacza (fioletowe) na wyższą wartość. Prawa strona Lewa strona Texi Tegra 4 Texi Tegra 4 INSTRUKCJA 2019.indb 202 Texi Tegra 4 INSTRUKCJA 2019.indb 202 18.09.2020 09:43 18.09.2020 09:43...
  • Seite 203: Ścieg 2-Nitkowy Marszczony

    ściegową, górny nóż, dolny nóż i obszar UWAGA: Przed wykonaniem czynności chwytacza szczotką z pudełka wyłącz zasilanie. z akcesoriami. Texi Tegra 4 Texi Tegra 4 INSTRUKCJA 2019.indb 203 Texi Tegra 4 INSTRUKCJA 2019.indb 203 18.09.2020 09:43 18.09.2020 09:43...
  • Seite 204: Wymiana Dolnego Noża

    Tweed, tkanina na garnitur, 2.0-4.0mm Przędza: 70-140# denim, itp. Bawełna: 40-60# DZIANINA 2.0-4.0mm Przędza: 70-140# OBRĘBIANIE SZWEM 2-NITKOWYM LUB Bawełna: 120-140# 1.0-2.0mm 3-NITKOWYM Texi Tegra 4 Texi Tegra 4 INSTRUKCJA 2019.indb 204 Texi Tegra 4 INSTRUKCJA 2019.indb 204 18.09.2020 09:43 18.09.2020 09:43...
  • Seite 205: Najczęstsze Problemy I Metody Ich Usuwania

    2. Zwiększ nacisk stopki dociskowej TKANINY 3. Przy szyciu cienkich tkanin stopka 3. Zmniejsz nacisk stopki dociskowej dociskowa jest zbyt wysoko Texi Tegra 4 Texi Tegra 4 INSTRUKCJA 2019.indb 205 Texi Tegra 4 INSTRUKCJA 2019.indb 205 18.09.2020 09:43 18.09.2020 09:43...
  • Seite 206: Specyfikacja Maszyny

    środowiska oraz zdrowia i pomagają w optymalizacji odzysku i ponownym wykorzystaniu części wchodzących w skład urządzenia. Nieprawidłowe usunięcie produktu przez użytkownika grozi zastosowaniem sankcji administracyjnych, zgodnie z obowiązującymi przepisami prawa. Texi Tegra 4 Texi Tegra 4 INSTRUKCJA 2019.indb 206 Texi Tegra 4 INSTRUKCJA 2019.indb 206 18.09.2020 09:43 18.09.2020 09:43...
  • Seite 207 Texi Tegra 4 Texi Tegra 4 INSTRUKCJA 2019.indb 207 Texi Tegra 4 INSTRUKCJA 2019.indb 207 18.09.2020 09:43 18.09.2020 09:43...
  • Seite 208: Инструкции По Безопасности

    создавать препятствий при передвижении. Для отключения машины от электрической сети повернуть главный выключатель в положение «О» (выключено), затем вытащить штепсель из розетки. Texi Tegra 4 Texi Tegra 4 INSTRUKCJA 2019.indb 208 Texi Tegra 4 INSTRUKCJA 2019.indb 208 18.09.2020 09:43 18.09.2020 09:43...
  • Seite 209 любых других манипуляций по регулировке машины необходимо отключить машину от электрической сети. СЛЕДУЕТ СОХРАНИТЬ ДАННУЮ ИНСТРУКЦИЮ ПО ЭКСПЛУАТАЦИИ Машина предназначена только для домашнего использования. Texi Tegra 4 Texi Tegra 4 INSTRUKCJA 2019.indb 209 Texi Tegra 4 INSTRUKCJA 2019.indb 209 18.09.2020 09:43 18.09.2020 09:43...
  • Seite 210 РЕГУЛИРОВКА ДИФФЕРЕНЦИАЛЬНОЙ ПОДАЧИ НАЧАЛО ШИТЬЯ ОКОНЧАНИЕ ШИТЬЯ НИТЕНАПРАВИТЕЛЬ ВСЕ ТИПЫ СТЕЖКОВ НАСТРОЙКИ НАТЯЖЕНИЯ НИТЕЙ ИГЛЫ 4-НИТОЧНЫЙ ОВЕРЛОЧНЫЙ СТЕЖОК 3-НИТОЧНЫЙ ОВЕРЛОЧНЫЙ СТЕЖОК Texi Tegra 4 Texi Tegra 4 INSTRUKCJA 2019.indb 210 Texi Tegra 4 INSTRUKCJA 2019.indb 210 18.09.2020 09:43 18.09.2020 09:43...
  • Seite 211 2-НИТОЧНЫЙ СБОРЧАТЫЙ СТЕЖОК УХОД ЗА МАШИНОЙ ЗАМЕНА НИЖНЕГО НОЖА ТКАНЬ, НИТЬ И ДЛИНА СТЕЖКА САМЫЕ РАСПРОСТРАНЕННЫЕ ПРОБЛЕМЫ И СПОСОБЫ ИХ УСТРАНЕНИЯ СПЕЦИФИКАЦИЯ Texi Tegra 4 Texi Tegra 4 INSTRUKCJA 2019.indb 211 Texi Tegra 4 INSTRUKCJA 2019.indb 211 18.09.2020 09:43 18.09.2020 09:43...
  • Seite 212: Наименования Деталей

    Рычаг регулировки дифференциальной подачи Ручка регулировки стежка Рычаг подъемника прижимной лапки Нитенаправитель верхней крышки Контейнер для обрезков Педаль регулировки скорости Разъем Вилка Texi Tegra 4 Texi Tegra 4 INSTRUKCJA 2019.indb 212 Texi Tegra 4 INSTRUKCJA 2019.indb 212 18.09.2020 09:43 18.09.2020 09:43...
  • Seite 213: Контейнер С Принадлежностями

    переключатель электропитания/освещения, который одновременно включает двигатель и освещение. Оставляя машину без присмотра или при проведении технического обслуживания необходимо отключить машину от сети. Texi Tegra 4 Texi Tegra 4 INSTRUKCJA 2019.indb 213 Texi Tegra 4 INSTRUKCJA 2019.indb 213 18.09.2020 09:43 18.09.2020 09:43...
  • Seite 214: Контейнер Для Обрезков

    отключите питание, прежде чем открывать крышку петлителя! СТОЙКА ДЛЯ КАТУШЕК Потяните стойку для катушек к себе, а затем установите держатель катушки. Texi Tegra 4 Texi Tegra 4 INSTRUKCJA 2019.indb 214 Texi Tegra 4 INSTRUKCJA 2019.indb 214 18.09.2020 09:43 18.09.2020 09:43...
  • Seite 215: Подготовка К Заправке Ниток

    Наденьте держатель катушки на стержень катушки. Если катушка с ниткой большая, необходимо использовать диск для катушки из контейнера с принадлежностями. Наденьте катушку на держатель. Texi Tegra 4 Texi Tegra 4 INSTRUKCJA 2019.indb 215 Texi Tegra 4 INSTRUKCJA 2019.indb 215 18.09.2020 09:43 18.09.2020 09:43...
  • Seite 216: Положение Иглы

    переднюю панель и рабочий стол. Поворотом маховика на себя поднимите иглу в верхнее положение. Поднимите лапку. ВНИМАНИЕ: После поднятия лапки ослабевает натяжение нитки. Texi Tegra 4 Texi Tegra 4 INSTRUKCJA 2019.indb 216 Texi Tegra 4 INSTRUKCJA 2019.indb 216 18.09.2020 09:43 18.09.2020 09:43...
  • Seite 217: Заправка Верхнего Петлителя

    через нитенаправитель. держатель обратно на место. ЗАПРАВКА ВЕРХНЕГО ПЕТЛИТЕЛЯ Примечание: Используйте пинцет из контейнера с принадлежностями, чтобы упростить заправку. Выполняйте шаги 1-4. Texi Tegra 4 Texi Tegra 4 INSTRUKCJA 2019.indb 217 Texi Tegra 4 INSTRUKCJA 2019.indb 217 18.09.2020 09:43 18.09.2020 09:43...
  • Seite 218: Заправка Нижнего Петлителя

    чтобы упростить заправку. Правое крайнее положение Поверните ручку на себя, так чтобы Выполняйте шаги 1-11. нижний петлитель достиг крайнего правого положения. Texi Tegra 4 Texi Tegra 4 INSTRUKCJA 2019.indb 218 Texi Tegra 4 INSTRUKCJA 2019.indb 218 18.09.2020 09:43 18.09.2020 09:43...
  • Seite 219: Заправка Правой Иглы

    нить через 10 см нити сквозь направитель 6 и 7. отверстие правой иглы Выполняйте и поместите ее под шаги 1-9. прижимную лапку. Texi Tegra 4 Texi Tegra 4 INSTRUKCJA 2019.indb 219 Texi Tegra 4 INSTRUKCJA 2019.indb 219 18.09.2020 09:43 18.09.2020 09:43...
  • Seite 220: Заправка Левой Иглы

    и сначала заправить нить петлителя, неполным. На рис. 1 показано а затем иглы. На рис. 2 показано неправильное положение. неправильное положение. Texi Tegra 4 Texi Tegra 4 INSTRUKCJA 2019.indb 220 Texi Tegra 4 INSTRUKCJA 2019.indb 220 18.09.2020 09:43 18.09.2020 09:43...
  • Seite 221: Замена Катушек

    контейнера для обрезков и отсоедините ее от машины, обрезков под крышку петлителя и затем сильно потяните левой рукой и снимите крышку. надежно защелкните зажим A См. снимки выше. Texi Tegra 4 Texi Tegra 4 INSTRUKCJA 2019.indb 221 Texi Tegra 4 INSTRUKCJA 2019.indb 221 18.09.2020 09:43 18.09.2020 09:43...
  • Seite 222: Рычаг Прижимной Лапки

    Опустите держатель лапки, чтобы зафиксировать лапку. Как показано на рисунке, шкала на лапке (“А” на рисунке) показывает диапазон перемещения иглы. Это может быть полезно в процессе шитья. Texi Tegra 4 Texi Tegra 4 INSTRUKCJA 2019.indb 222 Texi Tegra 4 INSTRUKCJA 2019.indb 222 18.09.2020 09:43 18.09.2020 09:43...
  • Seite 223: Нитеобрезатель

    Переместите рычаг верхнего ножа вправо и поверните верхний нож обратно в исходное положение. Снимите крышку петлителя, а затем прикрепите контейнер для обрезков. Texi Tegra 4 Texi Tegra 4 INSTRUKCJA 2019.indb 223 Texi Tegra 4 INSTRUKCJA 2019.indb 223 18.09.2020 09:43 18.09.2020 09:43...
  • Seite 224: Установка Распределителя (Слепой Петлитель)

    и слегка нажмите на верхнюю часть в направлении назад. Наконечник распределителя будет заблокирован в отверстии верхнего петлителя. Действуя в обратном порядке, можно снять распределитель. Texi Tegra 4 Texi Tegra 4 INSTRUKCJA 2019.indb 224 Texi Tegra 4 INSTRUKCJA 2019.indb 224 18.09.2020 09:43 18.09.2020 09:43...
  • Seite 225: Изменение Настроек Зубцовt

    шва (задайте диапазон 3,0-4,5 мм). Ширина регулировки указана на игольной пластине, “R” означает ширину при подрубке. Примечание: Когда крышка петлителя открыта, легче установить ширину шва. Texi Tegra 4 Texi Tegra 4 INSTRUKCJA 2019.indb 225 Texi Tegra 4 INSTRUKCJA 2019.indb 225 18.09.2020 09:43 18.09.2020 09:43...
  • Seite 226: Регулировка Длины Стежка

    чтобы он был на одном уровне с корпусом петлителя, затем задвиньте его вправо, так чтобы он пока он защелкнулся на своем месте. Texi Tegra 4 Texi Tegra 4 INSTRUKCJA 2019.indb 226 Texi Tegra 4 INSTRUKCJA 2019.indb 226 18.09.2020 09:43 18.09.2020 09:43...
  • Seite 227: Регулировка Дифференциальной Подачи

    получить плоский стежок (С). Эта настройка также позволяет выполнять стильное шитье. Таким образом можно добиться эффекта сборчатого стежка на деликатных тканях (D). Texi Tegra 4 Texi Tegra 4 INSTRUKCJA 2019.indb 227 Texi Tegra 4 INSTRUKCJA 2019.indb 227 18.09.2020 09:43 18.09.2020 09:43...
  • Seite 228 на “3”, когда ручка регулировки установлена на “2,0”. Примечание: В случае обычного шитья необходимо установить ручку регулировки дифференциальной подачи в положение “1,0”. Texi Tegra 4 Texi Tegra 4 INSTRUKCJA 2019.indb 228 Texi Tegra 4 INSTRUKCJA 2019.indb 228 18.09.2020 09:43 18.09.2020 09:43...
  • Seite 229: Начало Шитья

    поместите в держатель A, передвигая его влево и вправо в нужное положение. Нитенаправитель полезен при шитье лестничным и 2-ниточным цепным стежком с регулярным интервалом. Texi Tegra 4 Texi Tegra 4 INSTRUKCJA 2019.indb 229 Texi Tegra 4 INSTRUKCJA 2019.indb 229 18.09.2020 09:43 18.09.2020 09:43...
  • Seite 230: Все Типы Стежков

    средней толщины 3-ниточный сборчатый оверлочный стежок Шитье тонких (кайма) тканей и тканей средней толщины 2-ниточный оверлочный стежок (широкий) Шитье тканей средней толщины Texi Tegra 4 Texi Tegra 4 INSTRUKCJA 2019.indb 230 Texi Tegra 4 INSTRUKCJA 2019.indb 230 18.09.2020 09:43 18.09.2020 09:43...
  • Seite 231: Настройки Натяжения Нитей Иглы

    Если натяжение установлено оптимально, нить иглы верхнего петлителя (зеленая) и нижнего петлителя Нить левой иглы (фиолетовая) появляются с левой стороны ткани. Левая Правая сторона сторона Texi Tegra 4 Texi Tegra 4 INSTRUKCJA 2019.indb 231 Texi Tegra 4 INSTRUKCJA 2019.indb 231 18.09.2020 09:43 18.09.2020 09:43...
  • Seite 232: 3-Ниточный Оверлочный Стежок

    Если игольная нить (желтая или синяя) слишком петлителя свободная: установите ручку натяжения иглы Игольная нить (желтаяили синяя) на большее число. Правая Левая сторона сторона Texi Tegra 4 Texi Tegra 4 INSTRUKCJA 2019.indb 232 Texi Tegra 4 INSTRUKCJA 2019.indb 232 18.09.2020 09:43 18.09.2020 09:43...
  • Seite 233: 3-Ниточный Оверлочный Стежок

    на правой стороне: установите ручку нижнего петлителя (фиолетовая) на большее число или Игольная нить ручку верхнего петлителя (зеленая) на меньшее Правая Левая число. сторона сторона Texi Tegra 4 Texi Tegra 4 INSTRUKCJA 2019.indb 233 Texi Tegra 4 INSTRUKCJA 2019.indb 233 18.09.2020 09:43 18.09.2020 09:43...
  • Seite 234: 3-Ниточный Декоративный Стежок

    Если нить правой иглы (синяя) слишком свободна: Нить верхнего установите ручку натяжения правой иглы (синяя) на петлителя Нить нижнего большее число. петлителя Правая сторона Левая сторона Texi Tegra 4 Texi Tegra 4 INSTRUKCJA 2019.indb 234 Texi Tegra 4 INSTRUKCJA 2019.indb 234 18.09.2020 09:43 18.09.2020 09:43...
  • Seite 235: 3-Ниточный Сборчатый Оверлочный Стежок (Кайма)

    на правой стороне: Установите ручку нижнего петлителя (фиолетовая) на большее число или Игольная нить ручку верхнего петлителя (зеленая) на меньшее Правая Левая сторона сторона число. Texi Tegra 4 Texi Tegra 4 INSTRUKCJA 2019.indb 235 Texi Tegra 4 INSTRUKCJA 2019.indb 235 18.09.2020 09:43 18.09.2020 09:43...
  • Seite 236: 2-Ниточный Оверлочный Стежок

    Если нить нижнего петлителя (фиолетовая) слишком Игольная нить свободная: установите ручку натяжения нижнего Нить нижнего петлителя петлителя (фиолетовая) на большее число. Правая сторона Левая сторона Texi Tegra 4 Texi Tegra 4 INSTRUKCJA 2019.indb 236 Texi Tegra 4 INSTRUKCJA 2019.indb 236 18.09.2020 09:43 18.09.2020 09:43...
  • Seite 237: 2-Ниточный Сборчатый Стежок

    пластину, верхний нож, рисунке. нижний нож и область петлителя с помощью ПРИМЕЧАНИЕ: Перед выполнением щетки из контейнера с действия выключите питание. принадлежностями. Texi Tegra 4 Texi Tegra 4 INSTRUKCJA 2019.indb 237 Texi Tegra 4 INSTRUKCJA 2019.indb 237 18.09.2020 09:43 18.09.2020 09:43...
  • Seite 238: Замена Нижнего Ножа

    Пряжа: 70-140# ткань, толстое сукно и т. п. Хлопок: 40-60# ТРИКОТАЖ 2.0-4.0mm Пряжа: 70-140# ПОДРУБКА 2-НИТОЧНЫМ Хлопок: 120-140# 1.0-2.0mm ИЛИ 3-НИТОЧНЫМ ШВОМ Texi Tegra 4 Texi Tegra 4 INSTRUKCJA 2019.indb 238 Texi Tegra 4 INSTRUKCJA 2019.indb 238 18.09.2020 09:43 18.09.2020 09:43...
  • Seite 239: Самые Распространенные Проблемы И Способы Их Устранения

    2. Увеличьте нажим прижимной лапки ТКАНИ слишком низко 3. Сделайте нажим прижимной лапки 3. При шитье тонких тканей прижимная меньшим лапка расположена слишком высоко Texi Tegra 4 Texi Tegra 4 INSTRUKCJA 2019.indb 239 Texi Tegra 4 INSTRUKCJA 2019.indb 239 18.09.2020 09:43 18.09.2020 09:43...
  • Seite 240: Спецификация

    сбора для дальнейшей переработки отходов производства электрического и электронного оборудования или в магазин, где было приобретено изделие. Там оно будет утилизировано без нанесения вреда окружающей среде. Texi Tegra 4 Texi Tegra 4 INSTRUKCJA 2019.indb 240 Texi Tegra 4 INSTRUKCJA 2019.indb 240 18.09.2020 09:43 18.09.2020 09:43...
  • Seite 241 Texi Tegra 4 Texi Tegra 4 INSTRUKCJA 2019.indb 241 Texi Tegra 4 INSTRUKCJA 2019.indb 241 18.09.2020 09:43 18.09.2020 09:43...
  • Seite 242: Ce Declaration Of Conformity

    Electromagnetic compatibility: 2014/30/EU EN 55014-1:2006+A1+A2 EN 55014-2:2015 EN 61000-3-2:2014 EN 61000-3-3:2013 Low voltage: 2014/35/EU EN 60335-1:2012+A11 EN 60335-2-28:2003+A1 EN 62233: 2008 AfPS GS 2014:01 Texi Tegra 4 INSTRUKCJA 2019.indb 242 Texi Tegra 4 INSTRUKCJA 2019.indb 242 18.09.2020 09:43 18.09.2020 09:43...
  • Seite 243 Texi Tegra 4 INSTRUKCJA 2019.indb 243 Texi Tegra 4 INSTRUKCJA 2019.indb 243 18.09.2020 09:43 18.09.2020 09:43...
  • Seite 244 Texi Tegra 4 INSTRUKCJA 2019.indb 244 Texi Tegra 4 INSTRUKCJA 2019.indb 244 18.09.2020 09:43 18.09.2020 09:43...

Inhaltsverzeichnis