Herunterladen Inhalt Inhalt Diese Seite drucken
Relaxxnow VTX300 Benutzerhandbuch

Relaxxnow VTX300 Benutzerhandbuch

Standventilator
Vorschau ausblenden Andere Handbücher für VTX300:
Inhaltsverzeichnis

Werbung

Verfügbare Sprachen
  • DE

Verfügbare Sprachen

  • DEUTSCH, seite 1
RELA
NOW
VTX300
Standventilator
DE/EN/ES/FR/IT

Werbung

Inhaltsverzeichnis
loading

Inhaltszusammenfassung für Relaxxnow VTX300

  • Seite 1 RELA VTX300 Standventilator DE/EN/ES/FR/IT...
  • Seite 3: Inhaltsverzeichnis

    INHALT TECHNISCHE ANGABEN ..............4 EXPLOSIONSZEICHNUNG/ ERSATZTEILLISTE ........5 ALLGEMEINE HINWEISE..............6 WARNHINWEISE ................7 MONTAGEANLEITUNG ................7 INBETRIEBNAHME ................8 BETRIEBSANWEISUNG ...............8 SPEZIFIKATIONEN ................11 APP FUNKTION ..................12 REINIGUNG & AUFBEWAHRUNG ............16 FEHLERBEHEBUNG ................17 ENTSORGUNG ...................18 RELA...
  • Seite 4: Video Tutorials

    Video Tutorials Unsere für dich! Aufbau Benutzung Abbau In 3 einfachen Schritten zum schnellen und sicheren Start: 1. QR-Code scannen 2. Videos anschauen 3. schnell und sicher starten Link zu den Videos: www.sportstech.de/qr/vtx300.html 4 Relaxxnow...
  • Seite 5: Technische Angaben

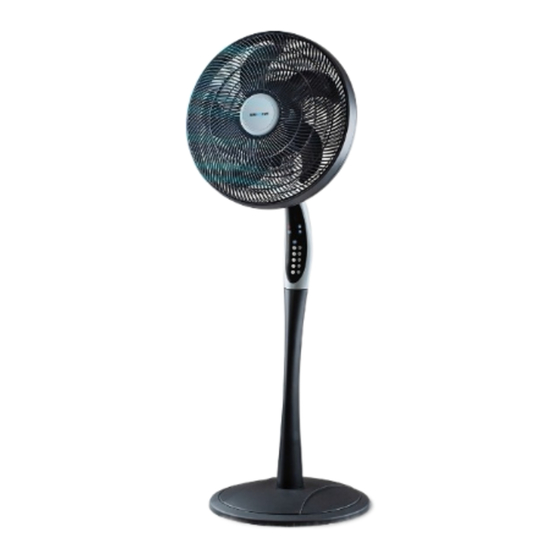
    7,5 h Digital Timer mit Remote Control mit WiFI Kopf des Ventilators kann manuellnach oben gekippt werden (max 90°). Luxus-Vollkunststoffgehäuse mit Patentschließfachsystem, einfache Montage und Demontage, kein Werkzeg erforderlich. Gewichteter runder Standfuß, leicht zu montierendes Standrohr. Lieferumfang: Ventilator, Fernbedienung,Bedienungsanleitung Relaxxnow 5...
  • Seite 6: Explosionszeichnung/ Ersatzteilliste

    EXPLOSIONSZEICHNUNG/ ERSATZTEILLISTE Unter folgendem Link finden Sie die Explosionszeichnung und die Ersatzteile-Liste: www.sportstech.de/manuals/pdf/sportstech_vtx300_spareparts.pdf 6 Relaxxnow...
  • Seite 7: Allgemeine Hinweise

    Verlegen Sie das Kabel nicht unter einem Teppich. Decken Sie das Kabel nicht mit Teppichen, Läufern oder ähnlichem ab. Verlegen Sie das Kabel so, dass niemand darüber stolpern kann. • Gebrauchen Sie den Ventilator nur so, wie in der Anleitung beschrieben. Relaxxnow 7...
  • Seite 8: Warnhinweise

    3. Installieren Sie den Propeller (3) an der Motorwelle (6), sodass die Cutouts passen. Setzen Sie die Propellerhaube (2) nach dem Propeller (3) auf die Motorwelle (6). Zum Befestigen ziehen Sie die Propellerhaube (2) gegen den Uhrzeigersinn fest. 8 Relaxxnow...
  • Seite 9: Inbetriebnahme

    Stecken Sie das Gerät an eine 220-240 V ~ 50/60 Hz Steckdose und folgen Sie der Betriebsanweisung: Verwendung des Kontrollschalters und der Fernbedieung Dieser Ventilator ist mit 4 Geschwindigkeitsstärken, einem Timer und einer Fernbedienung ausgestattet. Die Knöpfe auf der Schaltfläche haben dieselbe Funktion wie die auf der Fernbedienung. Relaxxnow 9...
  • Seite 10 Sie diese Taste erneut. Die Oszillation kann taste einmal. gesteuert werden, während der Lüfter in Betrieb ist. Oscilla- tion Mit diesem Knopf schalten Sie den Ventilator an und aus Die W-Lan Funktion wird eingeschaltet, nachdem der Knopf drei Sekunden ge- ON/OFF drückt wurde. 10 Relaxxnow...
  • Seite 11: Bedienung Der Fernbedienung

    • Vergewissern Sie sich, dass die Batterin korrekt eingelegt wurden, vorallem in Bezug auf die Polarität, Anpassung der +/- Seitden der Batterie an die entsprechenden Anzeigen auf der Fernbedienung. • Entfernen Sie gebrauchte und beschädigte/ entladene Batterien sofort. Relaxxnow 11...
  • Seite 12: Einstellmöglichkeiten Für Eine Verbesserte Luftzirkulation

    Position geneigt werden. Hinweis: Der Ventilator muss ausgeschaltet sein, wenn Sie diese Einstellung vor nehmen. SPEZIFIKATIONEN MODEL/ SKU VTX300 SPANNUNG (V) 220-240 V AC, 50/60 HZ WATTLEISTUNG (W) 55 W VORSICHT: Um einen Stromschlag zu vermeiden, passen Sie die breite Kante des Steckers an den breiten Schlitz an.
  • Seite 13: App Funktion

    1. Stecken Sie den Stecker des Ventilators in eine 220-240V Steckdose. Der Ventilator ist dabei im Standby Modus ist. 2. Drücken Sie „Add Device“ oder „+“ in der oberen rechten Ecke auf der Home- seite der App siehe Bild unten. Relaxxnow 13...
  • Seite 14 4. Drücken Sie den OSC Knopf auf dem Bedienungsfeld des Ventilators für 5 Sekunden, bis der WiFi Indikator auf dem Display anfängt schnell zu blinken. Drücken Sie dann „Confirm indicator rapidly blink“ auf dem Mobiltelefon, wie auf folgendem Bild dargestellt. 14 Relaxxnow...
  • Seite 15 Hinweis: Wenn die Verbindung fehlschlägt, drücken Sie „Ap Mode“ (rechts oben) und „Confirm indicator slowly blink“ auf dem Mobiltelefon wie auf dem unteren Bild dargestellt. Relaxxnow 15...
  • Seite 16: Amazon Alexa

    Wenn Sie Alexa nutzen wollen, drücken Sie „ME“ (rechts unten). Wählen Sie dann „more services“ und dann „Alexa“. Dort finden Sie, wie Sie Alexa nutzen. Um den Ventilator an oder aus zu schalten können Sie „Alexa schalte den Ventilator an/aus“. 16 Relaxxnow...
  • Seite 17: Reinigung & Aufbewahrung

    Entfernen Sie Öl und Flecken von dem Körper, um Schäden an dem Ventilator zu vermeiden. Nehmen Sie den Ventilator nach der Aufbauanleitung in umgekehrter Reihenfolge auseinander, legen Sie ihn zurück in den Karton und lagern Sie ihn an einem trockenen Ort. Relaxxnow 17...
  • Seite 18: Fehlerbehebung

    Verwendung der Batterien der ist zu weit vom Gerät Fernbedienung entfernt. Die Fernbedienung sendet kein Signal zum Gerät. Bitte versuchen Sie nicht, den Ventilator selber zu öffnen oder zu reparieren. Dadurch könnte die Garantie verfallen und Schäden oder Verletzungen verursacht werden. 18 Relaxxnow...
  • Seite 19: Entsorgung

    Werfen Sie Altgeräte nicht in den Hausmüll. Jeder Verbraucher ist gesetzlich verpflichtet Altgeräte, getrennt vom Hausmüll abzugeben (z. B. bei einer Sammelstelle). Nur so wird gewährleistet, dass Altgeräte fachgerecht verwertet werden und sich nicht negativ auf die Umwelt auswirken. Relaxxnow 19...
  • Seite 20 20 Relaxxnow...
  • Seite 21 CONTENT TECHNICAL SPECIFICATIONS ..............22 EXPLODED VIEW/ SPARE PARTS LIST ..........23 GENERAL INFORMATION ..............24 WARNINGS ..................25 ASSEMBLY INSTRUCTIONS ..............25 GETTING STARTED................26 OPERATING INSTRUCTIONS ..............26 SPECIFICATIONS ................29 APP FUNCTION..................31 CLEANING AND STORAGE..............35 TROUBLESHOOTING ................36 DISPOSAL ..................37 RELA...
  • Seite 22 3 simple steps for a fast and safe start: 1. scan the QR code 2. watch videos 3. start fast and safely Link to the videos: www.sportstech.de/qr/vtx300.html 22 Relaxxnow...
  • Seite 23: Technical Specifications

    Head of the fan can be manually tilted upwards (max 90 °). Luxury all-plastic casing with patent locker system, easy assembly and disassembly, no tools needed. Weighted round base, easy to mount stand tube. Delivery contents: fan, remote control, operating instructions. Relaxxnow 23...
  • Seite 24: Exploded View/ Spare Parts List

    EXPLODED VIEW/ SPARE PARTS LIST At the following link you will find the exploded drawing and the spare parts list: www.sportstech.de/manuals/pdf/sportstech_vtx300_spareparts.pdf 24 Relaxxnow...
  • Seite 25: General Information

    • Do not lay the cable under a carpet. Do not cover the cable with carpets, runners or similar. Lay the cable so that nobody can trip over it. • Use the fan only as described in the instructions Relaxxnow 25...
  • Seite 26: Warnings

    3. Install the propeller (3) on the motor shaft (6) so that the cutouts fit. Place the propeller cover (2) behind the propeller (3) on the motor shaft (6). To attach, tighten the propeller cover (2) counterclockwise. 26 Relaxxnow...
  • Seite 27: Getting Started

    Using the control switch and the remote control; This fan is equipped with 4 speed settings, a timer and a remote control. The buttons on the main product have the same function as those on the remote control. Relaxxnow 27...
  • Seite 28 Oscilla- button once tion With this button you can turn the fan on and of. The W-Lan function is activated after the button has ON/OFF been pressed for three seconds. 28 Relaxxnow...
  • Seite 29: Operating The Remote Control

    Make sure that the batteries are inserted correctly, especially with regard to polarity, by adjusting the +/- sides of the battery to the corresponding indicators on the remote control. • Remove used and damaged / discharged batteries immediately. Relaxxnow 29...
  • Seite 30: Specifications

    To a maximum, it can be tilted almost to a horizontal position Note: The fan must be switched off if you make this adjustment SPECIFICATIONS MODEL/ SKU VTX300 VOLTAGE (V) 220-240 V AC, 50/60 HZ WATTAGE(W) 55 W CAUTION: To avoid electric shock, adjust the wide edge of the connector to the wide slot.
  • Seite 31: App Function

    Step 3: Connect the app to the fan 1. Plug the fan plug into a 220-240V outlet. The fan is in standby mode. 2. Press „Add Device“ or „+“ in the upper right corner on the home page of the app as shown below. Relaxxnow 31...
  • Seite 32 4. Press the OSC button on the fan control panel for 5 seconds until the WiFi indicator on the display starts flashing rapidly. Then press „Confirm indicator rapid blink“ on the mobile phone, as shown in the following picture 32 Relaxxnow...
  • Seite 33 Note: If the connection fails, press „Ap Mode“ (top right) and „Confirm indicator slow blink“ on the mobile phone as shown in the picture below. Relaxxnow 33...
  • Seite 34: Amazon Alexa

    If you want to use Alexa, press „ME“ (bottom right). Then select „more services“ and then „Alexa“. There you will find how to use Alexa. To turn the fan on or off, you can „Alexa turn the fan on / off“. 34 Relaxxnow...
  • Seite 35: Cleaning And Storage

    Apply a few drops of lubricant to the motor shaft to prevent corrosion.Remove any excess oil and stains from the body to prevent any damage to the fan.Take the fan apart according to the assembly instructions in reverse order, put it back in the box and store it in a dry place. Relaxxnow 35...
  • Seite 36: Troubleshooting

    The remote control does remote control batteries not send a signal to the device. Please do not try to open or repair the fan yourself. This could void the warranty and cause damage or injury. 36 Relaxxnow...
  • Seite 37: Disposal

    Do not throw old devices into the trash. Every consumer is legally required to keep old units separate from household waste. Please dispose of the product at a collection point designated for electrical good. This ensures the equipment is recycled properly and does not adversely affect the environment. Relaxxnow 37...
  • Seite 38 38 Relaxxnow...
  • Seite 39 INDICE DATOS TÉCNICOS ................40 DIBUJO DE EXPLSOIÓN/LISTA DE REPUESTOS ........41 INFORMACIÓN GENERAL ..............42 ADVERTENCIAS DE SEGURIDAD ............43 INSTRUCCIONES DE MONTAJE ............43 PUESTA EN MARCHA .................44 MANUAL DE USO ................44 ESPECIFICATIONES ................47 COMPATIBLE CON APP ..............48 LIMPIEZA Y ALMACENAMIENTO ............52 SOLUCIÓN DE ERRORES ..............53 OPCIONES DE RECICLAJE ..............54 RELA...
  • Seite 40 Nuestros para usted! Construcción Utilizar Reducción En 3 sencillos pasos para un arranque rápido y seguro: 1. Escanear el código QR 2. Ver vídeos 3. Comienza rápido y seguro Enlace a los videos: www.sportstech.de/qr/vtx300.html 40 Relaxxnow...
  • Seite 41: Datos Técnicos

    El cabezal del ventilador se puede inclinar manualmente hacia arriba (máx. 90°). Estructura de plástico de gran calidad con sistema de montaje y desmontaje sencillo, sin necesidad de herramientas Base redonda con peso, tubo de soporte fácil de montar. Contenido: Ventilador, control remoto, manual de instrucciones Relaxxnow 41...
  • Seite 42: Dibujo De Explsoión/Lista De Repuestos

    DIBUJO DE EXPLSOIÓN/LISTA DE REPUESTOS En el siguiente enlace encontrarás el dibujo de explosión y la lista de repuestos: www.sportstech.de/manuals/pdf/sportstech_vtx300_spareparts.pdf 42 Relaxxnow...
  • Seite 43: Información General

    • No coloque el cable debajo de una alfombra. No cubra el cable con alfombras, alfombras u objetos similares. Extienda el cable para que nadie se pueda tropezar con él. • Utilice el ventilador sólo como se describe en el manual. Relaxxnow 43...
  • Seite 44: Advertencias De Seguridad

    3. Monte la hélice (3) en el eje del motor (6) de forma que encajen los detalles. Coloque la cubierta de la hélice (2) después de la hélice (3) en el eje del motor (6). Apriete la tapa de la hélice (2) en sentido contrario a las agujas del reloj. 44 Relaxxnow...
  • Seite 45: Puesta En Marcha

    Uso del panel de control y del mando a distancia Este ventilador cuenta con 4 niveles de potencia, un temporizador y un control remoto. El panel con botones cuenta con las mismas funciones que el control remoto. Relaxxnow 45...
  • Seite 46 La oscilación se puede controlar mientras el ventilador está Oscilaci- funcionando. ón Este botón enciende o apaga el ventilador. La función W-Lan se activa después de haber pulsado el botón durante tres segundos. ON/OFF 46 Relaxxnow...
  • Seite 47: Funcionamiento Del Control Remoto

    Limpie el contacto de las pilas antes de introducirlas. • Asegúrese de que la pila esté correctamente colocada, especialmente en términos de polaridad, haciendo coincidir los lados +/- de la pila con los indicadores correspondientes del control remoto. • inmediatamente las baterías usadas, dañadas o descargadas. Relaxxnow 47...
  • Seite 48: Especificationes

    ATENCIÓN: El ventilador debe permanecer apagado hasta que se complete el ajuste. ESPECIFICACIONES MODELO VTX300 ALIMENTACIÓN 220-240 V AC, 50/60 HZ MOTOR (En vatios) 55 vations ATENCIÓN: Para evitar descargas eléctricas, ajuste el borde ancho del enchufe a la ranura ancha.
  • Seite 49: Compatible Con App

    1.Conecte el ventilador a un enchufe de 220-240V El ventilador debe estar en modo Standby. 2.Pulse en „Añadir dispositivo“ o en „+“ en la esquina superior derecha de la pantalla de inicio como se ve en la siguiente imagen. Relaxxnow 49...
  • Seite 50 5 segundos hasta que el indicador WiFi de la pantalla comience a parpadear rápida- mente. A continuación, pulse „Confirmar que el indicador parpadea rápidamente“ en el teléfono móvil, como se muestra en la imagen siguiente. 50 Relaxxnow...
  • Seite 51 ATENCIÓN: Si la conexión falla, pulse „App Mode“ (arriba a la derecha) y „Confirmar indicador parpadea lentamente“ en el teléfono móvil como se muestra en la imagen de abajo. Relaxxnow 51...
  • Seite 52: Amazon Alexa

    Si utiliza un dispositivo Alexa, pulse „ME“ en la parte inferior derecha. Elija „más servicios“ y a continuación „Alexa“. Allí tendrás toda la información sobre cómo controlar Alexa. Para encender o apagar el ventilador puede decir „Alexa, enciende/apaga el ventilador“. 52 Relaxxnow...
  • Seite 53: Limpieza Y Almacenamiento

    Aplique unas cuantas gotas de lubricante al eje del motor para evitar la corrosión. Retire la grasa y las manchas de la estructura para evitar daños al ventilador. Desmonte el ventilador en orden inverso a las instrucciones de montaje, vuelva a colocarlo en la caja y guardelo en un lugar seco. Relaxxnow 53...
  • Seite 54: Solución De Errores

    Directrices para el uso de ventilador las pilas del control remoto. El control remoto no emite ninguna señal al ventilador Por favor, no intente abrir o reparar el ventilador usted mismo. Esto podría anular la garantía y causar daños o lesiones. 54 Relaxxnow...
  • Seite 55: Opciones De Reciclaje

    (por ejemplo, en un punto de recogida). Esta es la única manera de garantizar que los electrodomésticos viejos se reciclen profesionalmente y no tengan un impacto negativo en el medio ambiente. Relaxxnow 55...
  • Seite 56 MANUEL FRANÇAIS 56 Relaxxnow...
  • Seite 57 CONTENU DONNÉES TECHNIQUES ..............58 DESSIN ÉCLATÉ/LISTE DES DE RECHANGE ..........59 INFORMATIONS GÉNÉRALES ...............60 AVERTISSEMENTS ................61 NOTICE DE MONTAGE ................61 MISE EN MARCHE ................62 INSTRUCTION DE MONTAGE ..............62 SPÉCIFICATIONS ................65 FONCTION DE L‘APPLICATION .............66 NETTOYAGE ET STOCKAGE ..............70 RÉSOLUTION DES PROBLÈMES ............71 ÉLIMINATION DE DÉCHETS ..............72 RELA...
  • Seite 58 3 étapes simples pour un démarrage rapide et sécurisé: 1. Scannez le code QR 2. Regarder les vidéos 3. Démarrez rapidement et en toute sécurité. Lien vers les vidéos: www.sportstech.de/qr/vtx300.html 58 Relaxxnow...
  • Seite 59: Données Techniques

    La tête du ventilateur peut être inclinée manuellement vers le haut (max 90°). Structure de luxe en plastique plein avec système de fermeture breveté, montage et démontage simple, aucun outil requis. Pied rond lesté, tube facile à monter. Contenu de la livraison : ventilateur, télécommande, mode d‘emploi. Relaxxnow 59...
  • Seite 60: Dessin Éclaté/Liste Des De Rechange

    DESSIN ÉCLATÉ/LISTE DES DE RECHANGE A l‘adresse suivante vous trouverez le dessin éclaté et la liste des pièces de rechange : www.sportstech.de/manuals/pdf/sportstech_vtx300_spareparts.pdf 60 Relaxxnow...
  • Seite 61: Informations Générales

    Ne posez pas le câble sous un tapis. Ne recouvrez pas le câble avec des tapis, des patins ou similaires. Posez le câble de façon à ce que personne ne puisse se prendre les pieds dedans. • N‘utilisez le ventilateur que de la manière décrite dans le mode d‘emploi. Relaxxnow 61...
  • Seite 62: Avertissements

    3. Monter l‘hélice (3) sur l‘arbre du moteur (6) de manière à ce que les découpes s‘adaptent. Placer le capot d‘hélice (2) après l‘hélice (3) sur l‘arbre moteur (6). Pour fixer, serrer le couvercle d‘hélice (2) dans le sens contraire des aiguilles d‘une montre. 62 Relaxxnow...
  • Seite 63: Mise En Marche

    Brancher l‘appareil dans une prise 220-240 V ~ 50/60 Hz et suivre les instructions d‘utilisation : Utilisation de l‘interrupteur de commande et de la télécommande. Ce ventilateur dispose de 4 vitesses, d‘une minuterie et d‘une télécommande. Les touches du tableau de commande ont les mêmes fonctions que celles de la télécommande. Relaxxnow 63...
  • Seite 64 Oscillation. L‘oscillation peut être contrôlée lorsque O scilla- le ventilateur est en marche. tion Utilisez ce bouton pour allumer et éteindre le ventilateur. La fonction W-Lan est activée après trois secondes d‘appui sur ON/OFF la touche. 64 Relaxxnow...
  • Seite 65: Utilisation De La Télécommande

    Veillez à ce que la pile soit correctement insérée, en particulier en ce qui concerne la polarité, en ajustant les côtés +/- de la pile aux indicateurs correspondants sur la télécommande. • Retirez immédiatement les piles usagées, endommagées ou déchargées. Relaxxnow 65...
  • Seite 66: Spécifications

    REMARQUE: Le ventilateur doit être éteint lorsque vous effectuez ce réglage. SPÉCIFICATIONS MODÈLE/ SKU VTX300 TENSION (V) 220-240 V AC, 50/60 HZ UISSANCE (W) 55 vations ATTENTION: Pour éviter tout électrocution, ajustez le bord large du connecteur à la fente large.
  • Seite 67: Fonction De L'application

    Étape 3 : connecter l‘application au ventilateur 1. Insérez la fiche du ventilateur dans une prise 220-240V. Le ventilateur est en mode veille. 2. Appuyez sur „Add Device“ ou „+“ dans le coin supérieur droit de la page d‘accueil de l‘application, voir image ci-dessous. Relaxxnow 67...
  • Seite 68 5 secondes jusqu‘à ce que l‘indicateur WiFi de l‘écran commence à clignoter rapidement. Appuyez ensuite sur le bouton „Confirm indicator rapidly blink / Confirmer l‘indicateur clignote rapidement“ sur le téléphone mobile comme indiqué dans l‘image ci-dessous 68 Relaxxnow...
  • Seite 69 Remarque: En cas d‘échec de la connexion, appuyez sur „Ap Mode“ (en haut à droite) et le voyant „Confirm indicator slowly blink / Confirmer l‘indicateur clignote lentement „ sur le téléphone mobile comme indiqué sur l‘image ci-dessous. Relaxxnow 69...
  • Seite 70: Amazon Alexa

    Si vous voulez utiliser Alexa, appuyez sur „ME“ (en bas à droite). Sélectionnez ensuite „more services / plus de services“ et ensuite „alexa“. Vous y trouverez comment utiliser Alexa. Pour allumer ou éteindre le ventilateur, vous pouvez dire „Alexa allumer/éteindre le ventilateur“. 70 Relaxxnow...
  • Seite 71: Nettoyage Et Stockage

    Appliquer quelques gouttes de lubrifiant sur le moteur pour prévenir la corrosion. Enlevez l‘huile et les taches sur le corps pour éviter d‘endommager le ventilateur. Démonter le ventilateur dans l‘ordre inverse des instructions de montage, le remettre dans le carton et le conserver dans un endroit sec. Relaxxnow 71...
  • Seite 72: Résolution Des Problèmes

    La télécom- piles de la télécommande. mande n‘envoie pas de signal à l‘appareil. N‘essayez pas d‘ouvrir ou de réparer le ventilateur vous-même. Cela pourrait annuler la garantie et causer des dommages ou des blessures. 72 Relaxxnow...
  • Seite 73: Élimination De Déchets

    Chaque consommateur a l‘obligation légale d‘éliminer les appareils usagés séparément des ordures ménagères (par ex. dans un point de collecte). C‘est la seule façon de s‘assurer que les vieux appareils sont recyclés de manière professionnelle et n‘ont pas d‘impact négatif sur l‘environnement. Relaxxnow 73...
  • Seite 74 MANUALE D’USO ITALIANO 74 Relaxxnow...
  • Seite 75 CONTENUTO DATI TECNICI ..................76 ISEGNO ESPLOSO/LISTA DEI PEZZI DI RICAMBIO........77 LINEE GUIDA GENERALI ..............78 AVVERTENZE ..................79 INSTRUZIONI DI MONTAGGIO ..............79 MESSA IN SERVIZIO ................80 MANUALE PER L‘USO ...............80 SPECIFICHE ..................84 FUNZIONE APP ..................85 PULIZIA & CUSTODIA .................89 RISOLUZIONE ERRORE ...............90 SMALTIMENTO ..................91 RELA...
  • Seite 76 Video Tutorial Il nostro per te! Montaggio Utilizzo Smontaggio 3 semplici passaggi per un inizio veloce e sicuro: 1. Scannerizza il QR-Code 2. Guarda il Video 3. Inizia ad allenarti! Link per il Video: www.sportstech.de/qr/vtx300.html 76 Relaxxnow...
  • Seite 77: Dati Tecnici

    Il ventilatore può essere regolato verso l’alto manualmente (max 90°). Alloggiamento Luxus interamente in plastica con sistema di chiusura brevettato, montaggio e smontaggio facili da eseguire senza alcun attrezzo necessario. Piedini d’appoggio rotondi, facile da montare al supporto principale. Contenuto di spedizione: ventilatore, telecomando, istruzioni di funzionamento. Relaxxnow 77...
  • Seite 78: Isegno Esploso/Lista Dei Pezzi Di Ricambio

    DISEGNO ESPLOSO/LISTA DEI PEZZI DI RICAMBIO Al seguente link troverete il disegno esploso e la lista dei pezzi di ricambio: www.sportstech.de/manuals/pdf/sportstech_vtx300_spareparts.pdf 78 Relaxxnow...
  • Seite 79: Istruzioni Generali

    Non tirare mai il cavo. • Non posare il cavo sotto un tappeto. Non coprire il cavo con tappeti, corridori o simili. • Posare il cavo in modo che nessuno possa inciamparvi sopra • Utilizzare la ventilatore solo come descritto nelle istruzioni. Relaxxnow 79...
  • Seite 80: Avvertenze

    3. Installare l‘elica (3) sull‘albero del motore (6) in modo da adattare tutte le parti. Posizionare il coperchio dell‘elica (2) dietro l‘elica (3) sull‘albero del motore (6). Per attaccare, serrare il coperchio dell‘elica (2) in senso antiorario 80 Relaxxnow...
  • Seite 81: Messa In Servizio

    Collegare il dispositivo a una presa da 220-240 V ~ 50/60 Hz e seguire le istruzioni per l‘uso: Utilizzo dell’interruttore di controllo e del telecomando. Questo ventilatore è dotato di 4 livelli di velocità, un timer e un telecomando. I pulsanti sul pulsante hanno la stessa funzione di quelli sul telecomando. Relaxxnow 81...
  • Seite 82 Oscilla- il pulsante di oscil- è in funzione tion lazione. Con questo tasto accendete e speg- nete il ventilatore. La funzione W-Lan si attiva dopo ON/OFF che il tasto è stato pre- muto per tre secondi. 82 Relaxxnow...
  • Seite 83 Il telecomando non deve essere utilizzato in locali in cui sono in funzione macchinari • pesanti. • La linea di vista tra il telecomando e il ricevitore deve essere libera. • Maneggiare con cura il telecomando. Non lasciarlo cadere. Relaxxnow 83...
  • Seite 84: Specifiche

    Massimo può essere inclinato quasi in posizione orizzontale. NOTA: la ventilatore deve essere spenta se si effettua questa impostazione SPECIFICHE MODELLO/ SKU VTX300 VOLTAGGIO (V) 220-240 V AC, 50/60 HZ WATT (W) 55 vations ATTENZIONE: Per evitare scosse elettriche, adattare il bordo largo del connettore allo slot largo.
  • Seite 85: Funzione App

    Passaggio 3: collegare l‘app alla ventilatore 1. Inserire la spina della ventilatore in una presa da 220-240 V. La ventilatore è in modalità standby. 2. Premere „Aggiungi dispositivo“ o „+“ nell‘angolo in alto a destra sulla home page dell‘app come mostrato di seguito. Relaxxnow 85...
  • Seite 86 3. Cliccare su „Home Appliance“ e su ventilatore, come mostrato in figura 4. Premere il tasto OSC per 5 secondi, fino a che l’icona WiFi sul display si illumina. Premere quindi„Confirmindicatorrapidlyblink“sul vostro telefono,come rappresentato nello screen di sotto. 86 Relaxxnow...
  • Seite 87 Attenzione: se rilevate errori di collegamento cliccate su „Ap Mode“ (in alto a destra) e „Confirm indicator slowly blink“ sul vostro telefono come indicato sulla foto di sotto. Relaxxnow 87...
  • Seite 88 Se vuoi usare Alexa, premi „ME“ (in basso a destra). Quindi scegli „more services“ e successivamente „Alexa“.Li troverete come utilizzare Alexa. Per accendere o spegne- re la ventilatore, puoi premere su „Alexa schalte den Ventilator an/aus“ (spegni, accendi). 88 Relaxxnow...
  • Seite 89: Pulizia & Custodia

    Conservazione del prodotto: Applicare alcune gocce di lubrificante sull‘albero motore per prevenire la corrosione. Rimuovere l‘olio e le macchie dal corpo per evitare danni alla ventola. Smontare il ventilatore e rimetterlo nella scatola, conservandolo in un luogo asciutto. Relaxxnow 89...
  • Seite 90: Risoluzione Errore

    Si prega di non tentare di aprire o riparare da soli la ventilatore. Ciò potrebbe invalidare la garanzia e causare danni o lesioni. 90 Relaxxnow...
  • Seite 91: Smaltimento

    Non gettare vecchi dispositivi nel cestino. Ogni consumatore è legalmente obbligato a smaltire i vecchi apparecchi separatamente dai rifiuti domestici (ad esempio in un punto di raccolta). Questo è l‘unico modo per garantire che le vecchie apparecchiature siano correttamente riciclate e non danneggino l‘ambiente. Relaxxnow 91...
  • Seite 92: Declaration Of Conformity

    DECLARATION OF CONFORMITY Unter folgendem Link finden Sie die Konformitätserklärung: At the following link you will find the declaration of conformity: www.sportstech.de/manuals/pdf/sportstech_vtx300_conformity.pdf 92 Relaxxnow...
  • Seite 93 Innovamaxx GmbH Postdamer Platz 11 10785 Berlin service@innovamaxx.de +49 30 220 663 551 www.relaxxnow.de Relaxxnow 93...

Inhaltsverzeichnis