Herunterladen Inhalt Inhalt Diese Seite drucken
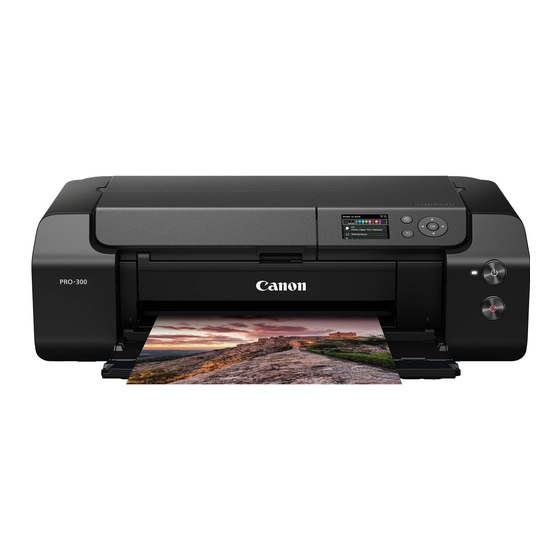
Canon imagePROGRAF PRO-300 Inbetriebnahme
Vorschau ausblenden Andere Handbücher für imagePROGRAF PRO-300:

Werbung

Verfügbare Sprachen
  • DE

Verfügbare Sprachen

  • DEUTSCH, seite 19
Getting Started
Démarrage
Inbetriebnahme
Aan de Slag-gids
Guida Rapida
Para Começar
Guía de inicio
Ξεκινώντας
Uppstartsguide
Read Safety and Important Information
(addendum) first.
Commencez par lire Sécurité et informations
importantes (addendum).
Lesen Sie Sicherheitsinformationen und wichtige
Hinweise (Anhang) zuerst.
Lees eerst Veiligheidsinformatie en belangrijke
informatie (addendum).
Leggere innanzitutto Informazioni importanti
e sulla sicurezza (addendum).
Leia Informações Importantes e Sobre Segurança
(adendo) primeiro.
Lea primero Información de seguridad
e información importante (apéndice).
Διαβάστε πρώτα τις Πληροφορίες για την ασφάλεια
και σημαντικές πληροφορίες (συμπλήρωμα).
Läs Information om säkerhet och annan viktig
information (bilaga) först.

Werbung

Inhaltsverzeichnis
loading

Inhaltszusammenfassung für Canon imagePROGRAF PRO-300

  • Seite 1 Getting Started Démarrage Inbetriebnahme Aan de Slag-gids Guida Rapida Para Começar Guía de inicio Ξεκινώντας Uppstartsguide Read Safety and Important Information (addendum) first. Commencez par lire Sécurité et informations importantes (addendum). Lesen Sie Sicherheitsinformationen und wichtige Hinweise (Anhang) zuerst. Lees eerst Veiligheidsinformatie en belangrijke informatie (addendum).
  • Seite 2 Installing the Printer ........................page 1 Installation de l'imprimante ....................page 1 Installation des Druckers ......................Seite 1 De printer installeren......................pagina 1 Installazione della stampante ..................pagina 1 Instalando a impressora ...................... página 1 Instalación de la impresora ....................página 1 Εγκατάσταση...
  • Seite 3: Setting Up The Printer

    Setting Up the Printer 2. Removing Packing Materials Online Setup Remove and dispose of any packing materials and orange tape. Installation Space Open the top cover, remove and dispose of the orange tape and protective material inside. 25 cm 40 cm Close the top cover.
  • Seite 4 Setting Up the Printer 4. Installing the Print Head Use the {, } and OK buttons to select a language. Open the paper output tray. Open the top cover. Press the OK button. Caution Do not touch the print head holder until it stops moving. Firmly raise the print head lock lever until it stops.
  • Seite 5 5. Installing the Ink Tanks Remove the protective cap. Remove the ink tank from the bag, and then slowly remove the orange cap. Set the print head in the print head holder. Important • Do not squeeze the sides of the ink tank.
  • Seite 6: Loading Paper

    Setting Up the Printer 6. Loading Paper Repeat steps 1 through 3 to install all the ink tanks. • Check that all the colors appear. Press the OK button. Close the top cover. • The printer will start initializing. Open the paper support. Open the feed slot cover.
  • Seite 7 • Follow the on-screen instructions to continue setup. This includes making selections related to sending information. Refer to "Sending Information To Canon" in Safety and Important Information. • Open the output tray extension and extend the When Select the connection method. appears on paper output support.
  • Seite 8 Setting Up the Printer 7. Selecting a Printer Connection Method Select a printer connection method from the table below. In the following descriptions, "smartphone" is used to refer collectively to smartphones and tablets. USB connection Wired LAN connection Wi-Fi connection USB cable LAN cable Router...
  • Seite 9: Connecting To A Computer

    Computer Smartphone smartphone page 8 Connecting to a Computer If you are using multiple computers, perform these steps on each computer. Access the Canon website from a Click Download. computer. Run the downloaded file. Click Start Setup. Set Up. Select Enter your printer's model name and click Go.
  • Seite 10: Connecting To A Smartphone

    Install the "Canon PRINT Inkjet/SELPHY" Open the installed app. app on your smartphone. • Scan the QR code shown on the right to access the Canon website, and then download the app. Follow the on-screen instructions in the Open your smartphone's Wi-Fi settings.
  • Seite 11: Configuration De L'imprimante

    Configuration de l'imprimante 2. Retrait du matériel Con guration en ligne d'emballage Enlevez et jetez tout matériel d'emballage et bande orange. Espace d'installation Ouvrez le capot supérieur, retirez et jetez la bande orange et le matériau protecteur se trouvant à l'intérieur. 25 cm (9,8 pouces) 40 cm (15,7 pouces)
  • Seite 12 Configuration de l'imprimante 4. Installation de la tête Utilisez les boutons {, } et OK pour sélectionner une langue. d'impression Ouvrez le bac de sortie papier. Ouvrez le capot supérieur. Appuyez sur le bouton OK. Attention Évitez tout contact avec le support de tête d'impression tant que celui-ci n'est pas arrêté.
  • Seite 13 5. Installation des cartouches Retirez la capsule de protection. d'encre Sortez la cartouche d'encre du sac, puis retirez doucement le capuchon orange. Placez la tête d'impression dans le support de tête d'impression. Important • N'appuyez pas sur les côtés de la cartouche d'encre.
  • Seite 14: Chargement Du Papier

    Configuration de l'imprimante 6. Chargement du papier Répétez les étapes 1 à 3 pour installer toutes les cartouches d'encre. • Vérifiez que toutes les couleurs s'affichent. Appuyez sur le bouton OK. Fermez le capot supérieur. • L'imprimante commence à s'initialiser. Ouvrez le support papier.
  • Seite 15 • Suivez les instructions à l'écran pour poursuivre la configuration. Cela inclut des sélections relatives à l'envoi d'informations. Reportez-vous à « Envoi d'informations à Canon » dans Sécurité et informations importantes. • Lorsque Sélectionner méth. de connexion. Ouvrez l'extension du bac de sortie papier et apparaît sur l'écran de l'imprimante, passez à...
  • Seite 16 Configuration de l'imprimante 7. Sélection d'une méthode de connexion à l'imprimante Sélectionnez une méthode de connexion à l'imprimante dans le tableau ci-dessous. Dans les descriptions suivantes, le terme « smartphone » est utilisé pour désigner collectivement les smartphones et les tablettes. Connexion USB Connexion au réseau câblé...
  • Seite 17: Connexion À Un Ordinateur

    Smartphone smartphone page 8 Connexion à un ordinateur Si vous utilisez plusieurs ordinateurs, effectuez ces étapes sur chaque ordinateur. Accès au site Web Canon à partir d'un Cliquez sur Télécharger. ordinateur. Exécutez le fichier téléchargé. Cliquez sur Commencer la configuration.
  • Seite 18 Connectez votre smartphone au routeur sans fil (si vous disposez d'un routeur sans fil). Pour plus d'informations, consultez la documentation de votre smartphone et du routeur sans fil. Installez l'application « Canon PRINT Ouvrez l'application installée. Inkjet/SELPHY » sur votre smartphone.
  • Seite 19: Einrichten Des Druckers

    Einrichten des Druckers 2. Entfernen des Onlineeinrichtung Verpackungsmaterials Entfernen und entsorgen Sie das gesamte Verpackungsmaterial sowie das orangefarbene Klebeband. Benötigter Platz für die Installation Öffnen Sie die obere Abdeckung, entfernen und entsorgen Sie das orangefarbene Klebeband und das Schutzmaterial aus dem Inneren. 25 cm 40 cm Schließen Sie die obere Abdeckung.
  • Seite 20 Einrichten des Druckers 4. Installation des Druckkopfs Verwenden Sie die Tasten {, } und OK, um eine Sprache auszuwählen. Öffnen Sie das Papierausgabefach. Öffnen Sie die obere Abdeckung. Drücken Sie die Taste OK. Vorsicht Berühren Sie den Druckkopfhalter nicht, solange er sich bewegt.
  • Seite 21: Installation Der Tintenbehälter

    5. Installation der Entfernen Sie die Schutzkappe. Tintenbehälter Nehmen Sie den Tintenbehälter aus der Verpackung und entfernen Sie vorsichtig die orangefarbene Kappe. Setzen Sie den Druckkopf in den Druckkopfhalter ein. Wichtig • Quetschen Sie die Seiten des Tintenbehälters nicht zusammen. •...
  • Seite 22: Einlegen Von Papier

    Einrichten des Druckers 6. Einlegen von Papier Wiederholen Sie die Schritte 1 bis 3, um alle Tintenbehälter einzusetzen. • Überprüfen Sie, ob alle Farben angezeigt werden. Drücken Sie die Taste OK. Schließen Sie die obere Abdeckung. • Der Drucker wird initialisiert. Öffnen Sie die Papierstütze.
  • Seite 23 Befolgen Sie die Anweisungen auf dem Bildschirm, um mit der Einrichtung fortzufahren. Dazu gehört das Vornehmen von Auswahlen, die im Zusammenhang mit dem Senden von Informationen stehen. Siehe „Information an Canon senden” in Sicherheitsinformationen und wichtige Hinweise. • Wenn auf dem Bildschirm des Druckers Öffnen Sie die Verlängerung des Ausgabefachs...
  • Seite 24: Auswahl Einer Druckeranschlussmethode

    Einrichten des Druckers 7. Auswahl einer Druckeranschlussmethode Wählen Sie aus der nachfolgenden Tabelle eine Druckeranschlussmethode aus. In den folgenden Beschreibungen wird der Begriff „Smartphone” als Sammelbegriff für Smartphones und Tablets verwendet. USB-Verbindung (USB connection) Drahtgebundenes LAN-Verb. Wi-Fi-Verbindung (Wi-Fi connection) (Wired LAN connection) USB-Kabel LAN-Kabel Router...
  • Seite 25: Herstellen Einer Verbindung Mit Einem Computer

    Wenn Sie mehrere Computer verwenden, führen Sie diese Schritte auf jedem Computer aus. Greifen Sie von einem Computer aus auf Klicken Sie auf Herunterladen. die Canon-Website zu. Führen Sie die heruntergeladene Datei aus. Klicken Sie auf Setup starten (Start Einrichten aus.
  • Seite 26: Herstellen Einer Verbindung Mit Einem Smartphone

    Stellen Sie eine Verbindung zwischen Ihrem Smartphone und dem Wireless Router her (wenn Sie über einen Wireless Router verfügen). Weitere Informationen finden Sie in den Handbüchern zu Ihrem Smartphone und dem Wireless Router. Installieren Sie die App „Canon PRINT Öffnen Sie die installierte App.
  • Seite 27 De printer instellen 2. Verpakkingsmateriaal Online installatie verwijderen Verwijder het verpakkingsmateriaal en de oranje tape en gooi het weg. Installatieoppervlak Open de bovenklep, verwijder de oranje tape en het beschermende materiaal erin en gooi het weg. 25 cm 40 cm Sluit de bovenklep.
  • Seite 28 De printer instellen 4. De printkop installeren Gebruik de knoppen {, } en OK om een taal te selecteren. Open de papieruitvoerlade. Open de bovenklep. Druk op de knop OK. Let op Raak de printkophouder niet aan totdat deze stopt met bewegen.
  • Seite 29 5. De inkttanks installeren Verwijder het beschermkapje. Haal de inkttank uit de zak en verwijder langzaam het oranje kapje. Plaats de printkop in de printkophouder. Belangrijk • Druk niet op de zijkanten van de inkttank. • Raak de aangegeven gebieden in de afbeelding niet aan.
  • Seite 30: Papier Plaatsen

    De printer instellen 6. Papier plaatsen Herhaal de stappen 1 tot en met 3 om alle inkttanks te plaatsen. • Controleer of alle kleuren worden weergegeven. Druk op de knop OK. Sluit de bovenklep. • De initialisatie van de printer wordt gestart. Open de papiersteun.
  • Seite 31 Volg de instructies op het scherm om door te gaan met de installatie. Hierbij moet u selecties maken die betrekking hebben op het verzenden van informatie. Raadpleeg "Gegevens verzenden naar Canon" in Veiligheidsinformatie en belangrijke informatie. • Open het verlengstuk van de uitvoerlade en trek Wanneer Selecteer de verbindingsmethode de papieruitvoersteun uit.
  • Seite 32 De printer instellen 7. Een printerverbindingsmethode selecteren Selecteer een printerverbindingsmethode in de onderstaande tabel. In de volgende omschrijvingen wordt de term "smartphone" gebruikt om te verwijzen naar smartphones en tablets. USB-verbinding (USB connection) Bedrade LAN-verbinding Wi-Fi-verbinding (Wi-Fi connection) (Wired LAN connection) USB-kabel LAN-kabel Router...
  • Seite 33 8 Verbinden met een computer Als u meerdere computers gebruikt, voert u deze stappen uit op elke computer. Ga naar de Canon-website op een Klik op Downloaden. computer. Voer het gedownloade bestand uit. Klik op Beginnen met instellen (Start Setup).
  • Seite 34 Schakel de Wi-Fi-instelling op uw smartphone in. Verbind uw smartphone met de draadloze router (als u een draadloze router gebruikt). Raadpleeg de handleiding van uw smartphone en draadloze router voor meer informatie. Installeer de app "Canon PRINT Inkjet/ Open de geïnstalleerde app. SELPHY" op uw smartphone.
  • Seite 35: Impostazione Della Stampante

    Impostazione della stampante 2. Rimozione del materiale da Impostazione online imballaggio Rimuovere e disfarsi di eventuale materiale da imballaggio e del nastro arancione. Spazio di installazione Aprire il coperchio superiore, rimuovere e disfarsi del nastro arancione e del materiale di protezione all'interno.
  • Seite 36 Impostazione della stampante 4. Installazione della testina di Utilizzare i pulsanti {, } e OK per selezionare una lingua. stampa Aprire il vassoio di uscita della carta. Aprire il coperchio superiore. Premere il pulsante OK. Attenzione Non toccare il supporto della testina di stampa fino a quando non si ferma.
  • Seite 37 5. Installazione dei serbatoi Rimuovere il cappuccio protettivo. d'inchiostro Estrarre il serbatoio d'inchiostro dalla confezione, quindi rimuovere lentamente il cappuccio arancione. Inserire la testina di stampa nel supporto della testina di stampa. Importante • Non schiacciare i lati del serbatoio d'inchiostro. •...
  • Seite 38: Caricamento Della Carta

    Impostazione della stampante 6. Caricamento della carta Ripetere i passi da 1 a 3 per installare tutti i serbatoi d'inchiostro. • Verificare che tutti i colori vengano visualizzati. Premere il pulsante OK. Chiudere il coperchio superiore. • Verrà avviata l'inizializzazione della stampante. Aprire il supporto per la carta.
  • Seite 39 Seguire le istruzioni visualizzate sullo schermo per continuare l'impostazione. Sono incluse le selezioni da effettuare in merito all'invio delle informazioni. Fare riferimento a "Invio di informazioni a Canon" in Informazioni importanti e sulla sicurezza. • Quando viene visualizzato Selezionare met. di connessione.
  • Seite 40 Impostazione della stampante 7. Selezione di un metodo di connessione della stampante Selezionare un metodo di connessione della stampante dalla tabella riportata di seguito. Nelle seguenti descrizioni, il termine "smartphone" viene utilizzato per indicare collettivamente smartphone e tablet. Connessione USB (USB connection) Connessione LAN wired Connessione Wi-Fi (Wi-Fi (Wired LAN connection)
  • Seite 41: Connessione A Un Computer

    8 Connessione a un computer Se si utilizzano più computer, eseguire questi passaggi su ciascun computer. Accedere al sito Web di Canon da un Fare clic su Scarica. computer. Eseguire il file scaricato. Fare clic su Avvia impostazione (Start Setup).
  • Seite 42 Aprire l'app installata. SELPHY" sullo smartphone. • Eseguire la scansione del codice QR sulla destra per accedere al sito Web di Canon e scaricare l'app. Per aggiungere la stampante, attenersi Aprire le impostazioni Wi-Fi dello alle istruzioni visualizzate nell'app. smartphone. Toccare il nome di rete (SSID) che inizia con "Canon_ij_".
  • Seite 43 Configurando a impressora 2. Removendo os materiais da Con guração On-line embalagem Remova e descarte quaisquer materiais de embalagem e a fita laranja. Espaço de instalação Abra a tampa superior, remova e descarte a fita laranja e o material de proteção que estão dentro.
  • Seite 44 Configurando a impressora 4. Instalando a Cabeça de Use os botões {, } e OK para selecionar um idioma. Impressão Abra a bandeja de saída do papel. Abra a tampa superior. Pressione o botão OK. Cuidado Não toque no suporte da cabeça de impressão antes de ele parar de se mover.
  • Seite 45 5. Instalando os cartuchos de Remova a tampa de proteção. tinta Retire o cartucho de tinta da bolsa e, em seguida, remova lentamente a tampa laranja. Coloque a cabeça de impressão no suporte da cabeça de impressão. Importante • Não aperte as laterais do cartucho de tinta.
  • Seite 46 Configurando a impressora 6. Colocando papel Repita as etapas 1 a 3 para instalar todos os cartuchos de tinta. • Confira se todas as cores aparecem. Pressione o botão OK. Feche a tampa superior. • A impressora será inicializada. Abra o suporte de papel. Abra a tampa do slot de alimentação.
  • Seite 47 • Siga as instruções da tela para continuar com a configuração. Isso inclui fazer escolhas relacionadas ao envio de informações. Consulte "Enviando informações para a Canon" em Informações Importantes e Sobre Segurança. • Quando Selecione o método de conexão. (Select the connection method.) aparecer na tela da...
  • Seite 48 Configurando a impressora 7. Selecionando um método de conexão para a impressora Selecione um dos métodos de conexão para a impressora da tabela abaixo. Na descrição abaixo, "smartphone" é usado para se referir coletivamente a smartphones e tablets. Conexão USB (USB connection) Conexão LAN com fio Conexão Wi-Fi (Wi-Fi connection) (Wired LAN connection)
  • Seite 49 8 Conectando a um Computador Se você estiver usando vários computadores, execute estas etapas em cada computador. Acesse o site Canon de um computador. Clique em Download. Execute o arquivo baixado. Clique em Iniciar configuração (Start Selecione Configurar.
  • Seite 50 Conecte seu smartphone ao roteador sem fio (se você tiver um roteador sem fio). Consulte os manuais do seu smartphone e do seu roteador sem fio para obter mais detalhes. Instale o aplicativo "Canon PRINT Inkjet/ Abra o aplicativo instalado.
  • Seite 51: Instalación De La Impresora

    Instalación de la impresora 2. Retirar los materiales de Con guración en línea protección Retire y tire los materiales de protección y la cinta naranja. Espacio de instalación Abra la cubierta superior, retire y tire la cinta naranja y el material de protección que hay dentro.
  • Seite 52 Instalación de la impresora 4. Instalar el cabezal de Utilice los botones {, } y OK para seleccionar un idioma. impresión Abra la bandeja de salida del papel. Abra la cubierta superior. Pulse el botón OK. Precaución No toque el soporte del cabezal de impresión hasta que deje de moverse.
  • Seite 53 5. Instalación de los depósitos Retire la tapa protectora. de tinta Retire el depósito de tinta de la bolsa y, a continuación, retire lentamente la tapa naranja. Coloque el cabezal de impresión en el soporte del cabezal de impresión. Importante •...
  • Seite 54: Carga Del Papel

    Instalación de la impresora 6. Carga del papel Repita los pasos 1 a 3 para instalar todos los otros depósitos de tinta. • Compruebe que aparezcan todos los colores. Pulse el botón OK. Cierre la cubierta superior. • La impresora comenzará a iniciarse. Abra el soporte del papel.
  • Seite 55 Siga las instrucciones que aparecen en pantalla para continuar con la instalación. Esto incluye la realización de selecciones relacionadas con el envío de información. Consulte "Enviando información a Canon" en Información de seguridad e información importante. Abra la extensión de la bandeja de salida y •...
  • Seite 56 Instalación de la impresora 7. Selección del método de conexión de la impresora Seleccione un método de conexión de la impresora en la tabla a continuación. En las siguientes descripciones se utiliza "teléfono inteligente" para referirse colectivamente a teléfonos inteligentes y tabletas. Conexión USB (USB connection) Conexión LAN cableada (Wired LAN Conexión Wi-Fi (Wi-Fi connection)
  • Seite 57 Teléfono inteligente teléfono inteligente página 8 Conectar al ordenador Si utiliza varios ordenadores, realice estos pasos en cada ordenador. Acceda al sitio web de Canon desde un Haga clic en Descargar. ordenador. Ejecute el archivo descargado. Haga clic en Iniciar configuración (Start Setup).
  • Seite 58 Inkjet/SELPHY" en su teléfono inteligente. • Escanee el código QR que se muestra a la derecha para acceder al sitio web de Canon Siga las instrucciones en pantalla de la y, a continuación, descargue aplicación para agregar su impresora. la aplicación.
  • Seite 59: Περιεχόμενα Συσκευασίας

    Ρύθμιση του εκτυπωτή 2. Αφαίρεση υλικών Ρύθ ιση online συσκευασίας Αφαιρέστε και απορρίψτε τυχόν υλικά συσκευασίας και πορτοκαλί ταινία. Χώρος εγκατάστασης Ανοίξτε το επάνω κάλυμμα, αφαιρέστε και απορρίψτε την πορτοκαλί ταινία και το προστατευτικό υλικό από το εσωτερικό. 25 εκ. 40 εκ.
  • Seite 60 Ρύθμιση του εκτυπωτή 4. Εγκατάσταση της κεφαλής Χρησιμοποιήστε τα κουμπιά {, } και OK για να επιλέξετε μια γλώσσα. εκτύπωσης Ανοίξτε τη θήκη εξόδου χαρτιού. Ανοίξτε το επάνω κάλυμμα. Πατήστε το κουμπί OK. Προσοχή Μην αγγίζετε τη θήκη κεφαλής εκτύπωσης μέχρι να σταματήσει...
  • Seite 61 5. Εγκατάσταση των δοχείων Αφαιρέστε το προστατευτικό κάλυμμα. μελάνης Αφαιρέστε το δοχείο μελάνης από τη σακούλα και μετά αφαιρέστε αργά το πορτοκαλί κάλυμμα. Τοποθετήστε την κεφαλή εκτύπωσης στη θήκη κεφαλής εκτύπωσης. Σημαντικό • Μην πιέζετε τις πλευρές του δοχείου μελάνης. •...
  • Seite 62 Ρύθμιση του εκτυπωτή 6. Τοποθέτηση χαρτιού Επαναλάβετε τα βήματα 1 έως 3 για να τοποθετήσετε όλα τα δοχεία μελάνης. • Ελέγξτε ότι εμφανίζονται όλα τα χρώματα. Πατήστε το κουμπί OK. Κλείστε το επάνω κάλυμμα. • Ο εκτυπωτής αρχίζει να προετοιμάζεται. Ανοίξτε...
  • Seite 63 να συνεχίσετε την εγκατάσταση. Σε αυτές περιλαμβάνονται επιλογές που σχετίζονται με την αποστολή πληροφοριών. Ανατρέξτε στο κεφάλαιο «Αποστολή πληροφοριών στην Canon» στην ενότητα Πληροφορίες για την Ανοίξτε την προέκταση θήκης εξόδου και ασφάλεια και σημαντικές πληροφορίες. • εκτείνετε την υποστήριξη εξόδου χαρτιού.
  • Seite 64 Ρύθμιση του εκτυπωτή 7. Επιλογή μεθόδου σύνδεσης εκτυπωτή Επιλέξτε μία μέθοδο σύνδεσης εκτυπωτή από τον παρακάτω πίνακα. Στην ακόλουθες περιγραφές, ο όρος «smartphone» χρησιμοποιείται συλλογικά για την περιγραφή των smartphone και των tablet. Σύνδεση USB (USB connection) Σύνδεση ενσύρματου LAN Σύνδεση...
  • Seite 65 σελίδα 8 Σύνδεση με υπολογιστή Εάν χρησιμοποιείτε πολλούς υπολογιστές, εκτελέστε αυτά τα βήματα σε κάθε υπολογιστή. Μεταβείτε στη διαδικτυακή τοποθεσία Κάντε κλικ στο Λήψη. της Canon από έναν υπολογιστή. Εκτελέστε το ληφθέν αρχείο. Κάντε κλικ στο Εκκίνηση ρύθμισης (Start Setup). Εγκατάσταση.
  • Seite 66 Εγκαταστήστε την εφαρμογή «Canon Ανοίξτε την εγκατεστημένη εφαρμογή. PRINT Inkjet/SELPHY» στο smartphone σας. • Για πρόσβαση στην τοποθεσία web της Canon, σαρώστε τον κωδικό QR που εμφανίζεται Ακολουθήστε τις οδηγίες που στα δεξιά και, έπειτα, εμφανίζονται στην οθόνη της πραγματοποιήστε λήψη της...
  • Seite 67: Ställa In Skrivaren

    Ställa in skrivaren 2. Ta bort Onlineinstallation förpackningsmaterial Ta bort och kassera eventuellt förpackningsmaterial och orange tejp. Installationsutrymme Öppna den övre luckan, ta bort och kassera den orange tejpen och skyddsmaterialet inuti. 25 cm 40 cm Stäng den övre luckan. 1.
  • Seite 68 Ställa in skrivaren 4. Installera skrivhuvudet Använd knapparna {, } och OK för att välja ett språk. Öppna utmatningsfacket. Öppna den övre luckan. Tryck på OK. Försiktighet Rör inte hållaren för skrivhuvudet förrän den slutar röra sig. Lyft låsspaken för skrivhuvudet tills det tar stopp.
  • Seite 69 5. Installera bläckbehållarna Ta bort skyddslocket. Ta ut bläckbehållaren ur påsen och ta långsamt bort det orange locket. Sätt in skrivhuvudet i hållaren för skrivhuvudet. Viktigt! • Kläm inte åt sidorna på bläckbehållaren. • Rör inte områdena som visas på bilden. Sänk låsspaken för skrivhuvudet helt.
  • Seite 70 Ställa in skrivaren 6. Fylla på papper Upprepa steg 1 till 3 för att installera alla bläckbehållare. • Kontrollera att alla färger visas. Tryck på OK. Stäng den övre luckan. • Skrivaren börjar initialiseras. Öppna pappersstödet. Öppna luckan för matningsfacket. Skjut den högra pappersledaren längst ut åt höger.
  • Seite 71 • Följ instruktionerna på skärmen för att fortsätta inställningen. Detta omfattar att göra val i samband med överföring av information. Läs "Skicka information till Canon" i Information om säkerhet och annan viktig information. • Öppna utmatningsfackets förlängningsdel och När Välj anslutningsmetoden. (Select the dra ut pappersutmatningsstödet.
  • Seite 72 Ställa in skrivaren 7. Välja en anslutningsmetod för skrivaren Välj en anslutningsmetod för skrivaren från tabellen nedan. I följande beskrivningar refererar "smarttelefon" både till smarttelefoner och till surfplattor. USB-anslutning (USB connection) Kablad LAN-anslutning Wi-Fi-anslutning (Wi-Fi connection) (Wired LAN connection) USB-kabel LAN-kabel Router Router...
  • Seite 73: Ansluta Till Dator

    8-a. Ansluta till dator Vilken enhet ansluter du? Dator och Dator Smarttelefon smarttelefon sida 8 Ansluta till dator Om du använder flera datorer utför du dessa steg på varje dator. Gå till Canons webbplats på en dator. Klicka på Hämta. Starta den hämtade filen.
  • Seite 74 Aktivera inställningen Wi-Fi på smarttelefonen. Anslut smarttelefonen till den trådlösa routern (om du har en trådlös router). Läs smarttelefonens och den trådlösa routerns handböcker för mer detaljer. Installera appen "Canon PRINT Inkjet/ Öppna den installerade appen. SELPHY" på smarttelefonen. •...
  • Seite 75 RMC (Regulatory Model Code): K10511...
  • Seite 76 Läs Onlinehandbok From your browser À partir de votre navigateur Über Ihren Browser Via de browser Dal browser Do seu navegador Desde su navegador Από το πρόγραμμα περιήγησής σας Från webbläsaren QT6-3540-V01 XXXXXXXX © CANON INC. 2020 PRINTED IN XXXXXXXX...

Diese Anleitung auch für:

Pixma pro-200

Inhaltsverzeichnis