
Verwandte Anleitungen für Nagra CLASSIC INT

Inhaltszusammenfassung für Nagra CLASSIC INT
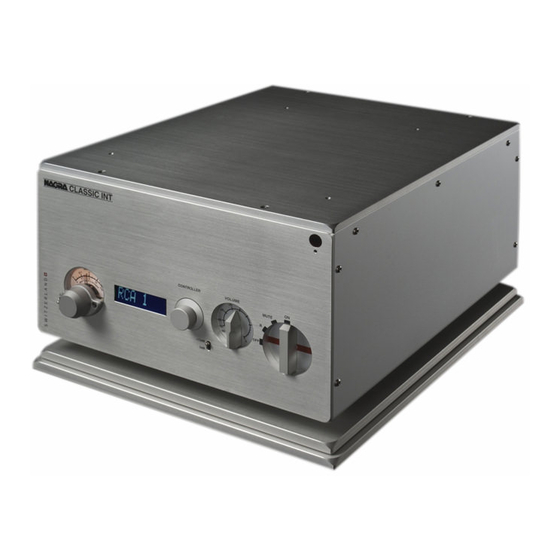
- Seite 1 CLASSIC INT MANUEL DE L’UTILISATEUR OWNER’S MANUAL BEDIENUNGSANLEITUNG P/N 2055032159 All rights reserved - © 2020 rev1...
- Seite 2 NAGRA – CLASSIC INT...
-
Seite 3: Inhaltsverzeichnis
SOMMAIRE _____________________________________________________________ page - avertissements de sécurité - garantie - équipement de votre CLASSIC INT INSTALLATION DE VOTRE CLASSIC INT - positionnement - présentation - face avant - panneau arrière - entrées - borne de masse - domotique - sorties... - Seite 4 SUMMARY _____________________________________________________________ page - safety warnings - warranty - package content INSTALLATION OF YOUR CLASSIC INT - choosing a location - identification of controls - front panel - rear panel - inputs - ground terminal - remote connection - speaker outputs...
- Seite 5 INHALTSVERZEICHNIS _____________________________________________________________ seite Sicherheit - Garantie - Packungsinhalt INSTALLATION - Positionieren des Classic Int - Ihr Classic Int - Vorderansicht - Rückseite - Eingänge - Erdungsanschluss - Fernsteuerungsanschluss - Ausgänge - Einstecken des Stromkabels BETREIBEN DES CLASSIC INT - auf ON schalten - einstellen ihres CLASSIC INT - Einstieg in die Menüs...
-
Seite 6: Avertissements De Sécurité
le CLASSIC INT ne nécessite pas d’être ouvert pour être configuré. Ne jamais tenter d’ouvrir l’appareil pour éviter tout risque d’électrocution. - Seite 7 Félicitations, vous venez d’acheter un des meilleurs amplificateurs jamais réalisés. Le CLASSIC INT a été conçu par une équipe d’ingénieurs qui bénéficie de soixante ans d’expérience dans le design d’appareils de hautes performances pour l’audio professionnel, la sécurité et les applications militaires.
-
Seite 8: Équipement De Votre Classic Int
240 V, en fonction de votre pays) Une (1) télécommande Merci de contacter votre revendeur Nagra s’il devait manquer l’un de ces éléments. (* Selon votre pays, le câble secteur est équipé d’une prise de type Europe, Suisse ou US.) -
Seite 9: Installation De Votre Classic Int
Le CLASSIC INT doit être installé sur un support stable qui permet une dissipation thermique optimale. Nous vous recommandons de demander à votre revendeur Nagra une démonstration du support anti-vibrations VFS-L qui offre une combinaison parfaite avec votre CLASSIC INT. -
Seite 10: Panneau Arrière
Le porte-fusible contient déjà un fusible de remplacement. Le fusible actif se situe du côté gauche sur l’image. Si les fusibles venaient à lâcher consécutivement deux fois, veuillez contacter votre revendeur Nagra pour qu’il vous conseille. NAGRA – CLASSIC INT... -
Seite 11: Entrées
Entrées Le CLASSIC INT est un amplificateur symétrique et dispose donc d’une entrée symétrique XLR. Si votre source n’est pas symétrique, l’appareil propose aussi quatre entrées asymétriques. Sensibilité En fonction de la source utilisée, vous pouvez ajuster la sensibilité de l’entrée XLR mais également de celle de l’entrée RCA1. Ceci vous garantira une compatibilité... -
Seite 12: Borne De Masse
Nagra MPS. Connectez la sortie AMP de l’alimentation MPS sur l’entrée REMOTE « IN » de votre CLASSIC INT. Vous pouvez raccorder la sortie remote « OUT » de votre CLASSIC INT à un autre appareil Nagra. -
Seite 13: Sorties
Sorties Le CLASSIC INT peut être utilisé avec deux types de terminaisons de câbles haut-parleurs : banane ou fourche. Connectez câbles haut- parleurs sur les connecteurs Cardas LEFT et RIGHT s’ils se terminent par des fourches. Si les câbles ont des fiches de... -
Seite 14: Utilisation De Votre Classic Int
UTILISATION DE VOTRE CLASSIC INT __________________________________________________________ Ne procédez à l’utilisation de votre CLASSIC INT qu’après avoir suivi les étapes décrites dans le chapitre précédent INSTALLATION DE VOTRE CLASSIC INT. Mise en service Pour utiliser votre amplificateur, vous devrez tout d’abord positionner l’interrupteur... -
Seite 15: Régler Votre Classic Int
Régler votre CLASSIC INT Grâce à son afficheur LCD et au bouton de contrôle CONTROLLER, vous pourrez personnaliser votre CLASSIC INT pour l’intégrer complètement à votre système. Veuillez prendre un peu de temps pour vous familiariser avec tous les réglages et les fonctions de votre CLASSIC INT. -
Seite 16: Arborescence Du Menu
Quand la langue apparaît, appuyez à nouveau pour sélectionner. Puis Français tournez à nouveau bouton pour retourner à position précédente « Langue » dans le menu. NAGRA – CLASSIC INT... -
Seite 17: Renommer Les Entrées
être modifiée (le « R »). En tournant le bouton de contrôle, vous ferez défiler les caractères dans l’ordre suivant: a…z_-*#/,.:;0123456789_A…Z Sélectionnez le C et appuyez sur le bouton CCA 1 pour passer au caractère suivant (le « C »). NAGRA – CLASSIC INT... -
Seite 18: Réinitialiser Le Nom Des Entrées
Pressez d’usine ont été restaurés. Télécommande Une télécommande RCU III est fournie avec votre CLASSIC INT. Cette télécommande qui utilise les codes standards RC5 de Philips est appelée RC5 dans le menu. Cependant, vous pouvez également contrôler votre appareil avec la télécommande Nagra RCU ou RCU II (qui équipe les Nagra CD). -
Seite 19: À Propos
Cette partie du menu vous donnera des informations utiles concernant votre CLASSIC INT. A propos Version software : vous pouvez vérifier la Version version du software de votre CLASSIC INT. mise à jour, nous informerons votre revendeur et nous le notifierons également sur notre site web. -
Seite 20: Sécurité
0 (OFF), attendre 30 secondes puis remettre l’interrupteur sur 1 (ON). Note: Si votre CLASSIC INT venait à entrer dans le « Mode de protection » de manière répétée et sans raison apparente, éteignez votre appareil en positionnant l’interrupteur secteur à l’arrière sur 0 (OFF) et contactez votre revendeur Nagra. -
Seite 21: Écrêtage Continu
NB : Si la température ambiante est élevée, la plage de fonctionnement de l'amplificateur sera plus faible et le risque de surchauffe de l’amplificateur plus important. Assurez-vous que la pièce est à une température raisonnable, de préférence inférieure à 30 ° C NAGRA – CLASSIC INT... -
Seite 22: Modulomètre
L'interrupteur à bascule 1 (voir page 9, « Face avant ») situé à gauche du modulomètre vous permet de régler l'intensité du rétroéclairage. Du plus lumineux jusqu’a l’extinction complète , il fournit 7 niveaux d’intensité. Ce réglage est automatiquement enregistré lors de l’extinction de l’appareil. NAGRA – CLASSIC INT... -
Seite 23: Dépannage
Surchauffe Mode L’amplificateur protection surchauffe s’éteint. Le laisser refroidir avant de le rallumer. Rouge Problème de Mode Veuillez contacter courant protection votre revendeur continu Nagra Rouge Problème de Mode Vérifiez le câblage court-circuit protection des haut-parleurs NAGRA – CLASSIC INT... -
Seite 24: Spécifications Techniques
EN61000-3-2 Moins de 1W (veille et mode automatique) Poids 18 Kg Poids net Dimensions 277 x 395 x 174 mm Plages de tension 90-110V ou 110-132V secteur de 50 - 60 Hz ou 180-264V fonctionnement NAGRA – CLASSIC INT... -
Seite 25: Déclaration De Conformité
2 (1000V) Immunité aux transitoires électriques rapides en salves sur câbles signaux d’entrées/sorties EN 61000-4-4 level 1 (500V) Immunité aux ondes de choc EN 61000-4-5 level 2 (1000V) ème Romanel trimestre 2016 Nagra Département R&D NAGRA – CLASSIC INT... - Seite 26 Pour toute information supplémentaire au sujet du recyclage produit, vous pouvez contacter votre municipalité, votre déchetterie ou le magasin où vous avez acheté le produit. Ceci s’applique aux articles suivants: CLASSIC INT et tous les accessoires livrés avec l’appareil NAGRA – CLASSIC INT...
-
Seite 27: Safety Warnings
We guarantee our products against all manufacturing defects, for a period of three years for the CLASSIC INT, running from the date of delivery to the customer and validated by the serial number on the device casing and the invoice from an official Nagra dealer. This warranty is only valid for the original purchaser of new equipment. - Seite 28 Congratulations, you have just purchased one of the best amplifiers ever made! The CLASSIC INT was created by an engineering team with more than 60 years of experience designing world-class products for the professional audio, national security and military businesses.
-
Seite 29: Package Content
Package content The package of your CLASSIC INT includes the following parts : One (1) Classic Int integrated amplifier One (1) owner’s manual One (1) pair of microfiber gloves « Haute Horlogerie » One (1) power cord * ... -
Seite 30: Installation Of Your Classic Int
Choosing a location The CLASSIC INT is designed for indoor use exclusively. The CLASSIC INT must be installed on a firm and stable stand which allows an optimal thermal dissipation. We recommend you to ask your Nagra dealer for a demonstration of the VFS-L isolation base that offers a perfect match for your Nagra CLASSIC INT. -
Seite 31: Rear Panel
The fuse holder already contains a spare fuse. The active fuse is located on the left side in the picture. Should an active fuse blow twice without any apparent reason, please contact your Nagra dealer for advice. NAGRA – CLASSIC INT... -
Seite 32: Inputs
Inputs The CLASSIC INT is a fully balanced amplifier thus it has one stereo XLR input. If your source is unbalanced, you can use one of the four unbalanced RCA inputs provided. Sensitivity Depending on the source, you can adjust the sensitivity of the XLR input and the RCA1 input. -
Seite 33: Ground Terminal
OFF with an external signal from a Nagra MPS. Connect the « AMP » output of the MPS to the Remote « IN » of your CLASSIC INT. You can use the Remote « OUT » of your CLASSIC trigger... -
Seite 34: Speaker Outputs
Speaker outputs The CLASSIC INT can be used with two types of loudspeaker cable connectors : banana or spade. Connect the speaker cables on the LEFT and RIGHT Cardas connectors if spades are used. If cables are fitted with banana... -
Seite 35: Operation Of Your Classic Int
1 (ON) first. The mains switch is located on the rear panel (please see page 31). The typical Nagra main selector has 4 positions : OFF : similar to STANDBY. The unit is still powered but the consumption remains very low. -
Seite 36: Settings
Settings Thanks to its LCD display and the controller knob, you will be able to customize your CLASSIC INT to fully integrate it in your system. Please take a moment to be as familiar as possible with all the features and functions of your new CLASSIC INT. -
Seite 37: Menu Tree Structure
Here is the menu tree structure that will help you localizing the function you are looking for. It may look complex but actually once you have completed the set-up of your CLASSIC INT, you won’t need to change it often or at all! -
Seite 38: Input Renaming
If you want to exit the menu, press and Language hold the knob for 2 seconds at least. Input renaming You have several characters available to name the CLASSIC INT inputs. Name can include letters, numbers and special signs. The characters are available in the following order: a…z_-*#/,.:;0123456789_A…Z When inside the menu, rotate the knob until «... -
Seite 39: Resetting Input Name To Default Name
This remote control uses standard RC5 codes from Philips. It is called RC5 in the menu. However, you may also control it with the classic Nagra RCU or RCU II remote (supplied with the Nagra CD range). Inside the menu, rotate the knob until Remote «... -
Seite 40: About
Serial number : this serial number cannot S.Number changed erased. very unfortunate event that your CLASSIC INT be stolen, please send us your CLASSIC INT serial number we will track this unit whenever it reaches a Nagra dealer or service center. Internal temperature : this T=41°C... -
Seite 41: Security
OFF (0) and contact your Nagra dealer. Mains voltage out of range The CLASSIC INT power supply is designed to work for a specific mains voltage, either 100-120 V or 220-240 V. To avoid potential component destruction, it won’t turn on if the mains voltage is not correct. -
Seite 42: Protection Against Clipping
A DC (direct current) component generated from the amplifier could damage your loudspeakers. If a DC component of more than +/- 2.5 V appears across the outputs of the CLASSIC INT, the modulometer LEDs will turn red and the amplifier will enter into Protection Mode. -
Seite 43: Modulometer
(please see on page 30) allows you to adjust the brightness intensity. From full brightness to complete extinction , it provides 7 levels of intensity. This setting is automatically memorized by the CLASSIC INT when you turn the amplifier OFF. NAGRA – CLASSIC INT... -
Seite 44: Troubleshooting
60° C (140° RED on DC problem Protection Mode To avoid damage to your speakers, the amplifier turns off, contact your Nagra dealer RED on Short-circuit Protection Mode You should check speaker connections NAGRA – CLASSIC INT... -
Seite 45: Technical Specifications
Less than 1W in standby- mode and Auto Weight 18 Kg Net net weight Dimensions 27.7 x 39.5 x 17.4 cm 11 x 15.5 x 7 inches Operating voltage 90-110V or 110-132V 50 - 60 Hz range or 180-264V NAGRA – CLASSIC INT... -
Seite 46: Declaration Of Conformity
Immunity to bursts on mains line EN 61000-4-4 level 2 (1000V) Immunity to bursts on input/output signal line EN 61000-4-4 level 1 (500V) Immunity to surge EN 61000-4-5 level 2 (1000V) Romanel quarter 2016 Nagra R&D team NAGRA – CLASSIC INT... - Seite 47 For more detailed information about recycling of this product, please contact your local authority, your household waste disposal service or the shop where you purchased the product. Applicable to the following devices: CLASSIC INT and all the supplied parts and accessories NAGRA – CLASSIC INT...
-
Seite 48: Sicherheit
Schäden, die durch nicht sachgemäße Bedienung und Nichteinhaltung der Anleitungen in der BA entstehen, sind durch die Garantie nicht gedeckt. Im Inneren des CLASSIC INT gibt es keine vom Benutzer zu bedienenden oder auszutauschenden Teile – unternehmen Sie keinen Versuch, das Gerät zu öffnen! ... - Seite 49 Die Nagra Philosophie ist seit Anbeginn dieselbe: für kontinuierliche Innovation und qualitativ hochwertige Technologie zu sorgen, um hochwertige Produkte zu erzeugen. Wir möchten Ihnen danken, dass Sie Nagra-Kunde geworden sind und Ihnen mit Ihrem CLASSIC INT viel Spaß und Genuß beim Musikhören wünschen! NAGRA – CLASSIC INT...
-
Seite 50: Packungsinhalt
Sicherungsset (für 100 - 120 oder 220 – 250 V, abhängig von Ihrem Land); Fernbedienung Sollte irgendein Teil fehlen, kontaktieren Sie bitte Ihren Händler. *abhängig von Ihrem Land, hat das AC-Netzkabel entweder einen US, Europäischen oder Schweizer Stecker. NAGRA – CLASSIC INT... -
Seite 51: Installation
INSTALLATION __________________________________________________________ Positionieren des CLASSIC INT Der CLASSIC INT sollte immer auf einer stabilen, ebenen, harten, glatten Oberfläche stehen, damit gute Luftzirkulation auch von untern gewährleistet ist. Nagra empfiehlt die Platzierung auf einer (einer Anti-Vibrations Plattform) klangliche Superiorität Ihres CLASSIC INT noch unterstreicht. -
Seite 52: Rückseite
3 – Eingänge 4 – Fernsteuerung 5 – Erdungsanschluss Sicherungs-Typ Austausch-Sicherungen befinden sich im Lieferumfang Ihres CLASSIC INT. Verwenden FST 5x20mm 250V / T 10A L für 100-120V Spannung im Netz und FST 5x20mm 250V / T 5A L für 220–250V Spannung im Netz. -
Seite 53: Eingänge
RCA 1-4. Empfindlichkeit Abhängig von der Quelle können Sie die Eingangs-Empfindlichkeit Ihres CLASSIC INT sowohl für den XLR-Eingang als auch für den RCA1-Eingang anpassen. Das garantiert perfekte Übereinstimmung mit der Quelle. Am XLR-Eingang, wenn er auf NORMAL geschaltet ist, kann der Verstärker Signale von 0 V bis 2 V weitergeben. -
Seite 54: Erdungsanschluss
Ausstattung. Ihr Nagra-Händler kann Ihnen sagen, Erdungsanschluss verwenden sollen oder nicht. Fernsteuerungsanschluss Der CLASSIC INT kann mit einem externen Signal eines Nagra MPS auf ON oder OFF gestellt werden. Verwenden Verstärker-Ausgang am MPS zu verbinden. Sie können den CLASSIC Verstärker-Ausgang dazu verwenden, um ein zweites Nagra Gerät anzusteuern. -
Seite 55: Ausgänge
Ausgänge Der CLASSIC INT kann mit 2 Arten von Kabeln betrieben werden: Banana-Stecker oder Kasbelschuhe. Verbinden Sie die Lautsprecher bei Left und Right an den Cardas Steckern, wenn Kabelschuhe verwenden. Wenn Banana-Stecker verwenden, nehmen Sie bitte die weißen Stecker. Right... -
Seite 56: Betreiben Des Classic Int
(siehe Abb. oben). Um den Verstärker in Betrieb zu nehmen, muss als erstes der Stromschalter auf die ON (I) Position gestellt werden. Der typische Nagra Drehschalter bietet 4 Positionen: OFF : ist äquivalent mit STANDBY. Das Gerät ist noch immer am Strom,... -
Seite 57: Einstellen Ihres Classic Int
Einstellen Ihres CLASSIC INT Dank seines LCD-Displays und des Controller-Drehknopfs kann der CLASSIC INT personalisiert und somit voll in Ihr Audio-System integriert werden. Nehmen Sie sich Zeit, mehr über die einzelnen Einstellungen zu erfahren, damit Sie Ihren CLASSIC INT wirklich vollkommen genießen können. -
Seite 58: Menübaum-Karte
Mithilfe dieses Menübaums finden Sie die Funktionen, nach denen Sie suchen. Im ersten Moment mag es aufgrund seiner Komplexität etwas schwierig erscheinen, aber wenn Sie Ihren CLASSIC INT eingestellt haben, brauchen Sie diese Einstellungen nicht mehr oft oder gar nicht mehr ändern. -
Seite 59: Eingänge Benennen
XLR ist der erste Eingang – dies ist der technische Name. Nun können Sie diesen Eingang benennen, so dass der Name immer angezeigt wird, sobald Sie auf Ihrem CLASSIC INT den XLR Eingang anwählen. Drehen Sie mit dem Controler weiter, um RCA 1 weitere Eingänge neu zu benennen. -
Seite 60: Löschen Eines Eingangs-Namen
Codes von Philips. Im Menü finden Sie sie unter RC5. Sie können Ihren CLASSIC INT. allerdings auch mit der klassischen Nagra RCU oder RCU II Fernbedieung (die Nagra CD Serie ist damit ausgestattet) steuern. In diesem Fall sollten Sie die DEVICE Remote Nummer hier ändern:... -
Seite 61: Über
Für den unerfreulichen Fall, dass Ihr CLASSIC INT gestohlen wurde, senden Sie bitte einfach die Seriennummer Ihres CLASSIC INT an Nagra. Dort kann Ihr Gerät aufgespürt werden, sobald es einen Nagra-Händler oder ein - Service-Center erreicht. -
Seite 62: Sicherheit
Verstärker abschalten. Dies ist der sogenannte “Protection mode”. LEDs im Front- Modulometer leuchten rot auf – siehe Abbildung. Wann geht der CLASSIC INT in den “Protection mode”? Wenn er an Netz mit falsche V-Zahl angeschlossen wird; Durch fortwährendes Clipping;... -
Seite 63: Spannung Außerhalb Des Normbereichs
Clip den Verstärker oder die Lautsprecher ruinieren. Das ist der Grund, weshalb die LEDs im Modulometer schon nach einer Sekunde kontinuierlichen Clippings auf Rot schalten und der CLASSIC INT aus ‚Selbstschutz‘ in den Protection Mode geht. Schutz vor Kurzschluss Im Falle eines Kurzschlusses an den Lautsprecher-Anschlüssen, wird der Front-Modulometer rot leuchten. -
Seite 64: Modulometer
Der Kippschalter auf der linken Seite des Modulometers erlaubt die Einstellung der Intensität der Hintergrundbeleuchtung. Von voll beleuchtet zu kompletter Dunkelheit , Es gibt 7 Stärkestufen. Was Sie einstellen, wird vom CLASSIC INT gespeichert, sobald Sie auf OFF schalten. NAGRA – CLASSIC INT... -
Seite 65: Fehlersuche
Der Verstärker ist leuchtet überhitzt. Er kann wieder starten, wenn Temperatur unter 60° C gefallen ist Problem mit Protection Mode Um einen Schaden leuchtet Gleichstrom Ihren Lautsprechern abzuwenden, schaltet sich Verstärker – kontaktieren bitte Ihren Nagra- Händler NAGRA – CLASSIC INT... -
Seite 66: Technische Daten
Rhodium Terminals Banana plugs Leistung 400 W max Weniger als 1W in Standby und Auto Gewicht 18 Kg Nettogewicht Maße 27.7 x 39.5 x 17.4 cm 90-110V oder 110-132V Betriebsbereich 50 - 60 Hz oder 180-264V NAGRA – CLASSIC INT... -
Seite 67: Konformitätserklärung
Störgrößen (Netz) EN 61000-4-4 level 2 (1000V) Störfestigkeit gegen schnelle transiente elektrische Störgrößen (Eingangs/Ausgangssignal) EN 61000-4-4 level 1 (500V) Störfestigkeit gegen Stoßspannungen EN 61000-4-5 level 2 (1000V) Romanel 2. Quartal 2016 Nagra R&D team NAGRA – CLASSIC INT... - Seite 68 Nicht im Restmüll entsorgen. NAGRA – CLASSIC INT...