Herunterladen Inhalt Inhalt Diese Seite drucken
Inhaltsverzeichnis

Werbung

Verfügbare Sprachen

Verfügbare Sprachen

1

Werbung

Inhaltsverzeichnis

Fehlerbehebung

loading

Inhaltszusammenfassung für Korg Beat Boy

  • Seite 2 Handling Precautions To avoid breakage, do not apply excessive force to Location the switches or controls. Using the unit in the following locations can result Care in a malfunction. If the exterior becomes dirty, wipe it with a clean, • In direct sunlight dry cloth.
  • Seite 3 DECLARATION OF CONFORMITY (for USA) THE FCC REGULATION WARNING (for USA) NOTE: Responsible Party : KORG USA INC. This equipment has been tested and found to comply with the limits for a Class B digital device, pursuant to Part 15 of the FCC Rules.
  • Seite 4 Notice regarding disposal (EU only) IMPORTANT NOTICE TO CONSUMERS When this “crossed-out wheeled bin” This product has been manufactured according to symbol is displayed on the product, strict specifications and voltage requirements that owner’s manual, battery, or battery are applicable in the country in which it is intended package, it signifies that when you wish that this product should be used.
  • Seite 5: Inhaltsverzeichnis

    Table of Contents Main features ..........6 Using the tuner and drum machine simultaneously ..........24 Parts of the Beat Boy ........6 Using the recorder ........24 Using the stand ..........8 Using the recorder and tuner Included rubber feet ........9 simultaneously ..........29 Installing batteries ........9 Using the recorder and drum machine Quick start............11...
  • Seite 6: Main Features

    Parts of the Beat Boy Drum Machine Recorder Tuner . Main features The Beat Boy allows you to record and tune a guitar or a bass that’s connected to the INPUT jack. The Beat Boy comes equipped with a high gain distortion effect that can be applied to a connected guitar.
  • Seite 7 7. Speaker d. TEMPO buttons p, q 8. Mic e. D.LEVEL buttons p, q 9. INPUT jack f. TAP TEMPO button 10. PHONES jack g. START/STOP button 11. VOL (Volume) 12. Tuning guide Recorder section 13. Display Drum machine section a. RECORDER ON button button c.
  • Seite 8: Using The Stand

    Display Using the stand You can use the stand provided on the back of the Beat Boy to tilt it back at an angle for easy viewing. a. Drum pattern number display b. OK icon c. A-B icon d. Tempo Sync Track icon e.
  • Seite 9: Included Rubber Feet

    Always replace the batteries after a recording is stopped. Slide the battery compartment cover on the back of the Beat Boy in direction “a” as shown in the illustration and lift up the cover in direction “b.” Insert the batteries, making sure to...
  • Seite 10 Although you will still be The setting will be completed, and the able to play back recorded data and use the Beat Boy will start up. tuner and drum machine functions, you should Depleted batteries should be immediately...
  • Seite 11: Quick Start

    While listening to the demo songs, the data. Follow these procedures while referring playback will be started from the beginning to the “Parts of the Beat Boy” section on page 6. of the following demo song once the button is pressed.
  • Seite 12 Recording a performance Recording time Prepare your musical instrument. Connect a guitar or a bass to the INPUT jack. Press the DIST/MIC button to select the desired distortion type. With acoustic string instruments or wind instruments, use the internal mic. Track number Press the RECORDER ON button to turn Press the REC button.
  • Seite 13 When the performance is complete, press Blinking red the PLAY/STOP button to stop recording. Playing back the recorded performance Next, let’s play back the data for the recorded performance. After recording was stopped, press the PLAY/STOP button. REC icon The performance that was recorded is Press the PLAY/STOP button or the played back.
  • Seite 14 Beat Boy. With the recorder stopped, press the A-B/ The recorder of the Beat Boy can be used DELETE button. simultaneously with the tuner and drum The delete screen will appear on the machine.
  • Seite 15: Turning The Power On/Off

    To turn the power off Beat Boy is placed in your pocket or in a The power for the Beat Boy will turn off when bag. Press and hold the power button for the tuner, drum machine and recorder are a while to turn ON or OFF.
  • Seite 16: Backlight

    Turning off the recorder Backlight When the recorder is in use, press the When necessary, press the Backlight button RECORDER ON button to turn off the “ ” to set the backlight. recorder. Each time the Backlight button is pressed, you Auto Power-Off function can switch to Soft ...
  • Seite 17: Connections

    Use the volume control to bass and plug the other end of the cable into adjust the volume of the headphone output. the Beat Boy’s INPUT jack. When tuning or recording using the internal mic, press the Switching distortion type or internal mic DIST/MIC button to select the internal MIC.
  • Seite 18: Using The Tuner

    While playing a single note on your Using the tuner instrument, tune your instrument so that the tip of the meter indicates 440 of Press the TUNER ON button. the center and the center indicator of the “ ” will appear at the top of tuning guide is lit up in green.
  • Seite 19: Using The Drum Machine

    the drum machine. Using the drum machine The display of the drum set varies according to the tempo. The TAP TEMPO Setting the drum pattern and tempo button will blink in time with this motion. Press the DRUM ON button. Press the TEMPO p, q button to set The “...
  • Seite 20 START/STOP button. Press the TAP TEMPO button several times at regular intervals at the tempo that you want. The Beat Boy detects the interval used when pressing the button and displays it as a BPM (Beats Per Minute) value, and sets it as the tempo.
  • Seite 21 Rhythm pattern list 16BEAT4 Genre No. Name 16BEAT5 8BEAT1 16BEAT6 8BEAT2 16BEAT7 8BEAT3 16BEAT8 16 BEAT 8BEAT4 16BEAT9 8BEAT5 16SHFL1 8BEAT6 8 BEAT 16SHFL2 8BEAT7 16SHFL3 8BEAT8 1/2TIMESFL 8BEAT9 POP1 8SHUFFLE1 POP2 8SHUFFLE2 ROCK1 8SHUFFLE3 POP/ROCK ROCK2 16BEAT1 '70S ROCK 16BEAT2 16 BEAT METAL1...
  • Seite 22 BLAST BT SAMBA1 R'N'B SAMBA2 BLUES TANGO POP/ROCK COUNTRY AFRO WORLD SURF LATIN1 BALLAD LATIN2 JAZZ SONGO FASTJAZZ 12/8 FUNK1 DANCE1 FUNK2 DANCE2 JAZZ/FUNK FUNK3 DANCE3 LINEAR DISCO1 DANCE LINEAR2 DISCO2 MOTOWN1 EURO MOTOWN2 NEW RNB REGGAE1 CHOPS WORLD REGGAE2 8FILL1 FILL BOSSA...
  • Seite 23 8FILL3 METRONOME 8FILL4 METRO VAR 16FILL1 METRO TRIPLETS 16FILL2 METRO SHUFFLE FILL 16FILL3 METRO2 16FILL4 METRO3 METRONOME BLUEFILL METRO3 VAR METALFILL METRO4 SHUF.FILL METRO 3-2 METRO5 3/4SHUFFLE METRO6 POLY METRO7 TRIPLETS 1 (6/8) SONG1 SONG SONG2 ODD METER TRIPLETS 2 (6/8) 7/4 1 7/4 2...
  • Seite 24: Using The Tuner And Drum Machine Simultaneously

    Using the tuner and drum machine Using the recorder simultaneously Recording The Beat Boy lets you use the tuner and the For more details on the information that will drum machine simultaneously. appear on the display, please refer to the For more details on the functionality of the “Quick start”...
  • Seite 25 A total of 100 tracks can be created Blinking red with the Beat Boy. However, a total of approximately 23 minutes can be recorded. When the recording time of one track reaches 20 minutes, recording will automatically stop. At this time, the recording time indication will continue alternating between “20:00”...
  • Seite 26 unit will enter record-standby mode for Playing back a recorded track the next track. With the recorder stopped, press the button or the button to select the track If the memory becomes full to play back. If the unit’s memory becomes full while recording, the current recording time and Press the PLAY/STOP button to start “FUL”...
  • Seite 27 of the track (within approximately 3 seconds STOP button again. from the beginning), the preceding track After playing to the end of the recording, will play. If you press the button during playback will automatically stop. playback, the next track will play. Loop playback To fast rewind through the track during This function allows you to loop playback...
  • Seite 28 At the end point for loop playback, press DELETE button during loop playback or the A-B/DELETE button. while loop playback is stopped. Point B is specified, and loop playback will To loop (repeat) an entire track start between points A and B. While the track plays back, press and hold The center indicator of the tuning guide the A-B/DELETE button for approximately...
  • Seite 29: Using The Recorder And Tuner Simultaneously

    Using the recorder and tuner To cancel the delete operation, press the simultaneously button. The Beat Boy lets you use the recorder and The following screen will appear on the tuner simultaneously. display during the delete operation. The tuner is always receiving signal from the INPUT jack/internal mic regardless of the play/ record state of the recorder.
  • Seite 30: Using The Recorder And Drum Machine Simultaneously

    Using the recorder and drum machine machine synchronized simultaneously Press the RECORDER ON button and The Beat Boy lets you use the recorder and DRUM ON button to turn on the recorder drum machine simultaneously. and drum machine, respectively. By turning on the drum machine before The “...
  • Seite 31 The center indicator of the tuning guide For more details on the setting procedures, will blink in red. please refer to the “Using the drum The REC icon, tempo-synchronized track machine” section on page 19. icon and track number will blink on the Press the button to select the precount.
  • Seite 32 precount “-2” (2 beat before) is displayed. set display will change. In addition, the TAP TEMPO button will blink in time To hear the drum machine while recording, use with the tempo. headphones connected to the PHONES jack. Note: You cannot change the tempo by pressing the TEMPO p, q button or the Playing back the tempo-synchronized track TAP TEMPO button or change the drum...
  • Seite 33: Using The Tuner, Drum Machine And Recorder Simultaneously

    Playing back a normal track Using the tuner, drum machine and A normal track can also be played back when recorder simultaneously the drum machine and recorder are being The tuner, drum machine and recorder can used simultaneously. When a normal track is be used simultaneously.
  • Seite 34 or while a track is being deleted. recorder and drum machine simultaneously” section on page 30. The tuner procedures are the same as when it is used individually. Please refer to the Deleting a track “Using the tuner” section on page 18 and the A track can be deleted by using the same “Using the recorder and tuner simultaneously”...
  • Seite 35: Connecting A Computer

    Connecting a computer Note: Use a USB cable with a Type A plug By using the USB cable to connect the Beat Boy on one end and a Mini-B plug on the other. to a computer, the Beat Boy can be used like Note: When the Beat Boy is connected to a a regular USB device.
  • Seite 36 To copy data, drag and drop recorded data Transferring data to any location on the computer. Data recorded by the Beat Boy can be copied Adding data from the computer to the computer, or music data saved on the You can copy WAV format files from your computer can be copied to the Beat Boy.
  • Seite 37 Beat Boy Disconnecting the Beat Boy from the computer into the EXTRA folder. When files are put Windows into any folder other than EXTRA folder, Click the icon that appears on the the computer will not recognize them.
  • Seite 38: Disk Diagnosis And Formatting

    Chkdsk (Windows) or Disk Utility (Mac OS X) from the computer. If the issue is still not improved, follow the procedure below to format the unit. All of the data on the Beat Boy will be erased during a format procedure.
  • Seite 39 Press the button to format. Be sure to only format using the Beat Boy. While formatting, the following screen If the Beat Boy is formatted using the will appear on the display, and the three computer, it may not run properly.
  • Seite 40: Troubleshooting

    RECORDER ON button. „ Nothing appears on the display. Follow the same procedure as that for • Is the power to the Beat Boy turned on? formatting while using the batteries. „ No sound is heard from the speaker.
  • Seite 41: Specifications

    • Detection accuracy: Better than ±1 cent Beat Boy. * Even if the pitch is within the range of • Make sure that the Beat Boy is connected to detection, the Beat Boy may be unable the computer correctly via the USB cable.
  • Seite 42 Main standard level of the drum machine and backlight • Connectors: INPUT jack (1/4"mono), PHONES settings of the Beat Boy are stored even when jack (1/8" mini) the power is off. However, when you change • Speaker: Dynamic speaker (ø23 mm) the batteries, these settings will return to the •...
  • Seite 44: Emplacement

    Maniement Précautions Pour éviter de les endommager, manipulez les Emplacement commandes et les boutons de cet instrument avec soin. L’utilisation de cet instrument dans les endroits suivants Entretien peut en entraîner le mauvais fonctionnement. Lorsque l’instrument se salit, nettoyez-le avec un chiffon •...
  • Seite 45 Note concernant les dispositions REMARQUE IMPORTANTE POUR LES (Seulement EU) CLIENTS Quand un symbole avec une poubelle Ce produit a été fabriqué suivant des spécifications barrée d’une croix apparait sur le produit, sévères et des besoins en tension applicables dans le le mode d’emploi, les piles ou le pack de pays où...
  • Seite 46 Table des matière Caractéristiques principales ......47 Utilisation simultanée de l’accordeur et de la boîte à rythmes ..........65 Commandes et fonctions du Beat Boy ..47 Utilisation de l’enregistreur ......65 Utiliser le pied..........49 Utilisation simultanée de l’enregistreur et de Pieds en caoutchouc fournis ......
  • Seite 47: Caractéristiques Principales

    Le Beat Boy vous permet d’enregistrer et d’accorder une guitare ou basse branchée à sa prise INPUT. Le Beat Boy est aussi équipé d’un effet de distorsion ‘hi gain’ pour pimenter le son d’une guitare branchée à l’instrument. Le micro interne du Beat Boy vous permet d’accorder...
  • Seite 48 7. Haut-parleur e. Boutons D.LEVEL p, q 8. Micro f. Bouton TAP TEMPO 9. Prise INPUT g. Bouton START/STOP 10. Prise PHONES Section Enregistreur 11. Vol (Volume) 12. Diode de contrôle 13. Afficheur Section Boîte à rythmes a. Bouton RECORDER ON b. Bouton c. Bouton A-B/DELETE d.
  • Seite 49: Utiliser Le Pied

    Afficheur Utiliser le pied Vous pouvez placer le Beat Boy en position verticale en déployant le pied situé à l’arrière de l’appareil. a. Affichage du numéro de motif de batterie b. Icône OK c. Icône A-B d. Icône piste synchronisée avec le tempo e.
  • Seite 50: Pieds En Caoutchouc Fournis

    Faites coulisser le couvercle du compartiment des piles à l’arrière du Beat Boy dans le sens “a” comme indiqué sur l’image et soulevez le couvercle dans le sens “b”. Insérez les piles, en respectant leur polarité.
  • Seite 51 Bien que La procédure de réglage est terminée et le vous puissiez toujours reproduire des données Beat Boy démarrera. enregistrées et utiliser les fonctions accordeur Retirez immédiatement les piles épuisées et boîte à rythmes, vous devriez remplacer les de l’appareil.
  • Seite 52: Démarrage Rapide

    Quand la lecture est à l’arrêt, une pression procédures, tout en vous référant à la section sur le bouton déclenche la lecture du “Commandes et fonctions du Beat Boy” à la page 47. morceau de démonstration suivant et une pression sur le bouton la lecture du morceau précédent.
  • Seite 53 à l’écran. entendu de l’espace dans la mémoire interne S’il s’agit du premier enregistrement ou s’il n’y du Beat Boy. Vous pouvez augmenter la durée a aucune piste d’ores et déjà enregistrée, “– –” d’enregistrement disponible en effaçant des s’affichera sur l’indicateur de piste de l’écran.
  • Seite 54 Une fois votre interprétation terminée, Rouge clignotant appuyez sur le bouton PLAY/STOP pour arrêter l’enregistrement. Lire l’interprétation enregistrée Lisez ensuite les données de l’interprétation enregistrée. A la fin de l’enregistrement, appuyez sur Icône REC le bouton PLAY/STOP. L’interprétation enregistrée est lue. Appuyez sur le bouton PLAY/STOP ou le L’indicateur central de la diode de contrôle bouton REC pour démarrer l’enregistre-...
  • Seite 55 Beat Boy. Vous pouvez utiliser l’enregistreur du Après avoir arrêté l’enregistreur, appuyez Beat Boy en même temps que ses fonctions sur le bouton A-B/DELETE. accordeur et boîte à rythmes. L’écran de suppression s’affichera, et le Pour de plus amples informations sur numéro de piste clignotera.
  • Seite 56: Mise Sous/Hors Tension

    Le Beat Boy vous permet d’utiliser simultanément De manière à ne pas mettre involontairement l’accordeur, la boîte à rythmes et l’enregistreur. l’appareil sous tension, une fois le Beat Boy dans votre poche ou un sac, le bouton TUNER ON Pour mettre l’appareil hors tension...
  • Seite 57: Rétro-Éclairage

    Mise hors tension de l’enregistreur Rétro-éclairage Si l’enregistreur est en cours d’utilisation, Si nécessaire, appuyez sur le bouton “ ” du appuyez sur le bouton RECORDER ON pour rétro-éclairage pour régler le rétro-éclairage. le mettre hors tension. A chaque fois que vous appuyez sur ce bouton, le Coupure automatique d’alimentation rétro-éclairage sera défini de la manière suivante L’accordeur, la boîte à...
  • Seite 58: Raccordements

    Branchez votre guitare ou basse à la prise INPUT Utilisez la commande de volume pour régler du Beat Boy à l’aide d’un câble. Pour accorder le volume du casque. votre instrument ou enregistrer avec le micro...
  • Seite 59: Utilisation De L'accordeur

    Tout en jouant une note unique sur votre Utilisation de l’accordeur instrument, accordez celui-ci de telle manière que la pointe de l’aiguille du Appuyez sur le bouton TUNER ON. compteur indique “440” et que la diode de “ ” s’affichera en haut de contrôle centrale s’allume en vert.
  • Seite 60: Utilisation De La Boîte À Rythmes

    tempo sélectionné. Le bouton TAP TEMPO Utilisation de la boîte à rythmes clignote sur le tempo. Appuyez sur la touche TEMPO p, q pour Régler le motif de batterie et le tempo régler le tempo. Appuyez sur le bouton DRUM ON. Appuyez sur les boutons TEMPO p, qpour L’icône et le kit de batterie “...
  • Seite 61 Pour arrêter la boîte à rythmes, appuyez sur TEMPO à intervalles réguliers. le bouton START/ STOP. Le Beat Boy détecte l’intervalle utilisé quand vous appuyez sur le bouton et l’affiche sous forme de temps par minute (BPM) qui sera défini comme le tempo.
  • Seite 62 Liste des motifs rythmiques 16BEAT4 Genre 16BEAT5 8BEAT1 16BEAT6 8BEAT2 16BEAT7 8BEAT3 16BEAT8 16BEAT 8BEAT4 16BEAT9 8BEAT5 16SHFL1 8BEAT6 8 BEAT 16SHFL2 8BEAT7 16SHFL3 8BEAT8 1/2TIMESFL 8BEAT9 POP1 8SHUFFLE1 POP2 8SHUFFLE2 ROCK1 8SHUFFLE3 POP/ROCK ROCK2 16BEAT1 '70S ROCK 16BEAT2 16BEAT METAL1 16BEAT3 METAL2...
  • Seite 63 BLAST BT SAMBA1 R'N'B SAMBA2 BLUES TANGO POP/ROCK COUNTRY AFRO WORLD SURF LATIN1 BALLAD LATIN2 JAZZ SONGO FASTJAZZ 12/8 FUNK1 DANCE1 FUNK2 DANCE2 JAZZ/FUNK FUNK3 DANCE3 LINEAR DISCO1 DANCE LINEAR2 DISCO2 MOTOWN1 EURO MOTOWN2 NEW RNB REGGAE1 CHOPS WORLD REGGAE2 8FILL1 FILL BOSSA...
  • Seite 64 8FILL3 METRONOME 8FILL4 METRO VAR 16FILL1 METRO TRIPLETS 16FILL2 METRO SHUFFLE FILL 16FILL3 METRO2 16FILL4 METRO3 METRONOME BLUEFILL METRO3 VAR METALFILL METRO4 SHUF.FILL METRO 3-2 METRO5 3/4SHUFFLE METRO6 POLY METRO7 TRIPLETS 1 (6/8) SONG1 SONG SONG2 ODD METER TRIPLETS 2 (6/8) 7/4 1 7/4 2...
  • Seite 65: Utilisation Simultanée De L'accordeur Et De La Boîte À Rythmes

    Utilisation simultanée de l’accordeur Utilisation de l’enregistreur et de la boîte à rythmes Enregistrement Le Beat Boy vous permet d’utiliser simultané- Pour de plus amples informations sur les ment ses fonctions accordeur et boîte à rythmes. éléments affichés à l’écran, reportez-vous à la Pour en savoir plus sur les fonctions accordeur section “Démarrage rapide”...
  • Seite 66 REC. Le numéro de piste augmen- tera de un, et l’appareil passera en mode d’at- Vous pouvez créer 100 pistes avec le Beat Boy. tente d’enregistrement pour la piste suivante. Vous ne disposez néanmoins que d’une durée...
  • Seite 67 Si la mémoire est pleine Lire une piste enregistrée Si la mémoire est pleine pendant un enregistrement, Après l’enregistrement, appuyez sur le le temps d’enregistrement actuel et la mention bouton pour sélectionner la “FUL” (mémoire pleine) alterneront sur l’écran, piste à lire. l’enregistrement s’arrêtera.
  • Seite 68 suivant le début), vous reviendrez à la s’arrêtera automatiquement. piste précédente. Si vous appuyez sur Lecture en boucle pendant la reproduction, la piste suivante Cette fonction vous permet d’effectuer une sera diffusée. lecture en boucle entre deux points définis. Pour rembobiner rapidement durant la lecture Sélectionnez la piste puis lisez-la.
  • Seite 69 commencera entre les points A et B. Lire une piste en boucle dans son L’indicateur central de la diode de contrôle intégralité (répéter) clignotera en orange. Pendant la lecture de la piste, appuyez et L’icône A-B de l’écran s’arrêtera de clignoter maintenez le bouton A-B/DELETE pendant pour rester fixe.
  • Seite 70: Utilisation Simultanée De L'enregistreur Et De L'accordeur

    Pour annuler la suppression, appuyez sur l’enregistreur et de l’accordeur le bouton L’écran suivant s’affichera pendant la Le Beat Boy vous permet d’utiliser simultanément suppression. l’enregistreur et l’accordeur. L’accordeur reçoit toujours le signal de la prise INPUT/ du micro interne, quel que soit le mode (lecture/ enregistrement) de l’enregistreur.
  • Seite 71: Utilisation Simultanée De L'enregistreur Et De La Boîte À Rythmes

    Vous pourrez ainsi vérifier si la piste enregistrée piste s’affichent à l’écran. est au tempo défini. Dans le jargon du Beat Boy, une piste enregistrée qui peut être lue en synchronisation avec la boîte à rythmes est ce que nous appelons une “piste synchronisée avec le tempo”.
  • Seite 72 L’indicateur central de la diode de contrôle la boîte à rythmes. clignotera en rouge. Pour en savoir plus sur ces réglages, voyez L’icône REC, l’icône de piste synchronisée la section “Utilisation de la boîte à rythmes” avec le tempo et le numéro de piste clignotent à...
  • Seite 73 l’enregistrement commencera une fois le dans les données de piste. décompte “–1” (1 temps avant) affiché. La lecture commencera 1 temps après avoir appuyé sur le bouton. “0:00” continuera de Si vous choisissez le micro (MIC), le son du clignoter sur l’indicateur de temps jusqu’à ce décompte cesse d’être produit par le haut- que la lecture démarre.
  • Seite 74: Utilisation Simultanée De L'accordeur, De La Boîte À Rythmes Et De L'enregistreur

    Lecture en boucle d’une piste synchro- Utilisation simultanée de nisée avec le tempo l’accordeur, de la boîte à rythmes et Vous pouvez lire une piste synchronisée avec le de l’enregistreur tempo avec la même procédure que la lecture en boucle d’une piste normale quand vous Vous pouvez utiliser simultanément l’accordeur, utilisez l’enregistreur individuellement.
  • Seite 75 est en mode d’attente d’enregistrement, pendant Fonctionnement de l’enregistreur le décompte ou si une piste est en cours de Avec l’enregistreur, vous pouvez enregistrer suppression. une piste synchronisée avec le tempo comme Les procédures de fonctionnement de si vous utilisiez simultanément l’enregistreur l’accordeur sont les mêmes que si vous l’utilisiez et la boîte à...
  • Seite 76: Connexion À Un Ordinateur

    Beat Boy comme un périphérique de type A d’un côté et une prise mini B de l’autre. USB standard. Remarque: Quand le Beat Boy est relié à un Vous pourrez transférer les données enregistrées ordinateur via son câble USB, il est alimenté...
  • Seite 77 à l’emplacement de musicales de votre ordinateur au Beat Boy. votre choix sur votre ordinateur. Le Beat Boy est en mesure de lire les données audio PCM mono et stéréo au format WAV Ajouter des données de l’ordinateur 16 bits 44,1 kHz.
  • Seite 78 Piste XX.wav) dans le répertoire ‘racine’ du Déconnexion du Beat Boy et de Beat Boy. En outre, vous pouvez copier des l’ordinateur fichiers WAV enregistrés par d’autres instruments Windows dans le dossier EXTRA du Beat Boy. Copiez Cliquez sur l’icône affichée du côté...
  • Seite 79: Diagnostic Et Formatage De Disque

    L’écran affiché ci-dessus apparaîtra. En présence d’une erreur durant la déconnexion Avant de débrancher le câble USB, assurez- du Beat Boy de l’ordinateur, ou quand les piles vous que l’écran ci-dessus apparaisse. ont été retirées pendant un enregistrement, la Débranchez le Beat Boy de l’ordinateur.
  • Seite 80 à l’aide du Beat Boy. Ne formatez pas le Pendant le formatage, l’écran suivant Beat Boy depuis un ordinateur car cela s’affichera, et les trois indicateurs de la diode pourrait provoquer un dysfonctionnement. de contrôle clignoteront successivement en rouge. Formatage avec alimentation USB Vert clignotant Mettez le Beat Boy hors tension.
  • Seite 81: Dépannage

    A-B/DELETE et le bouton REC, appuyez sur „ Rien n’apparaît à l’écran. le bouton RECORDER ON. • Le Beat Boy est-il allumé ? Suivez la même procédure que pour le „ Le haut-parleur ne produit aucun son. formatage alimentation USB.
  • Seite 82: Fiche Technique

    : 120 Mo) „ L’ordinateur ne reconnaît pas le Beat Boy. • Nombre totale de pistes: 100 pistes maximum • Vérifiez si le Beat Boy est correctement branché Section Accordeur à l’ordinateur, avec le câble USB fourni. • Gamme: 12 notes tempérament égal •...
  • Seite 83 • Nombre de motifs de batterie: 100 batterie et de niveau de la boîte à rythmes ainsi Normes principales que du rétro-éclairage du Beat Boy sont mémo- • Prises: Prise INPUT (mono 1/4’’), prise risés et conservés après la mise hors tension.
  • Seite 84 Empfangsstörungen hervorrufen. Betreiben Sie Vorsichtsmaßnahmen solche Geräte nur in einem geeigneten Abstand von diesem Erzeugnis. Aufstellungsort Vermeiden Sie das Aufstellen des Geräts an Bedienung Orten, an denen Vermeiden Sie bei der Bedienung von Schaltern • es direkter Sonneneinstrahlung ausgesetzt ist; und Reglern unangemessenen Kraftaufwand.
  • Seite 85 Geräts, Feuer oder ein elek-trischer Schlag WICHTIGER HINWEIS FÜR KUNDEN die Folge sein. Beachten Sie, daß keinerlei Dieses Produkt wurde unter strenger Beachtung Fremdkörper in das Gerät gelangen. von Spezifikationen und Spannungsanforderungen Hinweis zur Entsorgung (Nur EU) hergestellt, die im Bestimmungsland gelten. Wenn Sie dieses Produkt über das Internet, per Postversand Wenn Sie das Symbol mit der und/oder mit telefonischer Bestellung gekauft haben,...
  • Seite 86 Inhalt Die wichtigsten Funktionen......87 Gleichzeitiges Verwenden von Stimmgerät und Drum-Machine ..........105 Teile des Beat Boy ..........87 Verwenden des Recorders ......105 Verwenden des Ständers ......89 Gleichzeitiges Verwenden von Recorder und Beiliegende Gummifüße .......90 Stimmgerät ..........110 Einsetzen der Batterien .........90 Gleichzeitiges Verwenden von Recorder und Schnellstartanleitung ........92...
  • Seite 87: Die Wichtigsten Funktionen

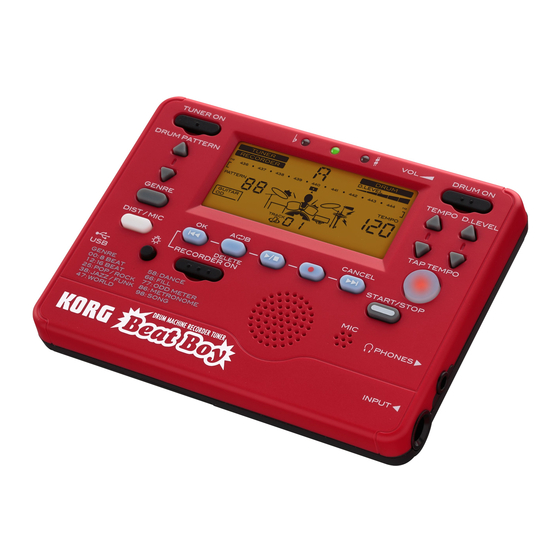
    Vielen Dank für den Kauf des Korg Beat Boy, Teile des Beat Boy der Drum-Machine, Recorder und Stimmgerät in einem Gerät vereint. Die wichtigsten Funktionen Mit dem Beat Boy können Sie Ihre Gitarre oder Ihren Bass über die INPUT-Buchse aufnehmen und stimmen.
  • Seite 88 7. Lautsprecher d. Tasten TEMPO p, q 8. Mikrofon e. Tasten D.LEVEL p, q 9. INPUT-Buchse f. TAP TEMPO-Taste 10. P HONES-Buchse g. START/STOP-Taste 11. V OL ( Lautstärke) Recorder-Sektion 12. S timmhilfe 13. D isplay Drum-Machine-Sektion a. RECORDER ON-Taste -Taste c.
  • Seite 89: Verwenden Des Ständers

    Display Verwenden des Ständers Sie können den an der Rückseite des Beat Boy vorhandenen Ständer verwenden, um das Gerät zur leichten Betrachtung zurückzuklappen. a. Anzeige der Drum-Pattern-Nummer b. OK-Symbol c. A-B-Symbol d. Symbol für temposynchronen Track e. Track-Nummer f. PLAY-Symbol g.
  • Seite 90: Beiliegende Gummifüße

    Tauschen Sie die Batterien erst auf, wenn die Aufnahme beendet ist. Schieben Sie den Batteriefachdackel auf der Rückseite des Beat Boy in Richtung „a“ und öffnen Sie die Abdeckung in Richtung „b“ (siehe Abbildung). Setzen Sie Batterien unter Beachtung der...
  • Seite 91 Drücken Sie die -Taste. kann die Aufnahmefunktion nicht mehr Die Einstellung ist abgeschlossen und der verwendet werden. Beat Boy wird eingeschaltet. Obwohl Sie weiterhin die aufgenommenen Daten wiedergeben sowie das Stimmgerät Leere Batterien sind unverzüglich aus dem und die Drum-Machine verwenden können, Gerät zu entfernen.
  • Seite 92: Schnellstartanleitung

    Drücken Sie die PLAY/STOP-Taste, um die Schnellstartanleitung Demo-Songs wiederzugeben. Mit dem Beat Boy können Sie Ihre Gitarre oder Drücken Sie während der Wiedergabe der Ihren Bass über die INPUT-Buchse oder mithilfe Demo-Songs die PLAY/STOP-Taste, um die des integrierten Mikrofons aufnehmen.
  • Seite 93 Aufnehmen Aufnahmezeit Bereiten Sie Ihr Musikinstrument vor. Schließen Sie Ihre Gitarre oder Ihren Bass an die INPUT-Buchse an. Drücken Sie die DIST/MIC-Taste, um den gewünschten Verzerrungstyp auszuwählen. Verwenden Sie bei akustischen Saiteninstrumenten und Track-Nummer Blasinstrumenten das integrierte Mikrofon. Drücken Sie die REC-Taste. Der Recorder geht in den Bereitschaftsmodus Drücken Sie die RECORDER ON-Taste, über und die blinkende Aufnahmezeitanzeige...
  • Seite 94: Das Aufgenommene Material Wird

    Wenn Sie die Aufnahme beenden wollen, Blinkt rot drücken Sie die PLAY/STOP-Taste. Wiedergabe des aufgenommenen Materials Befolgen Sie diese Anweisungen, um das aufgenommene Material wiederzugeben. Drücken Sie die PLAY/STOP-Taste, nachdem Sie die Aufnahme beendet haben. REC-Symbol Das aufgenommene Material wird Drücken Sie die PLAY/STOP-Taste oder die wiedergegeben.
  • Seite 95 Befolgen Sie diese Anweisungen, um das Aufnehmen, Wiedergeben und Löschen von aufgenommene Material zu löschen. Tracks mit dem Beat Boy. Der Recorder des Beat Boy kann gleichzeitig Drücken Sie bei gestopptem Recorder die mit dem Stimmgerät und der Drum-Machine A-B/DELETE-Taste.
  • Seite 96: Ein-/Ausschalten Des Geräts

    Mithilfe der TUNER ON-Taste, der DRUM ON- Display wird „ “ angezeigt. Taste und der RECORDER ON-Taste können Sie Der Beat Boy ermöglicht Ihnen, das Stimmgerät, den Beat Boy einschalten. die Drum-Machine und den Recorder Die TUNER ON-Taste und die DRUM ON- gleichzeitig zu verwenden.
  • Seite 97: Hintergrundbeleuchtung

    die RECORDER ON-Taste, um den Recorder Hintergrundbeleuchtung auszuschalten. Drücken Sie bei Bedarf die Beleuchtungstaste „ “, um Energiesparfunktion die Hintergrundbeleuchtung einzustellen. Stimmgerät, Drum-Machine und Recorder Mit jedem Tastendruck verändert sich die Hin- schalten sich außerdem automatisch aus, wenn tergrundbeleuchtung gemäß folgendem Schema: innerhalb von 20 Minuten kein Eingangssignal Soft ...
  • Seite 98: Anschlüsse

    Verwenden Sie den Lautstärkeregler zum Bass an und stecken Sie das andere Ende des Einstellen der Lautstärke der Kopfhörern. Kabels in die INPUT-Buchse des Beat Boy. Wenn Umschalten des Verzerrungstyps oder des Sie über das integrierte Mikrofon aufnehmen integrierten Mikrofons oder stimmen, drücken Sie die DIST/MIC-Taste...
  • Seite 99: Verwenden Des Stimmgeräts

    Außengeräusche eingefangen werden. Verwenden des Stimmgeräts Darüber hinaus ist der Stimmvorgang Drücken Sie die TUNER ON-Taste. einfacher, wenn die Drum-Machine keinen Im oberen Teil des Displays erscheint Sound wiedergibt. „ “. Während Sie eine einzelne Note auf Ihrem Schließen Sie Ihre Gitarre oder Ihren Bass Instrument spielen, stimmen Sie Ihr an die INPUT-Buchse an.
  • Seite 100: Verwenden Der Drum-Machine

    Sie Ihr Instrument mit einem anderen Drücken Sie die START/STOP-Taste, um Referenzton als A = 440 Hz stimmen. die Drum-Machine zu starten. Die Anzeige des Schlagzeugs variiert je nach Tempo. Die TAP TEMPO-Taste blinkt im Verwenden der Drum-Machine Gleichtakt mit dem Tempo. Einstellen von Drum-Pattern und Tempo Drücken Sie zum Einstellen des Tempos die TEMPO p, q-Taste.
  • Seite 101: Drücken Sie Die Tap Tempo-Taste

    Drücken Sie die TAP TEMPO-Taste Tempo. mehrmals in regelmäßigen Abständen. Drücken Sie die START/STOP-Taste, um Das Beat Boy erkennt das beim Drücken die Drum-Machine zu stoppen. der Taste verwendete Intervall und stellt es als Tempo ein. Das Intervall wird als BPM (Taktschläge pro Minute) angezeigt.
  • Seite 102 Liste der Rhythmus-Pattern 16BEAT4 Genre Name 16BEAT5 8BEAT1 16BEAT6 8BEAT2 16BEAT7 8BEAT3 16BEAT8 16BEAT 8BEAT4 16BEAT9 8BEAT5 16SHFL1 8BEAT6 8 BEAT 16SHFL2 8BEAT7 16SHFL3 8BEAT8 1/2TIMESFL 8BEAT9 POP1 8SHUFFLE1 POP2 8SHUFFLE2 ROCK1 8SHUFFLE3 POP/ROCK ROCK2 16BEAT1 '70S ROCK 16BEAT2 16BEAT METAL1 16BEAT3 METAL2...
  • Seite 103 BLAST BT SAMBA1 R'N'B SAMBA2 BLUES TANGO POP/ROCK COUNTRY AFRO WORLD SURF LATIN1 BALLAD LATIN2 JAZZ SONGO FASTJAZZ 12/8 FUNK1 DANCE1 FUNK2 DANCE2 JAZZ/FUNK FUNK3 DANCE3 LINEAR DISCO1 DANCE LINEAR2 DISCO2 MOTOWN1 EURO MOTOWN2 NEW RNB REGGAE1 CHOPS WORLD REGGAE2 8FILL1 FILL BOSSA...
  • Seite 104 8FILL3 METRONOME 8FILL4 METRO VAR 16FILL1 METRO TRIPLETS 16FILL2 METRO SHUFFLE FILL 16FILL3 METRO2 16FILL4 METRO3 METRONOME BLUEFILL METRO3 VAR METALFILL METRO4 SHUF.FILL METRO 3-2 METRO5 3/4SHUFFLE METRO6 POLY METRO7 TRIPLETS 1 (6/8) SONG1 SONG SONG2 ODD METER TRIPLETS 2 (6/8) 7/4 1 7/4 2...
  • Seite 105: Gleichzeitiges Verwenden Von Stimmgerät Und Drum-Machine

    Gleichzeitiges Verwenden von Stimmgerät Verwenden des Recorders und Drum-Machine Aufnehmen Der Beat Boy ermöglicht die gleichzeitige Informationen zu den Anzeigen auf dem Display Verwendung von Stimmgerät und Drum- finden Sie im Abschnitt „Schnellstartanleitung“ Machine. auf Seite 92. Einzelheiten zu den Funktionen von Stimmgerät und Drum-Machine finden Sie in den Drücken Sie die RECORDER ON-Taste,...
  • Seite 106 Um die Aufnahme fortzuführen, drücken Sie die REC-Taste erneut. Drücken Sie die PLAY/STOP-Taste, um die Aufnahme zu beenden. Die Aufnahmezeit blinkt dreimal auf dem Display. Insgesamt können Sie 100 Tracks mit dem Um erneut aufzunehmen, drücken Sie die Beat Boy aufnehmen. Die Gesamtaufnahme-...
  • Seite 107 REC-Taste. Die Track-Nummer erhöht sich um Wiedergeben eines aufgenommenen Tracks 1, und das Gerät geht für den nächsten Track Drücken Sie bei beendeter Aufnahme die in den Aufnahmebereitschaftsmodus über. -Taste oder die -Taste, um den Track Speicherkapazität erreicht zu wählen, den Sie wiedergeben möchten. Wird während des Aufnahmevorgangs die volle Drücken Sie die PLAY/STOP-Taste, um die Speicherkapazität des Geräts erreicht, werden...
  • Seite 108 -Taste drücken, wird der vorhergehende Die Wiedergabe wird am Ende der Aufnahme automatisch gestoppt. Track wiedergegeben.Wenn Sie während der Wiedergabe die -Taste drücken, wird der Schleifenwiedergabe nächste Track wiedergegeben. Diese Funktion erlaubt Ihnen die Wiedergabe Um einen Track während der Wiedergabe eines bestimmten Track-Abschnitts als Schleife.
  • Seite 109 Drücken Sie am gewünschten Endpunkt für die Sie während der Schleifenwiedergabe oder Schleifenwiedergabe die A-B/DELETE-Taste. bei gestoppter Schleifenwiedergabe die A-B/ Punkt B ist festgelegt, und die Schleifen- DELETE-Taste. wiedergabe zwischen Startpunkt A und Schleifenwiedergabe (Wiederholung) eines Endpunkt B beginnt. gesamten Tracks Die mittlere Anzeige der Stimmhilfe blinkt Drücken Sie die A-B/DELETE-Taste während orange.
  • Seite 110: Gleichzeitiges Verwenden Von Recorder Und Stimmgerät

    -Taste, um den Track Gleichzeitiges Verwenden von Recorder zu löschen. und Stimmgerät Um den Löschvorgang abzubrechen, drücken Das Beat Boy erlaubt es Ihnen, den Recorder Sie die -Taste. und das Stimmgerät gleichzeitig zu verwenden. Der folgende Bildschirm erscheint während Unabhängig vom Wiedergabe-/Aufnahmestatus des Löschvorgangs auf dem Display.
  • Seite 111: Gleichzeitiges Verwenden Von Recorder Und Drum-Machine

    Drum-Machine Gleichzeitiges Verwenden von Recorder und Drum-Machine Drücken Sie die RECORDER ON-Taste und die DRUM ON-Taste, um den Recorder und Der Beat Boy ermöglicht die gleichzeitige die Drum-Machine einzuschalten. Verwendung von Recorder und Drum-Machine. Die „ “, die Aufnahme-/...
  • Seite 112 Aufnahmebereitschaft zu aktivieren. Machine fest. Die mittlere Anzeige der Stimmhilfe Weitere Hinweise zur Einstellung finden blinkt rot. Sie im Abschnitt „Verwenden der Drum- Das REC-Symbol, das Symbol für einen tem- Machine“ auf Seite 100. posynchronen Track und die Track-Nummer Drücken Sie die -Taste, um den blinken auf dem Display.
  • Seite 113 Bei MIC als gewählte Eingangsquelle wird gespeicherten Tempo- und Pattern-Werte der Vorzählton vom Lautsprecher nicht eingestellt. ausgegeben, wenn der Vorzählwert „-2“ (2 Die Wiedergabe beginnt 1 Takt nach dem Takte vorher) angezeigt wird. Tastendruck. „0:00“ wird solange auf der Zeitanzeige des Displays blinken, bis die Wenn Sie die Drum-Machine während Wiedergabe startet.
  • Seite 114: Gleichzeitiges Verwenden Von Stimmgerät, Drum-Machine Und Recorder

    Schleifenwiedergabe eines temposynchro- Gleichzeitiges Verwenden von Stimmgerät, nen Tracks Drum-Machine und Recorder Die Vorgehensweise für die Schleifenwiedergabe Das Stimmgerät, die Drum-Machine und der Re- eines temposynchronen Tracks ist dieselbe wie corder können gleichzeitig verwendet werden. bei der Wiedergabe eines normalen Tracks bei Drücken Sie die TUNER ON-Taste, die DRUM alleiniger Verwendung des Recorders.
  • Seite 115 Der Stimmvorgang kann nicht durchgeführt Weitere Informationen zu Bedienung werden, wenn sich der Recorder im Aufnah- und Funktionen finden Sie im Abschnitt mebereitschaftsmodus befindet, die Vorzählung „Gleichzeitiges Verwenden von Recorder und erfolgt oder ein Track gelöscht wird. Drum-Machine“ auf Seite 111. Die Bedienung des Stimmgeräts ist dieselbe wie Löschen eines Tracks bei der alleinigen Verwendung des Stimmgeräts.
  • Seite 116: Anschluss Des Beat Boy An Einen Computer

    Anschluss an einen Computer Computer Mithilfe des USB-Kabels können Sie den Anmerkung: Verwenden Sie ein USB-Kabel mit Beat Boy an einen Computer anschließen und es einem Typ-1-Stecker an einem Ende und einem wie ein gewöhnliches USB-Gerät verwenden. Mit Mini-B-Stecker am anderen Ende.
  • Seite 117 Computer gespeicherte Musik kann an Daten vom Computer hinzufügen den Beat Boy übertragen werden. Sie können Dateien im WAV-Format von Ihrem Der Beat Boy kann Stereo- und Mono-PCM- Computer auf den Beat Boy übertragen und Audiodaten im WAV-Format mit 44,1 kHz darauf wiedergeben.
  • Seite 118 Beat Boy (Dateiname: Track XX.wav) Trennen des Beat Boy vom Computer in den Hauptordner. Zusätzlich können Sie Windows WAV-Dateien, die nicht mit dem Beat Boy Klicken Sie auf das -Symbol rechts in aufgenommen wurden, in den EXTRA-Ordner der Taskleiste des Computers.
  • Seite 119: Festplattendiagnose Und -Formatierung

    Sie sicher, dass Sie die Festplattendiagnose und -formatierung RECORDER ON-Taste ungefähr 3 Sekunden Wenn bei der Trennung des Beat Boy vom lang gedrückt halten. Computer ein Fehler aufgetreten ist, oder wenn Stellen Sie vor dem Trennen des USB-Kabels...
  • Seite 120 Der Beat Boy wechselt in den Formatierungs- modus. Der folgende Bildschirm wird auf dem Display angezeigt. Nach erfolgreicher Formatierung wird auf dem Display ein Bildschirm mit der Aufforderung zum Trennen des Geräts vom Computer angezeigt. ) Seite 118: Trennen des Beat Boy vom Computer...
  • Seite 121: Fehlersuche

    Trennen Sie den Beat Boy vom Computer. Fehlersuche Formatieren im Batteriebetrieb „ Das Gerät kann nicht eingeschaltet werden. • Blinkt das Batteriesymbol? Für die Formatierung des Geräts empfehlen wir die Stromzufuhr per USB. ()Seite 120: Tauschen Sie die Batterien aus. Wenn das Formatieren mit Stromzufuhr über USB)
  • Seite 122 • Wenn Sie Musikdateien wiedergeben wollen, die vom Computer an das Gerät übertragen wurden, müssen Sie sicherstellen, dass das Dateiformat vom Beat Boy unterstützt wird. „ Der Computer erkennt den Beat Boy nicht. • Überprüfen Sie die Verbindung des Beat Boy...
  • Seite 123: Technische Daten

    • Messgenauigkeit: Besser als ±1 Cent Kopfhörerbetrieb) * Auch wenn die Tonhöhe innerhalb des Recorder – Ca. 3.5/11 Stunden Erkennungsbereichs ist, kann der Beat Boy Drum-Machine – Ca. 9/12 Stunden eventuell nicht in der Lage sein, die Tonhöhe Stimmgerät – Ca. 11/16 Stunden...
  • Seite 124 • Lieferumfang: Bedienungsanleitung, zwei AAA-Batterien Die Einstellungen für Tempo, Drum-Pattern- Nummer und Drum-Level der Drum-Machine sowie die Hintergrundbeleuchtung des Beat Boy werden auch in ausgeschaltetem Zustand gespeichert. Wenn Sie aber die Batterien ersetzen, werden diese Einstellungen auf die folgenden Vorgabewerte zurückgesetzt.
  • Seite 126 Manejo Precauciones Para evitar una rotura, no aplique excesiva fuerza Ubicación a los conmutadores o controles. El uso de la unidad en las siguientes ubicaciones Cuidado puede dar como resultado un mal funcionamiento: Si exterior se ensucia, límpiese con un trapo seco. •...
  • Seite 127 Nota respecto a residuos y deshechos NOTA IMPORTANTE PARA EL (solo UE) CONSUMIDOR Cuando aparezca el símbolo del cubo de Este producto ha sido fabricado de acuerdo a basura tachado sobre un producto, su estrictas especificaciones y requerimientos de voltaje manual de usuario, la batería, o el embalaje aplicables en el país para el cual está...
  • Seite 128 índice de materias Características generales ......129 Uso del afinador y de la unidad de percusión simultáneamente ....147 Partes del Beat Boy ........129 Uso del grabador ........147 Uso del soporte ........131 Uso del grabador y del afinador Pies de goma incluidos ......132 simultáneamente ........152...
  • Seite 129: Características Generales

    Partes del Beat Boy grabador afinador Korg Beat Boy. Características generales El Beat Boy le permite grabar y afinar una guitarra o un bajo conectado al jack INPUT. El Beat Boy está equipado con un efecto de distorsión de ganancia alta que se puede aplicar a una guitarra conectada.
  • Seite 130 7. Altavoz d. Botones TEMPO p, q 8. Micrófono e. Botones D.LEVEL p, q 9. Jack INPUT f. Botón TAP TEMPO 10. Jack PHONES g. Botón START/STOP 11. VOL (Volumen) 12. Guía de afinación Sección del grabador 13. Pantalla Sección de la unidad de percusión a.
  • Seite 131: Uso Del Soporte

    Pantalla Uso del soporte Puede usar el Beat Boy en posición vertical abriendo el soporte situado en la parte posterior de la unidad. a. Pantalla de número de patrón de percusión b. Icono OK c. Icono A-B d. Icono de pista de sincronización de tempo e.
  • Seite 132: Pies De Goma Incluidos

    No extraiga Beat Boy. las baterías mientras el Beat Boy esté en uso. Sustituya siempre las baterías una vez que se haya detenido la grabación. Deslice la tapa del compartimento de las baterías en la parte posterior del Beat Boy...
  • Seite 133 En este Pulse el botón momento, ya no será posible utilizar la El ajuste finalizará y el Beat Boy se iniciará. función de grabador para grabar. Aunque Las baterías agotadas deben extraerse aún podrá reproducir datos grabados y utilizar inmediatamente de la unidad.
  • Seite 134: Inicio Rápido

    Pulse el botón RECORDER ON y Inicio rápido el botón DRUM ON para activar el El Beat Boy le permite grabar una guitarra o grabador y la unidad de percusión. un bajo conectado al jack INPUT o el sonido Pulse el botón PLAY/STOP para repro- procedente del micrófono interno.
  • Seite 135 grabación, consulte “Eliminación de una pista” Si es la primera vez que se realiza una en la página 151 para eliminar las canciones de grabación o si no hay pistas grabadas, demostración. Además, para la transferencia “– –” aparecerá en el indicador de pista de canciones de demostración, consulte “Trans- de la pantalla.
  • Seite 136 y el número de pista cambiará a “00”. Encendida en rojo Parpadeando en rojo Una vez finalizada la interpretación, Icono REC pulse el botón PLAY/STOP para detener la grabación. Pulse el botón PLAY/STOP o el botón REC para iniciar la grabación. Toque el Reproducción de la interpretación grabada instrumento.
  • Seite 137 Beat Boy. Con el grabador parado, pulse el botón El grabador del Beat Boy se puede utilizar A-B/DELETE. simultáneamente con el afinador y la La pantalla de eliminación aparecerá unidad de percusión.
  • Seite 138: Activación/Desactivación De La Alimentación

    Para desactivar la alimentación Beat Boy en el bolsillo o en una bolsa. La alimentación del Beat Boy se desactivará Mantenga pulsado el botón de encendido cuando el afinador, la unidad de percusión y unos momentos para activar ON u OFF.
  • Seite 139: Luz De Fondo

    Desactivación de la unidad de percusión Luz de fondo Cuando la unidad de percusión esté en uso, En caso necesario, pulse el botón de luz pulse el botón DRUM ON para desactivarla. de fondo “ ” para definir la luz de fondo. Cada vez que pulse el botón de luz de Desactivación del grabador fondo, podrá...
  • Seite 140: Conexiones

    Conecte un cable a la guitarra o al bajo eléctrico y enchufe el otro extremo del cable Cambio del tipo de distorsión o del micró- en el jack INPUT del Beat Boy. Al afinar fono interno o grabar utilizando el micrófono interno, Cada vez que pulse el botón DIST/MIC,...
  • Seite 141: Uso Del Afinador

    es más sencilla si la unidad de percusión no Uso del afinador se está reproduciendo. Pulse el botón TUNER ON. Al tocar una única nota en el instrumento, “ ” aparecerá en la parte afínelo para que la punta del medidor superior de la pantalla.
  • Seite 142: Uso De La Unidad De Percusión

    La visualización del ajuste de percusión Uso de la unidad de percusión varía en función del tempo. El botón TAP TEMPO parpadeará al ritmo de este Ajuste del tempo y del patrón de percusión movimiento. Pulse el botón DRUM ON. Pulse el botón TEMPO p, q para definir El icono “...
  • Seite 143 Pulse el botón TAP TEMPO varias veces a intervalos regulares. Para detener la unidad de percusión, El Beat Boy detecta el intervalo utilizado al pulse el botón START/STOP. pulsar el botón, lo muestra como un valor BPM (Tiempos por minuto) y lo definirá...
  • Seite 144 Lista de patrones de percusión 16BEAT4 Género N.º Nombre 16BEAT5 8BEAT1 16BEAT6 8BEAT2 16BEAT7 8BEAT3 16BEAT8 16BEAT 8BEAT4 16BEAT9 8BEAT5 16SHFL1 8BEAT6 8 BEAT 16SHFL2 8BEAT7 16SHFL3 8BEAT8 1/2TIMESFL 8BEAT9 POP1 8SHUFFLE1 POP2 8SHUFFLE2 ROCK1 8SHUFFLE3 POP/ROCK ROCK2 16BEAT1 '70S ROCK 16BEAT2 16BEAT METAL1...
  • Seite 145 BLAST BT SAMBA1 R'N'B SAMBA2 BLUES TANGO POP/ROCK COUNTRY AFRO WORLD SURF LATIN1 BALLAD LATIN2 JAZZ SONGO FASTJAZZ 12/8 FUNK1 DANCE1 FUNK2 DANCE2 JAZZ/FUNK FUNK3 DANCE3 LINEAR DISCO1 DANCE LINEAR2 DISCO2 MOTOWN1 EURO MOTOWN2 NEW RNB REGGAE1 CHOPS WORLD REGGAE2 8FILL1 FILL BOSSA...
  • Seite 146 8FILL3 METRONOME 8FILL4 METRO VAR 16FILL1 METRO TRIPLETS 16FILL2 METRO SHUFFLE FILL 16FILL3 METRO2 16FILL4 METRO3 METRONOME BLUEFILL METRO3 VAR METALFILL METRO4 SHUF.FILL METRO 3-2 METRO5 3/4SHUFFLE METRO6 POLY METRO7 TRIPLETS 1 (6/8) SONG1 SONG SONG2 ODD METER TRIPLETS 2 (6/8) 7/4 1 7/4 2...
  • Seite 147: Uso Del Afinador Y De La Unidad De Percusión Simultáneamente

    Uso del afinador y de la unidad de Uso del grabador percusión simultáneamente Grabación El Beat Boy le permite utilizar el afinador y Para obtener más detalles sobre la informa- la unidad de percusión simultáneamente. ción que aparecerá en la pantalla, consulte Para obtener detalles sobre la funcionalidad “Inicio rápido”...
  • Seite 148 Beat Boy. Sin embargo, se puede grabar Parpadeando en rojo un total de 23 minutos aproximadamente. Cuando el tiempo de grabación de una pista alcance 20 minutos, la grabación se detendrá automáticamente. En ese momento, la indicación de tiempo de grabación continuará...
  • Seite 149 El número de pista aumentará en uno y Reproducción de una pista grabada la unidad pasará al modo de grabación- Con el grabador detenido, pulse el botón espera para la siguiente pista. o el botón para seleccionar la pista que desea reproducir. Si la memoria se llena Si la memoria de la unidad se llena durante Pulse el botón PLAY/STOP para iniciar...
  • Seite 150 primeros 3 segundos desde el principio), PLAY/ STOP de nuevo. se reproducirá la pista anterior. Si pulsa Una vez reproducida la grabación hasta el botón durante la reproducción, se el final, la reproducción se detendrá reproducirá la pista siguiente. automáticamente. Para retroceder rápido por la pista du- Reproducción en bucle rante la reproducción, mantenga pulsado...
  • Seite 151 En el punto final de la reproducción ducción en bucle o con la reproducción en bucle, pulse el botón A-B/DELETE. en bucle parada. Se especifica el punto B y la reproducción Para repetir (bucle) una pista completa en bucle se iniciará entre los puntos A y B. Durante la reproducción de la pista, El indicador central de la guía de afinación mantenga pulsado el botón A-B/DELETE...
  • Seite 152: Uso Del Grabador Y Del Afinador Simultáneamente

    Uso del grabador y del afinador Para cancelar la operación de eliminación, simultáneamente pulse el botón El Beat Boy le permite utilizar el grabador y La siguiente pantalla aparecerá en la el afinador simultáneamente. visualización durante la operación de El afinador siempre recibe la señal del jack INPUT/ eliminación.
  • Seite 153: Uso Del Grabador Y De La Unidad De Percusión Simultáneamente

    Pulse el botón RECORDER ON y el botón DRUM ON para activar el grabador y la El Beat Boy le permite utilizar el grabador unidad de percusión, respectivamente. y la unidad de percusión simultáneamente. “ ”, el tiempo de grabación/ Si se activa la unidad de percusión antes de...
  • Seite 154 de grabación-espera. Para ver más información sobre los El indicador central de la guía de afinación procedimientos de ajuste, consulte “Uso parpadeará en rojo. de la unidad de percusión” en la página 142. El icono REC, el icono de pista con Pulse el botón para seleccionar el tempo sincronizado y el número de pista...
  • Seite 155 Si el MIC está seleccionado, el sonido de los números de patrón de percusión recuento previo procedente del altavoz no almacenados como datos de pista. se emitirá cuando se muestre el recuento La reproducción se iniciará 1 tiempo previo “-2” (2 tiempos antes). después de pulsar el botón.
  • Seite 156: Uso Del Afinador, De La Unidad De Percusión Y Del Grabador Simultáneamente

    Reproducción en bucle de una pista con Uso del afinador, de la unidad tempo sincronizado de percusión y del grabador La reproducción en bucle de una pista con simultáneamente tempo sincronizado se realiza utilizando el mismo procedimiento que en la reproducción El afinador, el metrónomo y el grabador se en bucle de una pista normal cuando pueden utilizar simultáneamente.
  • Seite 157 interno. Operaciones del grabador La afinación no se realiza si el grabador Con el grabador, es posible grabar una está en modo de grabación-espera, durante pista con tempo sincronizado utilizando el el recuento previo o mientras se está elimi- mismo procedimiento que cuando se utiliza nando una pista.
  • Seite 158: Conexión De Un Ordenador

    Conexión de un ordenador Nota: utilice un cable USB con un conector de tipo Al utilizar el cable USB para conectar el Beat Boy A en un extremo y un miniconector B en el otro. a un ordenador, el Beat Boy se puede utilizar Nota: Cuando el Beat Boy está...
  • Seite 159 Haga doble clic para abrir el icono de Transferencia de datos la unidad (Beat Boy) en el escritorio. Los datos grabados por el Beat Boy se pueden Para copiar datos, arrastre y suelte los copiar en el ordenador, o bien los datos de datos grabados en cualquier ubicación...
  • Seite 160 Beat Boy. en la parte derecha de la barra de tareas del ordenador. Copie los datos grabados en el Beat Boy (nombre de archivo: Track XX.wav) en En el menú emergente, haga clic en la carpeta raíz. Además, puede copiar “Quitar el dispositivo de almacena-...
  • Seite 161: Diagnóstico Y Formateo De Discos

    CORDER ON durante aproximadamente Diagnóstico y formateo de discos 3 segundos. A continuación, aparecerá la Si se produce un error con el Beat Boy pantalla mostrada anteriormente. desconectado del ordenador, o si las baterías Antes de desconectar el cable USB, se han extraído durante una grabación, la...
  • Seite 162 Asegúrese de formatear utilizando el Pulse el botón para formatear. Beat Boy. Si el Beat Boy se formatea Durante el formateo, la pantalla siguiente utilizando el ordenador, puede que no aparecerá en la visualización y los tres se ejecute correctamente.
  • Seite 163: Solución De Problemas

    • ¿Es posible que el símbolo de batería esté “Formateo con alimentación USB”) parpadeando? Desactive la alimentación del Beat Boy. Sustituya las baterías. No es posible grabar si el símbolo de batería está parpadeando. Con el botón A-B/DELETE y el botón •...
  • Seite 164 • Si intenta reproducir datos de música transferidos desde un ordenador, asegúrese de que el formato de archivo es compatible con el Beat Boy. „ El ordenador no reconoce el Beat Boy. • Asegúrese de que el Beat Boy está...
  • Seite 165: Especificaciones Principales

    9/12 horas intervalo de detección, puede que el Afinador: Aproximadamente 11/16 horas Beat Boy no sea capaz de detectar el tono * Se trata de casos en los que la unidad se si el sonido contiene numerosos armónicos utiliza de forma continua con baterías superiores o si el instrumento tiene una alcalinas, la retroiluminación desactivada...
  • Seite 166 El tempo, el número de patrón de percusión y el nivel de percusión de la unidad de percusión así como los ajustes de luz de fondo del Beat Boy se almacenan aunque la alimentación esté desactivada. Sin embargo, cuando se cambien las baterías, estos ajustes regresarán a los valores por...

Inhaltsverzeichnis