Inhaltsverzeichnis
Werbung
Verfügbare Sprachen
Verfügbare Sprachen
Quicklinks
FR Instructions d'utilisation -
Climatiseur local
EN Instructions for use – Local
air conditioner
DE Lokale Klimaanlage –
Bedienungsanleitung
ES Instrucciones de uso – Aire
acondicionado local
PT Instruções de utilização –
Ar condicionado local
IT Istruzioni per l'uso -
Climatizzatore per ambienti
NL Gebruiksaanwijzing -
verplaatsbare airco
AU4010F0
FR
EN
DE
ES
PT
IT
NL
1820004081 - 48/19
Werbung
Inhaltsverzeichnis
Fehlerbehebung

Verwandte Anleitungen für ROWENTA AU4010F0


Inhaltszusammenfassung für ROWENTA AU4010F0
- Seite 1 DE Lokale Klimaanlage – Bedienungsanleitung ES Instrucciones de uso – Aire acondicionado local PT Instruções de utilização – Ar condicionado local IT Istruzioni per l’uso - Climatizzatore per ambienti NL Gebruiksaanwijzing - verplaatsbare airco AU4010F0 1820004081 - 48/19...
-
Seite 2: Instructions De Sécurité
Le personnel de maintenance doit lire attentivement le MODE D’EMPLOI et le MANUEL D’INSTALLATION avant toute utilisation Pour plus d’informations, consultez le MODE D’EMPLOI, le MANUEL D’INSTALLATION, etc. Modèle Symbol AU4010F0 Unit Refrigerant R290 Quantité totale de réfrigérant Potentiel de réchauffement planétaire... - Seite 3 qualification similaire afin d’éviter tout danger. • Avant l’utilisation, vérifiez toujours que l’appareil, la prise et le câble d’alimentation sont en bon état. • L’appareil doit être utilisé dans des conditions de fonctionnement normales telles que définies dans ces instructions. •...
-
Seite 4: Précautions D'emploi
• Mettez l’appareil en mode veille et débranchez l’appareil du secteur avant de remplacer les piles. • Lors de l’installation de piles neuves, suivez les instructions du fabricant des piles. • Pour en savoir plus sur les piles, consultez le guide de l’utilisateur. Instructions spécifiques concernant les appareils contenant du gaz R290 •... - Seite 5 Schéma 1 - NETTOYAGE ET ENTRETIEN Avant tout nettoyage ou entretien, éteignez et débranchez toujours l’appareil. Nettoyage : essuyez l’appareil à l’aide d’un chiffon doux et sec. Ne lavez jamais le climatiseur avec de l’eau. N’utilisez jamais de substance volatile telle que de l’essence ou de la poudre à polir pour nettoyer l’appareil. Entretien des filtres à...
-
Seite 6: Instructions D'installation
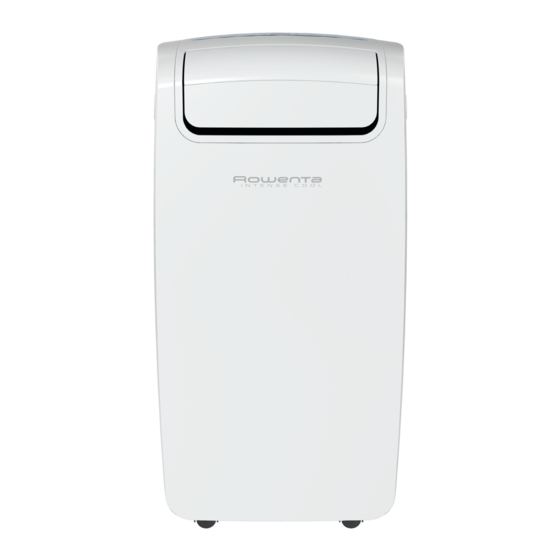
INSTRUCTIONS D’INSTALLATION Panneau de commande Sortie d’air Poignée Roulette Filtre à air Entrée d’air (évaporateur) Sortie d’air (échange thermique) Entrée d’air (condenseur) Câble d’alimentation 10. Tuyau d’écoulement d’eau Tuyau d’écoulement d’eau (mode déshumidification uniquement) 12. Tuyau d’évacuation 13 et 14. Connecteurs d’évacuation 15. - Seite 7 Installation 1 - Installation mobile 1/ Fixez la buse d’évacuation (n° 15) sur le connecteur d’évacuation sans encoche (n° 14)2/ Faites glisser l’autre connecteur d’évacuation (n° 13) dans la sortie d’air (n° 9) à l’arrière de l’unité et appuyez sur l’interrupteur à...
- Seite 8 Schémas 7 et 8 VIDANGE CONTINUE Pour utiliser l’unité en mode de déshumidification, vous devez régler la vidange continue comme suit. Remarque : Le tuyau de vidange n’est pas inclus. Vous aurez besoin d’un tuyau de vidange de taille 3/4 1.
-
Seite 9: Panneau De Commande
PANNEAU DE COMMANDE Assurez-vous d’ouvrir la grille d’aération (n° 2) avant toute utilisation. Commande d’alimentation (A) La commande d’alimentation permet d’allumer et d’éteindre l’unité. Après avoir éteint le climatiseur, vous devez attendre 3 minutes avant de le rallumer. Témoin d’avertissement « PLEIN » (B) L ’eau condensée peut s’accumuler dans l’unité. -
Seite 10: Dépannage
• l’unité ou son câble d’alimentation est endommagé(e) ; • votre appareil ne fonctionne pas correctement. Vous trouverez une liste de centres d’entretien agréés spécifiques sur le site Web de Rowenta. AIDEZ À PROTÉGER L’ENVIRONNEMENT ! Votre appareil contient des matériaux précieux qui peuvent être récupérés ou recyclés. -
Seite 11: Safety Instructions
Service personnel are required to carefully read the OPERATING INSTRUCTIONS and INSTALLATION MANUAL before operation Further information is available in the OPERATING INSTRUCTIONS, INSTALLATION MANUAL, and the like Model name Symbol AU4010F0 Unit Refrigerant R290 Total refrigerant amount Global warming potential... - Seite 12 department or a similarly qualified person, to avoid danger. • Before use, always check that the appliance, plug and power cord are in good condition. • The device must be used under normal operating conditions as defined in these instructions. •...
-
Seite 13: Precautions Of Use
• Put the device in standby mode and unplug the device from the mains prior to replacing the battery. • Follow the battery manufacturer’s instructions when installing new batteries. • Please find more information in the User Guide document to activate the battery. Specific instructions regarding appliances with R290 gas •... -
Seite 14: Cleaning & Maintenance
Fig.1 - CLEANING & MAINTENANCE Before cleaning or maintenance, turn the appliance off and always unplug the appliance. Cleaning: Wipe with a soft dry cloth. Never wash the air conditioner with water. Never use volatile substance such as gasoline or polishing powder to clean the appliance. Air filters maintenance: It is necessary to clean the air filters after using it for about 100 hours. -
Seite 15: Installation Instructions
INSTALLATION INSTRUCTIONS Control panel Air outlet Handle hole Caster Air filter Air intake (Evaporator) Air outlet (Heat exchange) Air intake (Condenser) Power supply cord 10. Water outlet drain Water outlet drain (Dehumidify mode only) 12. Exhaust hose 13&14. Exhausted connectors 15. - Seite 16 Installation 1 - mobile installation 1/ Click the exhausted nozzle (#15) to the exhausted connector without notches (#14) 2/ Slide the other exhausted connector (#13) to the air outlet (#9) on the rear of the unit and push the rocker switch to fix the assembly firmly. (Fig 3 &4) Extend hose (#13) to desired length and position the exhausted nozzle (#15) through an open window as shown on fig.5.
-
Seite 17: Continuous Drainage
Fig. 7&8 CONTINUOUS DRAINAGE To use the unit in dehumidifying mode, you will need to settle continuous drainage as follow. Note : the drain hose is not included. You will need a drain hose size 3/4 1. Take out drain cover from the drainage outlet. (evacuation #11) 2. -
Seite 18: Control Panel
CONTROL PANEL Make sure to open the louver (#2) before using. Power Control (A) The power control turns the unit on and off. After switching the air conditioner off, you must wait 3 minutes before switching it back on again. Warning Light “FULL ”... -
Seite 19: Troubleshooting
• Unit or its power cord is damaged, • If your appliance does not work properly. You can find a list of specific Approved Service Centres on Rowenta website. HELP PROTECT THE ENVIRONMENT! Your appliance contains valuable materials which can be recovered or recycled. - Seite 20 Das Bedienungspersonal wird gebeten, die BEDIENUNGSANLEITUNG und das INSTALLATIONSHANDBUCH vor Gebrauch des Gerätes sorgfältig durchzulesen Weitere Informationen finden Sie in der BEDIENUNGSANLEITUNG, im INSTALLATIONSHANDBUCH und sonstigen Anleitungen. Modellname Symbol AU4010F0 Unit Kältemittel R290 Gesamtmenge des Kältemittels Treibhauspotenzial kg CO2 eq Klimaklasse 16 –...
- Seite 21 Hersteller, dem Kundendienst des Herstellers oder einer Person mit vergleichbarer Qualifikation ausgewechselt werden. • Prüfen Sie vor dem Gebrauch stets, ob Gerät, Netzstecker und Netzkabel in gutem Zustand sind. • Das Gerät muss unter normalen Betriebsbedingungen, wie in diesen Anleitungen definiert, benutzt werden. •...
-
Seite 22: Vorsichtsmaßnahmen Für Den Gebrauch
ausgeschaltet und der Netzstecker gezogen werden. Nehmen Sie die Batterien aus der Fernbedienung, wenn Sie das Gerät für längere Zeit lagern. • Schalten Sie das Gerät auf Standby und trennen Sie es vom Stromnetz, bevor Sie den Akku austauschen. • Halten Sie sich beim Austauschen des Akkus an die Angaben des Herstellers. •... -
Seite 23: Reinigung Und Instandhaltung
(10) und lassen Sie das Wasser in einen Behälter ablaufen. (Abb. 1) Lassen Sie zur Trocknung der Spirale den Ventilatormodus für einige Stunden laufen, um Schimmel zu vermeiden. Abb. 1 - REINIGUNG UND INSTANDHALTUNG Schalten Sie das Gerät vor der Reinigung und Wartung aus und ziehen Sie den Netzstecker. Reinigung: Wischen Sie mit einem weichen und trockenen Tuch nach. - Seite 24 INSTALLATIONSHINWEISE Bedienfeld Luftauslass Griffloch Rollen Luftfilter Lufteinlass (Verdunster) Luftauslass (Wärmeaustausch) Lufteinlass (Kondensator) Netzkabel 10. Wasserauslass Wasserauslass (Nur im Entfeuchtungsmodus) 12. Abluftschlauch 13&14. Steckanschluss 15. Abluftdüse 16. Wandflanschzubehör und Kappe Hinweis: Stellen Sie vor der Verwendung sicher, dass der Wasserauslass ordnungsgemäß instal- liert wurde.
- Seite 25 Installation 1 – mobile Installation 1/ Schließen Sie die Abluftdüse (15) am Abluftanschluss ohne Kerben (14)2/ Schließen Sie den anderen Abluftanschluss (13) am Luftauslass (9) an der Rückseite des Geräts an und drücken Sie zur Befestigung den Kippschalter. (Abb. 3 &4) Ziehen Sie den Schlauch (13) auf die gewünschte Länge und positionieren Sie die Abluftdüse (15) durch ein offenes Fenster, wie in Abbildung 5.
- Seite 26 Abb. 7 & 8 KONTINUIERLICHES ENTLEEREN Führen Sie wie folgt eine kontinuierliche Entleerung durch, um das Gerät im Entfeuchtungsmodus zu verwenden. Hinweis: Ablaufschlauch nicht im Lieferumfang enthalten. Sie benötigen einen Ablaufschlauch mit Größe 3/4 1. Entfernen Sie den Verschluss von der Entwässerungsöffnung. (Entleerung 11) 2.
- Seite 27 BEDIENFELD Öffnen Sie vor der Verwendung die Lüftungsschlitze (2). Leistungsregelung (A) Die Leistungsregelung schaltet das Gerät ein und aus. Warten Sie drei Minuten nach Ausschalten der Klimaanlage, bevor Sie diese erneut einschalten. Warnleuchte „VOLL “ (B) Im Gerät hat sich Kondenswasser angesammelt. Wird der innere Tank voll, leuchtet die Warnleuchte auf und das Gerät ist erst nach Entleerung wieder einsatzfähig (Entleerung 10).
-
Seite 28: Fehlerbehebung
• Gerät oder Netzkabel beschädigt sind, • das Gerät nicht richtig funktioniert. Eine Liste mit qualifizierten Kundendienstzentren finden Sie auf der Website von Rowenta. TRAGEN SIE ZUM SCHUTZ DER UMWELT BEI! Ihr Gerät enthält wertvolle Rohstoffe, die zurückgewonnen bzw. recycelt werden können. -
Seite 29: Instrucciones De Seguridad
INSTRUCCIONES DE FUNCIONAMIENTO y el MANUAL DE INSTALACIÓN antes de la operación Hay más información disponible en las INSTRUCCIONES DE FUNCIONAMIENTO, el MANUAL DE INSTALACIÓN, etc. Nombre del modelo Symbol AU4010F0 Unit Refrigerant R290 Cantidad total de refrigerante Potencial de calentamiento global kg CO2 eq clase climática... - Seite 30 o una persona con una cualificación similar con el fin de evitar cualquier peligro. • Antes de su uso, asegúrate siempre de que el aparato, el enchufe y el cable de alimentación están en buen estado. • El dispositivo debe ser utilizado en condiciones normales de funcionamiento, tal como se define en estas instrucciones.
-
Seite 31: Precauciones De Uso
• Activa el modo standby del dispositivo y desenchúfalo de la red eléctrica antes de sustituir la batería. • Sigue las instrucciones del fabricante de la batería cuando instales baterías nuevas. • Consulta la guía del usuario para más información sobre cómo activar la batería. Instrucciones específicas para aparatos con gas R290 •... -
Seite 32: Limpieza Y Mantenimiento
Fig. 1 - LIMPIEZA Y MANTENIMIENTO Antes de proceder a la limpieza o mantenimiento del aparato, apágalo y desenchúfalo. Limpieza: Limpia el aparato con un paño seco y suave. No laves nunca el aire acondicionado con agua. No limpies nunca el aparato con sustancias volátiles como gasolina o polvo para pulir. Mantenimiento de los filtros de aire: Los filtros de aire se deben limpiar tras unas 100 horas de uso. -
Seite 33: Instrucciones De Instalación
INSTRUCCIONES DE INSTALACIÓN Panel de control Salida de aire Orificio del asa Rueda pivotante Filtro de aire Entrada de aire (evaporador) Salida de aire (intercambiador de calor) Entrada de aire (condensador) Cable de alimentación 10. Sistema de desagüe Sistema de desagüe (solo en modo de deshumidificación) 12. - Seite 34 Instalación 1: instalación móvil 1/ Encaja la boquilla de descarga (n. º 15) en el conector para descarga liso (n. º 14)2/ Desliza el otro conector para descarga (n. º 13) en la salida de aire (n. º 9) situado en la parte posterior de la unidad y pulsa el interruptor basculante para fijar el montaje firmemente.
- Seite 35 Fig. 7 y 8 DESAGÜE CONTINUO Para utilizar la unidad en modo de deshumidificación, se debe configurar el drenaje continuo como se indica a continuación. Nota: No se incluye el tubo de desagüe. El tamaño del tubo de desagüe debe ser de 3/4 1.
-
Seite 36: Panel De Control
PANEL DE CONTROL Asegúrate de abrir la rejilla (n. º 2) antes de usar el aparato. Control de encendido (A) El control de encendido enciende y apaga la unidad. Tras haber apagado el aire acondicionado, deben transcurrir 3 minutos antes de volver a encenderlo. Luz de advertencia «FULL»... -
Seite 37: Resolución De Problemas
• La unidad o el cable de alimentación están dañados. • Si el aparato no funciona adecuadamente. Encontrarás una lista de centros de servicio técnico oficial especializados en el sitio web de Rowenta. AYUDA A PROTEGER EL MEDIO AMBIENTE Tu equipo contiene materiales valiosos que se pueden recuperar o reciclar. - Seite 38 DE FUNCIONAMENTO e o MANUAL DE INSTALAÇÃO antes de realizar trabalhos Para mais informações, consulte as INSTRUÇÕES DE FUNCIONAMENTO, O MANUAL DE INSTALAÇÃO e semelhantes Nome do modelo Symbol AU4010F0 Unit Refrigerante R290 Quantidade total de refrigerante Potencial de aquecimento global kg CO2 eq classe climática...
- Seite 39 Serviço de Assistência Técnica autorizado ou por uma pessoa igualmente qualificada, de forma a evitar qualquer perigo. • Antes de cada utilização, certifique-se sempre de que o aparelho, a tomada e o cabo de alimentação estão em bom estado. • O aparelho deve ser utilizado em condições normais de funcionamento, conforme definido nestas instruções.
-
Seite 40: Precauções De Utilização
• Coloque o aparelho no modo de poupança de energia e desligue-o da corrente elétrica antes de substituir a pilha. • Siga as instruções do fabricante das pilhas ao instalar pilhas novas. • Poderá encontrar mais informações no documento do Manual do Utilizador para ativar as pilhas. Instruções específicas relativas a aparelhos com gás R290 •... -
Seite 41: Limpeza E Manutenção
Fig. 1 – LIMPEZA E MANUTENÇÃO Antes de proceder à limpeza ou manutenção, desligue o aparelho e retire sempre a ficha da tomada. Limpeza: Limpe com um pano macio e seco. Nunca lave o ar condicionado com água. Nunca utilize substâncias voláteis, tais como gasolina ou pó... -
Seite 42: Instruções De Instalação
INSTRUÇÕES DE INSTALAÇÃO Painel de controlo Saída do ar Orifício da pega Roda Filtro de ar Entrada de ar (evaporador) Saída de ar (trocador de calor) Entrada de ar (condensador) Cabo de alimentação 10. Drenagem de saída de água Drenagem de saída de água (apenas no modo desumidificador) 12. - Seite 43 Instalação 1 – Instalação móvel 1/ Encaixe o bico de saída (#15) no conector de saída sem ranhuras (#14)2/ Deslize o outro conector de saída (#13) para a saída de ar (#9) situado na parte de trás do aparelho e empurre o interruptor basculante para fixar o conjunto com firmeza.
- Seite 44 Fig. 7 e 8 DRENAGEM CONTÍNUA Para utilizar o aparelho no modo desumidificador, terá de instalar a drenagem contínua da seguinte forma. Nota: a mangueira de drenagem não está incluída. Irá necessitar de uma mangueira de drenagem com um tamanho de 3/4 1.
-
Seite 45: Painel De Controlo
PAINEL DE CONTROLO Certifique-se de que abre a persiana (#2) antes de utilizar. Controlo da alimentação (A) O controlo da alimentação liga e desliga o aparelho. Depois de desligar o ar condicionado, deve aguardar 3 minutos antes de o voltar a ligar. Luz de aviso «FULL»... -
Seite 46: Resolução De Problemas
• O aparelho ou o cabo de alimentação estiverem danificados. • O aparelho não funcionar corretamente. Pode encontrar uma lista de Serviços de Assistência Técnica autorizados no website da Rowenta. PROTEÇÃO DO AMBIENTE EM PRIMEIRO LUGAR! O aparelho contém materiais valiosos que podem ser recuperados ou reciclados. - Seite 47 DI FUNZIONAMENTO e IL MANUALE DI INSTALLAZIONE prima dell’uso Ulteriori informazioni sono disponibili nelle ISTRUZIONI DI FUNZIONAMENTO, nel MANUALE DI INSTALLAZIONE e in documenti simili Nome del modello Symbol AU4010F0 Unit Refrigerante R290 Quantità totale de refrigerante Potenziale di riscaldamento globale...
- Seite 48 assistenza o da un tecnico qualificato. • Prima dell’uso, assicurarsi che l’apparecchio, la spina e il cavo di alimentazione siano in buone condizioni. • L’apparecchio deve essere utilizzato in condizioni operative normali, come descritto in queste istruzioni. • Spegnere e scollegare l’apparecchio dalla presa di corrente prima di riempirlo, pulirlo o spostarlo.
-
Seite 49: Precauzioni Per L'uso
• Impostare il dispositivo sulla modalità di standby e scollegarlo dalla presa di corrente prima di sostituire le batterie. • Seguire le istruzioni del produttore delle batterie al momento di installarne di nuove. • Ulteriori informazioni sull’attivazione delle batterie sono disponibili nella Guida dell’utente. Istruzioni specifiche relative agli apparecchi con gas R290 •... -
Seite 50: Pulizia E Manutenzione
Fig. 1 - PULIZIA E MANUTENZIONE Prima di eseguire operazioni di pulizia o manutenzione, spegnere e scollegare sempre l’apparecchio dalla presa di corrente. Pulizia: pulire con un panno morbido e asciutto. Non lavare mai il climatizzatore con acqua. Non utilizzare mai sostanze volatili come benzina o polvere lucidante per pulire l’apparecchio. -
Seite 51: Istruzioni Di Installazione
ISTRUZIONI DI INSTALLAZIONE Pannello di controllo Uscita dell’aria Impugnatura Rotelle Filtro dell’aria Entrata dell’aria (Evaporatore) Uscita dell’aria (Scambio termico) Entrata dell’aria (Condensatore) Cavo di alimentazione 10. Uscita acqua di scarico Uscita acqua di scarico (solo modalità di deumidificazione) 12. Tubo di scarico 13 e 14. - Seite 52 Installazione 1 - Installazione mobile 1/ Far scattare in posizione il beccuccio di scarico (n. 15) nel connettore di scarico senza incavi (n. 14)2/ Far scorrere l’altro connettore di scarico (n. 13) verso l’uscita dell’aria (n. 9) sul retro dell’unità e premere l’interruttore per fissare saldamente il gruppo.
- Seite 53 Fig. 7 e 8 SCARICO CONTINUO Per utilizzare l’unità in modalità di deumidificazione, è necessario impostare lo scarico continuo come indicato di seguito. Nota: il tubo di scarico non è incluso. È necessario un tubo di scarico di dimensione 3/4 1.
-
Seite 54: Pannello Di Controllo
PANNELLO DI CONTROLLO Assicurarsi di aprire la griglia (n. 2) prima dell’uso. Comando alimentazione (A) Consente di accendere e spegnere l’unità. Dopo aver spento l’apparecchio, è necessario attendere 3 minuti prima di riaccenderlo. Spia “PIENO” (B) L’acqua condensata potrebbe accumularsi nell’unità. Se il serbatoio interno si riempie, la spia si accende e l’unità... -
Seite 55: Risoluzione Dei Problemi
• l’apparecchio o il suo cavo di alimentazione sono danneggiati; • l’apparecchio non funziona correttamente. È possibile trovare un elenco dei centri di assistenza autorizzati sul sito Web Rowenta. PROTEZIONE AMBIENTALE L ’apparecchio contiene materiali utili che possono essere recuperati o riciclati. - Seite 56 Het onderhoudspersoneel moet de BEDIENINGSINSTRUCTIES en INSTALLATIEHANDLEIDING zorgvuldig doorlezen voordat het systeem in gebruik wordt genomen Meer informatie vindt u in de BEDIENINGSINSTRUCTIES, de INSTALLATIEHANDLEIDING, enz. Modelnaam Symbol AU4010F0 Unit koelmiddel R290 Totale hoeveelheid koelmiddel Aardopwarmingsvermogen kg CO2 eq klimaatklasse 16 –...
- Seite 57 iemand met vergelijkbare kwalificaties. Dit om gevaar te voorkomen. • Controleer vóór elk gebruik de algemene staat van het apparaat, de stekker en het netsnoer. • Gebruik het apparaat onder normale bedrijfsomstandigheden, zoals beschreven in deze instructies. • Schakel het apparaat uit en haal de stekker uit het stopcontact voordat u het vult, schoonmaakt of verplaatst.
-
Seite 58: Voorzorgsmaatregelen Voor Gebruik
• Zet het apparaat in de stand-bymodus en haal de stekker uit het stopcontact voordat u de batterij vervangt. • Volg de instructies van de batterijfabrikant bij het plaatsen van nieuwe batterijen. • In de gebruikershandleiding vindt u meer informatie over het activeren van de batterij. Specifieke instructies over apparaten met het gas R290 •... -
Seite 59: Reiniging En Onderhoud
Fig. 1 - REINIGING EN ONDERHOUD Schakel het apparaat uit en haal altijd de stekker uit het stopcontact voordat u het reinigt of onderhoudt. Reiniging: veeg af met een zachte, droge doek. Was de airconditioning nooit met water. Gebruik nooit vluchtige stoffen zoals benzine of schuurpoeder om het apparaat schoon te maken. -
Seite 60: Installatie-Instructies
INSTALLATIE-INSTRUCTIES Bedieningspaneel Luchtuitlaat Handgreep Zwenkwielen Luchtfilter Luchtinlaat (verdamper) Luchtuitlaat (warmtewisselaar) Luchtinlaat ( condensator) Stroomsnoer 10. Waterafvoer Waterafvoer (alleen ontvochtigingsmodus) 12. Uitlaatslang 13 & 14. Uitlaatconnectoren 15. Uitlaatpijp 16. Muurflensaccessoire en dop Opmerking: zorg ervoor dat de waterafvoer goed is geïnstalleerd voor gebruik. - Seite 61 Installatie 1 - mobiele installatie 1/ Klik de uitlaatpijp (nr. 15) op de uitlaatconnector zonder inkepingen (nr. 14)2/ Schuif de andere uitlaatconnector (nr. 13) over de luchtuitlaat (nr. 9) aan de achterkant van de unit en druk op de tuimelschakelaar om de eenheid stevig vast te zetten.
- Seite 62 Fig. 7 & 8 CONTINUE AFVOER Als u het apparaat in de ontvochtigingsmodus wilt gebruiken, moet u de continue afvoer als volgt installeren. Opmerking: de afvoerslang wordt niet meegeleverd. U hebt een afvoerslang maat 3/4 nodig 1. Haal de plug uit de waterafvoer. (evacuatie nr. 11) 2.
- Seite 63 BEDIENINGSPANEEL Zorg ervoor dat u de ventilatiegaten (#2) opent voordat u het apparaat gebruikt. Stroomschakelaar (A) Met de stroomschakelaar schakelt u het apparaat in en uit. Nadat u de airconditioning hebt uitgeschakeld, moet u 3 minuten wachten voordat u deze weer inschakelt. Waarschuwingslampje ‘VOL’(B) Er kan condenswater in de unit ontstaan.
-
Seite 64: Probleemoplossing
• Het apparaat of het netsnoer is beschadigd. • Het apparaat niet goed werkt. U vindt een lijst met specifieke erkende servicecentra op de website van Rowenta. LEVER UW BIJDRAGE AAN HET MILIEU! Uw apparaat bevat waardevolle materialen die kunnen worden teruggewonnen of gerecycled.