Herunterladen Inhalt Inhalt Diese Seite drucken

Werbung

Verfügbare Sprachen
  • DE

Verfügbare Sprachen

USER MANUAL FOR ICE DISPENSER
BRUGERMANUAL FOR DISPENSER
ISMASKINER
BEDINUNGSANLEITUNG
MANUEL D'UTILISATION POUR
DISTRIBUTEUR DE GLACE
MANUALE D'USO PER DISTRIBUTORE DI
GHIACCIO
TC 180
090093 83 - REV. 11-2008

Werbung

Inhaltsverzeichnis
loading

Inhaltszusammenfassung für Scotsman TC 180

  • Seite 1 USER MANUAL FOR ICE DISPENSER BRUGERMANUAL FOR DISPENSER ISMASKINER BEDINUNGSANLEITUNG MANUEL D'UTILISATION POUR DISTRIBUTEUR DE GLACE MANUALE D'USO PER DISTRIBUTORE DI GHIACCIO TC 180 090093 83 - REV. 11-2008...
  • Seite 2 TC 180 - CLEANING-SANITIZING INSTRUCTIONS Unloose and remove the holding screws Remove top panel Unplug the ice level control connection Unplug the drive motor connections… Unloose the top bracket holding screws Remove the bin cover holding screws Lift up drive motor and bracket assembly...
  • Seite 3: Tc 180 - Anweisungen Säubern Und Sanierend

    TC 180 - ANWEISUNGEN SÄUBERN UND SANIEREND Lösen Sie die haltenen Schrauben Entfernen Sie obere Verkleidung Trennen Sie den Eisniveausteueranschluß Lösen Sie den oberen Haltewinkel, der die Entfernen Sie die Sortierfachabdeckung, Trennen Sie die Antriebsmotoranschlüsse Schrauben hält die die Schrauben hält...
  • Seite 4 TC 180 – INSTRUCTION POUR LE NETTOYAGE ET ASEPTISATION DU BAC DE STOCKAGE Débrancher le connecteur de la sonde de Dévisser les vis du panneau dessus Démonter le panneau dessus niveau de glace Débrancher la fiche du moteur électrique de Dévisser les vis de fixation du support moteur...
  • Seite 5 TC 180 – ISTRUZIONI PULIZIA e IGIENIZZAZIONE Scollegare il connettore della fotocellula di Svitare le viti di ancoraggio Rimuovere il pannello superiore livello ghiaccio Svitare le viti di ancoraggio del supporto Rimuovere le viti di ancoraggio del Scollegare la connessione del motore elettrico...
  • Seite 6 English ..........Page 2 Dansk ............6 Deutsch ............. 10 Français ............14 Italiano ............18...
  • Seite 7: Inhaltsverzeichnis

    TO INSTALL THE MACHINE minimum of 150 mm be allowed at the left and upper side for air circulation. Try to avoid hot, The TC 180 is designed to be installed on a dirty and crowded locations. counter. Determine the location from the anticipated use NOTE.
  • Seite 8: Final Check List

    or through the rear bottom side of the machine. FINAL CHECK LIST Is the ice system installed indoors in a HAND DISCONNECT location where water SWITCH temperatures are controlled, and where WATER VALVE they do not exceed the design limitations? Is there an electrical service disconnect within sight of the installed machine? Has the voltage been checked, and compared...
  • Seite 9: Sanitising & Cleaning

    ON be dispensed Push the third button and do it again. For 5 NOTE. In case of any malfunction of the TC 180 the seconds the machine will discharge just four LEDs start to blink. Unplug and re-plug again the water (not chilled).
  • Seite 10: Mechanical Maintenance

    Wash the splash panel and wipe with FAILURE ANALYSIS ♦ sanitiser (alcool) (What to do before calling for service) Switch ON the unit at main switch ♦ If the machine does not work Clean the outside of the cabinet with a mild detergent solution.
  • Seite 11: Installation Af Maskinen

    For luftafkølede modeller kræves der en afstand anvendelse. på mindst 150 mm til venstre for og oven over TC 180 er luftkølet, og maskinen suger luft ind maskinen til den nødvendige luftcirkulation. Prøv gennem venstre sidepanel og blæser luft ud at undgå...
  • Seite 12: Checkliste

    CHECKLISTE HAND DISCONNECT SWITCH Køntroller folgende 1. Er ismaskinen installeret inderdørs i et lokale, hvor luftog vandtemperaturen WATER VALVE kontrolleres, og hvor disse ikke overskrider de angivne grænser? 2. Er der en afbryderkontakt i nærheden af den installerede maskine? 3. Er spændingen kontrolleret og svarer denne til angivelserne på...
  • Seite 13 5. Med en beholder placeret foran dispenser- Tryk på 3. Kontact såfremt 15 sekunders fØleren og nder isudkastet kontrolleres det, at dispensertid ønskes. der kommer is ud af isudkastet (motoren i magasinet kører i max. 5 sekunder ad Indstilling af fast begyndelsesposition (default) gangen).
  • Seite 14: Forebyggende Vedligeholdelse

    Er kondensatoren i maskinen snavset? SCOTSMAN Service Center. Hvis maskinen lyder anderledes: FOREBYGGENDE VEDLIGEHOLDELSE Er maskinen blevet efterset og vedligeholdt to gange årligt? Forebyggende vedligeholdelse vigtigt ismaskinens optimale drift of denne bør udføres af et utoriset Scotsman Service Center minimum to gange om året.
  • Seite 15: Garantie

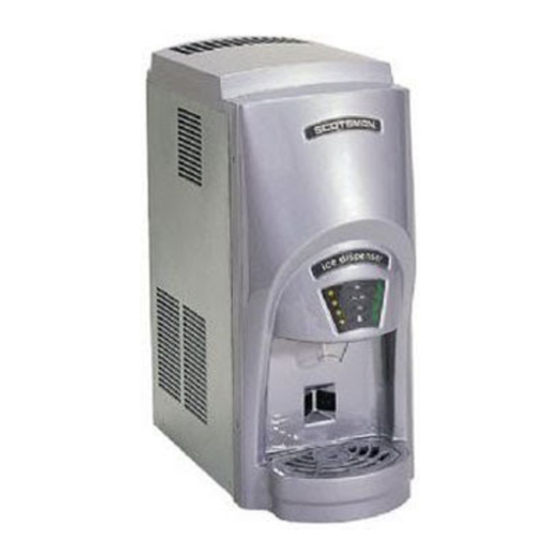
    STANDORT UND MONTAGE: INSTALLATION DER MASCHINE Nach der Entfernung der Verpackung und der optischen Überprüfung, ist das Gerät für die Das TC 180 Modell ist geplant worden für eine Installation bereit. Installation auf eine Bank (Tisch). Aufstellungsort wählen, daß...
  • Seite 16: Wasseranschluß

    Stromschwankungen dürfen nur im vertretbaren Wasseranschluß Bereich auftreten, auch bei Startbedingungen. Luftgekühltes Modell: Das erforderliche Wasser muß klar und sauber sein. SCHLUSSKONTROLLE AM AUFSTELLUNGSORT 1. Ist die Maschine in einem Raum installiert, in dem die angegeben Betriebsbedingungen wie HAND DISCONNECT SWITCH Temperatur und Luftzirkulation eingehalten werden?
  • Seite 17: Einstellung Des Verteilers

    Nach einige Augenblicke beginnt Einstellung der Verteilungsdauer Kondensator warme Luft durch die Gitter der oberen Wand (Blech) ablassen. Den 4. Schalter für 10 Sekunden betätigen ♦ Nach wenigen Minuten beginnt das Gerät die und drücken bis die 3 Lampen (A, B & C) zu Produktion von Eis.
  • Seite 18: Mechanische Wartung

    Das Gitter kann für die Reinigung entfernt MECHANISCHE WARTUNG werden. Becken kann warmes Wasser Die mechnische Wartung ist eine bedeutende gereinigt und mit einem feuchten Tuch (mit Operation für korrekten betrieb bakterientötende Lösung) hygienisiert Maschine. werden. Zu dieser Operation mindenstens 2 mal jährlich Die Reinigung des Frontbleches hat ein den Fachmann rufen.
  • Seite 19: Garantie

    POUR INSTALLER LA MACHINE Il est important pour l'entretien, que la machine soit installée dans un local ou il y a un Le TC 180 est étudié pour être installé sur un dégagement suffisant à...
  • Seite 20: Electricité

    connecter a le raccord 3/4" mâle sur l'arrivée La machine requiert un solide châssis raccordé à d'eau à l'arrière de la machine. la terre. La machine à glace doit être connectée à son propre circuit électrique et posséder une protection individuelle par des fusibles. Les variations de la tension doivent rester dans HAND DISCONNECT SWITCH...
  • Seite 21: Aseptisation Et Nettoyage

    NOTE. En cas de défaut de fonctionnement les 4 voyants du TC 180 clignotent. Débrancher et NOTE. Appuyer sur un de les trois premier boutons rebrancher la machine. Si le problème persiste ensemble avec le quatrième bouton permet une...
  • Seite 22: Entretien Mécanique

    A fin de poursuivre le nettoyage sans distribution Nettoyage du circuit hydraulique d'eau et/ou de glace il faut basculer l'interrupteur de la ligne électrique sur OFF. C'est capital pour le bon fonctionnement de la fois nettoyage terminé, basculer machine. Appelez le service authorisé au moins l'interrupteur sur ON.
  • Seite 23 Il distributore di ghiaccio TC 180 è stato manutenzione, e che abbia una distanza minima disegnato per essere montato sopra il banco. di almeno 15 cm dalla parete sinistra e dal momento dell’installazione è...
  • Seite 24: Controllo Finale

    La macchina è fornita provvista di un cavo HAND DISCONNECT SWITCH elettrico nella parte posteriore inferiore e richiede solamente l'installazione di una spina adeguata. Verificare tensione d’alimentazione WATER corrisponda con quanto riportato nella targhetta VALVE (incollata al pannello posteriore). L’apparecchio richiede un solido collegamento di messa a terra.
  • Seite 25: Pulizia E Manutenzione

    3. Controllare che l’apparecchio sia installato 10 Consegnare proprietario/utilizzatore correttamente secondo quanto riportato nella libretto d’istruzione ed accertarsi che abbia il lista del controllo finale. nome ed il numero telefonico del servizio di assistenza tecnica autorizzato della zona. Avviamento REGOLAZIONE DEL DISTRIBUTORE Aprire il rubinetto ed osservare che l’acqua entri all’interno...
  • Seite 26: Ricerca Guasti

    Lavare il pannello frontale ed igienizzarlo • Attenzione con un prodotto battericida ( alcool ). A meno che l’apparecchio sia spento, il ghiaccio Accendere di nuovo l’apparecchio • e/o l’acqua possono essere erogati durante la pulizia del pannello frontale. Per la pulizia della carrozzeria, è sufficiente Per poter eseguire le operazioni di pulizia senza usare un panno inumidito con un prodotto che sia erogato ghiaccio e/o acqua è...
  • Seite 27: Ec Declaration Of Conformity

    AC 25 A – AC/EC 45/46/55/56/85/86 A/W AC/EC 105/106/125/126/175/176/206/225/226 A/W – ICE one-two-three A/W MC 8/15/16/45/46/1210 A/W – AF 20/30/80/100/200 A/W – TC 180 A – CD 40 A/W MF 22/26/30/36/41/46/51/56/61/66 A/W – MFE 61 A/W – MV 300/450/600/800/1000 A/W CM450SL A/W –...
  • Seite 28 Produkt AC 25 A – AC/EC 45/46/55/56/85/86 A/W – AC/EC 105/106/125/126/175/176/206/225/226 A/W ICE one-two-three A/W – MC 8/15/16/45/46/1210 A/W – AF 20/30/80/100/200 A/W – TC 180 A MF 22/26/30/36/41/46/51/56/61/66 A/W – MFE 61 A/W – MV 300/450/600/800/1000 A/W CM450SL A/W –...

Inhaltsverzeichnis