Herunterladen Inhalt Inhalt Diese Seite drucken
Inhaltsverzeichnis

Werbung

Verfügbare Sprachen

Verfügbare Sprachen

LED-PANEL
404028 | 404029 | 404030
Simple via remote control.
Smart home ready.
BEDIENUNGSANLEITUNG ab Seite 2
MODE D'EMPLOI à partir de la page 28
INSTRUCTION MANUAL from page 52

Werbung

Inhaltsverzeichnis
loading

Inhaltszusammenfassung für Muller-Licht 404028

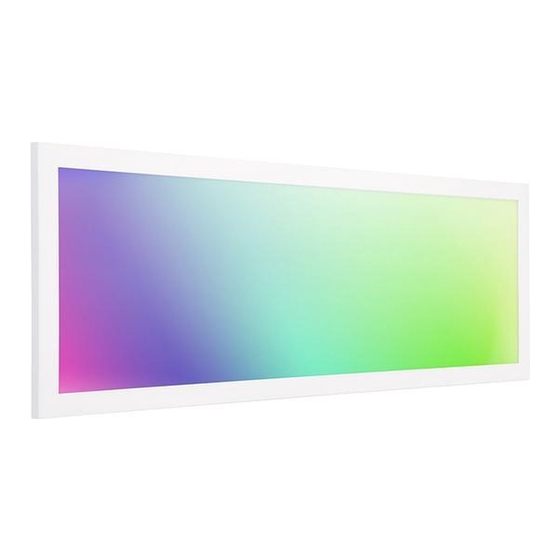
  • Seite 1 Simple via remote control. Smart home ready. LED-PANEL 404028 | 404029 | 404030 BEDIENUNGSANLEITUNG ab Seite 2 MODE D‘EMPLOI à partir de la page 28 INSTRUCTION MANUAL from page 52...
  • Seite 2: Inhaltsverzeichnis

    Batterien einlegen ........09 Entsorgen ............27 Wandhalterung für Fernbedienung..09 LED-Panel montieren ......11 Allgemeines Auf einen Blick Lieferumfang • tint-Panel white+color 404028 • tint-Fernbedienung mit Wandhalterung und Montagematerial • 2 Batterien 404029 LR03 (AAA) / 1,5 V • Bedienungsanleitung •...
  • Seite 3: Einleitung

    Sehr geehrte Kundin, sehr geehrter Kunde! Diese Bedienungsanleitung enthält wichtige Informationen zur Inbetriebnahme und Verwendung. Lesen Sie die Bedienungsanleitung, insbesondere die Sicher- heitshinweise, sorgfältig durch, bevor Sie das Produkt montieren. Die Nichtbeachtung dieser Bedienungsanleitung kann zu schweren Verlet- zungen und zu Schäden an den Produkten führen. Bewahren Sie die Bedienungsanleitung für die weitere Nutzung auf.
  • Seite 4: Sicherheitssymbole

    HINWEIS! Dieses Signalwort warnt vor möglichen Sachschäden. Dieses Symbol gibt Ihnen nützliche Zusatzinformationen zur Handhabung oder zum Betrieb. Bitte aufmerksam lesen. Sicherheitssymbole Dieses Produkt keiner Feuchtigkeit oder Nässe aussetzen, Schutzklasse IP20 Nicht dimmbar über konventionelle Dimmer Schutzisolierung nach Schutzklasse II Bestimmungsgemäßer Gebrauch Dieses LED-Panel dient zu Beleuchtungszwecken und kann nach der Verbindung mit der dazugehörigen Fernbedienung gesteuert und/oder in...
  • Seite 5: Sicherheitshinweise

    Sicherheitshinweise HINWEIS! • Dieser Artikel kann von Kindern ab 8 Jahren und darüber sowie von Personen mit verringerten physischen, sensorischen oder mentalen Fähigkeiten oder Mangel an Erfahrung und Wissen benutzt werden, wenn sie beaufsichtigt oder bezüglich des sicheren Gebrauchs des Artikels unterwiesen wurden und die daraus resultierenden Gefah- ren verstehen.
  • Seite 6: Gefahr Durch Elektrischen Stromschlag

    GEFAHR durch elektrischen Stromschlag • Stellen Sie vor der Benutzung sicher, dass die vorhandene Netzspan- nung mit der benötigten Betriebsspannung des Artikels übereinstimmt (siehe „Technische Daten“). • Achten Sie beim Einlegen der Batterien auf die richtige Polarität. • Tauschen Sie immer alle Batterien gleichzeitig aus. Verwenden Sie keine unterschiedlichen Typen oder gebrauchte und neue Batterien miteinander.
  • Seite 7 • Vermeiden Sie Kontakt der Batterieflüssigkeit mit Haut, Augen und Schleimhäuten. Bei Kontakt spülen Sie die betroffenen Stellen sofort mit reichlich klarem Wasser und suchen Sie umgehend einen Arzt auf. • Achten Sie beim Einlegen der Batterien auf die richtige Polarität. •...
  • Seite 8: Tint-Fernbedienung

    tint-Fernbedienung 2 Resonanzanzeige 1 Standby-Taste 3 Farbsteuerung 4 Weißsteuerung 5 Helligkeits- steuerung 6 Szenen-Taste 8 Szenen-Taste „Arbeitslicht“ „Party“ 9 Szenen-Taste 11 Szenen-Taste „Nachtlicht“ „Romantik“ 7 Szenen-Taste 10 Szenen-Taste „Sonnenuntergang“ „Lagerfeuer“ 12 Gruppenanzeige 13 Gruppentaste „3 Leuchtdioden“ tint-LED-PANEL ANLEITUNG...
  • Seite 9: Inbetriebnahme

    14 Reset-Taste 15 Batteriefach für 2 Batterien LR03 (AAA) Inbetriebnahme Batterien einlegen 1. Öffnen Sie das Batteriefach auf der Rückseite der tint-Fernbedienung. 2. Legen Sie 2 Batterien des Typs LR03 (AAA) / 1,5 V so ein, wie auf dem Boden des Batteriefachs abgebildet. Beachten Sie die richtige Polarität der Batterien (+/-).
  • Seite 10: Wandhalterung Aufkleben

    Wandhalterung aufkleben 1. Ziehen Sie die Schutzfolie von den beiden Klebepads. 2. Drücken Sie die Halterung mit etwas Kraft auf den sauberen, trockenen und staubfreien Untergrund. Wandhalterung anschrauben Je nach Untergrund können Sie die Wandhalterung auch mit Schrauben und ggf. Dübeln an eine Wand schrauben. Schrauben und Dübel gehören zum Lieferumfang.
  • Seite 11: Led-Panel Montieren

    4. Verbinden Sie nun das Kabel des LED-Treibers mit dem LED-Panel 5./6. Je nach Modell: schieben/drehen Sie nun das LED Panel auf die befestigte Halterung 7. Schalten Sie nun die Sicherung wieder ein.   – LED-PANEL 404028 | 404029   – LED-PANEL 404028 | 404029 À...
  • Seite 12: Bedienung

    Bedienung Das tint-LED-Panel ist bereits mit der mitgelieferten Fernbedienung verbunden und kann direkt gesteuert werden. Weitere tint-Lampen und -Leuchten müssen zuvor in die Fernbedienung eingebunden werden (siehe Kap. „Gruppenfunktionen - Neues tint-Produkt einbinden“). Es handelt sich bei der tint-Fernbedienung um eine Funkfernbedienung. •...
  • Seite 13: Farben Einstellen

    Farben einstellen Drücken Sie auf einen der vier Druckpunkte (Abb. 4) um die gewünschte Farbe zu wählen: Kurzes Drücken: Die Farbe verändert sich in die gewünschte Richtung der Farbskala. Langes Drücken: Die Farbe springt auf einen fest Abb. 4 hinterlegten Farbwert. Helligkeit einstellen Durch kurzes Drücken stellen Sie fest hinterlegte Hel- ligkeitsstufen ein: 100%, 80%, 50%, 20%, 10% und 5%.
  • Seite 14: Gruppenfunktionen

    Szene „Nachtlicht“: Auf 5% gedimmtes, warmweißes Licht. Szene „Lagerfeuer“: Simuliert ein Lagerfeuer in warmen Farbtönen bei einem Wechsel von orange, rot und weiß. Szene „Romantik“: Ein beständiger Wechsel der Farben rot, rosa und violett. Wenn Sie ein tint-Produkt „white“ verwenden, das lediglich weißes Licht bietet, stehen die Farblicht-Funktionen nicht zur Verfügung.
  • Seite 15: Umgang Mit Der Gruppentaste

    Beachten Sie: • Was eine Gruppe letztlich ist, bestimmen Sie selbst. Sie können z.B. auch tint-Produkte eines Zimmers oder einer Etage zusammenfassen. • Eine Gruppe kann erweitert oder verkleinert werden und es können auch tint-Produkte von einer Gruppe zu einer anderen Gruppe verschoben werden.
  • Seite 16: Neues Tint-Produkt Einbinden

    • Durch erneutes Drücken der Gruppentaste springen Sie eine Gruppe weiter. • Sie befinden sich in der nachstehenden Gruppe, wenn folgende Leuchte oberhalb der Gruppentaste leuchtet: ° Leuchtdiode 1 für die erste Gruppe ° Leuchtdiode 2 für die zweite Gruppe °...
  • Seite 17 tint-Produktes“). 3. Drücken Sie wiederholt die Gruppentaste, bis alle Leuchtdioden oberhalb der Gruppentaste leuchten. 4. Halten Sie die tint-Fernbedienung ganz nah (< 5 cm) an das neue tint-Produkt. 5. Halten Sie die Gruppentaste so lange gedrückt, bis das tint-Produkt anfängt zu blinken. Die Resonanzanzeige blinkt zunächst gleichmäßig rot, danach fängt sie an schneller zu blinken.
  • Seite 18: Ein Tint-Produkt Aus Einer Gruppe In Eine Andere Gruppe Einbinden

    2. Wählen Sie über die Gruppentaste die Gruppe aus, die Sie ändern möchten. 3. Halten Sie die Gruppentaste ca. 5 Sekunden gedrückt. Die Resonanzanzeige blinkt rot/grün. 4. Wählen Sie durch wiederholtes Drücken der Gruppentaste das ge- wünschte tint-Produkt aus. Durch An- und Abschwellen der Helligkeit signalisiert das tint-Produkt, dass es ausgewählt wurde.
  • Seite 19: Reset

    mittel blinken in der Reihenfolge, wie sie in der tint-Fernbedienung hinterlegt wurden. 5. Halten Sie erneut die Gruppentaste für ca. 5 Sekunden gedrückt, um das ausgewählte tint-Produkt in einer neuen Gruppe zu hinterlegen. Die Gruppenanzeige für Gruppe 1 leuchtet. 6. Wählen Sie (falls erforderlich) mit der Gruppentaste die Gruppe aus, zu der Sie das tint-Produkt hinzufügen möchten.
  • Seite 20: Reset Der Tint-Fernbedienung

    Reset des tint-Produktes/Kopplungsmodus Ein Reset des tint-Produktes ist nur im Ausnahmefall erforderlich, z.B. wenn die Fernbedienung zurückgesetzt werden musste, oder wenn Sie das tint-Produkt in ein Smart Home Gateway einbinden möchten. 1. Schalten Sie das tint-LED-Panel 5x ein und aus (Intervall von ca. 3 Sekunden).
  • Seite 21: Smart Home Ready

    Jedes LED-Panel wird dabei einzeln und nacheinander eingebunden. Gehören z.B. drei LED-Panels zu der Gruppe, müssen Sie den Vorgang „Neues tint-Produkt einbinden“ 3x wiederholen. Smart Home Ready: Die tint-Produkte von MÜLLER-LICHT sind steuerbar über den aktuellsten Zigbee Funkstandard 3.0 und kompatibel mit zahlreichen Lichtsteue- rungssystemen wie zum Beispiel Philips Hue* (ohne Hue Entertainment und ohne HomeKit-Integration), Osram Lightify*, dem Sprachassistenten von Amazon (über Amazon Echo Plus)**, und vielen weiteren.
  • Seite 22: Einbinden In Ein Zigbee-Gateway

    Einbinden in ein Zigbee-Gateway: - Starten Sie in der zugehörigen App den Suchvorgang. - Schalten Sie erst jetzt das tint-Produkt (im Kopplungsmodus) ein, auch wenn dies in der App ggf. anders angegeben wird. - Das tint-Produkt wird innerhalb weniger Sekunden von der App gefun- den und blinkt zur Bestätigung kurz auf.
  • Seite 23: Fehlersuchtabelle

    Fehlersuchtabelle Problem Mögliche Ursache Keine Funktion. Die Batterien in der tint-Fernbe- dienung sind leer und müssen gewechselt werden. Die tint-Produkte selbst sind aus- geschaltet oder die Netzstecker sind nicht eingesteckt. Sie haben über die Gruppentaste eine falsche bzw. gar keine Grup- pe ausgewählt.
  • Seite 24 Problem Mögliche Ursache Das tint-Produkt hat sich in die Stellen Sie sicher, in welcher falsche Gruppe eingebunden. Gruppe sich das tint-Produkt befindet. Gehen Sie vor wie in „tint-Produkt aus einer Gruppe in eine andere Gruppe einbinden“ beschrieben. Das tint-Produkt lässt sich nicht Bitte prüfen Sie, ob sich das in ein fremdes System einbinden.
  • Seite 25: Technische Daten

    Problem Mögliche Ursache In welcher Gruppe befindet sich Durch einfaches Ein- und Aus- mein tint-Produkt gerade? schalten der Gruppen können Sie feststellen, in welcher Gruppe sich Ihr gewünschtes tint-Produkt befindet. Antworten auf weitere häufig gestellte Fragen finden Sie unter www.mueller-licht.de/tint Technische Daten Frequenzband des drahtlosen RF-Modus: 2405-2480,0 MHz <20 mW...
  • Seite 26: Konformitätserklärung

    Panel white+color, Panel white+color Panel white+color 20x60 cm quadratisch, 45x45 rund, 45 cm Art. 404028 404029 404030 Leistung 26 W 30 W 30 W Lichtstrom 1300 lm 1800 lm 1800 lm Farbtemperatur 1800-6500 K + RGB 1800-6500 K + RGB 1800-6500 K + RGB Schaltzyklen 100.000...
  • Seite 27: Entsorgen

    Entsorgen Altgeräte dürfen nicht im normalen Hausmüll entsorgt werden. Entspre- chend Richtlinie 2012/19/EU ist das Gerät am Ende seiner Lebensdauer einer geordneten Entsorgung zuzuführen. Dabei werden im Gerät enthal- tene Wertstoffe der Wiederverwertung zugeführt und die Belastung der Umwelt vermieden. Geben Sie das Altgerät kostenlos an einer Sammelstelle für Elektroschrott oder einem Wertstoffhof ab.
  • Seite 28: Généralités

    Support mural pour télécommande ..35 Monter le panneau LED ......37 Généralités Volume de livraison En bref • Panneau LED tint • Télécommande 404028 tint avec support mural et matériel de montage • 2 piles LR03 404029 (AAA)/1,5 V •...
  • Seite 29: Introduction

    Chère cliente, cher client ! Ce mode d’emploi contient des informations importantes concernant la mise en service et l‘utilisation. Avant d’installer le panneau LED, veuillez lire soigneuse- ment le mode d’emploi, en particulier les consignes de sécurité. Le non-respect de ce mode d’emploi peut entraîner de graves blessures et endommager le produit.
  • Seite 30: Symboles De Sécurité

    AVIS! Ce mot de signalisation met en garde concernant d‘éventuels dommages matériels. Ce symbole fournit des informations complémentaires utiles concernant la manipulation ou l’utilisation. Veuillez lire ce docu- ment avec attention. Consignes de sécurité Ne pas exposer ce produit à l‘humidité ou à l’eau Régulation impossible par le variateur conventionnel Isolation de protection selon la classe de protection II Utilisation conforme...
  • Seite 31: Consignes De Sécurité

    Consignes de sécurité AVIS! • Le présent article peut être utilisé par des enfants à partir de 8 ans, ainsi que par des personnes présentant des capacités physiques, sensorielles ou mentales diminuées, ou un manque d’expérience et de connaissances si elles sont sous surveillance ou ont été infor- mées sur l’utilisation sûre de l‘article et les dangers qui en résultent.
  • Seite 32: Danger Lié Au Courant Électrique

    DANGER lié au courant électrique • Avant utilisation, vérifiez que la tension secteur disponible correspond à la tension de service requise par l‘article (voir « Caractéristiques techniques »). • Lors de l’insertion des piles, veillez à la bonne polarité. • Remplacez toujours toutes les piles en même temps. N’utilisez pas des types différents et ne mélangez pas des piles neuves et usagées.
  • Seite 33 • En cas de contact, rincez immédiatement et abondamment les zones concernées à l‘eau claire et consultez tout de suite un médecin. • Lors de l’insertion des piles, veillez à la bonne polarité. • Remplacez toujours toutes les piles en même temps. •...
  • Seite 34: Télécommande Tint

    Télécommande tint 1 Touche 2 Affichage de la de mise en résonance veille 3 Commande de la couleur 4 Commande du blanc 5 Commande de la lumino- sité 8 Touche de la 6 Touche de la scène « Fête » scène «...
  • Seite 35: Mise En Service

    14 Touche de remise à zéro 15 Compartiment pour 2 piles LR03 (AAA) Mise en service Insérer les piles 1. Ouvrez le compartiment pour piles au dos de la télécommande tint. 2. Insérez les 2 piles de type LR03 (AAA)/1,5 V comme l‘indique l‘illustration figurant sur le fond du compartiment pour piles.
  • Seite 36 Le support peut être monté avec des bandes adhésives ou des vis, et au besoin des chevilles sur son socle. La fixation magnétique du support sur des objets métalliques est égale- ment possible sans collage ni vissage. Collage du support mural 1.
  • Seite 37: Monter Le Panneau Led

    5. Placez la partie supérieure du support sur la partie inférieure vissée (fig. 3). Le support peut à présent être utilisé. Fig. 1 Fig. 2 Fig. 3 Monter le panneau LED 1. Avant le montage, mettez le câble réseau hors tension : arrêter le coupe-circuit ou dévisser le fusible et protéger contre toute remise en service.
  • Seite 38: Utilisation

      – LED-PANEL 404028 | 404029   – LED-PANEL 404028 | 404029 À À Õ Ã Õ Ã œ œ Œ Œ   – LED-PANEL   404030 – LED-PANEL 404030 À Õ À Ã Õ Ã Œ Œ œ œ...
  • Seite 39: Fonctions De Base

    • Chaque pression sur le bouton est confirmée par l‘allumage de l‘affichage de la résonance. Fonctions de base Activation/désactivation Appuyez sur la touche de veille pour activer et redésactiver les produits. La fonc- tion Mémoire mémorise le dernier « état de l‘éclairage » et démarre automatique- ment à...
  • Seite 40: Scènes

    Scènes Les scènes désignent les réglages d’éclairage prédéfinis. Une scène est activée par une courte pression sur la touche correspon- dante. Scène « Éclairage de travail » : Éclairage clair 100 % neutre Scène « Coucher de soleil » : Commence par une lumière blanche chaude (50 %), puis s’atténue après 15 minutes.
  • Seite 41 Exemple : • Un lieu de travail qui doit bénéficier d‘un éclairage clair. • Un coin détente qui doit bénéficier d‘un éclairage moyennement clair. • Un autre espace devant bénéficier d’un éclairage particulier. Attention : • Vous décidez vous-même de ce qu‘est finalement un groupe. Vous pouvez, par exemple, regrouper aussi les produits tint d‘une pièce ou d‘un étage.
  • Seite 42 trouvez. • Appuyez à nouveau sur la touche du groupe pour passer au groupe suivant. • Vous vous trouvez dans le groupe suivant lorsque le voyant suivant au-dessus de la touche du groupe est allumé : ° Voyant 1 pour le premier groupe °...
  • Seite 43 le produit 5 fois de suite. (voir le chap. « Réinitialisation du produit tint »). 3. Appuyez de manière répétée sur la touche du groupe jusqu‘à ce que tous les voyants situés au-dessus de la touche du groupe s‘allument. 4. Maintenez la télécommande tint tout près (< 5 cm) de la nouvelle ampoule.
  • Seite 44 2. Au moyen de la touche du groupe, sélectionnez le groupe que vous souhaitez modifier. 3. Maintenez la touche du groupe enfoncée pendant env. 5 secondes. L‘affichage de résonance clignote en rouge/vert. 4. Par des pressions répétées sur la touche du groupe sélectionnez le produit souhaitée.
  • Seite 45: Réinitialisation

    6. Si nécessaire, utilisez la touche du groupe pour sélectionner le groupe auquel vous souhaitez ajouter le produit. Après environ 10 secondes, le produit est ajoutée au groupe sélectionné et l‘affichage de résonance cesse de clignoter. Patientez pendant ce délai et n‘appuyez sur aucune touche.
  • Seite 46: Smart Home Ready

    Réinitialisation de la télécommande tint Une réinitialisation n‘est nécessaire que dans des cas exceptionnels, par exemple, si les ampoules ne répondent pas à la télécommande tint même après remplacement des piles. Lors d‘une réinitialisation, tous les paramètres de groupe prédé- finis sont perdus et vous devez ensuite reconnecter la télécom- mande tint et les ampoules.
  • Seite 47 Pour l‘intégration dans une passerelle Smart Home/application, le panneau LED doit être réinitialisé, voir « Réinitialisation du produit tint ». Le raccordement à une télécommande tint est d’abord supprimé. Intégration dans une passerelle Zigbee : • Lancez la recherche dans l’application correspondante. •...
  • Seite 48: Nettoyage

    Nettoyage Arrêtez le panneau LED et débranchez au besoin le/les prises secteur et/ou utilisez le fusible du boîtier. Nettoyez le panneau LED et la télécommande avec un chiffon sec. Con- servez le panneau LED et la télécommande au sec et hors de portée des enfants si elle n’est pas utilisée.
  • Seite 49 Problème Cause possible Vous voulez intégrer un nouveau Éteignez le nouveau produit déjà produit. Cependant, celle qui est déjà connecté ou éloignez-vous quelque intégrée clignote. peu du produit déjà connecté. Le produit a été intégré au mauvais Vérifiez le groupe dans lequel le groupe.
  • Seite 50: Données Techniques

    5–95 % (pas de condensation) Panel Panel Panel white+color, white+color white+color 20x60 cm 45x45 cm rond, 45 cm Art. 404028 404029 404030 Puissance totale 26 W 30 W 30 W Flux lumineux 1300 lm 1800 lm 1800 lm Température de couleur...
  • Seite 51: Déclaration De Conformité

    Déclaration de conformité La société Müller-Licht International GmbH déclare par la présente que le type d‘installation radio « Müller-Licht tint » est conforme à la directive 2014/53/UE. Le texte complet de la déclaration de conformité UE est disponible à l’adresse Internet suivante : www.mueller-licht.de/tint Élimination Les appareils usagés ne peuvent pas être éliminés avec les ordures ménagères.
  • Seite 52: General Information

    Mounting the wall bracket ......60 Installing the LED panel ......61 General information At a glance Included with the item • tint LED Panel, white+color 404028 • tint remote control with wall bracket and installation material 404029 • Installation material: 4x screws, 4x nozzles •...
  • Seite 53: Explanation Of Symbols

    Dear customers! This user manual contains important information on start-up and use. Before using the bulbs, please read through the user manual carefully. This particularly applies for the safety notes. Failure to follow this user manual may result in severe injury or damage the bulbs.
  • Seite 54: Safety Instructions

    This symbol gives useful additional information for handling or operation. Please read carefully. Safety Instructions Do not expose this lamp to moisture Not dimmable by conventional dimmers Protective insulation according to protection class II Proper use This LED panel is used for lighting purposes and, after connecting to the corresponding remote control, can be controlled and/or integrated in a Smart Home System with the Zigbee radio standard.
  • Seite 55: Safety Notes

    Safety Notes NOTICE! • This product may be used by children ages eight and over as well as persons with impaired physical, sensory or mental capacities or tho- se lacking experience and knowledge if they are supervised or have been instructed in how to safely use the light and have understood the risks associated with using it.
  • Seite 56: Danger Of Electric Shock

    DANGER of electric shock • Before use, make sure that the existing power voltage matches the required operating voltage of the item (see „Technical data“) • When inserting the batteries, pay attention to the right polarity. • Do not use different types and do not use a used battery and a new battery with each other.
  • Seite 57 • Do not use different types and do not use a used battery and a new battery with each other. ATTENTION! CAUTION against damage to property • Remove the batteries from the remote control when they are drained or if you are not using the item for a long time. In this way, you avoid damage that can result from leakage.
  • Seite 58: Tint Remote Control

    tint remote control 1 Standby 2 Feedback display button 3 Color control 4 White control 5 Brightness control 8 “Party” 6 “Working light” scene button scene button 11 “Romantic” 9 “Night lights” scene button scene button 10 “Campfire” 7 “Sunset” scene button scene button »...
  • Seite 59: Setup

    14 Reset button 15 Battery compart- ment for 2 batteries LR03 (AAA) Setup Inserting the batteries 1. Open the battery compartment at the rear of the tint remote control. 2. Insert 2 LR03 (AAA) / 1.5V batteries as shown on the bottom of the battery compartment.
  • Seite 60: Mounting The Wall Bracket

    Mounting the wall bracket 1. Remove the protective film from both sticky pads. 2. Press the bracket with some force against a clean, dry and dust-free surface. Screwing in the wall bracket Depending on the surface, the wall bracket can be attached to the wall with screws and wall plugs if required.
  • Seite 61: Installing The Led Panel

    4. Now connect the cable of the LED driver to the LED panel. 5./6. Depending on the model: Slide/rotate the LED panel onto the fixed bracket. 7. Reactivate the breaker.   – LED-PANEL 404028 | 404029   – LED-PANEL 404028 | 404029 À...
  • Seite 62: Operation

    Operation The tint LED panel is already connected to the supplied remote control and can be controlled directly. Further tint lamps and lights must first be integrated in the remote control (see chapter „Operation - Adding a new tint product“). The tint remote control is a radio remote control.
  • Seite 63: Set Brightness

    Set white tone Short-press to select permanently stored white tone settings: warm white, neutral white and cold white. Long-press to set the desired white tone from a continuous scale that reaches the super-warm white range. Set brightness Short-press to select permanently stored brightness levels: 100%, 80%, 50%, 20%, 10% and 5%.
  • Seite 64: Group Function

    If you are using a „tint white“ product that only emits white light, the colored light features will not be available. The tint product will be switched off. Group functions This is a group The LED panel is in the first group to begin with. It is possible to control several bulbs or other tint products with only one button.
  • Seite 65 • An individual tint product could also be a group all on its own. • You can use the tint remote control to control a maximum of 4 groups, whereby the fourth group is a combination of the other three groups.
  • Seite 66 1. Plug the new tint product in at the mains and set the corresponding light switch to I or ON. The new tint product will signal that it is in coupling mode by briefly increasing and decreasing its brightness and changing color if applicable.
  • Seite 67 Remove a tint product from the tint remote control 1. Switch the tint product off (to standby) with the tint remote control if necessary. 2. Select the group you would like to change using the group button. 3. Hold down the group button for approx. 5 seconds. The feedback display will blink red/green.
  • Seite 68: Reset

    5. Hold down the group button again until the selected tint product starts to blink again. The group display for group 1 will also light up. 6. Using the group button, select (if necessary) the group to which you would like to add the tint product while the feedback display still is blinking red/green.
  • Seite 69: Smart Home Ready

    integrate the LED Panel into a smart home gateway. 1. Switch the tint product on and off 5 times (interval of 3 seconds) 2. Switch the tint product on again. Depending on the tint product, a short cycle through the colors appears or the tint product flashes briefly. The reset has occurred as desired and you can now use the tint product as normal using your remote control or other Zigbee system.
  • Seite 70: Integration In A Zigbee Gateway

    control systems, such as Philips Hue* (without Hue Entertainment and without HomeKit integration), Osram Lightify*, Amazon’s voice assistant (using Amazon Echo Plus)** and many more. More information about the Zigbee Alliance can be found at www.zigbee.org. For integration in a Smart Home gateway/app, the LED panel must be reset, see „Resetting the tint product“.
  • Seite 71: Cleaning

    Cleaning Turn off the light and pull out the power plug and/or turn off the room protection at the fuse box. Clean the bulb and remote control only with a dry cloth. If not in use, keep them in a dry place protected from children. Troubleshooting Problem Possible causes...
  • Seite 72 Problem Possible causes You want to add a new tint pro- Switch off the tint product that are duct, but the ones that are already already added or remove them added are blinking. from the product that has already been connected. The tint product has been added Find out for sure which group the to the wrong group.
  • Seite 73: Technical Data

    Relative humidity: 5-95% (no condensation) Panel Panel Panel white+color, white+color white+color 20x60 cm 45x45 cm round, 45 cm Art. 404028 404029 404030 Total output 26 W 30 W 30 W Luminous flux 1300 lm 1800 lm 1800 lm Color temperature...
  • Seite 74: Declaration Of Conformity

    Declaration of Conformity Hereby Müller-Licht International GmbH declares that the radio equipment type „Müller-Licht tint“ complies with the directive 2014/53 / EU. The full text of the EU Declaration of Conformity is available at the following Internet address: www.mueller-licht.de/tint Dispose Old appliances must not be disposed of with normal household waste.
  • Seite 75 Dispose of the packaging materials in an environmentally friendly manner by placing them in the collection containers provided. General recycling symbol Further information can be found under: www.mueller-licht.de/recycle/ tint-LED-PANEL INSTRUCTION MANUAL...
  • Seite 76 Discover the whole world of tint... 404010 404013 404011 404005 404015 404023 404024 404006 404019 404000 404001 404008 tint-LED-PANEL INSTRUCTION MANUAL...
  • Seite 77 ...www.mueller-licht.de/tint 404025 404030 404028 404029 404021 404032 404027 404031 tint-LED-PANEL INSTRUCTION MANUAL...
  • Seite 78 www.mueller-licht.de/tint MÜLLER-LICHT International GmbH Goebelstr. 61/63 D-28865 Lilienthal Tel. 00800 44003311 service@mueller-licht.de Nachdruck, auch auszugsweise, nur mit schriftlicher Genehmigung des Urhebers. • Irrtum und Änderung vorbehalten. Reproduction, en tout ou en partie, uniquement avec la permission écrite de l‘auteur. • Sauf erreur ou omission. Full or partial reproduction subject to prior written approval.

Diese Anleitung auch für:

404029404030

Inhaltsverzeichnis